
Articles
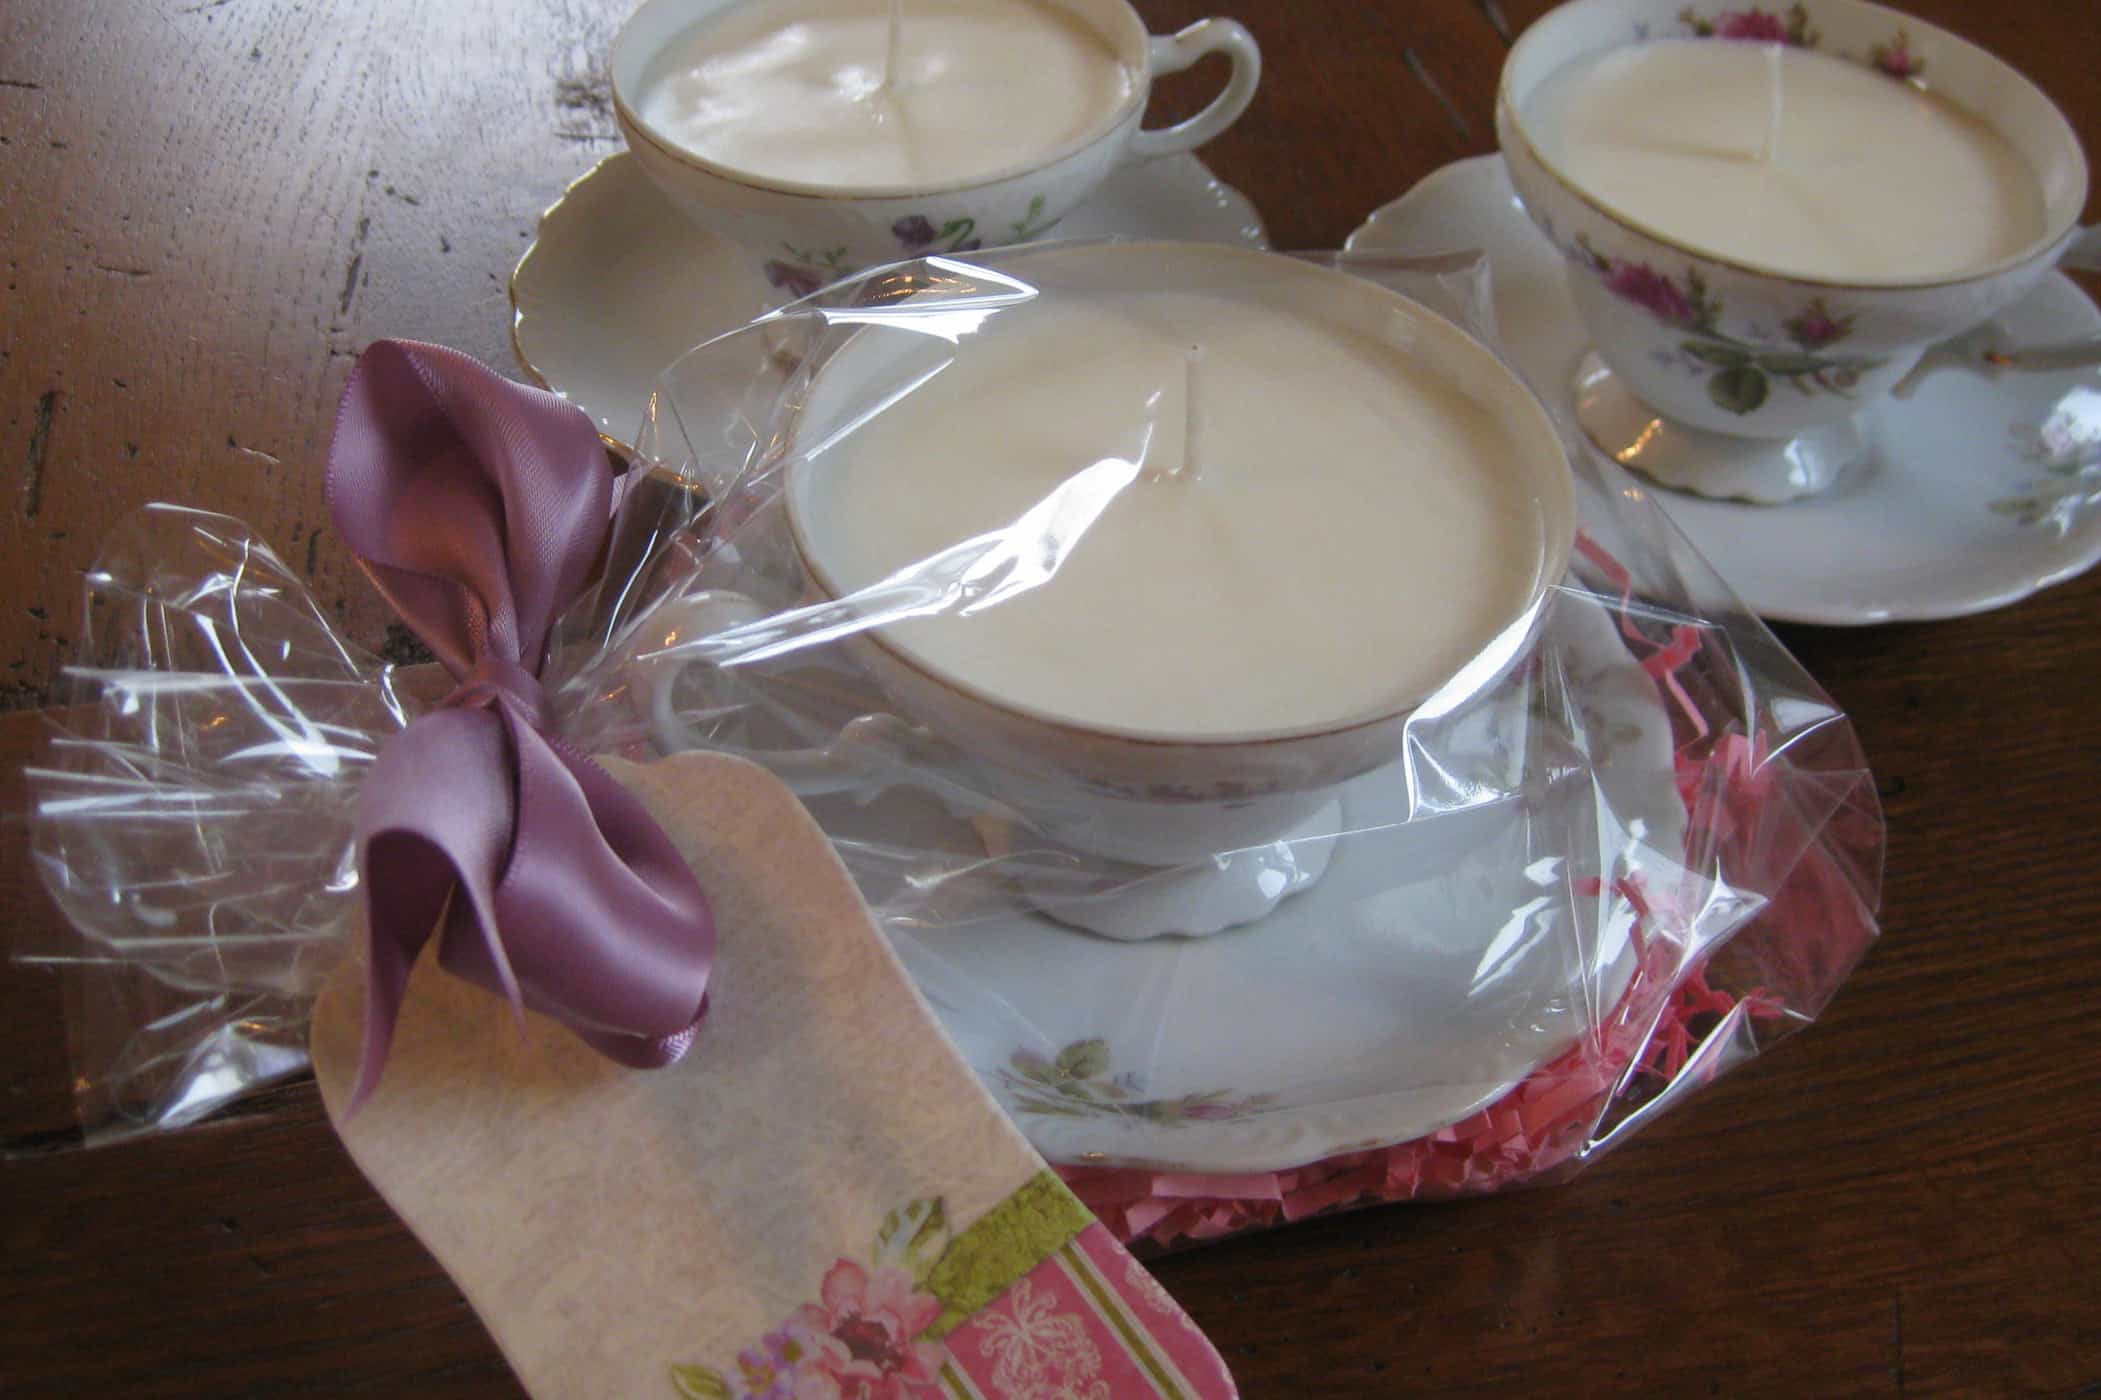
How To Make Teacup Candles
Modified: January 4, 2024
Learn the art of making teacup candles through step-by-step articles. Create unique and elegant candles with our easy-to-follow instructions and tips.
(Many of the links in this article redirect to a specific reviewed product. Your purchase of these products through affiliate links helps to generate commission for Storables.com, at no extra cost. Learn more)
Introduction
Welcome to the wonderful world of teacup candles! Creating your own teacup candles is not only a great way to repurpose old teacups, but it also allows you to customize your candles with different scents and colors to suit your preferences. Whether you’re a candle enthusiast or just looking for a fun and creative DIY project, making teacup candles is a rewarding and enjoyable craft.
In this article, we will guide you through the step-by-step process of making teacup candles, from preparing the teacups to adding fragrance and color, and finally, to enjoying the beautiful, handmade candles in your home.
Teacup candles make for perfect gifts or elegant additions to your home decor. You can choose to make them with a single teacup or create a set of matching or complementary candles using different teacup designs. No matter your level of crafting experience, this project is beginner-friendly and can be completed in just a few hours.
So gather your materials and let’s dive into the exciting world of teacup candle making!
Key Takeaways:
- Repurpose old teacups into personalized candles with scents and colors of your choice. Perfect for gifting or adding elegance to your home decor, this beginner-friendly DIY project is both rewarding and enjoyable.
- Enjoy the cozy ambiance and soothing fragrance of your handmade teacup candles. Personalize them with decorative elements and follow safety tips for a delightful and relaxing experience in your home.
Read more: How To Make Teacup Wine Glasses
Materials Needed
Before we begin, let’s gather all the materials you’ll need to create your teacup candles. Here’s a list of the essentials:
- Teacups: Choose teacups that are heat-resistant and have a wide enough opening to accommodate a candle. Vintage, thrifted, or mismatched teacups add a charming touch to your candles.
- Wax: Opt for high-quality candle wax, such as soy wax or beeswax, which ensure a clean and long-lasting burn. The amount of wax needed will depend on the size of your teacups.
- Candle Wicks: Use pre-tabbed wicks or wick stickers, which make the process easier. Select wicks that are suitable for the diameter of your teacups.
- Fragrance Oil: Choose your favorite scents to add a delightful aroma to your candles. Essential oils or candle fragrance oils work well.
- Candle Dye or Pigments: If desired, you can add color to your candles using candle dyes or pigments. Ensure they are specifically designed for candle making.
- Double Boiler or Melting Pot: Use a dedicated melting pot or an improvised double boiler (a heatproof container placed in a pan of simmering water) to melt the wax.
- Thermometer: A candle thermometer is essential to monitor the temperature of the wax for safe pouring.
- Heat-resistant Utensils: Have heat-resistant tools, such as a silicone spatula and a stirring stick, to mix the wax and other ingredients.
- Hot Glue Gun: Use a hot glue gun to secure the wicks to the bottom of the teacups.
- Optional Decorative Items: If you want to embellish your candles, consider adding dried flowers, glitter, or other decorative elements.
Ensure you have all these materials ready before you start making your teacup candles. Having everything within reach will make the process smoother and more enjoyable.
Step 1: Prepare the Teacups
Before we begin making the teacup candles, it’s important to prep the teacups to ensure they are ready for the wax. Follow these steps:
- Clean the Teacups: Wash the teacups thoroughly with warm, soapy water. Remove any dust, dirt, or residue from the cups. This will help create a clean and polished look for your candles.
- Remove Stickers or Labels: If your teacups have any stickers or labels, gently peel them off. Use a mild adhesive remover if needed. Make sure to clean off any residue left behind.
- Check for Cracks: Inspect each teacup for any cracks or chips. Any damaged cups may cause the wax to leak, so it’s best to avoid using them. Choose teacups that are in good condition.
- Secure Wicks: Using a dab of hot glue from a hot glue gun, attach the metal tab or wick sticker to the bottom center of each teacup. Ensure the wick is centered and straight.
- Trim the Wick: Trim the wick to a suitable length, leaving about 1/4 inch protruding from the bottom of the teacup. This will ensure a proper burn when the candle is lit.
Once you’ve completed these steps, your teacups are ready to be transformed into beautiful candles. The preparation stage is vital as it sets the foundation for a successful candle-making process. Take your time to ensure each teacup is clean, intact, and the wicks are securely attached.
Now that your teacups are prepped, let’s move on to the next step: melting the wax.
Step 2: Melt the Wax
Now that your teacups are prepped and ready, it’s time to melt the wax. Follow these steps to safely melt the wax:
- Prepare the Double Boiler: Fill a pot with a few inches of water and place it on the stove. Set a heatproof container, such as a pouring pitcher or a heatproof glass jar, into the pot. Ensure the container is stable and that the water level is below the bottom of the container.
- Add the Wax: Measure the amount of wax needed based on the volume of your teacups. Place the wax into the heatproof container. It’s essential to use a scale for accurate measurement.
- Heat the Wax: Turn the stove to medium heat and allow the water to come to a gentle simmer. Stir the wax occasionally as it melts to ensure even heat distribution. Use a thermometer to monitor the wax temperature.
- Monitor the Temperature: Heat the wax to the recommended temperature specified by the wax manufacturer. It’s usually around 160-180 degrees Fahrenheit (70-82 degrees Celsius) for soy wax. Avoid overheating the wax as it can affect the quality and scent of your candles.
- Remove from Heat: Once the wax has completely melted, remove the heatproof container from the double boiler. Carefully wipe off any water droplets on the bottom of the container to prevent them from mixing with the wax.
Be cautious when working with melted wax as it can cause burns. Remember to keep a close eye on the melting process and take proper safety precautions, such as using oven mitts or heat-resistant gloves.
With the wax melted and ready, we’re ready to move on to the next step: adding fragrance and color to our teacup candles.
Step 3: Add Fragrance and Color
Adding fragrance and color to your teacup candles is an exciting step that allows you to personalize your creations. Follow these steps to infuse your candles with delightful scents and vibrant hues:
- Choose Your Fragrance: Select your desired fragrance oil or essential oil. Measure the appropriate amount based on the recommended fragrance load for your chosen wax. Generally, 1 ounce of fragrance oil per pound of wax is a good starting point.
- Add the Fragrance: Carefully pour the measured fragrance oil into the melted wax. Stir the mixture gently using a heat-resistant utensil, ensuring the fragrance is evenly distributed throughout the wax.
- Add Color (Optional): If you wish to add color to your candles, use candle dyes or pigments specifically designed for candle making. Start with a small amount and gradually add more until you achieve the desired color. Stir well to ensure even color dispersion.
- Blend the Wax: Continue stirring the wax gently and consistently for a few minutes to ensure the fragrance and color are well incorporated. Take note not to stir vigorously, as it can introduce air bubbles into the wax.
Adding fragrance and color to your teacup candles is a fantastic way to create a sensory experience and make them truly unique. Experiment with different combinations of scents and colors to create captivating and visually appealing candles.
Now that you’ve added fragrance and color to the wax, it’s time to move on to the next step: oiling the teacups.
Read more: How To Make Candles
Step 4: Oil the Teacup
In this step, we will prepare the teacups to ensure easy removal of the candles once they have hardened. Follow these steps to oil the teacups:
- Select a Heat-Resistant Oil: Choose a heat-resistant oil such as cooking oil (vegetable or canola oil) or a specialized candle release agent. The oil will create a barrier between the teacup and the hardened wax, allowing for easy removal.
Oiling the teacups will help release the candles easily once they are fully hardened. It prevents any sticking or difficulty in removing the candles from the cups, ensuring a clean and smooth finish.
Now that the teacups are oiled, we can move on to the exciting step of pouring the wax into the teacups.
When making teacup candles, ensure the wick is centered and secured in place before pouring the hot wax to prevent it from shifting. This will help ensure an even burn.
Step 5: Pour the Wax
Now that everything is prepared, it’s time to pour the melted wax into the teacups. Follow these steps for a successful pouring process:
- Position the Teacups: Arrange your prepared teacups on a stable and heat-resistant surface. Consider using a tray or a baking sheet lined with parchment paper to catch any potential spills or drips.
- Pour the Wax Slowly: Gradually pour the melted wax into each teacup, starting from the center and working your way out. Be careful not to overflow the cups. Leave a little space at the top to accommodate the wick later.
Take your time while pouring the wax to ensure a neat and clean finish. If any wax spills occur, quickly wipe it away with a clean cloth or paper towel before it hardens.
With the wax poured into the teacups, we’re almost there! The next step involves inserting the wick into the candles.
Step 6: Insert the Wick
Now that the wax has settled in the teacups, it’s time to insert the wicks. Follow these steps to ensure proper placement and stability of the wicks:
Properly inserting and centering the wick is crucial for a successful teacup candle. It ensures that the wick burns evenly and the candle functions optimally. Take your time to position the wick correctly and make any necessary adjustments before the wax fully solidifies.
Now that the wicks are in place, we’re almost done! The candles need time to cool and solidify before we move on to the next step: trimming the wick.
Step 7: Let the Candles Cool
After inserting the wicks, it’s important to allow the teacup candles to cool and solidify completely. This step ensures that the candles retain their shape and integrity. Follow these steps for proper cooling:
Resist the temptation to rush the cooling process. Allowing the teacup candles ample time to cool will improve their overall quality and ensure a more enjoyable burning experience.
Once the candles have cooled and solidified completely, we can move on to the next step: trimming the wick.
Read more: How To Make A Candle From Old Candles
Step 8: Trim the Wick
Now that your teacup candles have cooled and solidified, it’s time to trim the wicks. Trimming the wick not only enhances the aesthetic appeal of the candle but also ensures a safe and efficient burn. Follow these steps to trim the wick properly:
- Inspect the Wick Length: Check the length of the wick and ensure it is approximately 1/4 inch above the surface of the wax. If the wick is too long, it may create excessive smoke or a large flame when lit.
Trimming the wick before lighting your teacup candles is essential for a safe and controlled burn. A properly trimmed wick promotes an even and consistent flame, minimizing soot and extending the candle’s lifespan.
With the wicks trimmed, we’re almost finished! The next step involves adding a decorative touch to the teacups.
Step 9: Decorate the Teacup
Now that your teacup candles are complete, it’s time to add a decorative touch to enhance their visual appeal. Follow these steps to decorate your teacups:
- Choose Your Decorative Elements: Select decorations that complement the style and theme of your teacup candles. Options can include dried flowers, ribbon, lace, or glitter.
Decorating the teacup candles adds a personal and unique touch to each piece. It allows you to customize them according to your taste or the occasion, making them even more special as gifts or home decor.
With the teacup candles beautifully decorated, we’ve reached the final step: enjoying your creations!
Step 10: Enjoy Your Teacup Candles!
Congratulations! You have successfully made your own teacup candles. Now it’s time to sit back, relax, and enjoy the cozy ambiance and soothing fragrance they bring. Follow these final steps to fully enjoy your teacup candles:
- Find the Perfect Spot: Place your teacup candles in a safe and suitable location in your home. Consider displaying them on a mantle, coffee table, or as a centerpiece on a dining table.
As you enjoy your teacup candles, take a moment to appreciate the effort and creativity you put into making them. These handmade candles not only add a touch of warmth and beauty to your home but also make for thoughtful and personal gifts for your loved ones.
Remember to trim the wick before each subsequent use to maintain a safe and efficient burn. With proper care, your teacup candles will continue to bring joy and relaxation for many hours.
Now sit back, unwind, and indulge in the cozy atmosphere created by your beautifully crafted teacup candles!
Frequently Asked Questions about How To Make Teacup Candles
Was this page helpful?
At Storables.com, we guarantee accurate and reliable information. Our content, validated by Expert Board Contributors, is crafted following stringent Editorial Policies. We're committed to providing you with well-researched, expert-backed insights for all your informational needs.
