Articles
How To Assemble Kegerator Tower
Modified: October 19, 2024
Learn how to assemble a kegerator tower with step-by-step instructions and helpful articles. Upgrade your home bar with expert advice and tips.
(Many of the links in this article redirect to a specific reviewed product. Your purchase of these products through affiliate links helps to generate commission for Storables.com, at no extra cost. Learn more)
Introduction
Welcome to the world of kegerators! If you’re a beer aficionado or simply enjoy the convenience of having draft beer at home, then assembling a kegerator tower is a must. A kegerator tower is the vertical component that houses the beer lines and faucet, allowing you to pour your favorite brews on tap. Not only does it provide a professional and sleek look to your setup, but it also ensures that you can enjoy freshly poured beer whenever you want.
In this article, we will guide you through the process of assembling a kegerator tower. Whether you’re a DIY enthusiast or a novice with minimal experience, don’t worry! We’ll break down each step in a clear and comprehensive manner, ensuring that you can successfully assemble your kegerator tower with confidence.
Before we dive into the nitty-gritty details, let’s take a quick look at the tools and materials you’ll need for this project.
Key Takeaways:
- Assembling a kegerator tower is a fun and rewarding DIY project that brings the joy of draft beer right into your home. Follow the step-by-step guide to create a stylish and functional addition to your home bar or entertaining area.
- By carefully preparing, mounting, and connecting the components, you can ensure a smooth and enjoyable pouring experience. Troubleshoot any issues during testing and maintenance to keep your kegerator tower in optimal condition for countless pours of delicious, fresh beer.
Read more: How To Change A Tower On A Kegerator
Tools and Materials Needed
Before you begin assembling your kegerator tower, gather the following tools and materials:
- Drill
- Drill bits (appropriate size for mounting screws)
- Wrench or adjustable wrench
- Screwdriver
- Teflon tape
- Beer line connector(s)
- Beer faucet
- Beer tower
- Base plate
- Mounting screws
- Beer line
- Gas line
- CO2 tank
- CO2 regulator
Make sure you have all the tools and materials listed above before starting the assembly process. Having everything at hand will help you save time and ensure a smooth assembly experience.
Now that you have your tools and materials ready, let’s move on to the step-by-step process of assembling your kegerator tower.
Step 1: Preparing the Tower Components
Before you can begin mounting your kegerator tower, it’s important to prepare the tower components for installation. Follow these steps:
- Unbox and inspect the tower: Carefully remove the tower from its packaging and check for any visible damage. Ensure that all necessary components, such as the beer lines, faucet, and tower base, are included.
- Clean the tower: Use a non-abrasive cleaner and a soft cloth to clean the surface of the tower. Remove any dust or debris to ensure a clean and sanitary environment for your beer.
- Wrap threads with Teflon tape: Take the beer faucet and wrap the threaded end with Teflon tape. This will create a tight seal and prevent any leaks when connecting the faucet to the beer line.
- Attach the beer line connectors: Gently twist the beer line connectors onto the ends of the beer lines. Be sure to tighten them securely to prevent any leaks.
By preparing the tower components in advance, you are setting the stage for a smooth installation process. Once you’ve completed these steps, you’re ready to move on to the next phase – mounting the base plate.
Step 2: Mounting the Base Plate
Mounting the base plate is an essential step in assembling your kegerator tower. The base plate provides a sturdy foundation for the tower and ensures its stability. Follow these instructions to successfully mount the base plate:
- Position the base plate: Choose a suitable location on your kegerator where you want to mount the tower. Place the base plate in this position, aligning it with the holes or mounting points on the kegerator.
- Mark the hole locations: With the base plate in position, use a marker or pencil to mark the locations of the screw holes on the kegerator. This will serve as a guide when drilling the holes.
- Drill pilot holes: Using a drill and an appropriate-sized drill bit, carefully drill pilot holes at the marked locations on the kegerator. These pilot holes will make it easier to insert the mounting screws later on.
- Attach the base plate: Line up the base plate with the pilot holes and insert the mounting screws through the holes in the base plate and into the pilot holes. Use a wrench or screwdriver to tighten the screws, ensuring a secure attachment.
- Check for stability: Give the base plate a gentle shake to test its stability. If it feels loose or wobbly, tighten the screws further. You want the base plate to be firmly secured to the kegerator.
Once you’ve mounted the base plate, you’re ready to move on to the next step – installing the beer lines and faucet.
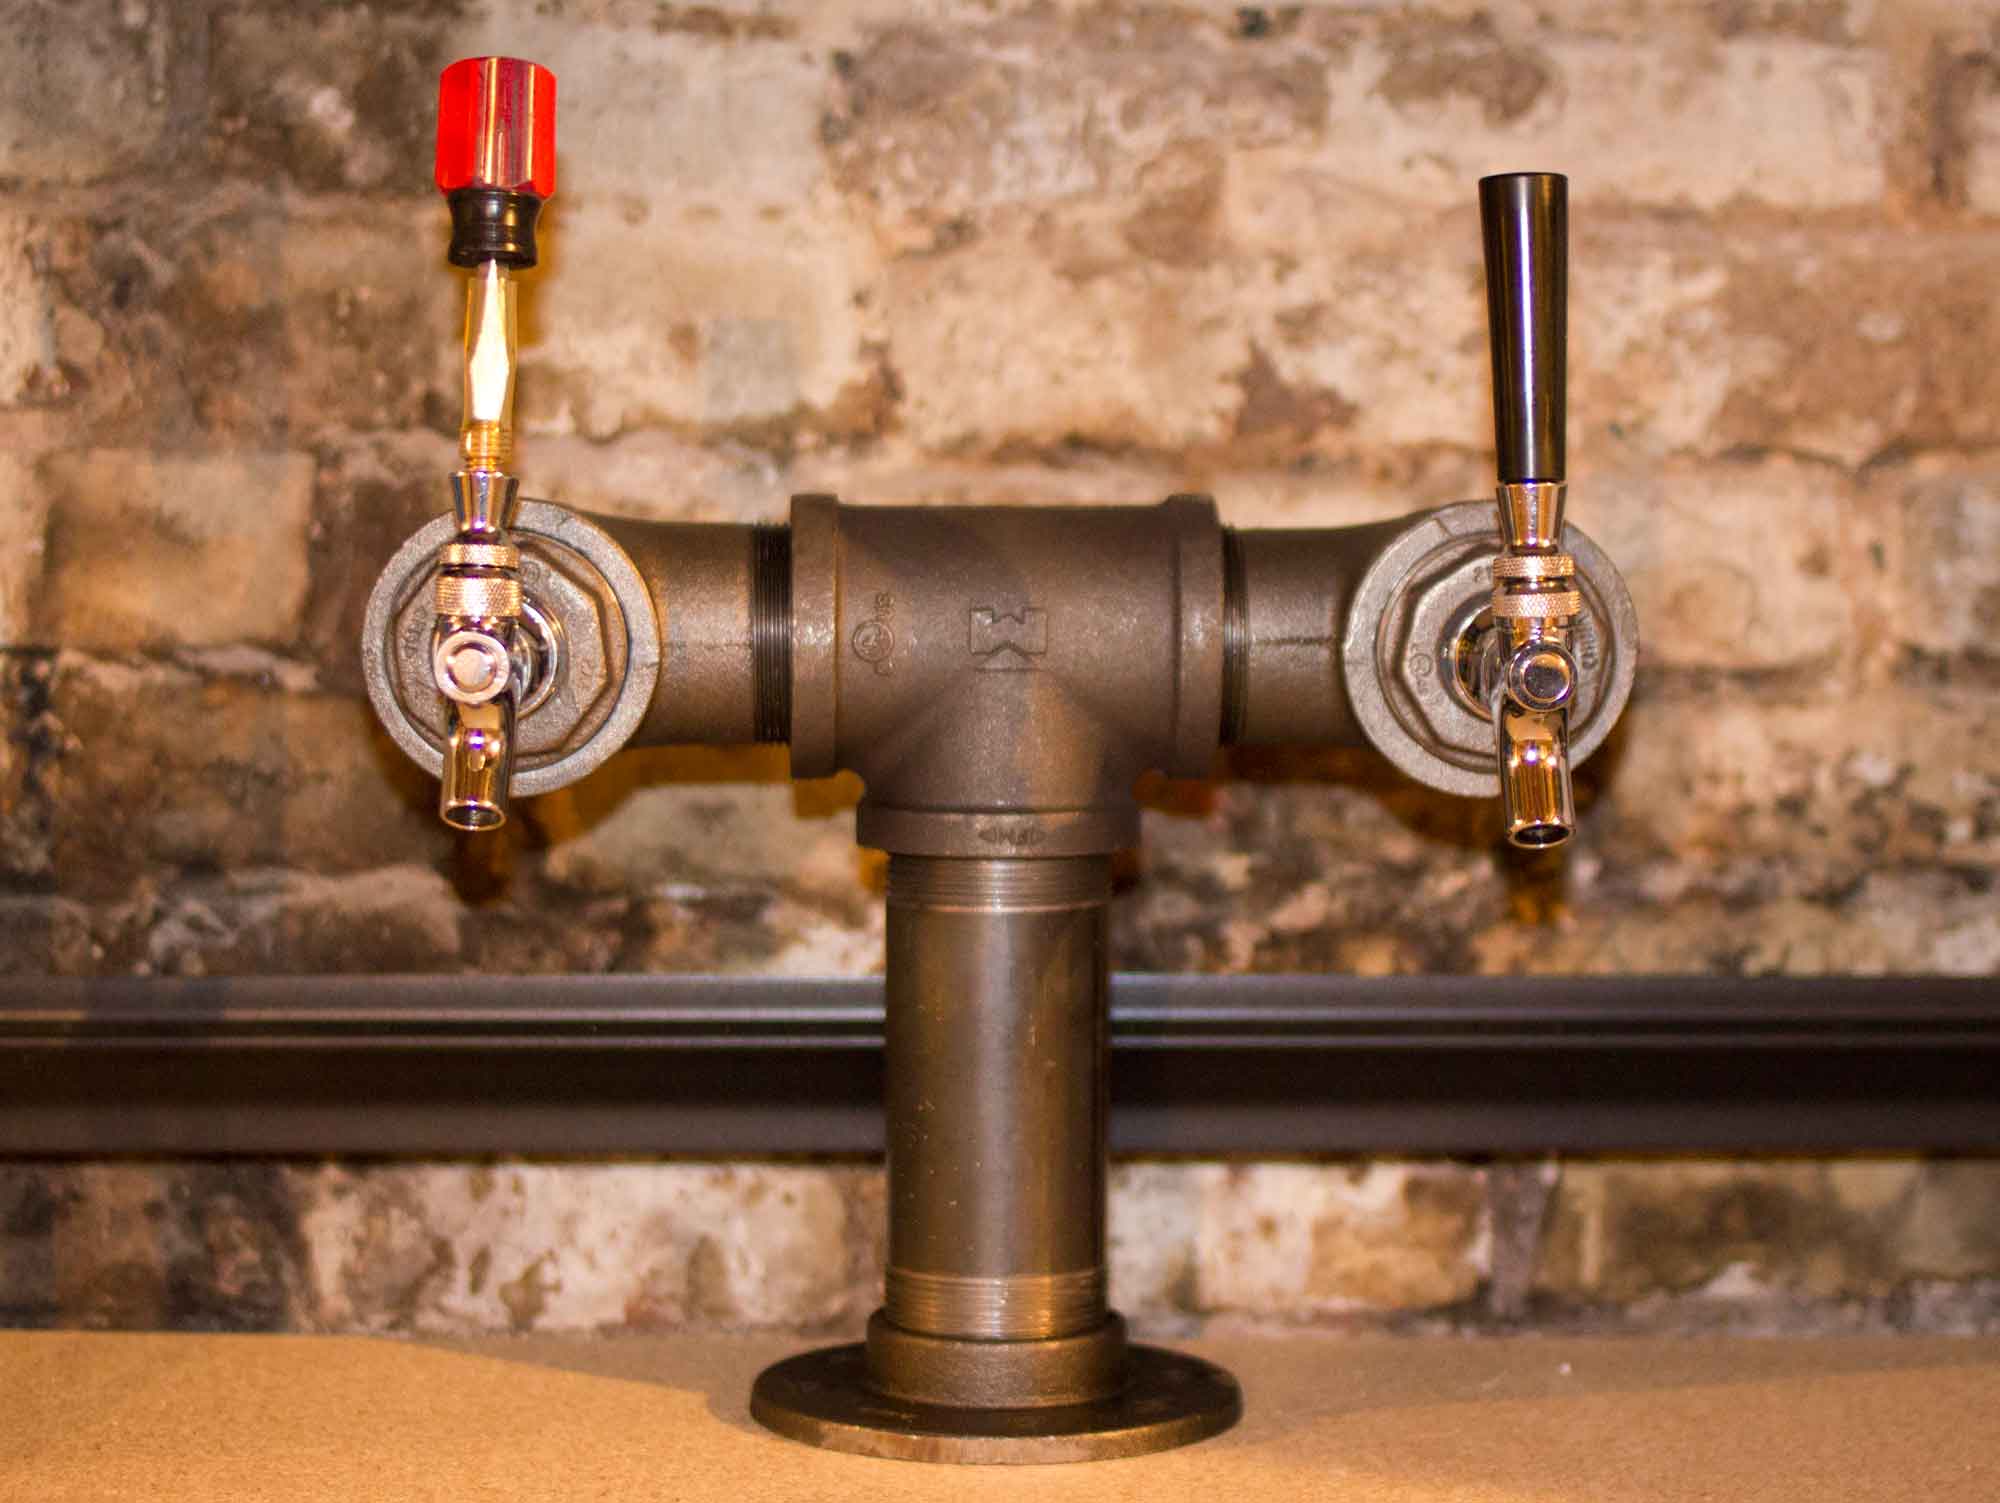
Step 3: Installing the Beer Lines and Faucet
Now that you have the base plate securely mounted, it’s time to install the beer lines and faucet. This step will involve connecting the different components to ensure a proper flow of beer from the keg to the faucet. Follow these instructions:
- Connect the beer lines: Take the beer lines with the attached connectors and feed them through the hole or opening in the tower. Ensure that the lines are long enough to reach the keg while allowing for some flexibility.
- Attach the beer faucet: Take the wrapped threaded end of the beer faucet and screw it onto the connector at the end of one of the beer lines. Tighten it securely but avoid over-tightening.
- Secure the beer lines in the tower: With the beer lines and faucet attached, carefully place the tower onto the base plate. Allow the beer lines to rest inside the tower, ensuring they are not twisted or kinked. Proper alignment will ensure a smooth flow of beer.
Take your time during this step to ensure that all connections are secure and properly aligned. A well-installed beer line system will prevent leaks and maintain the integrity of your beer.
Next, we will move on to the fourth step – connecting the tower to the kegerator.
When assembling a kegerator tower, make sure to carefully follow the manufacturer’s instructions to ensure proper installation and avoid any leaks. Tighten all connections securely, but be careful not to over-tighten and damage the components.
Read more: How To Insulate Kegerator Tower
Step 4: Connecting the Tower to the Kegerator
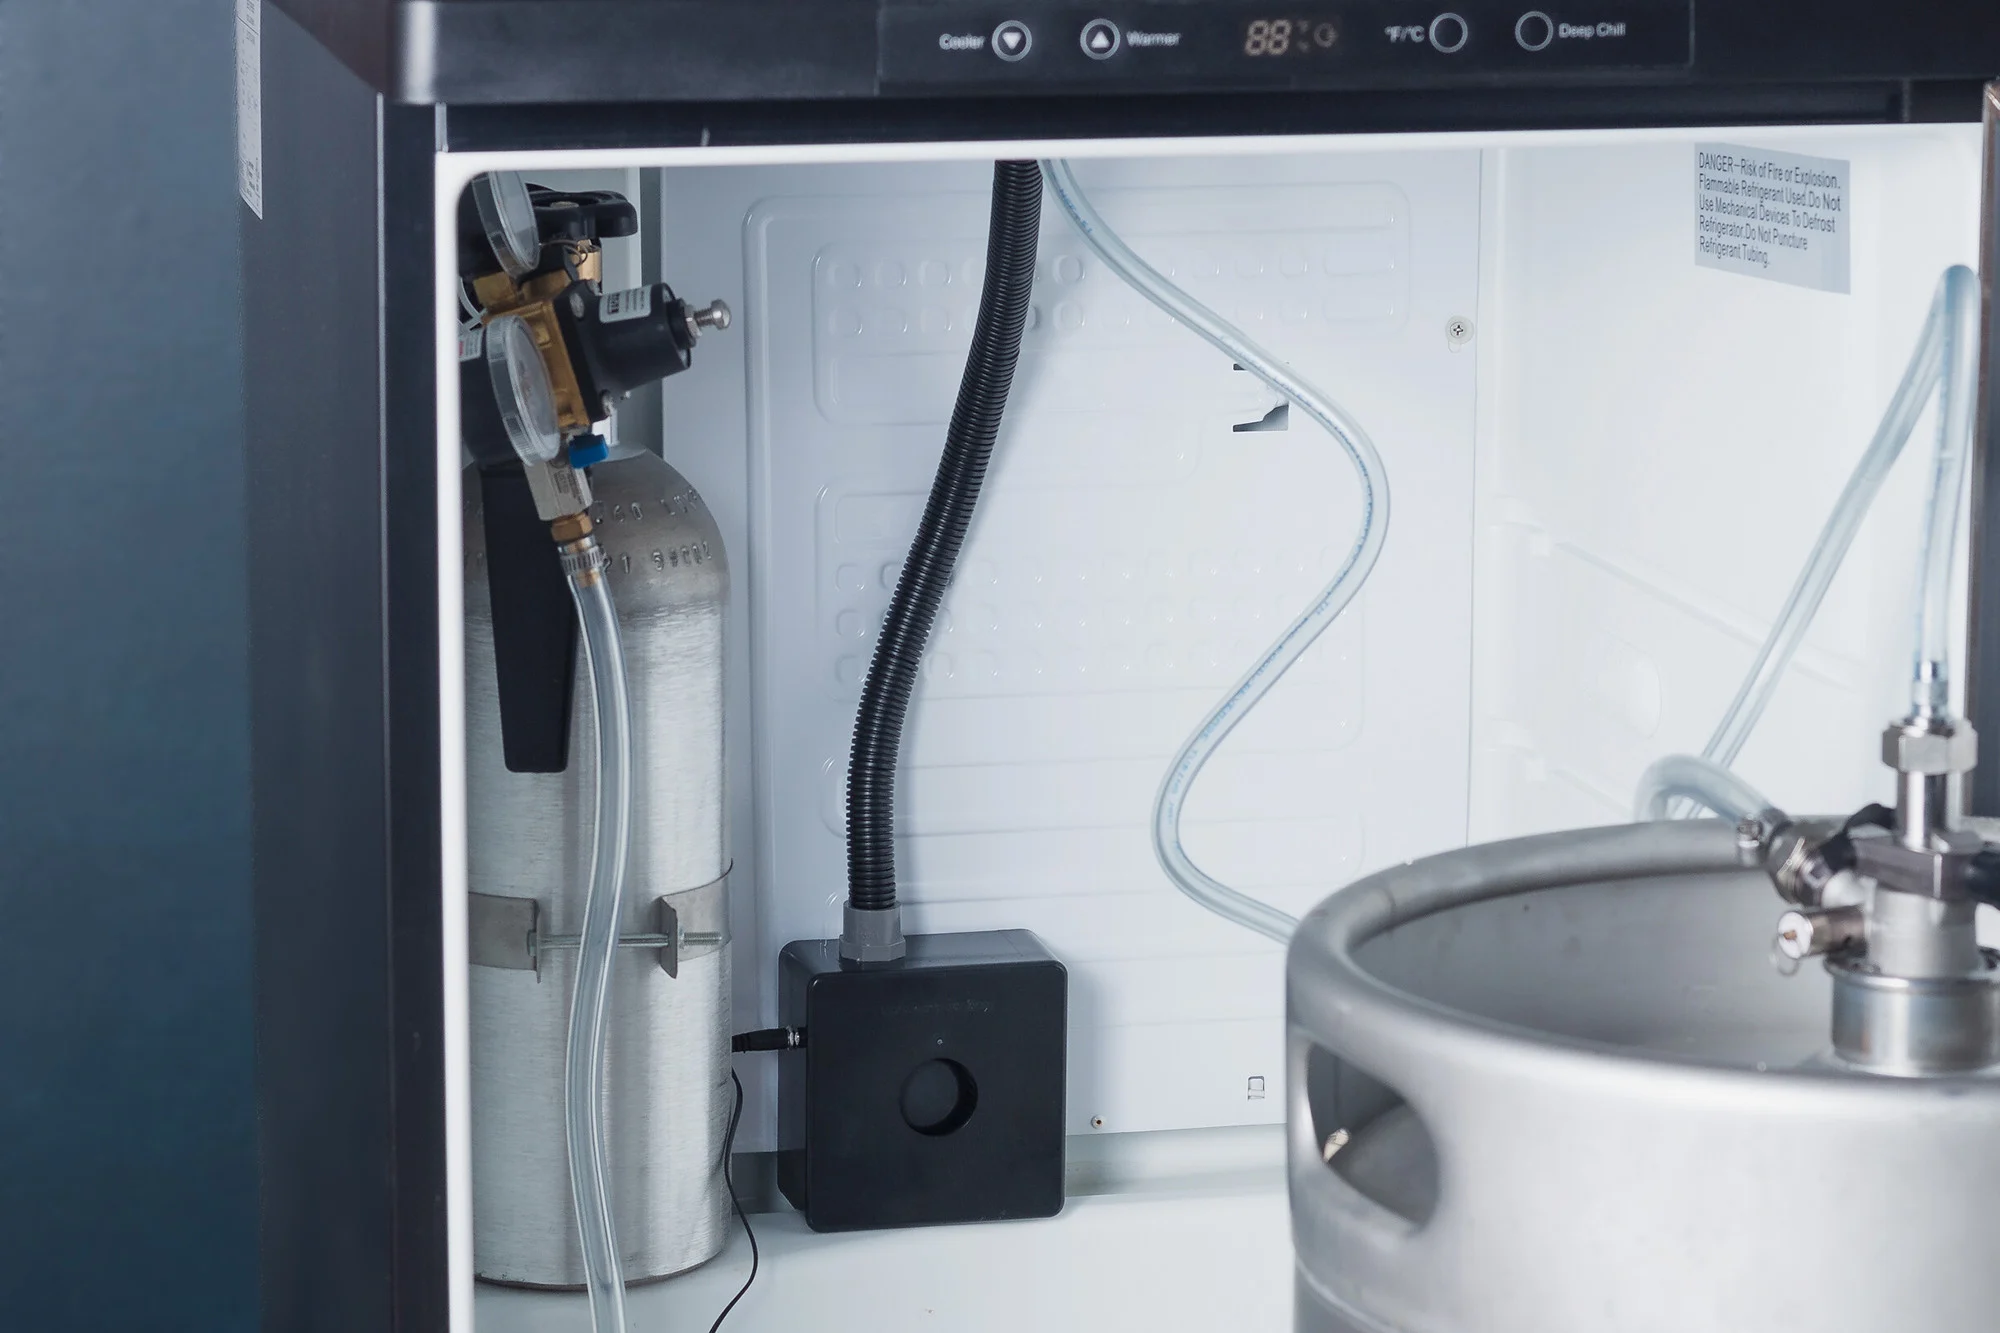
Now that you’ve installed the beer lines and faucet, it’s time to connect the kegerator tower to the main unit. This step will involve connecting the beer and gas lines, as well as the CO2 tank and regulator. Follow these instructions:
- Locate the beer and gas line connections: On the back of your kegerator, you should find designated ports or connections for the beer and gas lines. These ports are typically labeled for easy identification.
- Connect the beer line: Take the loose end of the beer line that is not attached to the faucet and connect it to the beer line port on the kegerator. Ensure a snug fit by firmly pushing it onto the port.
- Connect the gas line: Take the gas line and connect it to the gas line port on the kegerator. This port is responsible for maintaining the pressure in the keg and ensuring a steady flow of beer. Again, ensure a secure connection.
- Attach the CO2 regulator: Take the CO2 regulator and attach it to the gas line. The regulator allows you to control and adjust the pressure of the CO2 entering the keg. Follow the manufacturer’s instructions for proper setup and adjustment.
- Connect the CO2 tank: Place the CO2 tank in a suitable location near your kegerator and connect it to the regulator. Use a wrench or adjustable wrench to tighten the connection, but be careful not to overtighten.
Once you have connected all the necessary lines and components, double-check that all connections are secure and tight. This will ensure proper operation and prevent any potential leaks during use.
Now that you’ve successfully connected the tower to the kegerator, let’s move on to the next step – securing the tower in place.
Step 5: Securing the Tower in Place
Now that you have connected the kegerator tower to the main unit, it’s important to secure the tower in place to prevent any unwanted movement. Follow these instructions to ensure a stable and secure installation:
- Position the tower: Adjust the position of the tower to your desired placement, ensuring that it is centered and level on the base plate.
- Mark the hole locations: Using a marker or pencil, mark the hole locations on the base plate where you will secure the tower. These marks will serve as a guide for drilling the holes.
- Drill pilot holes: With the base plate marked, use a drill and an appropriate-sized drill bit to carefully drill pilot holes at the marked locations. These pilot holes will make it easier to insert the mounting screws later on.
- Secure the tower: Align the holes on the tower with the pilot holes on the base plate, then insert the mounting screws through the holes and into the pilot holes. Use a wrench or screwdriver to tighten the screws, ensuring a secure and stable attachment.
- Check for stability: Give the tower a gentle shake to test its stability. If there is any wobbling or movement, tighten the screws further until the tower is firmly secured in place.
By securing the tower in place, you ensure that it remains steady and secure during use. This not only enhances the aesthetic appeal of your kegerator but also prevents any potential damage to the system.
Now that the tower is securely attached, let’s move on to the final step – testing and troubleshooting.
Step 6: Testing and Troubleshooting
With the kegerator tower assembled and secured in place, it’s time to test the system and troubleshoot any potential issues. Follow these steps to ensure everything is working properly:
- Check for leaks: It’s important to check all the connections and components for any leaks. Look for any signs of beer or gas escaping, such as dripping or hissing sounds. If you notice any leaks, tighten the connections or replace any faulty components.
- Activate the CO2: Open the valve on the CO2 tank to allow the flow of CO2 into the system. Make sure the pressure is set to the desired level according to the manufacturer’s recommendations.
- Purge the system: To remove any air from the beer lines, open the faucet and allow the beer to flow for a few seconds. This will ensure that you get a clean pour when you’re ready to enjoy your draft beer.
- Pour a test beer: Connect a keg to the system and start pouring a small test beer. Pay attention to the flow and appearance of the beer. If it’s too foamy, adjust the CO2 pressure. If it’s not pouring properly, check for any obstructions or kinks in the beer lines.
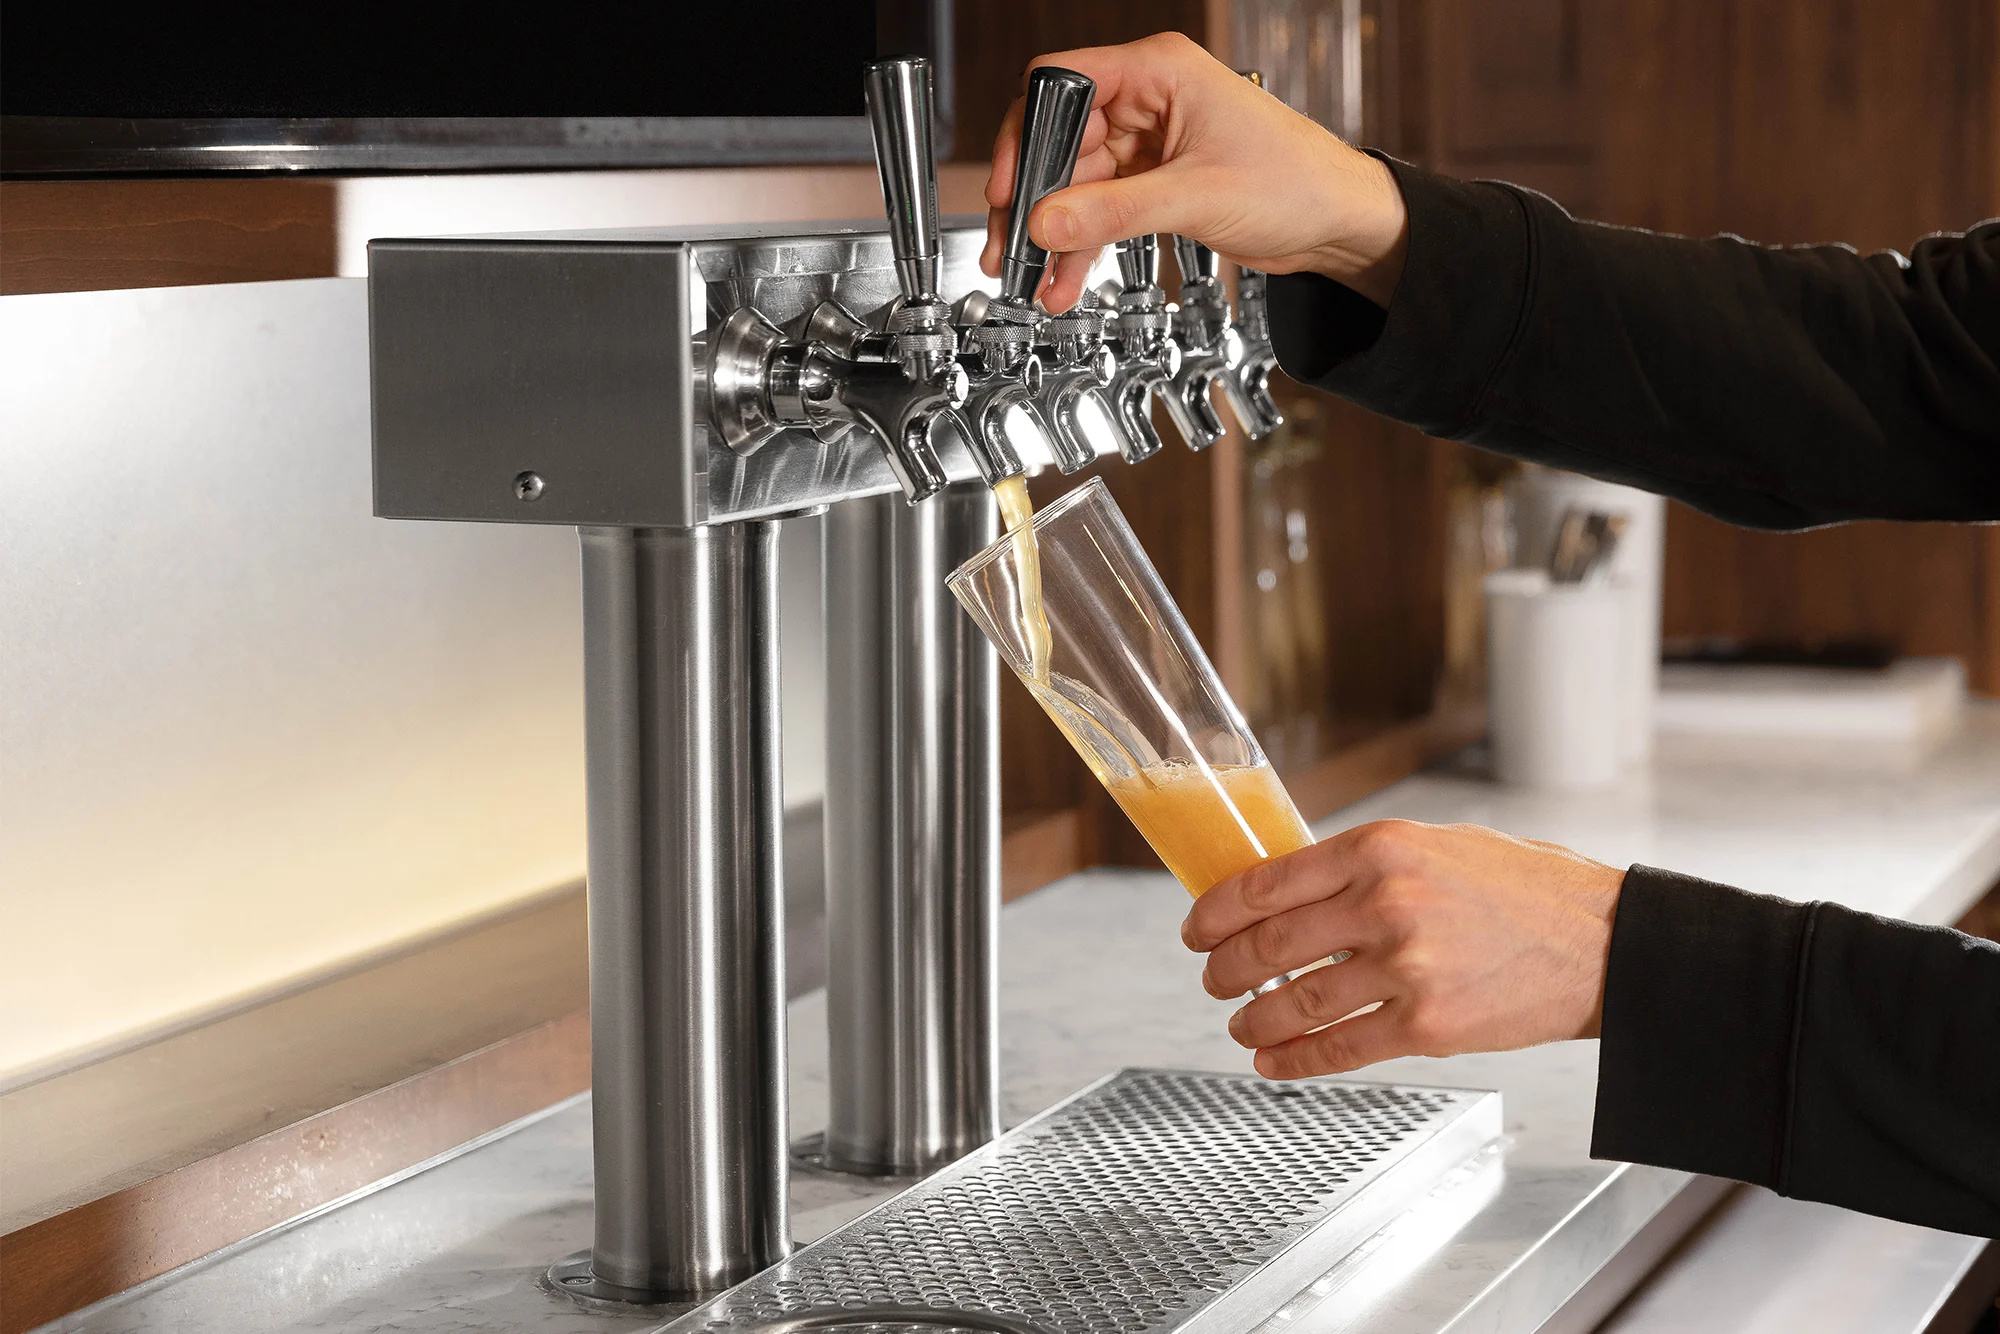
- Adjust and enjoy: Once you’ve tested the system and tweaked any necessary settings, it’s time to sit back and enjoy your freshly poured draft beer from your fully assembled kegerator tower!
Remember, troubleshooting is an essential part of the process. If you encounter any issues during the testing phase, consult the instructions provided with your kegerator or seek assistance from the manufacturer or a professional.
Congratulations on successfully assembling your kegerator tower! You now have a stylish and functional addition to your home bar or entertaining area. Cheers!
Conclusion
Assembling a kegerator tower is a rewarding and exciting project that allows you to bring the experience of having draft beer right into your home. By following the steps outlined in this article, you have successfully completed the process of assembling and installing your kegerator tower.
We started by preparing the tower components, ensuring that everything was clean, secure, and ready for installation. Then, we moved on to mounting the base plate, providing a stable foundation for the tower. The next step involved installing the beer lines and faucet, connecting the components that allow the beer to flow from the keg to the tap.
Afterward, we connected the tower to the kegerator, making sure the beer and gas lines were properly attached and that the CO2 tank and regulator were securely connected. Securing the tower in place was the next step, ensuring that it remained stable and firmly attached to the base plate. Finally, we tested the system, checking for leaks and troubleshooting any issues that arose to ensure a smooth and enjoyable pouring experience.
Now that your kegerator tower is fully assembled and operational, you can sit back and enjoy the convenience and pleasure of having draft beer on tap in the comfort of your own home. Impress your friends and family with perfectly poured pints, and savor the experience of enjoying your favorite brews at their best.
Remember, always maintain and clean your kegerator regularly to keep it in optimal condition. Follow the manufacturer’s instructions for proper care and maintenance, and enjoy countless pours of delicious, fresh beer.
Thank you for joining us on this kegerator journey. Cheers to many unforgettable moments filled with good company, great beer, and the satisfaction of your DIY kegerator tower!
Frequently Asked Questions about How To Assemble Kegerator Tower
Was this page helpful?
At Storables.com, we guarantee accurate and reliable information. Our content, validated by Expert Board Contributors, is crafted following stringent Editorial Policies. We're committed to providing you with well-researched, expert-backed insights for all your informational needs.


0 thoughts on “How To Assemble Kegerator Tower”