Articles
How To Mount A Ring Doorbell On Vinyl Siding
Modified: October 20, 2024
Learn how to mount a Ring doorbell on vinyl siding with our informative articles.
(Many of the links in this article redirect to a specific reviewed product. Your purchase of these products through affiliate links helps to generate commission for Storables.com, at no extra cost. Learn more)
Introduction
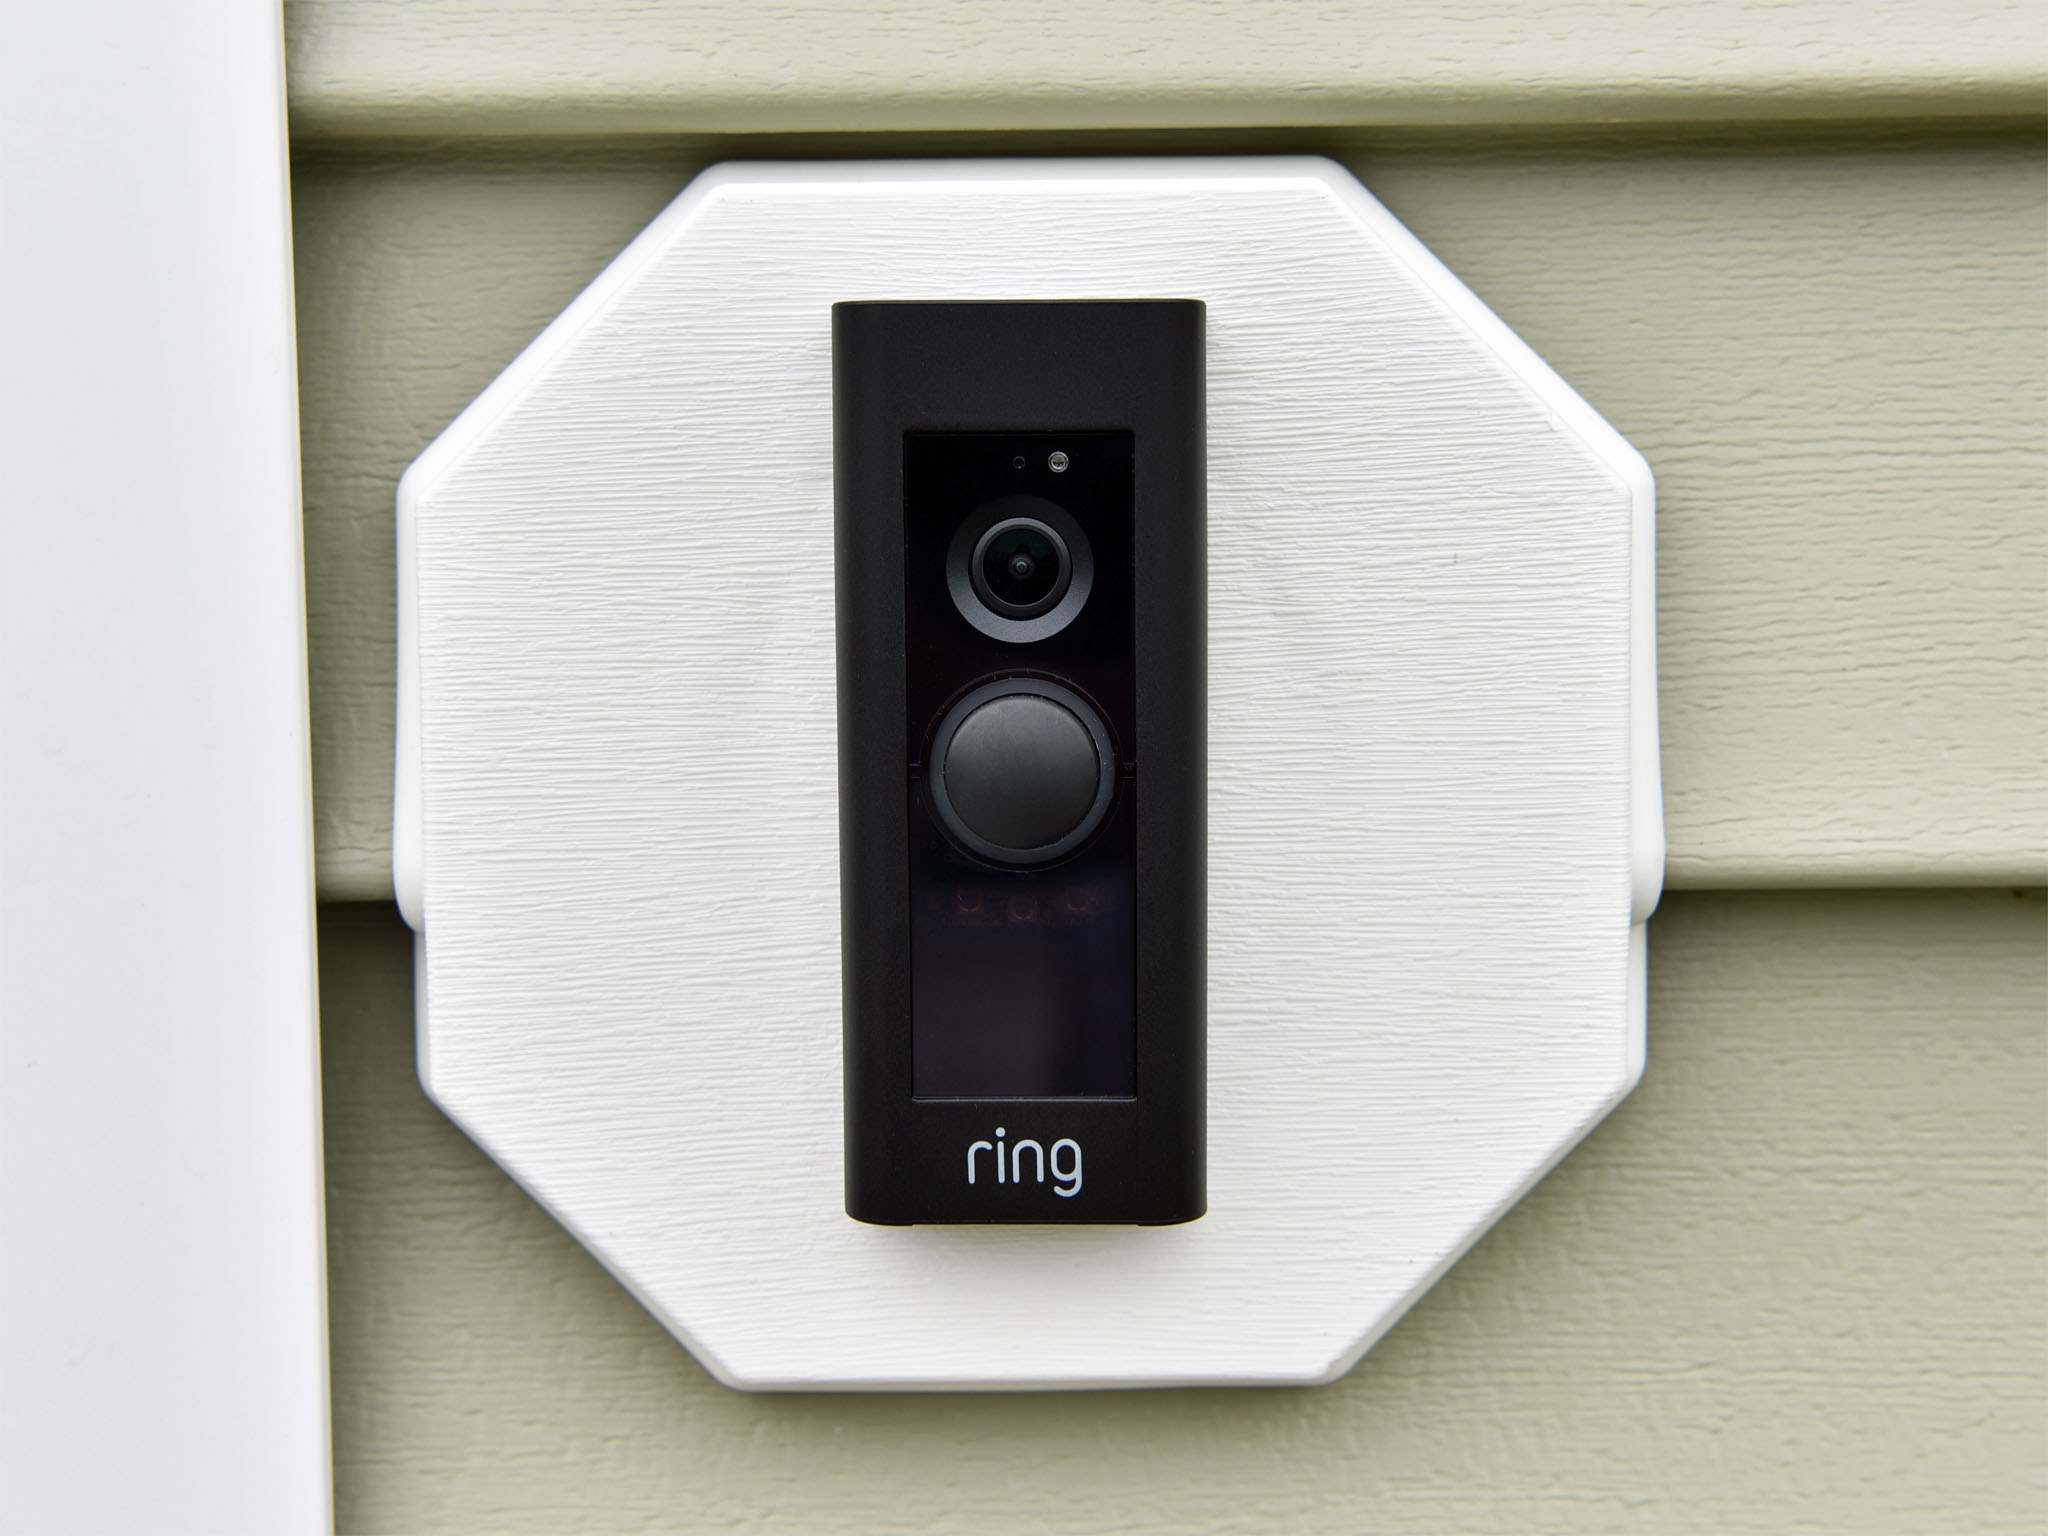
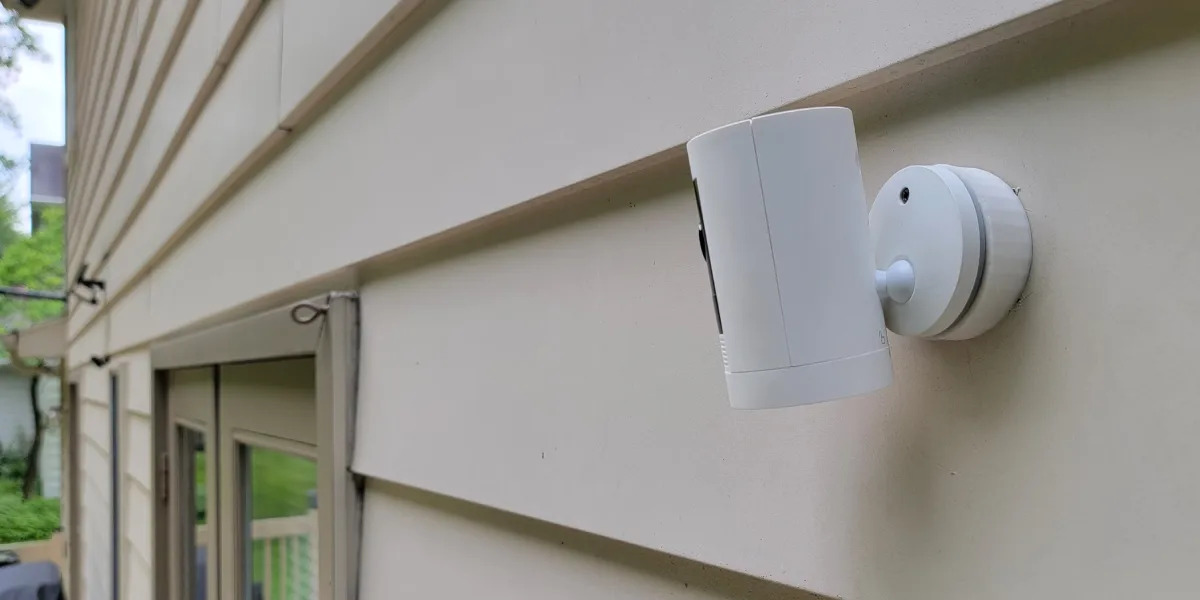
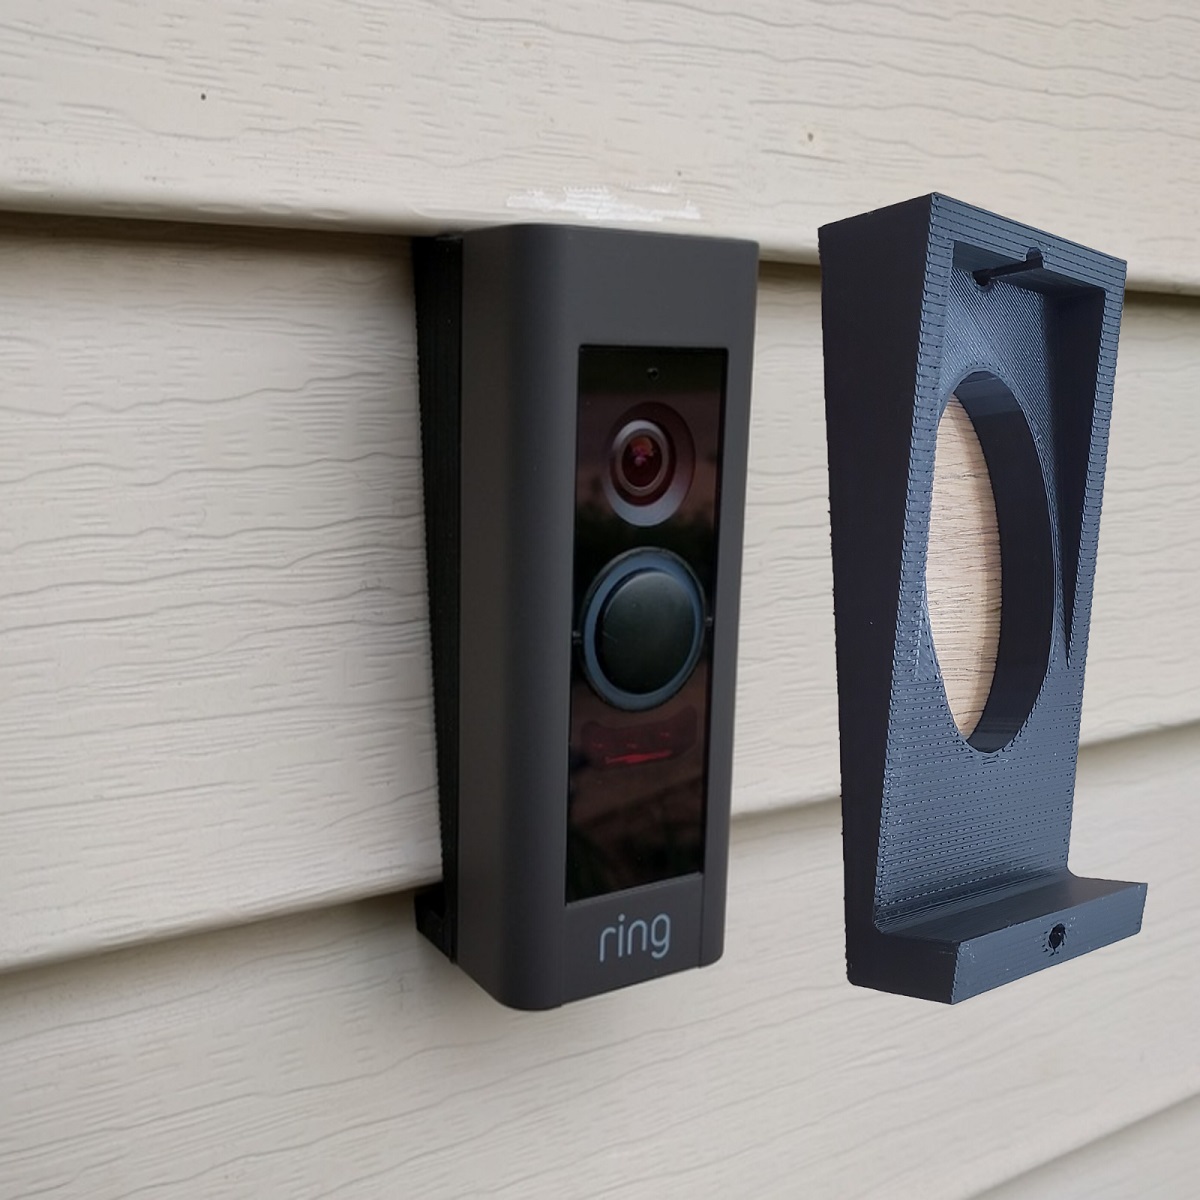
Installing a Ring Doorbell on vinyl siding can be a tricky task, but with the right technique and tools, it can be done successfully. The Ring Doorbell is a popular smart home device that provides security and convenience to homeowners. By mounting it on your vinyl siding, you can enhance the security of your home and have peace of mind knowing that you can monitor your front door from anywhere.
In this article, we will guide you through the process of mounting a Ring Doorbell on vinyl siding. We will discuss the necessary tools and materials you’ll need, as well as provide step-by-step instructions to ensure a seamless installation. Whether you’re a seasoned DIY enthusiast or a beginner, this article will equip you with the knowledge and confidence to complete the task.
Before we jump into the installation process, it’s important to assess your vinyl siding to ensure it is suitable for mounting the Ring Doorbell. Vinyl siding is a popular choice for its durability, low maintenance, and aesthetic appeal. However, it may not provide a solid surface or sufficient structural support for mounting the device. It’s crucial to examine the condition of your siding and determine if any repairs or reinforcements are needed before proceeding with the installation.
Now that you’re aware of the considerations regarding your vinyl siding, let’s move on to the tools and materials you’ll need for the installation. Proper preparation and having the right equipment on hand will make the job much easier and efficient. In the next section, we will discuss the necessary tools and materials and provide explanations on their use.
Remember, safety should always be a priority when working with tools and heights. Take necessary precautions, such as using a ladder with a stable footing and wearing appropriate safety gear, to ensure a safe installation process. Now, let’s proceed to the next step and gather the required tools and materials for mounting the Ring Doorbell on vinyl siding.
Key Takeaways:
- Proper assessment and preparation of vinyl siding are crucial before mounting a Ring Doorbell. Ensuring stability, surface texture, and clearances sets the stage for a successful and secure installation.
- Gathering the right tools and materials, along with careful preparation of the mounting location, are essential for a smooth and efficient installation process. Attention to detail and proper execution lead to a functional and reliable Ring Doorbell system.
Read more: How To Mount To Vinyl Siding
Assessing the Vinyl Siding
Before you begin the installation, it is important to thoroughly assess the condition of your vinyl siding. This step will help you determine if any repairs or reinforcements are needed. Here are a few factors to consider when assessing your vinyl siding:
1.1. Visual Inspection:
Start by visually inspecting your vinyl siding. Look for any signs of damage, such as cracks, warping, or loose panels. Make sure that the siding is in good condition and free from any defects that may affect the installation or the structural integrity of the siding.
1.2. Stability and Structural Support:
Check if your vinyl siding is stable enough to support the weight of the Ring Doorbell and withstand any external forces such as wind and rain. Gently push against the siding to see if it’s securely attached to the wall. If you notice any areas that feel loose or unstable, it may be necessary to reinforce the siding before proceeding with the installation.
1.3. Surface Texture:
Vinyl siding typically has a textured surface to mimic the appearance of natural materials like wood. Ensure that the texture of the siding is suitable for mounting the Ring Doorbell. If the surface is too rough or uneven, it may cause difficulties during installation or affect the adhesion of the mounting bracket.
1.4. Obstructions and Clearances:
Identify any potential obstructions that may interfere with the installation process, such as electrical outlets, light fixtures, or decorative trim. Measure the clearances around these objects to ensure there is enough space to mount the Ring Doorbell without any interference.
1.5. Plan the Doorbell Position:
Consider the optimal location for mounting the Ring Doorbell. It should provide a clear view of your front door and the surrounding area. Additionally, ensure that there is a nearby power source or an existing doorbell wiring if you’re not using a battery-powered Ring Doorbell model.
By carefully assessing your vinyl siding, you’ll be able to identify any areas that may require attention or repairs. This will help you plan the installation process more effectively and ensure a secure and successful mounting of the Ring Doorbell. Once you’ve assessed your vinyl siding, and if it’s in good condition, you’re ready to move on to the next step – gathering the tools and materials needed for the installation.
Gathering the Required Tools and Materials
Before you can start the installation process, it’s essential to gather all the necessary tools and materials. Having everything prepared and readily available will save you time and make the installation smoother. Here’s a list of the tools and materials you’ll need for mounting a Ring Doorbell on vinyl siding:
2.1. Tools:
– Drill: Use a drill with a suitable drill bit for drilling holes in the siding and the mounting bracket.
– Screwdriver: A screwdriver will be needed to attach the mounting bracket and secure the Ring Doorbell.
– Level: A level will help ensure that the mounting bracket and the doorbell installation are perfectly straight.
– Tape Measure: Use a tape measure to measure the distances accurately for the installation.
– Pencil or Marker: These will be handy for marking the drilling spots on the vinyl siding.
– Ladder: Depending on the height of your doorbell placement, you may need a ladder for easy access.
2.2. Materials:
– Ring Doorbell: Choose the model of Ring Doorbell that suits your needs, whether it’s a battery-powered or hardwired version.
– Mounting Bracket: The mounting bracket is typically included with the Ring Doorbell. This bracket will serve as a base for attaching the Ring Doorbell to the vinyl siding.
– Mounting Screws: You’ll need screws that are suitable for your vinyl siding material and long enough to securely hold the bracket in place.
– Wall Anchors (if necessary): In case your vinyl siding is not sturdy enough to support the screws, you may need wall anchors for additional reinforcement.
– Power Source: If you’re installing a hardwired Ring Doorbell, ensure that you have a suitable power source nearby or the necessary wiring to connect the doorbell.
It’s crucial to ensure that you have the correct tools and materials before starting the installation. If you’re unsure about any of the items on the list, refer to the Ring Doorbell installation manual or consult with a professional. Once you have gathered all the required tools and materials, you’re ready to move on to the next step – preparing the mounting location.
Preparing the Mounting Location
To ensure a secure and successful installation of your Ring Doorbell on vinyl siding, it is essential to properly prepare the mounting location. Here are the steps to follow:
3.1. Choose the Location:
Select an ideal location for your Ring Doorbell that offers a clear view of your front door and the surrounding area. Consider the height, visibility, and accessibility when determining the placement. It’s recommended to position the doorbell at a height where most people can easily reach it and interact with it.
3.2. Clear the Area:
Clear any debris, dirt, or vegetation around the selected mounting location. Ensure that the area is clean and free from any potential obstructions that may interfere with the installation or obstruct the camera’s view.
3.3. Mark the Mounting Holes:
Hold the mounting bracket against the vinyl siding where you want to install the Ring Doorbell. Use a pencil or marker to mark the locations of the mounting holes on the siding. Make sure the bracket is level and properly aligned before marking the holes.
3.4. Check for Studs or Reinforcements:
Before drilling into the vinyl siding, check if there are any studs or structural reinforcements behind the siding at the marked hole locations. Using a stud finder or tapping on the siding can help you identify any solid areas that may provide additional support for the mounting. If you encounter a stud or reinforcement, adjust the position of the mounting holes accordingly to ensure a secure installation.
3.5. Consider Weatherproofing:
Vinyl siding is relatively weather-resistant, but it’s still important to take precautions to protect the Ring Doorbell and the mounting location from the elements. Consider using a weatherproofing sealant around the mounting holes to prevent water or moisture from seeping into the siding and causing damage.
By properly preparing the mounting location, you set the stage for a smooth installation process. Taking the time to choose the right location, clearing the area, and marking the holes accurately will help ensure a secure and reliable mounting for your Ring Doorbell. With the mounting location prepared, you’re now ready to move on to installing the mounting bracket.
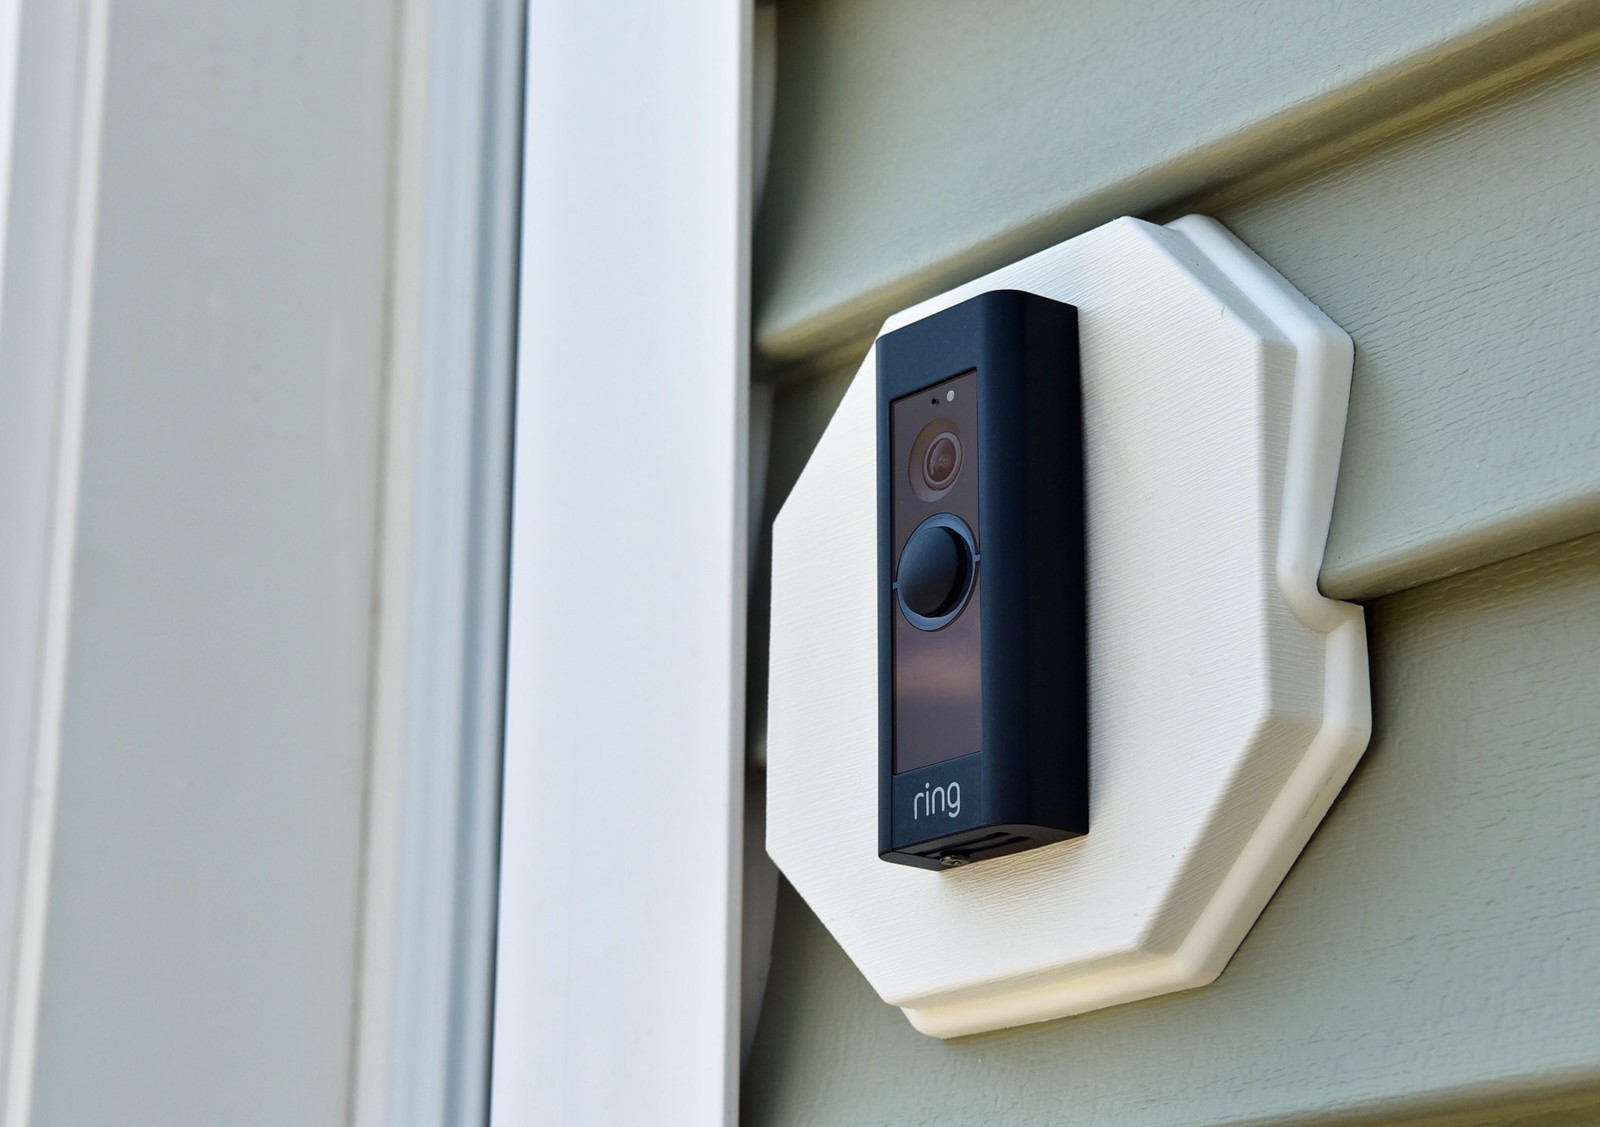
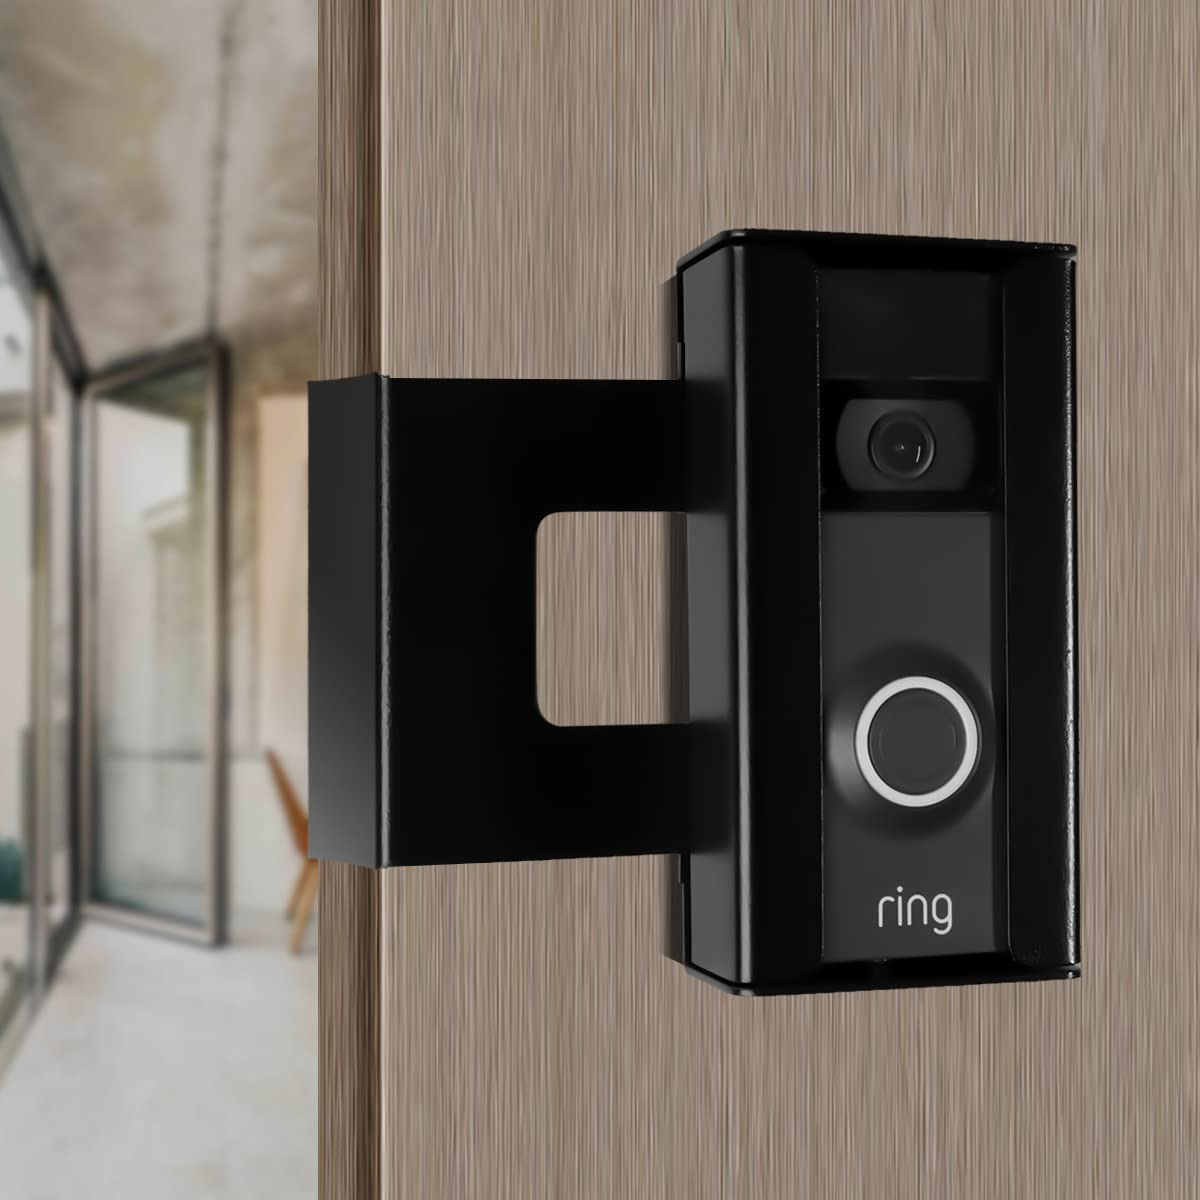
Installing the Mounting Bracket
Installing the mounting bracket is a crucial step in securely mounting your Ring Doorbell on vinyl siding. The bracket serves as the base for attaching the doorbell and provides the necessary stability. Follow these steps to install the mounting bracket:
4.1. Align the Bracket:
Hold the mounting bracket against the vinyl siding, ensuring that it aligns with the marked hole locations. Check that the bracket is level using a level tool to ensure a straight installation.
4.2. Mark the Screw Holes:
Once the bracket is aligned, use a pencil or marker to mark the screw hole locations on the vinyl siding. These markings will serve as guides for drilling the holes.
4.3. Pre-drill the Holes:
Using a drill with a suitable drill bit, pre-drill holes at the marked locations on the vinyl siding. Take care not to drill too deep, as you want to ensure the holes are only as deep as necessary to accommodate the length of the screws.
4.4. Attach the Bracket:
Hold the mounting bracket back up against the vinyl siding over the pre-drilled holes. Insert the screws into the bracket’s holes and drive them into the pre-drilled holes using a screwdriver or drill. Ensure that the screws are securely fastened, but be cautious not to overtighten them, as it may damage the siding.
4.5. Verify Stability:
Once the mounting bracket is attached, check for stability by gently pushing or pulling on it. It should be firmly in place without any wobbling or movement. If it feels loose, recheck the screw tightness and adjust as needed.
By properly installing the mounting bracket, you establish a solid foundation for mounting your Ring Doorbell on vinyl siding. Take your time during this step to ensure the bracket is securely attached and aligned correctly. With the mounting bracket in place, you’re now ready to move on to connecting the Ring Doorbell to the bracket.
When mounting a Ring doorbell on vinyl siding, use a level to ensure it’s straight, and pre-drill holes to avoid cracking the siding. Use the provided screws and anchors for a secure installation.
Read more: How To Mount TV To Vinyl Siding
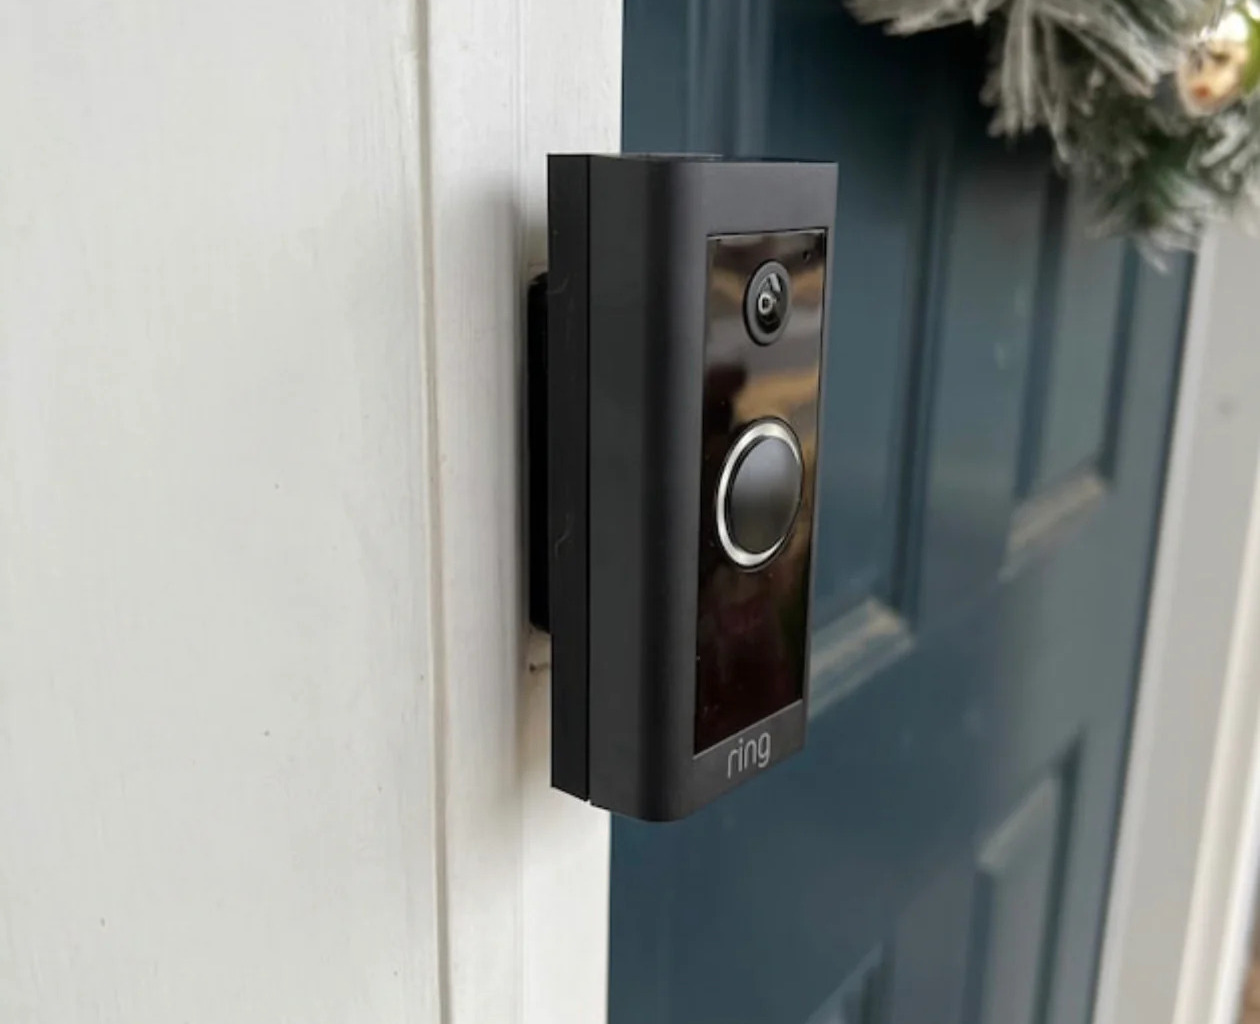
Connecting the Ring Doorbell
Now that you have successfully installed the mounting bracket, it’s time to connect the Ring Doorbell to the bracket. Follow these steps to ensure a proper connection:
5.1. Prepare the Ring Doorbell:
If you’re using a battery-powered Ring Doorbell, ensure that the battery is fully charged before proceeding. If you’re installing a hardwired model, make sure the power source is turned off at the circuit breaker for safety.
5.2. Align the Doorbell:
Hold the Ring Doorbell over the mounting bracket, aligning it with the holes on the bracket. Make sure the device is level and properly positioned.
5.3. Attach the Doorbell:
Slowly lower the Ring Doorbell onto the mounting bracket, aligning the holes on the device with the holes on the bracket. Once aligned, insert the screws into the holes and tighten them securely. Use a screwdriver or drill to drive the screws into place, but be careful not to overtighten and risk damaging the device or the bracket.
5.4. Test the Connection:
After attaching the Ring Doorbell to the mounting bracket, give the device a gentle tug or shake to ensure it is securely connected. It should not move or come loose. If it feels unstable, recheck the screws and make any necessary adjustments.
5.5. Check the Functionality:
Before finalizing the installation, check that the Ring Doorbell is functioning properly. Press the doorbell button to see if it activates and sends a signal. If applicable, connect the device to your Wi-Fi network following the manufacturer’s instructions.
By connecting the Ring Doorbell to the mounting bracket, you bring the installation one step closer to completion. Ensure that the device is securely attached and functioning correctly before proceeding to the next step of adjusting and securing the doorbell for optimal performance.
Adjusting and Securing the Doorbell
After connecting the Ring Doorbell to the mounting bracket, it’s important to adjust and secure the device to ensure proper functionality and stability. Follow these steps to complete this crucial stage of the installation:
6.1. Level the Doorbell:
Check that the Ring Doorbell is level, both horizontally and vertically. Use a level tool to make any necessary adjustments. A level doorbell will ensure accurate motion detection and video recording.
6.2. Fine-tune the Position:
Adjust the position of the Ring Doorbell, if needed, to ensure the camera captures the desired field of view. Tilt it slightly up or down, left or right, to optimize the visibility. Keep in mind any potential obstructions or angles that may affect the camera’s performance.
6.3. Secure the Doorbell:
Once you have achieved the desired positioning, tighten any screws or locking mechanisms provided with the Ring Doorbell to secure it in place. This step will prevent the device from shifting or moving due to external factors like wind or vibrations.
6.4. Manage Excess Wires (if applicable):
If you have installed a hardwired Ring Doorbell and there are excess wires, carefully tuck them away or secure them using wire clips to prevent them from becoming a visual distraction or getting damaged.
6.5. Follow Manufacturer Guidelines:
Refer to the manufacturer’s instructions for any additional adjustments or securing methods specific to your Ring Doorbell model. Follow their guidelines to ensure proper installation and optimal performance.
By adjusting and securely positioning the Ring Doorbell, you ensure that the device is ready to monitor your front door effectively. Taking the time to level the doorbell, fine-tune its position, and secure it in place will contribute to the overall functionality and longevity of the device. Once you have completed this step, you’re almost ready to test your newly installed Ring Doorbell!
Testing the Installation
After completing the installation of your Ring Doorbell on vinyl siding, it’s crucial to test its functionality to ensure everything is working as intended. Follow these steps to test the installation:
7.1. Power Up the Device:
If you’re using a battery-powered Ring Doorbell, ensure that the battery is properly inserted and charged. For hardwired models, turn the power back on at the circuit breaker.
7.2. Connect to Wi-Fi (if applicable):
If you haven’t already done so during the installation process, follow the manufacturer’s instructions to connect the Ring Doorbell to your Wi-Fi network. This step is necessary for remote access and to receive notifications on your smartphone or other devices.
7.3. Adjust Motion and Sound Settings:
Using the Ring app or the device’s settings, adjust the motion and sound sensitivity according to your preferences. This will help fine-tune the device’s performance and reduce false alerts or unnecessary recordings.
7.4. Test the Doorbell Response:
Press the doorbell button to simulate a visitor ringing your doorbell. Check if you receive a notification on your connected devices, such as your smartphone or tablet. Ensure that you can see and hear the live video feed and communicate (if applicable) through the built-in speaker and microphone.
7.5. Test Motion Detection:
Walk in front of the Ring Doorbell to test the motion detection capabilities. Confirm that you receive motion alerts and that the device begins recording when motion is detected. Review the recorded footage to ensure the camera captures the desired field of view.
7.6. Test Night Vision (if applicable):
If your Ring Doorbell has night vision capabilities, test it by simulating low-light conditions or by adjusting the lighting around your doorstep. Check that you can clearly see and identify objects or individuals in the recorded footage.
7.7. Check Battery Life (if applicable):
For battery-powered models, monitor the battery life through the Ring app or the device settings. Ensure that the battery is holding a charge and that it’s not draining too quickly. If necessary, consider adjusting the settings or seeking technical support if battery drain seems excessive.
By thoroughly testing the installation, you can identify any potential issues or adjustments needed to ensure the optimal performance of your Ring Doorbell. If you encounter any problems, refer to the manufacturer’s instructions or consult their support resources for troubleshooting guidance. Once you’ve confirmed that the installation is successful and the device is functioning properly, you can enjoy the added security and convenience of your Ring Doorbell system.
Conclusion
Mounting a Ring Doorbell on vinyl siding may seem like a challenging task, but with the right tools, materials, and careful preparation, it can be accomplished successfully. By following the step-by-step instructions provided in this article, you can ensure a secure and functional installation.
Assessing the condition of your vinyl siding before starting the installation is crucial, as it helps identify any repairs or reinforcements needed. Gathering the required tools and materials beforehand saves time and ensures that you have everything necessary to complete the installation.
Preparing the mounting location involves choosing an ideal spot, clearing the area, marking the mounting holes, and checking for obstructions. Installing the mounting bracket securely is essential for a stable and secure base for your Ring Doorbell. Connecting the Ring Doorbell to the bracket is the next step, ensuring a proper attachment and functionality.
Adjusting and securing the Ring Doorbell guarantees that it is level and properly positioned for the best performance. Testing the installation is crucial to verify that the Ring Doorbell is functioning correctly, with features such as motion detection, live video feed, and night vision working as intended.
By following these steps and testing the installation, you can enjoy the added security, convenience, and peace of mind offered by your Ring Doorbell on your vinyl siding.
Remember that safety should always be a priority when working with tools and heights. Take necessary precautions, such as using a stable ladder and wearing appropriate safety gear, throughout the installation process.
If you ever need additional guidance or encounter any issues, refer to the manufacturer’s instructions or seek assistance from their support resources.
Now that you have the knowledge and understanding to mount a Ring Doorbell on vinyl siding, it’s time to bring your home security to the next level. Enjoy the convenience of monitoring your front door and enhancing your home’s security with this smart home device.
Excited to take your home's comfort and safety to the next level? Dive into our guide on DIY home improvement where you'll pick up practical skills and creative ideas. For peace of mind, understanding home security needs is a must, providing insights into safeguarding your living space effectively. If you've just installed a Ring doorbell, don't miss out on our tips for Ring doorbell setup to ensure smooth integration with your existing chime. Keep enhancing your home with these essential reads!
Frequently Asked Questions about How To Mount A Ring Doorbell On Vinyl Siding
Was this page helpful?
At Storables.com, we guarantee accurate and reliable information. Our content, validated by Expert Board Contributors, is crafted following stringent Editorial Policies. We're committed to providing you with well-researched, expert-backed insights for all your informational needs.


0 thoughts on “How To Mount A Ring Doorbell On Vinyl Siding”