Articles
How To Move Doorbell Wiring
Modified: October 20, 2024
Learn the essential steps and tips for safely moving doorbell wiring in this informative article. Trust our comprehensive guide for a seamless DIY project.
(Many of the links in this article redirect to a specific reviewed product. Your purchase of these products through affiliate links helps to generate commission for Storables.com, at no extra cost. Learn more)
Introduction
Installing a doorbell is a common home improvement project that can enhance the functionality and convenience of your home. However, there may be instances when you need to move the doorbell wiring to a different location. This could be due to renovations, relocating the doorbell to a more convenient spot, or simply wanting to upgrade the existing doorbell system.
In this article, we will guide you through the process of moving doorbell wiring. We will provide step-by-step instructions, safety precautions, and tips to ensure a smooth and successful relocation of your doorbell wiring. So, grab your tools and let’s get started!
Key Takeaways:
- Prioritize safety and gather necessary tools and materials before moving doorbell wiring. Assess current wiring, prepare new location, and follow step-by-step instructions for a successful and convenient relocation.
- Carefully disconnect and extend the wiring, connect it to the new location, and test the doorbell connection for proper functionality. Finalize the installation with attention to detail and safety precautions.
Read more: How To Wire A Doorbell
Safety Precautions
Before undertaking any electrical project, it is essential to prioritize safety. Moving doorbell wiring involves working with electricity, so it is crucial to take the necessary precautions to protect yourself and prevent accidents.
Here are some safety guidelines to follow when moving doorbell wiring:
- Turn off the power: Before working with any electrical wiring, ensure that the power to the doorbell system is turned off. Locate the circuit breaker or fuse that controls the doorbell circuit and switch it off to avoid any potential electric shock.
- Use proper tools and equipment: Ensure that you have the necessary tools and equipment for the job, such as wire cutters, wire strippers, a voltage tester, and insulated gloves. Using the right tools will make the process easier and safer.
- Protective gear: To protect yourself from any potential hazards, wear safety goggles to shield your eyes, gloves to prevent direct contact with live wires, and non-slip footwear to avoid accidents.
- Work in a well-lit area: Ensure that you have proper lighting when working on the doorbell wiring. This will help you see the wires clearly and minimize the risk of making mistakes or causing damage.
- Avoid water and wet conditions: Do not attempt to work on the doorbell wiring in wet or damp conditions. Moisture can increase the risk of electric shock. If the work area is wet, wait until it is dry before proceeding.
- Follow manufacturer’s instructions: If you are using a new doorbell or any additional components, carefully read and follow the manufacturer’s instructions. This will help you understand the specific requirements and ensure a safe installation.
- If unsure, consult a professional: If you have limited experience with electrical work or feel uncertain about any aspect of the project, it is best to consult a qualified electrician. They can provide expert guidance and ensure the job is done safely.
By following these safety precautions, you can minimize the risks associated with moving doorbell wiring and ensure a safe and successful installation.
Gathering Tools and Materials
Before you begin moving the doorbell wiring, you’ll need to gather the necessary tools and materials. Having everything prepared beforehand will make the process more efficient and help you avoid any unnecessary interruptions. Here is a list of tools and materials you will need:
- Wire cutters and wire strippers: These tools will allow you to cut and strip the wires as needed.
- Voltage tester: An essential tool for checking if the power is indeed turned off before working on the wiring.
- Screwdriver: You will need a screwdriver to remove the cover plate of the doorbell and any mounting screws.
- Electrical tape: Used to insulate and secure the wiring connections.
- New doorbell kit or components (optional): If you are planning to upgrade your doorbell system or need additional components, make sure to have them ready. This may include a new doorbell button, chime, or transformer.
- Replacement wiring (if necessary): Depending on the new location of your doorbell, you may need to purchase additional wiring to extend the connection.
- Ladder or step stool: If the new location of the doorbell is higher or out of reach, a ladder or step stool will be necessary to access the wiring.
- Marker or labeling tape: These can be used to mark and label the wires for easier identification during the installation process.
It’s a good idea to gather all the tools and materials in one place before starting the project. This way, you’ll have everything you need within reach and won’t waste time searching for missing items.
Once you have gathered all the necessary tools and materials, you are ready to move on to the next steps of assessing the current doorbell wiring and preparing the new location.
Assessing the Current Doorbell Wiring
Before you start moving the doorbell wiring, it’s important to assess the current setup and understand how the wiring is currently configured. This will help you plan and execute the relocation process smoothly. Here are the steps to assess the current doorbell wiring:
- Locate the doorbell transformer: The transformer is usually located near the electrical panel or in a utility room. It converts the high voltage electrical supply to a lower voltage suitable for the doorbell system.
- Turn off the power: Once you’ve located the transformer, make sure to turn off the power to the doorbell system by switching off the corresponding circuit breaker or removing the fuse.
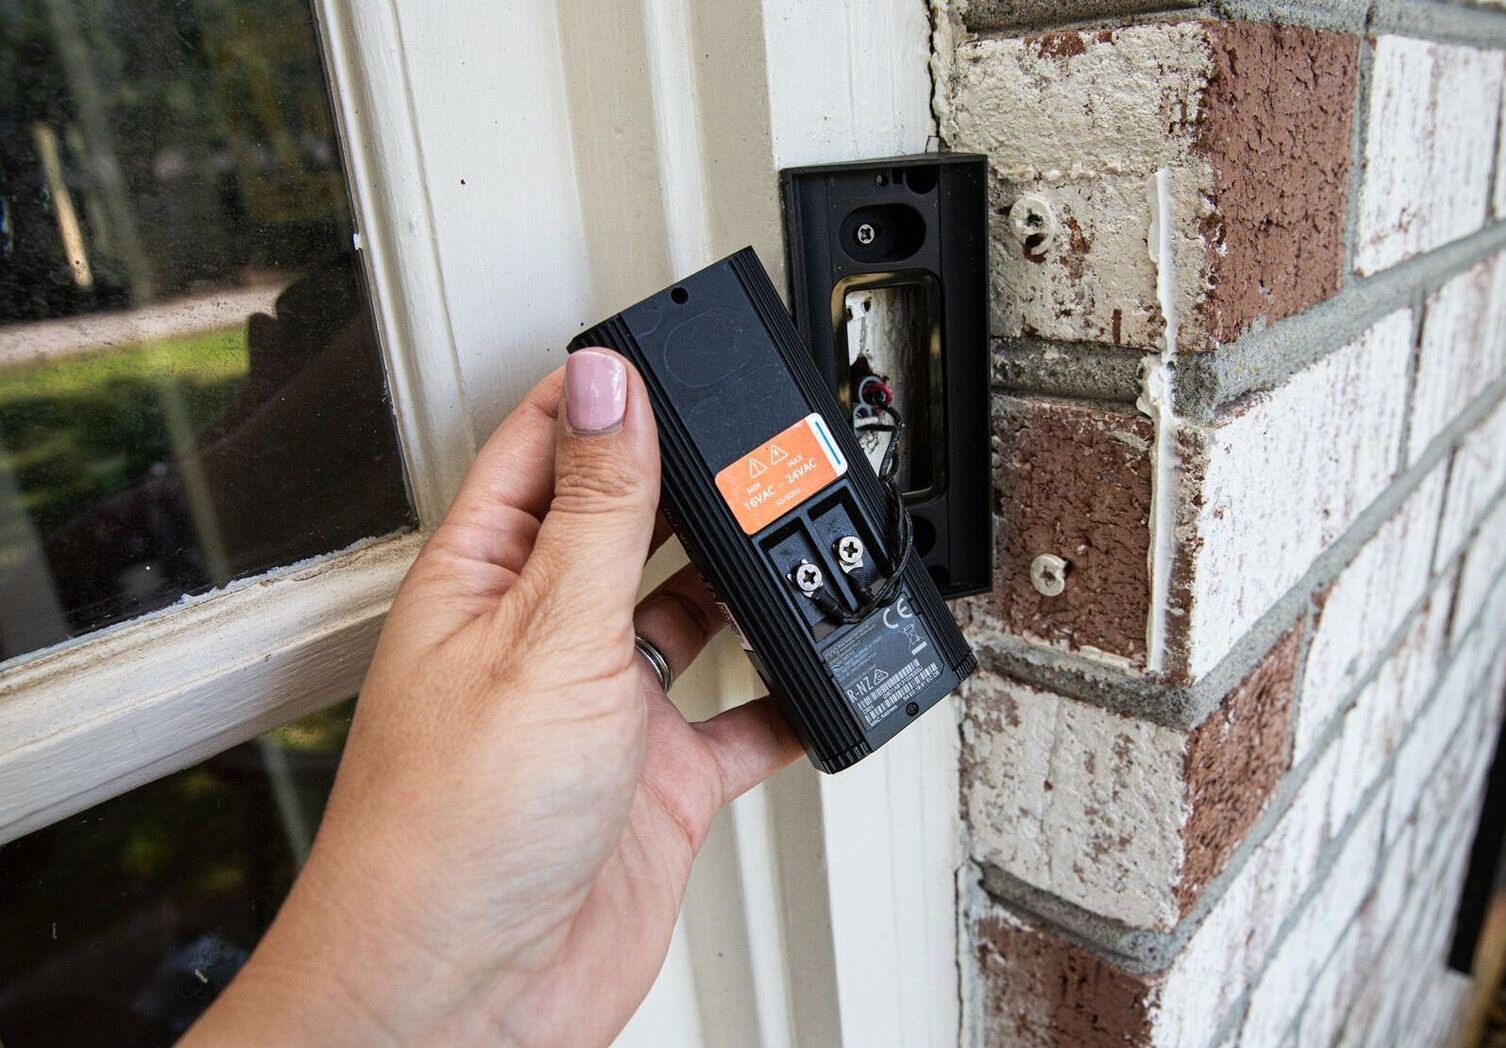
- Remove the doorbell cover plate: Using a screwdriver, remove the cover plate of the doorbell to access the wiring behind it.
- Examine the wiring connections: Take a close look at the wiring connections. Identify the wires connected to the doorbell button, transformer, and any additional chime units.
- Take note of wire colors: Note the colors of the wires connected to each component. Most standard doorbell systems have two wires, one connected to the transformer (typically red or white) and one connected to the doorbell button (typically black or blue).
- Check for any existing extensions: If there are any extensions or additional wires used in the current setup, make a note of those as well.
- Document the current wiring configuration: Take photos or make a diagram of the current wiring configuration. Include the wire colors and the connections for future reference.
Assessing the current doorbell wiring will provide you with a clear understanding of how the system is currently set up. This information will be crucial as you proceed to prepare the new location and make the necessary wiring adjustments during the relocation process.
Once you have assessed the current doorbell wiring, you can move on to preparing the new location for the doorbell installation.
Preparing the New Doorbell Location
Now that you have assessed the current doorbell wiring, it’s time to prepare the new location where you will be relocating the doorbell. Follow these steps to ensure a smooth installation:
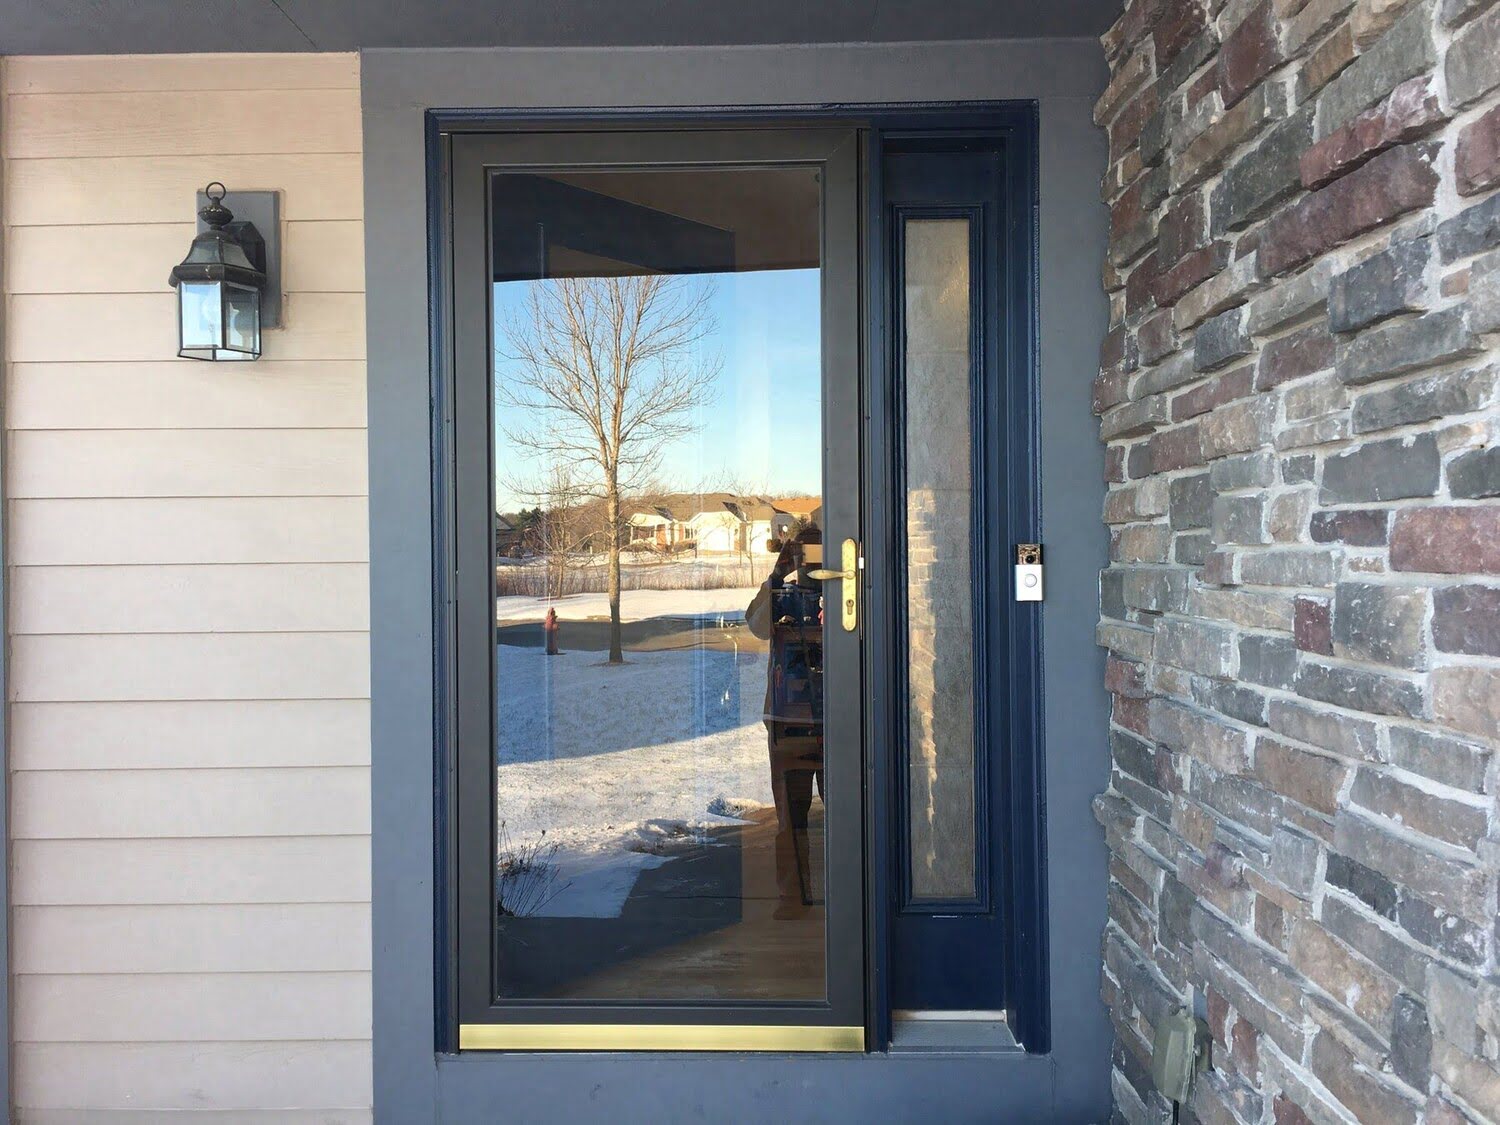
- Choose the new location: Determine where you want to install the doorbell. It should be easily accessible and within audible range. Common locations include near the front door or entryway.
- Ensure proper wiring access: Make sure there is easy access to the wiring from the chosen location. This will allow you to extend the existing wiring or run new wires to the doorbell.
- Clean the area: Clear the area of any debris or obstructions that may hinder the installation process. A clean workspace will make it easier to work with the wiring and mount the new doorbell.
- Check for compatibility: If you are using a new doorbell or components, ensure that they are compatible with the existing wiring system. Refer to the manufacturer’s instructions for compatibility guidelines.
- Inspect the new doorbell: If you are installing a new doorbell button, chime, or transformer, carefully inspect the components for any damage or defects before proceeding with the installation.
- Plan the wire path: Determine the path the wiring will take from the existing location to the new location. This may involve running the wires along walls, through conduits, or behind baseboards. Ensure that the wire path is discreet and does not pose any tripping hazards.
- Measure and mark the mounting holes: If required, use a tape measure to accurately measure and mark the mounting holes for the new doorbell button or chime. Double-check the measurements to ensure proper alignment.
By thoroughly preparing the new doorbell location, you will save time and effort during the installation process. It will also help ensure that the doorbell is conveniently located and functions properly once the relocation is complete.
With the new location prepared, you can now proceed to the next steps of disconnecting the existing doorbell wiring and extending the wiring to the new location.
Read more: How To Install Wired Nest Doorbell
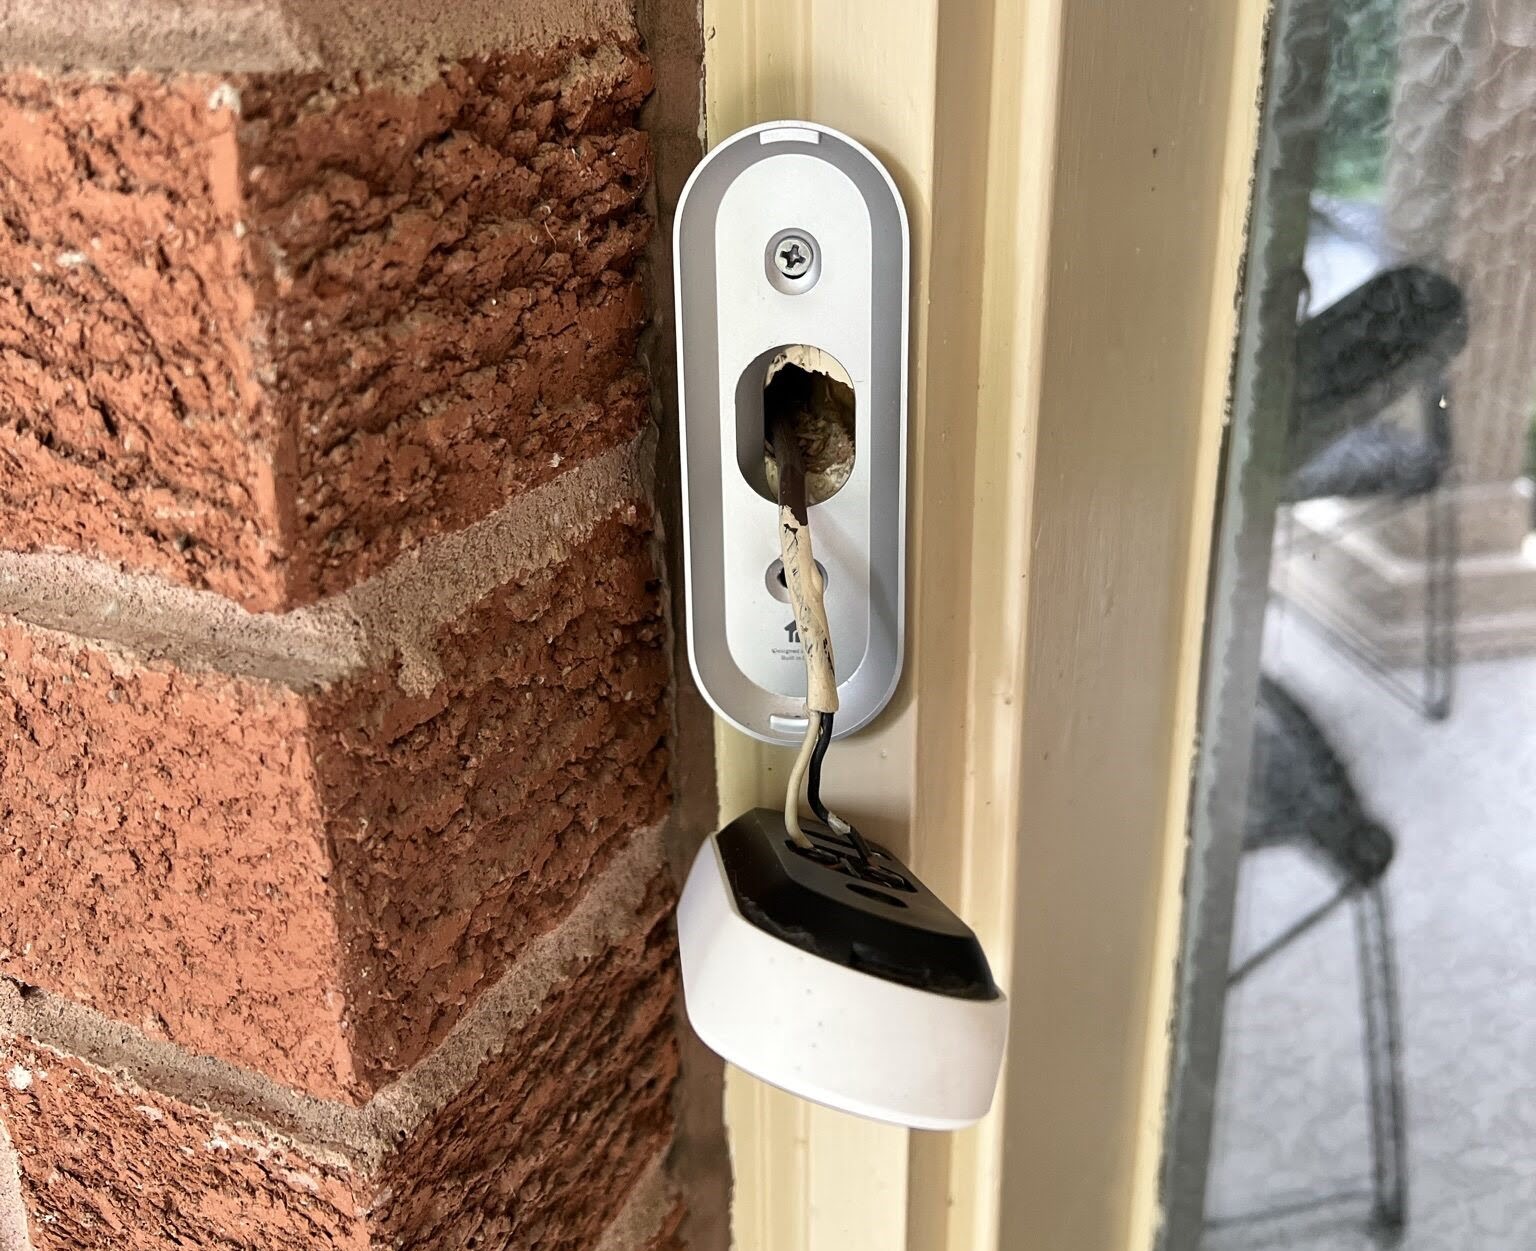
Disconnecting the Existing Doorbell Wiring
Now that you have prepared the new doorbell location, it’s time to disconnect the existing doorbell wiring from its current location. Follow these steps to safely disconnect the wiring:
- Turn off the power: Begin by ensuring that the power to the doorbell system is turned off. Locate the circuit breaker or fuse that controls the doorbell circuit and switch it off.
- Remove the doorbell cover plate: Using a screwdriver, remove the cover plate of the existing doorbell to expose the wiring behind it.
- Identify the wiring connections: Take a close look at the wiring connections inside the doorbell assembly. Identify the wires connected to the transformer and the doorbell button.
- Label the wires: To avoid confusion later on, use a marker or labeling tape to label the wires with their corresponding connections. This will make it easier to reconnect them in the new location.
- Disconnect the wires: To disconnect the wiring, carefully unscrew the wire terminals or unplug the wire connectors. Use caution and avoid pulling the wires forcefully to prevent damaging them.
- Secure the loose wires: Once the wires are disconnected, secure them with wire nuts or electrical tape to prevent them from coming into contact with each other or any metal surfaces.
- Inspect the wiring: Take a moment to inspect the wires for any signs of damage, such as fraying or exposed copper. If you notice any issues, it is best to replace the wiring before proceeding with the installation.
- Double-check for power: Use a voltage tester to verify that there is no power running through the wires before proceeding to the next step.
By following these steps, you will safely disconnect the existing doorbell wiring from its current location. Remember to take proper precautions, such as turning off the power and labeling the wires, to ensure a smooth and hassle-free relocation process.
Next, we will move on to extending the wiring to the new location for the doorbell installation.
When moving doorbell wiring, always turn off the power to the circuit before starting. Use a voltage tester to ensure the wires are not live before handling them. Be sure to label the wires to make reinstallation easier.
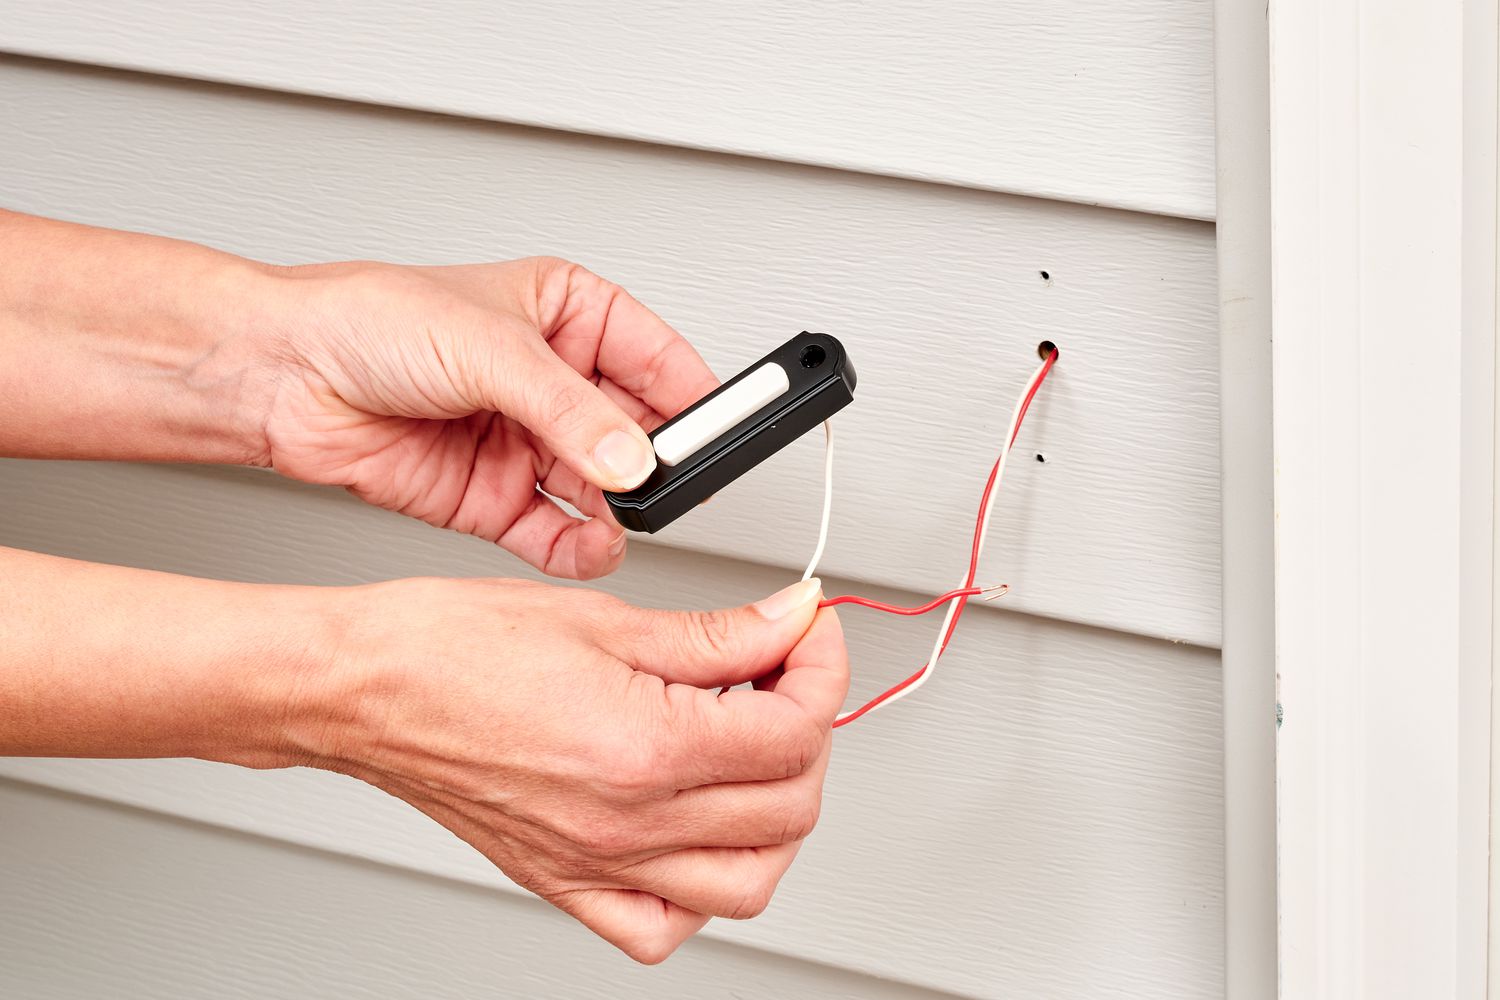
Extending the Wiring to the New Location
With the existing doorbell wiring successfully disconnected, it’s time to extend the wiring to the new location where you will be relocating the doorbell. Follow these steps to extend the wiring:
- Determine the length of wire needed: Measure the distance between the existing doorbell location and the new location. Add a few extra feet to account for any necessary slack or routing requirements.
- Select the appropriate wire: Choose a wire gauge that is suitable for your doorbell system. Typically, a 20 or 22 gauge wire is sufficient for most doorbell applications.
By following these steps, you will successfully extend the wiring from the existing doorbell location to the new location. Take your time to ensure that the wiring is neatly routed and securely connected at both ends.
Next, we will move on to the crucial step of connecting the doorbell wiring to the new location and testing the doorbell connection.
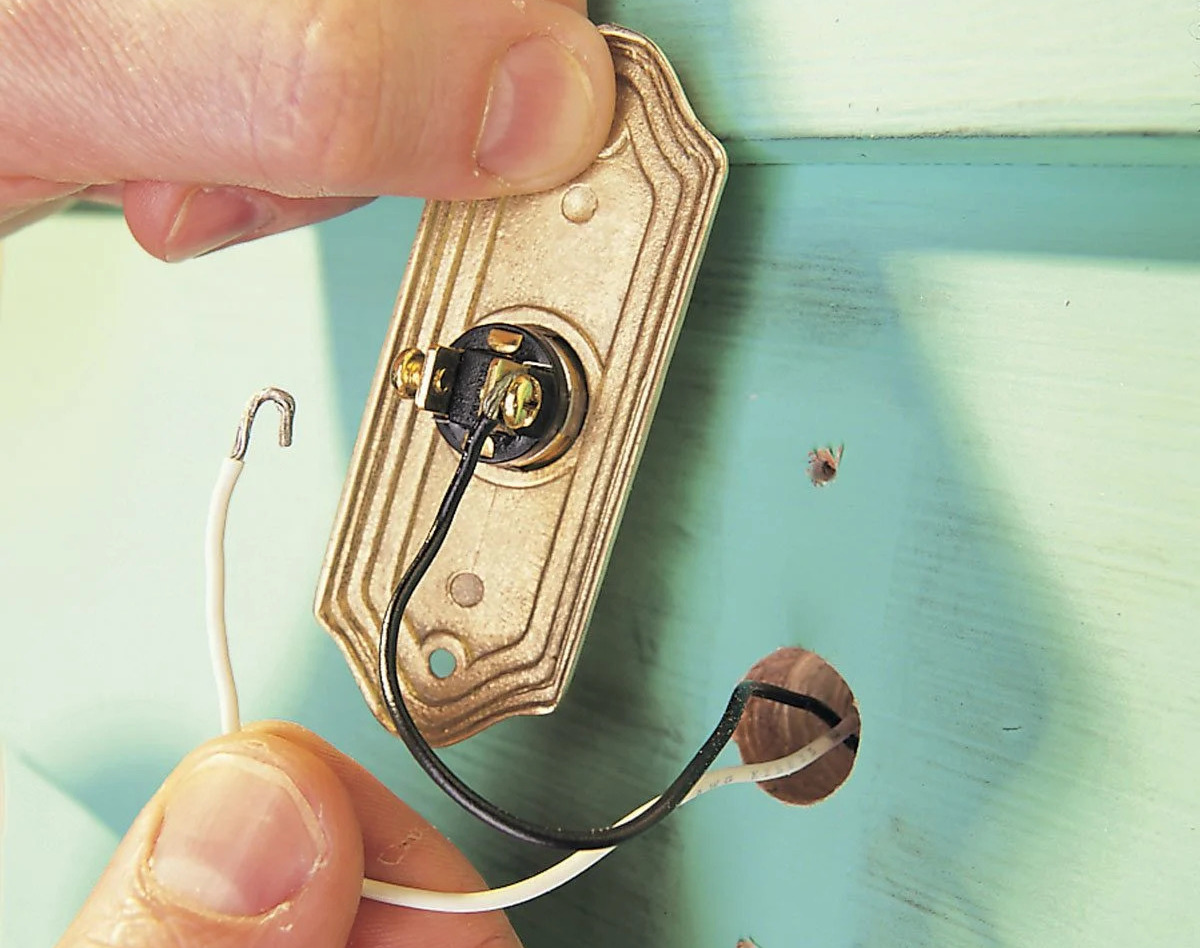
Connecting the Doorbell Wiring to the New Location
Now that you have extended the doorbell wiring to the new location, it’s time to connect the wiring to the doorbell components in the new position. Follow these steps to ensure a proper connection:
- Prepare the doorbell components: If you are using a new doorbell button or chime, carefully read the manufacturer’s instructions for any specific wiring or installation requirements. Ensure that the components are ready for installation.
- Identify the wire connections: Take a moment to review the wiring connections at the new location. Identify the wires that correspond to the transformer and the doorbell button based on the previous labeling.
- Connect the wiring: Strip about 1/2 inch of insulation from the ends of the doorbell wiring at the new location. Connect the wires to the corresponding terminals of the doorbell button or chime, following the labeled connections.
By following these steps, you will successfully connect the doorbell wiring to the new location and verify that the doorbell system is functioning as intended. Take your time to ensure proper wiring connections and adjust the components for optimal performance.
Next, we will move on to testing the doorbell connection and finalizing the doorbell wiring installation.
Testing the Doorbell Connection
With the doorbell wiring connected to the new location, it’s important to test the doorbell connection to ensure that everything is working properly. Follow these steps to test the doorbell connection:
- Double-check the wiring: Before testing the doorbell, visually inspect the wiring connections at both the doorbell button/chime and the transformer to ensure they are secure and properly connected.
- Turn on the power: With caution, turn on the power to the doorbell system by switching the corresponding circuit breaker back on or replacing the fuse.
- Press the doorbell button: Stand near the doorbell button and press it to trigger the doorbell chime or sound. Listen for a clear and audible sound indicating that the doorbell is working.
- Check all components: If your doorbell system includes multiple chimes or sound units, make sure to check all of them to ensure that they are producing sound when the button is pressed.
- Verify consistency: Test the doorbell connection multiple times to ensure consistency in the sound quality and volume. If there are any issues, double-check the wiring connections and troubleshoot as needed.
- Make adjustments if necessary: If the sound is too faint, consider adjusting the volume settings on the doorbell chime or sound unit, if applicable. Additionally, you may need to reposition or adjust the doorbell components for optimal performance.
By following these steps, you will be able to test the doorbell connection and ensure that the doorbell system is functioning as expected. If you encounter any issues during the testing process, it may be necessary to troubleshoot the wiring connections or consult the manufacturer’s guidelines for further assistance.
Once you are satisfied with the sound and functionality of the doorbell system, you can proceed to finalize the doorbell wiring installation.
Read more: How To Run Wire For A Doorbell
Finalizing the Doorbell Wiring Installation
After testing the doorbell connection and ensuring that everything is in proper working order, it’s time to finalize the doorbell wiring installation. Follow these steps to complete the installation:
- Secure the wiring: Use wire clips or staple gun to secure the doorbell wiring along its route from the existing location to the new location. Ensure that the wiring is neatly organized and free from any potential damage or hazards.
By following these steps, you will complete the doorbell wiring installation and have a fully operational doorbell system in the new location. Take pride in your work and enjoy the convenience of a properly installed doorbell.
Remember, if you encounter any issues or have any concerns about the doorbell wiring installation, it’s always a good idea to consult a professional electrician for guidance and assistance.
With the doorbell wiring installation finalized, you can now sit back and enjoy the convenience of your newly relocated doorbell system.
Conclusion
Relocating the doorbell wiring may seem like a daunting task, but with the right knowledge and guidance, it can be a manageable home improvement project. By following the steps outlined in this article, you can successfully move the doorbell wiring to a new location and enjoy a functional and convenient doorbell system.
Throughout the process, it is crucial to prioritize safety. Always remember to turn off the power, use the appropriate tools and equipment, and follow safety precautions to prevent accidents and ensure a safe working environment.
Gathering the necessary tools and materials ahead of time will streamline the installation process and prevent any unnecessary delays. Assessing the current doorbell wiring, preparing the new location, and extending the wiring are crucial steps in ensuring a smooth installation.
Disconnecting the existing doorbell wiring and connecting it to the new location requires attention to detail and careful labeling of the wires to avoid confusion. Testing the doorbell connection is essential to ensure that the system is functioning properly, and making any necessary adjustments or troubleshooting as needed.
Finally, by securing the wiring, covering it if desired, and cleaning up the area, you can finalize the doorbell wiring installation and have a visually appealing and fully functional doorbell system.
Remember, if you are unsure about any aspect of the doorbell wiring installation, it is always recommended to consult a professional electrician who can provide expert guidance and ensure a safe and successful project.
With the project completed, you can now enjoy the convenience and functionality of your doorbell system in its new location. So, go ahead, ring that doorbell with pride!
Now that you've mastered moving doorbell wiring, why not tackle your next DIY project? If you're contemplating a more advanced setup, learning about how to install a doorbell transformer could be your next step. Or maybe you're planning to extend your handy work to the garage; if so, understanding running overhead electrical wires to your garage will prove invaluable. For those intrigued by cutting-edge home improvements, our guide on best home automation systems of 2024 offers a peek into futuristic living spaces. Don't miss out—each read provides unique insights and practical advice to enhance your home's functionality and comfort.
Frequently Asked Questions about How To Move Doorbell Wiring
Was this page helpful?
At Storables.com, we guarantee accurate and reliable information. Our content, validated by Expert Board Contributors, is crafted following stringent Editorial Policies. We're committed to providing you with well-researched, expert-backed insights for all your informational needs.


0 thoughts on “How To Move Doorbell Wiring”