Articles
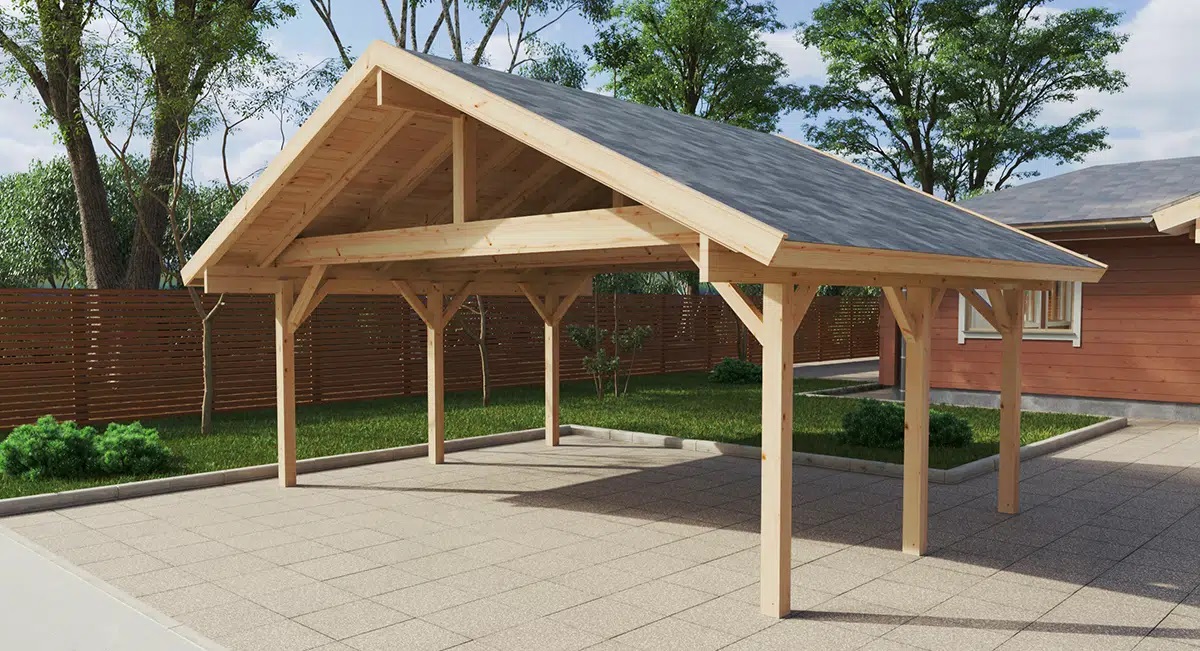
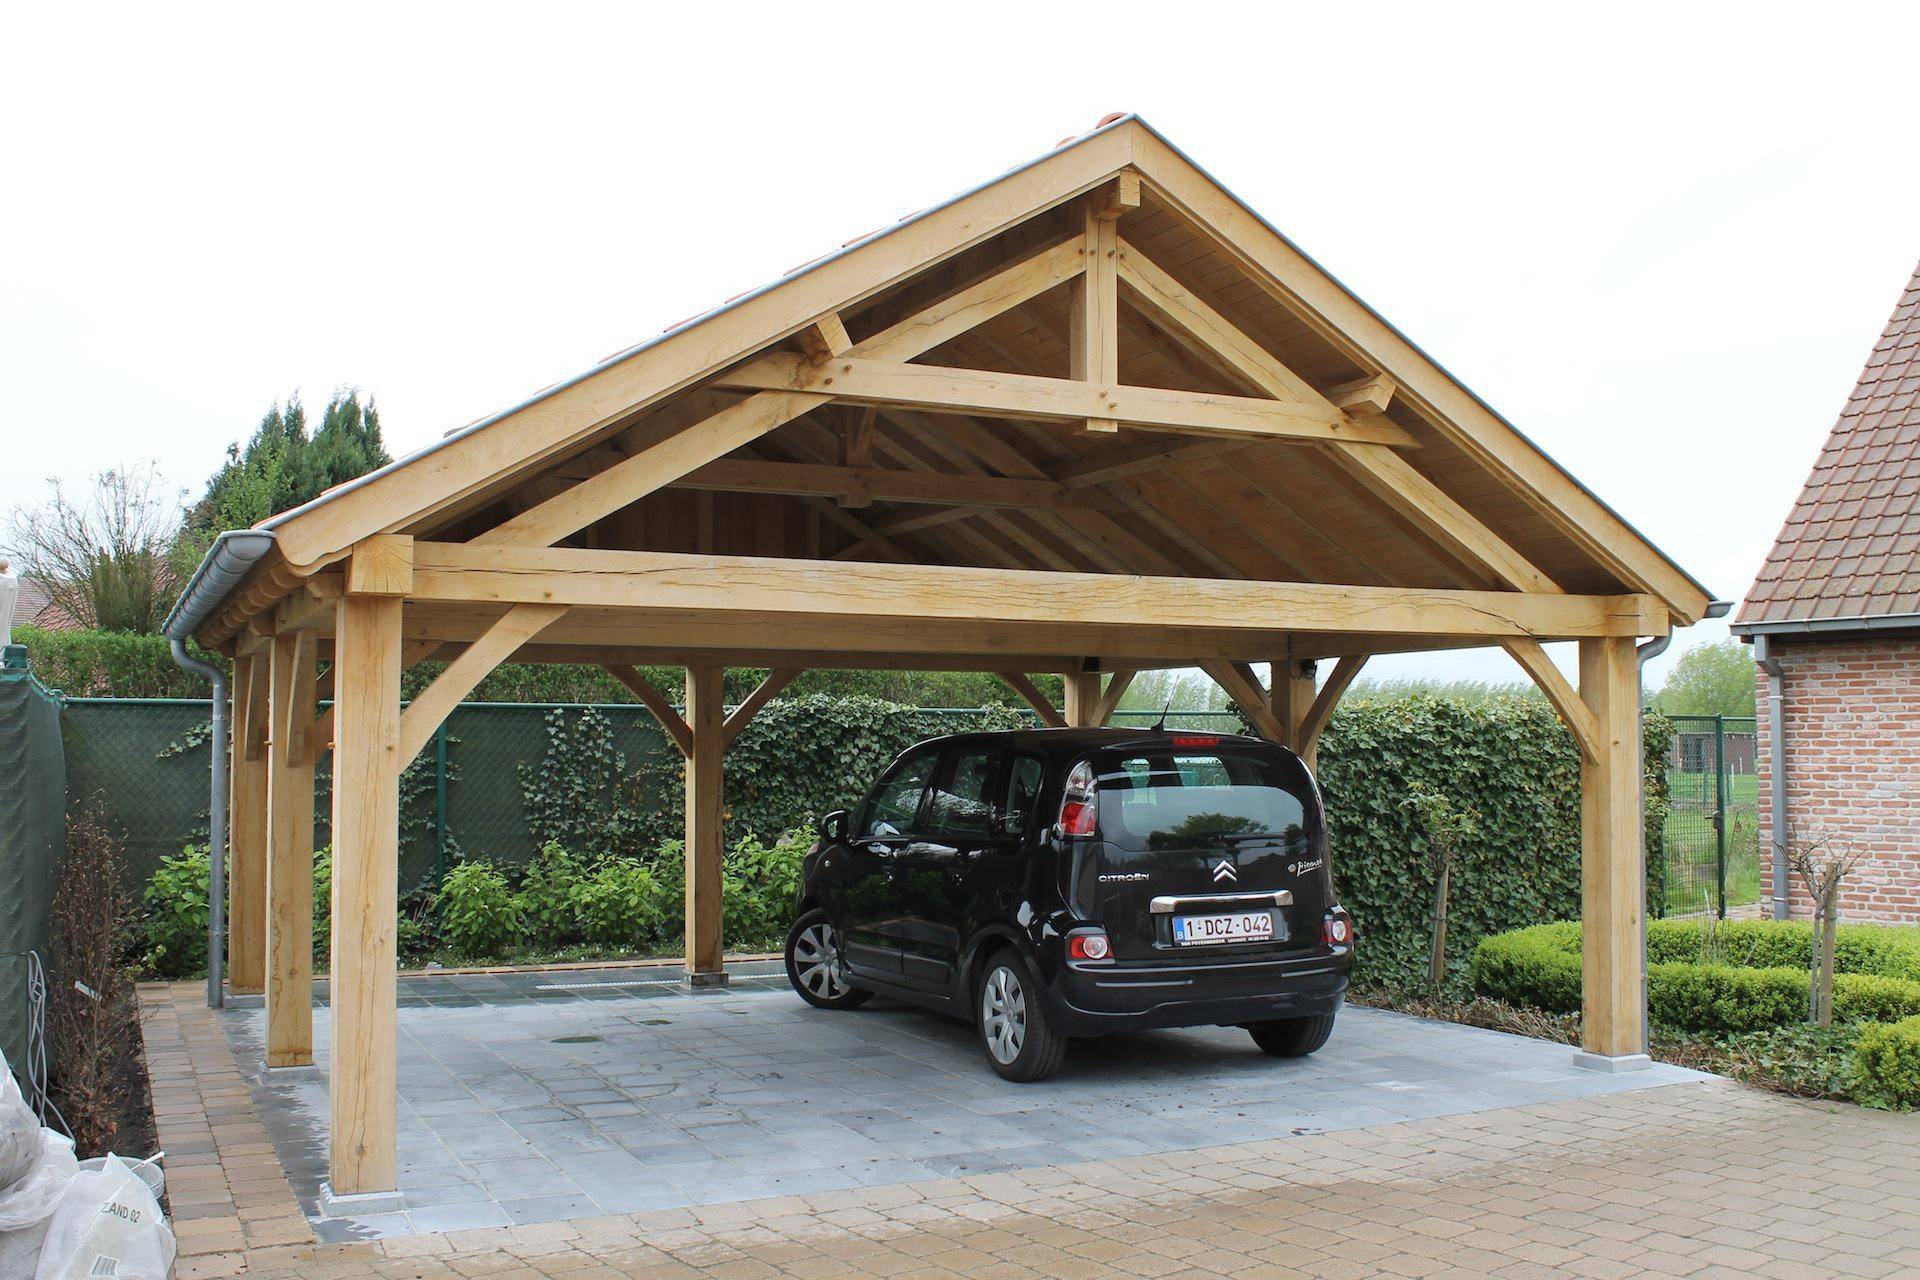
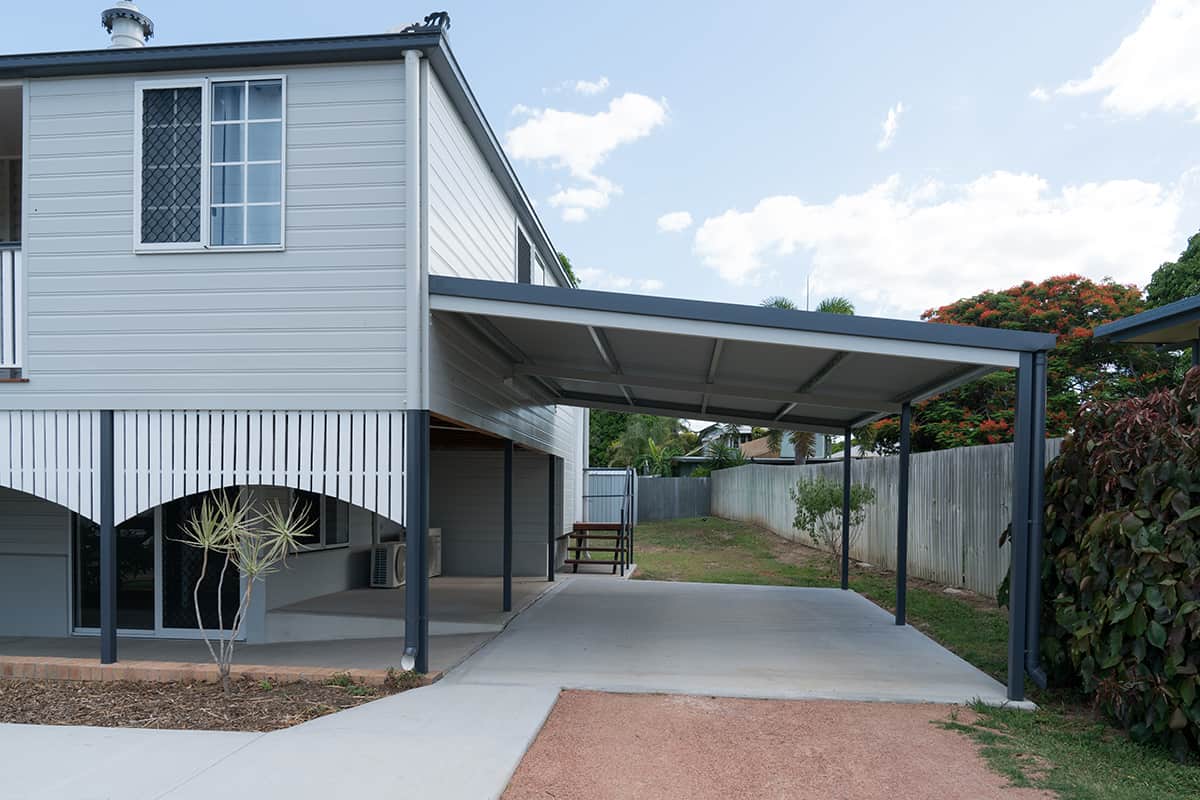
How To Build A Wood Carport
Modified: October 20, 2024
Learn how to build a wood carport with our comprehensive articles. Find step-by-step guides, tips, and expert advice to create the perfect carport for your needs.
(Many of the links in this article redirect to a specific reviewed product. Your purchase of these products through affiliate links helps to generate commission for Storables.com, at no extra cost. Learn more)
Introduction
Building a wood carport can be a practical and cost-effective solution for protecting your vehicles from the elements, as well as providing additional outdoor storage space. Whether you need a shelter for your car, RV, or boat, constructing a wood carport can be a rewarding project that you can tackle yourself with some basic tools and carpentry skills.
In this comprehensive guide, we will walk you through the step-by-step process of building a wood carport. From planning and gathering materials to installing the roof, we’ll cover all the essential aspects to help you successfully complete your project.
Before you begin, it’s important to check local building codes and regulations to ensure compliance. Additionally, it’s always a good idea to consult with professionals or experienced builders to get expert advice and guidance specific to your location.
Now, let’s dive into the exciting journey of building your very own wood carport!
Key Takeaways:
- Planning and preparation are essential for building a wood carport. Consider size, permits, location, foundation, materials, and budget. Start with a simple design if you’re new to carpentry.
- Attention to detail is crucial when building a wood carport. Properly set posts, install beams and joists, and add roofing materials. Finish with trim, gutters, and regular maintenance for a reliable and attractive shelter.
Read more: How To Build A Carport Out Of Wood
Step 1: Planning
Before you start building your wood carport, it’s crucial to plan and gather all the necessary information. Here are the key aspects to consider:
- Size and Design: Determine the size of the carport based on the number and size of vehicles you intend to park underneath. Consider any future needs as well. Sketch out the design, including the shape, roof pitch, and any additional features such as storage or a workshop area.
- Permits and Regulations: Check with your local building department to inquire about any permits or approvals required for constructing a carport. They will also provide you with any specific regulations, setbacks, or restrictions that you need to abide by.
- Location: Choose a suitable location for your carport. Consider factors such as accessibility, sunlight exposure, and the existing landscaping. Ensure there is enough space not only for the carport itself but also for maneuvering vehicles in and out.
- Foundation: Decide on the type of foundation for your carport, whether it’s a concrete slab, piers, or gravel. The choice will depend on the soil conditions, local building codes, and personal preference.
- Materials: Determine the type of wood you want to use for the carport structure. Common options include pressure-treated lumber, cedar, or redwood, which offer durability and resistance to decay.
- Budget: Set a budget for your carport project, taking into account the cost of materials, tools, permits, and any professional assistance you may require. Be realistic about your financial limitations.
As you plan, remember to consider your own DIY skills and the amount of time you can dedicate to the project. If you’re new to carpentry, it may be a good idea to start with a simpler design and gradually tackle more complex projects as your skills improve.
Once you have a clear plan in place, you’re ready to move on to the next step: gathering the materials needed for your wood carport construction.
Step 2: Gathering Materials
Now that you have a solid plan for your wood carport, it’s time to gather all the necessary materials. Here’s what you’ll need:
- Lumber: Depending on the size of your carport, you’ll need treated or weather-resistant lumber for the posts, beams, and joists. Calculate the required lengths and thicknesses based on your design and measurements.
- Hardware: Collect a variety of galvanized or stainless steel hardware, including brackets, screws, bolts, and nails. Make sure they are suitable for outdoor use to withstand the elements.
- Roofing Materials: Determine the type of roofing material you want to use, such as shingles, metal panels, or corrugated plastic sheets. Consider factors like durability, aesthetics, and budget when making your choice.
- Concrete Mix: If you’re planning to build a concrete foundation or footers, purchase the appropriate amount of concrete mix. Follow the instructions on the packaging for mixing and pouring.
- Tools: Gather the necessary tools for the project, including a circular saw, drill, level, tape measure, hammer, and safety equipment like goggles and gloves.
- Additional Materials: Depending on your specific design, you may need additional materials such as bracing, flashing, or sealant. Take note of any extra items required in your plan.
Before purchasing the materials, it’s a good idea to create a comprehensive shopping list. Double-check your measurements and make sure you have accurate quantities to avoid any last-minute trips to the hardware store.
When gathering the materials, don’t forget to consider the quality and longevity of each item. Investing in durable materials will ensure the longevity and strength of your wood carport.
With all the necessary materials in hand, you’re now ready to move on to the next step: site preparation.
Step 3: Site Preparation
Before you can start building your wood carport, you need to properly prepare the site where it will be constructed. Follow these steps to ensure a solid foundation:
- Clean the Area: Clear the site of any debris, vegetation, or obstacles that may hinder the construction process. This includes removing rocks, tree roots, and any other obstructions.
- Mark the Boundaries: Use stakes or spray paint to mark the boundaries of the carport area. This will give you a clear visual of where the structure will be placed.
- Level the Ground: Use a shovel and a level to even out the ground where the carport will sit. This is crucial for ensuring a stable and properly aligned foundation. Remove any high spots and fill in any low areas with gravel or soil to create a level surface.
- Measure and Mark Post Locations: Based on your carport design, measure and mark the locations for the posts. Use a measuring tape and string to achieve accurate measurements and ensure proper spacing.
- Check for Utility Lines: Before digging any holes for the posts, check for underground utility lines. Contact your local utility company to have them mark the location of any buried lines to avoid damaging them during excavation.
Once you’ve completed the site preparation, take a final look at the area to ensure it is clear and ready for construction. It’s important to have a clean and level site to ensure the stability and longevity of your wood carport.
With the site prepared, you’re ready to move on to the next step: building the foundation of your wood carport.
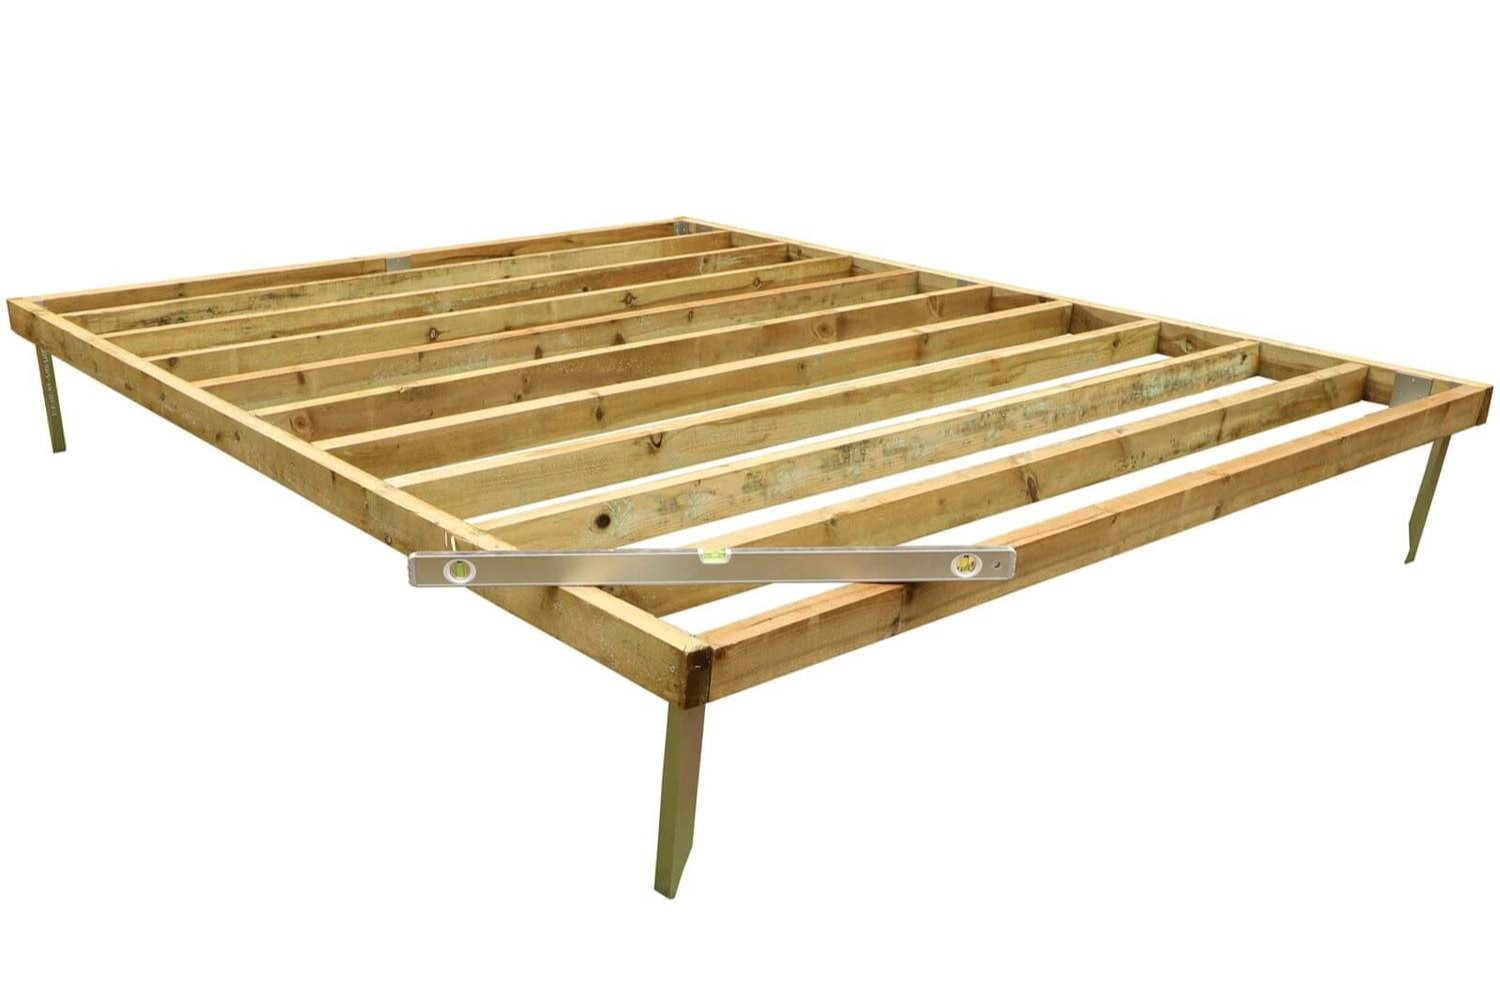
Step 4: Building the Foundation
The foundation of your wood carport is crucial for providing stability and support. Depending on your design and local building codes, there are several foundation options to consider:
- Concrete Slab: A concrete slab is a popular choice for carport foundations. It provides a solid and level surface for the structure. Excavate the area to the required depth, install formwork, and pour the concrete. Allow it to cure according to the manufacturer’s instructions.
- Piers: Piers are typically used for smaller carports or in areas with frost heave concerns. Dig holes at each marked post location, then pour concrete into the holes to create stable footings. Install metal brackets into the concrete while it is still wet to secure the wooden posts.
- Gravel: A gravel foundation is a cost-effective and easy-to-install option. Excavate the area, level the ground, and spread a compacted layer of gravel. This ensures proper drainage and stability for your carport.
Whichever foundation option you choose, ensure that it is level and securely anchored to the ground. This will prevent any shifting or settling over time.
Take the necessary precautions to ensure compliance with local building codes and regulations regarding foundation construction. It’s also important to consult any specific guidelines provided by the manufacturer of your carport kit or plans.
Once the foundation is complete, allow it to fully cure or settle before proceeding to the next step of setting the posts.
When building a wood carport, make sure to use pressure-treated lumber to prevent rot and decay. Additionally, consider adding a waterproof sealant to protect the wood from the elements.
Read more: How To Build A Lean To Carport
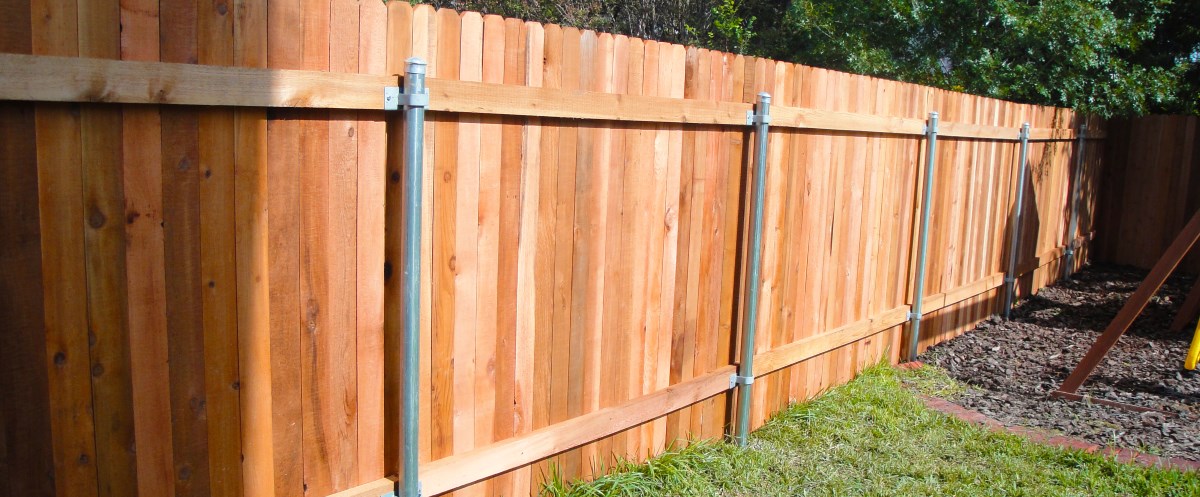
Step 5: Setting the Posts
Setting the posts is a critical step in constructing your wood carport, as they provide the structural support for the entire framework. Here’s how to properly set the posts:
- Measure and Mark: Using your carport design and measurements, mark the locations where the posts will be placed. Ensure that the markings are aligned with the foundation and spaced according to your plans.
- Digging Holes: Dig holes at each marked post location, ensuring they are deep enough to meet local building codes and provide proper stability. The depth will depend on the overall height of your carport and the soil conditions in your area.
- Placing the Posts: Place the wooden posts into the holes, making sure they are aligned vertically and level. Use a level and braces to keep the posts stable during installation.
- Filling the Holes: Fill the holes around the posts with concrete. This will provide additional stability and prevent the posts from shifting over time. Ensure the concrete is level with the surface of the ground and allow it to fully cure according to the manufacturer’s instructions.
- Secure the Posts: Once the concrete has cured, check that the posts are securely anchored. Use braces or temporary supports to hold the posts upright until the framework is fully constructed.
Remember to double-check the alignment and positioning of the posts before the concrete fully sets. This will allow for any adjustments or corrections if needed.
Setting the posts correctly is essential for the overall stability and durability of your wood carport. Take care to ensure that they are securely placed and properly aligned to support the weight of the structure.
With the posts set in place, you’re now ready to move on to the next step: installing the beams and joists.
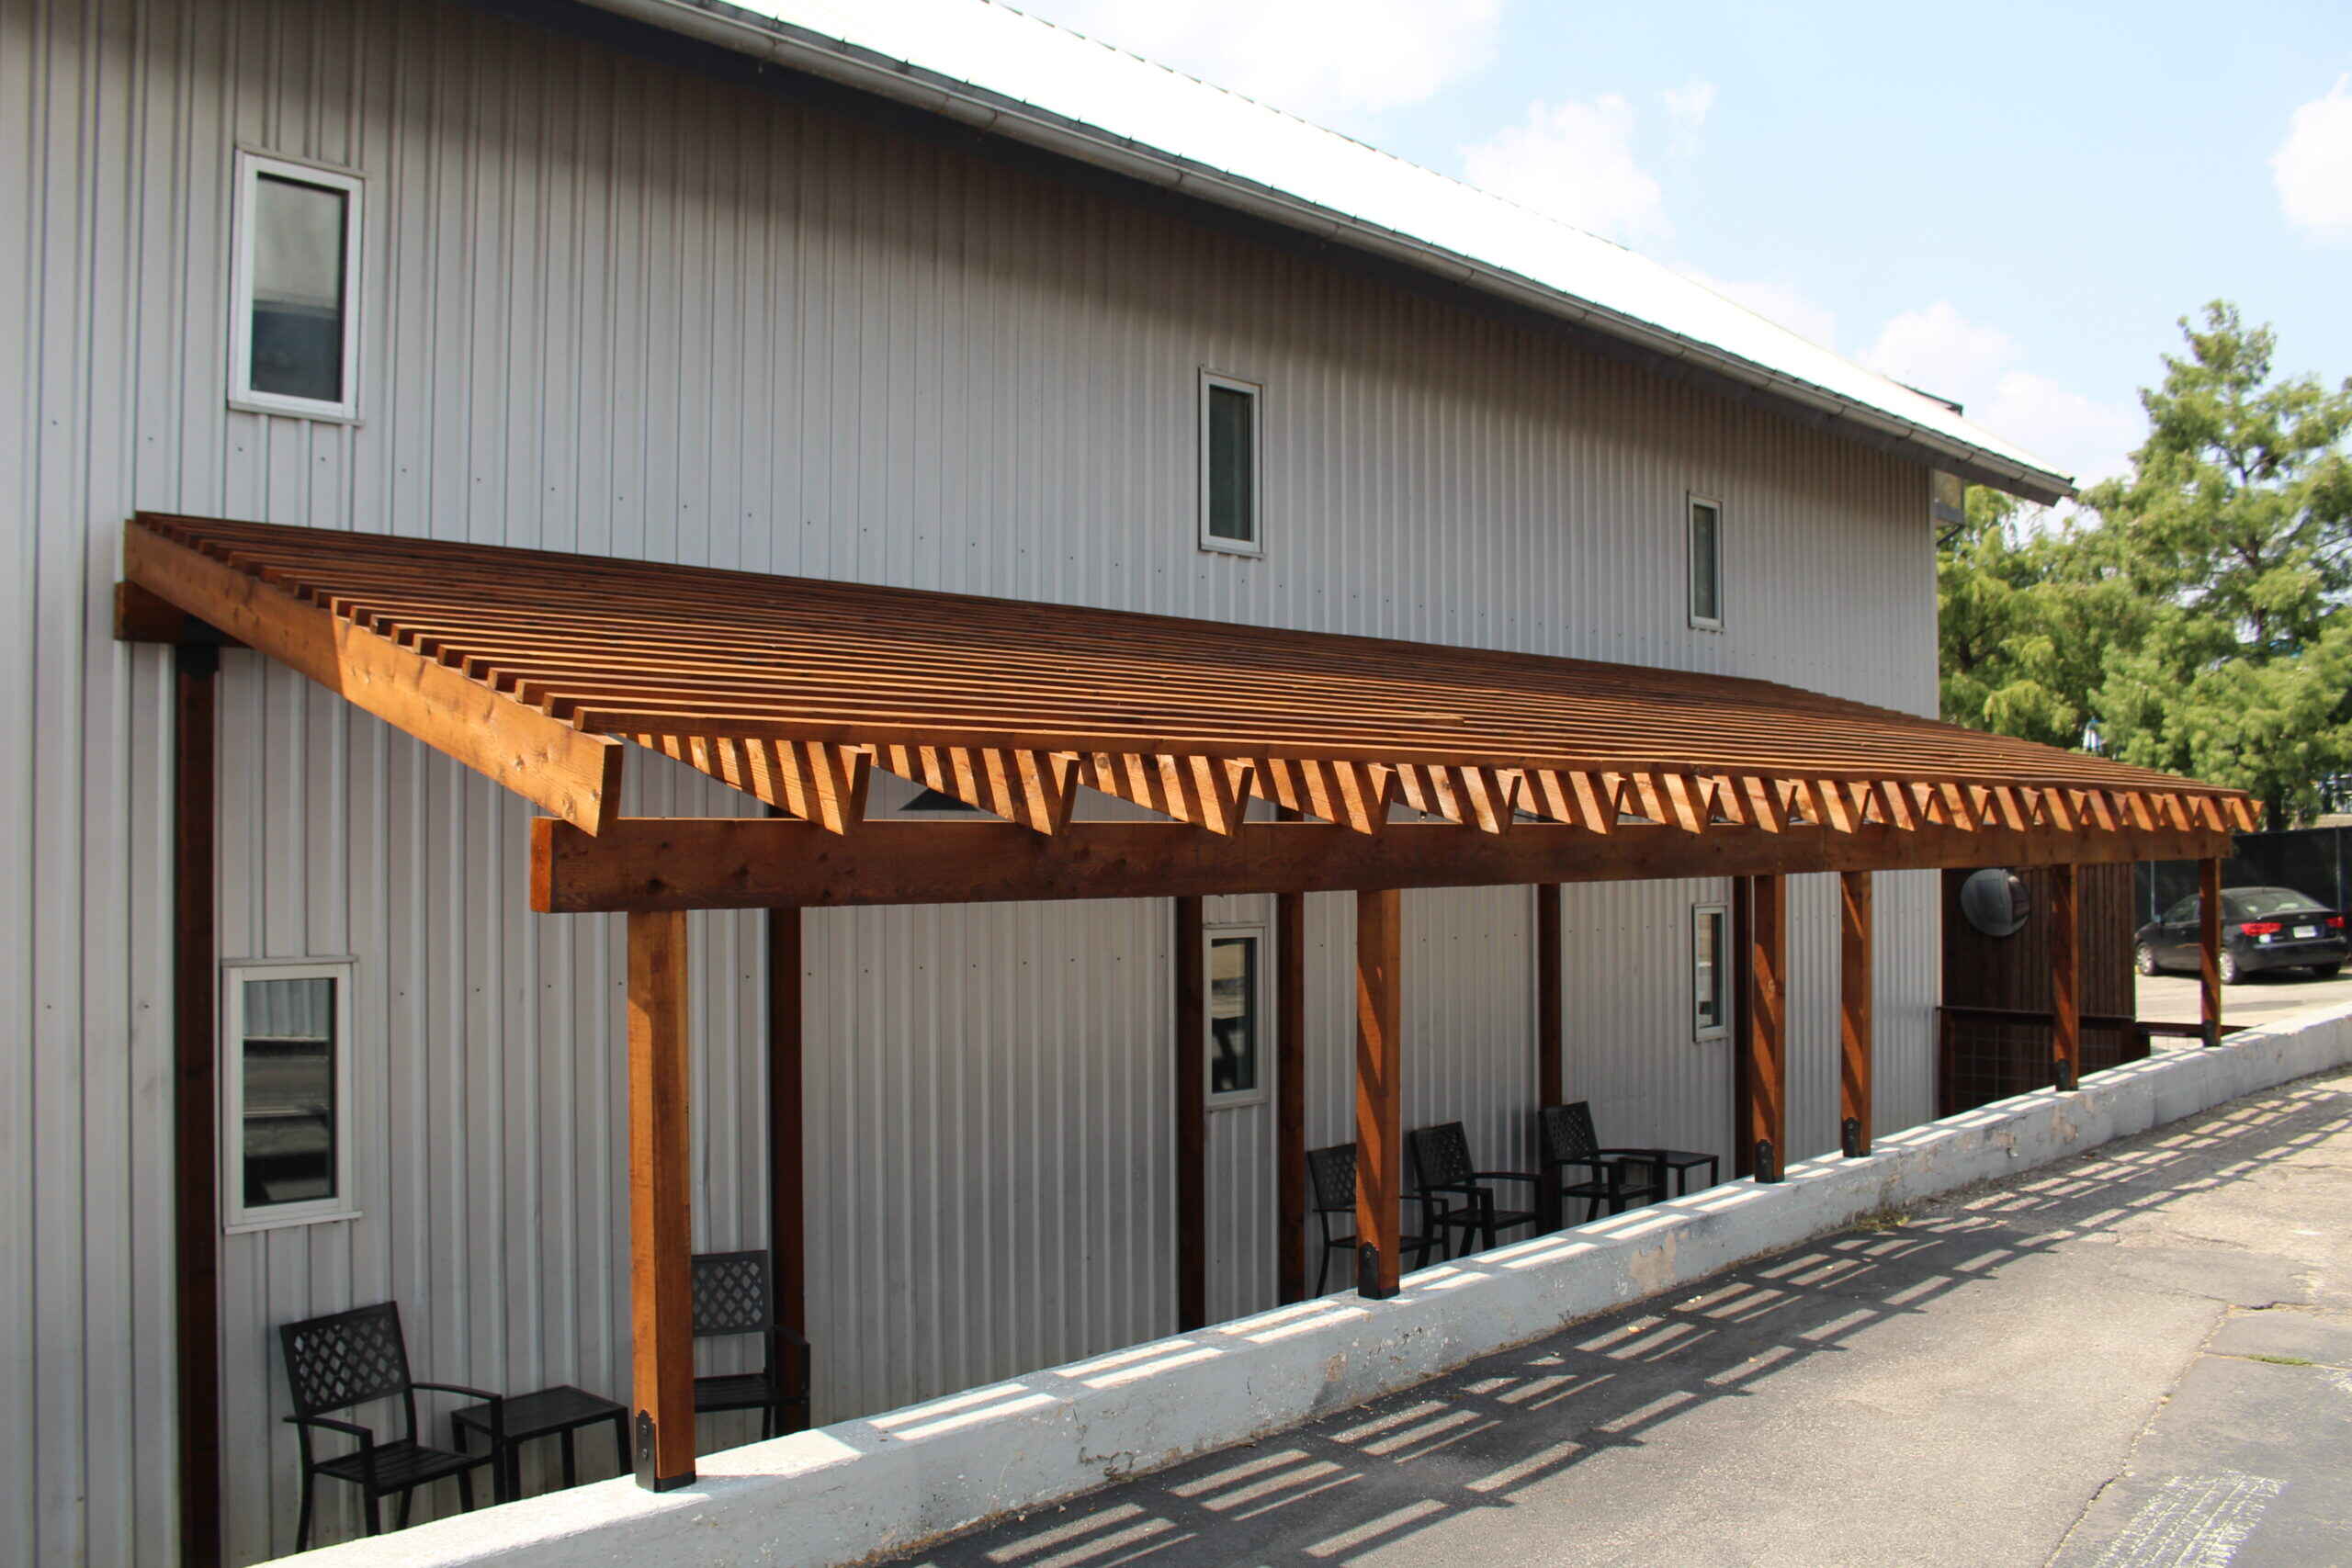
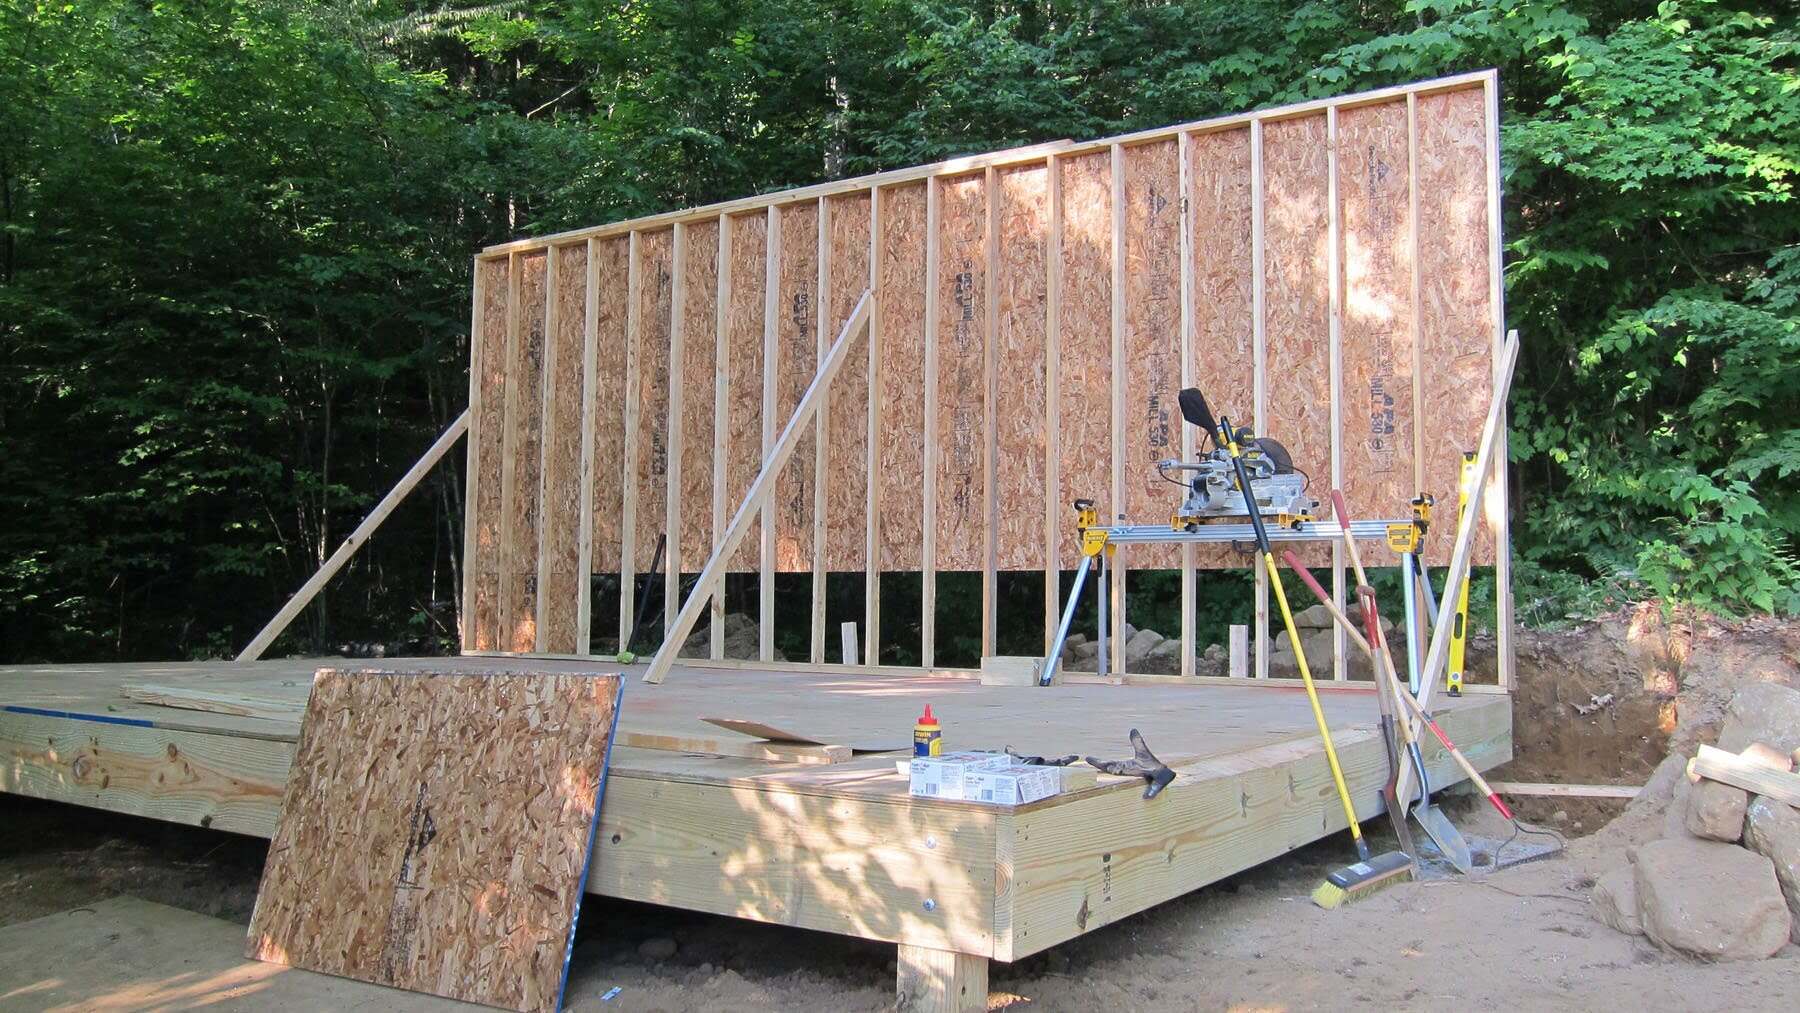
Step 6: Installing Beams and Joists
With the posts securely set, it’s time to install the beams and joists that will form the framework of your wood carport. This step is crucial for providing structural support and stability. Follow these steps to properly install the beams and joists:
- Measure and Cut: Measure the length of the beams and joists based on your carport design. Use a saw to cut them to the appropriate size. It’s important to ensure accurate measurements and straight cuts for a level and sturdy framework.
- Attach Beams to Corner Posts: Begin by attaching the beams to the corner posts. Use brackets, screws, or lag bolts to secure the beams to the posts. Make sure they are level and aligned properly.
- Install Intermediate Beams: Depending on the size and span of your carport, you may need additional beams for support. Install these intermediate beams between the corner posts, evenly spaced according to your design.
- Attach Joists: Once the beams are securely in place, attach the joists perpendicular to the beams. Space them evenly, ensuring they are level and flush with the top of the beams. Use joist hangers or brackets to secure them in place.
- Check for Level: Use a level to ensure that the beams and joists are level and aligned correctly. This will help prevent any issues with the roof installation and provide proper weight distribution.
- Reinforce Connections: As you install the beams and joists, reinforce all connections using additional brackets or hardware. This will add strength and stability to the framework.
Take the time to properly align and fasten the beams and joists. This will ensure a strong and secure framework that can withstand various weather conditions.
Once the beams and joists are installed, you’re ready to move on to the next step: adding the roofing materials to complete your wood carport.
Step 7: Adding the Roofing Materials
Adding the roofing materials is the next crucial step in constructing your wood carport. The roof not only protects your vehicles from the elements but also enhances the overall appearance of the structure. Follow these steps to properly install the roofing materials:
- Choose the Roofing Material: Select the roofing material that best suits your needs, budget, and design aesthetic. Popular options include shingles, metal panels, or corrugated plastic sheets. Consider factors such as durability, weather resistance, and maintenance requirements.
- Measure and Cut: Measure the roof area and calculate the necessary amount of roofing material. Use appropriate tools to cut the material to size, ensuring clean and precise cuts.
- Install Underlayment: Before installing the actual roofing material, it’s essential to add a layer of underlayment. This provides an extra layer of protection against moisture and helps to create a weatherproof barrier.
- Begin Roof Installation: Starting from one corner, lay the first row of roofing material, following the manufacturer’s instructions. Secure the material using appropriate roofing nails, screws, or adhesives, depending on the type of roofing material you’re using.
- Continue Installing Rows: Working your way from the bottom to the top, continue installing subsequent rows of roofing material. Ensure that each row overlaps the previous row to create a watertight seal. Pay attention to alignment and take care to maintain a consistent pattern.
- Seal and Flash: Once the roofing material is installed, seal any gaps or seams using appropriate sealants recommended for your chosen material. Install flashing around any roof penetrations, such as vent pipes or chimneys, to prevent leaks.
- Check for Proper Drainage: Ensure that the roof has proper drainage by confirming that water will flow off the carport and away from the structure. This can be achieved by constructing a slight slope or adding gutters and downspouts.
Installing the roofing materials requires careful attention to detail and precision. Proper installation is vital to ensure the functionality and longevity of your wood carport.
With the roofing materials in place, you’re almost ready to enjoy your completed wood carport. Before that, there’s one final step: adding the finishing touches.
Step 8: Finishing Touches
As you near the completion of your wood carport, it’s time to add the finishing touches that will enhance its overall appearance and functionality. Here are some important finishing steps to consider:
- Trim and Fascia: Install trim and fascia boards along the edges of the carport roof. This not only provides a polished look but also protects the edges from weather damage.
- Gutters and Downspouts: Consider adding gutters and downspouts to your carport to divert water away from the structure. This helps prevent erosion and keeps the area around the carport dry.
- Paint or Stain: Apply a coat of paint or stain to protect the wood and enhance its appearance. Choose a product that is suitable for outdoor use and complements the overall design of your carport.
- Lighting and Electrical: If desired, install lighting fixtures or electrical outlets to make the carport more functional and convenient. This allows for better visibility at night and the ability to charge electric vehicles or use power tools.
- Security Measures: Consider adding security features like motion sensor lights, surveillance cameras, or locking mechanisms to protect your vehicles and belongings.
- Landscaping: Enhance the surroundings of your carport by adding landscaping elements such as plants, flower beds, or decorative stones. This helps integrate the carport into your overall outdoor living space.
- Regular Maintenance: Once your wood carport is complete, be sure to establish a regular maintenance routine. This includes inspecting for any damage, cleaning the roof and gutters, and treating the wood as needed to ensure its longevity.
By taking the time to add these finishing touches, you can create a functional and aesthetically pleasing wood carport that enhances the value and appeal of your property.
Congratulations! You’ve successfully completed the construction of your wood carport. Take a step back and admire your hard work, knowing that you now have a reliable and attractive shelter for your vehicles.
Remember, it’s always important to consult local building codes and regulations, as well as seek professional assistance when needed. Safety should always be a top priority during any construction project.
Enjoy the benefits of your new wood carport and the peace of mind knowing that your vehicles are protected!
Read more: How Much To Build A Carport
Conclusion
Building a wood carport can provide you with valuable protection for your vehicles while also adding functional outdoor storage space to your property. By following the step-by-step guide outlined in this article, you can successfully construct a sturdy and aesthetically pleasing wood carport.
Starting with careful planning and gathering the necessary materials, you can ensure that you have everything you need for a smooth construction process. From site preparation to setting the posts, building the foundation, and installing the beams and joists, each step plays a crucial role in creating a stable and durable structure.
Adding the roofing materials is another vital step that protects your carport from the elements. Proper installation and attention to detail ensure that your roof is watertight and secure.
As you near the completion of your wood carport, adding the finishing touches can truly elevate its overall appearance and functionality. From trim and fascia, to gutters and downspouts, to painting or staining, these final steps contribute to the overall aesthetics and long-term durability of your carport.
Remember to prioritize regular maintenance to keep your wood carport in excellent condition. Inspect for any damage, clean the roof and gutters regularly, and treat the wood as needed to ensure its longevity.
Building a wood carport may require some time, effort, and attention to detail, but the end result will be worth it. You’ll have a reliable and attractive shelter for your vehicles, providing invaluable protection against the elements.
Keep in mind that it’s important to consult with local building codes and regulations to ensure compliance throughout the construction process. If needed, seek professional assistance or advice to ensure that your wood carport meets all the necessary safety requirements.
Enjoy the satisfaction of completing your wood carport and the peace of mind knowing that your vehicles are protected and your property has gained an appealing and functional addition.
Now, go out and enjoy the benefits of your newly constructed wood carport!
Frequently Asked Questions about How To Build A Wood Carport
Was this page helpful?
At Storables.com, we guarantee accurate and reliable information. Our content, validated by Expert Board Contributors, is crafted following stringent Editorial Policies. We're committed to providing you with well-researched, expert-backed insights for all your informational needs.


0 thoughts on “How To Build A Wood Carport”