Articles
How To Paint Fireplace Insert
Modified: October 28, 2024
Learn how to paint a fireplace insert with our helpful articles. Transform your fireplace into a stunning focal point in just a few easy steps.
(Many of the links in this article redirect to a specific reviewed product. Your purchase of these products through affiliate links helps to generate commission for Storables.com, at no extra cost. Learn more)
Introduction
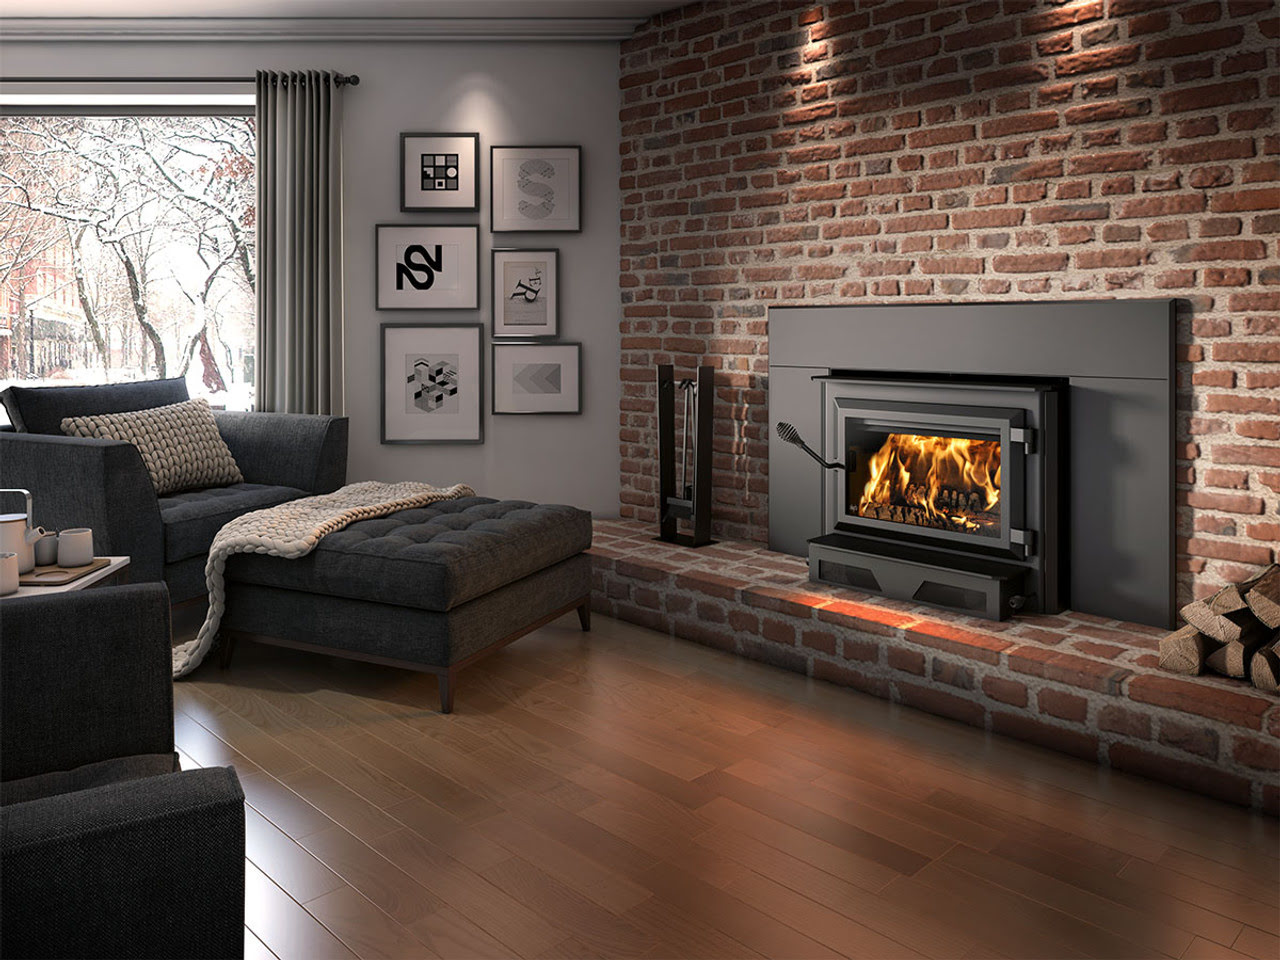
Welcome to our guide on how to paint a fireplace insert. A fireplace insert can be a beautiful focal point in any room, but over time, the paint may fade, chip, or become outdated. Painting your fireplace insert is a cost-effective way to rejuvenate its appearance and give it a fresh new look.
In this article, we will take you through the step-by-step process of painting a fireplace insert. We will cover everything from preparing the surface to choosing the right paint and applying a professional finish. So, grab your materials and let’s get started!
Before we begin, it’s important to note that the specific steps may vary depending on the type of fireplace insert you have. Whether it’s made of metal, cast iron, or another material, the general principles of painting will apply. Always consult your insert’s manufacturer’s guidelines for any specific instructions.
Now, let’s gather the materials and tools you’ll need for this project.
Key Takeaways:
- Transform your fireplace insert with a fresh coat of paint, enhancing your living space’s aesthetics and creating a warm, inviting atmosphere for your loved ones to enjoy.
- Prioritize safety, proper preparation, and attention to detail to achieve a successful fireplace insert paint job, ensuring a stunning transformation that lasts for years to come.
Read more: What Is A Fireplace Insert
Materials and Tools Needed
Before you begin painting your fireplace insert, ensure you have the following materials and tools on hand:
- Painter’s tape
- Drop cloths or plastic sheets
- Sandpaper (medium grit)
- Tack cloth or microfiber cloth
- Primer
- Paint suitable for high-temperature applications (e.g., heat-resistant paint)
- Paintbrushes (large and small)
- Roller brush and tray (optional)
- Paint thinner (if using oil-based paint)
- Bucket or container for water and soap
- Protective gloves and eyewear
- Dust mask
- Old newspapers or cardboard
These materials and tools will ensure that you have everything you need to properly prepare and paint your fireplace insert.
Now that you have gathered the necessary supplies, let’s move on to the next step: preparing the fireplace insert for painting.
Preparing the Fireplace Insert
Before you can start painting your fireplace insert, it’s crucial to properly prepare the surface. This step ensures the paint adheres well and provides a long-lasting finish. Follow these steps to prepare your fireplace insert:
- Ensure the fireplace insert is cool to the touch. If it was recently used, allow it to cool down completely before proceeding.
- Carefully remove any objects, such as grates, screens, or glass doors, from the fireplace insert. Set them aside in a safe place.
- Use painter’s tape to cover any adjacent surfaces, such as the surrounding wall or mantel, to protect them from accidental paint splatters.
- Lay drop cloths or plastic sheets on the floor and around the fireplace to catch any drips or spills. This will make cleanup easier.
- If your fireplace insert has any loose or peeling paint, use medium-grit sandpaper to gently remove it. Be careful not to damage the surface underneath.
- Once the loose paint is removed, use a tack cloth or microfiber cloth to wipe the entire surface of the fireplace insert. This step ensures that any dust or debris is removed, allowing for better paint adhesion.
By taking the time to properly prepare the fireplace insert, you are setting the foundation for a successful paint job. Next, we’ll discuss how to choose the right paint for your fireplace insert.
Choosing the Right Paint
When it comes to painting a fireplace insert, it’s essential to choose a paint that can withstand high temperatures. The heat produced by the fireplace can cause standard paint to blister and peel, compromising the overall finish. Here are a few factors to consider when selecting the right paint:
- Heat Resistance: Look for paint specifically designed for high-temperature applications, such as heat-resistant paint. These paints can withstand the heat generated by the fireplace without deteriorating.
- Type of Fireplace Insert: Consider the material of your fireplace insert. Different materials may require specific types of paint. For example, if you have a metal insert, opt for a paint formulated for metal surfaces.
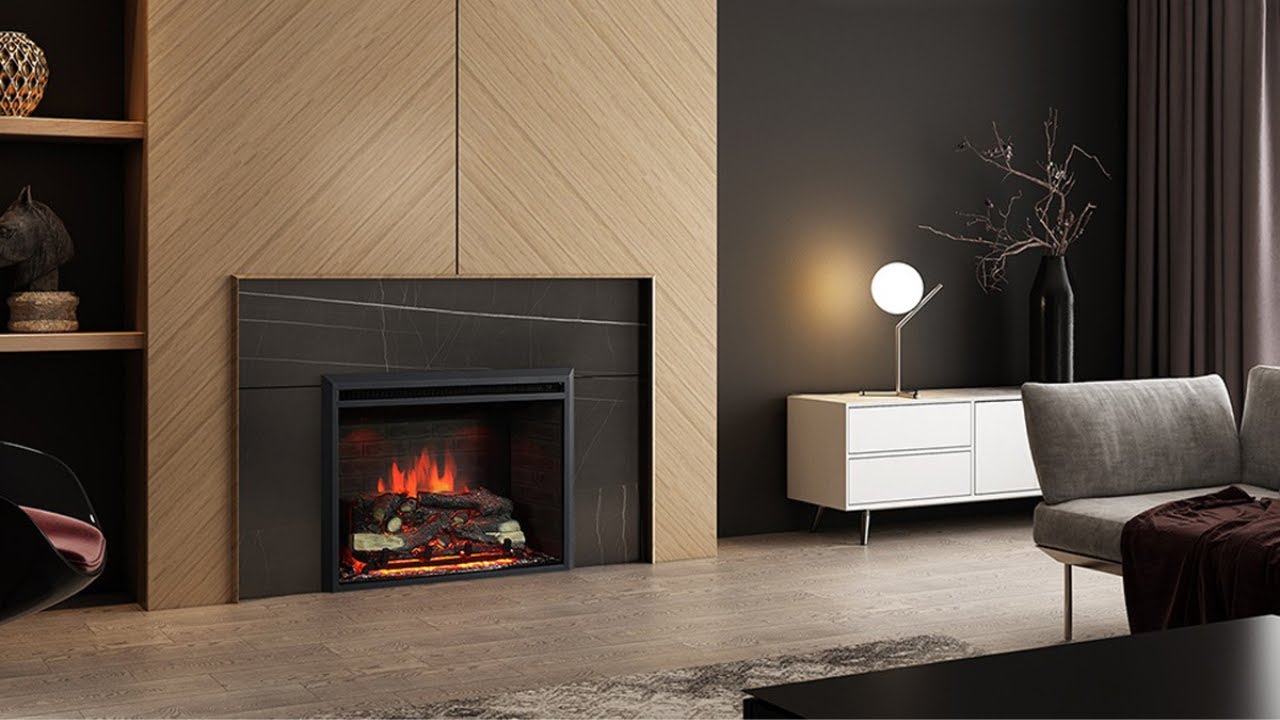
- Color and Finish: Choose a paint color and finish that complement your existing decor and personal style. Popular choices for fireplace inserts include black, silver, white, or a metallic finish for a sleek and contemporary look.
- Paint Application: Decide whether you prefer using a brush, roller, or a combination of both. Certain paints may recommend a specific application method, so be sure to check the manufacturer’s instructions.
- Drying Time: Consider how quickly the paint will dry. Some paints require longer drying times, while others dry quickly, allowing you to apply multiple coats in a shorter period.
Once you have chosen the right paint for your fireplace insert, you can move on to the next step: priming the surface.
Priming the Fireplace Insert
Priming the fireplace insert is an important step that helps the paint bond to the surface and ensures a smooth and durable finish. Follow these steps to prime your fireplace insert:
- Ensure that the surface is clean and free of dust. Use a tack cloth or microfiber cloth to wipe away any remaining debris.
- If your fireplace insert has any rust spots or areas with bare metal, lightly sand those areas with medium-grit sandpaper. This step promotes better paint adhesion.
- Place drop cloths or plastic sheets to protect the surrounding area from primer overspray.
- Using a brush or roller, apply a thin and even coat of primer to the entire surface of the fireplace insert. Make sure to reach all the nooks and crannies.
- Allow the primer to dry according to the manufacturer’s instructions. This typically takes around 2-4 hours, but it’s best to let it dry overnight for optimal results.
- After the primer is fully dry, inspect the surface for any rough spots or imperfections. Lightly sand those areas with fine-grit sandpaper to achieve a smooth surface.
- Once you have finished sanding, wipe away any dust with a clean cloth.
Priming helps the paint adhere better and provides a uniform surface for the topcoat. With the primer applied, you are now ready to move on to the exciting step of painting the fireplace insert.
When painting a fireplace insert, be sure to clean the surface thoroughly and use a high-heat resistant paint to prevent peeling and chipping. Sanding the surface lightly before painting can also help the paint adhere better.
Read more: How To Clean A Fireplace Insert
Painting the Fireplace Insert
Now that you have prepared and primed the surface of your fireplace insert, it’s time to apply the paint. Follow these steps to achieve a smooth and professional finish:
- Stir the paint thoroughly to ensure an even consistency. If needed, thin the paint according to the manufacturer’s instructions.
- Start by painting the corners and edges of the fireplace insert using a small paintbrush. This will help create crisp lines and ensure even coverage.
- Next, use a brush or roller to apply the paint to the larger areas of the fireplace insert. Work in small sections, applying the paint evenly and in smooth strokes.
- Ensure that the paint is applied in thin, even layers. Avoid heavy coats, as they can lead to drips or an uneven finish. If necessary, wait for the first coat to dry, and then apply a second coat for better coverage.
- As you paint, periodically step back and examine the fireplace insert from different angles to check for any missed spots or uneven areas. Touch up any imperfections as you go.
- If you are using a heat-resistant paint, follow the specific drying times mentioned on the product label. Allow the paint to dry completely before handling or reinstalling any fixtures.
Remember to take breaks as needed and allow the paint to dry thoroughly between coats. Patience and attention to detail are key to achieving a beautiful and long-lasting finish.
With the fireplace insert painted, you may choose to proceed with applying a second coat of paint for added durability and a more vibrant color.
Now, let’s move on to the final step: adding the finishing touches to complete the transformation of your fireplace insert.
Applying a Second Coat (Optional)
Applying a second coat of paint to your fireplace insert is an optional step, but it can provide improved coverage and a more vibrant finish. Here’s how you can go about applying a second coat:
- Before applying the second coat, ensure that the first coat is completely dry. Refer to the drying time mentioned on the paint can, as it can vary depending on the type of paint used.
- Inspect the fireplace insert for any uneven areas, thin spots, or missed spots. Lightly sand those areas with fine-grit sandpaper to create a smooth surface for the second coat.
- Using the same technique as before, apply the second coat of paint. Start with the corners and edges using a small brush, then move on to the larger areas with a brush or roller.
- Apply the paint in thin, even layers, ensuring full coverage of the surface. Take your time and maintain a consistent stroke pattern for a smooth and professional finish.
- Allow the second coat to dry completely as per the manufacturer’s instructions. This may take a similar amount of time as the first coat, but it’s best to be patient and wait until the paint is fully dry.
Applying a second coat of paint can enhance the durability and appearance of your fireplace insert. It allows for better coverage, ensures consistency, and provides a more robust finish that can withstand the heat.
With the second coat applied, it’s time for the final step: adding the finishing touches to make your newly painted fireplace insert look even more impressive.
Finishing Touches
Now that you have successfully painted your fireplace insert, it’s time to add some finishing touches to complete the transformation. Here are a few ideas to enhance the overall appearance:
- Clean the Surrounding Area: Take a moment to clean the surrounding area of the fireplace. Remove any dust, cobwebs, or debris using a soft brush or vacuum cleaner. This will ensure a clean and polished look.
- Reinstall Fixtures: If you removed any grates, screens, or glass doors during the painting process, now is the time to reinstall them. Make sure they fit properly and secure them according to the manufacturer’s instructions.
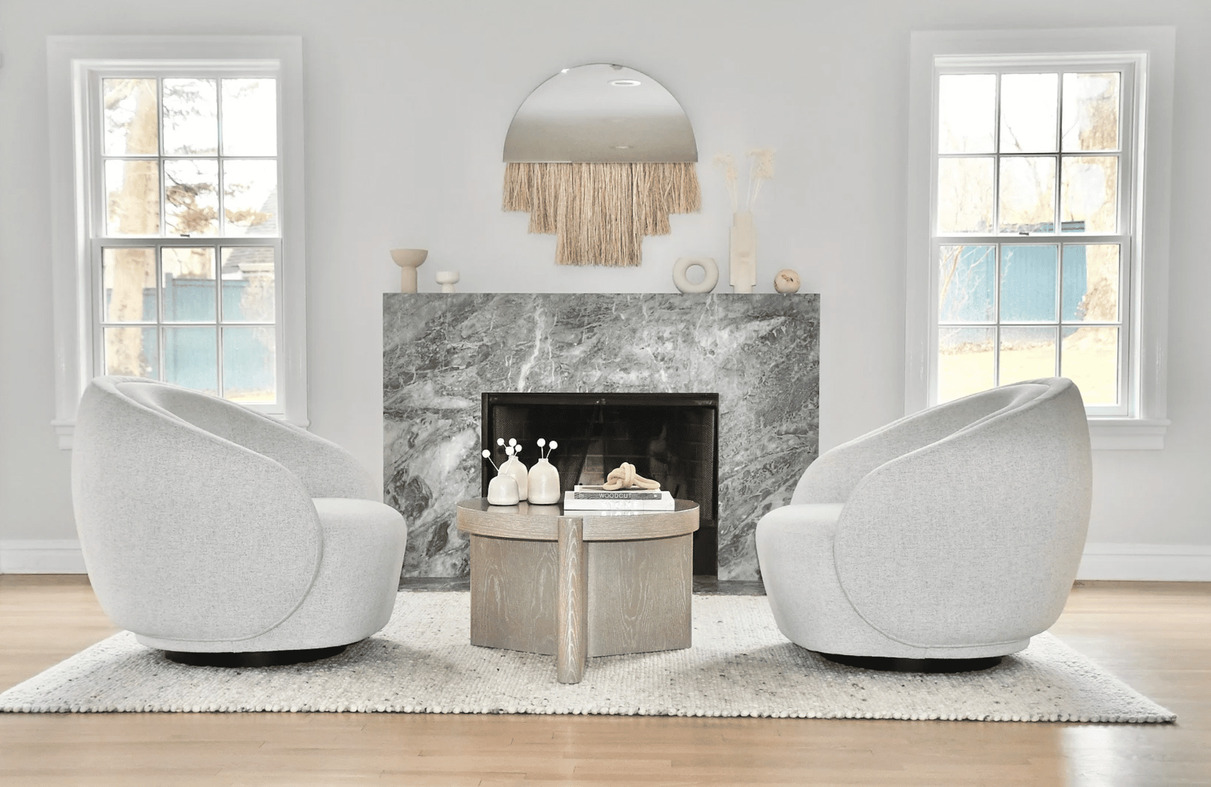
- Add Decorative Elements: Consider adding decorative elements to enhance the visual appeal of the fireplace insert. This could include arranging candles, small plants, or decorative items on the mantel or hearth area. Be sure to use flame-resistant materials and keep them a safe distance from the heat source.
- Accessorize the Mantel: Personalize the mantel area with artwork, framed photos, or decorative objects that reflect your style and complement the newly painted fireplace insert. Be mindful of the scale and balance of the accessories to create an aesthetically pleasing arrangement.
- Accent Lighting: Install accent lighting above or around the fireplace to create a cozy and inviting atmosphere. Choose warm-toned light bulbs or LED strips to highlight the beauty of your painted fireplace insert.
- Maintain Regular Cleaning: To keep your freshly painted fireplace insert looking its best, implement a regular cleaning routine. Wipe down the surface with a soft cloth or microfiber cloth to remove any dust or dirt. Avoid using harsh chemicals that could damage the paint.
By paying attention to these finishing touches, you can elevate the overall look of your fireplace and create a stylish and inviting focal point in your living space.
Now that you have completed the final steps, take a step back and admire your beautifully painted fireplace insert. With proper maintenance, it will continue to impress and provide warmth and ambiance for years to come.
Safety Precautions
When painting a fireplace insert, it’s vital to prioritize safety to prevent any accidents. Follow these safety precautions throughout the process:
- Ensure Proper Ventilation: Work in a well-ventilated area or open windows and doors to allow for adequate airflow. This will help minimize the inhalation of fumes and maintain good air quality.
- Wear Protective Gear: Protect yourself by wearing gloves and safety goggles to shield your hands and eyes from any potential hazards. Additionally, consider wearing a dust mask to avoid inhaling particles during sanding or painting.
- Use Heat-Resistant Paint: Choose a paint specifically designed for high-temperature applications, such as heat-resistant paint. This type of paint is formulated to withstand the heat generated by the fireplace and reduce the risk of peeling or blistering.
- Keep Fire Safety in Mind: Ensure that your fireplace insert is cool to the touch before beginning the painting process. Never paint a hot or recently used fireplace, as it can lead to dangerous situations. Follow your manufacturer’s guidelines for safe usage and maintenance of the fireplace.
- Handle Materials Properly: Follow the instructions provided by the paint and primer manufacturers regarding proper handling, storage, and disposal of any materials used during the process.
- Fire Safety Measures: When you’re finished painting and the paint has thoroughly dried, take the time to review and practice fire safety measures. Check or install smoke detectors and carbon monoxide alarms, as well as ensure there is a functional fire extinguisher nearby.
- Read and Follow Instructions: It’s crucial to carefully read and follow all instructions and recommendations provided by the paint and primer manufacturers. Adhering to their guidelines will help ensure a safe and successful painting experience.
By following these safety precautions, you can enjoy a smooth and worry-free painting process without compromising your well-being or the safety of your home.
Now that you are aware of the safety measures, let’s wrap up this guide on painting your fireplace insert.
Read more: How To Measure For A Fireplace Insert
Conclusion
Congratulations! You have reached the end of our comprehensive guide on how to paint a fireplace insert. By following the steps outlined in this article, you can successfully transform the look of your fireplace and breathe new life into your living space.
We started by gathering the necessary materials and tools, ensuring that you have everything you need for the project. We then walked you through the important steps of preparing the fireplace insert, choosing the right paint, priming the surface, and applying the paint in thin, even coats.
We discussed the option of applying a second coat for improved coverage, and we emphasized the importance of taking safety precautions throughout the entire process. Lastly, we highlighted the finishing touches that can enhance the overall appearance of your newly painted fireplace insert.
Remember, the key to a successful paint job is proper preparation and attention to detail. Take your time, follow the instructions provided by the paint and primer manufacturers, and prioritize safety at all times.
Now, it’s time to step back and enjoy the stunning transformation you have achieved. Your freshly painted fireplace insert will not only enhance the aesthetics of your space but also create a warm and inviting atmosphere for you and your loved ones to cherish.
Thank you for joining us on this painting journey. We hope this guide has been informative and helpful to you. Happy painting!
Frequently Asked Questions about How To Paint Fireplace Insert
Was this page helpful?
At Storables.com, we guarantee accurate and reliable information. Our content, validated by Expert Board Contributors, is crafted following stringent Editorial Policies. We're committed to providing you with well-researched, expert-backed insights for all your informational needs.


0 thoughts on “How To Paint Fireplace Insert”