Home>Furniture & Design>Bathroom Accessories>How To Replace A Bathtub Surround
Bathroom Accessories
How To Replace A Bathtub Surround
Published: February 20, 2024
Learn how to replace a bathtub surround and upgrade your bathroom accessories with our step-by-step guide. Transform your space with ease!
(Many of the links in this article redirect to a specific reviewed product. Your purchase of these products through affiliate links helps to generate commission for Storables.com, at no extra cost. Learn more)
Introduction
Replacing a bathtub surround can breathe new life into your bathroom, transforming it from outdated to modern and stylish. Whether you're looking to upgrade your bathroom's aesthetic appeal or address water damage and mold issues, installing a new bathtub surround is a rewarding project that can be accomplished with the right tools, materials, and know-how.
A bathtub surround serves as a protective barrier around your bathtub, shielding the walls from water damage and providing a clean, polished look. Over time, wear and tear, mold, or simply a desire for a fresh look may prompt the need to replace the existing surround. By embarking on this project, you have the opportunity to revitalize your bathroom space and create a more inviting and functional environment.
In this comprehensive guide, we will walk you through the step-by-step process of replacing a bathtub surround. From removing the old surround to installing the new one and finishing the project with a professional touch, you'll gain valuable insights and practical tips to ensure a successful and satisfying outcome.
Before diving into the project, it's essential to gather the necessary tools and materials, including a new bathtub surround, adhesive, caulk, a utility knife, a level, and safety equipment. Additionally, it's crucial to set aside ample time for the project, as rushing through the process can lead to errors and compromise the final result.
By following this guide and approaching the project with patience and attention to detail, you'll be well-equipped to tackle the task of replacing your bathtub surround, ultimately elevating the ambiance and functionality of your bathroom space. Let's embark on this transformative journey and bring new life to your bathroom!
Key Takeaways:
- Transform Your Bathroom: Replacing a bathtub surround can breathe new life into your bathroom, creating a modern and stylish space while addressing water damage and mold issues.
- Attention to Detail: From meticulous removal to precise installation, replacing a bathtub surround requires patience and care, resulting in a visually stunning and enduring addition to your bathroom.
Read more: How Many Square Feet Is A Bathtub Surround?
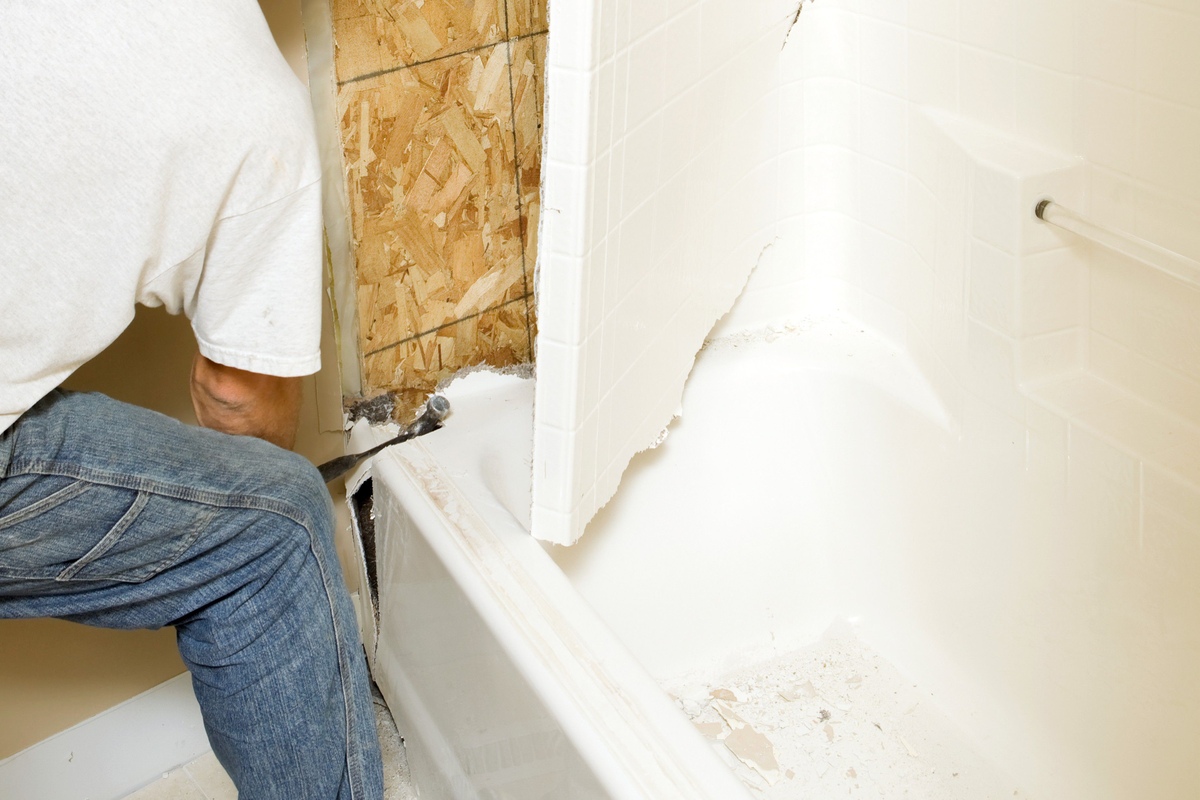
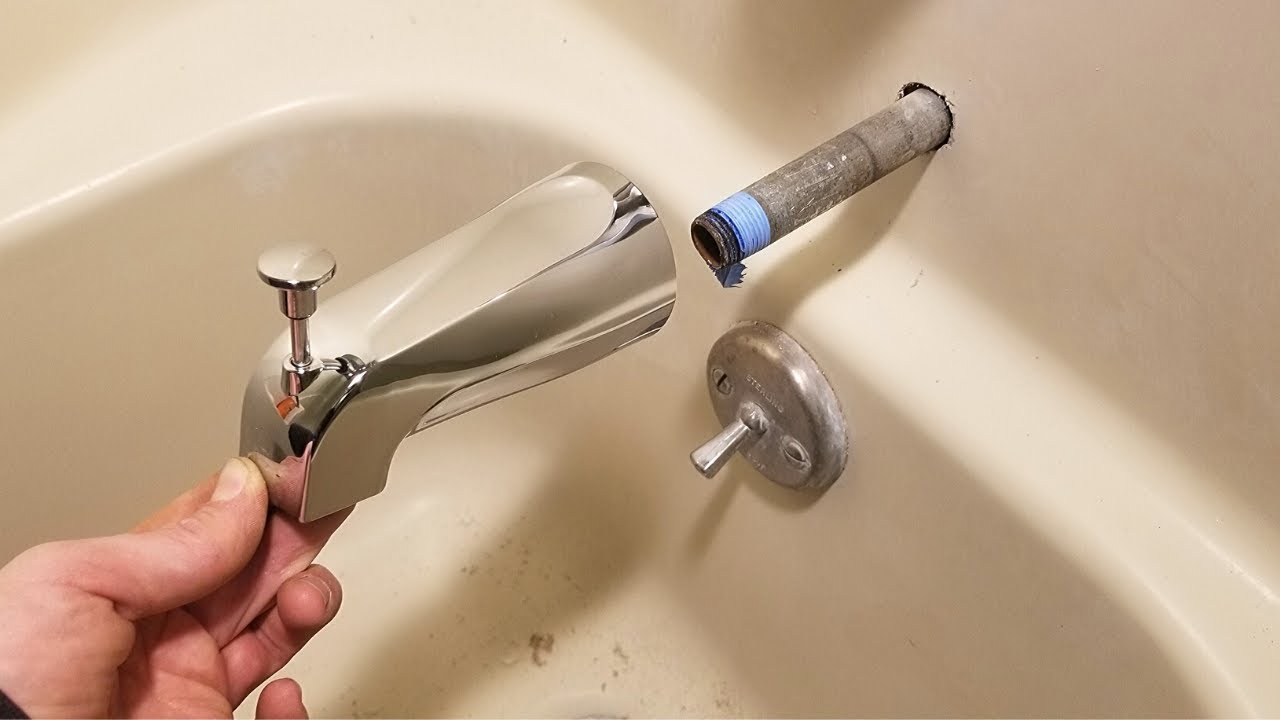
Step 1: Remove the Old Bathtub Surround
Removing the old bathtub surround is the crucial first step in the process of replacing it with a new one. This task requires patience, precision, and the right tools to ensure a smooth and successful removal.
Assess the Surround
Begin by carefully examining the existing bathtub surround. Look for any caulking or adhesive that secures the surround to the wall. Use a utility knife to cut through the caulking and carefully pry off any trim or fixtures attached to the surround.
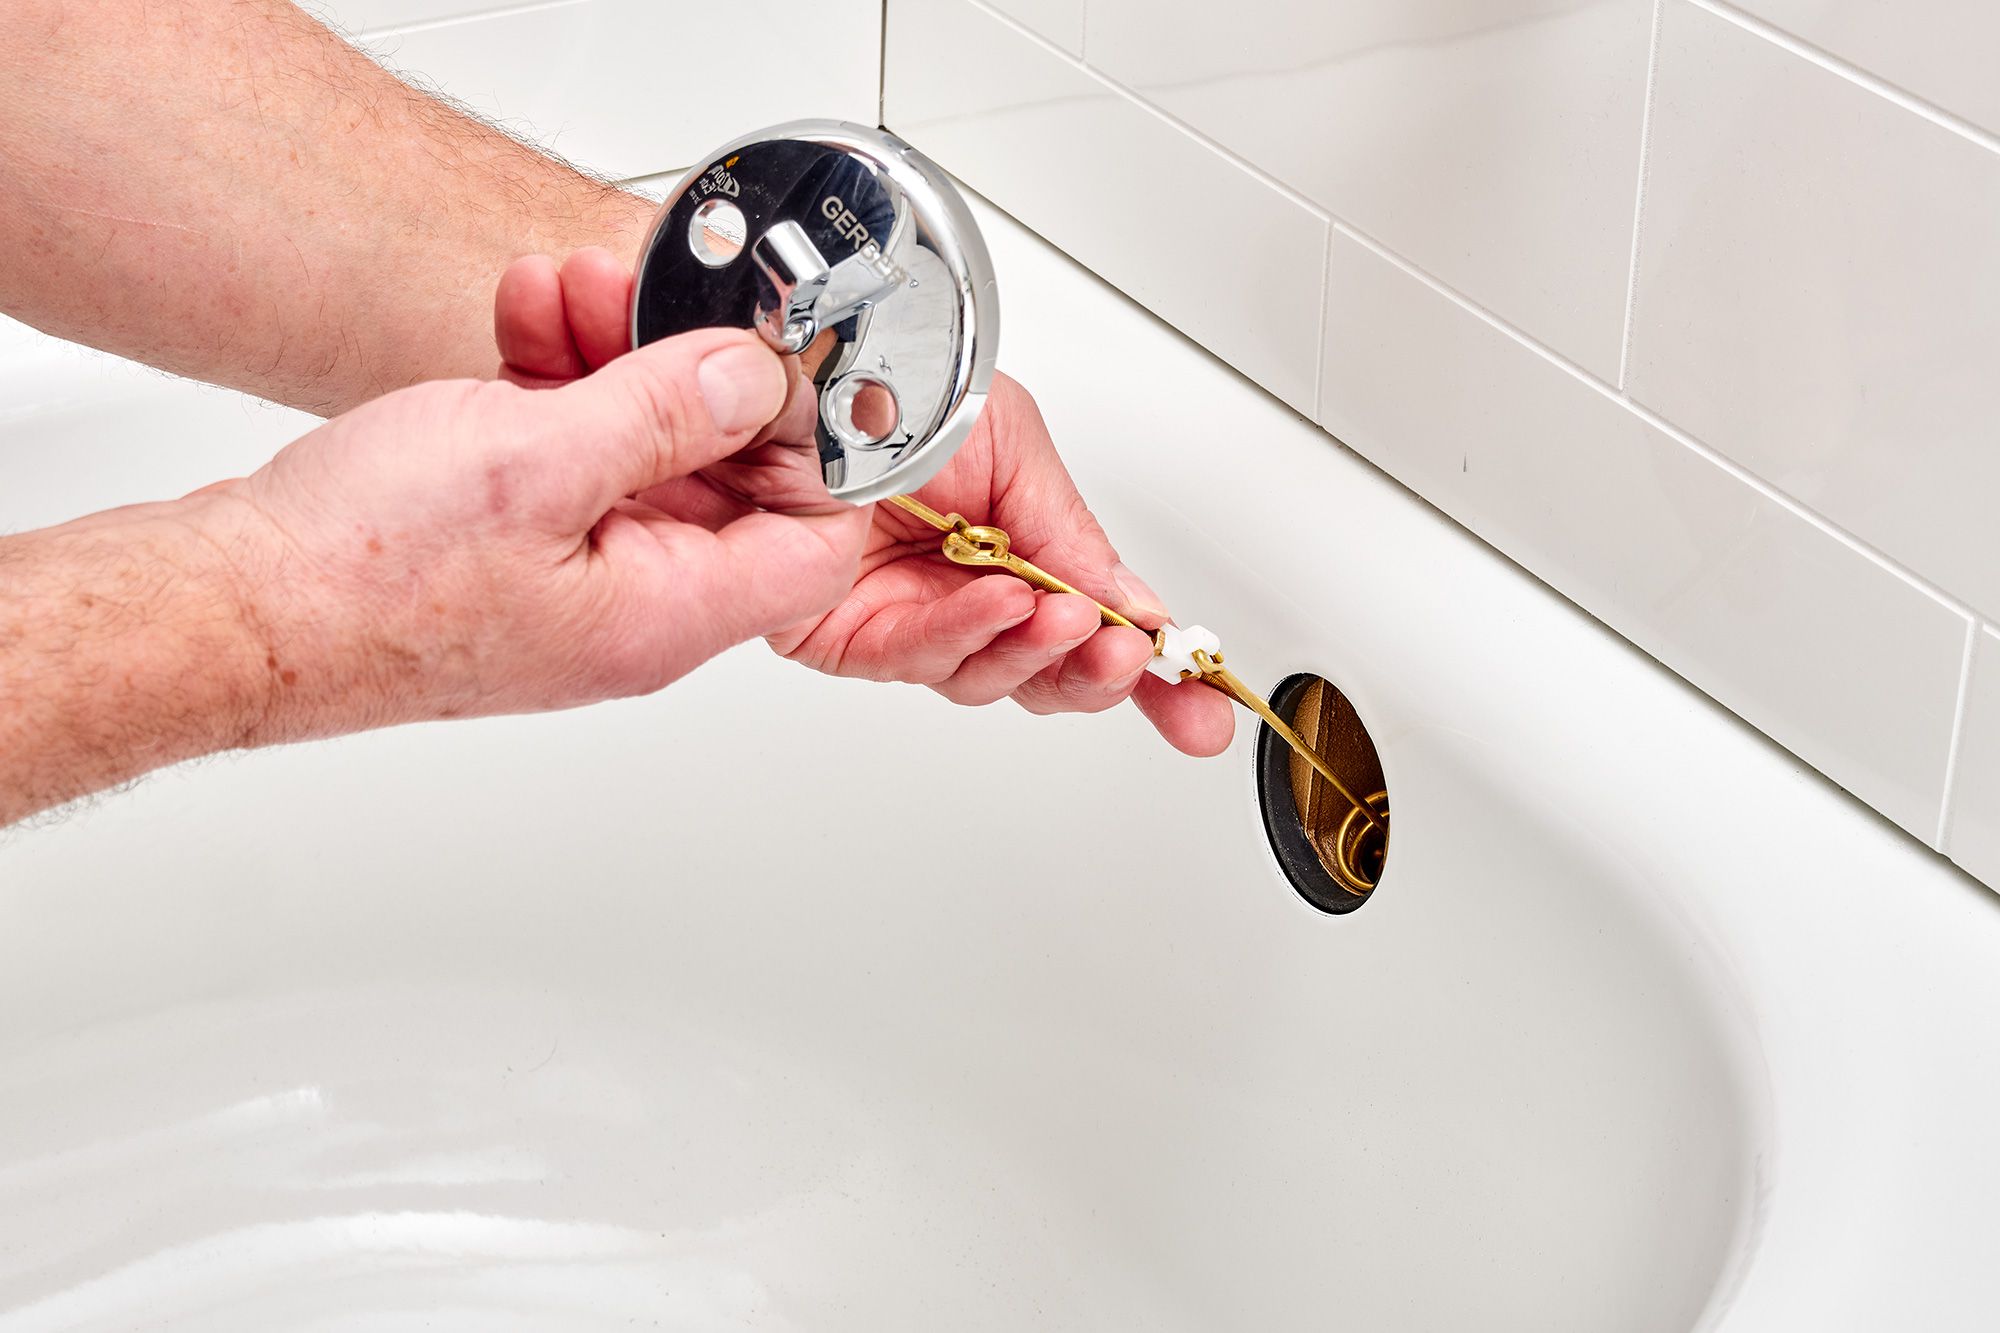
Disassemble the Surround
Next, disassemble the surround by removing any screws, nails, or fasteners holding it in place. Take care to avoid damaging the walls or the bathtub during this process. If the surround is made of multiple pieces, start by removing the corner pieces and then work your way around the rest of the surround.
Detach the Surround
Once the trim and fixtures are removed, gently detach the surround from the wall. It's essential to proceed cautiously to prevent any damage to the walls or the bathtub itself. If the surround is glued to the wall, use a putty knife to carefully pry it away, taking care not to apply excessive force that could cause wall damage.
Read more: When To Replace A Bathtub
Clean the Area
After successfully removing the old bathtub surround, take the time to clean the area thoroughly. Remove any remaining adhesive, caulk, or debris from the walls and the bathtub to ensure a clean and smooth surface for the installation of the new surround.
By meticulously following these steps and exercising care throughout the removal process, you'll set the stage for a seamless transition to the next phase of the project. With the old bathtub surround successfully removed, you're now ready to prepare the area for the installation of the new surround.
Step 2: Prepare the Area
With the old bathtub surround successfully removed, the next crucial step is to prepare the area for the installation of the new bathtub surround. This phase is essential for ensuring a smooth and secure fit for the new surround, ultimately contributing to a professional and long-lasting result.
Assess the Wall Condition
Before proceeding with the installation, carefully inspect the walls surrounding the bathtub. Look for any signs of damage, such as moisture, mold, or mildew. Addressing any underlying issues at this stage will prevent future complications and ensure a solid foundation for the new surround.
Repair and Reinforce
If you encounter any damage or deterioration on the walls, take the necessary steps to repair and reinforce them. Replace any water-damaged drywall and address any structural concerns to create a stable and secure surface for the new bathtub surround.
Read more: How To Replace The Bathtub Drain
Measure and Mark
Accurate measurements are crucial for a precise and snug fit of the new bathtub surround. Use a level and measuring tape to mark the precise dimensions on the walls where the new surround will be installed. This step is essential for aligning the surround correctly and ensuring a professional finish.
Make Necessary Adjustments
In some cases, adjustments may be required to accommodate the new bathtub surround. This could involve cutting the surround panels to fit around fixtures or making modifications to ensure a seamless integration with the existing plumbing and fixtures. Carefully plan and execute these adjustments to achieve a seamless and polished look.
Clean and Prime
Before proceeding with the installation, thoroughly clean the walls and the surrounding area. Remove any dust, debris, or residues from the previous surround to create a clean and smooth surface. Additionally, consider applying a primer to the walls to enhance adhesion and create a uniform surface for the new surround.
Create a Workspace
Establish a well-organized and clutter-free workspace for the installation process. Clear the area around the bathtub, ensuring ample space for maneuvering and working comfortably. Having a well-prepared workspace will streamline the installation process and contribute to a more efficient and successful outcome.
By meticulously preparing the area for the installation of the new bathtub surround, you'll lay the groundwork for a seamless and professional result. This phase sets the stage for the upcoming installation process, ensuring that the new surround fits securely and enhances the overall aesthetic and functionality of your bathroom.
Read more: How To Replace Stopper In A Bathtub
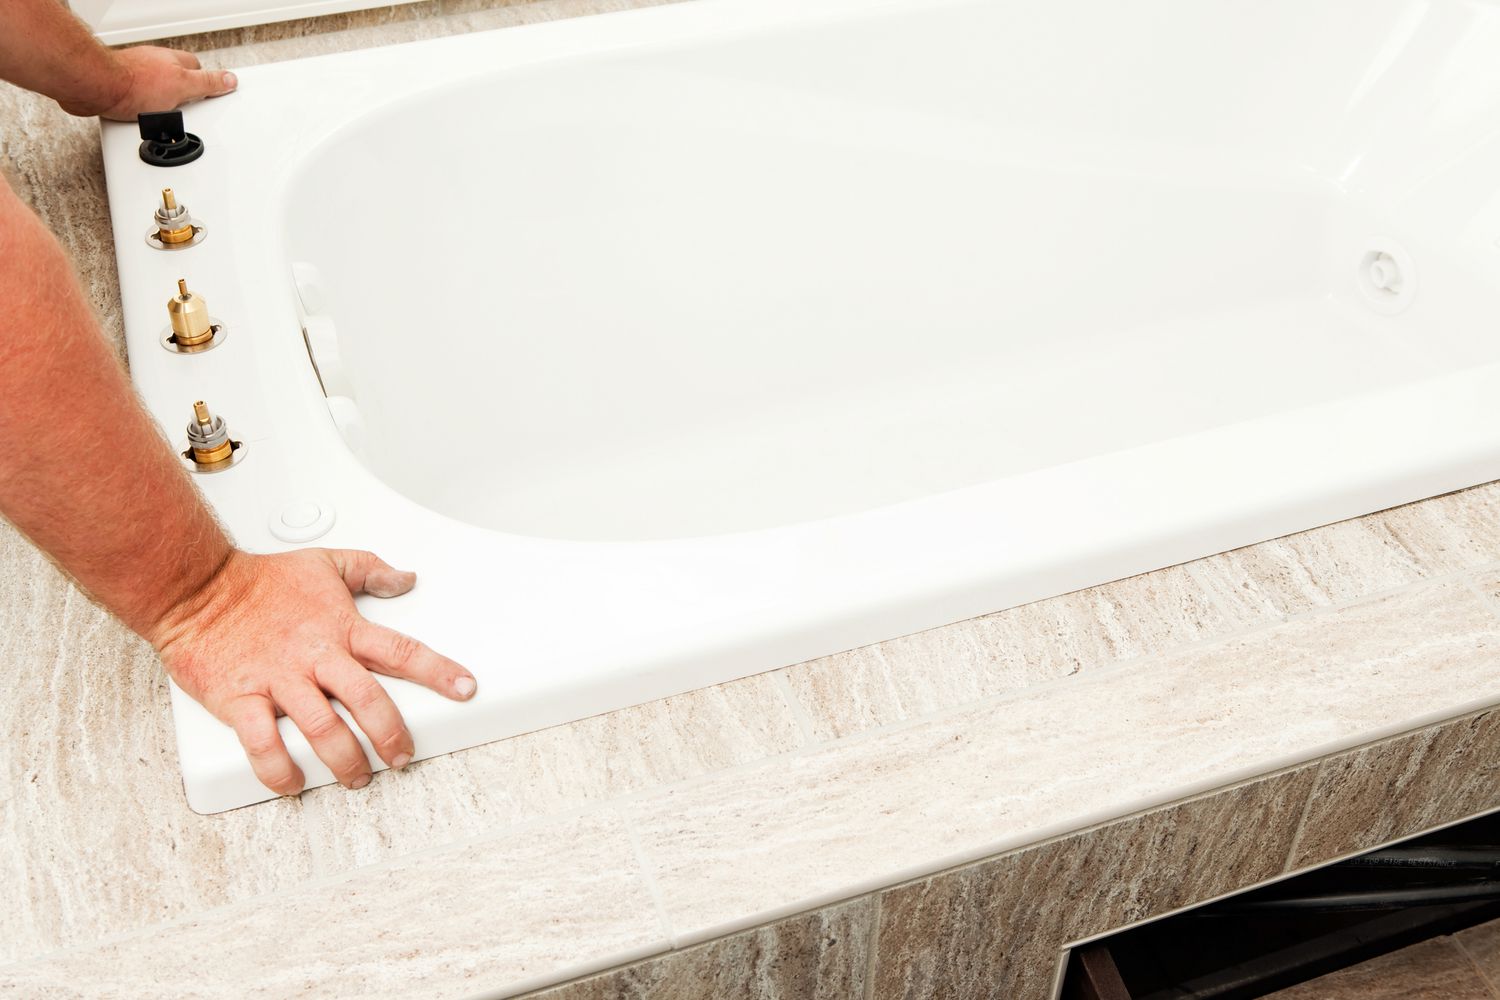
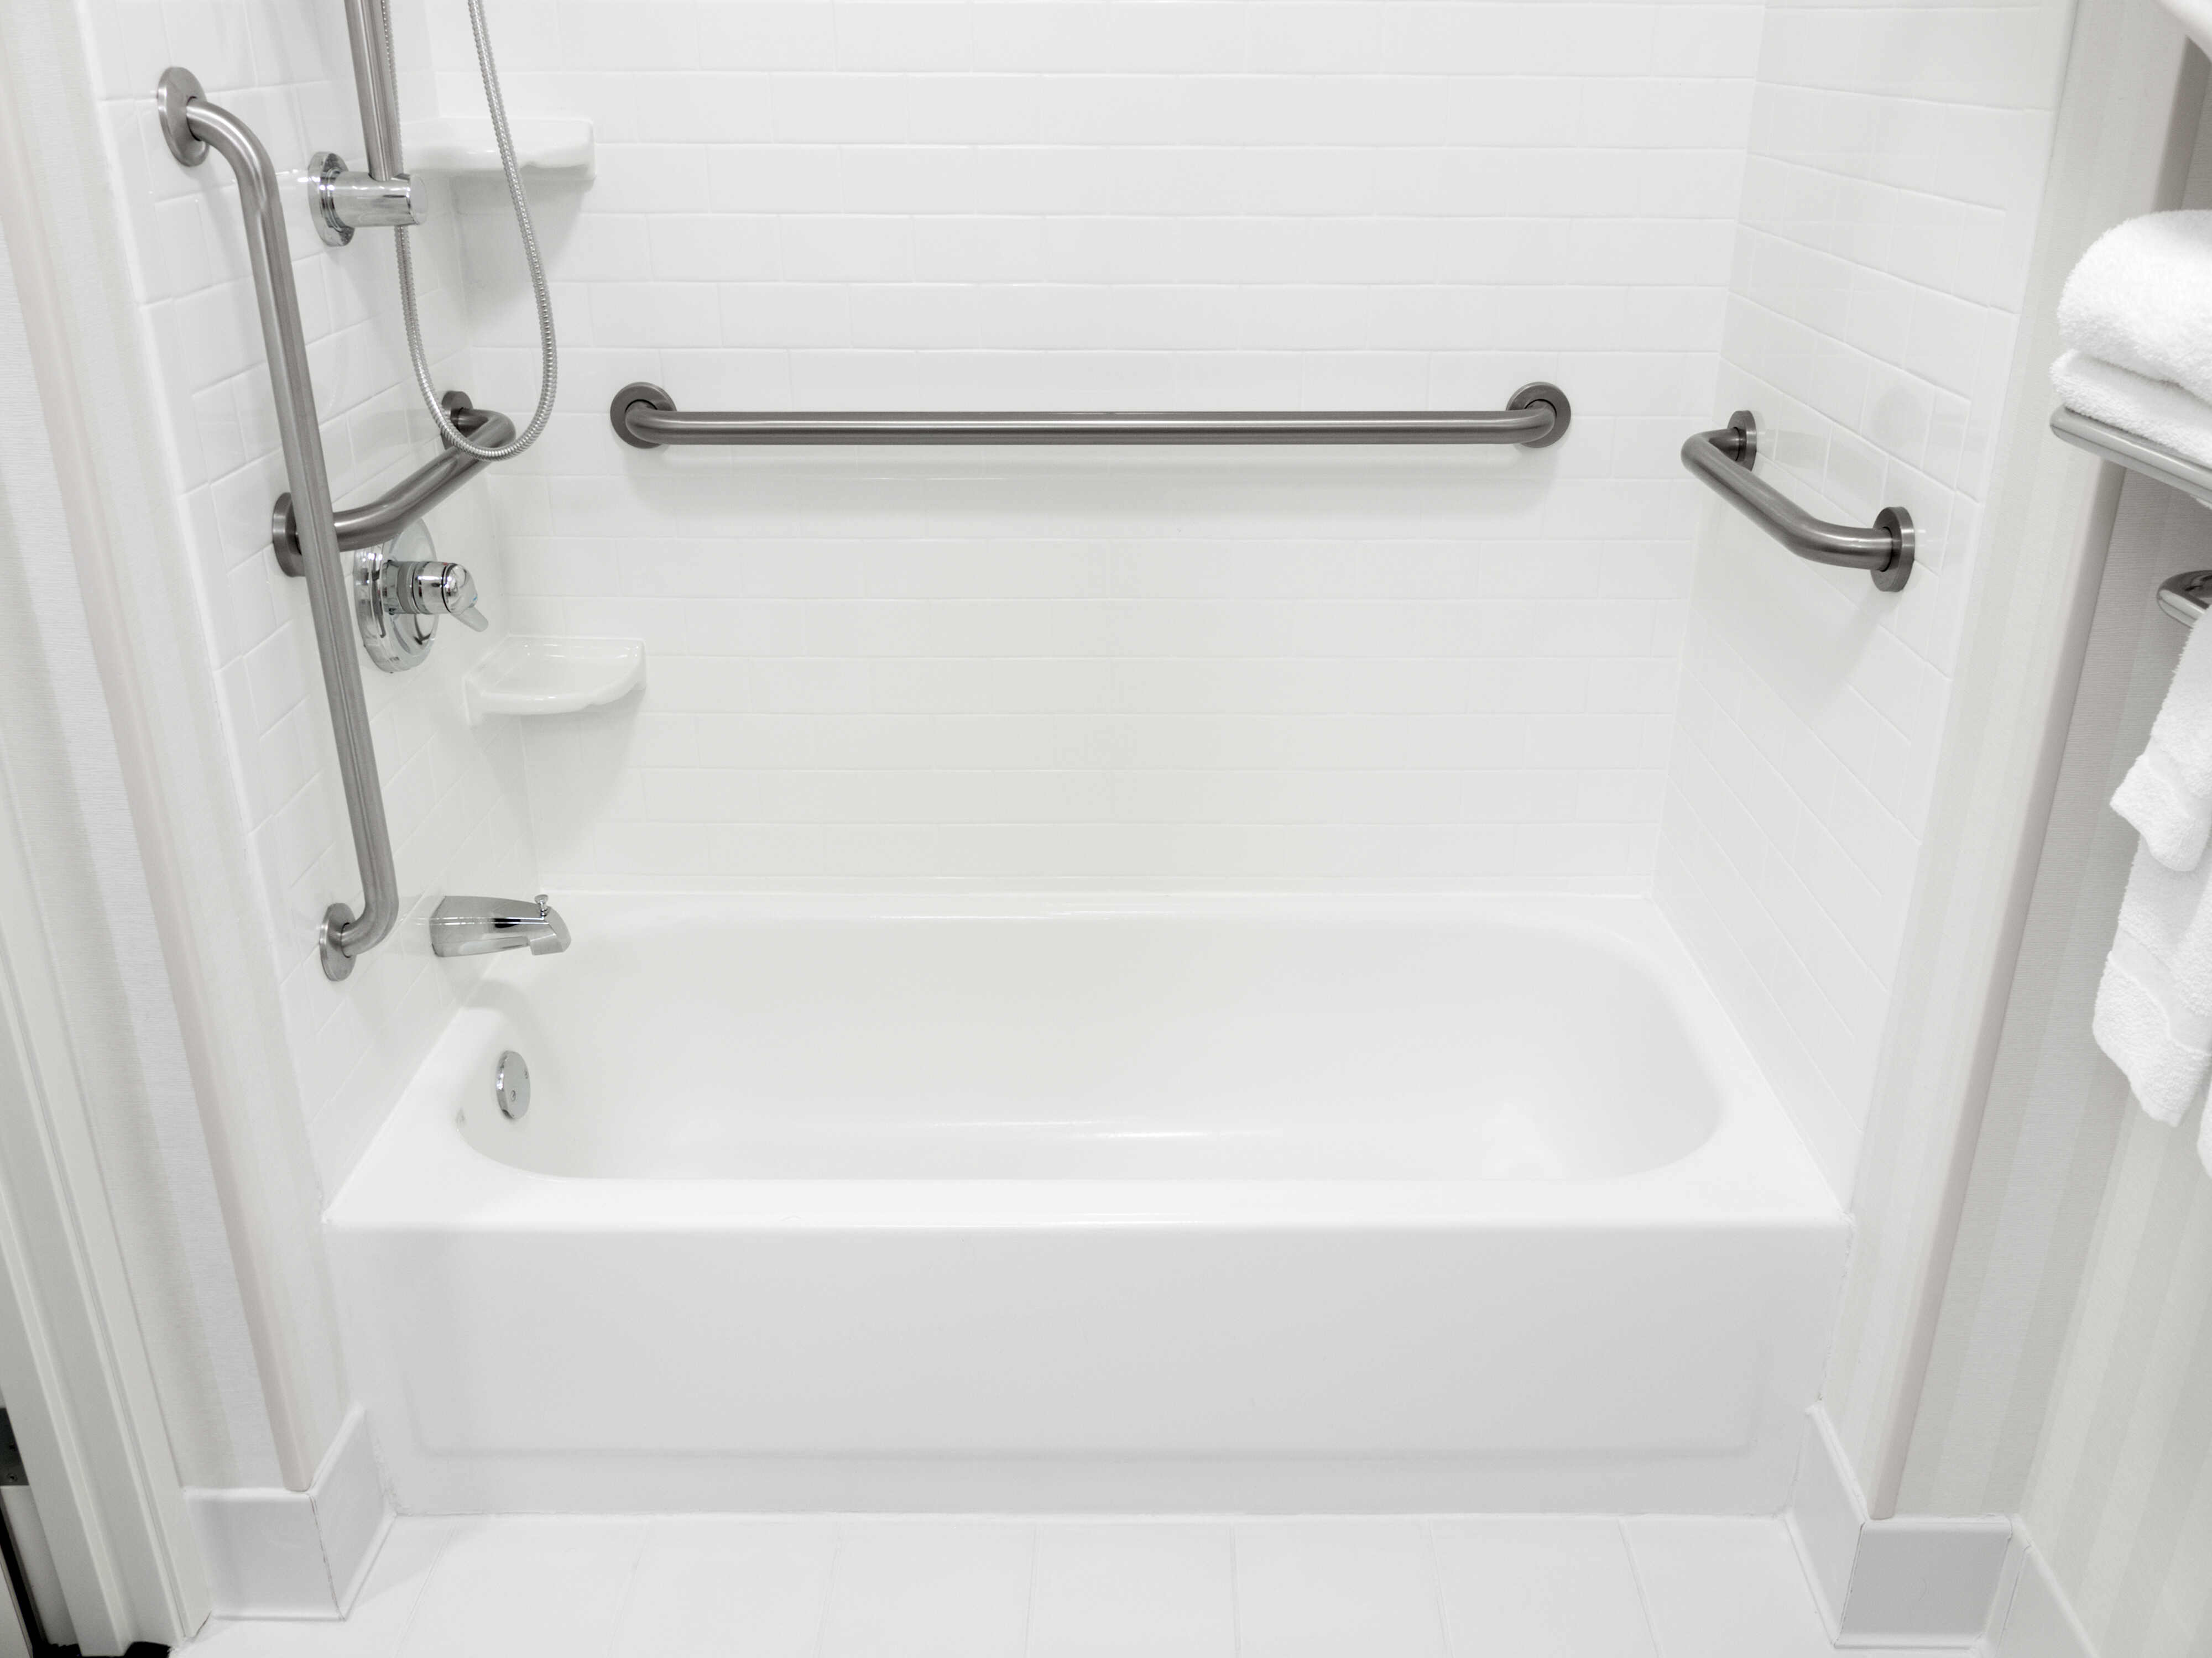
Step 3: Install the New Bathtub Surround
Installing the new bathtub surround marks a pivotal phase in the process of revitalizing your bathroom space. This step requires precision, attention to detail, and a methodical approach to ensure a seamless and secure fit for the new surround. By following the steps outlined below, you'll be well-equipped to embark on this transformative phase of the project.
Dry Fit the Surround
Before applying adhesive, it's essential to conduct a dry fit of the new bathtub surround. Carefully position the panels against the walls to ensure that they align accurately and fit snugly around the bathtub. This step allows you to make any necessary adjustments and confirm that the surround is compatible with the existing plumbing and fixtures.
Apply Adhesive
Once the dry fit is successful, it's time to apply adhesive to the back of the surround panels. Choose a high-quality adhesive recommended for bathtub surround installations, and follow the manufacturer's instructions for application. Apply the adhesive evenly, ensuring full coverage on the back of the panels to promote a strong and durable bond with the walls.
Position and Secure the Surround
With the adhesive applied, carefully position the surround panels against the walls, aligning them with the previously marked measurements. Take care to apply even pressure to ensure a secure bond between the panels and the walls. Use a level to confirm that the surround is perfectly aligned and adjust as needed to achieve a straight and uniform installation.
Read more: How Long To Replace A Bathtub
Secure the Edges and Corners
Once the main panels are in place, focus on securing the edges and corners of the surround. Use screws or fasteners recommended for the specific type of surround to anchor the panels securely to the walls. Pay special attention to the corners, ensuring that they are tightly secured and aligned for a polished and professional finish.
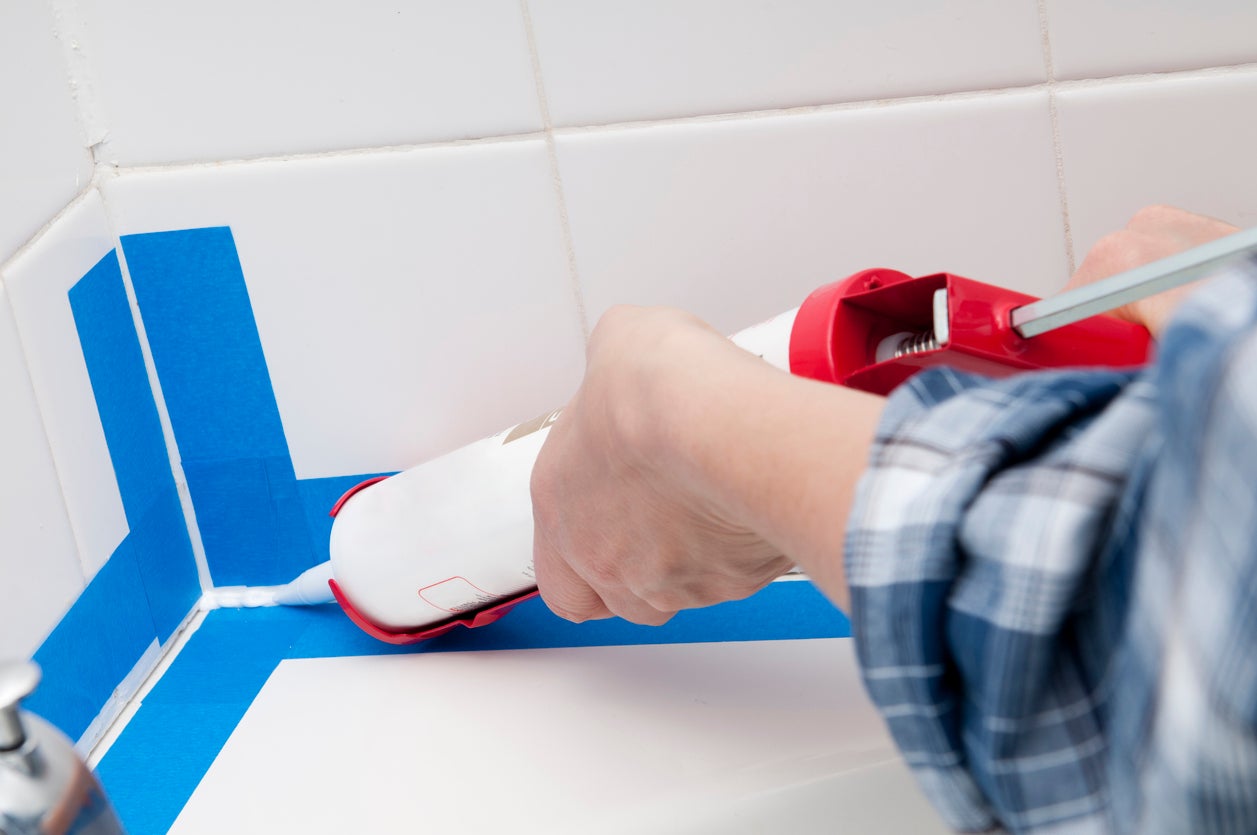
Seal the Joints
After the surround is securely in place, it's essential to seal the joints and seams to prevent water infiltration and ensure a watertight installation. Apply a high-quality silicone caulk along the edges and seams of the surround, smoothing it with a caulk finishing tool for a clean and seamless appearance. This step is crucial for maintaining the integrity of the installation and preventing water damage.
Clean and Inspect
Once the new bathtub surround is installed and sealed, take the time to clean the panels and the surrounding area. Remove any adhesive residues or smudges, ensuring that the surround is pristine and ready for use. Conduct a thorough inspection to confirm that the installation is secure and that the surround enhances the visual appeal and functionality of your bathroom.
By meticulously following these steps and approaching the installation process with care and precision, you'll achieve a professional and visually stunning result. The new bathtub surround will not only elevate the aesthetic appeal of your bathroom but also provide a durable and functional solution for years to come.
Step 4: Seal and Finish the Installation
Sealing and finishing the installation of the new bathtub surround is a critical phase that ensures the longevity, functionality, and visual appeal of the completed project. By meticulously attending to the details outlined in this step, you'll elevate the overall quality of the installation and create a polished and professional finish that enhances your bathroom space.
Read more: How To Replace A Bathtub Shower
Apply a Protective Finish
Once the new bathtub surround is securely installed, consider applying a protective finish to enhance its durability and resistance to moisture. Choose a high-quality sealant or protective coating designed for use in wet environments, and carefully apply it to the surface of the surround. This protective layer will safeguard the panels from water damage, mold, and stains, prolonging their lifespan and maintaining their pristine appearance.
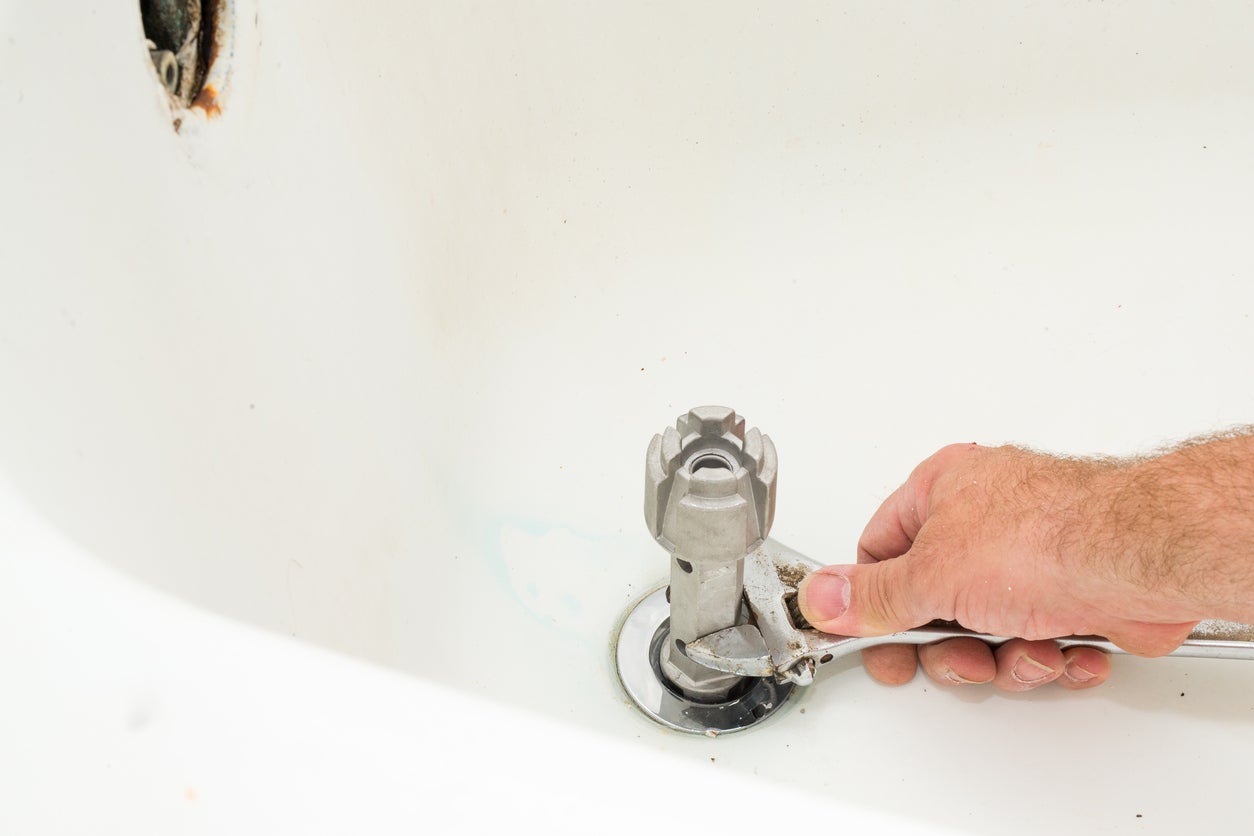
Inspect and Test for Leaks
After sealing the surround, conduct a thorough inspection to ensure that all joints, seams, and edges are effectively sealed. Carefully examine the caulked areas and seams for any gaps or inconsistencies that could potentially lead to water infiltration. Additionally, perform a water test by running the shower or faucet to verify that the installation is watertight and that no leaks are present. Address any areas of concern promptly to prevent water damage and maintain the integrity of the installation.
Trim and Finish Details
To achieve a seamless and polished look, pay attention to the finishing details of the installation. Install trim pieces, such as corner moldings or edge caps, to conceal any exposed edges and create a cohesive and refined appearance. Ensure that the trim pieces are securely attached and seamlessly integrated with the surround, contributing to a visually appealing and professional finish.
Clean and Polish
Once the installation is complete, take the time to clean and polish the entire bathtub surround. Remove any construction residues, adhesive smudges, or fingerprints from the panels and the surrounding area. Use a mild cleaning solution and a soft cloth to gently clean the surface, restoring its luster and ensuring that the new surround is immaculate and ready for use.
Read more: How To Replace A Bathtub Valve
Final Inspection
Conduct a final inspection of the completed installation, paying attention to the overall aesthetics and functionality of the new bathtub surround. Verify that all components are securely in place, the caulked seams are uniform and watertight, and the surrounding area is clean and free of debris. This comprehensive inspection ensures that the installation meets the highest standards of quality and craftsmanship, providing you with a visually stunning and long-lasting addition to your bathroom.
By meticulously sealing and finishing the installation of the new bathtub surround, you'll elevate the overall quality and visual appeal of your bathroom space. This final phase of the project ensures that the installation is not only visually striking but also durable, functional, and resistant to the rigors of daily use. With the completion of this step, you can revel in the transformative impact of your newly installed bathtub surround, creating a welcoming and rejuvenated ambiance in your bathroom.
Conclusion
In conclusion, the process of replacing a bathtub surround is a transformative endeavor that holds the potential to revitalize and elevate the ambiance of your bathroom space. By embarking on this project with patience, attention to detail, and a methodical approach, you have the opportunity to achieve a visually stunning and functional result that enhances the overall appeal of your bathroom.
Throughout the journey of replacing the bathtub surround, you have navigated through essential steps, from the meticulous removal of the old surround to the precise installation and sealing of the new one. Each phase of the project has contributed to the creation of a polished and professional finish, ensuring that the new bathtub surround not only enhances the aesthetic appeal of your bathroom but also provides a durable and watertight solution for years to come.
The careful removal of the old bathtub surround set the stage for a seamless transition to the installation of the new one. By assessing the wall condition, making necessary repairs, and meticulously preparing the area, you have created a solid foundation for the successful installation of the new surround. The installation process itself, from the precise application of adhesive to the meticulous sealing of joints and edges, has culminated in a visually striking and watertight result that elevates the functionality and appeal of your bathroom.
As you conclude this project, take a moment to appreciate the transformative impact of the newly installed bathtub surround. Not only does it breathe new life into your bathroom, but it also serves as a testament to your dedication to creating a welcoming and rejuvenated space within your home. The attention to detail, precision, and care invested in this project have resulted in a visually stunning and enduring addition to your bathroom, enriching your daily experience and creating a space that exudes comfort and style.
In the end, the journey of replacing a bathtub surround transcends the mere act of installation; it embodies the pursuit of creating a space that reflects your vision and enhances the comfort and functionality of your home. As you revel in the completion of this project, take pride in the transformative impact it has had on your bathroom, and the enduring value it adds to your living space.
Frequently Asked Questions about How To Replace A Bathtub Surround
Was this page helpful?
At Storables.com, we guarantee accurate and reliable information. Our content, validated by Expert Board Contributors, is crafted following stringent Editorial Policies. We're committed to providing you with well-researched, expert-backed insights for all your informational needs.


0 thoughts on “How To Replace A Bathtub Surround”