Home>Interior Design>How To Clean Walls Before Painting For Professional Results
Interior Design
How To Clean Walls Before Painting For Professional Results
Modified: January 23, 2024
Learn how to achieve professional results when painting your walls with our interior design tips. Discover the best techniques for cleaning your walls beforehand.
(Many of the links in this article redirect to a specific reviewed product. Your purchase of these products through affiliate links helps to generate commission for Storables.com, at no extra cost. Learn more)
Introduction
When it comes to giving your walls a fresh coat of paint, preparation is key. Properly cleaning the walls before painting ensures a smooth and long-lasting finish, allowing the new paint to adhere effectively. Whether you’re planning to tackle a DIY painting project or hiring a professional, knowing how to clean your walls before painting is essential for achieving professional results.
In this article, we will guide you through the step-by-step process of cleaning your walls before painting. From gathering the necessary materials to final touch-ups, we will cover everything you need to know to achieve a flawless paint job.
Before diving into the cleaning process, it’s important to understand that different types of walls may require different cleaning techniques. For instance, painted walls, wallpapered walls, and walls with textured finishes may have specific requirements. It’s always a good idea to consult with the manufacturer’s guidelines or seek professional advice if you’re unsure about the appropriate cleaning methods for your specific wall type.
Now, let’s get started and learn how to clean your walls effectively for a professional and polished result.
Key Takeaways:
- Properly cleaning walls before painting is crucial for a flawless finish. From inspecting and repairing damages to thorough scrubbing and final preparation, following a step-by-step process ensures professional results.
- Gathering the right materials, inspecting for damages, and addressing stains are essential steps in preparing walls for painting. Thorough cleaning, repairs, and final preparations set the stage for a successful and professional painting project.
Gather the necessary materials
Before you begin cleaning your walls, it’s important to gather all the necessary materials to ensure a smooth and efficient process. Here are some essential items you’ll need:
- Bucket of warm water
- Mild detergent or wall cleaner
- Sponge or soft cloth
- Soft-bristle brush
- Dust cloth or microfiber cloth
- Drywall patching compound (if needed)
- Sandpaper (if needed)
- Drop cloths or plastic sheets
- Painter’s tape
- Protective gloves
Ensure that you have all these items readily available before starting the cleaning process. Having everything at hand will save you time and prevent interruptions as you proceed with the following steps.
It’s also important to choose the right cleaning solution for your walls. Opt for a mild detergent or a specifically formulated wall cleaner that won’t damage the paint or wallpaper.
By gathering all the necessary materials beforehand, you’ll be well-prepared for the task of cleaning your walls, setting the stage for a successful painting project.
Inspect the walls
Before diving into the cleaning process, it’s crucial to inspect the walls for any visible damage or issues that need to be addressed. Start by closely examining the surface of the walls, paying attention to the following things:
- Cracks or holes: Look for any cracks, holes, or dents in the walls. These imperfections should be repaired before painting to ensure a smooth and even finish.
- Peeling or flaking paint: Check for any areas where the paint is peeling or flaking. These areas will need to be scraped and sanded down to create a level surface for the new paint to adhere to.
- Mold or mildew growth: Inspect the walls for any signs of mold or mildew. These issues need to be treated and resolved before painting, as they can affect the longevity of the new paint and pose health risks.
- Stains or discoloration: Take note of any stains or discoloration on the walls. These may require additional cleaning or spot treatment to ensure an even paint application.
- Wallpaper or textured finishes: If your walls are covered with wallpaper or have textured finishes, examine them for any signs of damage or loose sections. These issues should be addressed before painting.
By thoroughly inspecting the walls, you’ll be able to identify any necessary repairs or treatments that need to be done prior to cleaning and painting. Taking care of these issues in the early stages of the process will result in a more professional and polished end result.
Remove furniture and artwork
Now that you have inspected the walls, it’s time to prepare the room for cleaning by removing any furniture and artwork. Clearing the space will allow you to have unrestricted access to the walls and ensure that your belongings are protected from any potential damage or staining during the cleaning process.
Start by moving any furniture away from the walls, or if possible, remove it from the room altogether. Large or heavy items can be covered with drop cloths or plastic sheets to protect them from dust or cleaning solutions.
Next, take down any artwork, mirrors, or decorations that are hanging on the walls. Carefully handle these items and store them in a safe place to avoid any accidental damage or breakage.
By removing furniture and artwork, you not only create a clean slate for cleaning the walls but also minimize the risk of any accidental damage or smudging of the paint during the cleaning process.
Once the room is cleared, you can proceed with the next steps of protecting the surrounding areas and preparing the walls for a thorough cleaning.
Protect the surrounding areas
Before you start cleaning the walls, it’s important to take the necessary precautions to protect the surrounding areas from any potential damage or mess. Here are some steps you can take to safeguard the floors, furniture, and other surfaces:
- Lay down drop cloths or plastic sheets: Place drop cloths or plastic sheets on the floor to catch any drips or spills. This will help protect your flooring from cleaning solution or water damage.
- Cover furniture: If you can’t move the furniture out of the room, cover it with drop cloths or plastic sheets to prevent any accidental splashes or drips from touching the surfaces.
- Use painter’s tape: Apply painter’s tape along the edges of baseboards, trims, and any adjacent surfaces that you want to protect from getting cleaning solution or water splashed onto them.
- Wear protective gloves: Put on protective gloves to shield your hands from any harsh chemicals in the cleaning solution and to avoid direct contact with dirt and grime on the walls.
By taking these protective measures, you can ensure that the cleaning process is contained and doesn’t result in any damage or mess beyond the walls you are working on.
Once you’ve set up the necessary precautions, you’re ready to move on to the next step: dusting and vacuuming the walls to remove loose dirt and debris.
Dust and vacuum the walls
After protecting the surrounding areas, it’s time to start prepping the walls for a thorough cleaning. Begin by dusting the walls to remove any loose dirt, cobwebs, or debris. Here’s how:
- Start at the top: Begin dusting from the top of the walls and work your way down. This helps prevent any dust or dirt from settling on already cleaned areas.
- Use a dust cloth or microfiber cloth: Take a clean dust cloth or microfiber cloth and gently wipe the walls in a sweeping motion. Make sure to cover all areas, including corners and edges.
- Pay attention to details: Dust any moldings, trims, or baseboards along the walls as well. These areas can accumulate dust and should be thoroughly cleaned.
Once you’ve dusted the walls, it’s time to vacuum them to remove any remaining dirt or particles. Attach a soft brush attachment to your vacuum cleaner and run it along the walls using gentle strokes. This will help pick up any loose debris that may have been missed during the dusting process.
Dusting and vacuuming the walls not only helps remove surface-level dirt and debris but also allows the cleaning solutions to work more effectively by preventing any loose particles from getting in the way.
Now that the walls are dust-free, it’s time to tackle any stains or marks that may be present on the surface.
Remove stains and marks
Before proceeding with a deep cleaning of the walls, it’s important to address any stains or marks that may be present. Whether it’s food splatters, fingerprints, or stubborn marks, removing them will ensure a clean surface for painting. Here’s how to tackle common stains:
- Food stains: For grease or food stains, create a gentle cleaning solution by mixing warm water with a mild dish detergent. Apply the solution to a sponge or soft cloth and gently scrub the stained area. Rinse the sponge or cloth frequently and continue until the stain is gone.
- Ink or marker stains: Use rubbing alcohol or a specialized ink remover to tackle ink or marker stains. Apply a small amount of the solution to a clean cloth and gently blot the stain until it lifts. Avoid using excessive force as it may damage the paint or wallpaper.
- Water stains: If you notice water stains on the walls, it’s crucial to determine the underlying cause and address it. If the stain is due to a leak or water damage, it’s best to consult a professional to assess and repair the issue before proceeding with painting.
- Scuff marks: Scuff marks can often be removed by gently rubbing the affected area with a clean, damp cloth. If the marks persist, try using a magic eraser or a mild abrasive cleaner to gently scrub them away.
Remember to test any cleaning solution or method in an inconspicuous area before applying it to the entire wall. This will ensure that it doesn’t cause any discoloration or damage to the paint or wallpaper.
By effectively removing stains and marks, you’ll create a clean and smooth surface for the next step: thoroughly scrubbing the walls to remove any dirt or grime.
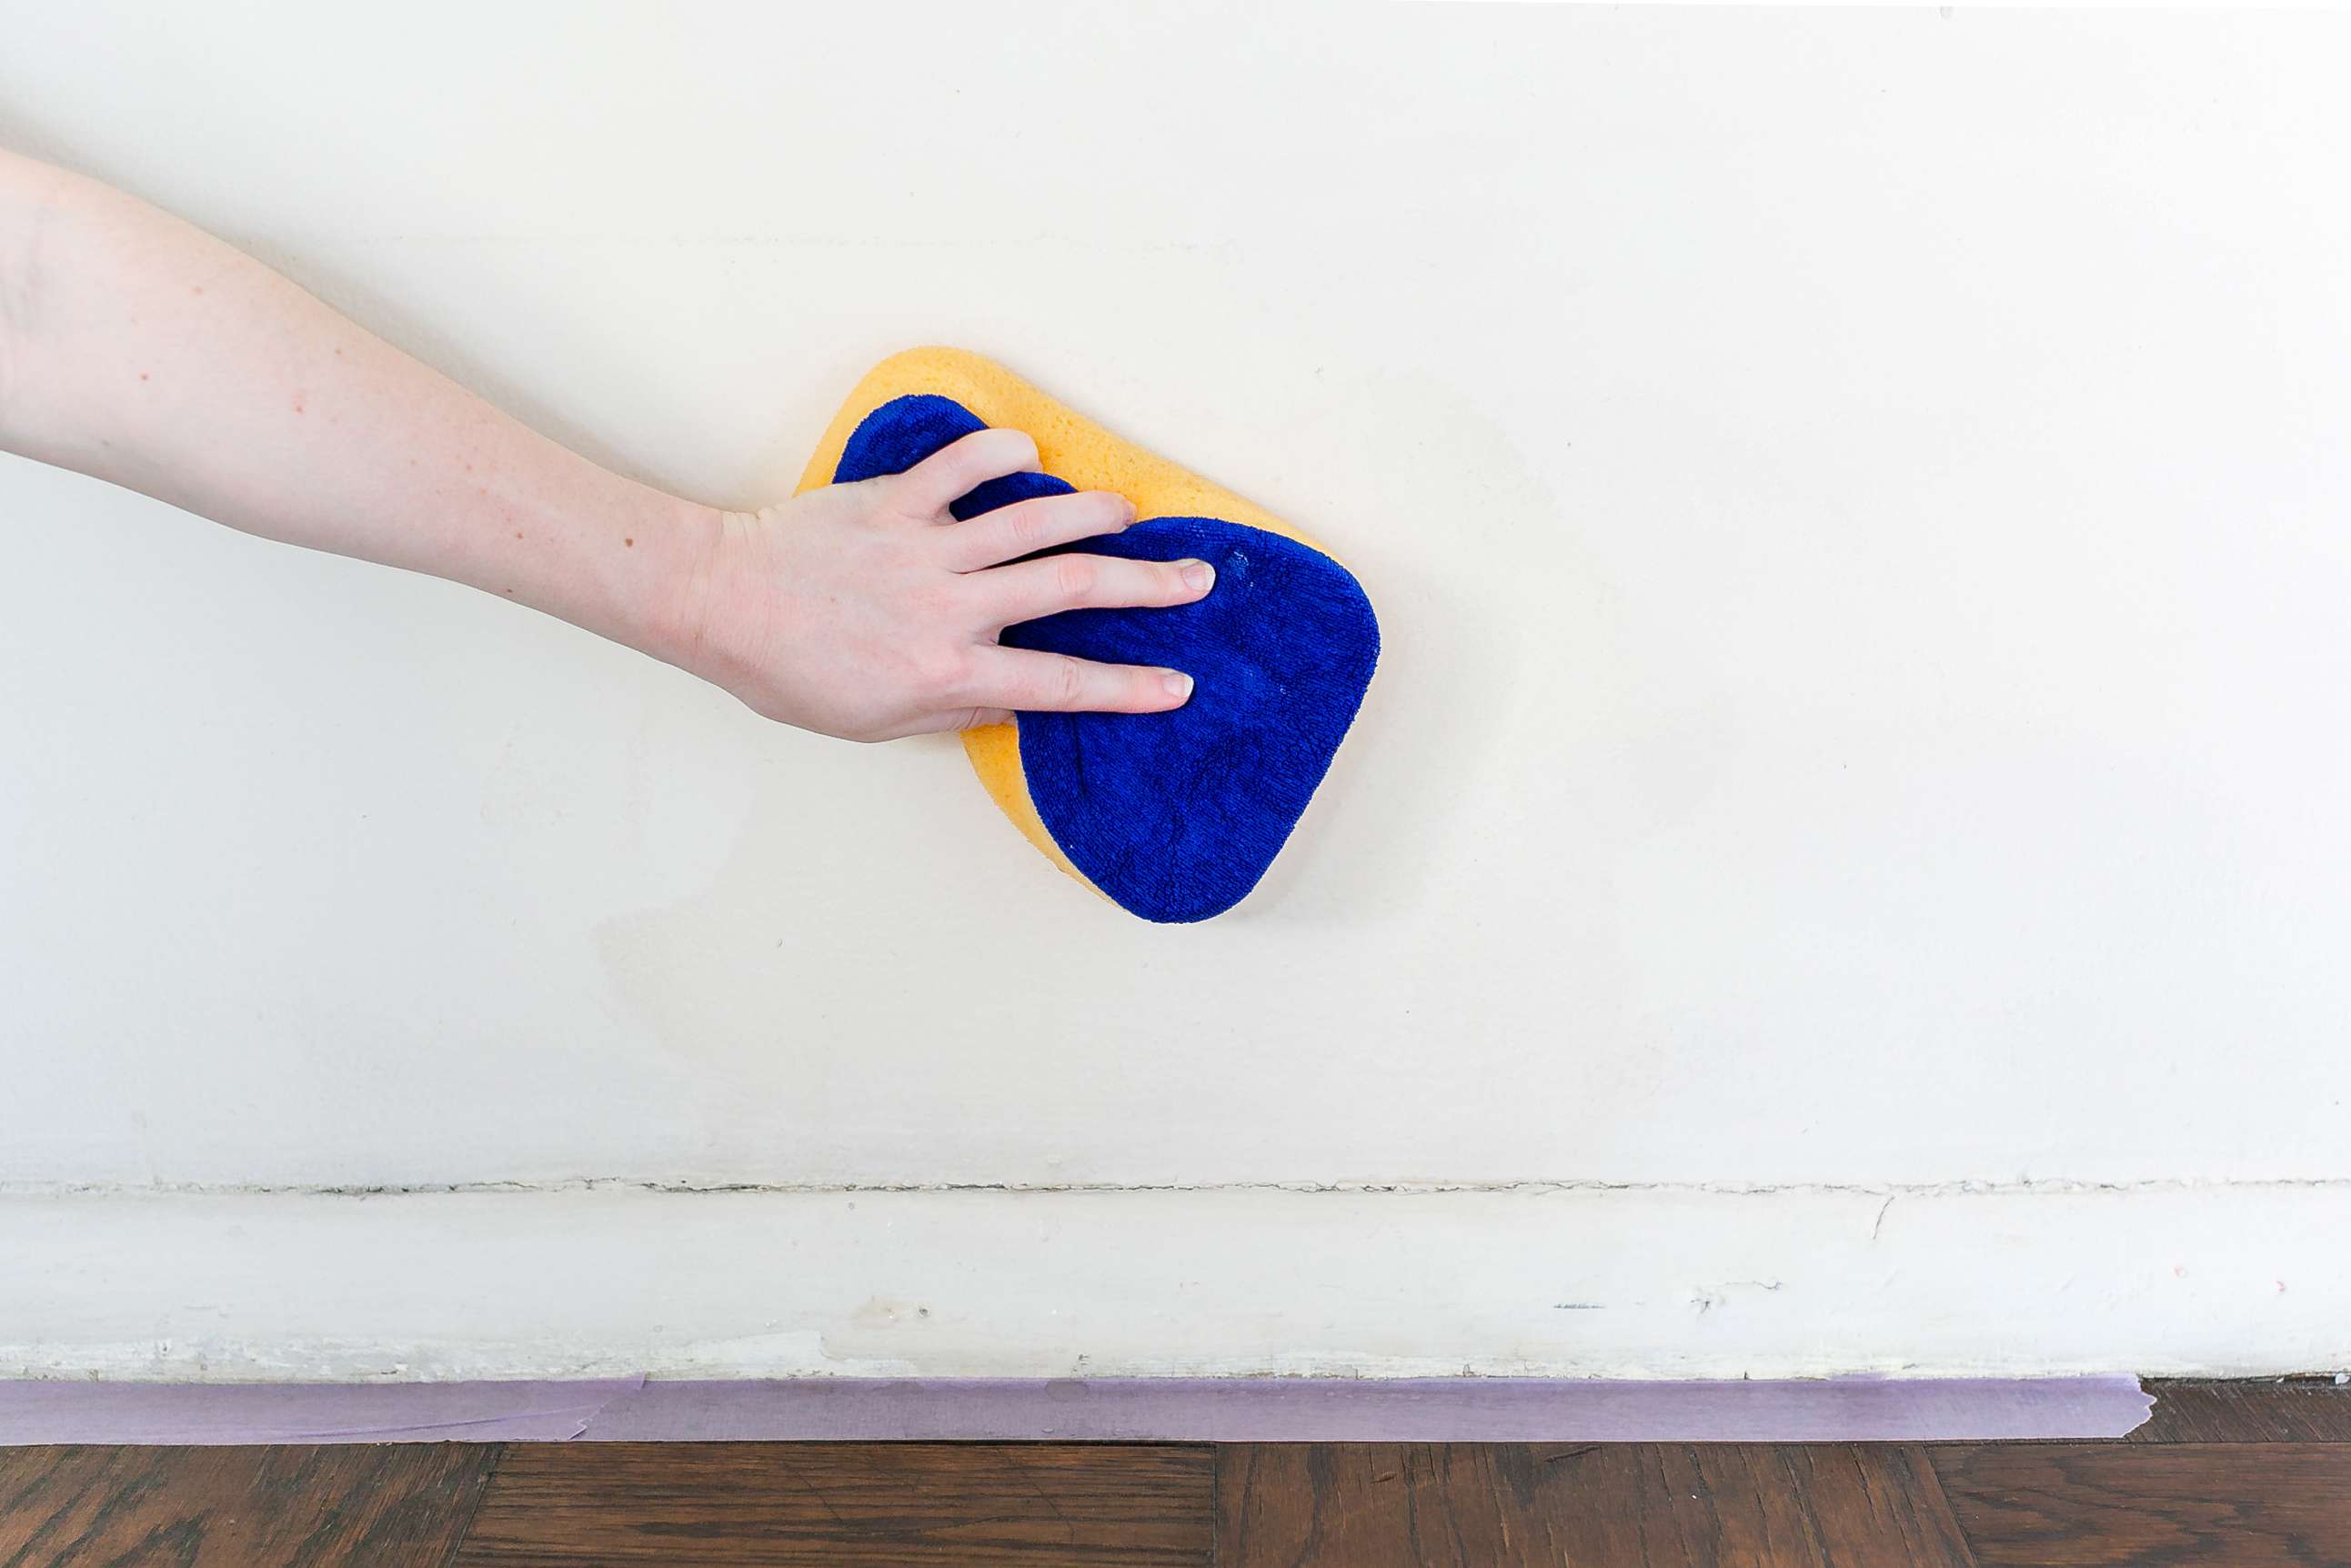
Scrub the walls
Now that you have addressed the stains and marks on the walls, it’s time to give them a thorough scrubbing to remove any lingering dirt, grime, or residue. Follow these steps for an effective cleaning:
- Fill a bucket with warm water: Fill a bucket with warm water, but avoid using hot water as it can damage the paint or wallpaper.
- Add a mild detergent or wall cleaner: Add a small amount of mild detergent or a specifically formulated wall cleaner to the warm water. Follow the product instructions for the appropriate dilution ratio.
- Soak a sponge or soft cloth: Dip a sponge or soft cloth into the cleaning solution and wring out any excess water. It should be damp, but not dripping wet.
- Start from the top: Begin scrubbing the walls from the top and work your way down. This will prevent any streaks or drips of cleaning solution from causing uneven marks on the surface.
- Use gentle, circular motions: Scrub the walls using gentle, circular motions. Pay extra attention to areas that are prone to dirt and grime buildup, such as near light switches or high-traffic areas.
- Rinse the sponge or cloth frequently: Rinse the sponge or cloth in clean water frequently to remove any dirt or cleaning residue. This will prevent dirt from being redistributed onto the walls.
- Avoid excessive moisture: Avoid saturating the walls with excessive moisture. Too much water can damage the paint or wallpaper, so ensure that the sponge or cloth is only damp and not soaking wet.
As you scrub the walls, you’ll likely notice the cleaning solution becoming discolored as it lifts dirt and grime off the surface. This is a sign that the cleaning process is working effectively.
Continue working your way around the room until you have scrubbed all the walls. If necessary, change the water and cleaning solution in the bucket to ensure that you’re using clean water.
When you’re satisfied with the cleanliness of the walls, it’s time to address any damages or imperfections before proceeding with the next steps of the painting process.
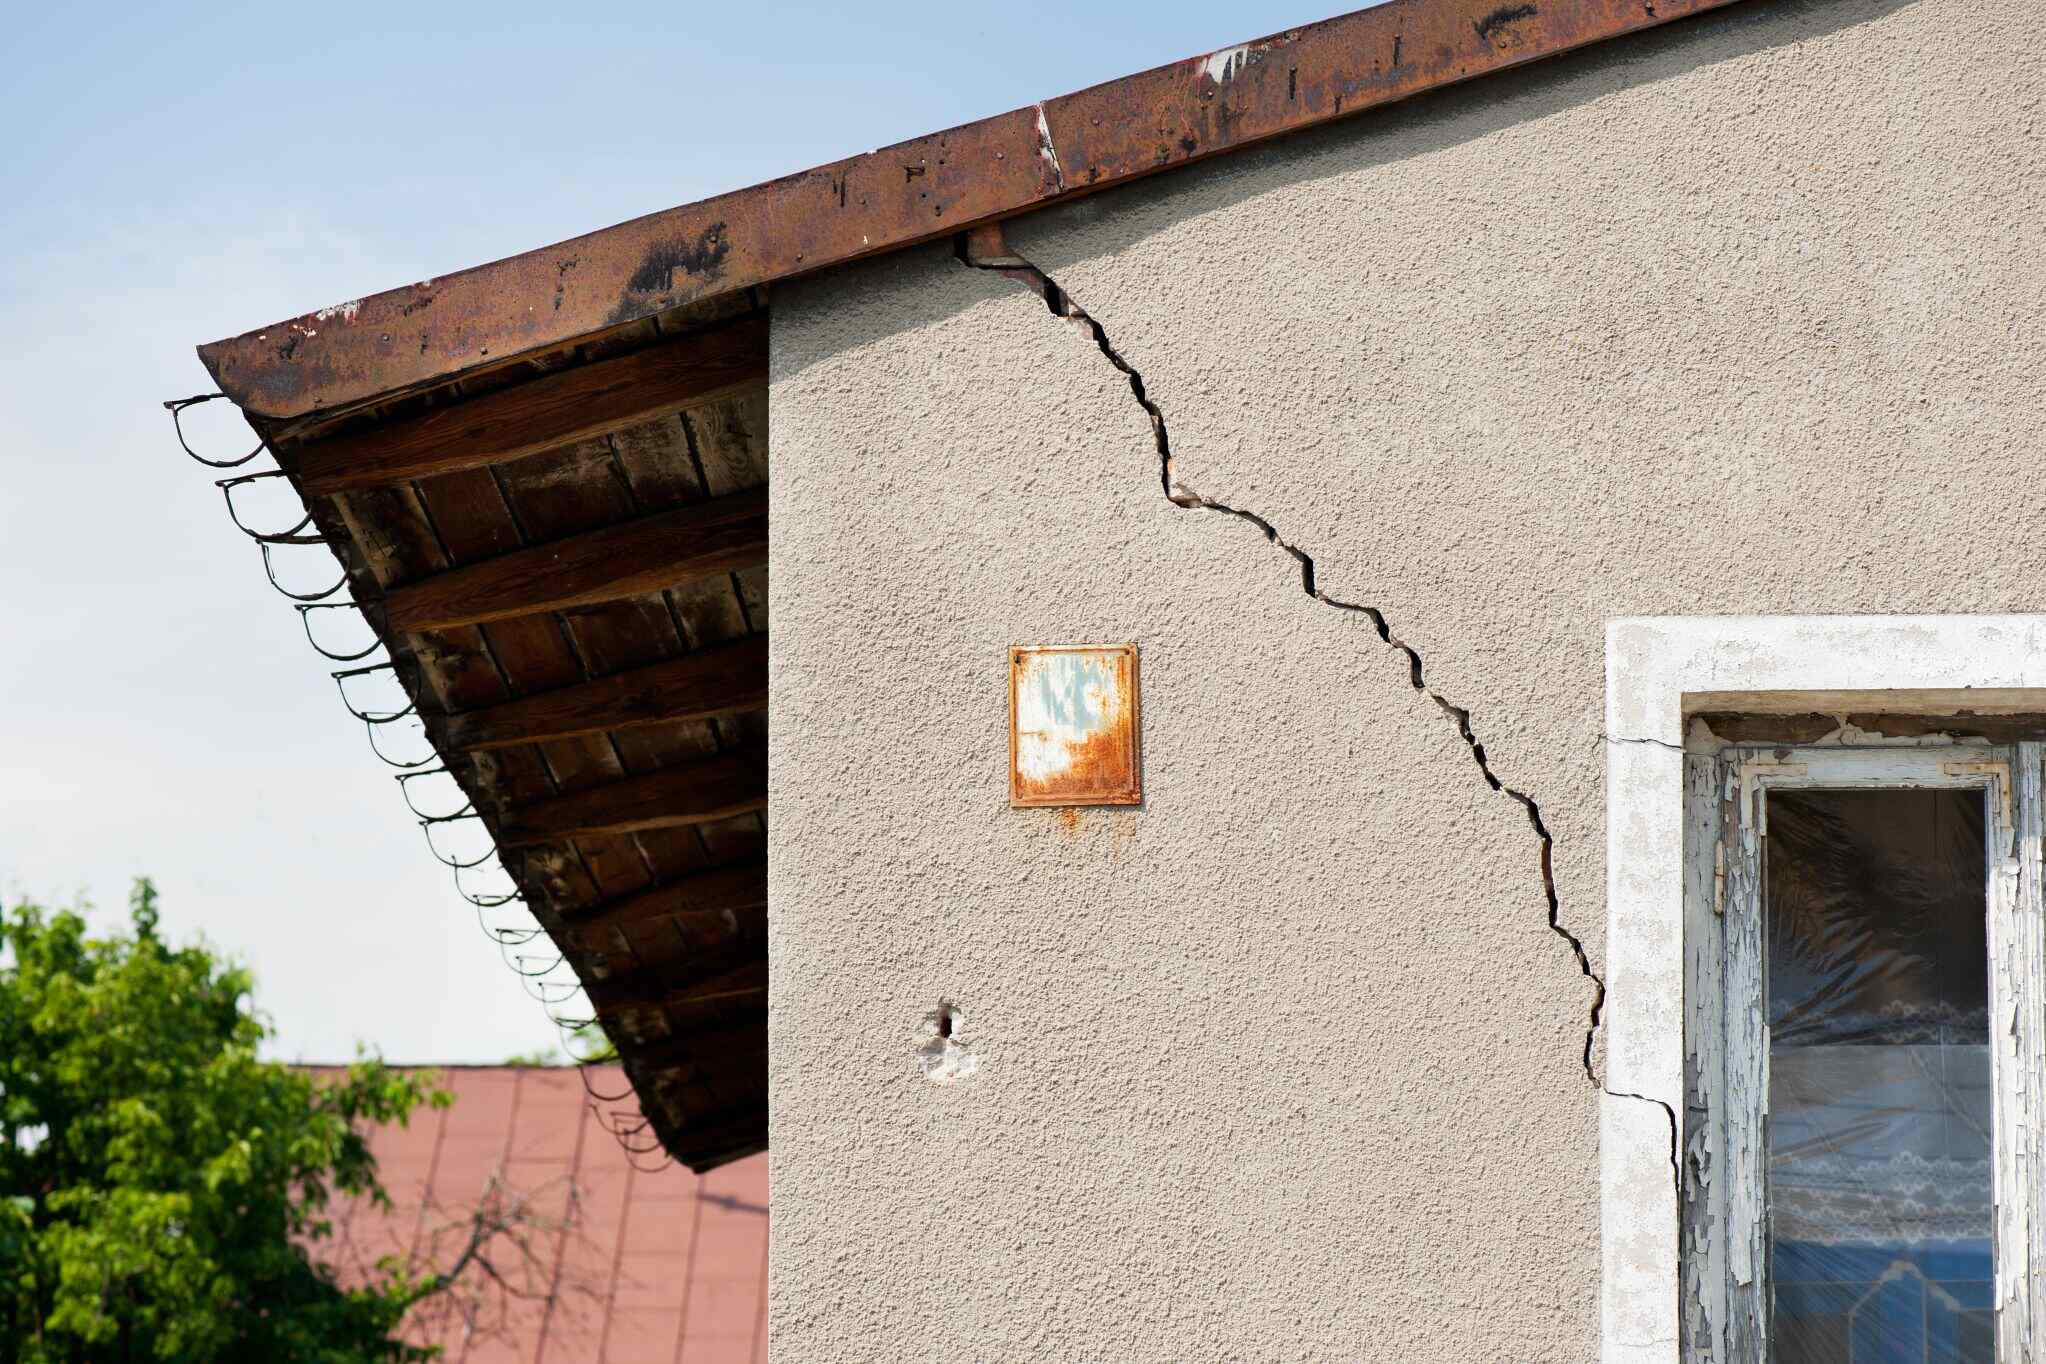
Repair any damages
Before moving forward with the painting process, it’s important to address any damages or imperfections on the walls. Here are some common issues and how to fix them:
- Cracks or holes: If you noticed any cracks or holes during the inspection process, now is the time to repair them. Use a spackling compound or a drywall patching compound to fill in the cracks or holes. Apply the compound with a putty knife, ensuring it is leveled with the surrounding wall surface. Allow it to dry according to the product instructions, and then sand it smooth with sandpaper.
- Peeling or flaking paint: If you encountered areas with peeling or flaking paint, it’s important to address them before painting. Use a putty knife or scraper to gently remove any loose or peeling paint. Once the loose paint is removed, sand the area lightly to create a smooth surface. Wipe away any debris or dust with a tack cloth or a damp cloth.
- Wallpaper damage: If your walls are covered with wallpaper and you notice any damaged or loose sections, carefully remove the affected area. Use a sharp utility knife to cut out the damaged portion and replace it with a patch of matching wallpaper using wallpaper adhesive.
By repairing these damages, you’re ensuring that the walls are in the best possible condition for painting. This will result in a more professional and polished end result.
Once you have addressed any damages, it’s time to move on to the next step: rinsing the walls to remove any cleaning residue.
Before painting walls, clean them with a mixture of water and mild detergent to remove dirt and grease. Use a sponge or cloth to scrub gently, then rinse with clean water and allow to dry completely for a smooth, professional finish.
Rinse the walls
After scrubbing the walls and addressing any damages, it’s important to thoroughly rinse them to remove any residue from the cleaning solution. Rinsing the walls will help ensure that the surface is clean and ready for the painting process. Follow these steps to rinse the walls:
- Fill a bucket with clean water: Fill a bucket with clean, lukewarm water.
- Dip a sponge or soft cloth: Dip a sponge or soft cloth into the clean water and wring out any excess water. It should be damp, but not soaking wet.
- Start from the top: Begin at the top of the walls and work your way down, just as you did during the scrubbing process. This will prevent any streaks or drips from marring the clean surface.
- Wipe the walls with the damp cloth or sponge: Use the damp cloth or sponge to wipe down the walls, ensuring that you cover all areas. This will help remove any remaining cleaning residue.
- Change the water if necessary: If the water in the bucket becomes dirty or cloudy, change it to ensure that you’re using clean water for rinsing.
As you rinse the walls, you’ll notice that the water may become slightly discolored. This is normal and is a sign that any remaining dirt or residue is being removed.
Continue rinsing the walls until you’ve covered the entire surface area and you’re satisfied that the cleaning residue has been thoroughly removed.
Once the walls are fully rinsed, it’s important to allow them to dry completely before proceeding to the next steps of the painting process.
Allow the walls to dry
After rinsing the walls, it’s crucial to allow them to dry completely before moving forward with the painting process. Proper drying ensures that the paint will adhere properly and results in a smooth and even finish. Here are some tips for effectively drying the walls:
- Air circulation: Open windows and doors to promote air circulation in the room. This will help speed up the drying process by allowing moisture to evaporate.
- Use fans: If available, set up fans in the room to increase airflow and facilitate drying. Position them in such a way that they promote proper air circulation around the walls.
- Avoid humid conditions: Avoid painting or proceeding with the next steps if the room is excessively humid or if there is high moisture content in the air. Wait for the walls to dry completely in optimal conditions.
- Patience is key: Depending on the humidity levels and the thickness of the walls, drying times can vary. It’s important to exercise patience and wait until the walls are completely dry to the touch.
While it may be tempting to move on to the next steps immediately, allowing sufficient drying time is crucial for the success of your painting project. Rushing the process can result in paint peeling, cracking, or not adhering properly to the walls.
Once the walls are thoroughly dry, you can move on to the next steps, such as sanding (if necessary), cleaning the baseboards and trim, and applying any necessary primer.
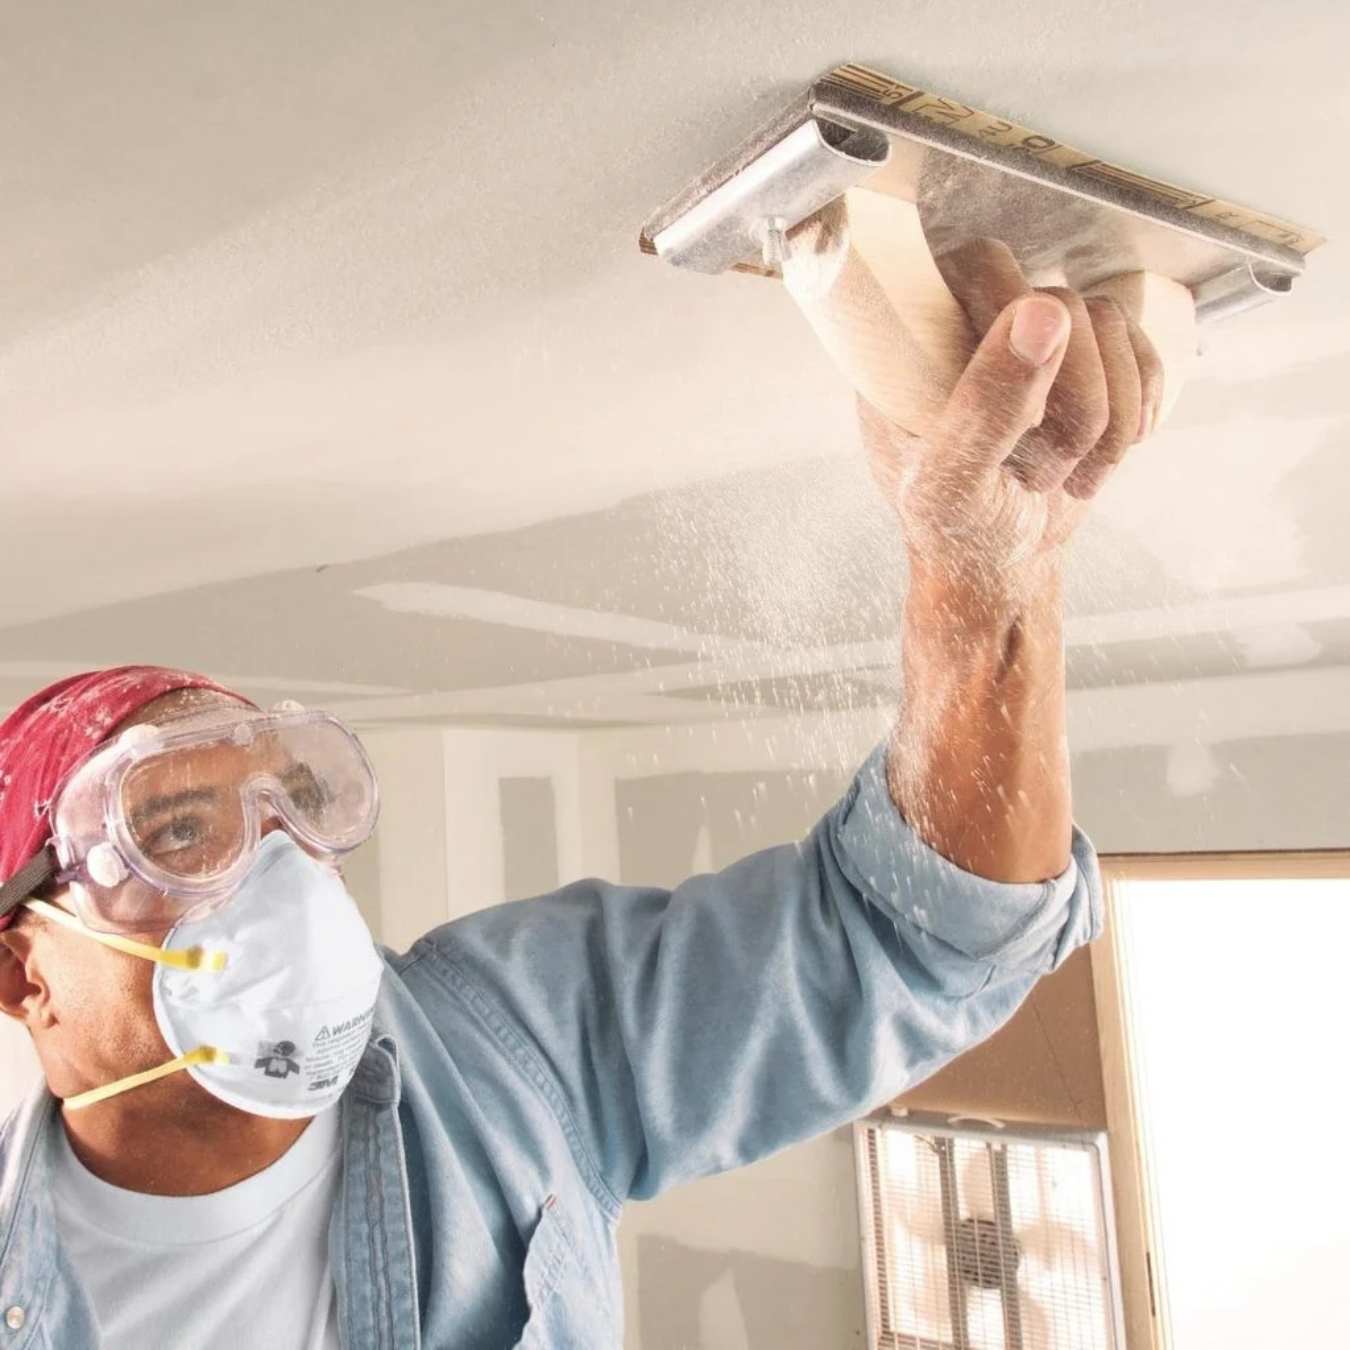
Sand the walls (if necessary)
After allowing the walls to dry completely, it’s important to assess their condition and determine if any additional preparation is needed. One common step is sanding the walls, which can help smooth out rough areas, remove imperfections, and promote better paint adhesion. Here’s how to sand the walls effectively:
- Inspect the walls: Take a close look at the walls and run your hand over the surface to check for any rough patches, bumps, or uneven areas.
- Gather the necessary materials: You’ll need sandpaper, sanding block or pole sander, and a vacuum or damp cloth to clean up the dust.
- Select the appropriate sandpaper grit: Depending on the condition of the walls, choose a sandpaper grit that suits your needs. A medium-grit sandpaper (around 120-150) is usually suitable for most situations.
- Sand in a circular motion: Attach the sandpaper to the sanding block or pole sander and start sanding the walls in a circular motion. Apply light to medium pressure and work your way across the entire wall surface.
- Focus on problem areas: Pay extra attention to areas with noticeable imperfections, such as patched areas or rough patches. Sand these areas more thoroughly to ensure a smooth and even finish.
- Clean up the dust: After sanding, use a vacuum or a damp cloth to remove the dust from the walls. This will prevent the dust from interfering with the paint application.
It’s important to note that not all walls will require sanding. If your walls are in good condition with a smooth surface, you may be able to skip this step. However, if you notice any roughness or imperfections that could affect the quality of the paint finish, sanding is recommended.
Once the walls are sanded and free of dust, you can move on to the next steps, such as cleaning the baseboards and trim and applying any necessary primer.
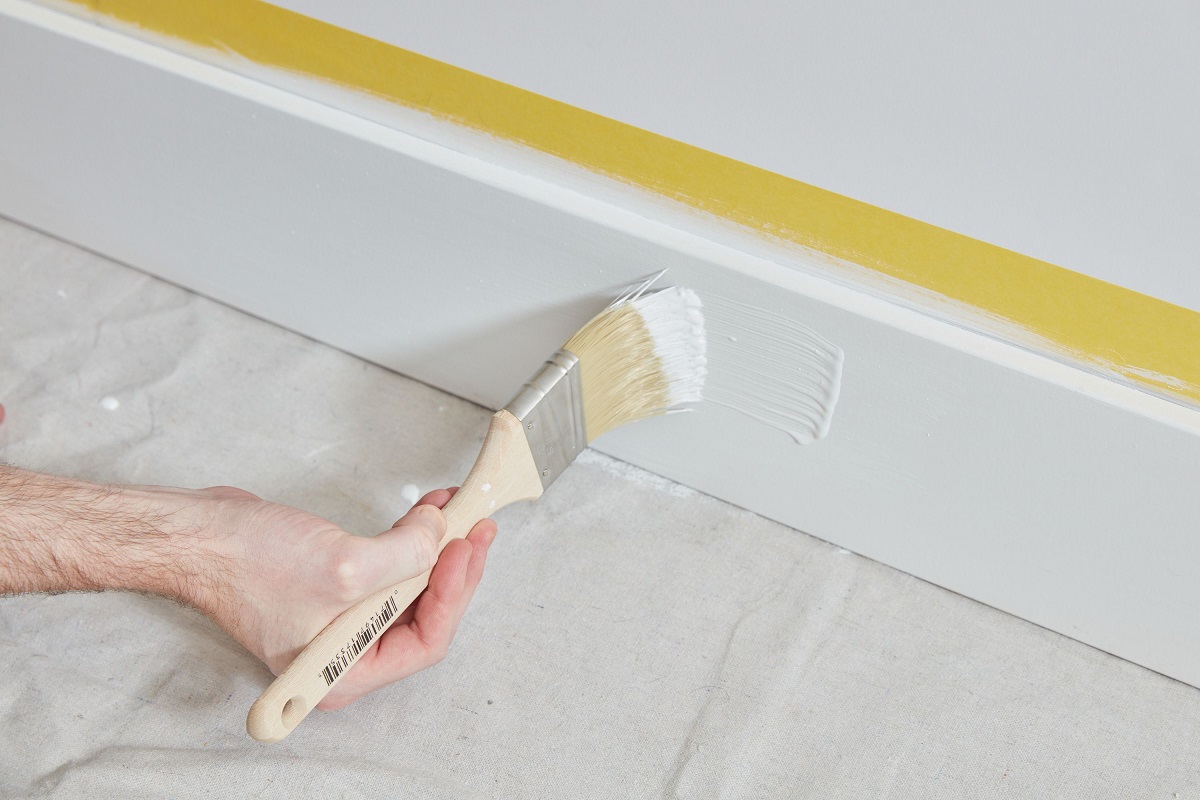
Clean the baseboards and trim
When preparing your walls for painting, it’s crucial not to overlook the baseboards and trim. These areas can accumulate dust, dirt, and grime over time, and cleaning them will ensure a polished look for your finished project. Follow these steps to clean the baseboards and trim:
- Gather the necessary materials: You’ll need a vacuum cleaner or a broom, a microfiber cloth or a sponge, a small bucket of warm water, and a mild detergent or cleaning solution.
- Remove loose dirt: Start by removing any loose dirt or debris from the baseboards and trim. Use a vacuum cleaner with a brush attachment or a broom to gently sweep away any dust or particles.
- Mix a cleaning solution: In a small bucket, mix warm water with a small amount of mild detergent or a specifically formulated cleaning solution. Follow the product instructions for the appropriate dilution ratio.
- Dampen a cloth or sponge: Dip a microfiber cloth or sponge into the cleaning solution, then wring out any excess water. The cloth or sponge should be damp, not dripping wet.
- Clean the baseboards and trim: Wipe down the baseboards and trim with the damp cloth or sponge. Start at one end and work your way along, ensuring that you cover all surfaces. Pay extra attention to any noticeable stains or marks.
- Rinse with clean water: After wiping down the baseboards and trim, rinse the cloth or sponge with clean water and wring it out. Use the damp cloth or sponge to wipe away any remaining cleaning solution residue from the baseboards and trim.
- Dry with a dry cloth: Finally, use a dry cloth to wipe away any excess moisture from the baseboards and trim. This will prevent water spots or streaks from forming.
Cleaning the baseboards and trim not only enhances the overall aesthetic appeal of your walls but also ensures that paint adheres smoothly to these surfaces. It’s an important step that should not be overlooked.
Once the baseboards and trim are clean and dry, you’re ready to move on to the next step—removing any dust residue from the walls.
Read more: How To Clean Ceiling Before Painting
Remove any dust residue
After sanding the walls and cleaning the baseboards and trim, it’s important to remove any dust residue that may have settled on the walls. Even if you’ve taken precautions to minimize dust during the preparation process, there can still be fine particles left behind. Here’s how to remove dust residue effectively:
- Prepare a clean, dry cloth or a microfiber cloth: Ensure that the cloth you use is clean and free of any debris or lint that could potentially scratch the walls.
- Gently wipe the walls: Starting from the top and working your way down, gently wipe the walls with the dry cloth. Use light, sweeping motions to collect any remaining dust particles.
- Pay attention to corners and edges: Dust tends to accumulate in corners and along the edges of walls. Be thorough in these areas, making sure to remove any visible dust or residue.
- Check for any stubborn spots: If you come across any stubborn spots or areas that still have visible dust, use a soft brush or a vacuum cleaner with a brush attachment to gently loosen and remove the dust.
By removing any dust residue, you create a clean surface for the paint to adhere to, resulting in a smoother and more professional finish. Taking this extra step will also help prevent dust particles from getting trapped in the fresh paint.
Once you’ve thoroughly removed the dust residue from the walls, you can move on to the next steps of the painting process, such as filling in any holes or gaps and applying a primer if necessary.
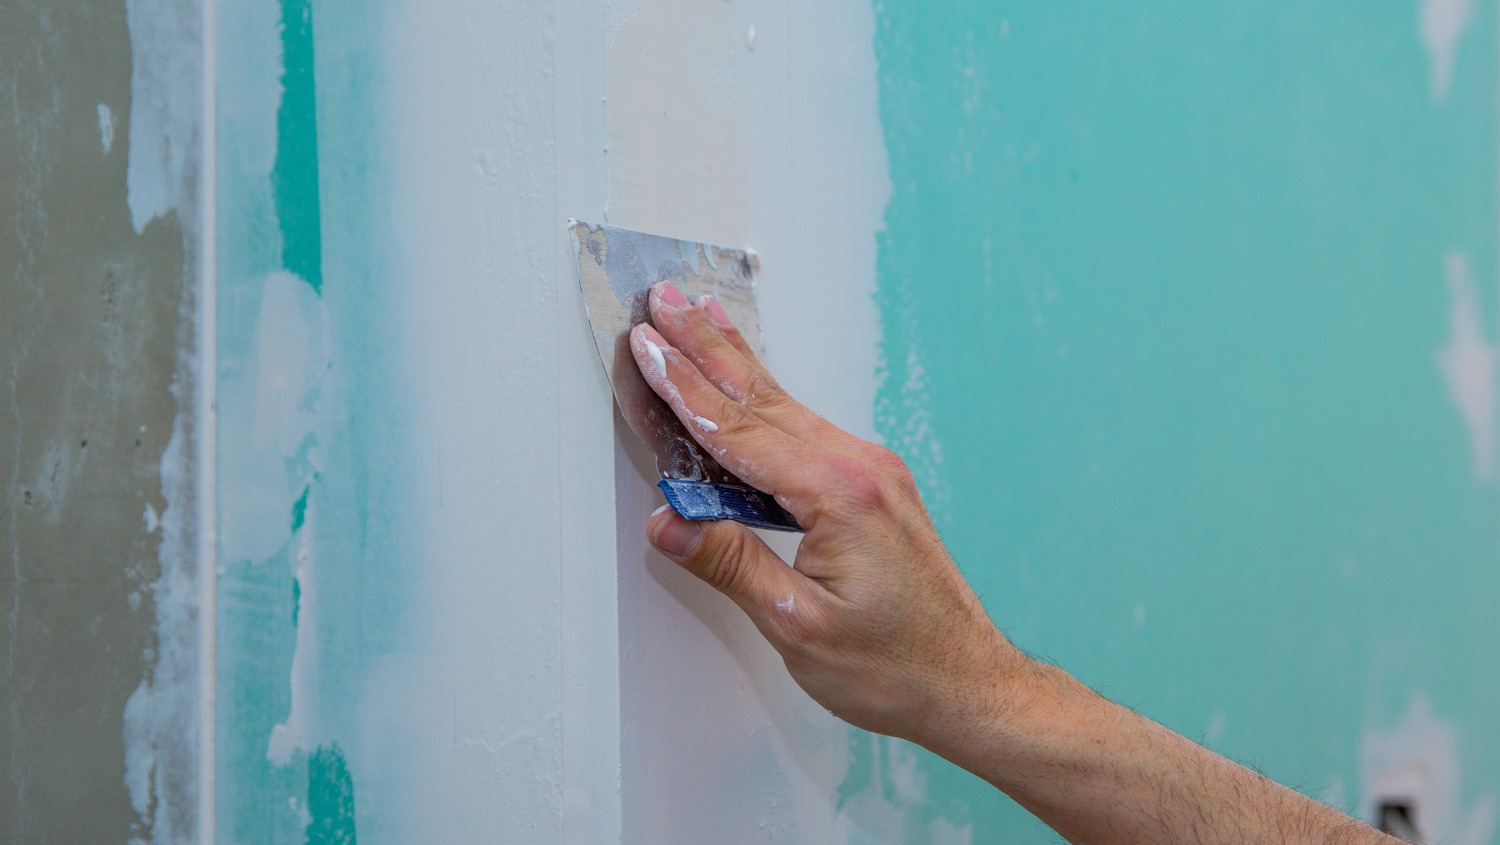
Fill in any holes and gaps
Before painting your walls, it’s important to fill in any holes, cracks, or gaps to achieve a smooth and even surface. Here’s how you can effectively fill in these imperfections:
- Gather the necessary materials: You’ll need a putty knife, spackling compound, joint compound (for larger holes or cracks), sandpaper, and a damp cloth for cleaning.
- Clean the area: Ensure that the area you’re going to fill is clean and free of dust or debris. Use a damp cloth to wipe away any dirt or loose particles.
- Apply the spackling compound: For small holes or cracks, scoop a small amount of spackling compound onto the putty knife and apply it to the affected area. Use the putty knife to smooth it out, ensuring that it’s level with the surrounding wall surface.
- Fill larger holes or cracks: For larger holes or cracks, use joint compound. Apply it to the area with the putty knife, filling the hole or crack completely. Smooth out the surface with the putty knife, ensuring that it’s level and flush with the wall.
- Allow the compound to dry: Follow the instructions on the packaging of the spackling compound or joint compound to determine the drying time. It’s important to allow the compound to dry completely before proceeding.
- Sand the patched area: Once the compound is dry, use sandpaper to gently sand down the patched area until it’s smooth and blends seamlessly with the rest of the wall. Wipe away any dust with a damp cloth.
- Inspect the patched area: Take a step back and examine the patched area. If necessary, repeat the filling and sanding process for any spots that require further attention.
By filling in holes, cracks, and gaps, you ensure that the surface of your walls is ready for a flawless paint application. The patched areas will be indistinguishable once the painting is complete, creating a professional and polished look.
Once you’re satisfied with the patched areas and the walls are smooth, you can move on to the next steps, which may include applying a primer.
Apply a primer (optional)
Applying a primer to your walls before painting is an optional but beneficial step. Primer creates a smooth and even surface, enhances the adhesion of the paint, and can help hide any underlying stains or color variations. Here’s how to apply a primer:
- Gather the necessary materials: You’ll need a primer suitable for your wall type, a paint roller, a paint tray, a paintbrush, painter’s tape, and a drop cloth or plastic sheets.
- Prepare the area: Protect the surrounding areas with a drop cloth or plastic sheets. Use painter’s tape to cover any trims, baseboards, or areas you want to keep free of primer.
- Pour the primer into a paint tray: Pour the primer into a paint tray, making sure to fill it to an appropriate level for your paint roller.
- Load the roller with primer: Dip the paint roller into the tray, ensuring that the roller is evenly coated with primer. Roll it back and forth on the tray’s ridges to evenly distribute the primer on the roller.
- Apply the primer to the walls: Start at one corner of the room and work your way across the walls, using smooth and even strokes. Apply the primer in a consistent direction, such as from top to bottom or from left to right.
- Overlap the strokes: To achieve an even coverage, slightly overlap each stroke as you move along the wall. This will help blend the primer and create a uniform base for the paint.
- Allow the primer to dry: Follow the instructions on the primer label to determine the drying time. It’s crucial to allow the primer to dry completely before proceeding with the next steps.
- Inspect the primed walls: Once the primer is dry, inspect the walls to ensure that they have a smooth and uniform appearance. Check for any missed spots or areas that may require a second coat of primer.
Applying a primer can help achieve better paint coverage and longevity, especially when painting over challenging surfaces or making significant color changes. It’s particularly beneficial if you’re using a lighter paint color over a dark or vibrant color.
However, if you’re painting over a similar color or using a premium paint with built-in primer properties, you can opt to skip this step.
Once the primer is dry and you’ve inspected the walls, you’re now ready to move on to the final cleaning and preparation steps before starting the painting process.
Final cleaning and preparation
Before you begin painting, it’s important to perform one last round of cleaning and preparation to ensure the best possible results. Here are the final steps to follow:
- Inspect for dust or debris: Take a close look at the walls and surrounding areas to ensure they are free of any dust or debris. Use a clean cloth or a duster to gently remove any remaining particles.
- Clean the paintbrushes and rollers: If you plan to reuse any paintbrushes or rollers from previous painting sessions, make sure to clean them thoroughly. Rinse them with warm water and mild detergent, then allow them to air dry.
- Protect the surrounding areas: Cover any furniture or items that remain in the room with drop cloths or plastic sheets to shield them from accidental paint splatters or drips.
- Set up the paint supplies: Prepare your paint trays, brush, and roller for the painting process. Make sure you have all the necessary supplies readily available and organized for easy access.
- Double-check your paint color and finish: Verify that you have the correct paint color and finish that you desire. It’s essential to have the right paint for your project to achieve the desired aesthetic result.
- Follow the paint manufacturer’s instructions: Before proceeding with painting, read and follow the instructions provided by the paint manufacturer. This includes any specific guidelines regarding application techniques, drying times, and recommended conditions.
- Ensure good ventilation: Open windows or use fans to ensure proper ventilation in the room during the painting process. This will help in drying the paint and minimize the odor.
By performing these final cleaning and preparation steps, you’re creating an optimal environment for a successful painting project. Ensuring a clean workspace, protecting your belongings, and having the necessary supplies ready will streamline the painting process and help you achieve professional results.
Now, armed with a clean and prepared space, you’re ready to start painting your walls and bring your vision to life!
Conclusion
Cleaning your walls before painting is an essential step that should not be overlooked. It not only ensures a smooth and professional finish but also helps the paint adhere better and last longer. By following the steps outlined in this guide, you can achieve outstanding results and transform your space. Here’s a quick recap of the key points:
- Gather the necessary materials for wall cleaning.
- Inspect the walls for any damage or issues that need to be addressed.
- Remove furniture and artwork to protect them from damage or staining.
- Take precautions to protect surrounding areas with drop cloths and painter’s tape.
- Dust and vacuum the walls to remove loose dirt and debris.
- Address stains and marks using appropriate cleaning solutions.
- Thoroughly scrub the walls with a damp cloth or sponge.
- Repair any damages such as cracks, holes, or peeling paint.
- Rinse the walls with clean water to remove cleaning solution residue.
- Allow the walls to dry completely.
- Sand the walls if necessary to create a smooth surface.
- Clean the baseboards and trim for a polished look.
- Remove any dust residue from the walls.
- Fill in any holes, cracks, or gaps for an even surface.
- Consider applying a primer for better paint adhesion and coverage.
- Perform a final cleaning and preparation before painting.
By following these steps and incorporating your creativity, you can achieve professional results and transform your walls into a beautiful canvas for your personal style. Remember to choose the right cleaning solutions and materials for your specific wall type, and always follow manufacturer instructions for any products you use. Good luck with your painting project, and enjoy your newly refreshed space!
Frequently Asked Questions about How To Clean Walls Before Painting For Professional Results
Was this page helpful?
At Storables.com, we guarantee accurate and reliable information. Our content, validated by Expert Board Contributors, is crafted following stringent Editorial Policies. We're committed to providing you with well-researched, expert-backed insights for all your informational needs.


0 thoughts on “How To Clean Walls Before Painting For Professional Results”