Articles
How To Paint Wooden Fence
Modified: January 5, 2024
Learn the best techniques and tips for painting your wooden fence with our comprehensive articles. Transform your outdoor space with a fresh coat of paint.
(Many of the links in this article redirect to a specific reviewed product. Your purchase of these products through affiliate links helps to generate commission for Storables.com, at no extra cost. Learn more)
Introduction
Welcome to our comprehensive guide on how to paint a wooden fence. A well-maintained wooden fence can not only add charm and character to your property but also provide privacy and security. However, over time, exposure to the elements can cause the paint on your fence to fade, chip, and peel.
Repainting your wooden fence not only restores its appearance but also protects the wood from rot, mold, and other types of damage. Whether you have a new fence that needs its first coat of paint or an existing fence that requires a fresh coat, our step-by-step guide will help you achieve professional-looking results.
In this article, we will discuss the importance of choosing the right paint for your wooden fence, the proper preparation techniques, the priming process, various painting techniques to consider, and the steps to apply the final coat. We will also provide tips on how to maintain your painted fence, ensuring its longevity and visual appeal.
So, let’s dive in and learn how to transform your weathered and worn-out wooden fence into a beautiful and vibrant focal point of your outdoor space!
Key Takeaways:
- Choose weather-resistant paint that complements your home’s exterior and consider the type of wood used in your fence for long-lasting results.
- Properly prepare, prime, and apply the final coat with care to achieve a beautiful and durable finish. Regular maintenance practices will help preserve the beauty and integrity of your painted wooden fence.
Read more: How To Protect A Wooden Fence
Choosing the Right Paint
When it comes to painting a wooden fence, selecting the right paint is crucial for long-lasting results. The ideal paint should not only provide excellent coverage but also offer protection against the elements. Here are a few factors to consider when choosing the right paint for your fence:
1. Weather Resistance: Since your fence is constantly exposed to harsh weather conditions, it’s important to choose a paint that can withstand the elements. Look for paints that are specifically designed for exterior use and provide protection against UV rays, moisture, and temperature changes.
2. Durability: A durable paint will ensure that your fence stays looking fresh for years to come. Opt for paint that is resistant to chipping, cracking, and peeling. Acrylic and oil-based paints are popular choices for outdoor applications due to their durability.
3. Color Options: Consider the color palette of your outdoor space when selecting a paint color. Choose a color that complements your home’s exterior and landscaping. Neutral tones like white, beige, or gray are classic choices, while bolder colors can add a pop of personality to your fence.
4. Type of Wood: Different types of wood may have different paint requirements. For example, pressure-treated or cedar wood may require a specific type of paint or primer. Consult with your local paint store or manufacturer to find the best paint options for the type of wood used in your fence.
5. Eco-Friendliness: If environmental impact is a concern for you, look for paints that are labeled as low or zero VOC (Volatile Organic Compounds). These paints have reduced levels of harmful chemicals, making them better for both the environment and your health.
6. Budget: Finally, consider your budget when selecting the paint. While high-quality paints may be more expensive upfront, they often provide better coverage and durability, resulting in a longer-lasting finish.
By considering these factors and consulting with professionals if needed, you can select the right paint that will not only enhance the appearance of your wooden fence but also protect it from the elements.
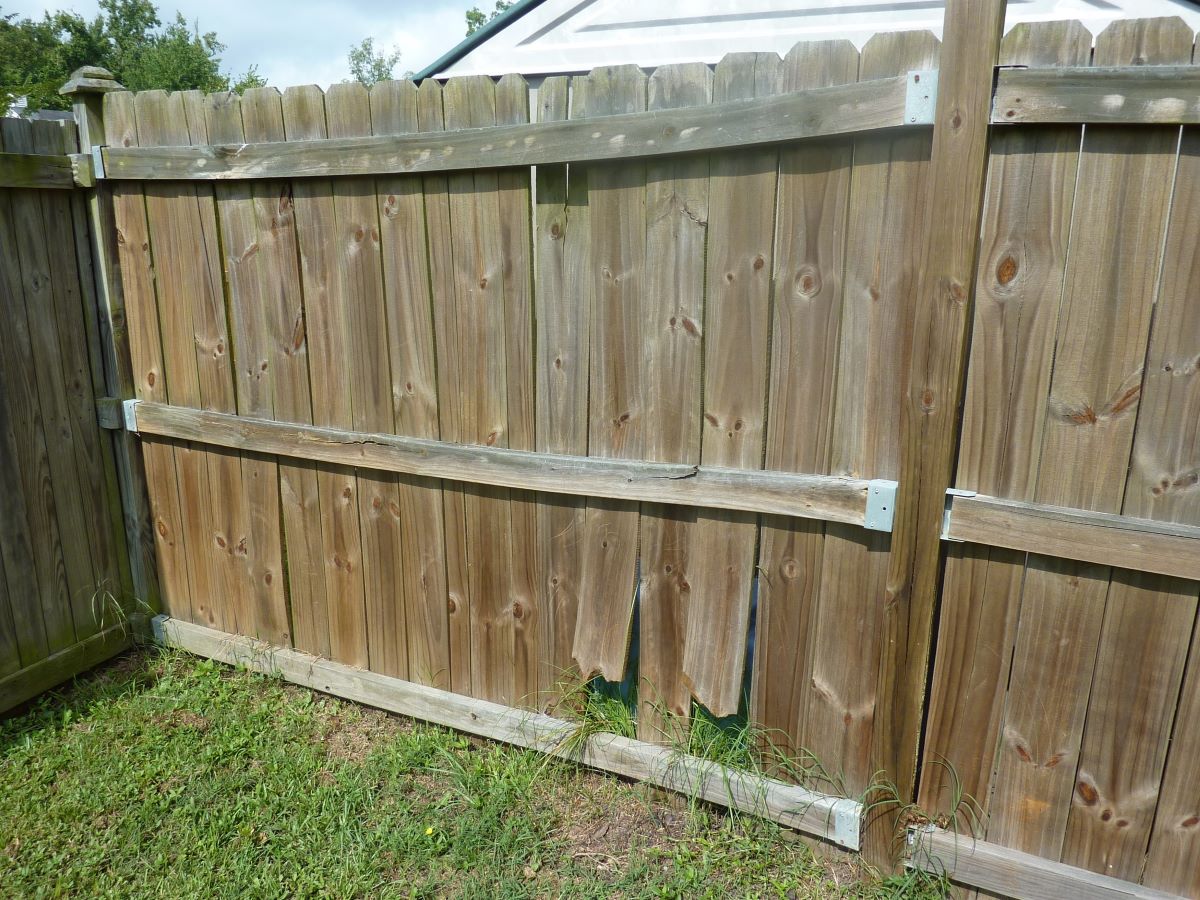
Preparing the Fence
Properly preparing your wooden fence is essential for a successful paint job. Taking the time to prepare the surface will ensure better paint adhesion and a smoother finish. Here are the steps to follow when preparing your fence:
1. Clean the Surface: Begin by thoroughly cleaning the fence to remove dirt, grime, and any loose or flaking paint. Use a pressure washer or a garden hose with a high-pressure nozzle to spray down the entire fence. Scrub stubborn stains or mildew with a mixture of water and mild detergent. Rinse the fence and allow it to dry completely.
2. Sand the Surface: After the fence is dry, inspect it for any rough or splintered areas. Sand these spots using medium-grit sandpaper until smooth. Sanding the entire surface will also help etch the wood, creating a better surface for paint adhesion. Use a sanding block or an electric sander for larger areas.
3. Repair Damaged Areas: Inspect the fence for any cracks, holes, or loose boards. Repair these areas by filling them with a suitable wood filler. Follow the manufacturer’s instructions for application and drying time. Once the wood filler is dry, sand it to ensure a smooth surface.
4. Protect Surrounding Areas: Before you begin painting, protect any nearby plants, surfaces, or furniture from paint overspray or drips. Cover them with plastic sheets or drop cloths to avoid accidental damage.
5. Masking: If there are any areas you want to keep paint-free, such as gate hinges or hardware, use painter’s tape to mask them off. Apply the tape along the edges and press it firmly to create a clean line.
6. Prune Vegetation: If there are any overhanging branches, vines, or bushes near the fence, trim them back to ensure easy access and prevent damage from wet foliage.
By following these preparation steps, you can ensure that your wooden fence is clean, smooth, and ready for the next stage of painting. Proper preparation is key for achieving a professional and long-lasting paint job.
Priming the Wooden Fence
Priming your wooden fence before painting is an important step that helps the paint adhere better to the surface and provides an additional layer of protection. Priming also helps to seal the wood, preventing moisture from seeping in and causing damage. Here are the steps to follow when priming your wooden fence:
1. Choose the Right Primer: Select a primer that is specifically formulated for use on exterior wood surfaces. Look for a primer that offers good adhesion, seals the wood, and provides a smooth base for the paint. Consider using a stain-blocking primer if your fence has any stains or discoloration.
2. Prepare the Primer: Follow the manufacturer’s instructions to prepare the primer for application. Some primers may require stirring, while others may need thinning with a suitable solvent. Make sure to read and follow the instructions carefully.
3. Apply the Primer: Using a paintbrush or a roller, apply an even coat of primer to the wooden fence. Start at the top and work your way down, ensuring full coverage on all surfaces. Pay extra attention to any cracks or crevices in the wood. Work in small sections to prevent the primer from drying before you can apply the paint.
4. Allow Drying Time: The drying time for the primer will vary depending on the product and environmental conditions. Refer to the manufacturer’s instructions for the recommended drying time. It is important to allow the primer to fully dry before moving on to the next step.
5. Sand the Primed Surface: After the primer has dried, gently sand the surface using a fine-grit sandpaper. This will help smooth out any imperfections and provide a better surface for the paint to adhere to. Wipe away any dust with a clean cloth or tack cloth.
6. Inspect for Touch-Ups: Take a close look at the primed surface to check for any missed spots or areas that require touch-ups. Apply additional primer as needed and allow it to dry before proceeding with the painting process.
Priming your wooden fence is an important step that helps ensure a smooth and long-lasting paint job. By following these steps and using the right primer, you can create a solid foundation for the paint application and enhance the overall durability of your painted fence.
Before painting a wooden fence, make sure to clean and sand the surface to remove any dirt, debris, and rough spots. This will help the paint adhere better and result in a smoother finish.
Painting Techniques
When it comes to painting a wooden fence, choosing the right painting technique can make a significant difference in the final result. Here are some popular painting techniques to consider:
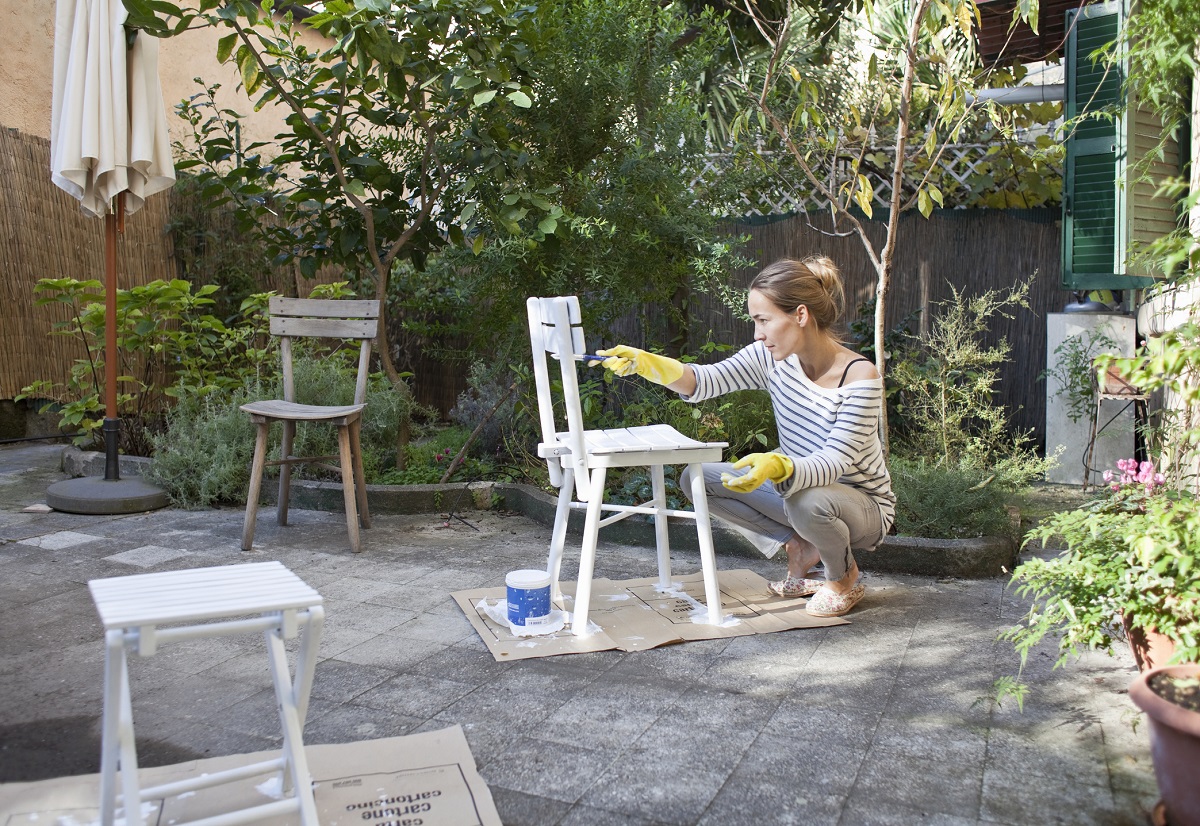
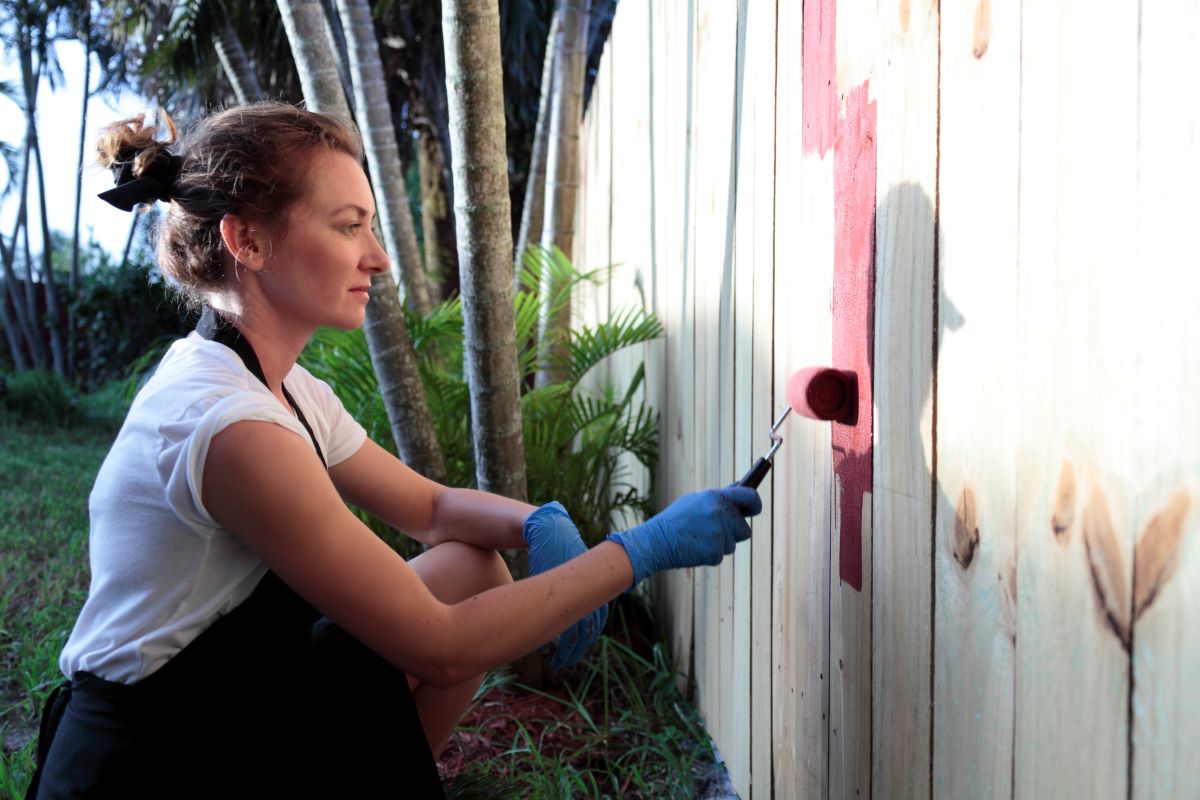
1. Brush Painting: Brush painting is the most traditional and commonly used technique for painting a wooden fence. Use a high-quality paintbrush with synthetic bristles to achieve smooth and even coverage. Start at the top of the fence and work your way down, applying the paint in long, even strokes. Be sure to use a paintbrush with bristles that can reach into the grain of the wood for optimal coverage.
2. Roller Painting: Using a roller is a faster and more efficient way to paint a fence, especially for larger areas. Use a roller with a medium nap for smooth and controlled application. Roll the paint onto the fence in overlapping vertical or horizontal strokes, making sure to cover the entire surface evenly. The roller can be particularly useful for flat or smooth fence panels.
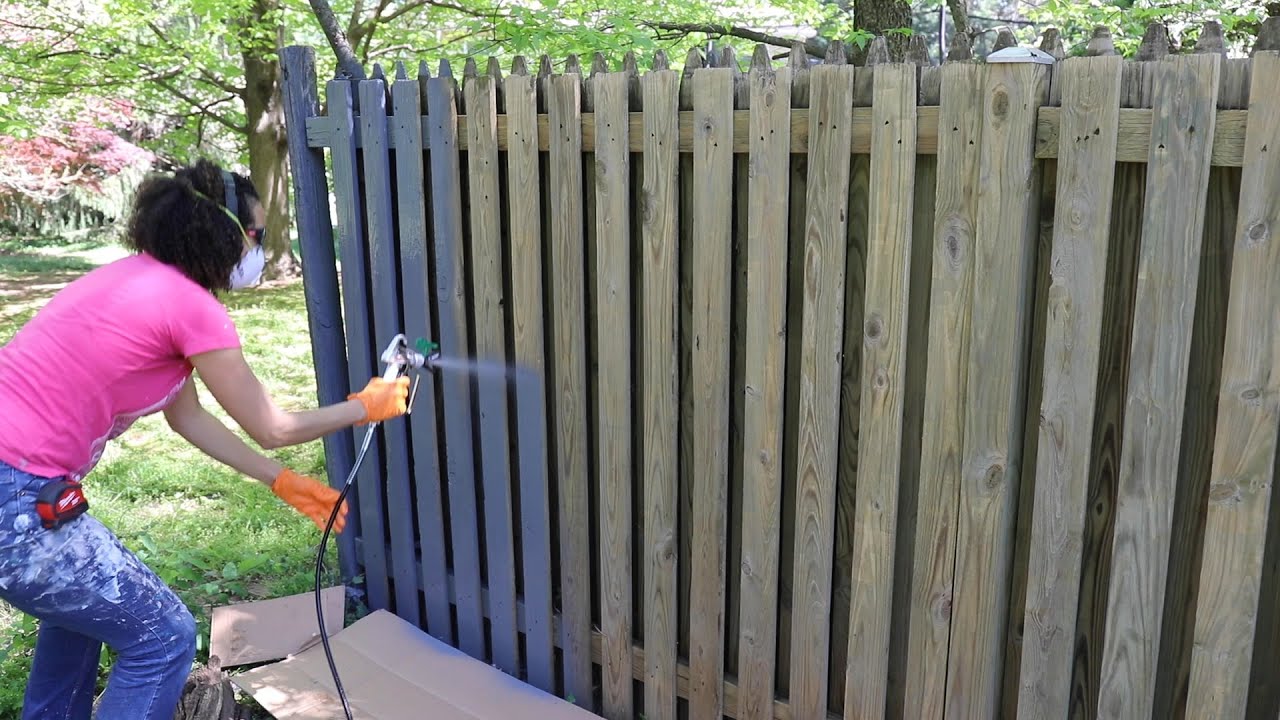
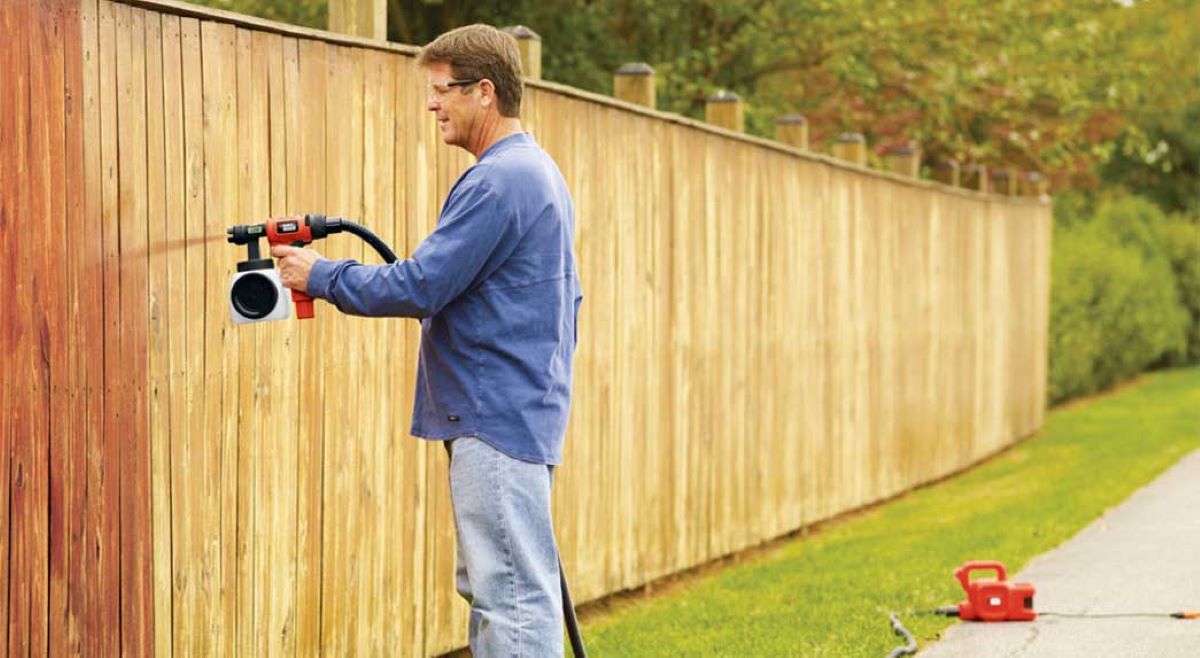
3. Spraying: If you have access to a paint sprayer, it can be an excellent option for achieving a flawless finish on your wooden fence. Sprayers offer quick and even application, especially for fences with intricate designs or hard-to-reach areas. However, it is essential to follow the manufacturer’s instructions and take necessary precautions, such as wearing protective gear and covering nearby surfaces to avoid overspray.
4. Combination Techniques: Depending on the size and design of your fence, you may find that using a combination of techniques works best. For example, you can use a brush for detailed areas, a roller for larger sections, and a sprayer for quick coverage. This combination approach allows you to achieve precision and efficiency while ensuring consistent paint application throughout the fence.
5. Multiple Coats: Regardless of the painting technique you choose, it is generally recommended to apply multiple thin coats rather than a single thick coat. This helps build up a solid and durable paint layer while minimizing the chances of drips or uneven coverage. Allow each coat to dry fully before applying the next one, following the manufacturer’s instructions for drying time.
Remember to work systematically and pay attention to detail while painting your fence. Take breaks between sections to ensure that the paint is applied smoothly and evenly. By employing the right painting techniques, you can achieve a beautiful, long-lasting finish on your wooden fence.
Read more: How To Clean A Wooden Fence
Applying the Final Coat
The final coat of paint is the finishing touch that brings your wooden fence to life. Proper application of the final coat ensures a smooth, even, and durable finish that will enhance the appearance and protection of your fence. Here are the steps to follow when applying the final coat:
1. Stir the Paint: Before applying the final coat, stir the paint thoroughly to ensure consistent color and texture. Use a paint stirrer or a wooden stick to mix the paint, making sure to scrape the bottom of the container to incorporate any settled pigments.
2. Start from the Top: Begin applying the final coat of paint at the top of the fence and work your way down. This prevents any drips or splatters from marring the painted surfaces below.
3. Use a Brush or Roller: Depending on your preference and the nature of your fence, you can use a high-quality paintbrush or a roller to apply the final coat. Use long, even strokes in the direction of the wood grain for the best results. When using a roller, start from the top and work your way down, applying enough pressure to ensure the paint saturates the wood evenly.
4. Overlap for Consistency: When applying the final coat, slightly overlap each stroke or roller pass with the previous one to ensure consistent coverage. This prevents any gaps or thin areas in the paint layer.
5. Work in Sections: Divide your fence into manageable sections and focus on one section at a time. This allows you to maintain a consistent application and address any potential issues promptly. Take breaks if needed, but try to complete each section before moving on to the next.
6. Check for Drips and Smudges: As you apply the final coat, keep an eye out for any drips, smudges, or uneven areas. These can be fixed immediately by smoothing them out with a brush or roller while the paint is still wet.
7. Allow Sufficient Drying Time: Follow the manufacturer’s instructions for the recommended drying time between coats. Avoid touching or leaning against the freshly painted surfaces until the paint has fully cured to prevent any damage.
By following these steps and applying the final coat with care and precision, you can achieve a professional-looking finish on your wooden fence. The final coat will not only enhance the aesthetic appeal of your fence but also provide long-lasting protection against the elements.
Maintaining the Painted Fence
To ensure the longevity and beauty of your painted wooden fence, it’s essential to implement regular maintenance practices. Proper maintenance will help protect the paint and the underlying wood from wear and tear caused by weather conditions and other factors. Here are some tips for maintaining your painted fence:
1. Regular Cleaning: Clean your painted fence regularly to remove dirt, dust, pollen, and other debris that can accumulate over time. Use a mild detergent mixed with water and a soft-bristle brush or sponge to gently scrub the surface. Rinse thoroughly with clean water to remove any soap residue. Regular cleaning will help preserve the paint’s appearance and prevent the accumulation of damaging substances.
2. Inspect for Damage: Periodically inspect your painted fence for any signs of damage or wear. Look for any peeling or chipping paint, cracks, or rotting wood. Address these issues promptly by repainting the affected areas or performing necessary repairs to prevent further damage and maintain the integrity of the fence.
3. Touch-Ups: Keep a small amount of touch-up paint on hand to address any minor blemishes or scratches that may occur over time. Touch up any areas that need attention using a small brush or roller. Ensure that the touch-up paint matches the existing color and blends seamlessly with the surrounding areas.
4. Seal or Stain: Consider applying a protective sealant or stain to your painted fence. This extra layer of protection can help prolong the life of the paint and provide added resistance against UV rays, moisture, and other weather elements. Consult with a professional or your local paint store for suitable sealant or stain options that are compatible with the type of paint used on your fence.
5. Trim Vegetation: Regularly trim any vegetation, such as overhanging branches or vines, that may come into contact with your painted fence. Plants can hold moisture against the fence, promoting mold and mildew growth and causing the paint to peel or deteriorate. By keeping vegetation away from the fence, you can reduce the risk of damage and make maintenance easier.
6. Monitor Moisture Levels: Excessive moisture can cause the paint to crack and peel. Regularly check for any areas of the fence that might be exposed to excessive moisture, such as near sprinklers or downspouts. Ensure that the fence remains adequately sealed and address any moisture-related issues promptly.
By implementing these maintenance practices, you can extend the life of your painted fence and keep it looking fresh and vibrant for years to come. Regular upkeep will protect your investment, prevent damage, and contribute to the overall aesthetic appeal of your outdoor space.
Conclusion
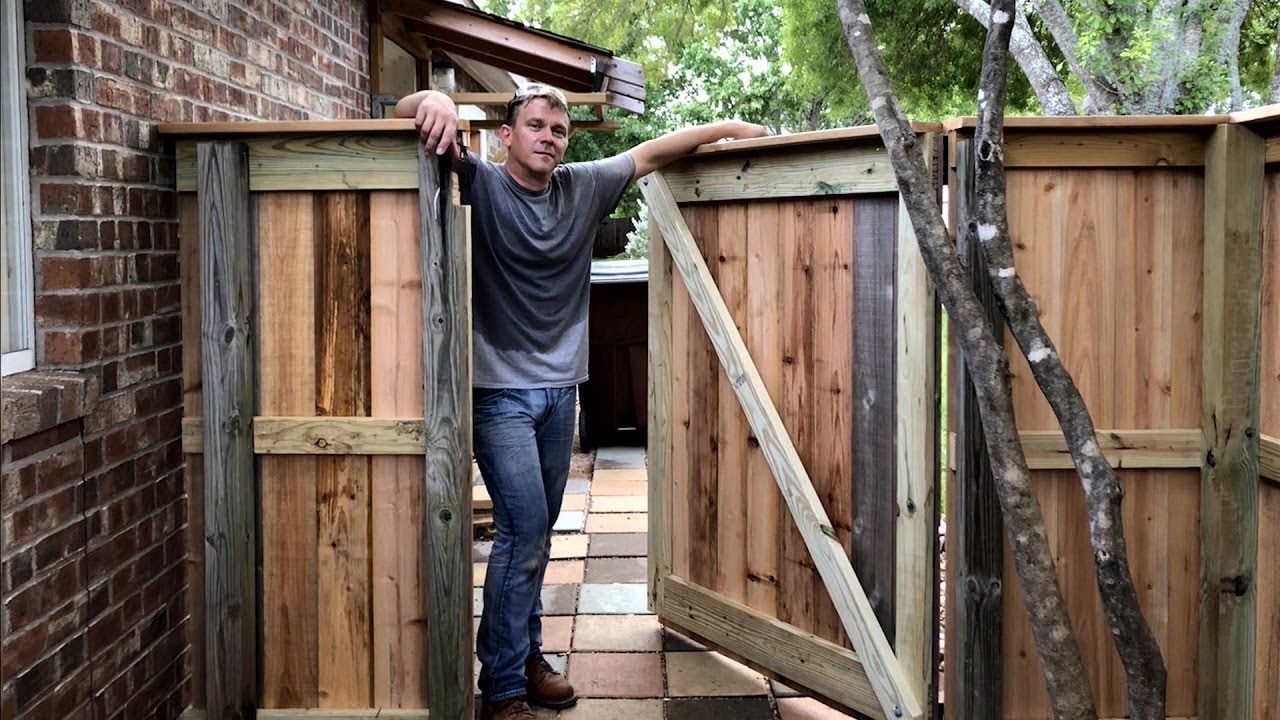
Painting a wooden fence not only enhances its appearance but also provides essential protection against the elements. Through careful selection of the right paint, thorough preparation of the fence, proper priming, employing the right painting techniques, and applying the final coat with precision, you can achieve a beautiful and durable finish that will transform your outdoor space.
Choosing weather-resistant paint that complements your home’s exterior and taking into account the type of wood used in your fence are important considerations. Properly preparing the fence by cleaning, sanding, and repairing any damage ensures a smooth surface for paint adhesion. Priming the fence before painting seals the wood and enhances the longevity of the paint job.
When it comes to painting techniques, brush painting offers control and precision, while roller painting is efficient for larger areas. Spraying can provide a flawless finish for intricate or hard-to-reach areas. Employing a combination of techniques can ensure optimal results.
Finally, applying the final coat with care, allowing it to fully dry, and maintaining the painted fence through regular cleaning, inspections, touch-ups, and protective measures will help preserve its beauty and integrity. Trimming vegetation, monitoring moisture levels, and addressing any issues promptly are important steps in maintaining a painted fence.
By following these steps, your painted wooden fence will not only be an attractive addition to your property but also a well-protected and long-lasting investment. So, roll up your sleeves, grab a paintbrush or roller, and transform your weathered wooden fence into a stunning focal point that will enhance the beauty of your outdoor space for years to come.
Frequently Asked Questions about How To Paint Wooden Fence
Was this page helpful?
At Storables.com, we guarantee accurate and reliable information. Our content, validated by Expert Board Contributors, is crafted following stringent Editorial Policies. We're committed to providing you with well-researched, expert-backed insights for all your informational needs.


0 thoughts on “How To Paint Wooden Fence”