Articles
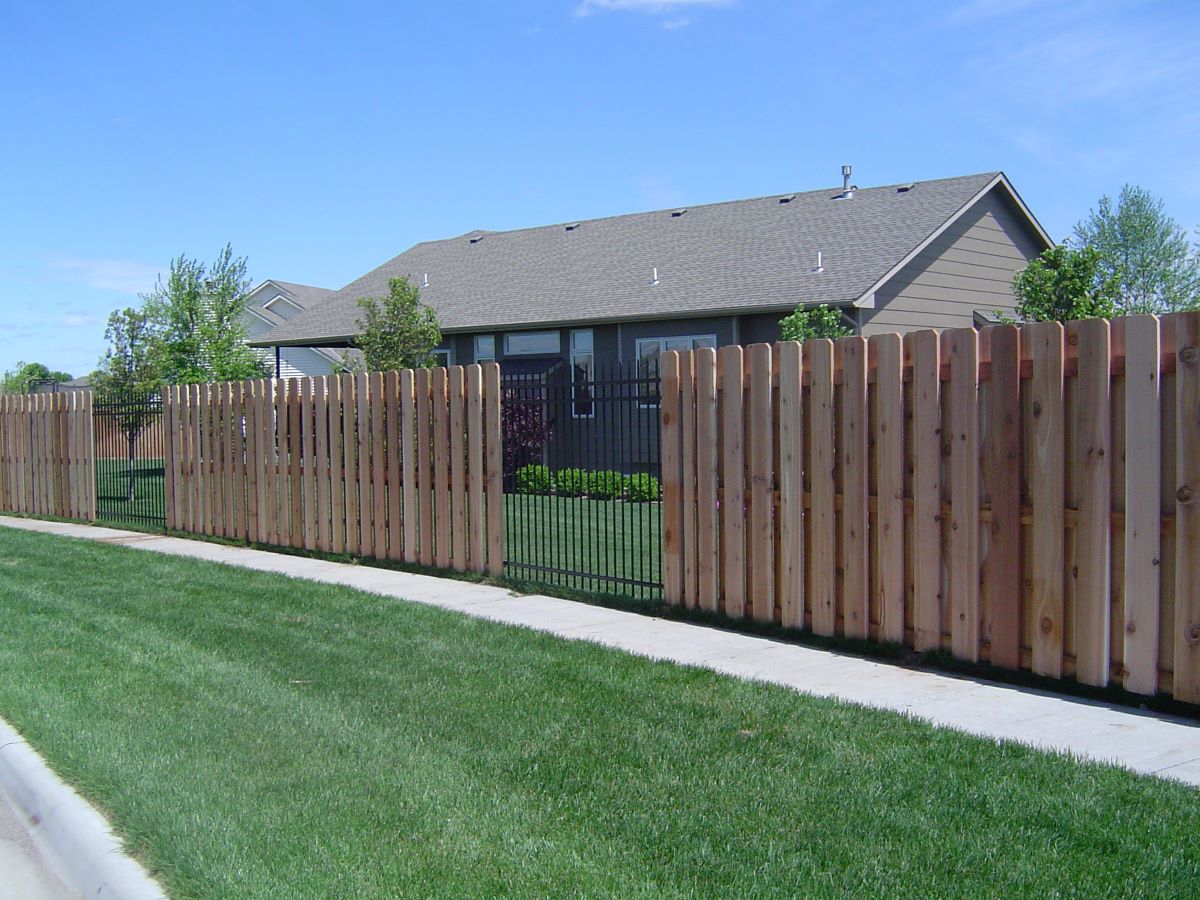
How To Build A Wooden Fence
Modified: February 23, 2024
Learn how to build a beautiful and durable wooden fence with our comprehensive articles. Get step-by-step instructions, tips, and expert advice.
(Many of the links in this article redirect to a specific reviewed product. Your purchase of these products through affiliate links helps to generate commission for Storables.com, at no extra cost. Learn more)
Introduction
Building a wooden fence is a great way to add privacy, security, and aesthetic appeal to your property. Whether you’re looking to keep out wandering animals or create a defined boundary for your outdoor space, a well-constructed wooden fence can serve as both a functional and decorative element. In this guide, we will take you through the step-by-step process of building a wooden fence, from planning and preparation to adding the finishing touches.
Before you begin the construction process, it’s important to consider a few key factors. First, determine the purpose of your fence. Are you looking for added privacy, noise reduction, or to keep pets and children within a certain area? This will help determine the height, design, and materials you’ll need for your fence.
Next, check with your local authorities and homeowners association (if applicable) to see if there are any regulations or permits required for building a fence on your property. It’s important to ensure you comply with any building codes or restrictions before starting your project.
Once you have a clear understanding of your needs and any necessary approvals, you can begin the planning and preparation phase. This includes mapping out the layout of your fence, gathering the materials and tools you’ll need, and taking accurate measurements of your property line.
In the following sections, we’ll walk you through each step of the process, providing detailed instructions and tips to help you build a beautiful and sturdy wooden fence. Let’s get started!
Key Takeaways:
- Proper planning and preparation are essential for building a sturdy wooden fence. From determining the layout to gathering materials and tools, attention to detail sets the foundation for a successful construction process.
- Adding finishing touches, such as protective finishes and decorative elements, enhances the appearance and durability of a wooden fence. Regular maintenance ensures long-term functionality and visual appeal.
Step 1: Planning and Preparation
Before diving into the construction of your wooden fence, it’s important to carefully plan and prepare for the project. This step will set the foundation for a successful and efficient construction process. Here are some key considerations:
- Determine the layout: Start by determining the boundaries where you want to install the fence. Use a measuring tape to accurately mark the corners and create a clear outline of the fence line. Take into account any obstructions such as trees, structures, or uneven terrain that may affect the placement of the fence.
- Consider the design: Think about the design and style of your fence. Do you want a traditional picket fence, a privacy fence with no gaps, or a decorative fence with intricate patterns? Consider the overall aesthetic of your property and choose a design that complements it.
- Choose the right materials: Selecting the right type of wood is crucial for the longevity and durability of your fence. Common wood options include cedar, pine, and redwood. Each has its own advantages, such as resistance to rot or insect damage. Research the pros and cons of each type and choose the one that best suits your needs and budget.
- Determine the height: Decide on the height of your fence based on your desired level of privacy and the purpose of the fence. If you’re looking to keep pets or children inside, a taller fence will be necessary. For aesthetic reasons, you may want to vary the height in certain areas to add visual interest.
- Check local regulations: Before moving forward, check with your local municipality or homeowners association to ensure you comply with any regulations or permits required for building a fence. There may be specific height restrictions, setback requirements, or material limitations you need to be aware of.
Once you have completed the planning phase, it’s time to gather the necessary materials and tools for the construction process. In the next step, we will cover the items you’ll need to successfully build your wooden fence.
Step 2: Gathering Materials and Tools
In order to build a wooden fence, you’ll need to gather the necessary materials and tools. Having everything ready before you begin will make the construction process more efficient. Here’s a list of commonly used materials and tools:
Materials:
- Wooden fence posts
- Wooden fence boards
- Gravel or concrete mix
- Nails or screws
- Gate hardware (if applicable)
- Fence stain or paint (optional)
Tools:
- Tape measure
- Level
- Post hole digger
- Shovel
- String or twine
- Saw (circular or miter)
- Hammer or drill
- Screwdriver or screw gun
- Paintbrush or sprayer (if staining or painting the fence)
- Safety gear (gloves, goggles, etc.)
When it comes to the materials, choose high-quality wood that is resistant to rot and decay. Cedar and redwood are popular choices due to their natural resistance to insect damage and durability. Make sure to purchase enough wood to cover the entire length of your fence, accounting for any waste or spare boards.
The tools listed will help you measure, dig post holes, level, cut wood, and secure the fence boards in place. It’s important to have the proper tools to ensure the construction process goes smoothly and efficiently.
Before you start construction, double-check that you have all the necessary materials and tools. This will save you time and prevent any delays once you begin building your wooden fence.
In the next step, we will guide you on marking and measuring the layout before installing the fence posts.
Read more: How To Reinforce Wooden Fence
Step 3: Marking and Measuring the Layout
Now that you have gathered all the materials and tools, it’s time to start marking and measuring the layout for your wooden fence. This step is crucial to ensure that your fence is installed in the correct position and follows the desired design. Follow these steps to mark and measure the layout:
- Locate property lines: Use a property survey or consult your property’s plot plan to identify and mark the exact location of your property lines. This will ensure that your fence is built within your property boundaries.
- Layout string lines: Attach a length of string or twine to one corner post and stretch it along the entire length of the fence line. Use stakes or flags at regular intervals to hold the string in place and maintain a straight line.
- Measure post spacing: Determine the recommended spacing between fence posts based on the length of your fence panels and the thickness of the boards. As a general rule, plan for a post every 6 to 8 feet.
- Mark post hole locations: Along the string line, mark the locations for each fence post using spray paint or stakes. Make sure the spacing is consistent, and double-check for accuracy.
- Double-check measurements: Before proceeding, double-check all measurements and ensure that the corners are square. Adjust the string lines and post locations if necessary.
Taking the time to properly mark and measure the layout will ensure that your fence is level and aligned correctly. This step is crucial to maintain the structural integrity and visual appeal of your wooden fence.
Once you have marked the layout and confirmed the measurements, you’re ready to move on to the next step: digging the post holes. We will guide you through this process in the following step.
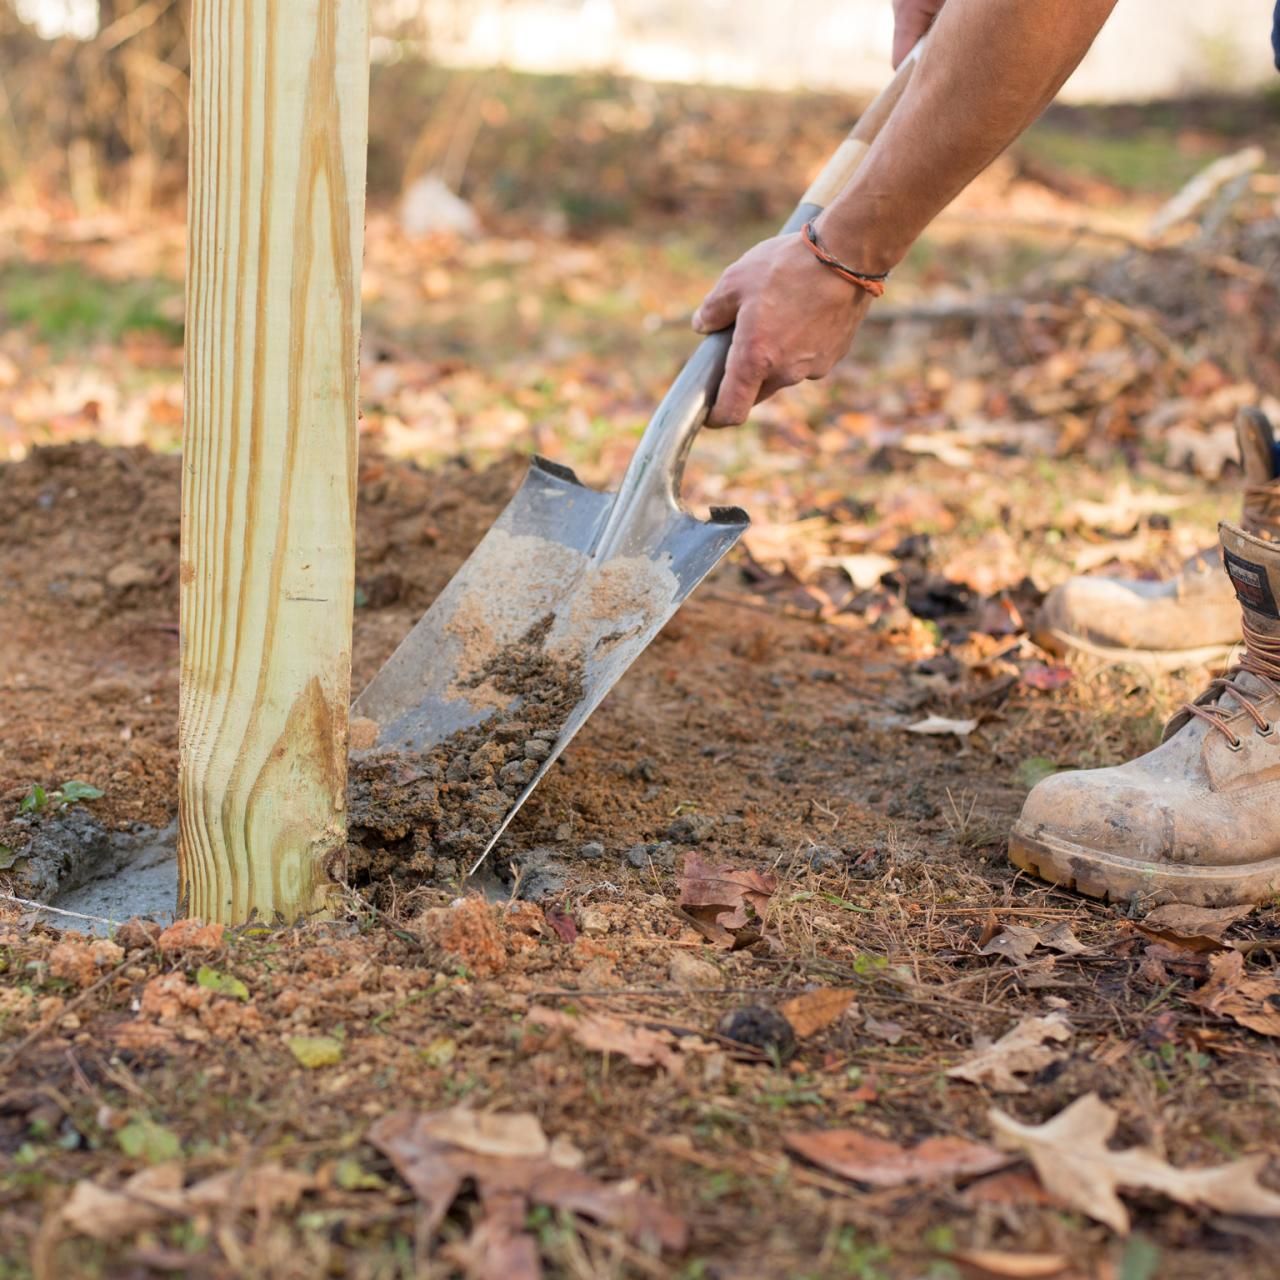
Step 4: Digging Post Holes
With the layout marked and measured, it’s time to dig the post holes for your wooden fence. Digging proper and sturdy post holes is essential to provide a solid foundation for your fence. Follow these steps to dig the post holes:
- Choose the right post hole digger: Select a post hole digger appropriate for the size and depth of the holes you need to dig. A manual post hole digger with shovel-like blades is commonly used for fence installations.
- Start digging: Begin digging at the first marked location for a fence post. Keep in mind the recommended depth for your specific fence type. Typically, you should dig a hole that is one-third to one-half the height of the fence post above ground.
- Remove the soil: Use the post hole digger to lift and remove the soil from the hole. Set it aside for later use if needed.
- Check hole depth and width: Periodically check the depth and width of the hole as you dig. It should match the required specifications to accommodate the fence post and provide stability.
- Repeat the process: Move on to the next marked location along the fence line and repeat the digging process. Take breaks as needed and use caution to avoid injury.
While digging, be mindful of any underground utilities or cables that may be in the area. Contact your local utility companies to mark the locations of any buried lines before you start digging.
As you dig each hole, make sure that they are of consistent depth and width. This will help ensure that your fence is level and properly aligned when installed.
Once all the post holes are dug, you’re ready to move on to the next step: setting the posts. This step will secure the fence posts in place and provide the framework for your wooden fence.
Step 5: Setting the Posts
Now that you have dug the post holes, it’s time to set the posts in place. Properly setting the posts is crucial for the stability and longevity of your wooden fence. Follow these steps to set the posts:
- Prepare the posts: Before setting the posts, ensure they are appropriately sized and have any necessary attachments, such as brackets, already in place.
- Add gravel: Place a few inches of gravel at the bottom of each post hole. This will aid in drainage and prevent excess moisture from accumulating around the base of the posts.
- Position the post: Lower the first fence post into one of the holes, making sure it is plumb and level. Use a level tool to ensure it is perfectly vertical and adjust the post as needed.
- Secure the post: Once the post is in the desired position, fill the hole with concrete mix or firmly pack the soil around it. Ensure the post is held securely in place, taking care not to disturb its alignment.
- Repeat the process: Move on to the next post hole and repeat the steps to set each fence post along the entire fence line. Use the string line or a level to ensure that the tops of the posts are even.
- Allow for proper curing: If using concrete, allow it to cure for the recommended amount of time before continuing with the construction process. This typically takes a few days.
Double-check the alignment and levelness of each post as you go along. Properly setting the posts will ensure that your fence stands strong and remains straight over time.
Once the posts are set and cured, you’re ready to move on to the next step: installing the horizontal rails. These rails will provide additional support and stability to your wooden fence.
When building a wooden fence, make sure to set your posts at least 2 feet deep in the ground to ensure stability and longevity of the fence. Use a level to ensure the posts are straight before securing them in place.
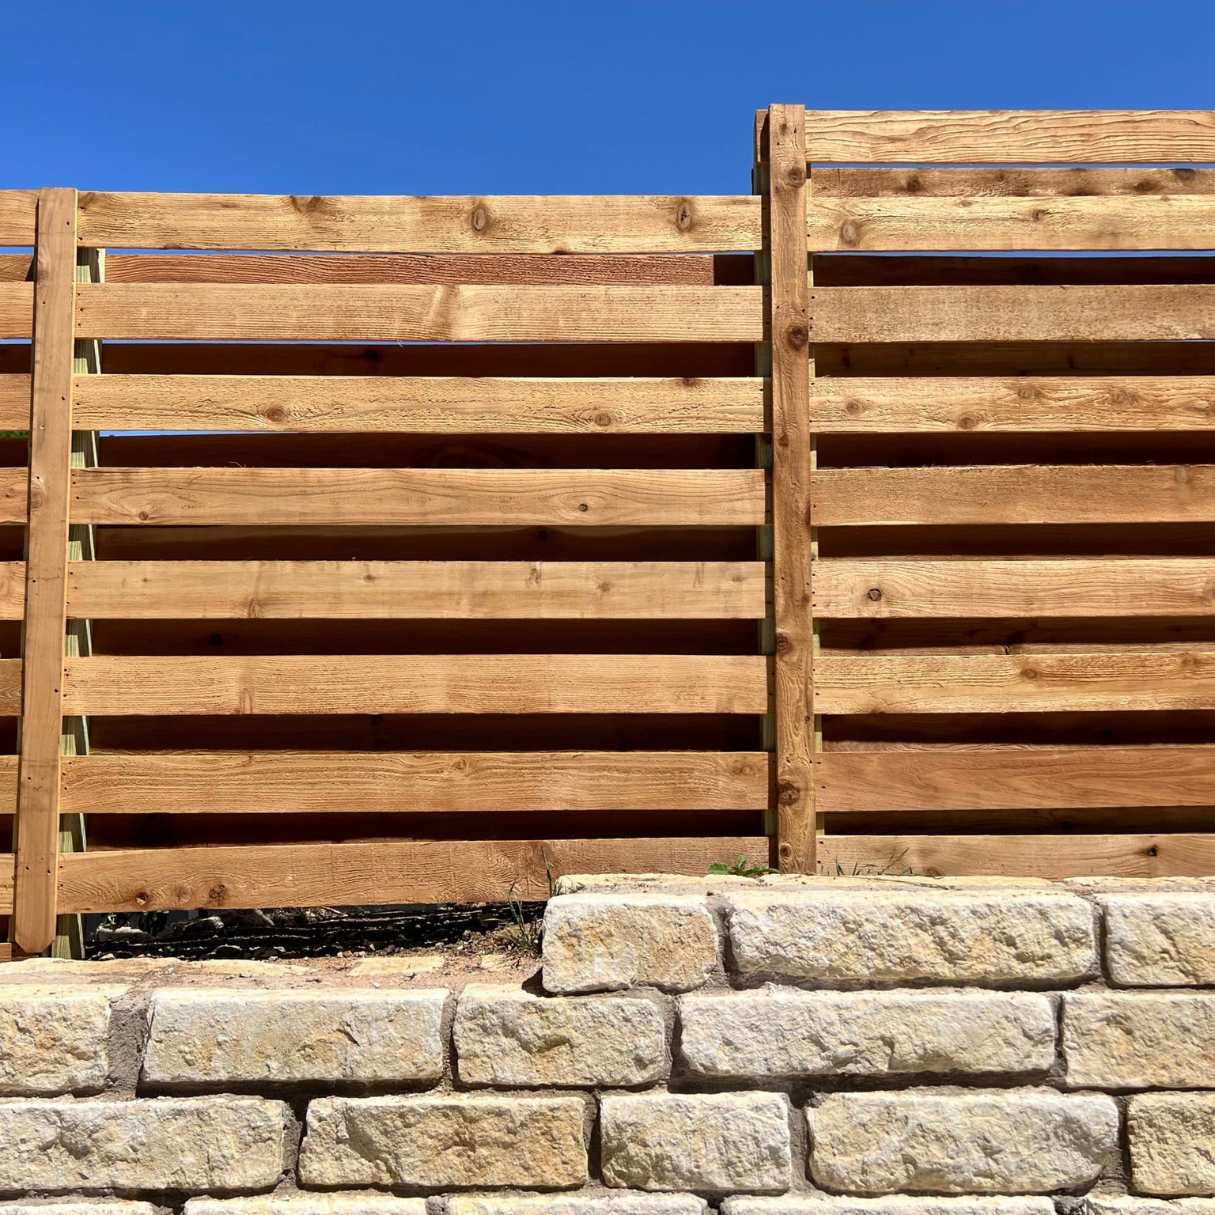
Step 6: Installing the Horizontal Rails
With the fence posts securely in place, it’s time to install the horizontal rails. These rails will provide structural support and help hold the fence boards in position. Follow these steps to install the horizontal rails:
- Measure and cut the rails: Measure the distance between two adjacent fence posts at the desired height for the rails. Cut the rails to the appropriate length using a saw, ensuring they fit snugly between the posts.
- Attach the rails: Place the first rail at the desired height and position it horizontally between two posts. Use a level to ensure it is straight and flush with the tops of the posts. Attach the rail to each post using nails or screws, ensuring a secure connection.
- Repeat for additional rails: Depending on the desired spacing between the rails, repeat the process to install additional horizontal rails along the length of the fence. Use a level to ensure each rail is positioned correctly and secure them to the posts.
It’s important to maintain a consistent height and levelness across all the rails. This will ensure a visually appealing and structurally sound wooden fence.
If you prefer a decorative touch, you can also opt for alternate rail placement. For example, you can install one rail near the top of the fence boards and another near the bottom, creating a visually appealing pattern.
Once the horizontal rails are in place, it’s time to move on to the next step: attaching the vertical fence boards. This step will complete the construction of your wooden fence and provide the desired privacy and security.
Read more: How To Clean A Wooden Fence
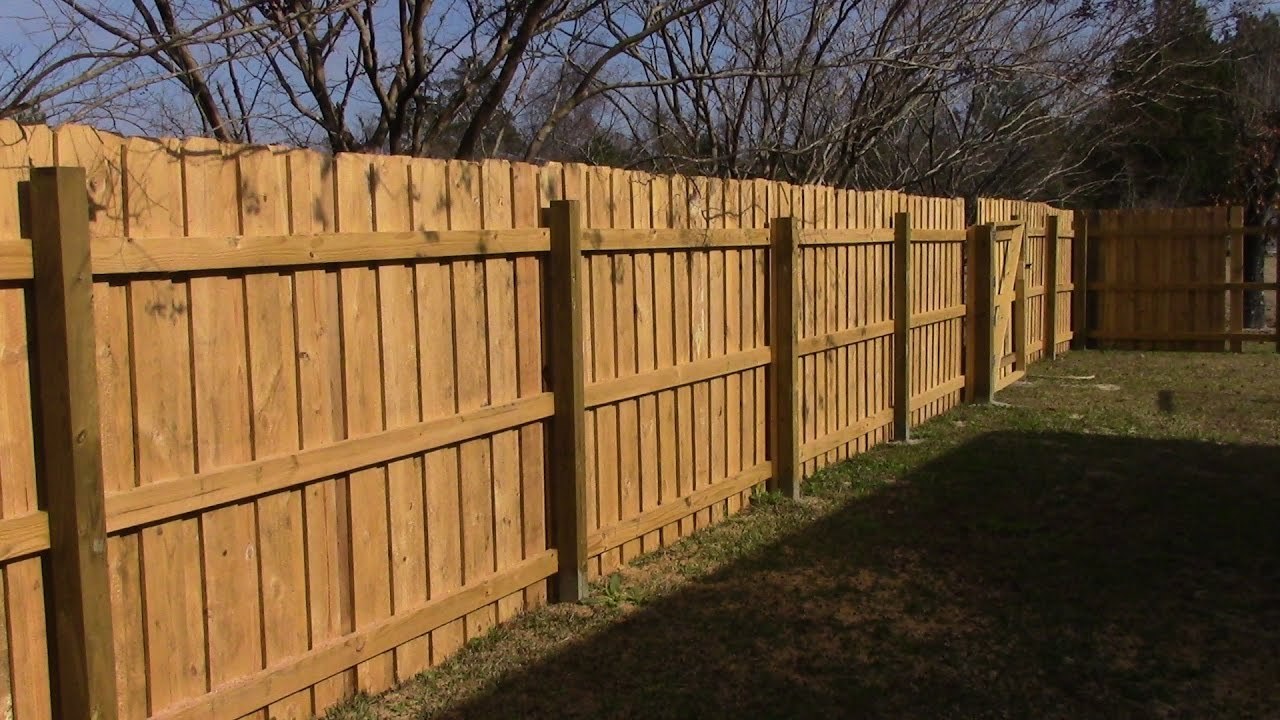
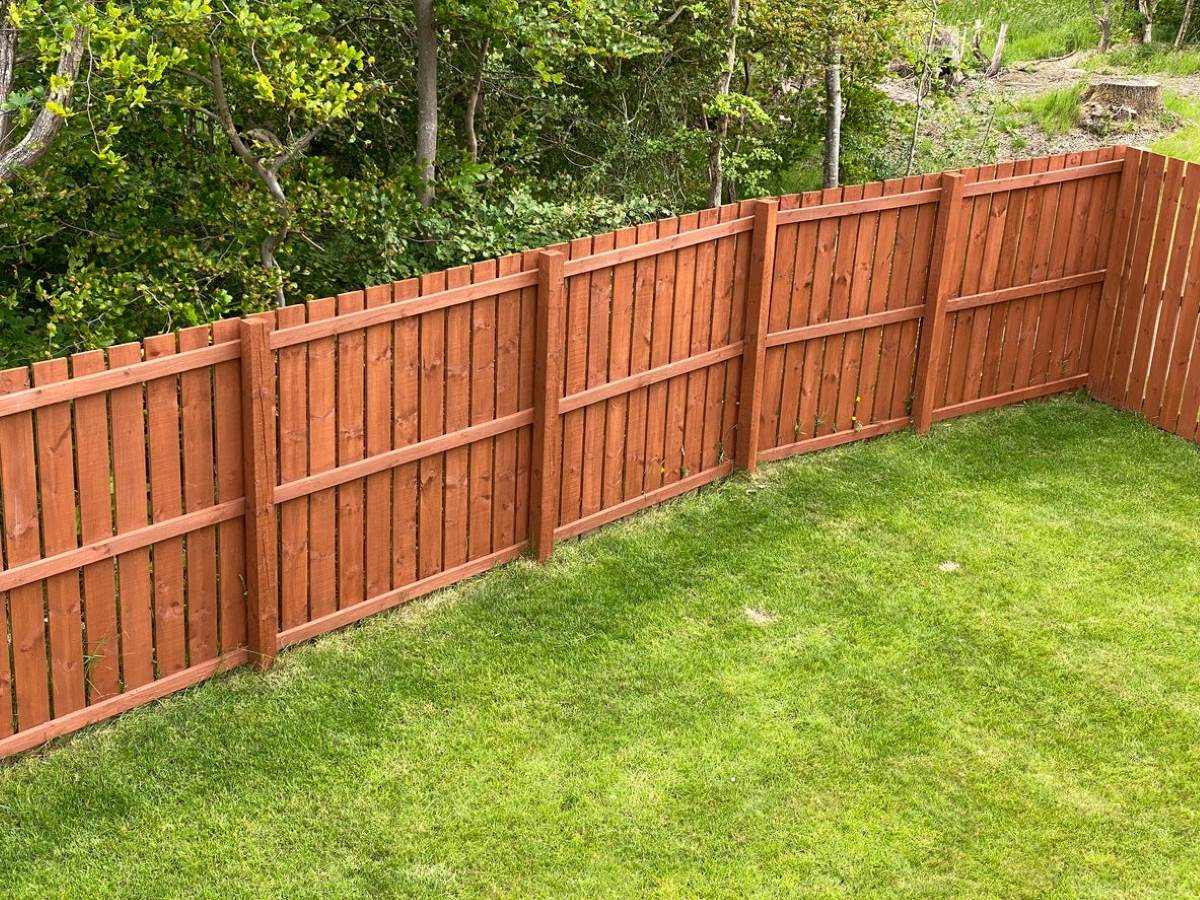
Step 7: Attaching the Vertical Fence Boards
Now that the horizontal rails are installed, it’s time to attach the vertical fence boards. These boards will create the main structure of your wooden fence and provide the desired privacy and aesthetic appeal. Follow these steps to attach the vertical fence boards:
- Measure and cut the boards: Measure the height between the top and bottom rails to determine the length of the fence boards. Cut the boards to the appropriate length using a saw.
- Position the first board: Start at one end of the fence and position the first board vertically against the first two posts. Ensure the bottom of the board is flush with the bottom rail and adjust the position as needed. Use a level to ensure the board is straight.
- Secure the board: Attach the first board to the rails and posts using nails or screws. Place fasteners near the top and bottom of the board, ensuring a secure connection. Repeat this process for each fence board along the length of the fence.
- Check for spacing: As you attach each board, ensure there is an even spacing between them. This may depend on your desired level of privacy or the specific style of fence you’re building.
- Trim or adjust boards if necessary: If any of the fence boards are longer than the required length, trim them to fit. In some cases, you may need to adjust the height of the boards to accommodate uneven terrain.
- Continue attaching boards: Move along the fence line, attaching each vertical fence board until the entire fence is covered.
Take your time to ensure that each fence board is properly aligned and securely fastened. This will provide a neat and cohesive look to your wooden fence. Additionally, periodically check that the boards are plumb and level as you progress.
Once all the vertical fence boards are securely attached, you’re ready to move on to the next step: adding finishing touches to complete the construction of your wooden fence.
Step 8: Adding Finishing Touches
Congratulations, you’re almost done building your wooden fence! In this final step, you’ll add some finishing touches to enhance the appearance and longevity of your fence. Here are some key considerations:
- Trim the tops of the fence: To give your fence a polished look, you can trim the tops of the fence boards in various styles, such as flat, arched, or pointed. Use a saw or a router to achieve the desired design.
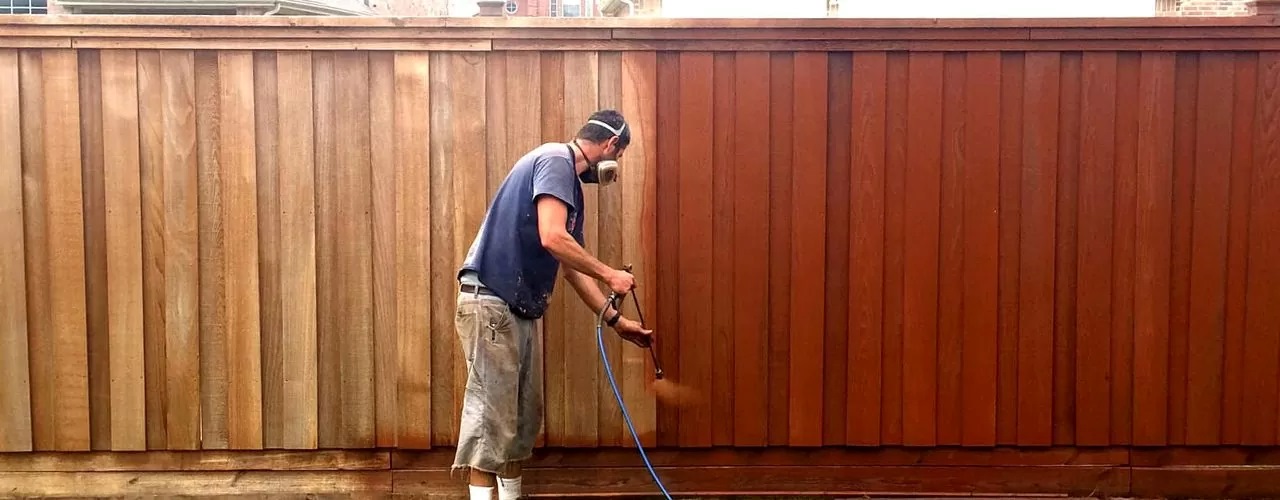
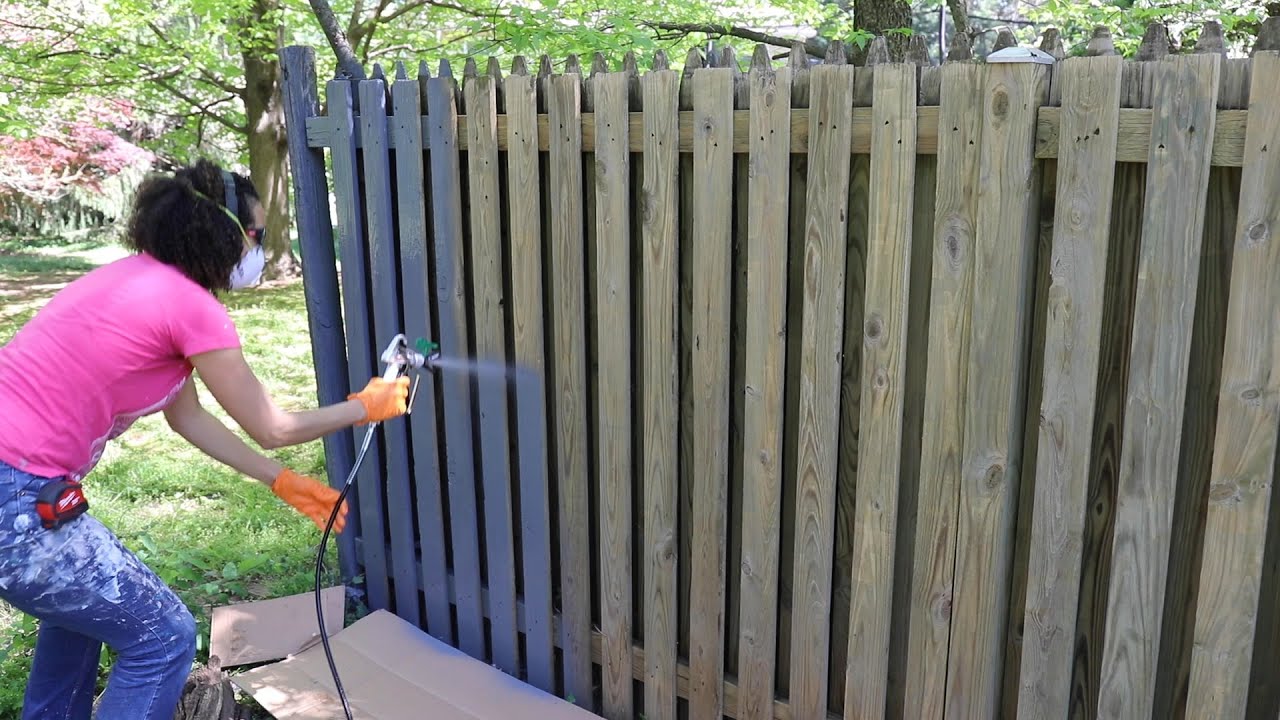
- Apply a protective finish: Consider applying a protective finish, such as a water-resistant stain or paint, to protect the wood from moisture, UV rays, and other environmental factors. Choose a finish that complements the style and color scheme of your property.
- Add decorative elements: If desired, you can incorporate decorative elements into your fence design. This can include lattice panels, decorative caps for the posts, or trellises for climbing plants. These additions can add visual interest and a personal touch to your fence.
- Maintain and repair: Regularly inspect your wooden fence for any signs of damage or wear. Replace any warped or rotten boards, tighten loose screws or nails, and perform any necessary maintenance to keep your fence in good condition.
- Consider gates: If you need access to your enclosed area, consider installing one or more gates in your fence. Choose gate hardware that matches the style and durability of your fence, and ensure proper installation for smooth operation.
Adding these finishing touches will not only enhance the overall appearance of your wooden fence but also contribute to its long-term durability and functionality. Remember to regularly maintain and care for your fence to ensure it looks its best for years to come.
Congratulations on successfully building your wooden fence! You have now created a beautiful and functional addition to your property that will provide privacy, security, and visual appeal. Enjoy the benefits of your hard work and take pride in a job well done.
Thank you for following this step-by-step guide. Happy fencing!
Conclusion
Building a wooden fence is a rewarding project that adds privacy, security, and beauty to your property. By following the steps outlined in this guide, you can confidently construct a sturdy and impressive fence. Here’s a summary of what we covered:
We began by emphasizing the importance of proper planning and preparation. Understanding the purpose of your fence, checking local regulations, and choosing the right materials are crucial initial steps. Gathering the necessary materials and tools also ensures a smooth construction process.
Marking and measuring the layout accurately sets the foundation for a well-aligned fence. Digging post holes of the correct depth and width provides stability to the fence posts.
Moving on to setting the posts, taking care to ensure they are plumb and secure is vital for a sturdy fence. Installing the horizontal rails and attaching the vertical fence boards adds structure and visual appeal to the fence.
By adding finishing touches, such as trimming the tops of the fence boards and applying a protective finish, you can enhance both the appearance and longevity of your wooden fence. Regular maintenance, including repairs and upkeep, will ensure your fence remains in great condition for years to come.
In conclusion, building a wooden fence is a rewarding project that requires careful planning, precise execution, and attention to detail. The end result is a beautiful and functional fence that enhances the aesthetic appeal of your property and meets your specific needs.
We hope this step-by-step guide has provided you with the knowledge and confidence to embark on your wooden fence-building journey. Remember to prioritize safety and take your time throughout the construction process. Enjoy the satisfaction of creating a lasting structure that adds value and character to your outdoor space.
Frequently Asked Questions about How To Build A Wooden Fence
Was this page helpful?
At Storables.com, we guarantee accurate and reliable information. Our content, validated by Expert Board Contributors, is crafted following stringent Editorial Policies. We're committed to providing you with well-researched, expert-backed insights for all your informational needs.


0 thoughts on “How To Build A Wooden Fence”