Articles
How To Paint Wooden Outdoor Furniture
Modified: September 2, 2024
Learn how to paint wooden outdoor furniture and give it a fresh new look. Transform your FURNITURE with our step-by-step guide and expert tips.
(Many of the links in this article redirect to a specific reviewed product. Your purchase of these products through affiliate links helps to generate commission for Storables.com, at no extra cost. Learn more)
Introduction
Welcome to our comprehensive guide on how to paint wooden outdoor furniture. If you have outdoor furniture that is looking worn, faded, or in need of a style update, painting can be a cost-effective and satisfying solution. Not only does painting wooden furniture give it a fresh, new look, but it also helps to protect the wood from the elements, extending its lifespan.
Before you dive into the painting process, it’s important to have a clear understanding of the steps involved and the tools and materials you will need. This article will walk you through the process step by step, ensuring that your furniture is prepped and painted to perfection.
Whether you have a wooden patio set, Adirondack chairs, or a picnic table, the principles behind painting outdoor furniture remain the same. The key is selecting the right paint, preparing the surface properly, and applying the paint correctly.
By following our expert advice and tips, you can transform your weather-worn wooden furniture into a stunning focal point for your outdoor space. Let’s get started!
Key Takeaways:
- Transform weathered outdoor furniture into a vibrant focal point by selecting the right paint, prepping the surface, and applying thin, even coats for a professional, long-lasting finish.
- Enjoy the process of painting wooden outdoor furniture, experiment with colors and finishes, and maintain the beauty and durability with proper care and protective covers.
Read more: How To Protect Outdoor Wooden Furniture
Selecting the Right Paint and Tools
Choosing the right paint for your outdoor wooden furniture is crucial for achieving a long-lasting and attractive finish. Not all paints are suitable for outdoor use, as they need to withstand exposure to sunlight, rain, and other weather conditions. Here are some tips to help you select the right paint:
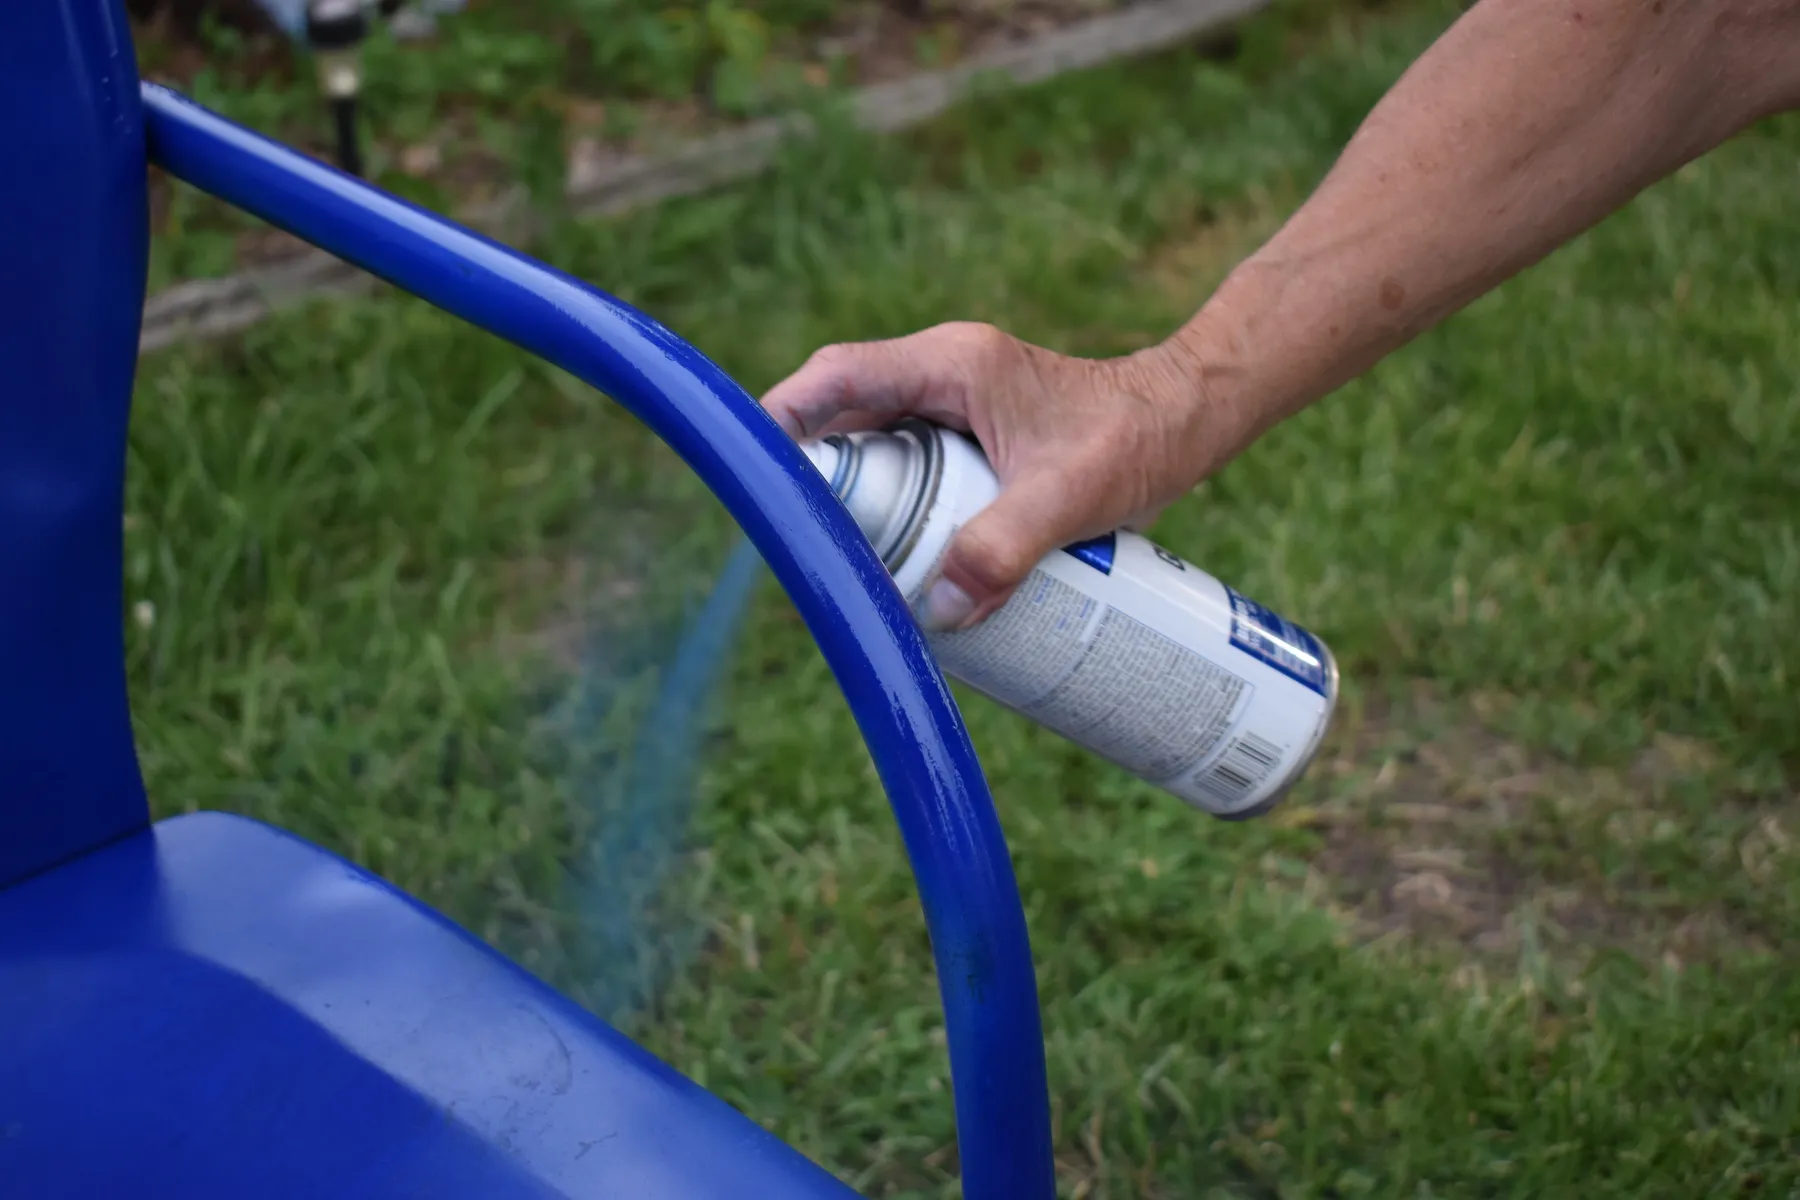
- Type of Paint: Opt for a high-quality exterior paint specifically formulated for outdoor use. Look for paints that are labeled as “exterior” or “outdoor” and can withstand UV rays and moisture.
- Finish: Consider the finish you prefer, such as matte, satin, or gloss. Keep in mind that glossy finishes tend to show imperfections more prominently, while matte finishes offer a more forgiving look.
- Color: Choose a color that complements your outdoor space and personal style. Neutral tones like white, gray, and beige are popular choices, but don’t be afraid to go bold with vibrant hues.
Alongside the paint, you’ll need the right tools to ensure a smooth and professional finish. Here are the essential tools for painting wooden outdoor furniture:
- Paintbrushes: Invest in high-quality synthetic bristle brushes for a smoother application. Choose brushes of different sizes to ensure you can reach all the nooks and crannies of your furniture.
- Paint Roller: A paint roller is useful for larger, flat surfaces of your furniture, providing an even and efficient coat of paint.
- Sandpaper or Sander: Before painting, you’ll need to sand the wooden surface to remove any existing finish or rough patches. Use a medium-grit sandpaper or a sander for larger furniture pieces.
- Primer: A high-quality primer specifically designed for outdoor use is essential. It helps the paint adhere better to the wood and provides an extra layer of protection. Choose a primer that matches the type of paint you’ve selected.
- Drop Cloth or Newspaper: To protect your working area from paint splatters, lay down a drop cloth or old newspapers.
- Masking Tape: If there are areas of your furniture that you don’t want to paint, use masking tape to cover them up.
- Cleaner: Before painting, clean the furniture thoroughly with a mild soap and water solution or a dedicated wood cleaner to remove dirt, grime, and mold.
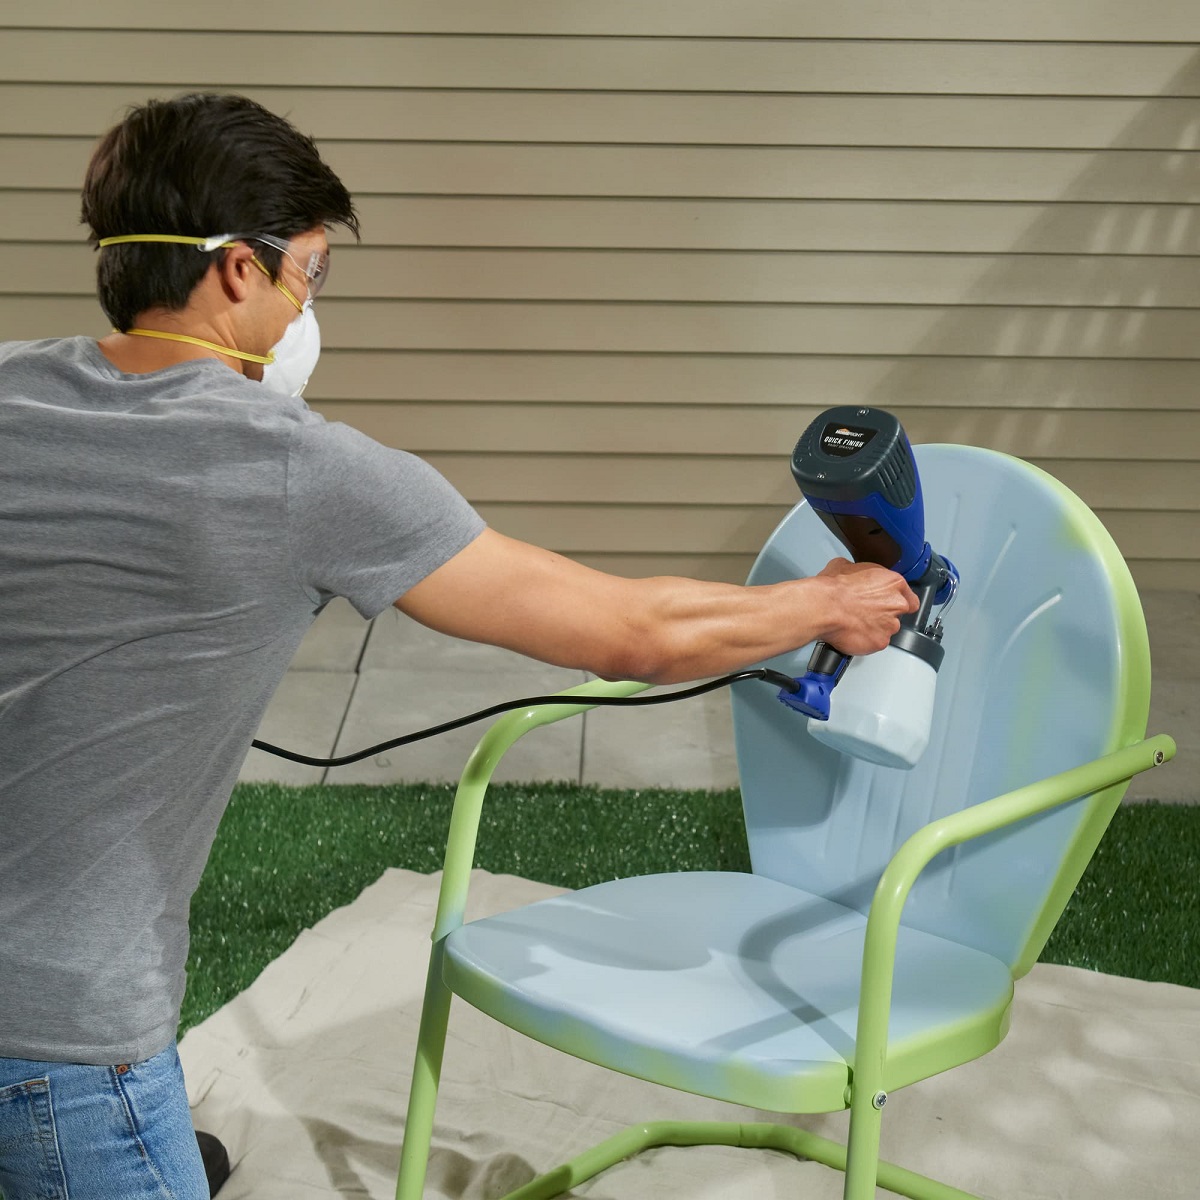
- Protective Gear: Wear protective goggles and gloves to keep yourself safe during the painting process.
Now that you have an understanding of the paint and tools needed, let’s move on to preparing the wooden surface for painting.
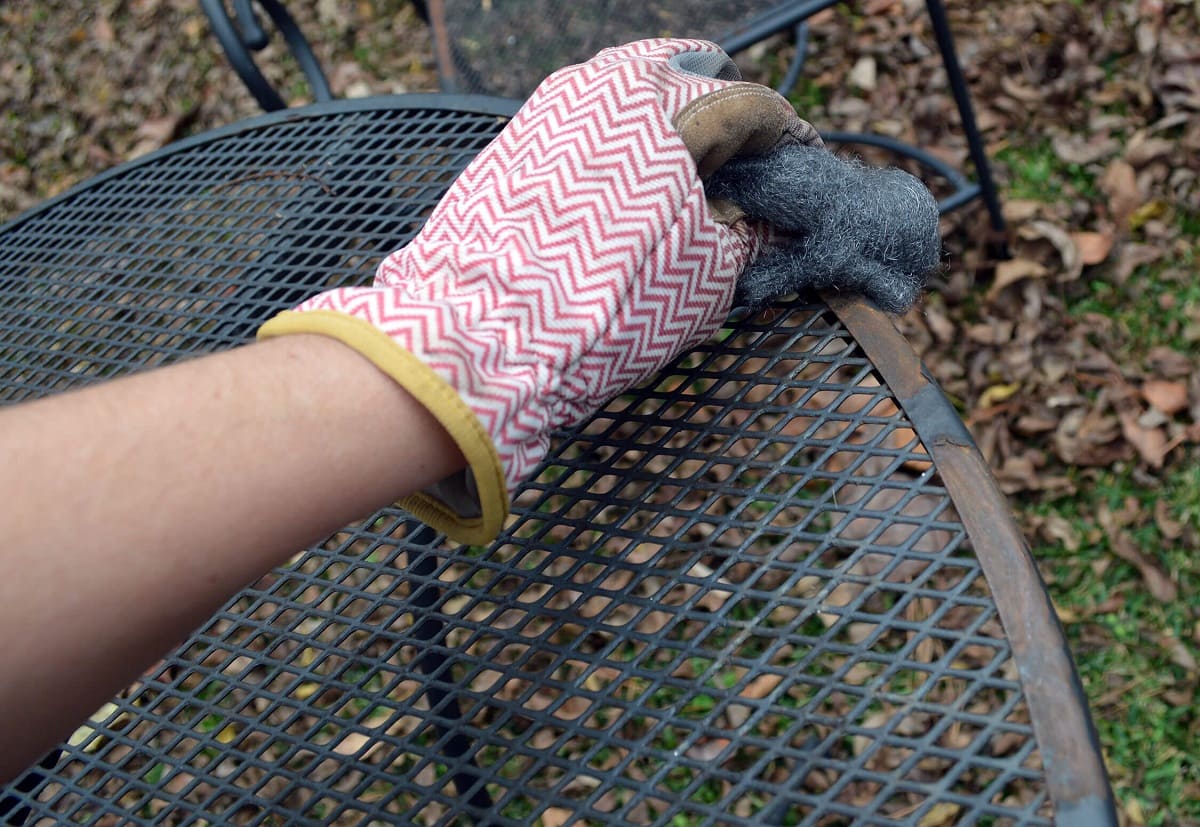
Preparing the Surface for Painting
Properly preparing the surface of your wooden outdoor furniture is crucial for achieving a smooth and long-lasting paint finish. Follow these steps to ensure your furniture is ready for painting:
- Clean the Furniture: Start by removing any dirt, debris, and existing finish from the surface of the furniture. Use a mild soap and water solution or a dedicated wood cleaner and a scrub brush or sponge to clean the wood thoroughly. Rinse off any residue with clean water and allow the furniture to dry completely.
- Sand the Surface: Next, sand the wooden surface to create a smooth and even base for the paint. Use medium-grit sandpaper (around 120-150 grit) and sand in the direction of the wood grain. Sand any rough spots, scratches, or flaking paint until the surface feels smooth to the touch. Make sure to sand all the areas, including corners and crevices.
- Remove Dust: After sanding, wipe away any dust or debris from the surface using a clean, damp cloth or a tack cloth. Ensure that the surface is completely clean before moving on to the next step.
- Repair Damaged Areas: Inspect the furniture for any damaged areas, such as cracks, chips, or loose joints. Use wood filler or epoxy to repair these imperfections. Follow the product instructions for application and drying time. After the filler has dried, sand it lightly to blend it with the surrounding wood.
- Remove Hardware: If your furniture has any hardware or removable parts, such as knobs or handles, unscrew or remove them before painting. This will allow for easier and more even painting.
- Mask Off Areas: If there are any parts of the furniture that you don’t want to paint, such as metal accents or upholstery, use masking tape to cover them and protect them from paint splatters.
By following these prepping steps, you’ll ensure a clean, smooth, and well-prepared surface for painting. Now, it’s time to apply the primer to your furniture.
Applying the Primer
Applying a primer to your wooden outdoor furniture is essential for several reasons. It helps the paint adhere better to the surface, reduces the number of paint coats needed, and provides an extra layer of protection for the wood. Follow these steps to apply the primer:
- Read the Instructions: Before applying the primer, carefully read the instructions on the can. Different primers may have specific application instructions and drying times.
- Stir the Primer: Use a stir stick to thoroughly mix the primer. This ensures that any settled solids are evenly distributed throughout the primer.
- Apply the Primer: Use a paintbrush or a paint roller to apply a thin and even coat of primer to the surface of your furniture. Start with the top and work your way down, making sure to cover all the nooks and crannies. For intricate details, use a smaller brush to ensure thorough coverage.
- Smooth out Drips: While the primer is still wet, check for any drips or excess primer and smooth them out with the brush. This will help prevent drips from drying and affecting the final paint finish.
- Allow Drying Time: Follow the recommended drying time indicated on the primer can. Typically, it takes a few hours for the primer to dry, but refer to the specific product instructions for accurate drying times.
- Sand the Primer: Once the primer has dried, lightly sand the surface using a fine-grit sandpaper (around 220 grit). This is known as “scuff sanding” and helps create a smooth surface for the paint to adhere to.
- Remove Dust: After sanding, wipe away any dust or debris using a clean, damp cloth or a tack cloth. Ensure that the surface is clean and free from any particles before moving on to the next step.
By applying a primer to your wooden outdoor furniture, you’re providing a solid foundation for the paint and ensuring a professional and long-lasting finish. Next, we’ll move on to the exciting part: painting your furniture!
Before painting wooden outdoor furniture, make sure to clean and sand the surface to remove any dirt, old paint, or rough spots. This will help the paint adhere better and result in a smoother finish.
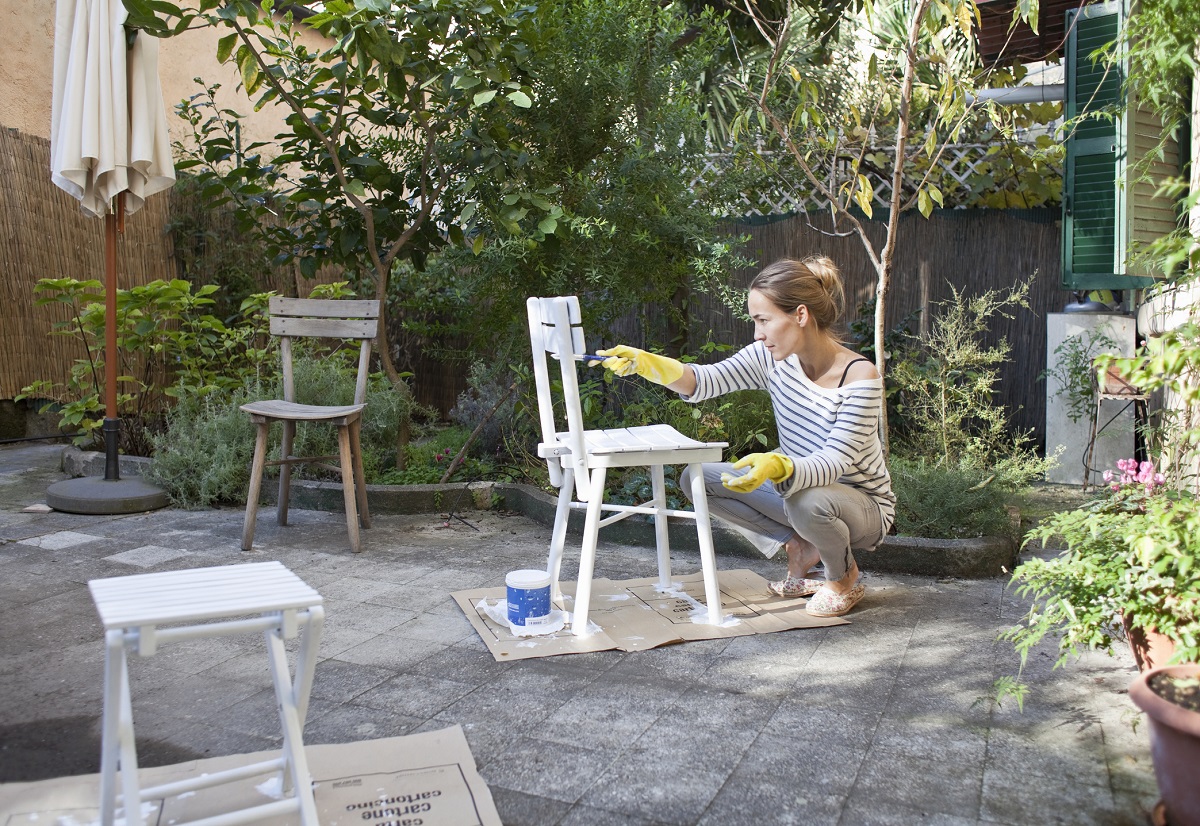
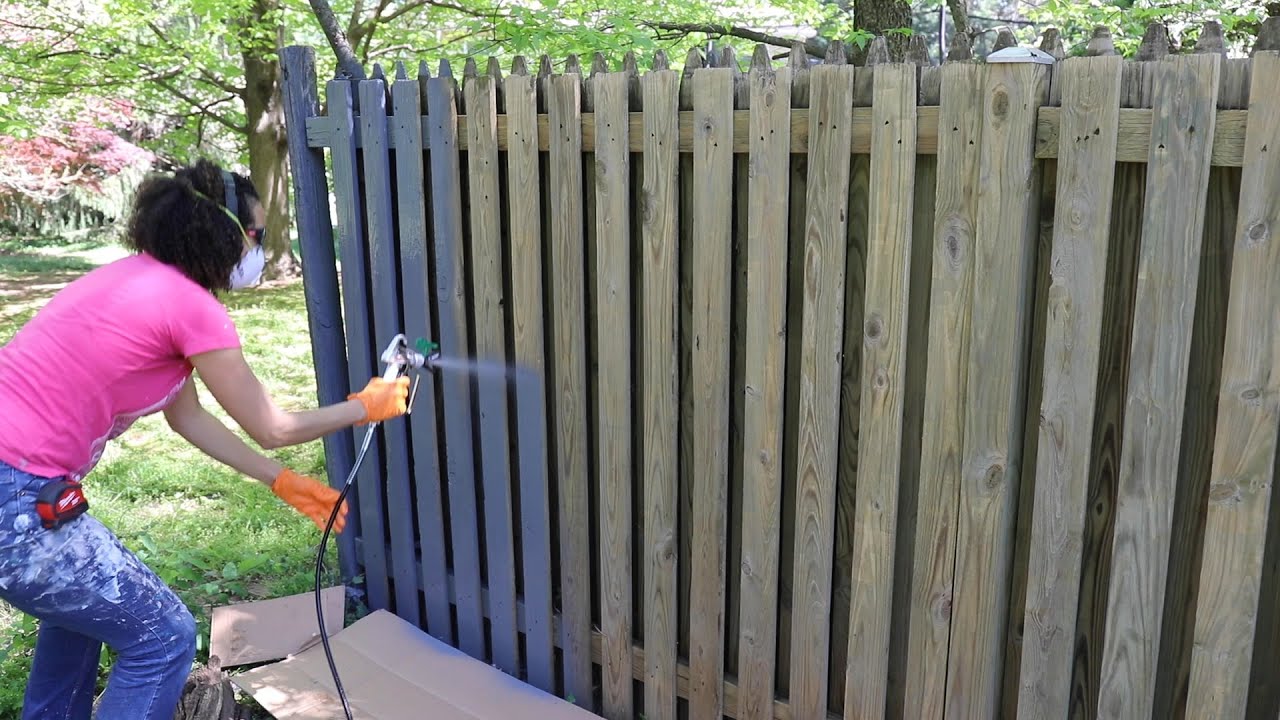
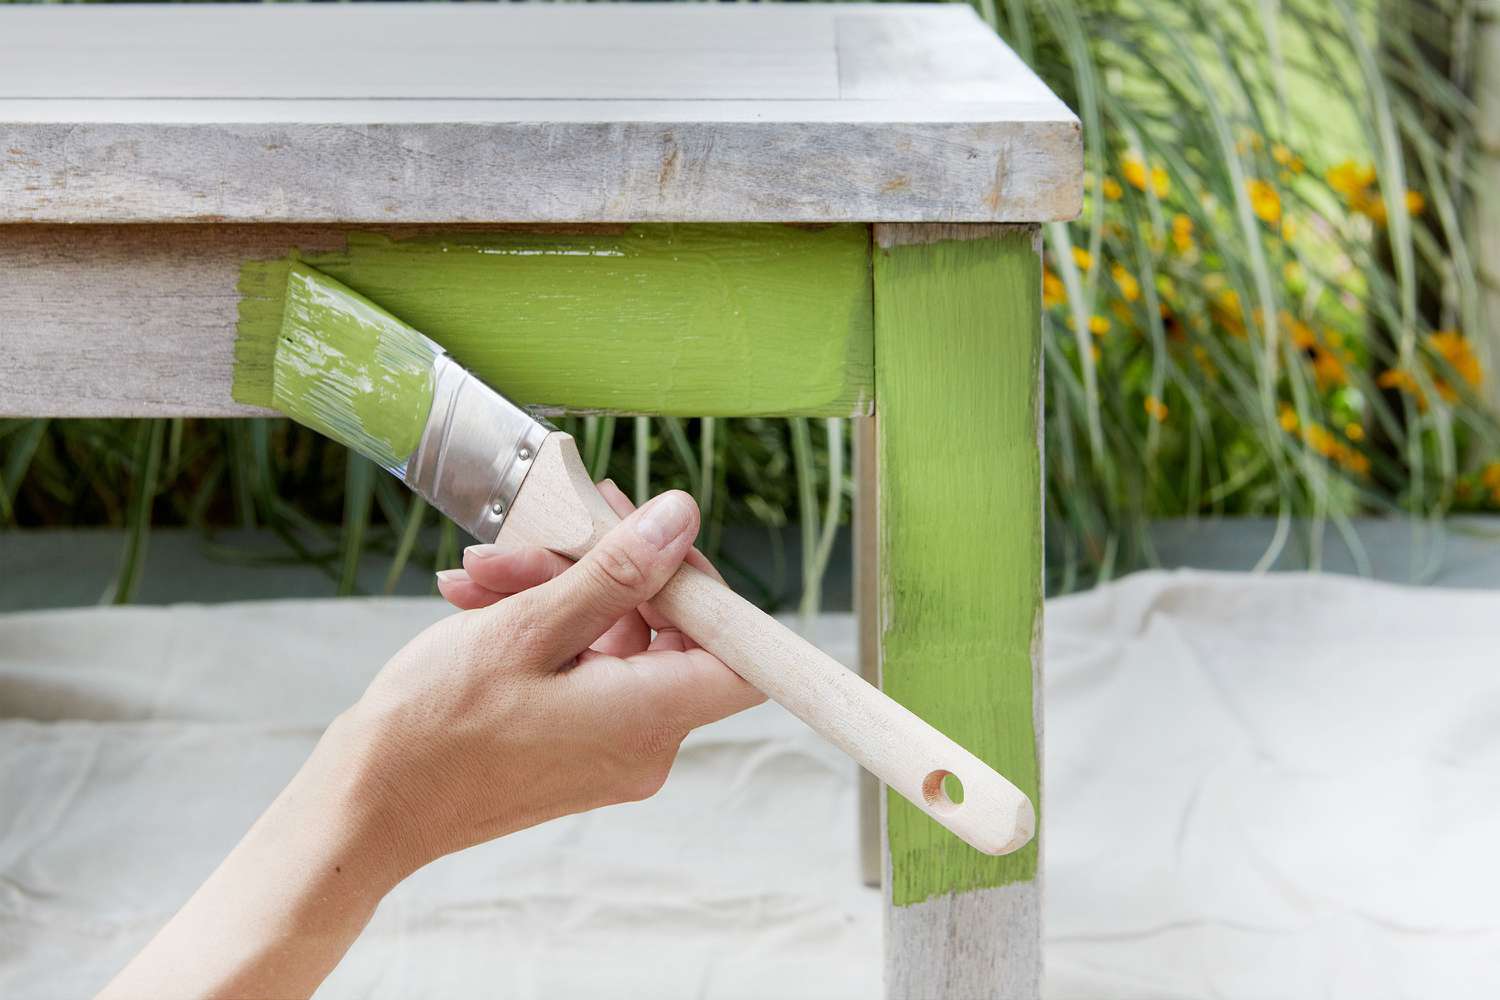
Painting the Furniture
Now that you have prepped the surface and applied the primer, it’s time to bring your wooden outdoor furniture to life with a fresh coat of paint. Follow these steps to achieve a smooth and professional paint finish:
- Choose your Paint Application Method: Depending on the size and intricacy of your furniture, you can choose to use a paintbrush, a paint roller, or a combination of both. A paintbrush is ideal for detailed areas and corners, while a paint roller is great for larger, flat surfaces.
- Stir the Paint: Use a stir stick to thoroughly mix the paint, ensuring that the color pigments are evenly distributed.
- Start with the Underside: Begin by painting the underside of your furniture first. This allows you to practice your technique and ensures that the visible areas will be painted last, minimizing the risk of smudges or drips.
- Apply Thin and Even Coats: Dip your paintbrush or roller into the paint and remove any excess by gently tapping it on the edge of the paint container. Apply thin, even coats of paint to the surface, using long, smooth strokes in the direction of the wood grain.
- Work in Small Sections: Paint one small section at a time, ensuring that you cover the entire area before moving on. This helps prevent the paint from drying unevenly or showing brush or roller marks.
- Check for Drips and Smoothing: As you paint, regularly inspect for any drips or excess paint and smooth them out with your brush. This will help maintain a flawless finish.
- Allow Drying Time: Follow the recommended drying time indicated on the paint can. Typically, it takes a few hours for the paint to dry, but refer to the specific product instructions for accurate drying times.
- Apply Additional Coats: Depending on the desired color and coverage, you may need to apply multiple coats of paint. Allow each coat to dry completely before applying the next one. Sand lightly between coats using a fine-grit sandpaper to ensure a smooth finish.
Remember, patience is key when painting. Take your time and apply the paint carefully to achieve the best results. Once you’re satisfied with the coverage and finish of the paint, it’s time for the final step: applying the protective topcoat.
Read more: How To Clean Wooden Outdoor Furniture
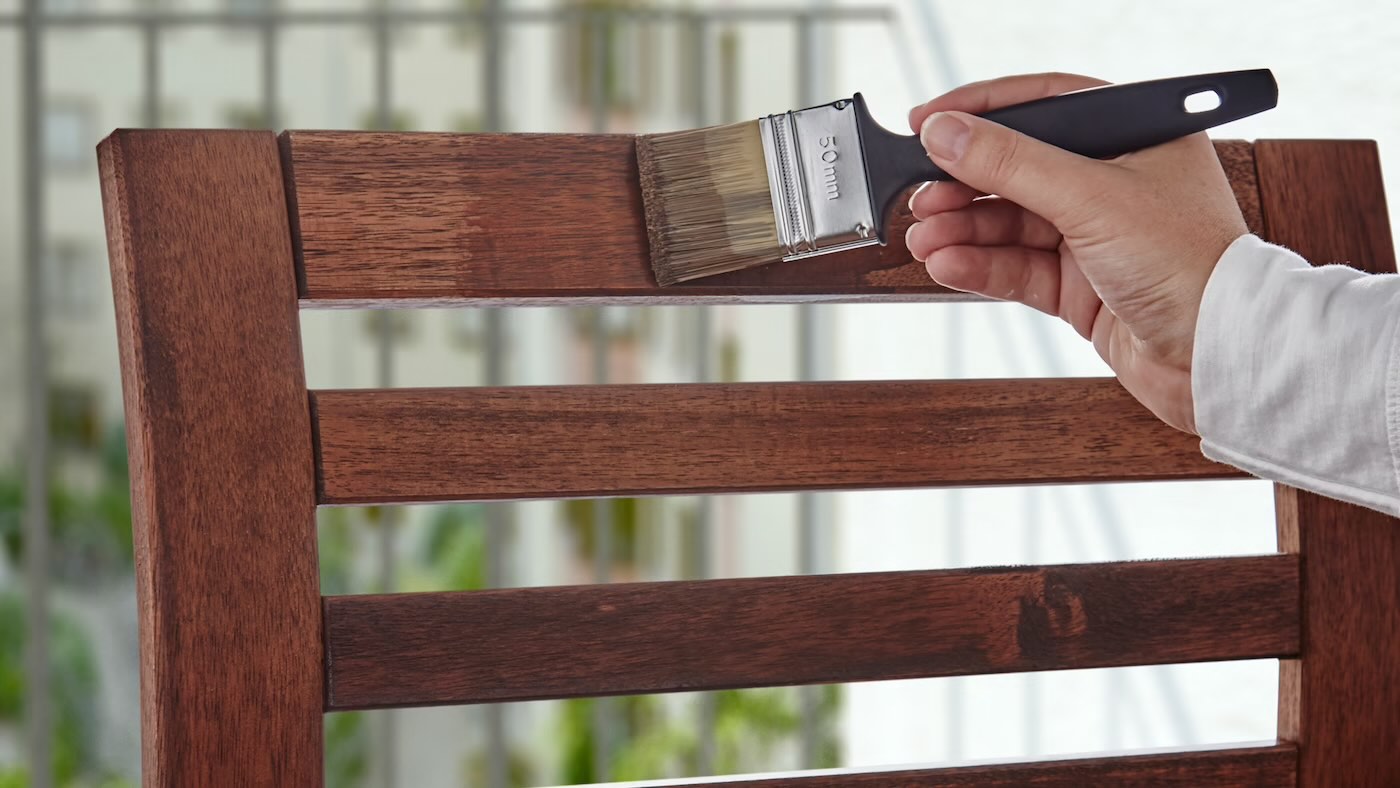
Applying the Final Coat
After you have painted your wooden outdoor furniture with the desired number of color coats, it’s time to apply the final protective topcoat. This step helps to seal and protect the paint, providing added durability and resistance to the outdoor elements. Follow these steps to apply the final coat:
- Select the Right Topcoat: Choose a topcoat specifically designed for outdoor use. Look for a clear polyurethane or an exterior-grade sealant that offers UV protection and is suitable for the type of paint you used.
- Read the Instructions: Before applying the topcoat, carefully read the instructions provided on the product label. Different topcoats may have specific application instructions and drying times.
- Stir the Topcoat: Use a stir stick to thoroughly mix the topcoat. This ensures that any settled ingredients are evenly distributed throughout the product.
- Apply the Topcoat: Use a clean paintbrush to apply a thin and even coat of the topcoat over the painted surface of the furniture. Apply the topcoat in the same manner as the paint, using long, smooth strokes in the direction of the wood grain.
- Work in Small Sections: Just like when you painted the furniture, work in small sections to ensure complete coverage and avoid visible brush marks.
- Allow Drying Time: Follow the recommended drying time indicated on the topcoat can. Typically, it takes a few hours for the topcoat to dry, but refer to the specific product instructions for accurate drying times.
- Apply Additional Coats: Depending on the level of protection desired, you may choose to apply multiple coats of the topcoat. Allow each coat to dry completely before applying the next one. Sand lightly between coats using a fine-grit sandpaper to ensure a smooth and even finish.
- Let it Cure: After the final coat of the topcoat has been applied, allow the furniture to cure for the recommended time provided on the product label. This will ensure that the paint and topcoat fully adhere and harden, providing maximum protection.
By applying the final protective topcoat, you’re fortifying the paint and adding an extra layer of defense against the outdoor elements. Your newly painted wooden outdoor furniture is now ready to be showcased and enjoyed in your outdoor space!
Additional Tips and Considerations
As you paint your wooden outdoor furniture, keep these additional tips and considerations in mind to ensure the best possible results:
- Choose the Right Weather: Select a day with optimal weather conditions for painting. Ideally, pick a day with mild temperatures, low humidity, and minimal wind. Avoid painting in direct sunlight, as it can cause the paint to dry too quickly and result in uneven coverage.
- Protect Surrounding Areas: Cover nearby plants, flooring, or any other items you want to keep paint-free. Use plastic sheets or drop cloths to protect surrounding surfaces from accidental paint splatters.
- Apply Paint in Thin Coats: It’s better to apply multiple thin coats of paint rather than one thick coat. Thin coats dry faster, adhere better, and result in a smoother finish. This also helps to reduce the likelihood of drips or paint pooling in corners.
- Follow the Drying Times: Patience is vital when it comes to painting furniture. Follow the recommended drying times for both the paint and the topcoat, as rushing the process can lead to smudging, sticking, or a less durable finish.
- Consider the Wood Type: Different types of wood may require specific preparation and paint application techniques. For example, softwoods like pine may need extra layers of primer to prevent bleeding of tannins. Research the best practices for painting the specific type of wood you have.
- Maintain and Clean Regularly: Once your furniture is painted, it’s important to maintain and clean it regularly to prolong its lifespan and keep it looking fresh. Use a mild soap and water solution to gently clean the surface, and avoid using harsh chemicals or abrasive scrubbing brushes that can damage the paint.
- Consider Cushions or Protective Covers: If your outdoor furniture has cushions or seat pads, consider adding them to provide extra comfort and protection. Additionally, for extended periods of non-use, consider using protective covers to shield the furniture from harsh weather conditions.
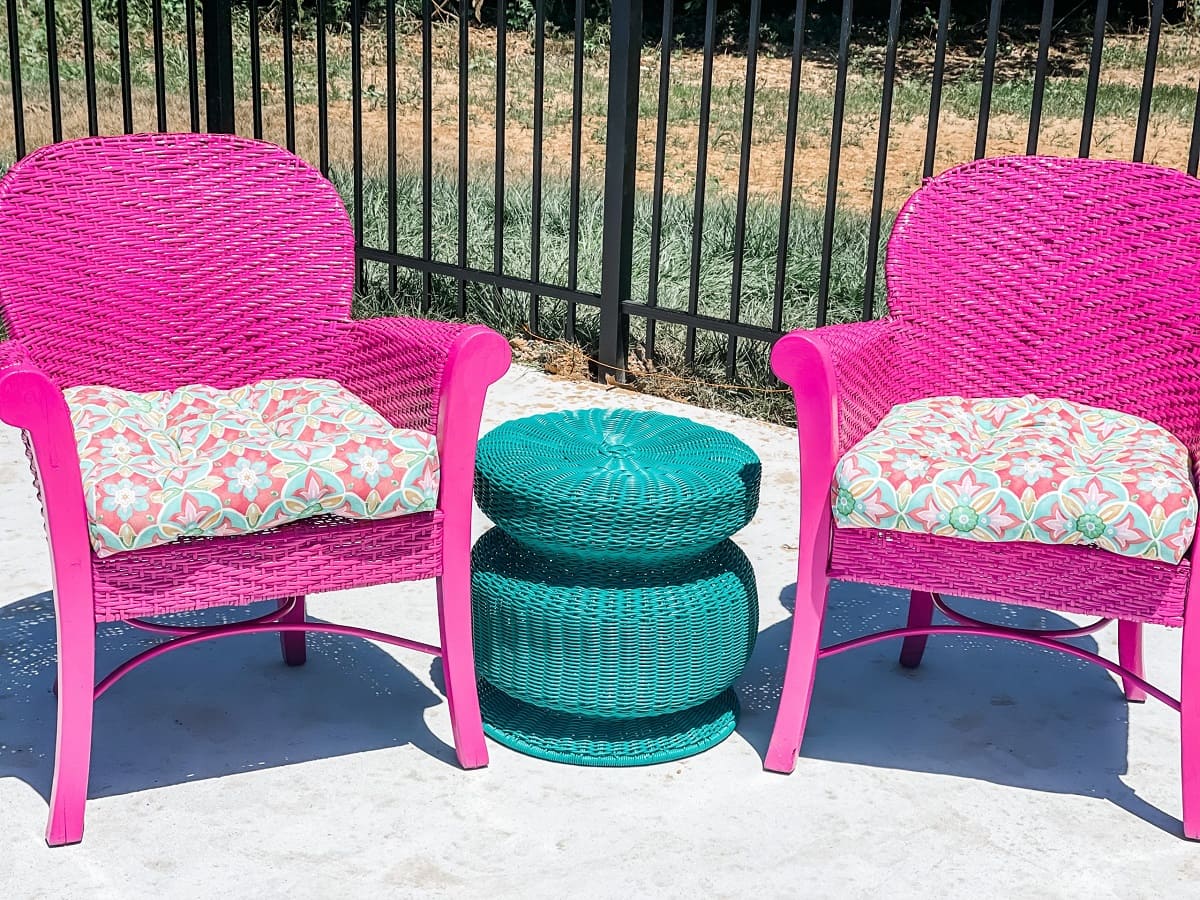
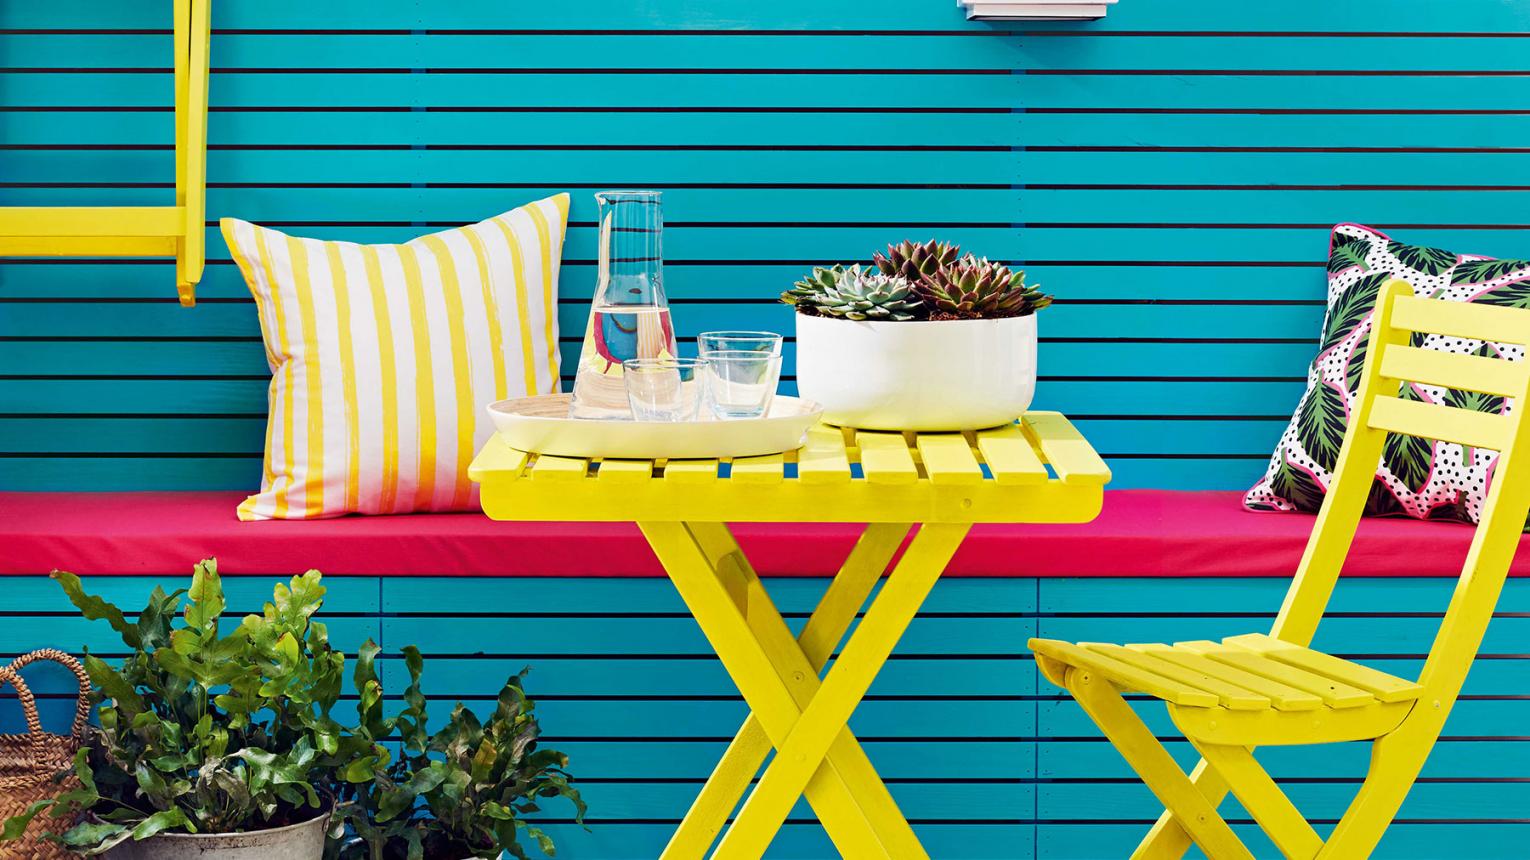
- Update the Look: Painting your wooden outdoor furniture not only extends its life but also offers an opportunity to update its look. Play with different colors and finishes to create a unique and personalized style that enhances your outdoor space.
By following these additional tips and considerations, you’ll be able to achieve a beautiful, long-lasting finish for your wooden outdoor furniture and enjoy it for years to come.
Conclusion
Congratulations! You have successfully learned how to paint wooden outdoor furniture. By following the steps in this comprehensive guide, you have transformed your weathered and worn furniture into a fresh and vibrant focal point for your outdoor space.
From selecting the right paint and tools to preparing the surface, applying the primer, painting, and adding the final protective topcoat, you have gained the knowledge to achieve a professional and long-lasting finish. With proper care and maintenance, your painted wooden outdoor furniture will now be able to withstand the elements and continue to enhance your outdoor living area for years to come.
Remember to choose the appropriate paints and finishes for outdoor use, thoroughly clean and prep the surface, and apply paint and topcoats in thin, even layers. Take your time, follow the recommended drying times, and use protective covers to maintain the beauty and durability of your painted furniture.
Whether you prefer a classic and elegant look or a bold and vibrant statement, painting your wooden outdoor furniture offers endless possibilities to express your style and create a space that reflects your personality. Enjoy the process and have fun experimenting with different colors and finishes to achieve the desired aesthetic for your outdoor oasis.
We hope this guide has been informative and helpful in your painting endeavors. Enjoy your newly painted furniture and make the most out of your outdoor living space!
Frequently Asked Questions about How To Paint Wooden Outdoor Furniture
Was this page helpful?
At Storables.com, we guarantee accurate and reliable information. Our content, validated by Expert Board Contributors, is crafted following stringent Editorial Policies. We're committed to providing you with well-researched, expert-backed insights for all your informational needs.


0 thoughts on “How To Paint Wooden Outdoor Furniture”