Articles
How To Polish An Aluminum Tool Box
Modified: August 24, 2024
Learn the best techniques and tips for polishing an aluminum tool box with our informative articles. Achieve a shiny and polished finish effortlessly.
(Many of the links in this article redirect to a specific reviewed product. Your purchase of these products through affiliate links helps to generate commission for Storables.com, at no extra cost. Learn more)
Introduction
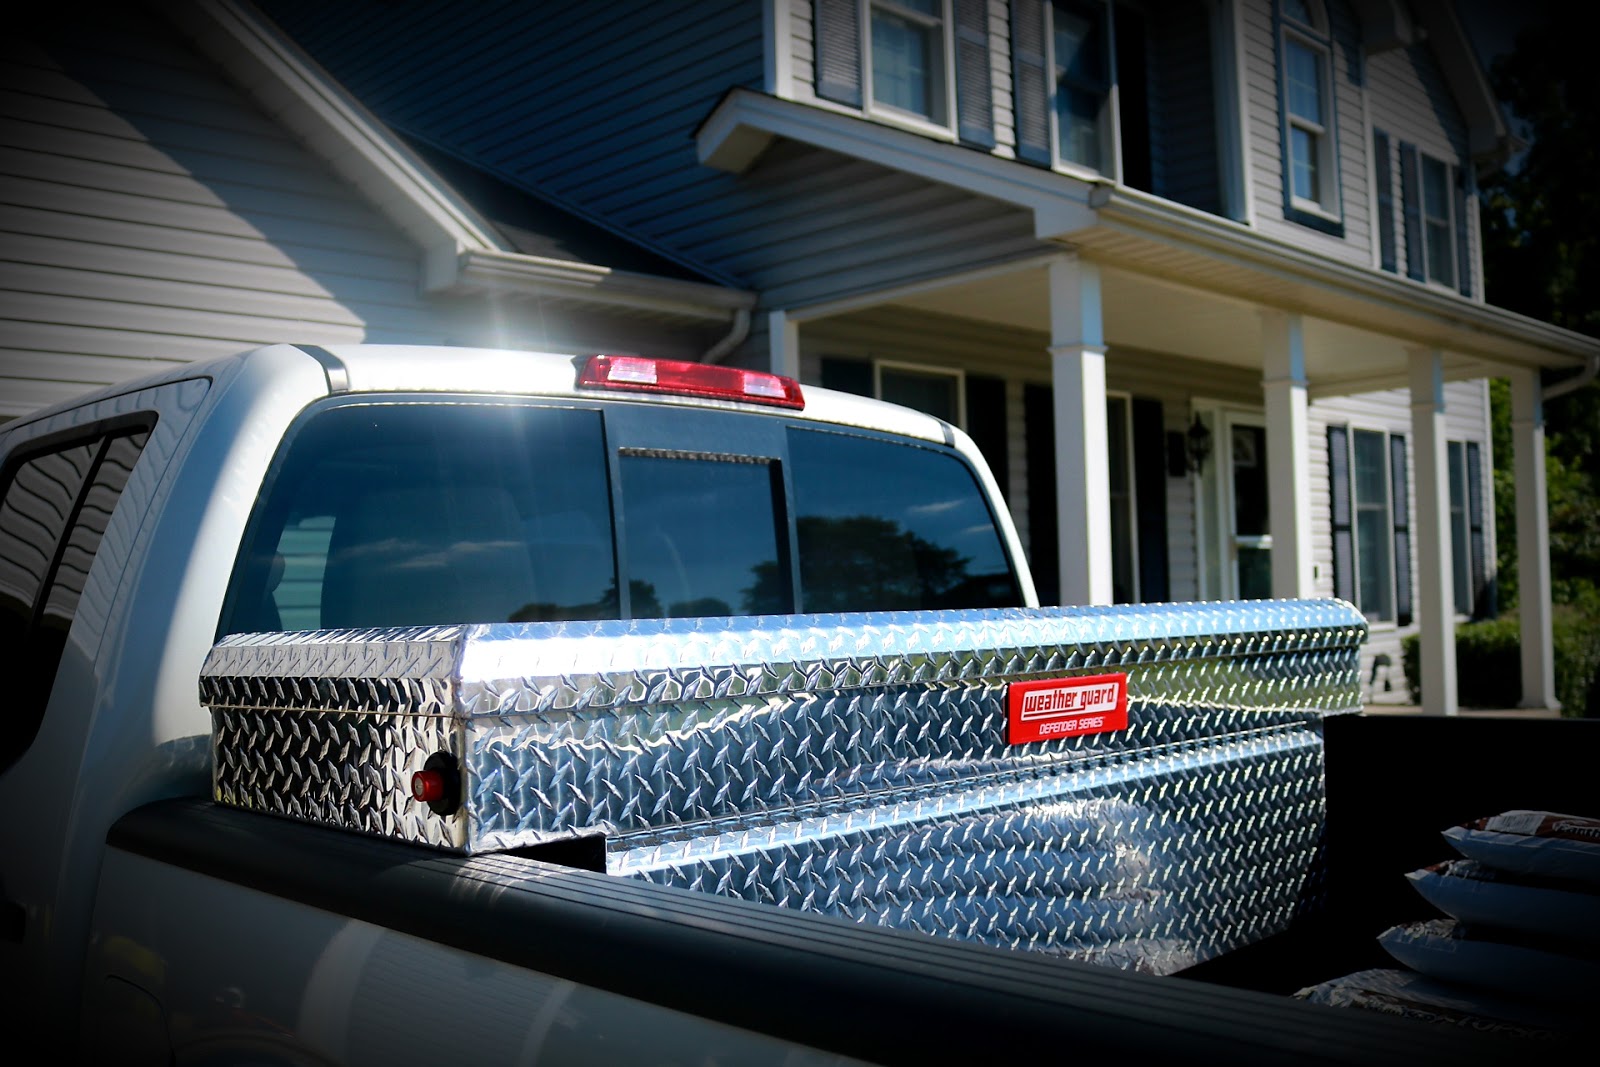
Having an aluminum tool box can be a great asset for any handyman or DIY enthusiast. Not only does it provide a sturdy and secure storage space for your valuable tools, but it also adds a touch of professional elegance to your workspace. However, over time, the aluminum surface of your tool box may become dull, scratched, or tarnished, affecting both its appearance and performance.
To restore the shine and luster of your aluminum tool box, proper polishing is the key. In this article, we will guide you through the step-by-step process of how to polish an aluminum tool box to bring it back to its former glory.
But before we delve into the polishing techniques, it is important to prioritize safety to prevent any accidents or injuries. Let’s begin by discussing some safety precautions you should take before getting started.
Key Takeaways:
- Restore the shine and luster of your aluminum tool box by following safety precautions, gathering necessary materials, and using step-by-step polishing techniques. Enjoy the satisfaction of a rejuvenated and professional workspace.
- Prioritize safety, gather materials, and follow each step carefully to effectively remove scratches, address dullness, and bring your aluminum tool box back to its former glory. Enjoy the rewarding process of polishing and maintaining your valuable tools.
Read also: 11 Amazing Aluminum Electrical Box for 2025
Safety Precautions
Before you start polishing your aluminum tool box, it is crucial to follow certain safety precautions to ensure your well-being. Here are some guidelines to keep in mind:
- Wear protective gear: It is essential to wear gloves, safety glasses, and a dust mask to protect yourself from any potential harm. These items will help shield your skin, eyes, and lungs from chemicals, dust, and debris that may be involved in the polishing process.
- Work in a well-ventilated area: When polishing aluminum, certain chemical compounds may produce fumes that can be harmful if inhaled. It is advisable to work in a well-ventilated area, such as outdoors or in a garage with open doors or windows. Proper ventilation will help disperse any hazardous fumes and ensure a safe working environment.
- Avoid flammable substances: Polishing compounds and solvents may be flammable, so it is crucial to keep any open flames or sparks away from your work area. Make sure you are not working near any flammable substances or ignition sources, such as gas cylinders or electrical outlets.
- Read and follow product instructions: Different polishing products may have specific application instructions and safety precautions. It is important to carefully read and follow these instructions provided by the manufacturer to ensure proper usage and avoid any mishaps.
- Work in a clean environment: Before you start polishing, make sure your work area is clean and clutter-free. Clear away any objects that may obstruct your movement or cause accidents. Additionally, ensure that your aluminum tool box is free from any loose tools or debris that may interfere with the polishing process.
By following these safety precautions, you can minimize the risk of accidents and create a safe working environment for polishing your aluminum tool box. Now, let’s move on to the next step: gathering the necessary materials.
Gathering the Necessary Materials
Before you begin the process of polishing your aluminum tool box, it is essential to gather all the necessary materials. Having everything prepared beforehand will ensure a smooth and efficient polishing experience. Here are the materials you will need:
- Aluminum polish: Choose a high-quality aluminum polish that is specifically designed for metal surfaces. Look for one that is safe to use on aluminum and provides effective cleaning and polishing properties.
- Clean, lint-free cloths: Select soft, lint-free cloths such as microfiber or cotton cloths. These will be used for cleaning, applying the polish, and buffing the aluminum surface.
- Soft-bristle brush: A soft-bristle brush, such as a toothbrush or a dedicated cleaning brush, will help in removing any dirt or debris from hard-to-reach areas of the tool box.
- Mild detergent: Use a mild detergent or dish soap to clean the tool box before polishing. Make sure the detergent does not contain any harsh chemicals that could damage the aluminum surface.
- Water: You’ll need water for rinsing off the cleaning solution and for dampening the cloths during the polishing process.
- Protective gloves: It is advisable to wear protective gloves to shield your hands from the chemicals and to prevent any skin irritation.
- Safety glasses: Protect your eyes from any potential splashes or debris by wearing safety glasses throughout the polishing process.
By gathering all these materials, you will be well-equipped and prepared to begin the aluminum tool box polishing process. In the next section, we will guide you through the steps of cleaning the tool box to remove any surface dirt or grime.
Cleaning the Aluminum Tool Box
Before you start polishing your aluminum tool box, it is important to give it a thorough cleaning to remove any dirt, grease, or grime that may have accumulated on the surface. Follow these steps to clean your aluminum tool box:
- Start by removing all the tools and contents from the tool box to access the entire surface area.
- Using a soft-bristle brush, gently scrub the exterior and interior of the tool box to loosen any dirt or debris. Pay close attention to corners, edges, and any hard-to-reach areas.
- Dilute a small amount of mild detergent with water in a bucket. Dip a clean cloth into the solution and wring out any excess liquid.
- Thoroughly wipe the entire aluminum surface of the tool box with the damp cloth. Make sure to remove any dirt, grease, or stains. Rinse and wring out the cloth as needed.
- Once you have cleaned the entire surface, rinse the cloth and dampen it with clean water. Use the damp cloth to wipe away any residual detergent from the aluminum tool box.
- Lastly, dry the tool box with a clean and dry cloth. Ensure that it is completely dry before moving on to the next step of polishing.
By following these cleaning steps, you will remove any surface dirt or grime that may hinder the polishing process. Once your aluminum tool box is clean and dry, you can proceed to the next step of addressing scratches and dullness on the surface.
Removing Scratches and Dullness
After cleaning your aluminum tool box, it’s time to address any scratches or dullness on the surface. Here are some techniques to help you remove scratches and restore the shine of your tool box:
- Sand the surface: For deeper scratches, you may need to use sandpaper to gently sand the affected area. Start with a fine-grit sandpaper and gradually move to a higher grit for a smoother finish. Make sure to sand in the direction of the grain to avoid creating additional scratches.
- Use aluminum polish paste: Apply a small amount of aluminum polish paste onto a clean, lint-free cloth. Rub the paste onto the scratched area using firm but gentle circular motions. Continue this process until the scratches start to fade.
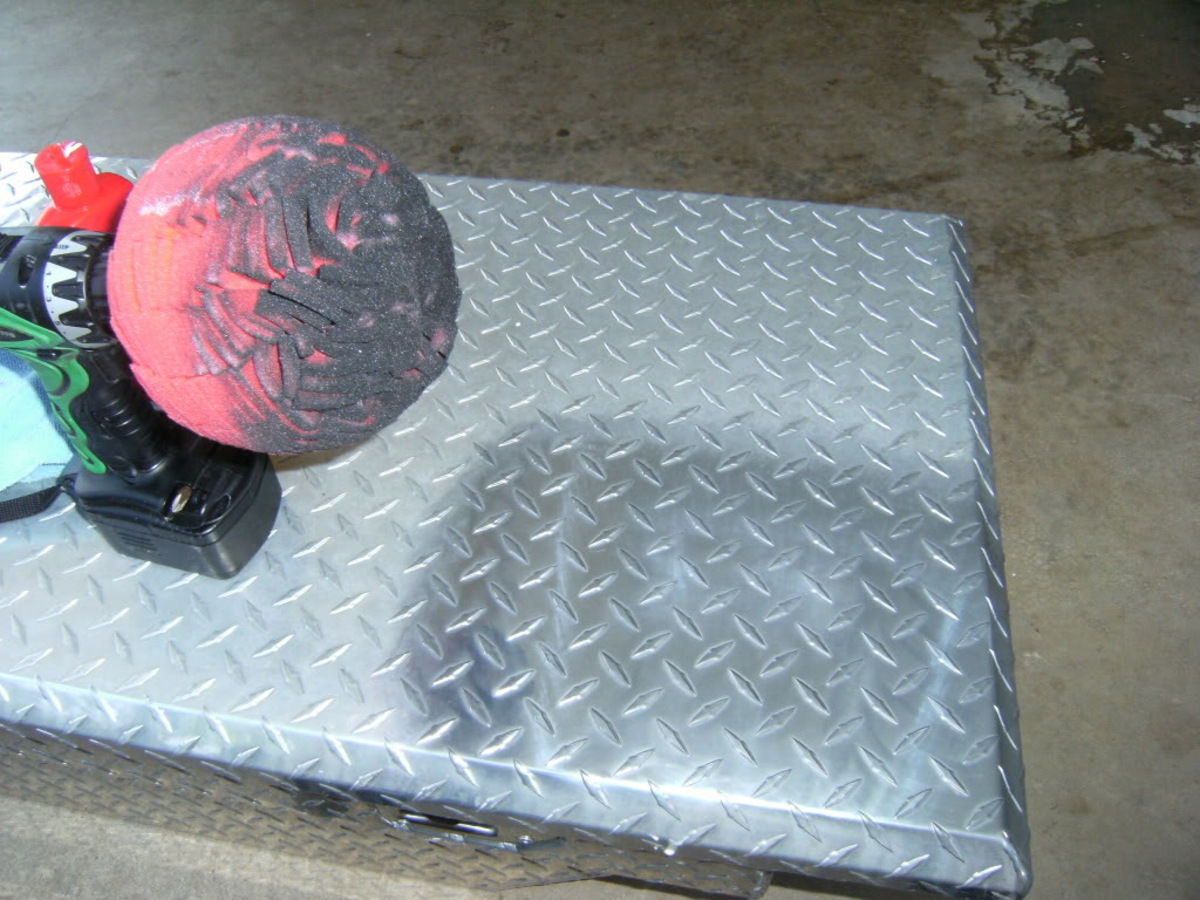
- Buff with a buffing wheel: If the scratches are substantial or the surface is dull, you can use a buffing wheel attached to a drill or a rotary tool. Apply a small amount of aluminum polish onto the buffing wheel and slowly move it across the surface of the tool box. The friction and movement of the buffing wheel will help remove scratches and restore the shine.
- Repeat if necessary: Depending on the depth and severity of the scratches, you may need to repeat the polishing process multiple times until the desired results are achieved. Be patient and take your time to ensure a thorough and even polishing.
Remember to always follow the instructions provided by the manufacturer of the aluminum polish paste or buffing wheel to ensure safe and effective usage. Once you have successfully addressed the scratches and restored the shine of your tool box, it’s time to move on to the next step: applying aluminum polish.
After cleaning the aluminum tool box, use a metal polish specifically designed for aluminum to restore its shine. Apply the polish with a soft cloth, working in small circular motions, and then buff the surface to a high shine.
Applying Aluminum Polish
Once you have addressed the scratches and dullness on your aluminum tool box, it’s time to apply the aluminum polish to further enhance its shine and appearance. Follow these steps to apply the polish:
- Take a clean, lint-free cloth and apply a small amount of aluminum polish to it. Be sure to read the instructions on the polish container for specific application guidelines.
- Starting from one corner of the tool box, gently rub the cloth with the polish onto the aluminum surface. Use circular motions and apply even pressure to ensure thorough coverage.
- Continue applying the aluminum polish to the entire surface of the tool box, working in small sections at a time. Make sure to reach all the nooks, corners, and edges.
- Allow the aluminum polish to sit on the surface for the recommended duration specified by the manufacturer. This will give the polish time to penetrate and dissolve any remaining contaminants on the metal.
- Once the specified time has passed, use a clean section of the cloth to remove the excess polish. Wipe the tool box in gentle, circular motions, ensuring that all the polish has been removed.
Remember to follow the instructions provided by the manufacturer of the aluminum polish for the best results. Additionally, avoid applying excessive pressure or using abrasive materials that may scratch or damage the aluminum surface. With the aluminum polish applied, it’s time to move on to the next step: buffing and polishing the tool box.
Buffing and Polishing the Tool Box
Buffing and polishing your aluminum tool box is the next crucial step to achieve a brilliant shine and a smooth, flawless finish. Follow these steps to effectively buff and polish your tool box:
- Take a clean, dry, and lint-free cloth or a buffing wheel attachment for a drill or a rotary tool.
- Using the cloth or the buffing wheel, gently buff the polished surface of the tool box in circular motions. Apply moderate pressure to ensure the polish is evenly distributed and worked into the aluminum surface.
- Continue buffing the entire surface of the tool box, making sure to cover all areas, including corners and edges. Pay special attention to any remaining scratches or dull spots, and buff them until they blend in with the rest of the surface.
- Periodically check the cloth or the buffing wheel for any buildup of polish or debris. If necessary, switch to a clean cloth or clean the buffing wheel to maintain the effectiveness of the buffing process.
- Repeat the buffing process until you achieve the desired level of shine on your aluminum tool box. Remember that multiple passes may be needed, especially for heavily scratched or oxidized surfaces.
Buffing and polishing require patience and attention to detail. Take your time to ensure that you thoroughly cover the entire tool box surface and achieve an even shine. Once you are satisfied with the results, it’s time to move on to the final touches and maintenance.
Final Touches and Maintenance
After polishing and buffing your aluminum tool box, there are a few final touches and maintenance tips to keep in mind to preserve its shine and prolong its longevity:
- Inspect the tool box: Take a moment to carefully inspect the tool box for any remaining scratches, dull spots, or missed areas. If necessary, repeat the polishing and buffing process on specific areas until you achieve a consistent shine.
- Remove excess polish residue: Use a clean, dry cloth to gently wipe away any residual polish or debris from the tool box surface. Ensure that the surface is clean and free of any leftover polishing compounds.
- Apply a protective coating: Consider applying a protective coating, such as wax or clear sealant, to the polished aluminum surface. This will help maintain the shine, minimize the effects of oxidation, and protect against future scratches or stains.
- Maintain regular cleaning: To keep your aluminum tool box looking its best, establish a regular cleaning routine. Periodically wipe down the surface with a damp cloth and mild detergent to remove any dirt or grime that may accumulate over time.
- Promptly address any damage: If you notice any new scratches or damage on your tool box, address them promptly to prevent further degradation of the surface. Use appropriate methods and materials to repair or touch up the affected areas.
- Store and handle with care: When not in use, store your aluminum tool box in a clean and dry environment. Avoid placing heavy objects on top of it and handle it with care to prevent accidental drops or impacts that can cause damage.
By following these final touches and maintenance tips, you can ensure that your aluminum tool box remains in pristine condition for years to come. Regular cleaning and maintenance will help preserve its appearance and functionality, making it a reliable companion for all your projects.
Now that you have learned the step-by-step process of how to polish an aluminum tool box, you can enjoy the satisfaction of restoring its shine and bringing it back to its former glory. Remember to prioritize safety, gather the necessary materials, and follow each step carefully for optimal results. Happy polishing!
Conclusion
Polishing an aluminum tool box is a rewarding process that allows you to restore its shine and enhance its appearance. By following the step-by-step guide outlined in this article, you can effectively remove scratches, address dullness, and bring your tool box back to its former glory.
Remember to prioritize safety by wearing protective gear, working in a well-ventilated area, and following product instructions. Gathering the necessary materials, including aluminum polish, clean cloths, and a soft-bristle brush, is essential to ensure a smooth and successful polishing experience. Cleaning the tool box thoroughly and removing any scratches or dullness are crucial steps in achieving a flawless finish.
Applying the aluminum polish and buffing the tool box helps to further enhance its shine and create a smooth surface. Taking the time for final touches, such as inspecting the tool box, removing any residual polish, and applying a protective coating, will help maintain its appearance and prolong its longevity.
Regular cleaning and proper storage will ensure that your aluminum tool box remains in optimal condition for future use. By following the maintenance tips and promptly addressing any damage, you can ensure the longevity and functionality of your tool box.
In conclusion, with the knowledge and techniques outlined in this article, you are now equipped to confidently polish your aluminum tool box. Enjoy the satisfaction of a shiny and rejuvenated tool box as you tackle your projects with a touch of elegance and professionalism.
Frequently Asked Questions about How To Polish An Aluminum Tool Box
Was this page helpful?
At Storables.com, we guarantee accurate and reliable information. Our content, validated by Expert Board Contributors, is crafted following stringent Editorial Policies. We're committed to providing you with well-researched, expert-backed insights for all your informational needs.

0 thoughts on “How To Polish An Aluminum Tool Box”