
Articles
How To Pull HDMI Cable Through Conduit
Modified: August 20, 2024
Discover helpful articles on how to efficiently pull HDMI cables through conduits and achieve seamless audio and video connections.
(Many of the links in this article redirect to a specific reviewed product. Your purchase of these products through affiliate links helps to generate commission for Storables.com, at no extra cost. Learn more)
Introduction
Welcome to the world of HDMI cables and conduit installation! If you’re looking to pull HDMI cables through a conduit, you’ve come to the right place. In this article, we will guide you through the process of pulling HDMI cables through a conduit, ensuring a seamless and hassle-free installation.
HDMI (High-Definition Multimedia Interface) cables are widely used in modern home theater and audio/video systems to transmit high-quality digital audio and video signals. They offer superior image and sound quality, making them essential for a truly immersive entertainment experience.
Conduits, on the other hand, provide a protective pathway for cables, keeping them organized and safe from potential damage. Whether you’re setting up a new home theater system or making upgrades to an existing one, pulling HDMI cables through a conduit is a smart choice to keep your installation neat and professional.
Now, let’s dive into the process of pulling HDMI cables through a conduit and explore the necessary tools and techniques for a successful installation.
Key Takeaways:
- Proper preparation, lubrication, and careful pulling are essential for successfully installing an HDMI cable through a conduit. Attention to detail ensures a seamless and reliable audiovisual experience in your home theater setup.
- Troubleshooting common issues, such as signal loss or poor audio/video quality, can help resolve potential problems with your HDMI cable connection. Be proactive and adaptable to ensure an uninterrupted viewing and listening experience.
Read more: How To Pull Electrical Wire Through Conduit
Understanding HDMI Cable and Conduit
Before we begin the installation process, it’s crucial to have a solid understanding of HDMI cables and conduits.
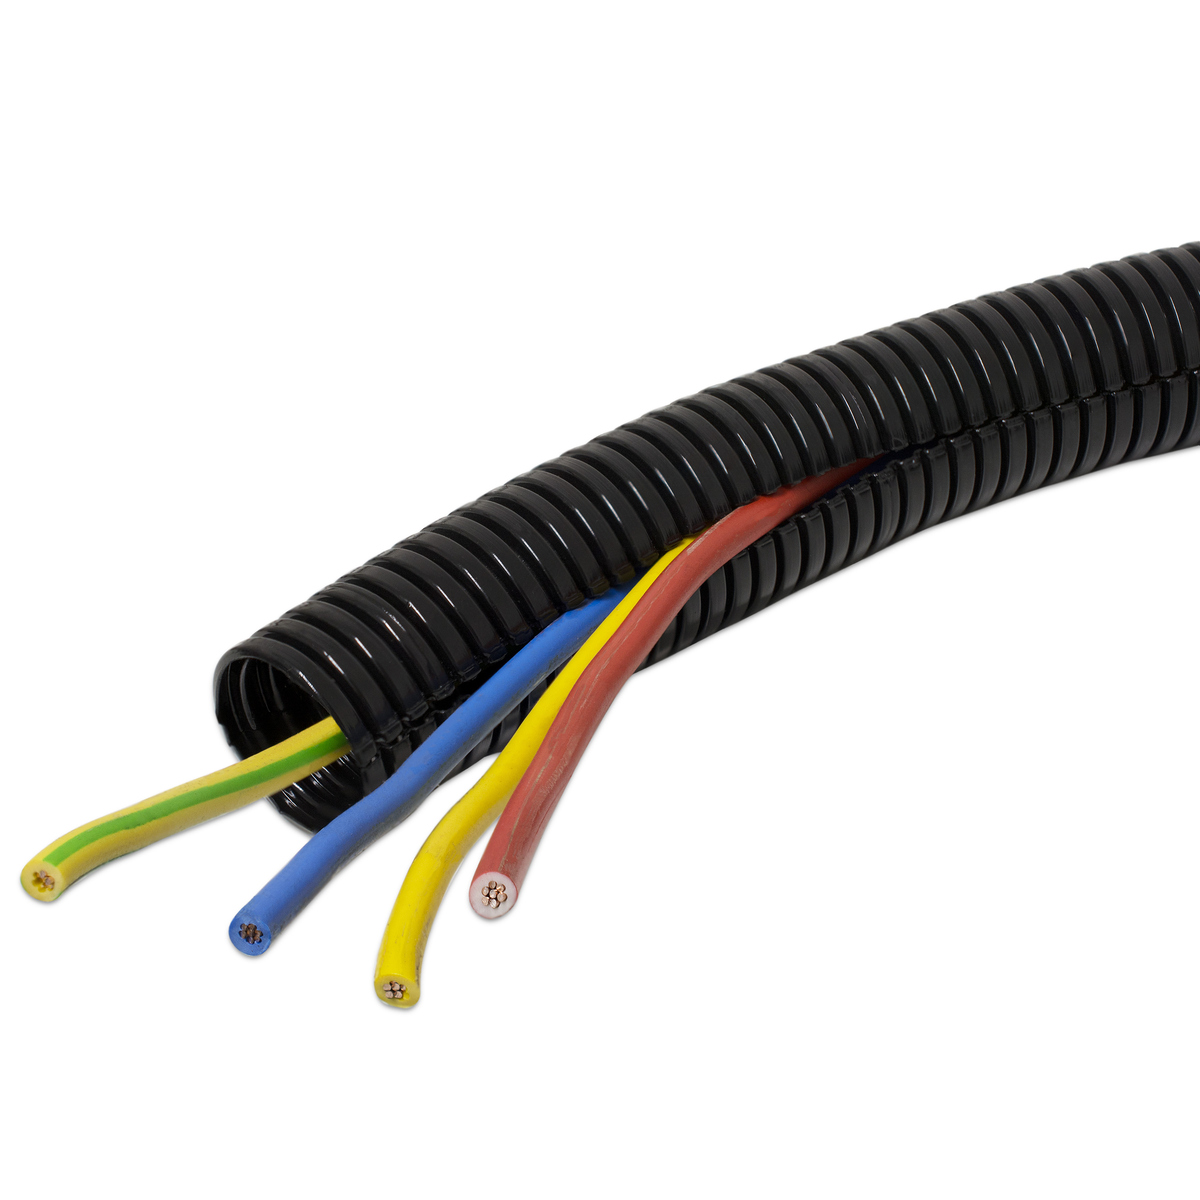
HDMI cables are specifically designed to transmit high-definition audio and video signals between devices. They consist of multiple conductors encased in a protective jacket. HDMI cables come in different lengths and versions, such as HDMI 1.4, HDMI 2.0, and HDMI 2.1, each offering varying levels of signal quality and support for features like 4K resolution, HDR, and audio return channel.
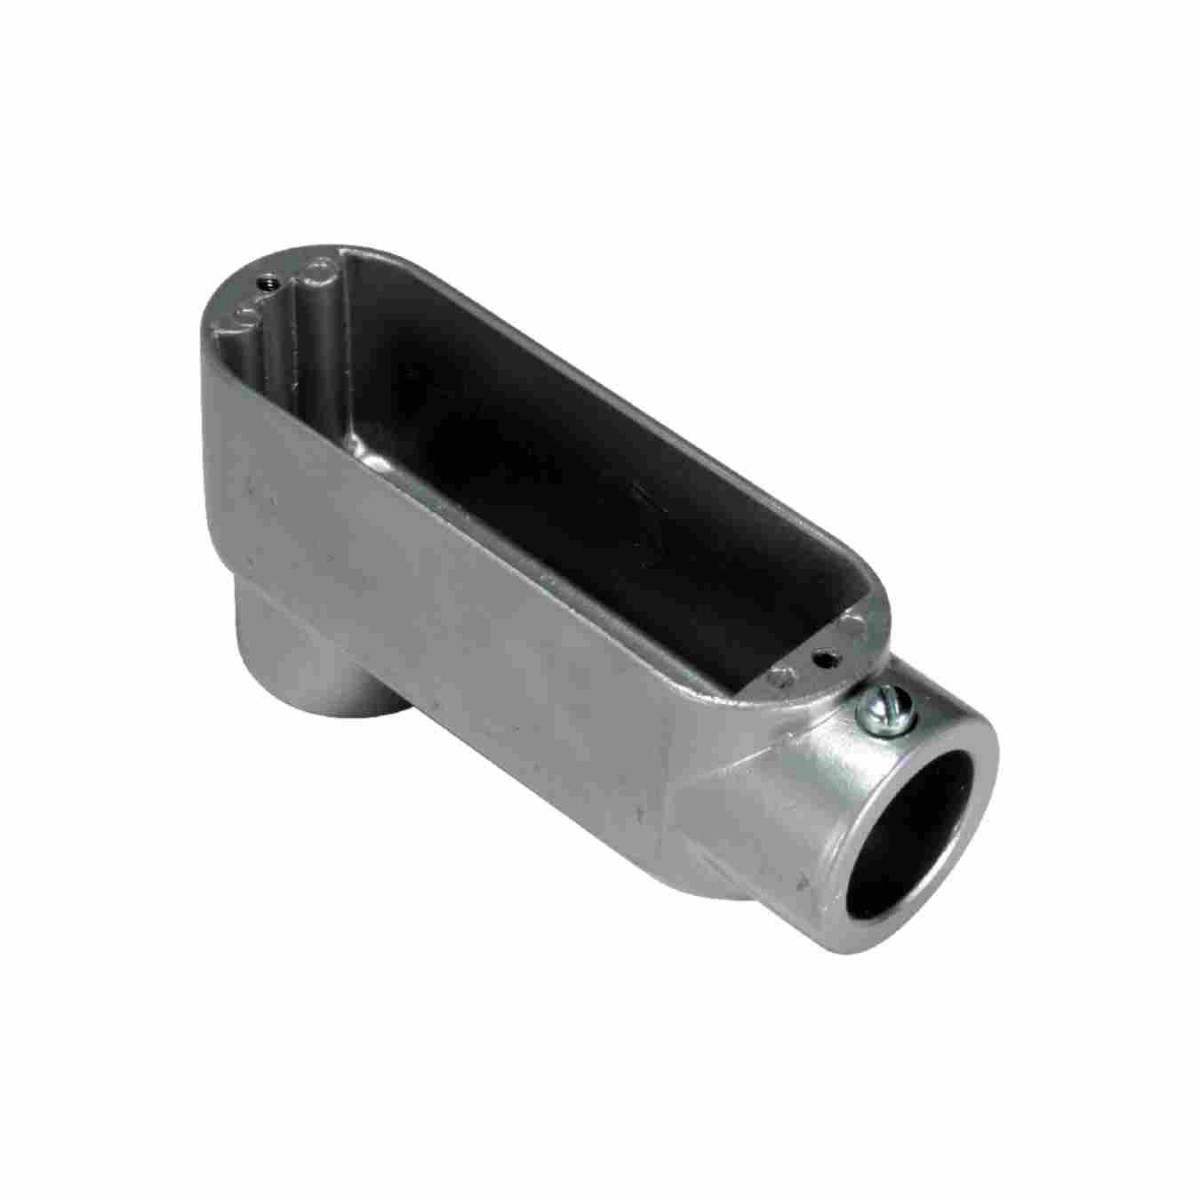
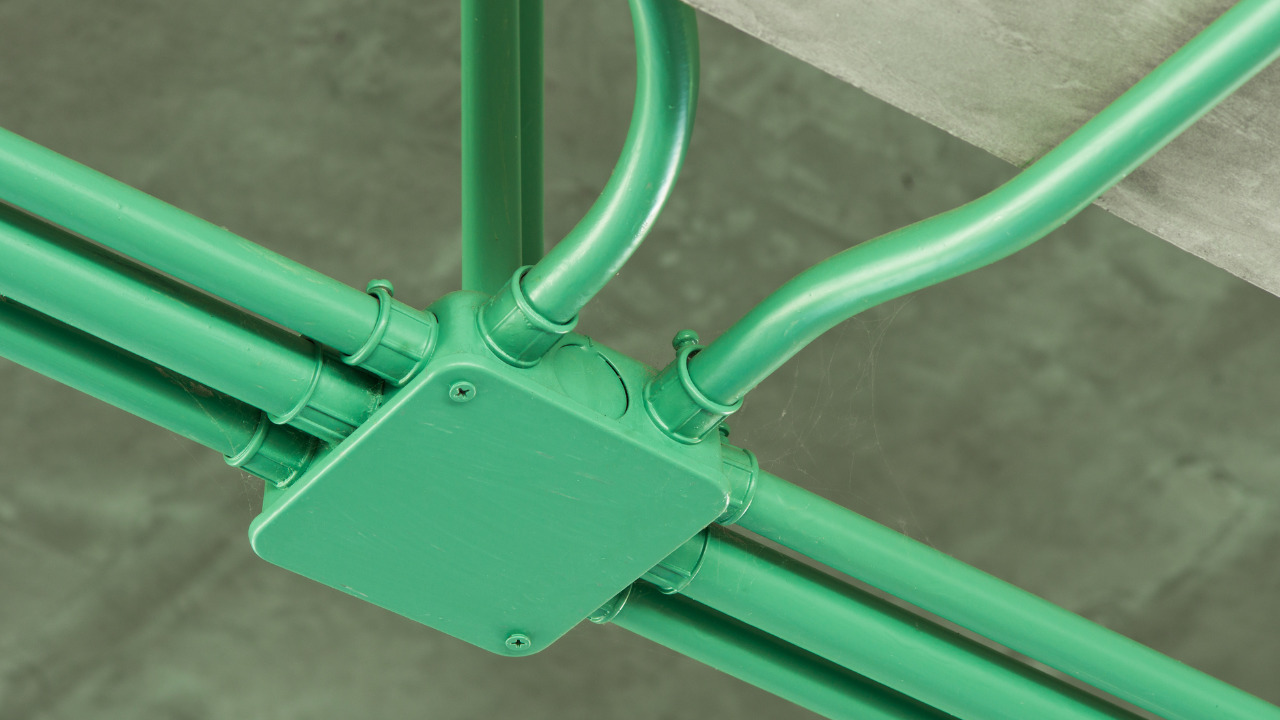
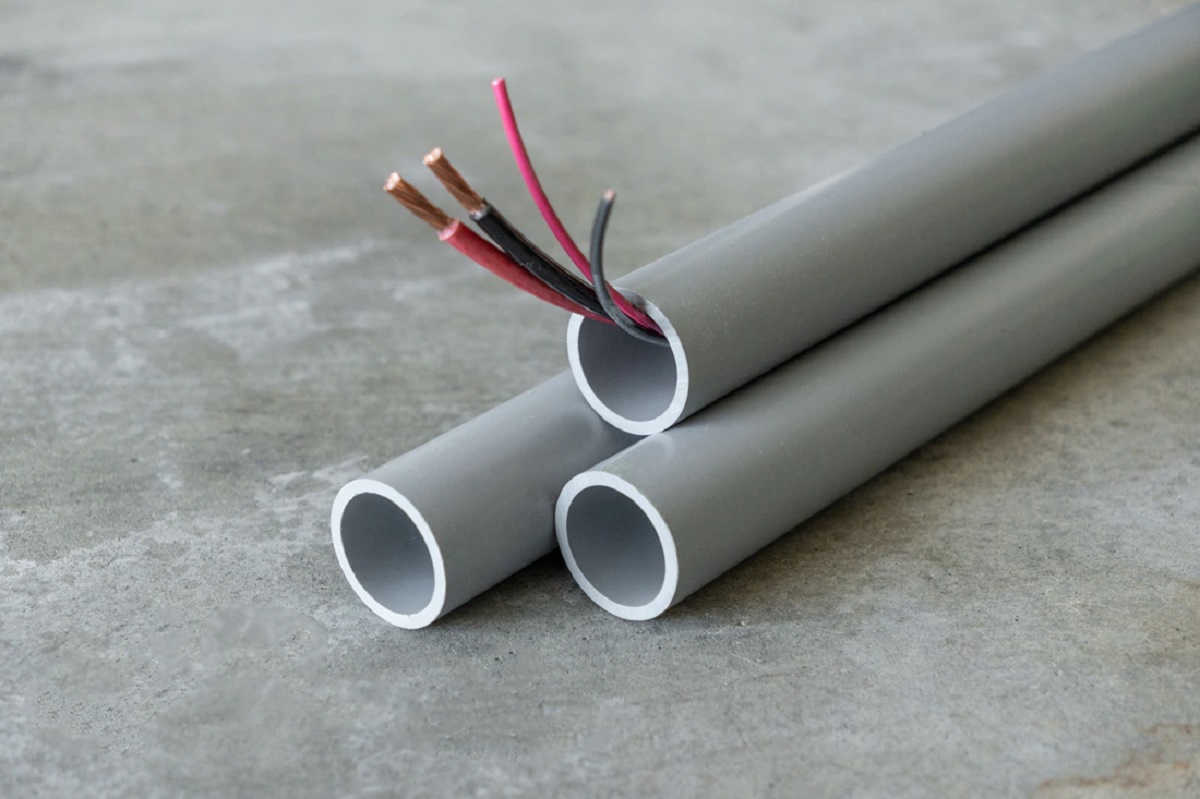
Conduits, on the other hand, are tubes or channels used to route and protect cables. They are typically made of PVC or metal and come in various sizes to accommodate different cable diameters. Conduits offer several benefits, including protecting cables from physical damage, preventing tangling or entanglement, and providing a clean and organized installation.
When it comes to pulling HDMI cables through a conduit, it’s essential to choose an appropriate conduit size that can comfortably accommodate the HDMI cable’s thickness. Ensure that the conduit is long enough to span the distance between the devices you’re connecting.
Now that you have a basic understanding of HDMI cables and conduits, let’s move on to the next step: preparing the conduit and gathering the necessary tools for the installation process.
Preparing the Conduit and Tools
Before you can start pulling the HDMI cable through the conduit, you’ll need to prepare the conduit and gather the necessary tools for a smooth installation process.
Here are the steps to prepare the conduit and tools:
- Measure the distance: Determine the length of the conduit needed to connect the devices. Measure the distance between the two endpoints, taking into account any twists, turns, or bends in the pathway.
- Select the right conduit size: Ensure that the conduit you choose has enough space to comfortably accommodate the HDMI cable. Measure the outer diameter of the HDMI cable to select the appropriate conduit size.
- Clean the conduit: Before installation, clean the conduit to remove any dirt or debris that could hinder the smooth movement of the HDMI cable. Use a pipe brush or a clean cloth to wipe down the interior of the conduit.
- Gather the tools: Prepare the necessary tools for the installation. This may include a fish tape, electrical tape, lubricant or wire pulling gel, pliers, and a utility knife. Having these tools readily available will make the installation process much more efficient.
Once you have prepared the conduit and gathered your tools, you’re ready to move on to the next step: attaching the HDMI connector to the cable.
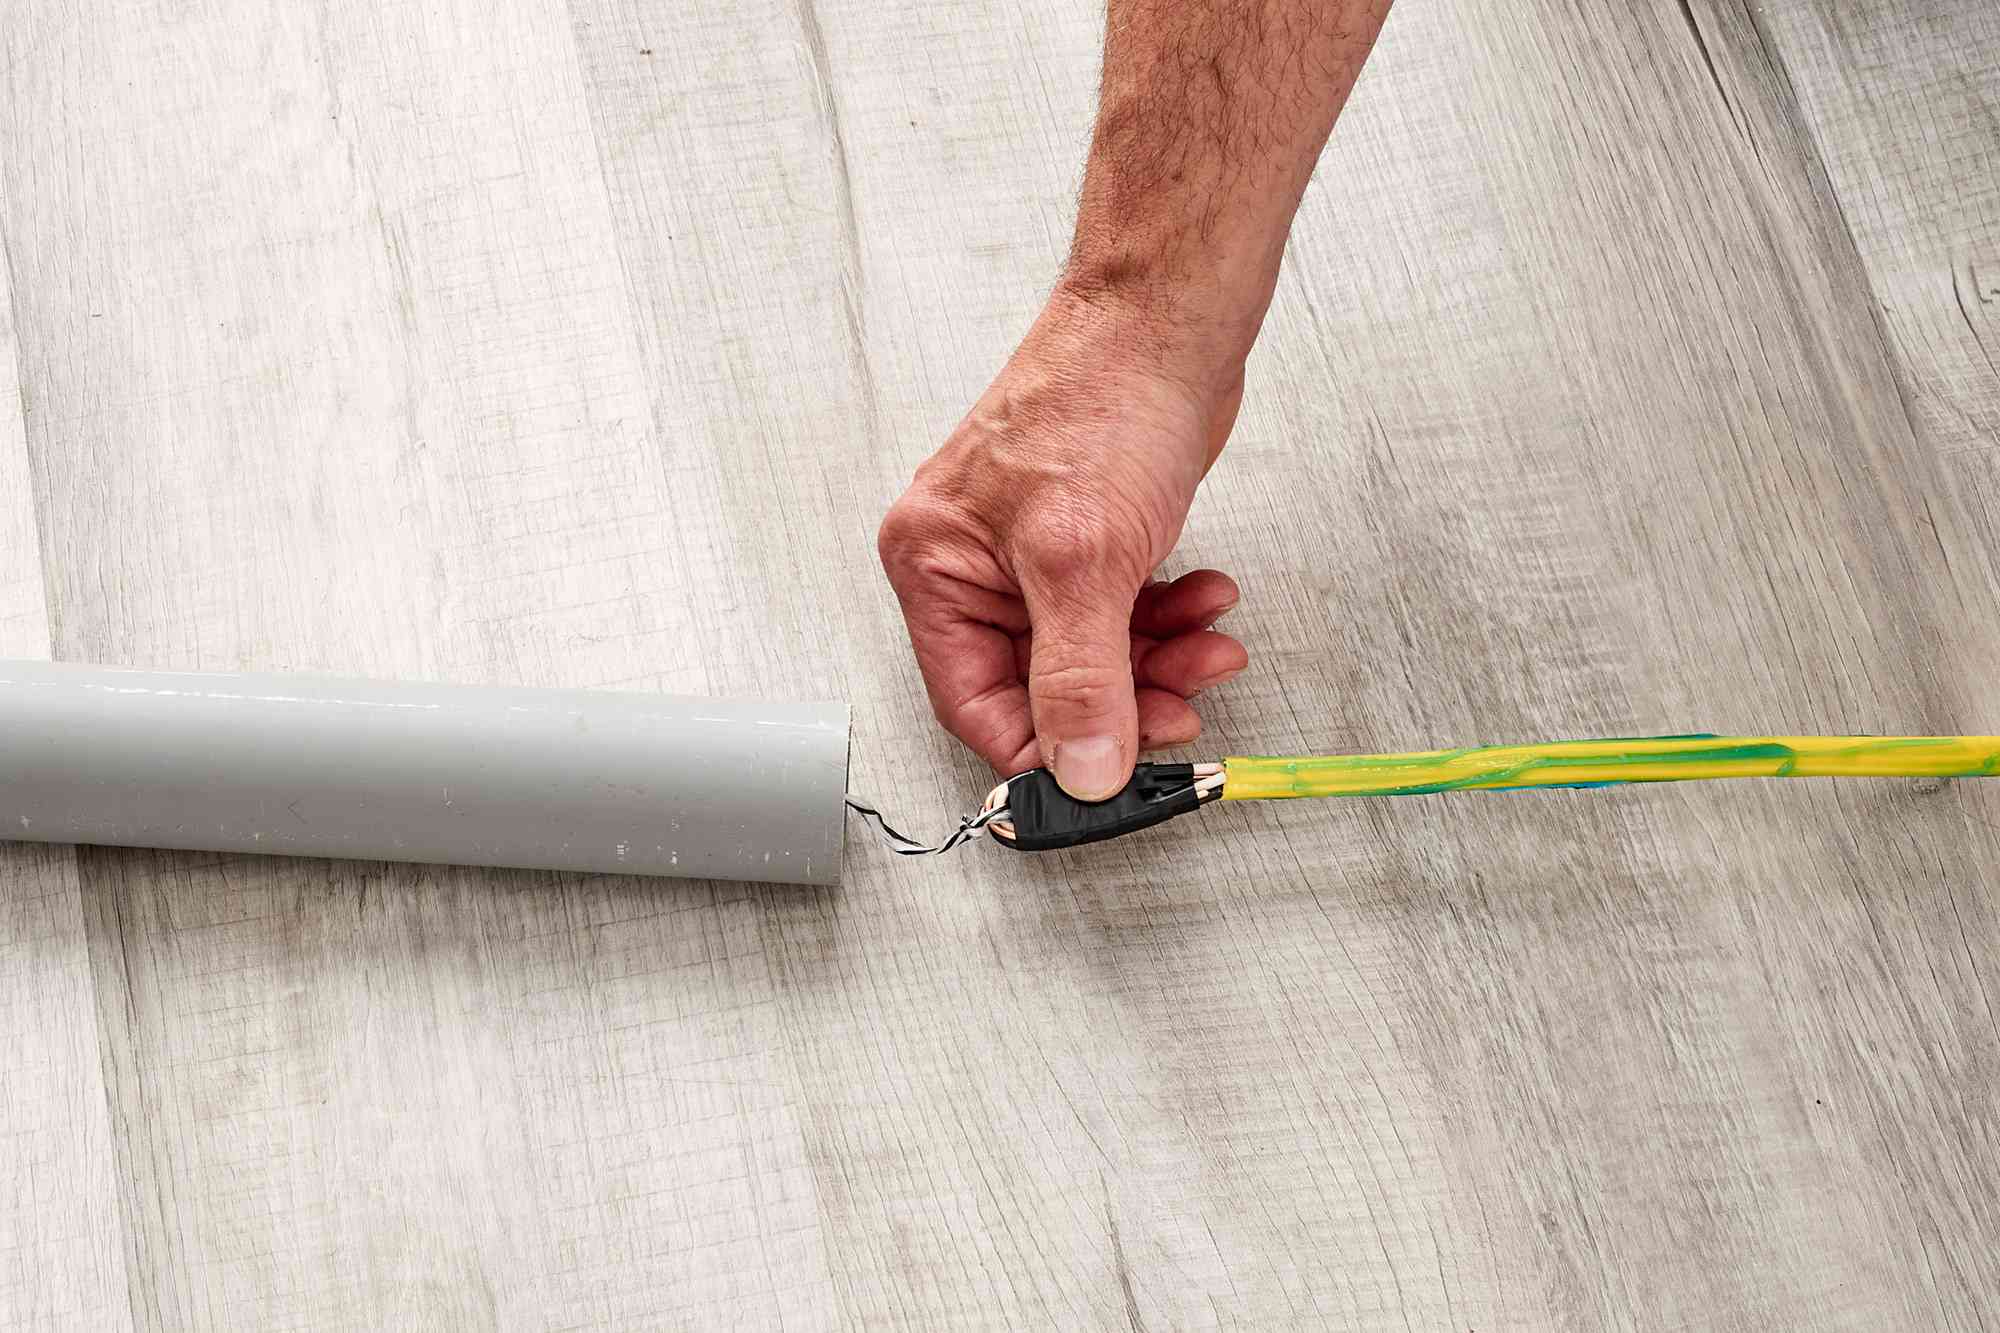
Attaching HDMI Connector to the Cable
Before you can start pulling the HDMI cable through the conduit, you need to attach an HDMI connector to the cable. Here are the steps to follow:
- Measure and cut the cable: Start by measuring the length of cable you will need for your installation. Use a sharp utility knife to cut the cable to the desired length, ensuring a clean and precise cut.
- Strip the cable jacket: Carefully remove about 2-3 inches of the outer jacket from the cut end of the cable. Be cautious not to damage or cut any of the internal wires.
- Identify the wires: Inside the cable, you will find several color-coded wires. The most common HDMI cable configuration includes 19 wires. Familiarize yourself with the wire colors and their corresponding functions by referring to the HDMI cable’s documentation.
- Strip the wires: Using a wire stripper, carefully strip the insulation from the smaller wires within the cable. Expose an appropriate amount of the wire for easy connection to the HDMI connector.
- Insert wires into the HDMI connector: Insert each wire into its corresponding slot in the HDMI connector. Ensure that the wires are aligned correctly and fully inserted into the connector.
- Solder or crimp the connector: Depending on the type of HDMI connector you are using, you may need to solder or crimp the wires to secure them in place. Follow the instructions provided with your HDMI connector to properly attach the wires.
- Test the connection: Once the HDMI connector is securely attached, test the connection by connecting the cable to your devices and ensuring that audio and video signals are transmitted successfully.
By following these steps, you can successfully attach an HDMI connector to the cable, preparing it for the installation process. Now it’s time to lubricate the cable before pulling it through the conduit.
Lubricating the Cable for an Easier Pull
To ensure a smooth and effortless pulling process, it is recommended to lubricate the HDMI cable before inserting it into the conduit. Lubrication helps reduce friction and allows the cable to glide more easily through the conduit, preventing any potential damage or resistance.
Here are the steps to lubricate the cable for an easier pull:
- Choose the right lubricant: Select a cable lubricant or wire pulling gel specifically designed for this purpose. These lubricants are formulated to provide optimal lubrication for cable installation.
- Apply the lubricant: Apply the lubricant generously to the length of the cable that will be inserted into the conduit. Make sure to cover all sides of the cable evenly, taking care not to over-apply as excess lubricant can become messy.
- Distribute the lubricant: Use your fingers or a clean cloth to spread the lubricant evenly along the cable’s surface. Ensure that the lubricant reaches the nooks and crannies of the cable, providing a smooth and consistent layer.
- Remove excess lubricant: Before inserting the cable into the conduit, wipe off any excess lubricant. This step helps prevent the lubricant from dripping or causing a mess during the installation process.
Lubricating the cable before pulling it through the conduit reduces friction, making the entire process much easier and less time-consuming. Once the cable is properly lubricated, it’s time to move on to the next step: inserting the HDMI cable into the conduit.
When pulling an HDMI cable through conduit, use a cable lubricant to reduce friction and make the process easier. It will also help protect the cable from damage.
Read more: How To Pull Wire Through Conduit
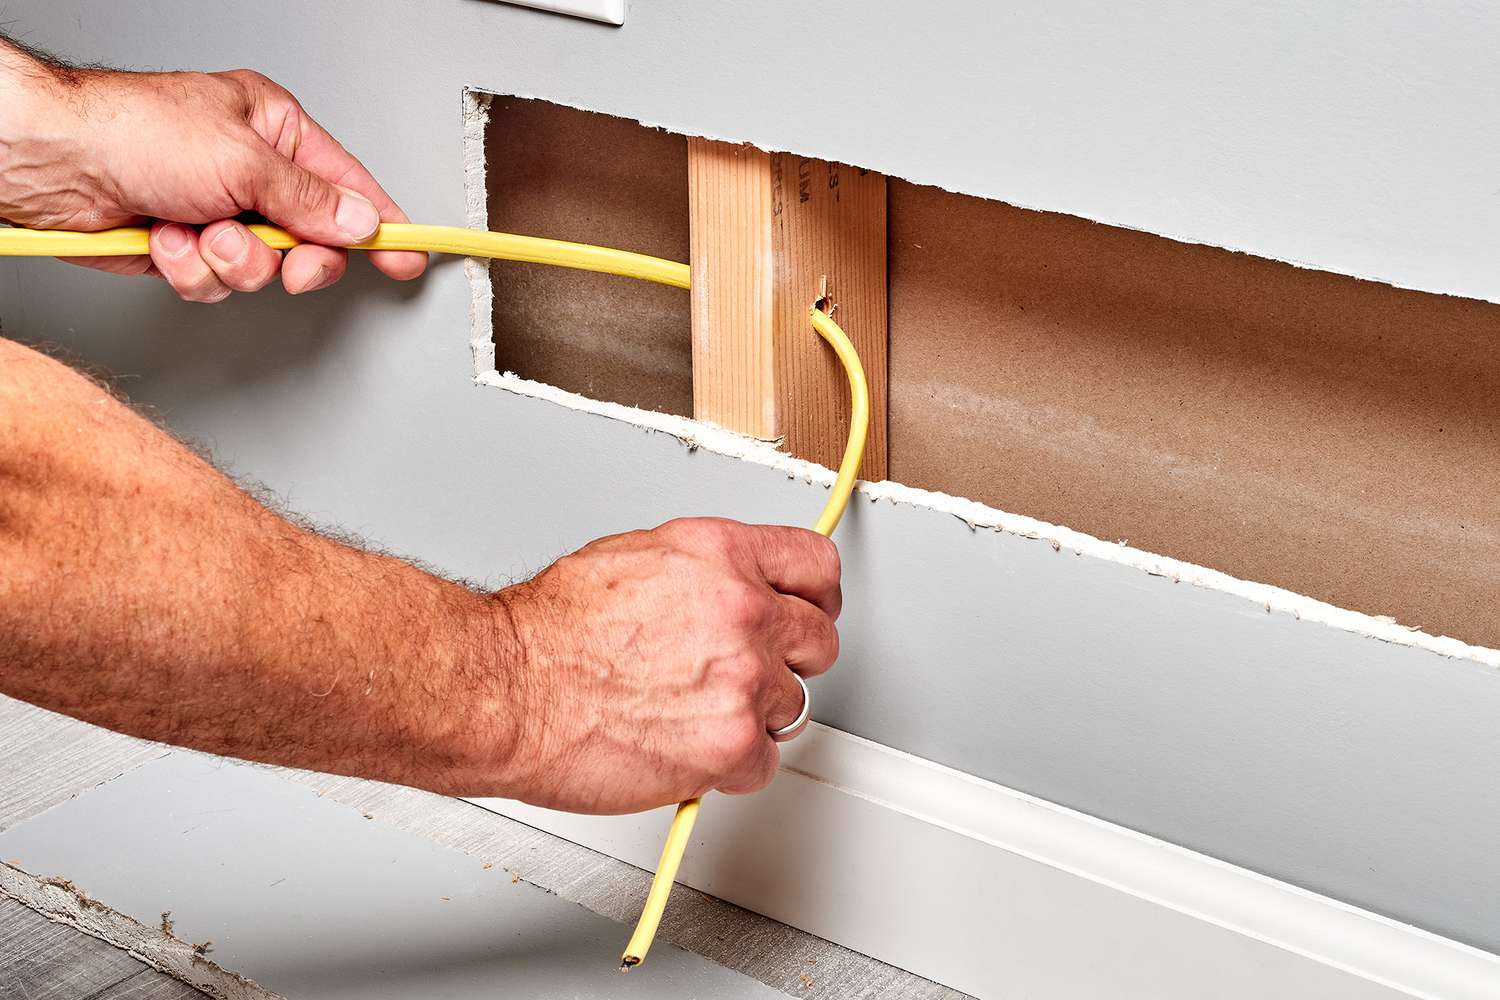
Inserting the HDMI Cable into the Conduit
Now that you have prepared the cable and lubricated it for an easier pull, it’s time to insert the HDMI cable into the conduit. This step requires careful handling to ensure that the cable smoothly navigates through the pathway.
Follow these steps to insert the HDMI cable into the conduit:
- Starting point: Identify the starting point of the conduit, usually where your video source device is located. Ensure that the conduit is securely fastened in place to prevent it from moving or shifting during the installation process.
- Feed the cable: Gently feed the lubricated end of the HDMI cable into the opening of the conduit. Slowly push the cable into the conduit, allowing it to gradually move through the pathway. Avoid applying excessive force as this may cause the cable to get stuck or damaged.
- Monitor the progress: As you insert the cable, keep an eye on its movement and ensure that it is progressing smoothly through the conduit. In case you encounter any resistance or difficulty, take immediate action to prevent any damage to the cable.
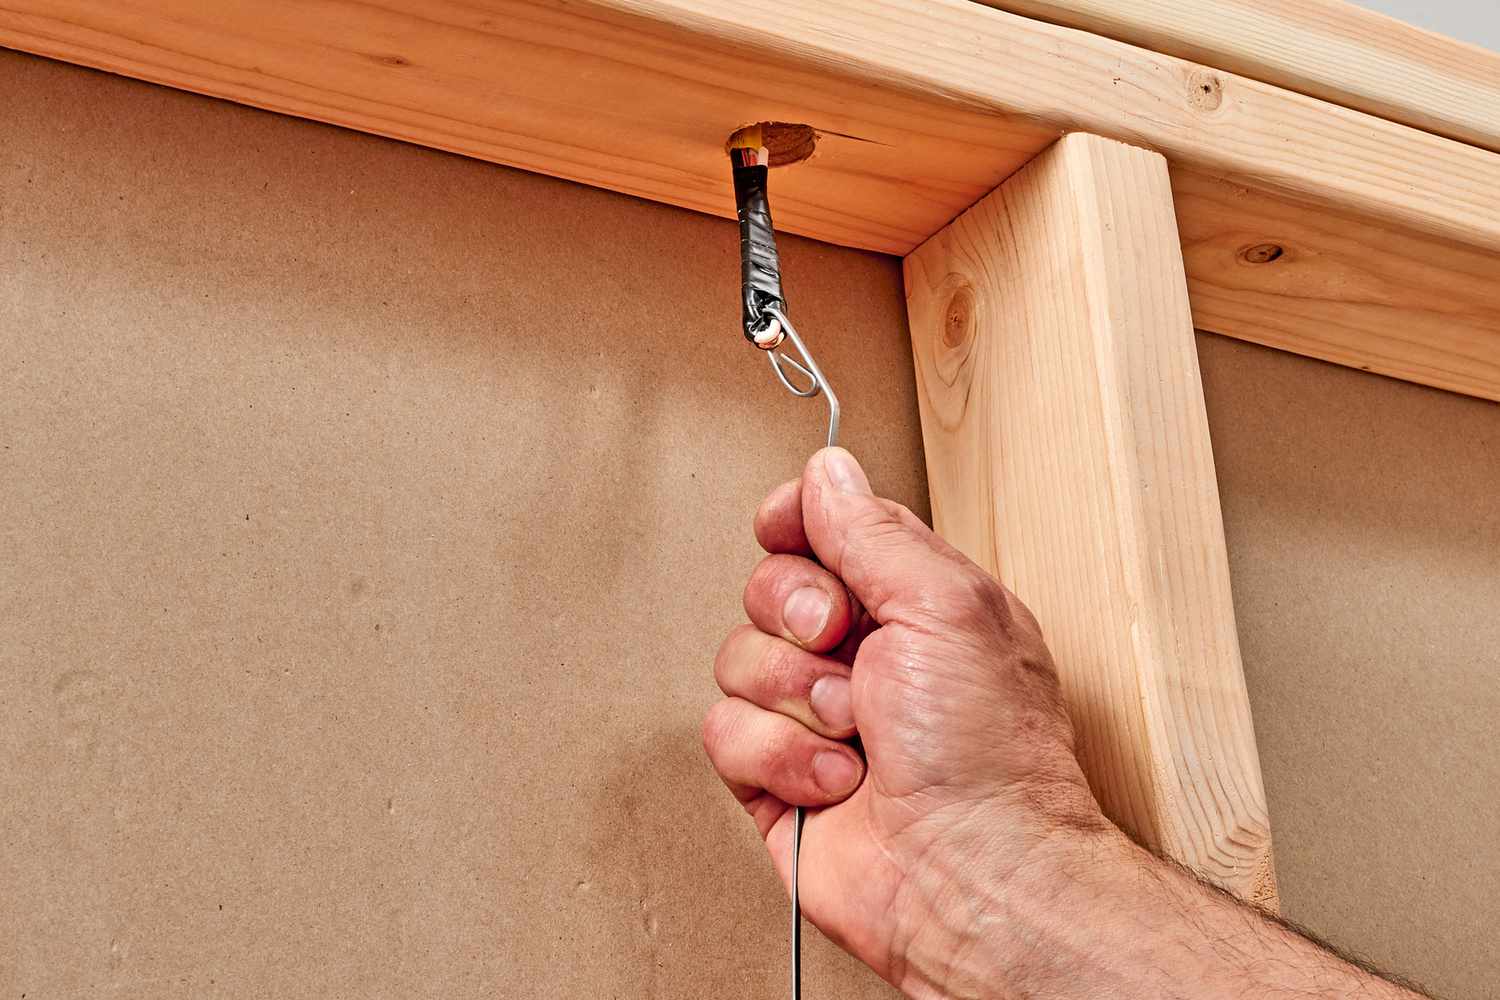
- Assist with a fish tape: For longer conduit runs or challenging installations, you may need to use a fish tape to guide the cable through tight bends or corners. Attach the HDMI cable to the end of the fish tape and carefully navigate it through the conduit, ensuring it stays on track.
- Secure the cable: Once the entire length of the HDMI cable has been inserted into the conduit, secure the cable at the endpoint to prevent it from retracting back into the conduit. Use a cable clamp or tie to keep the cable in place.
By following these steps, you can successfully insert the HDMI cable into the conduit, ensuring a seamless and secure installation. Now it’s time to move on to the next step: pulling the HDMI cable through the conduit.
Pulling the HDMI Cable Through the Conduit
With the HDMI cable securely inserted into the conduit, it’s time to begin the process of pulling the cable through. This step requires careful coordination and attention to ensure a successful and damage-free installation. Follow these steps to pull the HDMI cable through the conduit:
- Prepare for pulling: Make sure that both the starting point and endpoint of the conduit are accessible and free from any obstacles. Clear any debris or objects that may hinder the smooth movement of the cable.
- Choose a pulling method: Depending on your specific installation needs, you have a few options for pulling the HDMI cable. One common method is using a fish tape or pulling wire attached to the end of the cable. Another option is using a cable-pulling tool or grip, which provides a secure grip on the cable for easier pulling.
- Start pulling: Slowly and steadily begin pulling the HDMI cable from the starting point towards the endpoint. Apply gradual and consistent force to ensure the cable moves smoothly through the conduit. Avoid jerking or pulling forcefully, as this may cause the cable to get tangled or damaged.
- Assist with lubricant: If you encounter any resistance or difficulty during the pulling process, consider applying a small amount of cable lubricant near the starting point or at any tight bends or corners. This will help reduce friction and facilitate the cable’s movement.
- Monitor the cable’s progress: Keep a close eye on the cable as you pull it through the conduit. Ensure that it doesn’t get caught on any protrusions or tangles along the pathway. Use your other hand to guide the cable into the desired direction if necessary.
- Secure the cable at the endpoint: Once the HDMI cable has been successfully pulled through the conduit, secure it at the endpoint to prevent it from retracting back into the conduit. Use cable clamps or ties to fasten the cable securely.
By following these steps and maintaining a careful and controlled approach, you can successfully pull the HDMI cable through the conduit, completing the installation process. Now it’s time to move on to the testing phase to ensure a reliable connection.
Testing the Cable Connection
Now that you have successfully pulled the HDMI cable through the conduit, it’s time to test the cable connection to ensure that it is working properly. Testing the cable connection is an essential step to verify that the audio and video signals are transmitting accurately between the connected devices.
Follow these steps to test the cable connection:
- Connect the devices: Connect one end of the HDMI cable to the video source device, such as a Blu-ray player or gaming console. Connect the other end of the cable to the display device, such as a TV or projector. Ensure that the devices are powered on.
- Select the correct input: On your display device, select the appropriate HDMI input that corresponds to the connected device. This allows the display to recognize and display the audio and video signals from the source device.
- Check for a signal: Once the devices are connected and the input is selected, check to see if there is a signal displayed on the screen. Look for the display device to show the video output from the connected device.
- Verify audio output: Play some audio content on the source device and ensure that the audio is being transmitted to the display device. Check if the audio is coming through the speakers or headphones connected to the display device.
- Check for signal quality: Pay attention to the quality of the audio and video signals. Look for any distortions, flickering, or loss of signal during playback. Adjust the settings on both the source and display devices if necessary to optimize the signal quality.
- Repeat the test: If possible, repeat the test using different audio and video content to ensure consistency in the signal transmission. This will help identify any potential issues with the cable or devices.
If you encounter any issues during the testing phase, such as a loss of signal or poor audio/video quality, double-check the cable connections and ensure that the HDMI cable is securely attached to both devices. You may also need to inspect the cable for any signs of damage or bending that could be affecting the signal transmission.
By conducting thorough testing of the cable connection, you can ensure a reliable and high-quality audiovisual experience with your HDMI setup. If everything checks out, congratulations! You have successfully installed and tested your HDMI cable connection.
Troubleshooting Common Issues
While installing and testing your HDMI cable connection, you may encounter some common issues that can disrupt the audio and video signals. Here are a few troubleshooting tips to help you resolve these issues:
- No signal: If you’re not getting any signal on your display device, double-check the cable connections. Ensure that the HDMI cable is securely plugged into both the source and display devices. Try unplugging and re-plugging the cable to establish a proper connection.
- Poor audio or video quality: If you notice distortions, flickering, or pixelation in the audio or video, first check the HDMI cable for any signs of damage, such as frayed wires or bent connectors. Replace the cable if necessary. Additionally, ensure that both the source and display devices are set to output the highest quality audio and video resolutions supported by your equipment.
- No audio: If you’re not getting any audio from the connected devices, make sure that the audio settings on both the source and display devices are properly configured. Check the mute settings, volume levels, and audio output settings to ensure they are correct. You may also want to try using a different HDMI input on the display device.
- Intermittent signal loss: If the audio or video signal intermittently cuts out, it could be due to a loose connection. Check that the HDMI cable is securely plugged into both devices. If the problem persists, try using a different HDMI cable or port to rule out any issues with the cable or device hardware.
- Compatibility issues: Some older devices may not be fully compatible with newer HDMI cable versions or features. If you’re experiencing compatibility issues, check for firmware updates for your devices. Updating the firmware can often resolve compatibility problems and ensure optimal performance.
- Length limitations: HDMI cables have length limitations, with longer cables being more susceptible to signal degradation. If your cable length exceeds the recommended limit for your chosen HDMI version, consider using an HDMI extender or a signal booster to maintain signal integrity.
If troubleshooting these common issues does not resolve the problem, consult the user manuals for your devices or seek professional assistance. Remember, each installation may have its unique challenges, so adapt these troubleshooting tips as needed to address your specific situation.
By being proactive in troubleshooting and resolving any issues, you can enjoy a seamless and uninterrupted audiovisual experience with your HDMI cable connection.
Conclusion
Congratulations on successfully pulling the HDMI cable through the conduit and setting up a reliable and high-quality audiovisual connection! By understanding the basics of HDMI cables and conduits, preparing the conduit and tools, attaching the HDMI connector to the cable, lubricating the cable, inserting it into the conduit, pulling it through, testing the cable connection, and troubleshooting common issues, you have completed a comprehensive installation process.
Through careful planning, attention to detail, and troubleshooting when necessary, you have ensured a seamless and reliable audiovisual experience. The HDMI cable and conduit setup will provide a neat and organized installation while preserving the integrity of the audio and video signals.
Remember to always select the appropriate conduit size, use lubrication for smoother cable pulling, and test the connection to verify optimal signal transmission. If you encounter any issues along the way, don’t hesitate to troubleshoot and seek assistance if needed.
With your HDMI cable properly installed, you can now enjoy crystal-clear audio and stunning high-definition video in your home theater or audiovisual setup. Whether you’re watching movies, playing games, or enjoying other multimedia content, the HDMI cable will ensure a captivating and immersive experience.
Thank you for following this guide on how to pull an HDMI cable through a conduit. We hope that this article has been informative and has empowered you to successfully set up your HDMI cable connection.
Happy viewing and listening!
Frequently Asked Questions about How To Pull HDMI Cable Through Conduit
Was this page helpful?
At Storables.com, we guarantee accurate and reliable information. Our content, validated by Expert Board Contributors, is crafted following stringent Editorial Policies. We're committed to providing you with well-researched, expert-backed insights for all your informational needs.
0 thoughts on “How To Pull HDMI Cable Through Conduit”