Home>Articles>How To Reattach A Threaded Dropear Fitting On A Showerhead
Articles
How To Reattach A Threaded Dropear Fitting On A Showerhead
Modified: August 26, 2024
Looking for step-by-step instructions on reattaching a threaded dropear fitting on a showerhead? Check out our informative articles for expert guidance and tips.
(Many of the links in this article redirect to a specific reviewed product. Your purchase of these products through affiliate links helps to generate commission for Storables.com, at no extra cost. Learn more)
Introduction
When it comes to household repairs, one common issue that many people encounter is a threaded drop ear fitting becoming loose or detached on a showerhead. This can occur due to regular wear and tear, improper installation, or simply over time as the connections loosen. Reattaching a threaded drop ear fitting may seem like a daunting task, but with the right tools and a little know-how, you can easily fix this problem yourself without having to call a plumber.
In this article, we will guide you through the step-by-step process of reattaching a threaded drop ear fitting on a showerhead. By following these instructions, you can save time, money, and frustration by resolving the issue quickly and effectively.
Before we dive into the repair process, it’s important to note that safety should always be a top priority. Make sure to turn off the water supply to the shower before beginning any work and take necessary precautions to avoid injury. Additionally, it’s recommended to consult the manufacturer’s instructions for your specific showerhead to ensure you are following the correct procedure.
Now, let’s gather the necessary tools so we can get started!
Key Takeaways:
- Easily reattach a loose threaded drop ear fitting on a showerhead by following simple steps and using basic tools, saving time and money on plumber services.
- Prioritize safety, gather necessary tools, clean and apply thread sealant tape, securely reattach the fitting, and reinstall the showerhead to resolve the issue effectively.
Step 1: Gather the necessary tools
Before you begin the process of reattaching a threaded drop ear fitting on a showerhead, it’s important to gather all the necessary tools to ensure a smooth and efficient repair. Having everything you need on hand will save you time and frustration during the process.
Here’s a list of the tools you will need:
- Adjustable wrench
- Thread sealant tape
- Plumber’s tape (optional)
- Soft cloth or towel
- Bucket or container (to catch any water that may drain from the showerhead)
The adjustable wrench is essential for loosening and tightening the fitting, while the thread sealant tape will help create a watertight seal. Plumber’s tape, although optional, can also be useful for added protection against leaks.
Additionally, having a soft cloth or towel nearby will be handy for wiping away any excess water or debris during the repair process. Finally, having a bucket or container to catch any water that may drain from the showerhead will prevent a mess in your bathroom.
Once you have gathered all the tools, you are ready to move on to the next step: removing the showerhead. This will allow you better access to the threaded drop ear fitting and make the repair process easier. So let’s move on to Step 2!
Step 2: Remove the showerhead
Now that you have gathered all the necessary tools, it’s time to remove the showerhead. Removing the showerhead will provide you with better access to the threaded drop ear fitting, making it easier to reattach it later on. Follow these steps to remove the showerhead:
- Locate the showerhead. It is typically located at the end of the shower arm, which is the pipe that extends out from the wall.
- Using an adjustable wrench, grip the flat sides of the showerhead where it connects to the shower arm.
- Turn the wrench counterclockwise to loosen the showerhead. Apply gentle pressure at first to avoid damaging the threads.
- Continue turning the wrench until the showerhead is completely detached from the shower arm. You may need to use a bit of force, but be careful not to exert too much pressure.
- Once the showerhead is removed, set it aside in a safe place.
Removing the showerhead may cause some water to drain out, so be prepared with a bucket or container to catch any excess water. It’s also a good idea to use a soft cloth or towel to wipe away any water or residue from the shower arm.
With the showerhead removed, you now have a clear view of the threaded drop ear fitting. In the next step, we will discuss how to clean the threaded area to ensure a proper seal. So, let’s move on to Step 3!
Step 3: Clean the threaded area
After removing the showerhead, it’s important to clean the threaded area to ensure a proper seal when reattaching the threaded drop ear fitting. Over time, dirt, debris, and residue can accumulate on the threads, which may prevent a secure connection. Follow these steps to clean the threaded area:
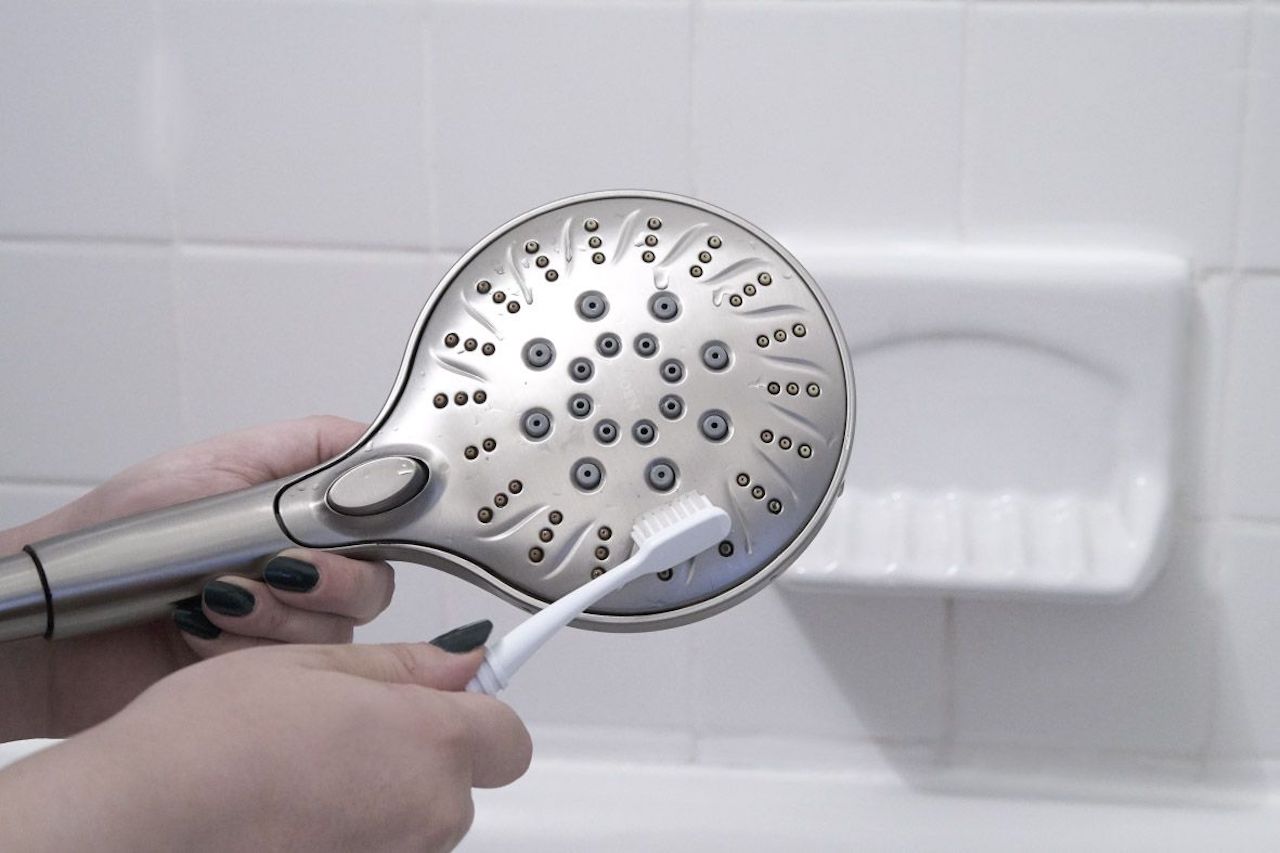
- Inspect the threads for any visible dirt, debris, or old thread sealant tape.
- If you notice any buildup, use a soft cloth or toothbrush to gently scrub the threads and remove any dirt or debris. Be careful not to scrub too forcefully and avoid damaging the threads.
- If there is old thread sealant tape present, peel it off using your fingers or a small tool. Make sure to remove all remnants of the old tape.
- Once the threads are clean, use a damp cloth to wipe away any residue or debris.
- Inspect the cleaned threads to ensure they are free from any remaining dirt, debris, or old tape.
By cleaning the threaded area, you are removing any potential obstacles that may hinder a tight and secure connection. This will help in achieving a proper seal later on when reattaching the threaded drop ear fitting.
Now that the threaded area is clean and free from debris, it’s time to prepare the thread sealant tape. In the next step, we will discuss how to do this effectively. Let’s move on to Step 4!
Step 4: Prepare the thread sealant tape
Before reattaching the threaded drop ear fitting, it’s important to prepare the thread sealant tape. This tape, also known as plumber’s tape or Teflon tape, is used to create a watertight seal between the threads of the fitting and the showerhead. Follow these steps to prepare the thread sealant tape:
- Take the thread sealant tape roll and locate the starting end of the tape.
- Hold the starting end of the tape between your thumb and index finger.
- With your other hand, unwind a small section of the tape, about 2-3 inches in length.
- Once you have unwound a section of tape, tear it off from the roll using your fingers or a pair of scissors.
- Roll the small section of tape between your fingers to form a thin, even strip.
- Repeat the process of unwinding, tearing, and forming the tape strip until you have enough tape to cover the threads of the fitting.
The thread sealant tape is essential for creating a tight seal and preventing any leaks between the fitting and the showerhead. By preparing the tape beforehand, you can ensure a quicker and smoother reattachment process. Now that the thread sealant tape is ready, it’s time to apply it to the threaded drop ear fitting. Move on to Step 5 to learn how to do this correctly.
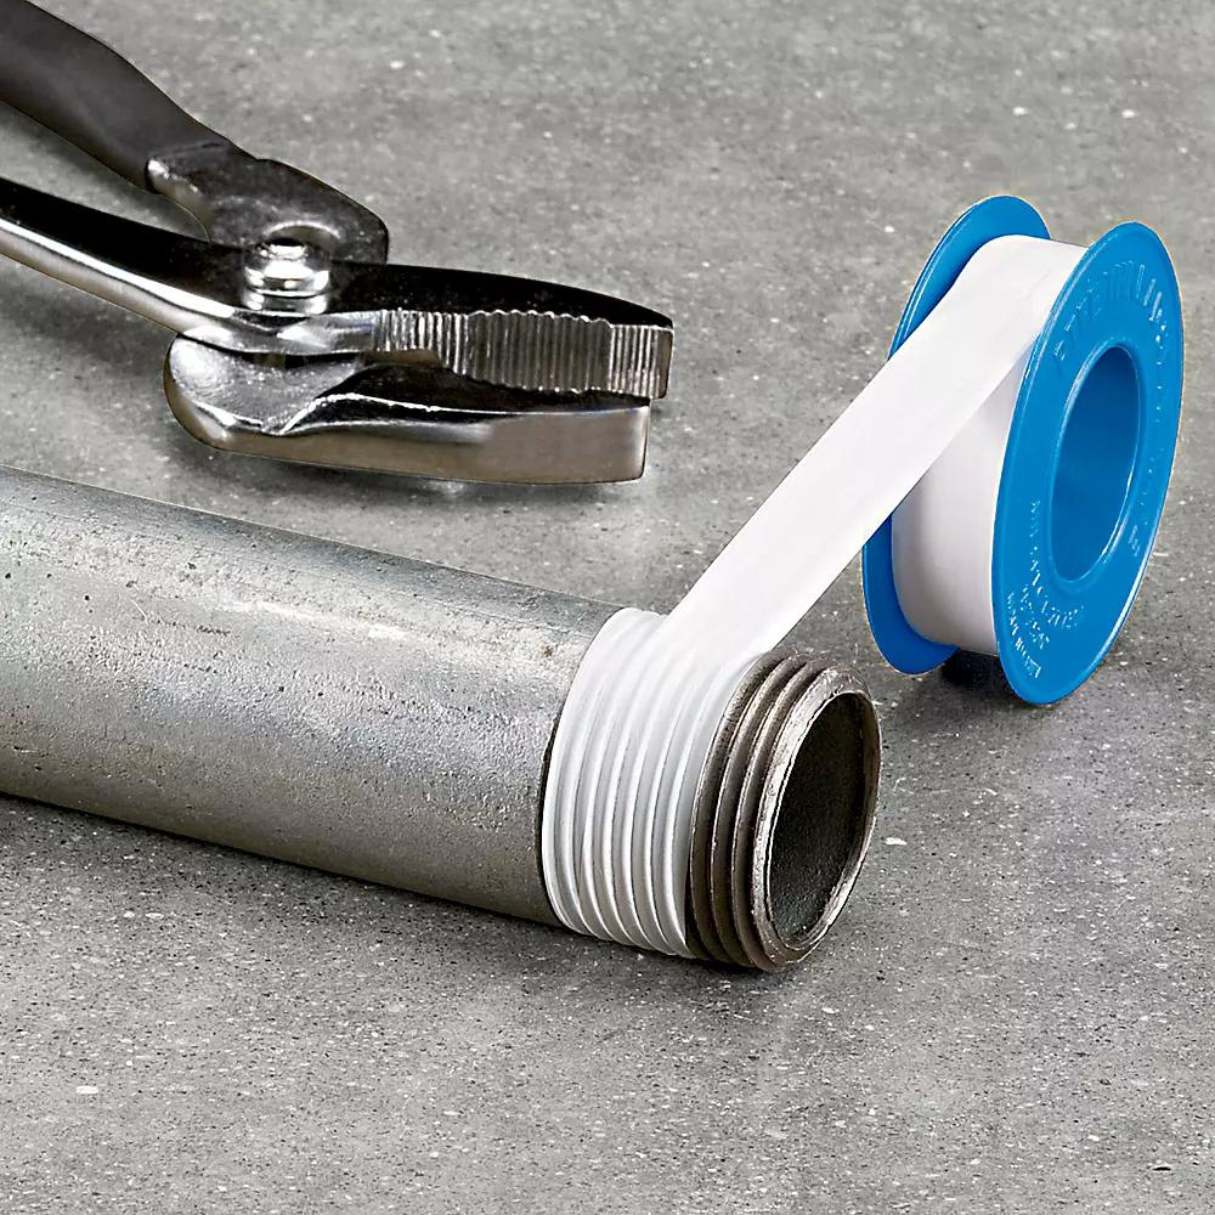
When reattaching a threaded drop ear fitting on a showerhead, use Teflon tape on the threads to create a tight seal and prevent leaks. Wrap the tape around the male threads in the direction of the threads to ensure a secure connection.
Read more: How To Thread Conduit
Step 5: Apply the thread sealant tape
Now that you have prepared the thread sealant tape, it’s time to apply it to the threaded drop ear fitting. The tape serves as a barrier to seal any potential gaps or leaks between the fitting and the showerhead. Follow these steps to apply the thread sealant tape:
- Take the thin, even strip of thread sealant tape you prepared in the previous step.
- Hold the fitting with one hand, making sure the threaded portion is exposed.
- With your other hand, begin wrapping the tape clockwise around the threads of the fitting.
- Apply gentle pressure while wrapping to ensure the tape adheres firmly, but be careful not to stretch or tear it.
- Continue wrapping the tape around the threads, overlapping each layer by about half of the tape’s width.
- Continue wrapping until you have covered the entire threaded portion of the fitting.
- Tear off the excess tape once you reach the end of the fitting.
- Smooth down the edges of the tape to ensure a secure and even seal.
Make sure to apply enough layers of thread sealant tape to form a thick barrier, but avoid applying an excessive amount that could interfere with the proper attachment of the fitting.
With the thread sealant tape applied, the threaded drop ear fitting is now ready to be reattached. In the next step, we will guide you through the process of securely attaching the fitting. Let’s move on to Step 6!
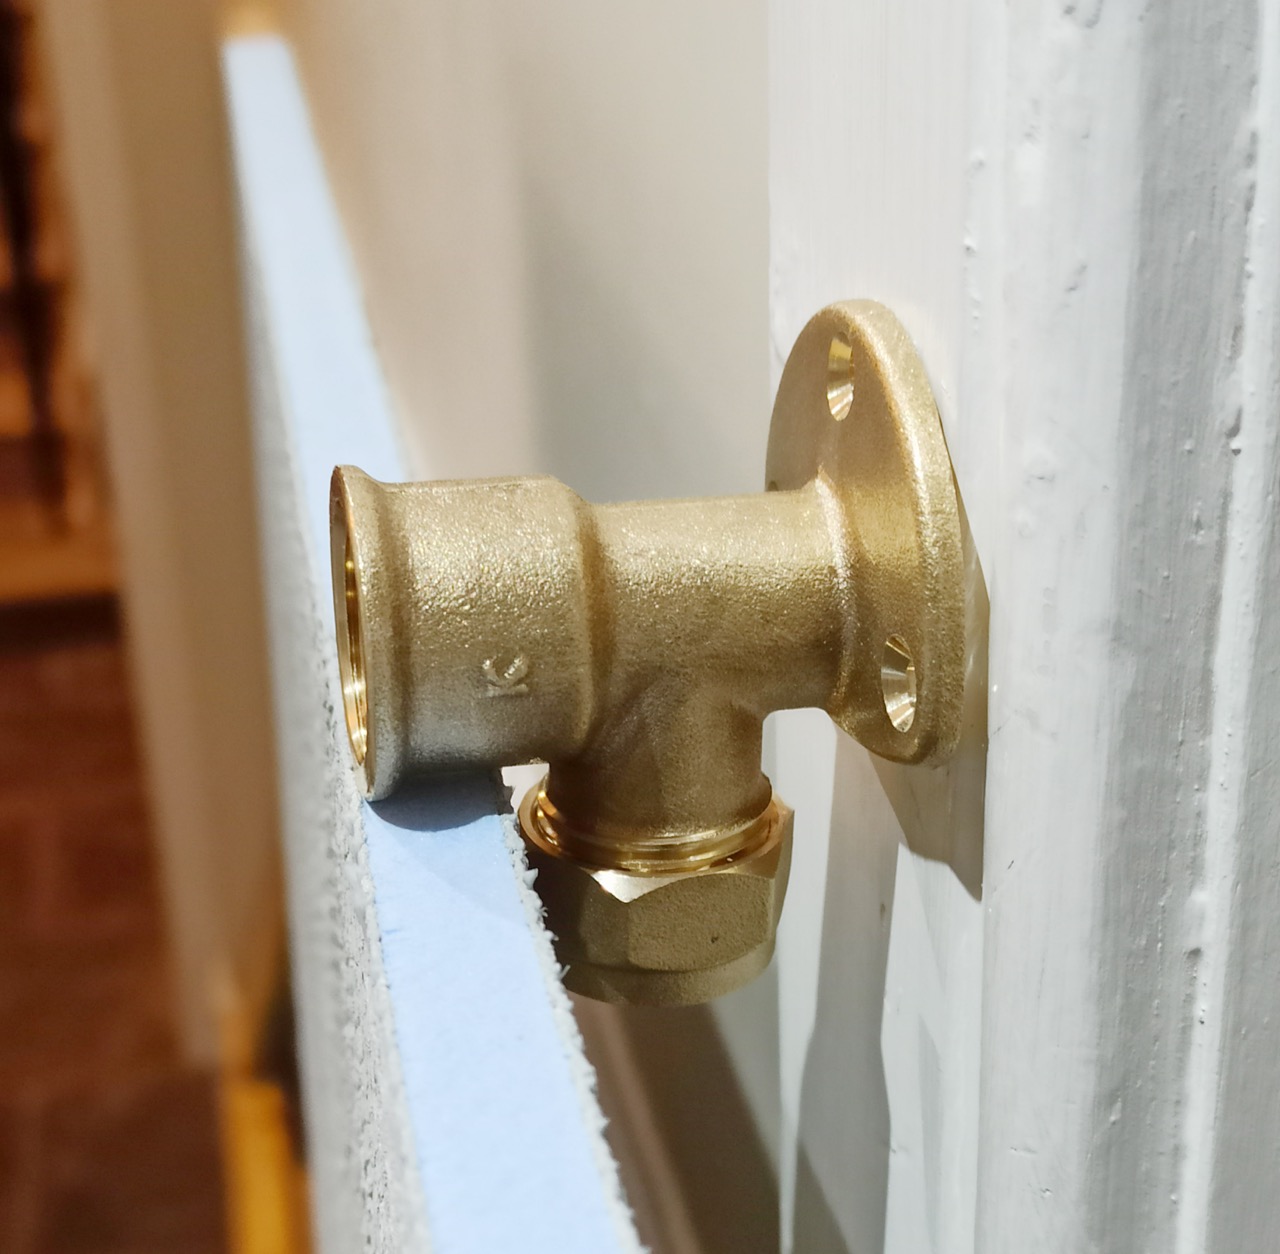
Step 6: Reattach the threaded drop ear fitting
Now that you have applied the thread sealant tape, it’s time to reattach the threaded drop ear fitting to the showerhead. Follow these steps to securely attach the fitting:
- Hold the threaded drop ear fitting in one hand, aligning it with the threads of the showerhead.
- Gently begin turning the fitting clockwise by hand, ensuring that the threads engage properly.
- Continue turning the fitting clockwise until it is hand-tightened and snug against the showerhead.
- Use an adjustable wrench to further tighten the fitting. It’s recommended to grip the fitting with the wrench near the center to avoid damaging the threads.
- Turn the wrench clockwise to tighten the fitting, using moderate pressure. Be careful not to overtighten, as this can cause damage.
- Stop tightening when you feel resistance or when the fitting is securely attached without any wobbling or loosening.
By securely reattaching the threaded drop ear fitting, you ensure a stable and leak-free connection to the showerhead. It’s important not to overtighten, as this can lead to damage or leaks. Once the fitting is properly attached, move on to the next step to ensure its tightness.
In the next step, we will guide you through the process of tightening the fitting securely. Proceed to Step 7 to learn more.
Step 7: Tighten the fitting securely
After reattaching the threaded drop ear fitting to the showerhead, it’s important to ensure that it is tightened securely. This will help prevent any leaks or loosening of the fitting over time. Follow these steps to tighten the fitting securely:
- Use an adjustable wrench to grip the flat sides of the fitting, making sure to hold it near the center.
- Gently turn the wrench clockwise to tighten the fitting.
- Apply moderate pressure while turning the wrench, ensuring that the fitting is securely tightened without overtightening.
- Check for any wobbling or movement of the fitting. If you feel or see any, continue to tighten the fitting until it is stable.
- Stop tightening once the fitting feels secure and doesn’t move with gentle pressure.
It’s important to strike a balance between tightening the fitting securely and avoiding overtightening, which can lead to damage or leaks. By following these steps, you can ensure that the threaded drop ear fitting is properly secured to the showerhead.
Now that the fitting is securely tightened, it’s time to reinstall the showerhead. In the next step, we will guide you through the process of doing this. Let’s move on to Step 8!
Step 8: Reinstall the showerhead
With the threaded drop ear fitting securely tightened, it’s time to reinstall the showerhead. Follow these steps to properly reinstall the showerhead:
- Take the showerhead and hold it in your hand, aligning the threads with the exposed shower arm.
- Turn the showerhead clockwise by hand, starting the threads onto the shower arm.
- Continue turning the showerhead clockwise until it is hand-tightened and snug against the shower arm.
- Use an adjustable wrench to further tighten the showerhead if needed, gripping it near the center to avoid damaging the threads.
- Turn the wrench clockwise to tighten the showerhead, applying moderate pressure.
- Stop tightening once the showerhead is securely attached without any wobbling or movement.
It’s important not to overtighten the showerhead, as this can cause damage or result in leaks. Once the showerhead is properly reinstalled and tightened, double-check to ensure that it is securely attached.
With the showerhead successfully reinstalled, you have completed the process of reattaching a threaded drop ear fitting on a showerhead. Congratulations!
Remember, it’s a good idea to check for any leaks after turning the water supply back on. If you notice any leaks, make sure to tighten the fittings further or consult a professional if needed.
By following these steps, you have successfully resolved the issue of a loose or detached threaded drop ear fitting on your showerhead. Instead of calling a plumber, you have saved time, money, and hassle by tackling the repair yourself.
Thank you for reading this guide, and we hope it has been helpful in assisting you with your repair needs. Happy showering!
Read more: How To Store Embroidery Thread
Conclusion
In conclusion, reattaching a threaded drop ear fitting on a showerhead may seem like a daunting task, but with the right tools and a little know-how, you can easily fix this issue yourself. By following the step-by-step process outlined in this article, you have learned how to gather the necessary tools, remove the showerhead, clean the threaded area, prepare the thread sealant tape, apply the tape, reattach the threaded drop ear fitting, tighten it securely, and finally reinstall the showerhead.
Throughout the repair process, it’s important to prioritize safety by turning off the water supply and taking necessary precautions. Additionally, consulting the manufacturer’s instructions for your specific showerhead can provide valuable guidance.
By successfully reattaching the threaded drop ear fitting, you have not only resolved the problem of a loose or detached fitting but also saved time and money by avoiding the need to call a plumber. You have taken control of the repair process and empowered yourself to tackle household repairs with confidence.
We hope this comprehensive guide has been informative and helpful in assisting you with your repair needs. Remember, never hesitate to seek professional assistance if you encounter any difficulties or feel unsure about any step of the process.
Thank you for reading, and we wish you a secure and leak-free showerhead for many refreshing showers to come!
Frequently Asked Questions about How To Reattach A Threaded Dropear Fitting On A Showerhead
Was this page helpful?
At Storables.com, we guarantee accurate and reliable information. Our content, validated by Expert Board Contributors, is crafted following stringent Editorial Policies. We're committed to providing you with well-researched, expert-backed insights for all your informational needs.


0 thoughts on “How To Reattach A Threaded Dropear Fitting On A Showerhead”