Articles
How To Remove Cover From Ring Doorbell
Modified: August 25, 2024
Learn the step-by-step process to remove the cover from your Ring Doorbell with this informative article. Find helpful tips and tricks to successfully complete the task.
(Many of the links in this article redirect to a specific reviewed product. Your purchase of these products through affiliate links helps to generate commission for Storables.com, at no extra cost. Learn more)
Introduction
The Ring Doorbell has become a popular choice for homeowners looking to enhance their home security. With its sleek design and innovative features, it provides a convenient way to monitor and protect your property. However, there may be times when you need to remove the cover from your Ring Doorbell, whether it’s for maintenance, troubleshooting, or upgrading to a new model. In this article, we will guide you through the steps to safely remove the cover from your Ring Doorbell, ensuring that you can easily access and work on the device.
Before we begin, it’s important to note that removing the cover of a Ring Doorbell may void the warranty. So, if your device is still under warranty, it’s best to contact Ring support for assistance. Additionally, make sure to follow all safety precautions and turn off the power supply to the doorbell before starting the removal process.
Now, let’s dive into the tools and materials you will need for this task.
Key Takeaways:
- Safely remove the cover from your Ring Doorbell by following step-by-step instructions, ensuring easy access for maintenance, troubleshooting, or upgrades while prioritizing safety and proper handling of components.
- Gather necessary tools and materials, turn off power, remove faceplate, disconnect wiring, unscrew mounting bracket, detach doorbell, and reinstall or replace the cover to maintain functionality and aesthetic appeal of your Ring Doorbell.
Read more: How To Remove Ring Doorbell From Wall
Tools and Materials Needed
Before you start removing the cover from your Ring Doorbell, gather the following tools and materials:
- Flathead screwdriver
- Philips screwdriver
- Needle-nose pliers
- Wire strippers (if necessary)
- New cover (if needed)
Having these tools and materials ready will ensure that you have everything you need to successfully remove the cover.
Step 1: Turn off the power
Before you begin removing the cover from your Ring Doorbell, it’s crucial to turn off the power supply to the device. This step is essential for your safety and to avoid any damage to the doorbell.
To turn off the power, you need to locate the circuit breaker or fuse box in your home. Look for the switch or fuse that controls the power supply to the doorbell. Depending on your electrical setup, it may be labeled as “Doorbell” or “Ring Doorbell.”
Once you have identified the correct circuit breaker or fuse, flip the switch to the “Off” position or remove the fuse to cut off power to the doorbell.
After turning off the power, it’s a good idea to double-check that the doorbell is no longer functioning. Press the doorbell button to ensure that it doesn’t ring or activate any features. If the doorbell still functions, you may have mistakenly turned off the wrong breaker or fuse. Take the necessary precautions and try again until the doorbell is completely powered off.
With the power turned off, you can now confidently move on to the next step of removing the cover from your Ring Doorbell.
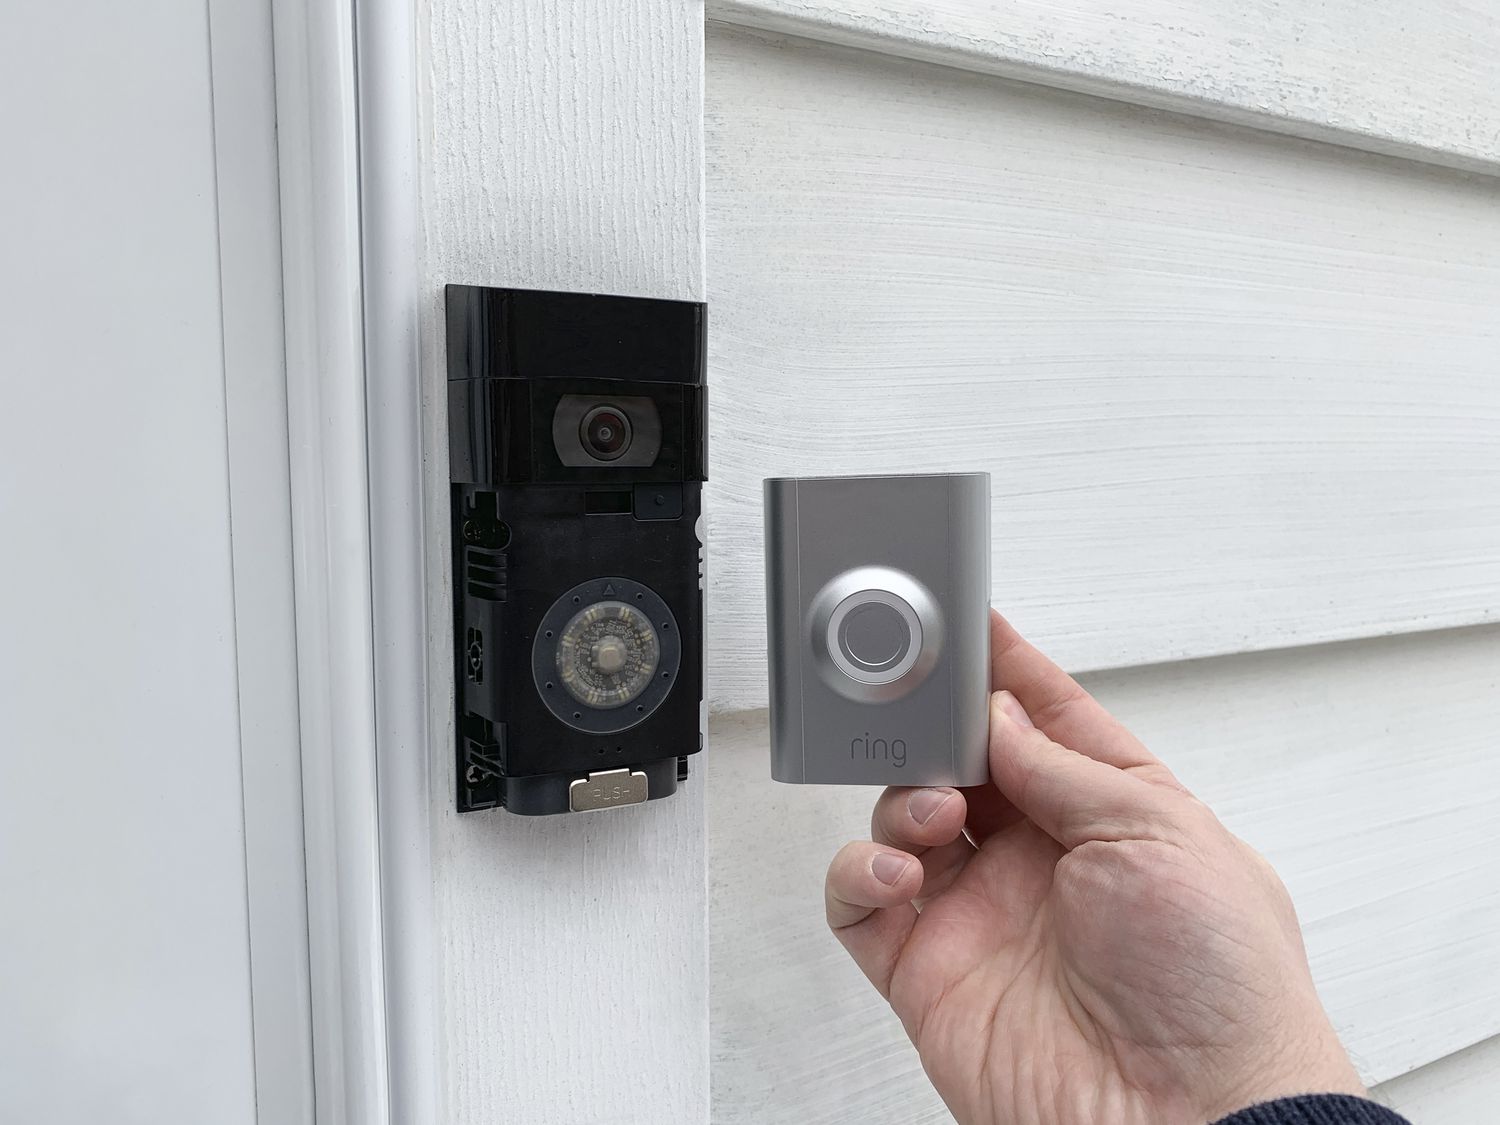
Step 2: Remove the faceplate
Now that you have turned off the power to your Ring Doorbell, it’s time to remove the faceplate. The faceplate is the visible part of the doorbell that covers the internal components.
Start by inspecting the faceplate for any screws or clips holding it in place. In most cases, there will be one or two small screws located either at the bottom or on the sides of the faceplate. Use a Phillips screwdriver to carefully unscrew these screws, taking care not to drop them or lose them.
If there are no visible screws, your Ring Doorbell might have a faceplate that is held in place by clips. In this case, use a flathead screwdriver to gently pry the faceplate away from the wall or mounting bracket. Insert the screwdriver between the faceplate and the wall and carefully apply pressure to release the clips. Work your way around the faceplate, gently prying it out until it detaches from the doorbell.
Once the screws or clips are removed, or the faceplate is detached, set it aside in a safe place. Be mindful of any wiring that may be connected to the faceplate. If necessary, use a small piece of tape to secure the wiring to the wall to prevent it from falling back inside.
With the faceplate removed, you now have access to the inner workings of your Ring Doorbell. In the next step, we will guide you through disconnecting the wiring.
Step 3: Disconnect the wiring
With the faceplate removed from your Ring Doorbell, you now need to disconnect the wiring that connects the doorbell to your electrical system. This step is essential to ensure a safe and hassle-free removal process.
Start by carefully examining the wiring that is attached to the back of the doorbell. You will typically find two or three wires: a red wire (for power), a white wire (for audio), and sometimes a green wire (for the doorbell’s chime).
Using your needle-nose pliers, gently grip the plastic connectors that secure the wires to the doorbell. Twist the connectors counterclockwise to loosen them. Once loose, carefully pull the connectors apart, separating the wiring from the doorbell.
As you disconnect the wiring, be cautious not to forcefully pull or yank the wires. Doing so can lead to damage or breakage. Handle them delicately and ensure a smooth removal process.
If you encounter any difficulty in disconnecting the wiring, you may find it helpful to strip a small portion of each wire to expose the bare copper. This will allow you to connect and disconnect the wires with ease. However, if you’re not comfortable with this step, it’s best to seek assistance from a professional.
Once the wiring is disconnected, set it aside and ensure that it doesn’t come into contact with any metal or other wires. This will prevent any electrical contact or short circuits during the removal process.
Having successfully disconnected the wiring, we can now move on to the next step – unscrewing the mounting bracket.
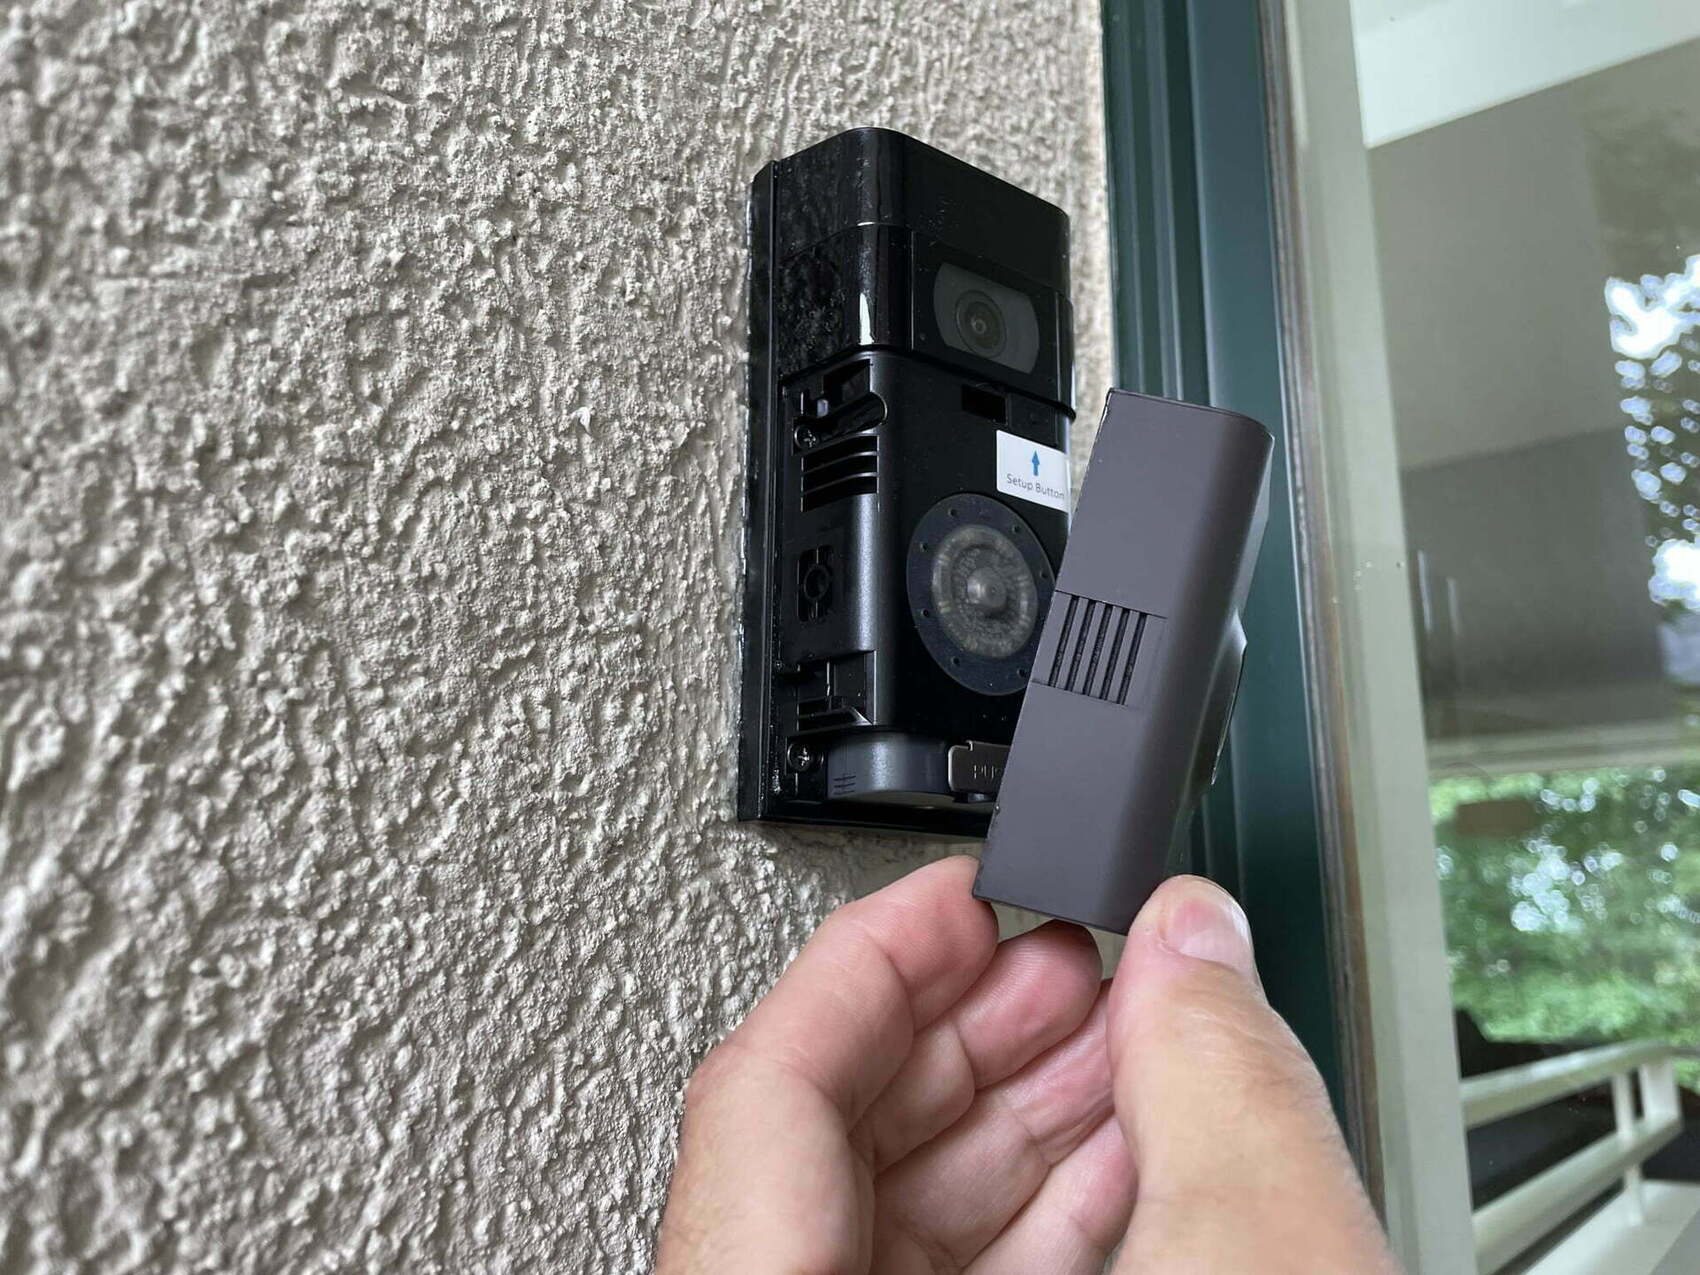
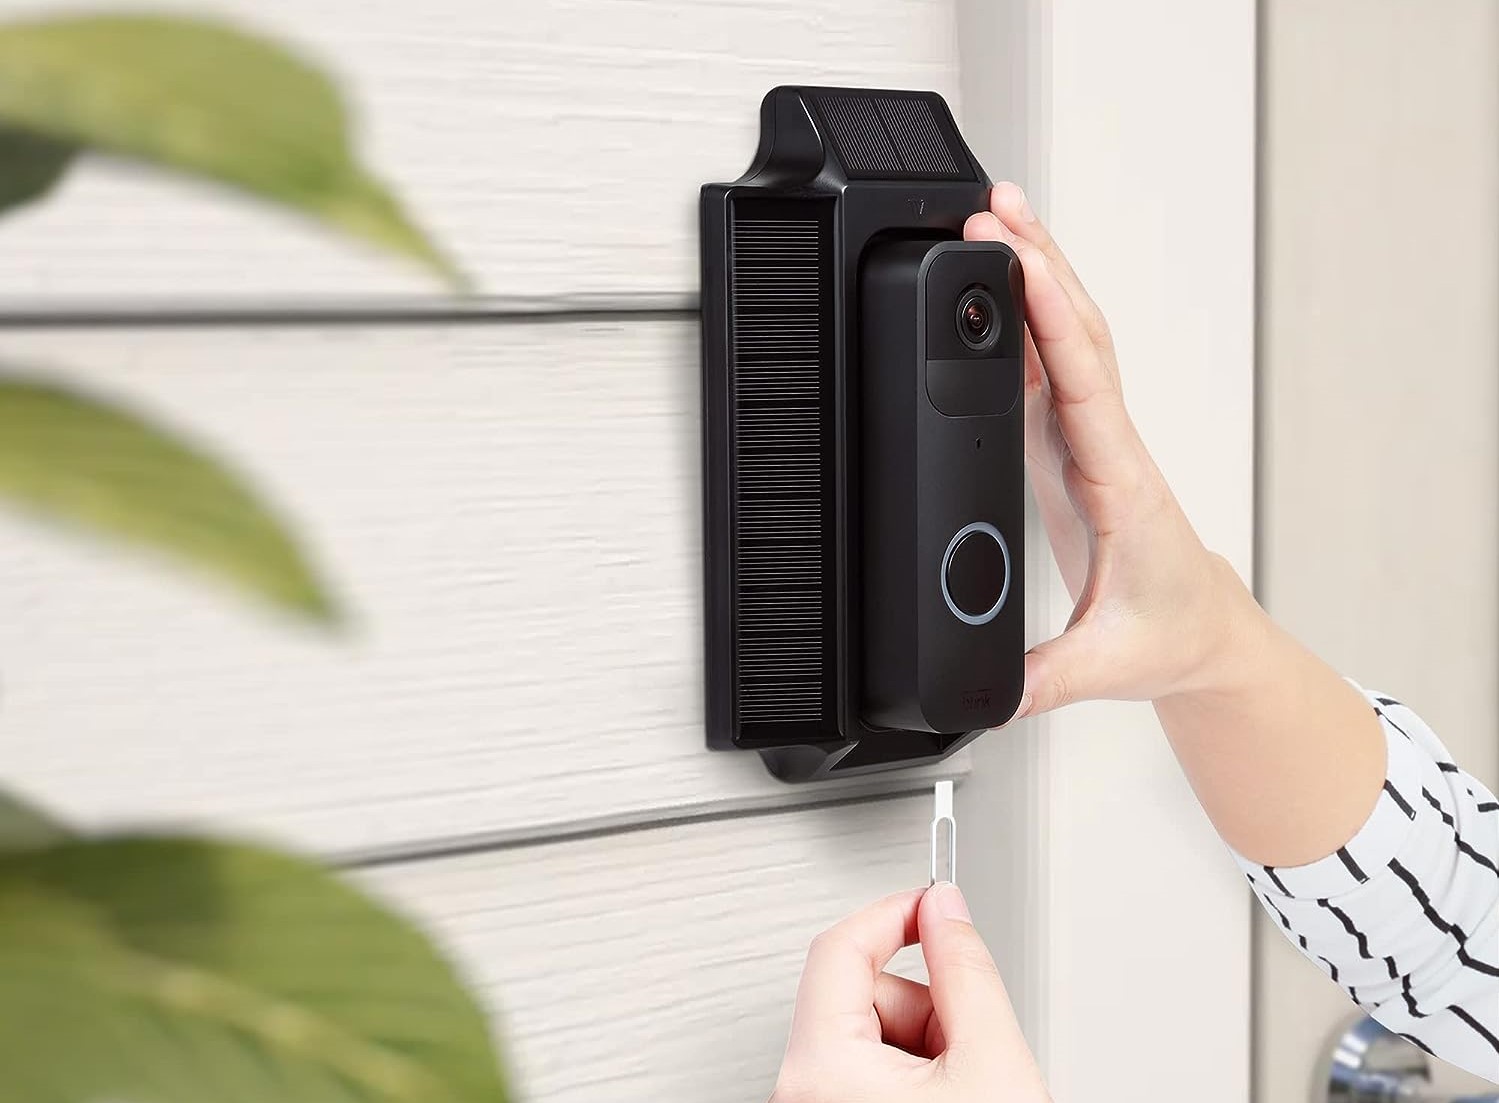
To remove the cover from a Ring Doorbell, first, use the included screwdriver to loosen the security screws on the bottom of the device. Then, gently lift the cover off to access the internal components.
Read more: How To Remove The Faceplate On Ring Doorbell
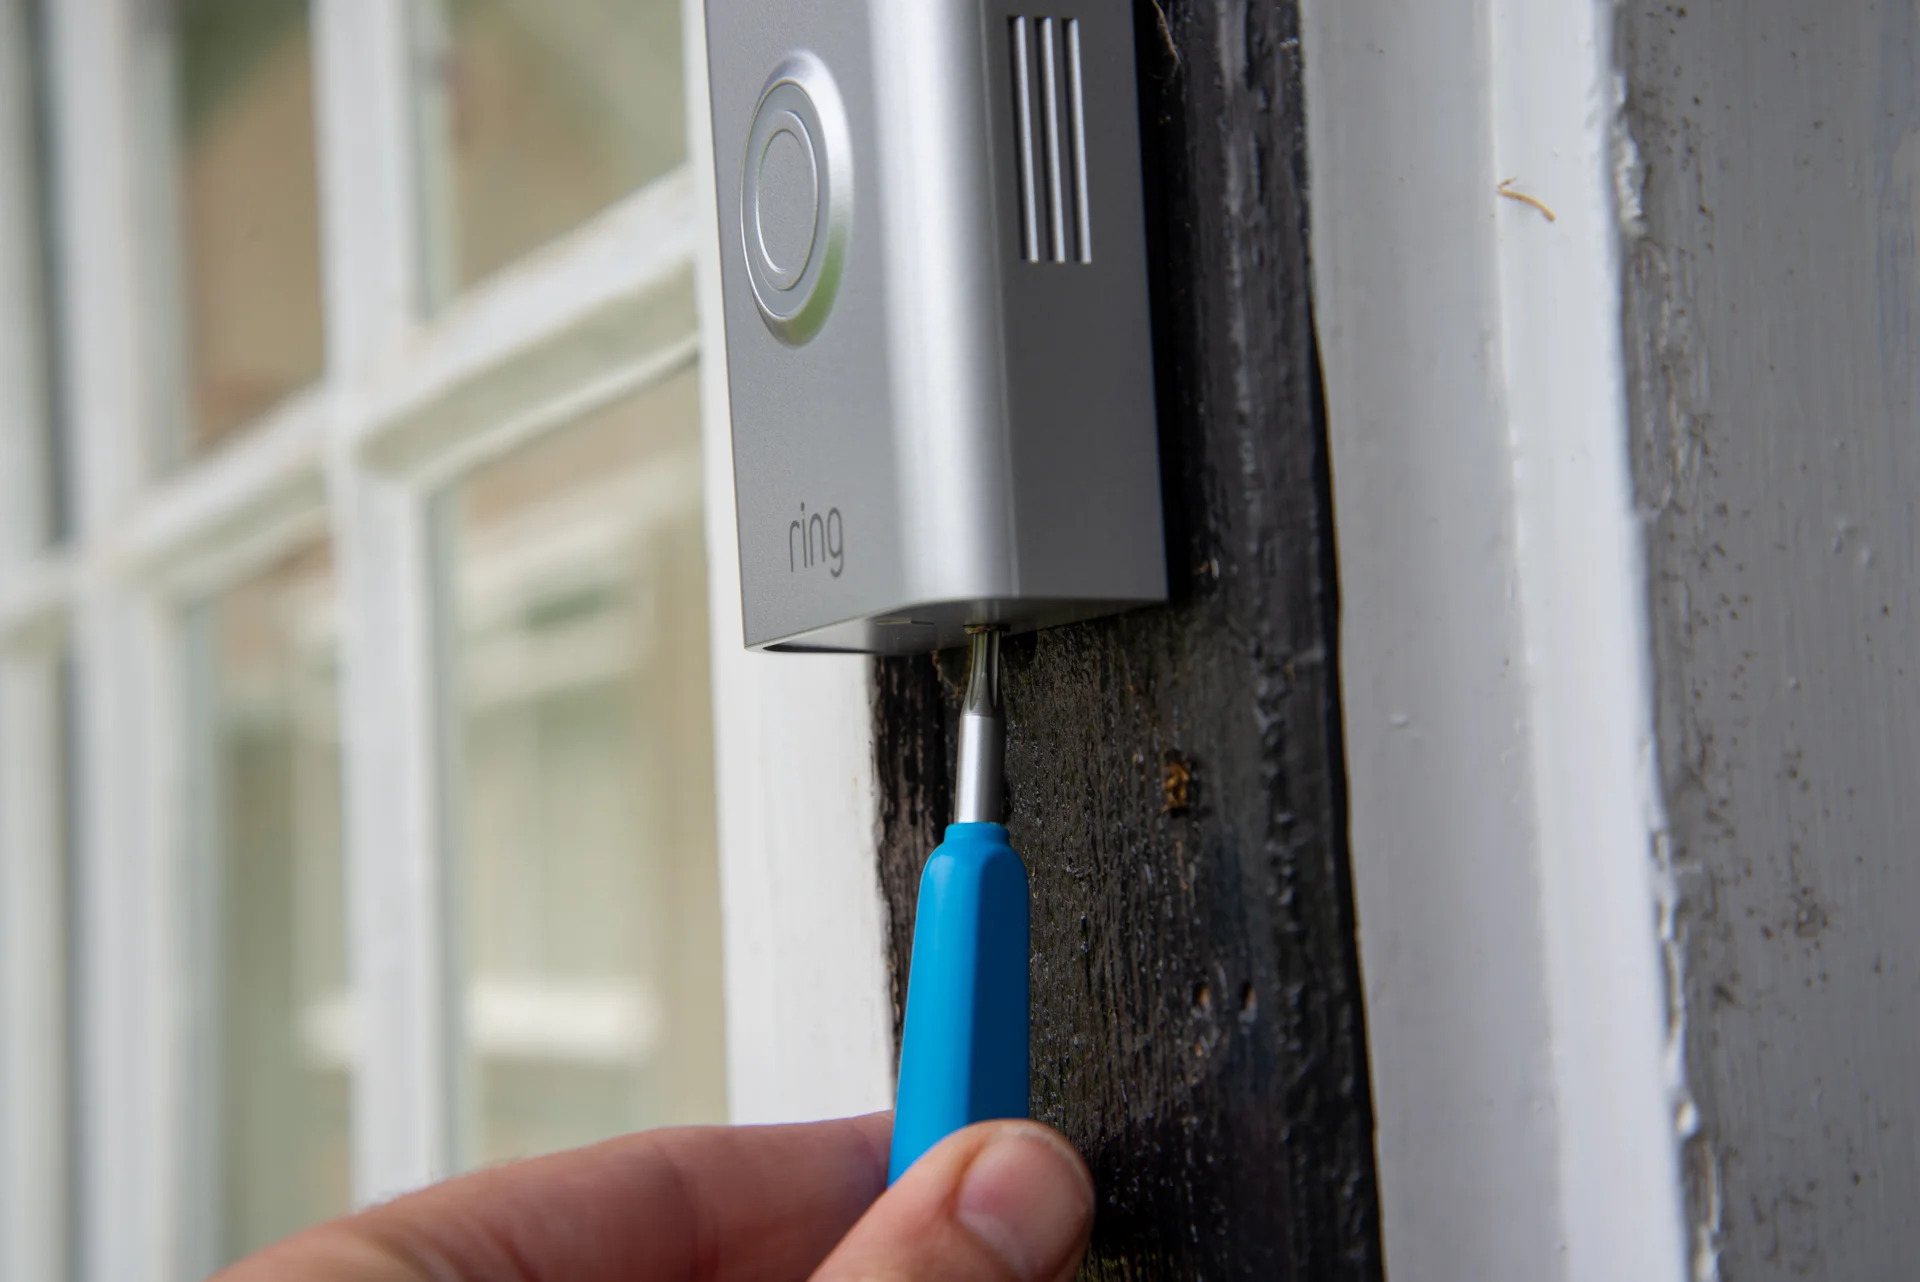
Step 4: Unscrew the mounting bracket
With the wiring disconnected from your Ring Doorbell, the next step is to unscrew the mounting bracket. The mounting bracket is the piece that attaches the doorbell to the wall or surface.
Take your Phillips screwdriver and locate the screws that secure the mounting bracket. Depending on the model of your Ring Doorbell, there may be two or four screws holding the bracket in place.
Carefully loosen and unscrew each screw, making sure to keep a firm grip on the mounting bracket to prevent it from falling off the wall. As you remove the screws, set them aside in a safe place to avoid misplacing them.
Once all the screws are removed, gently pull the mounting bracket away from the wall, taking care not to damage any surrounding surfaces or wires. If there is any resistance, double-check to ensure that all the screws have been removed.
If your Ring Doorbell is mounted on a different surface, such as wood or siding, follow the same steps to unscrew the mounting bracket and remove it from the surface.
With the mounting bracket successfully removed, we can now proceed to the next step of detaching the doorbell from the bracket.
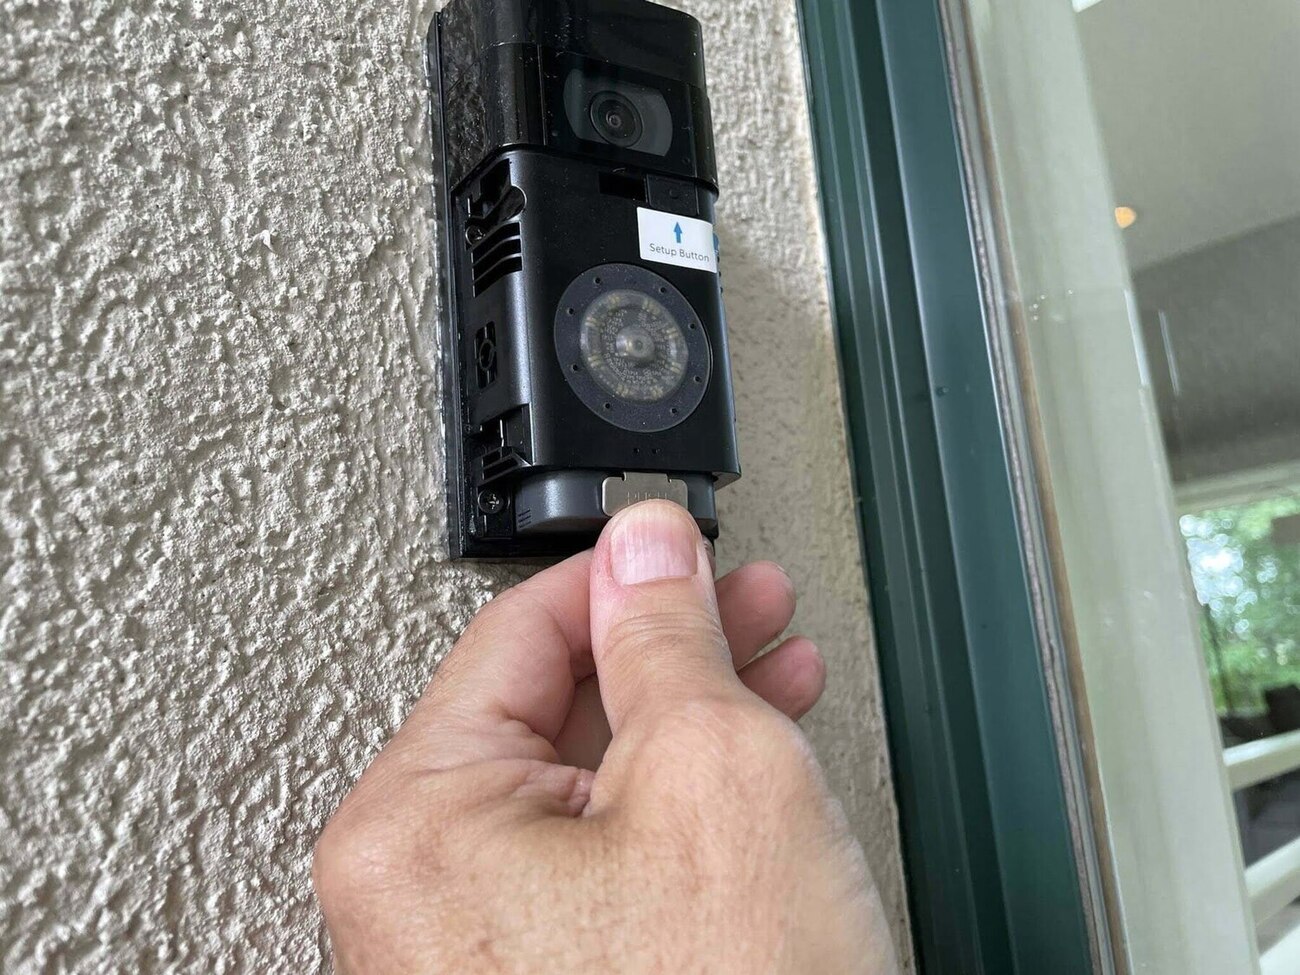
Step 5: Detach the doorbell from the bracket
Now that the mounting bracket is removed from the wall, it’s time to detach the Ring Doorbell from the bracket itself. This step involves separating the doorbell unit from the bracket for a complete removal.
Inspect the back of the Ring Doorbell and locate the release mechanism. Depending on the model, this may be a small lever or a release button. Press or slide the release mechanism to unlock the doorbell from the bracket.
Once the doorbell is unlocked, gently lift it off the bracket, ensuring a steady grip to prevent any accidental drops or damage. Take your time to separate the doorbell from the bracket slowly and securely.
As you detach the doorbell, be mindful of any remaining wires that might still be connected. If necessary, detach or loosen any additional wiring connectors to completely free the doorbell from the bracket.
Place the separated doorbell in a safe spot, away from any obstructions or hazards. Keep it in a secure location to avoid damage or loss during the cover removal process.
Now that the doorbell is detached from the bracket, we are ready to move on to the next step of reinstalling or replacing the cover.
Step 6: Reinstall or Replace the Cover
Now that you have successfully removed the Ring Doorbell from its bracket, it’s time to reinstall the cover or replace it with a new one, depending on your specific needs. This final step ensures that your doorbell is protected and aesthetically appealing.
If you removed the cover for maintenance purposes and there are no issues, simply align the cover with the back of the Ring Doorbell and gently press it into place. Make sure it fits securely and snugly without any gaps or loose edges.
If you need to replace the cover, ensure that you have the correct replacement cover that is compatible with your specific Ring Doorbell model. Align the replacement cover with the back of the doorbell and gently press it into place as mentioned above.
Once the cover is installed or replaced, you can now proceed to reattach the doorbell to the mounting bracket. Align the doorbell with the bracket and slide or press it securely until you hear or feel it click into place. Make sure it is firmly attached to the bracket.
With the doorbell securely reattached, you can proceed to reconnect the wiring. Refer to the color codes on the wires and match them to the appropriate terminals on the back of the doorbell. Gently twist the wiring connectors clockwise to secure them in place.
Double-check all the connections and ensure that everything is in proper order. Take a moment to tidy up any loose wires and ensure they are neatly tucked away.
Finally, it’s time to restore power to your Ring Doorbell. Locate the circuit breaker or fuse that corresponds to your doorbell and flip the switch to the “On” position or replace the fuse.
Once the power is restored, test your Ring Doorbell to ensure it is functioning properly. Press the doorbell button and listen for the chime or check if the connected device, such as your smartphone or tablet, receives the notification.
Congratulations! You have successfully reinstalled or replaced the cover on your Ring Doorbell. Your doorbell is now ready to provide you with the desired security and convenience.
Conclusion
Removing the cover from your Ring Doorbell may seem like a daunting task, but by following these step-by-step instructions, you can safely and easily access the internal components for maintenance, troubleshooting, or upgrading purposes.
Remember to always turn off the power before starting the removal process to ensure your safety and prevent any damage to the doorbell. Use the necessary tools and materials, such as screwdrivers and pliers, to remove the faceplate, disconnect the wiring, unscrew the mounting bracket, detach the doorbell from the bracket, and reinstall or replace the cover.
Take your time during each step, ensuring that you handle the components with care and attention to detail. If you encounter any difficulties or are unsure about any part of the process, don’t hesitate to seek assistance from a professional or contact Ring support for guidance.
By properly removing and reinstalling the cover, you can maintain the functionality and aesthetic appeal of your Ring Doorbell, ensuring that it continues to provide you with reliable and convenient home security.
With the cover removed, you have the opportunity to carry out necessary maintenance, troubleshoot any issues, or even upgrade to a newer model if desired. Enjoy the benefits and peace of mind that come with a properly functioning Ring Doorbell.
Remember, safety should always be a priority. Be sure to follow all precautions and guidelines provided by Ring when handling and working with your Ring Doorbell.
Now that you have the knowledge and understanding of how to remove the cover from your Ring Doorbell, you can confidently tackle any related maintenance or upgrade tasks that may arise in the future.
Secure your home and elevate your home security system with the Ring Doorbell, knowing that you can easily access and work on it when necessary.
Now that you've mastered removing the cover from your Ring Doorbell, why not secure your entire home? Our next piece dives into the essential benefits of bolstering your living space with reliable home security systems. You'll find practical advice on safeguarding your property, ensuring peace of mind for you and your loved ones. Don't miss out on understanding why enhancing security measures is a smart move in today's world.
Frequently Asked Questions about How To Remove Cover From Ring Doorbell
Was this page helpful?
At Storables.com, we guarantee accurate and reliable information. Our content, validated by Expert Board Contributors, is crafted following stringent Editorial Policies. We're committed to providing you with well-researched, expert-backed insights for all your informational needs.


0 thoughts on “How To Remove Cover From Ring Doorbell”