Articles
How To Remove Bathroom Fan Cover
Modified: October 28, 2024
Learn how to remove a bathroom fan cover with our informative articles. Find step-by-step guides and expert tips to make the process easy and hassle-free.
(Many of the links in this article redirect to a specific reviewed product. Your purchase of these products through affiliate links helps to generate commission for Storables.com, at no extra cost. Learn more)
Introduction
Welcome to our guide on how to remove a bathroom fan cover. The bathroom fan is an essential component of any bathroom as it helps to remove odors, excess moisture, and improve air circulation. Over time, the fan cover can accumulate dust, dirt, and other debris, which can hinder its effectiveness. Cleaning or replacing the cover is a simple task that can greatly improve the functionality and appearance of your bathroom fan.
In this article, we will provide you with step-by-step instructions on how to safely remove the cover from your bathroom fan. We will also discuss the tools you’ll need, the different types of covers you may encounter, and tips for cleaning and maintaining the cover to ensure optimal performance. Let’s get started!
Key Takeaways:
- Keep your bathroom fan cover clean to maintain optimal performance, improve air circulation, and reduce excess moisture. Follow safety precautions and use the right tools for a hassle-free removal process.
- Regularly cleaning and maintaining your bathroom fan cover will contribute to a cleaner, fresher, and healthier bathroom environment. Enjoy improved air quality and a pleasant experience in your bathroom.
Read more: How To Remove Clutch Fan
Step 1: Gather necessary tools
Before starting the process of removing the bathroom fan cover, it’s important to gather the necessary tools. Having these tools on hand will make the task easier and more efficient. Here are the tools you will need:
- Screwdriver (depending on the type of screws used to secure the cover)
- Needle-nose pliers (if the cover is held in place by clips)
- Cleaning supplies (such as a mild detergent, warm water, and a soft cloth)
- Flashlight (optional, but helpful for better visibility)
The type of tools required may vary depending on the specific design of your bathroom fan cover. It’s always a good idea to consult the user manual or manufacturer’s instructions for any additional tools or specific requirements.
Once you have gathered all the necessary tools, you are ready to proceed to the next step: turning off the power to the bathroom fan.
Step 2: Turn off power to the bathroom fan
Safety should always be a top priority when working with electrical components. Before removing the bathroom fan cover, it is crucial to turn off the power to the fan to avoid any risk of electrical shock. Here’s how to do it:
- Locate the circuit breaker panel in your home. This panel is usually found in the basement, utility room, or garage.
- Open the circuit breaker panel and look for the breaker that controls the bathroom fan. It is typically labeled, but if not, you may need to refer to the electrical plan of your home or use trial and error to identify the correct breaker.
- Once you have identified the breaker, switch it to the “Off” position. This will cut off the power supply to the bathroom fan.
- To double-check, go to the bathroom and switch on the fan. If the fan doesn’t turn on, you have successfully turned off the power.
It’s important to ensure that the power is completely turned off before proceeding to remove the bathroom fan cover. This step will help prevent any accidental injury or damage to the fan or electrical components. Once you have confirmed that the power is off, you can move on to the next step: identifying the type of bathroom fan cover.
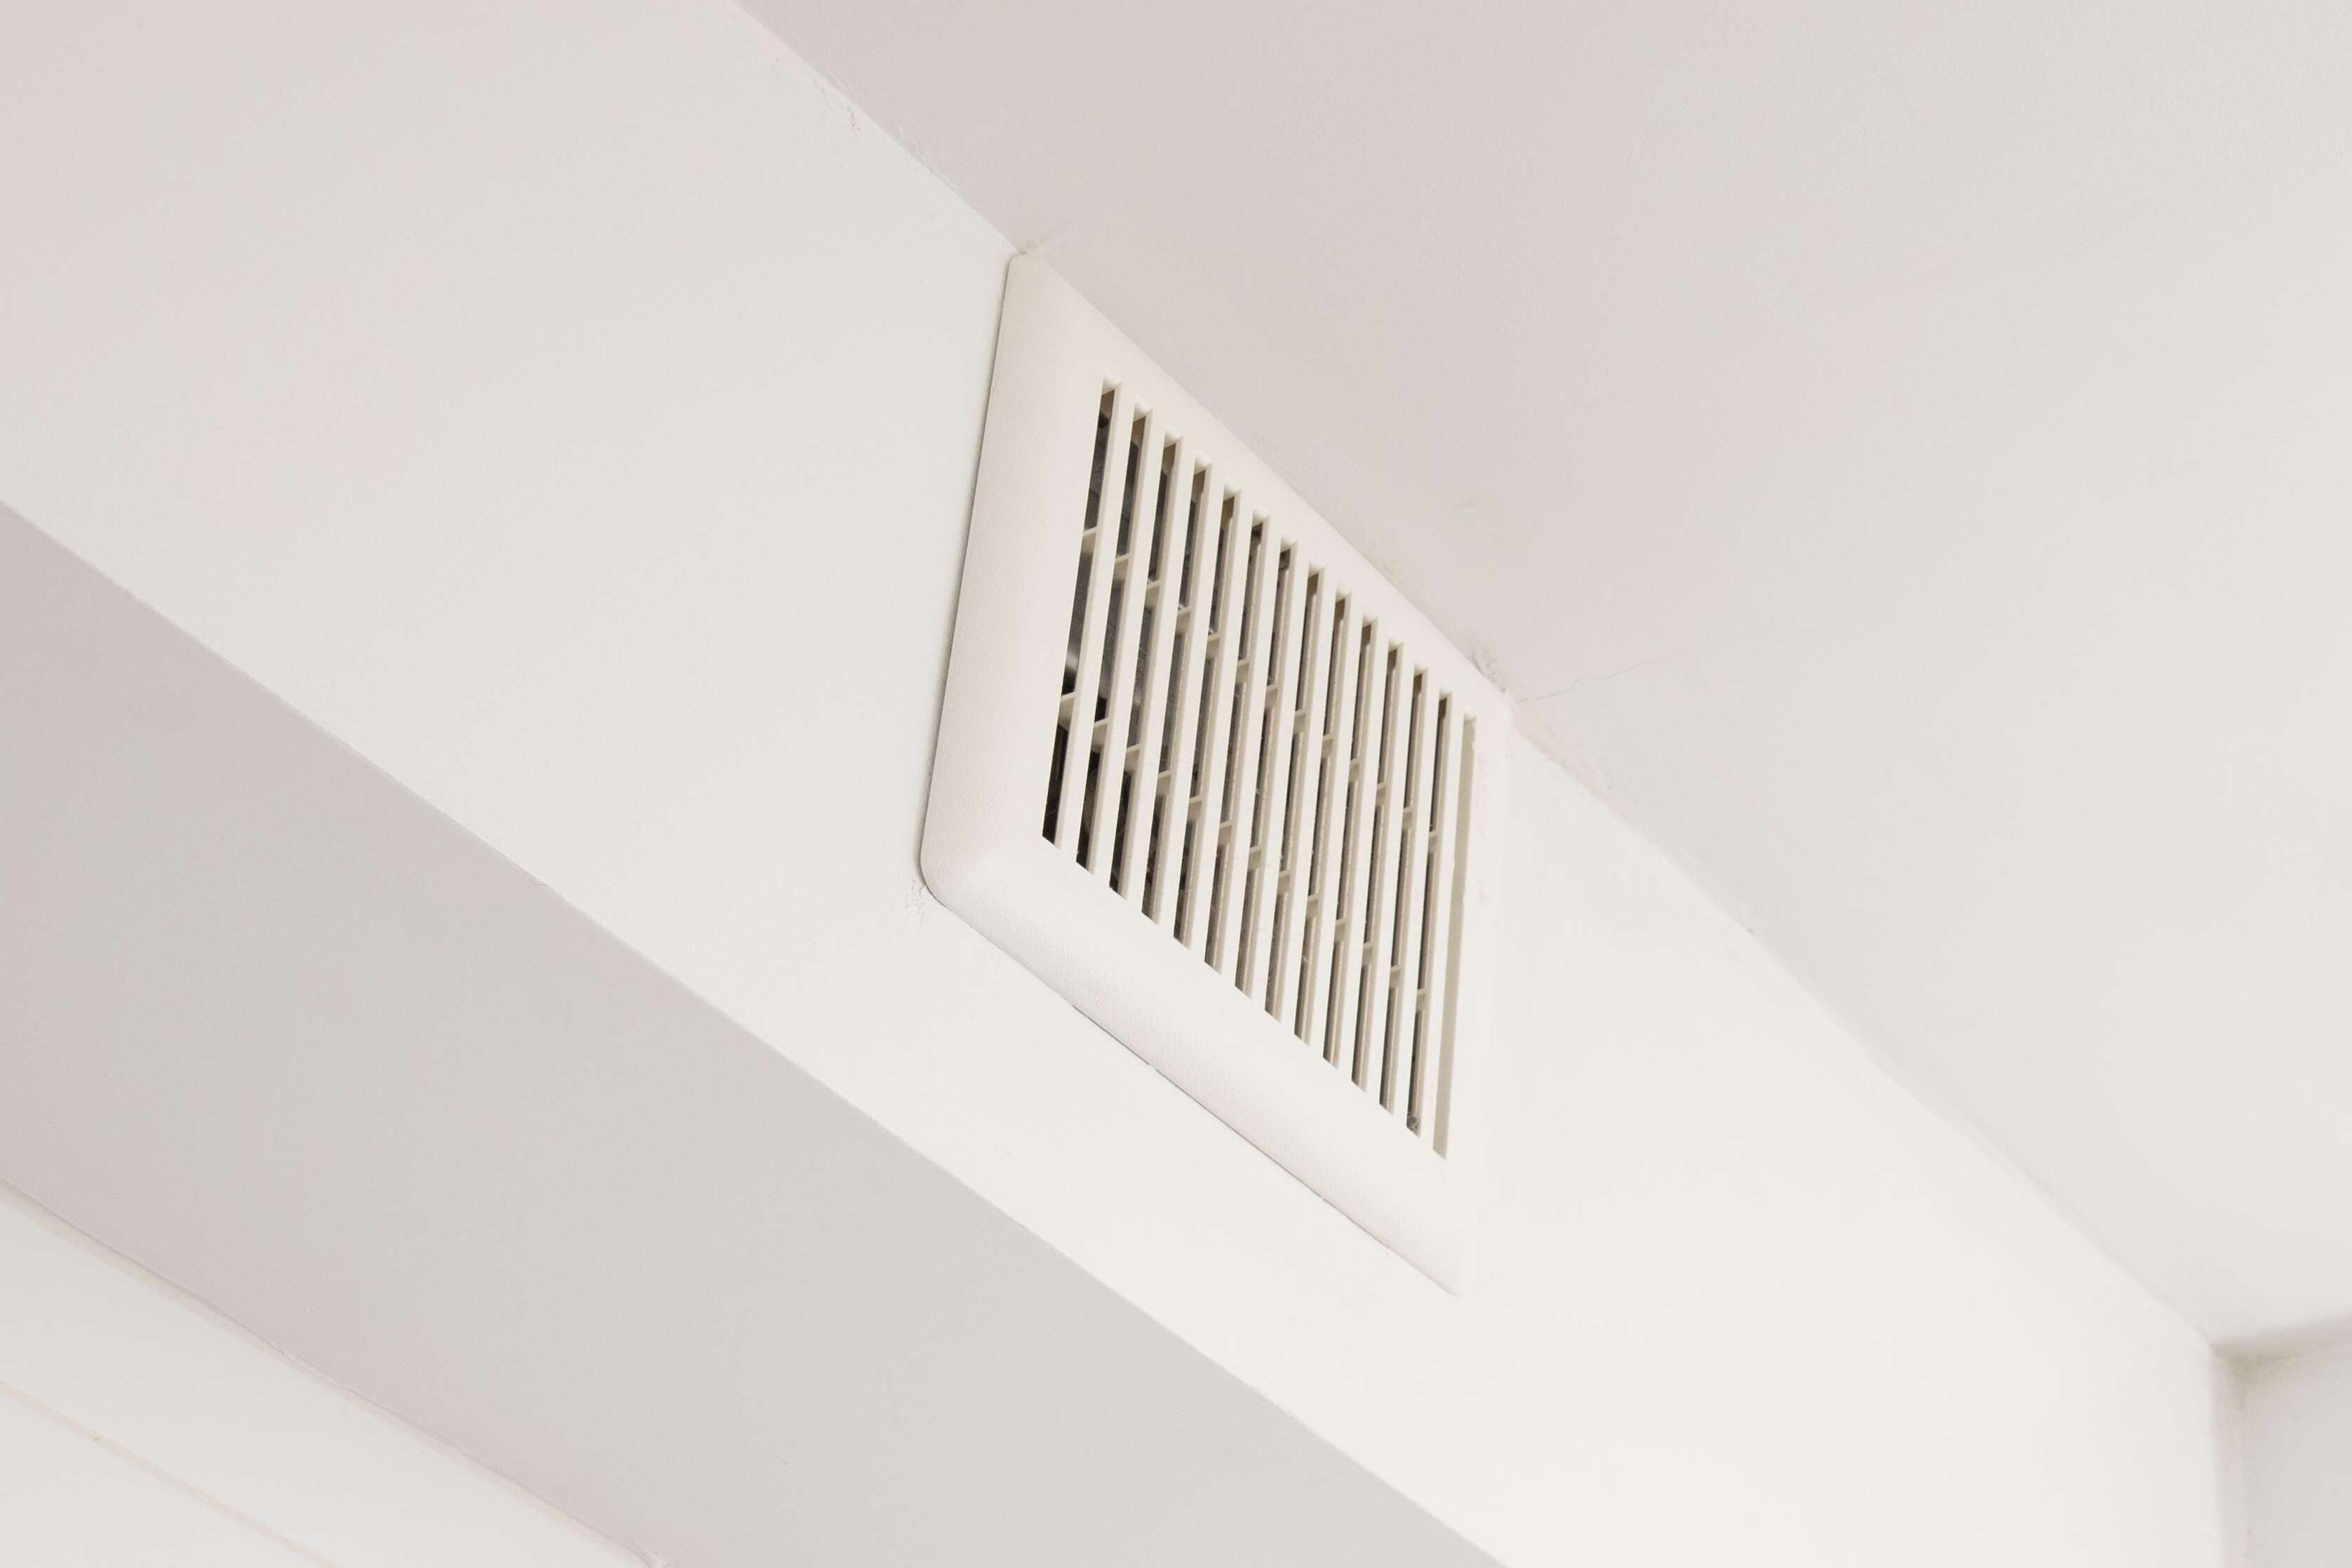
Step 3: Identify the type of bathroom fan cover
Before you can remove the bathroom fan cover, it’s important to determine the type of cover that is installed. This will help you understand the specific method to remove it. Here are the common types of bathroom fan covers:
- Screwed-on cover: This type of cover is secured to the fan housing with screws. The screws are usually located on the edges or corners of the cover. In some cases, they may be hidden under a decorative cover or grill.
- Clip-on cover: Some bathroom fan covers are held in place with clips. These clips are often located on the sides or edges of the cover. To remove this type of cover, you may need to use needle-nose pliers to gently release the clips.
- Bayonet mount cover: This type of cover is attached to the fan housing using a bayonet mount. It requires a twisting motion to remove it. Look for small tabs or arrows indicating the direction in which the cover should be twisted to unlock and remove it.
- Spring-loaded cover: Certain bathroom fan covers are equipped with springs that hold them in place. To remove this type of cover, you will need to push inwards or squeeze the sides of the cover to compress the springs and release it from the fan housing.
- Magnetic cover: In some modern bathroom fans, the cover is held in place by magnets. These covers can be easily removed by gently pulling them away from the fan housing.
By identifying the type of bathroom fan cover you have, you will be able to proceed with the appropriate method of removal. This will prevent any unnecessary damage to the cover or the fan itself. Once you have determined the type of cover, you can move on to the next step: removing screws or clips securing the cover.
Step 4: Remove screws or clips securing the cover
Now that you have identified the type of bathroom fan cover, you can proceed with removing the screws or clips that secure it in place. Here’s how to do it:
- Screwed-on cover: If your cover is secured with screws, use a screwdriver of the appropriate size to carefully loosen and remove each screw. Place the screws in a safe location to prevent losing them.
- Clip-on cover: For covers held in place with clips, use needle-nose pliers to grip and gently release the clips. Start at one side and work your way around the cover, releasing all the clips one by one until the cover is free.
- Bayonet mount cover: To remove a bayonet mount cover, locate the small tabs or arrows on the cover. Twist the cover in the indicated direction to unlock it from the fan housing. Apply steady but gentle force until the cover comes free.
- Spring-loaded cover: For covers with springs, squeeze the sides of the cover inward or push inwards on specific points to compress the springs. As you compress the springs, the cover will start to release from the fan housing. Continue this process until the cover is free.
- Magnetic cover: If your cover is held in place by magnets, simply grip the edges of the cover and gently pull it away from the fan housing. The magnets will release, allowing you to remove the cover easily.
It’s important to exercise caution when removing screws or releasing clips to avoid causing damage to the cover or the fan housing. Take your time and be gentle with the removal process. Once all the screws or clips are removed, you can proceed to the next step: gently detaching the cover from the fan housing.
To remove a bathroom fan cover, look for the screws or clips holding it in place. Use a screwdriver to loosen the screws or gently press the clips to release the cover. Be sure to turn off the power to the fan before attempting to remove the cover.
Read more: How To Remove An Attic Fan
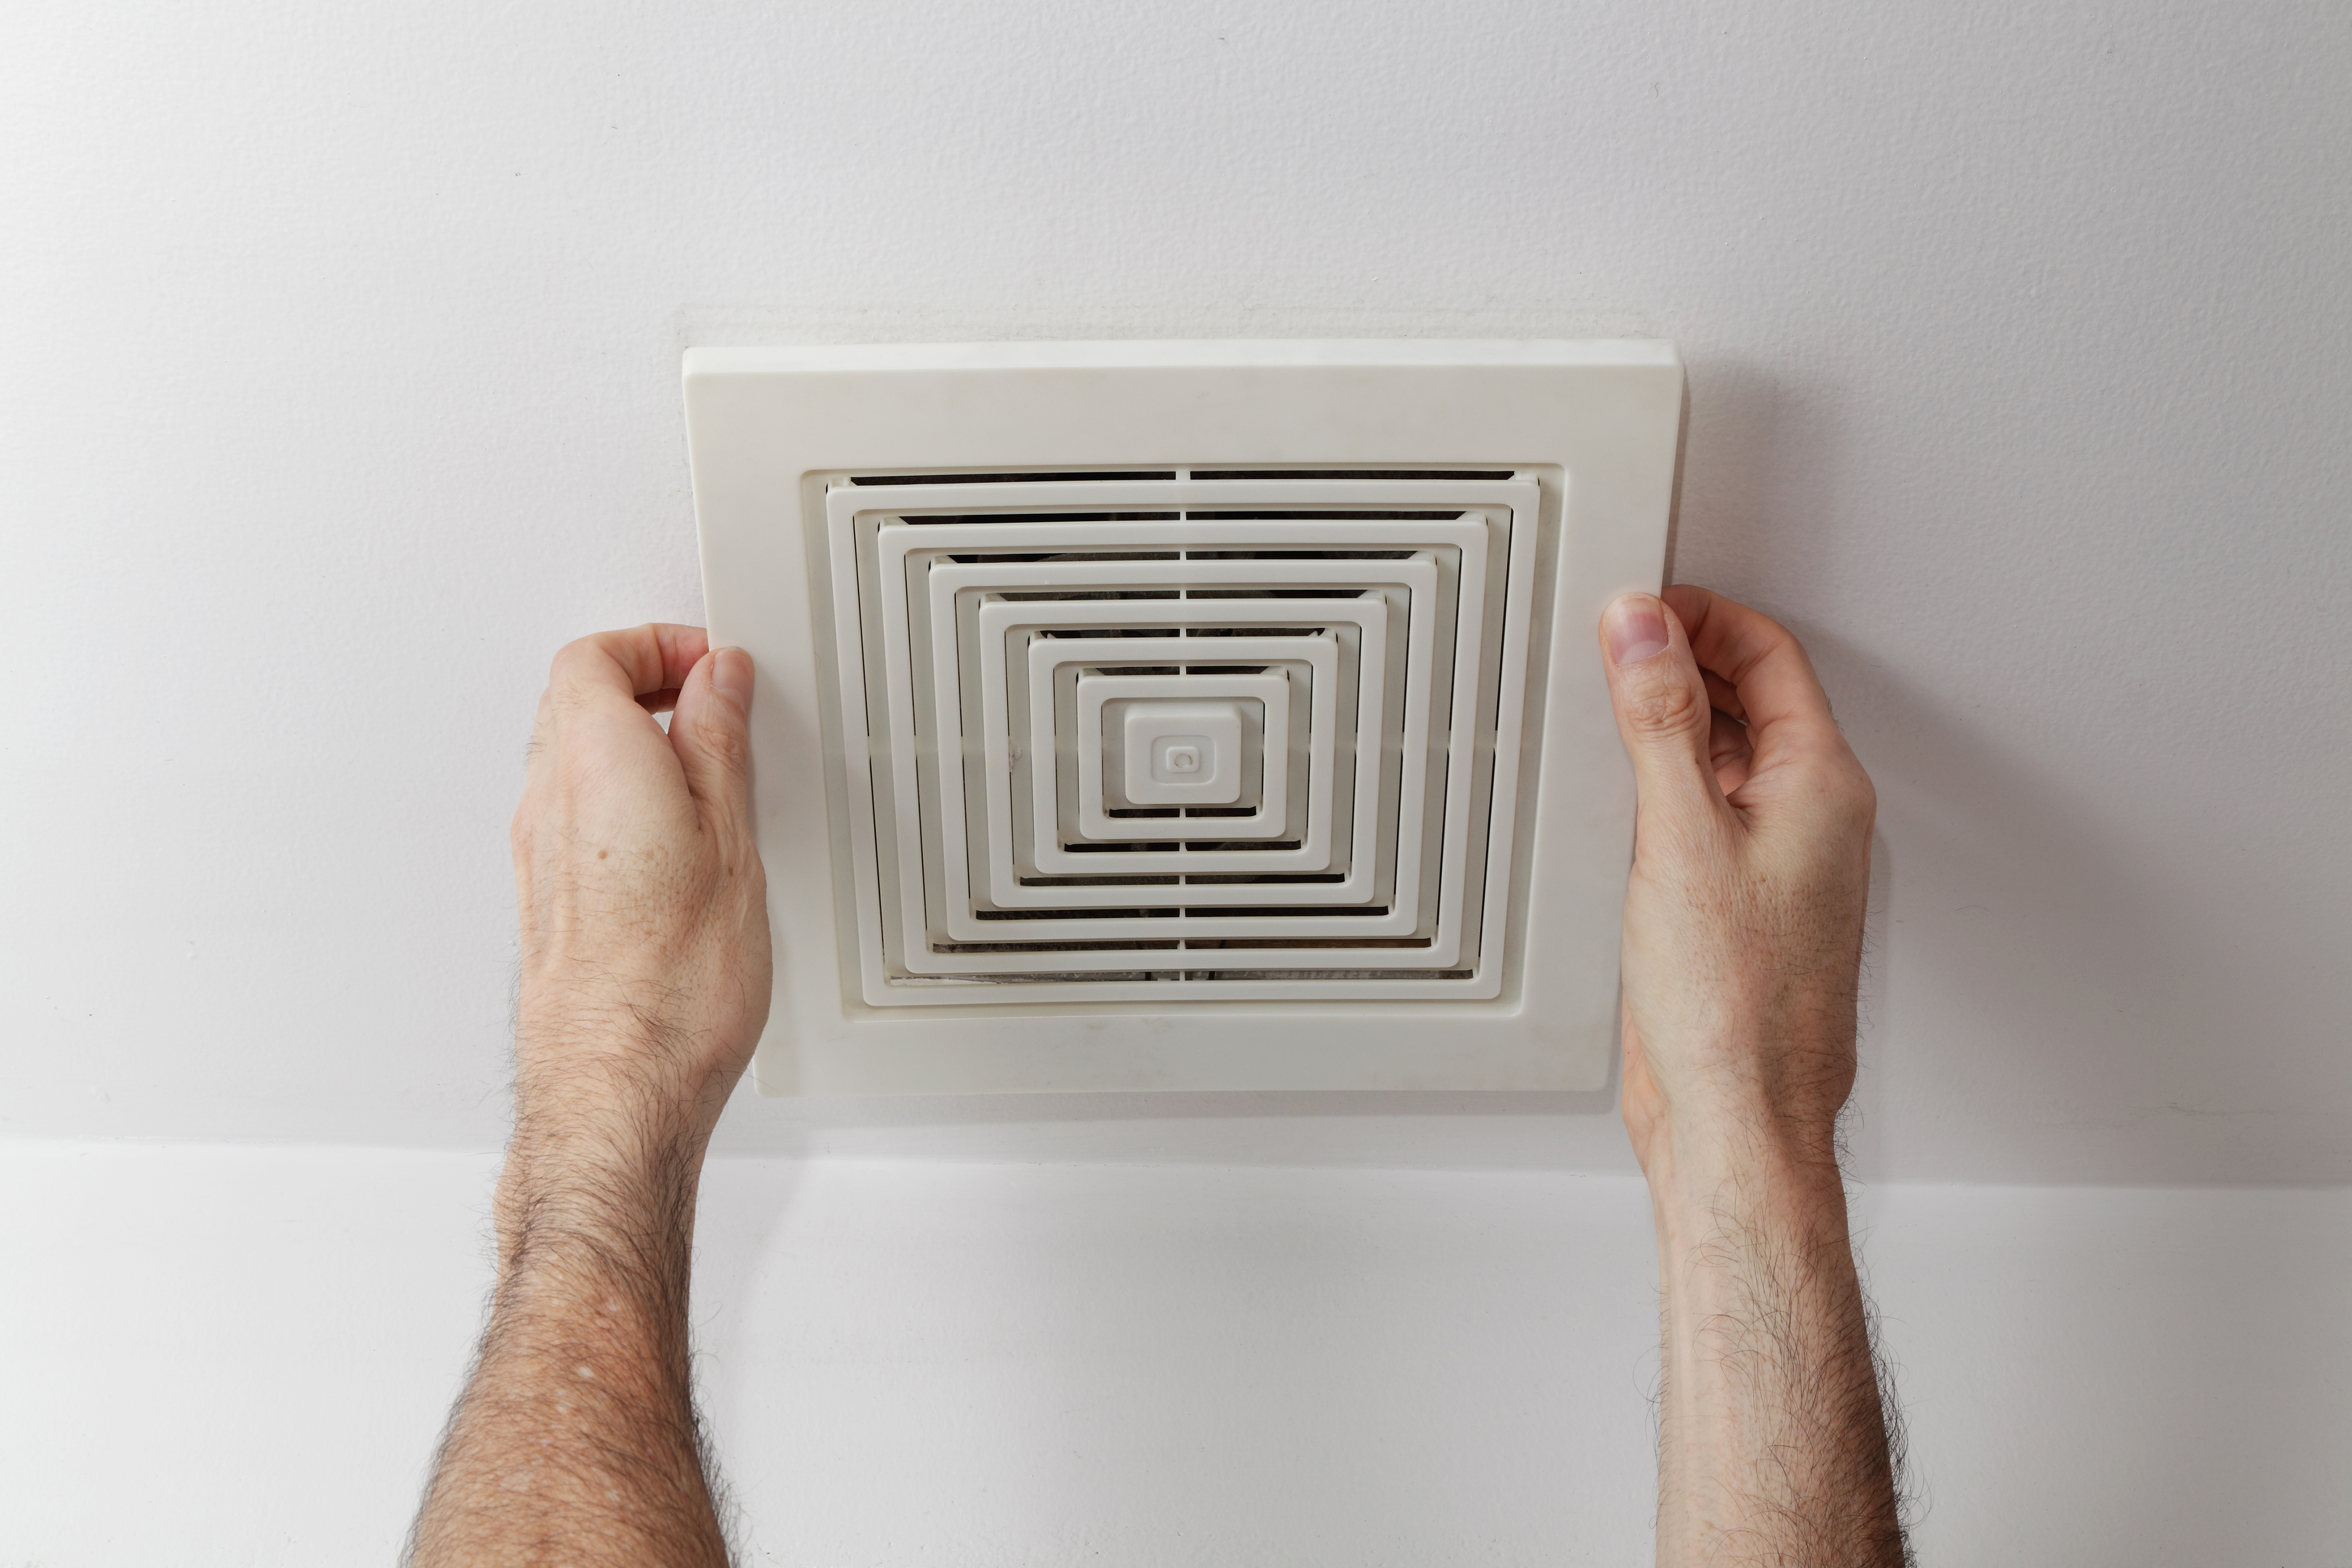
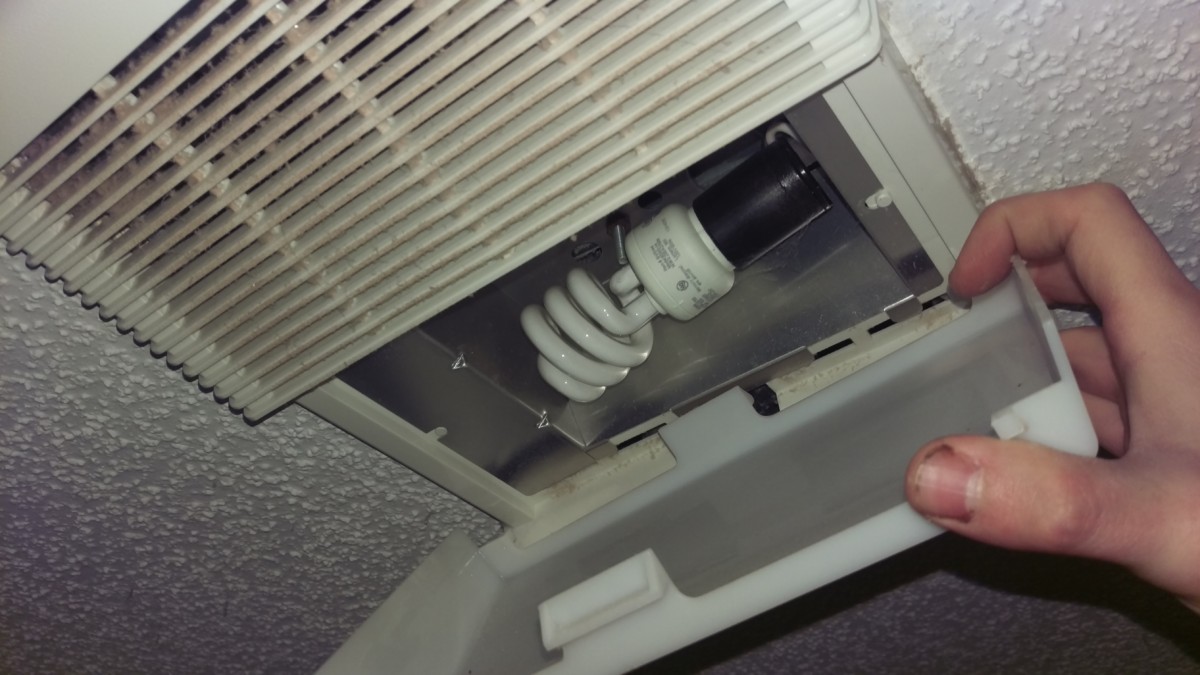
Step 5: Gently detach the cover from the fan housing
With the screws or clips removed, it’s time to carefully detach the cover from the fan housing. Follow these steps:
- Place your hands on opposite sides of the cover, ensuring a firm grip but being careful not to apply excessive force.
- Gently pull the cover away from the fan housing, using a slight rocking or wiggling motion if necessary.
- Be mindful of any wires or cables that may be connected to the fan housing. If you encounter any resistance, avoid yanking or pulling forcefully. Instead, examine the area to identify any wires or cables that may be securing the cover.
- If there are wires or cables attached to the cover, carefully disconnect them by gently pulling apart any connectors or unplugging them from the fan housing. Be mindful of any wire nuts that may require twisting to disconnect.
- Once all connections are detached, continue slowly and steadily pulling the cover until it is fully detached from the fan housing.
It’s important to be patient and gentle during this step to avoid damaging the cover or the fan housing. If you encounter any difficulties or resistance while detaching the cover, take a moment to reassess and ensure that all screws, clips, or wires have been properly addressed. Once the cover is completely detached, you can move on to the next step: cleaning the bathroom fan cover.
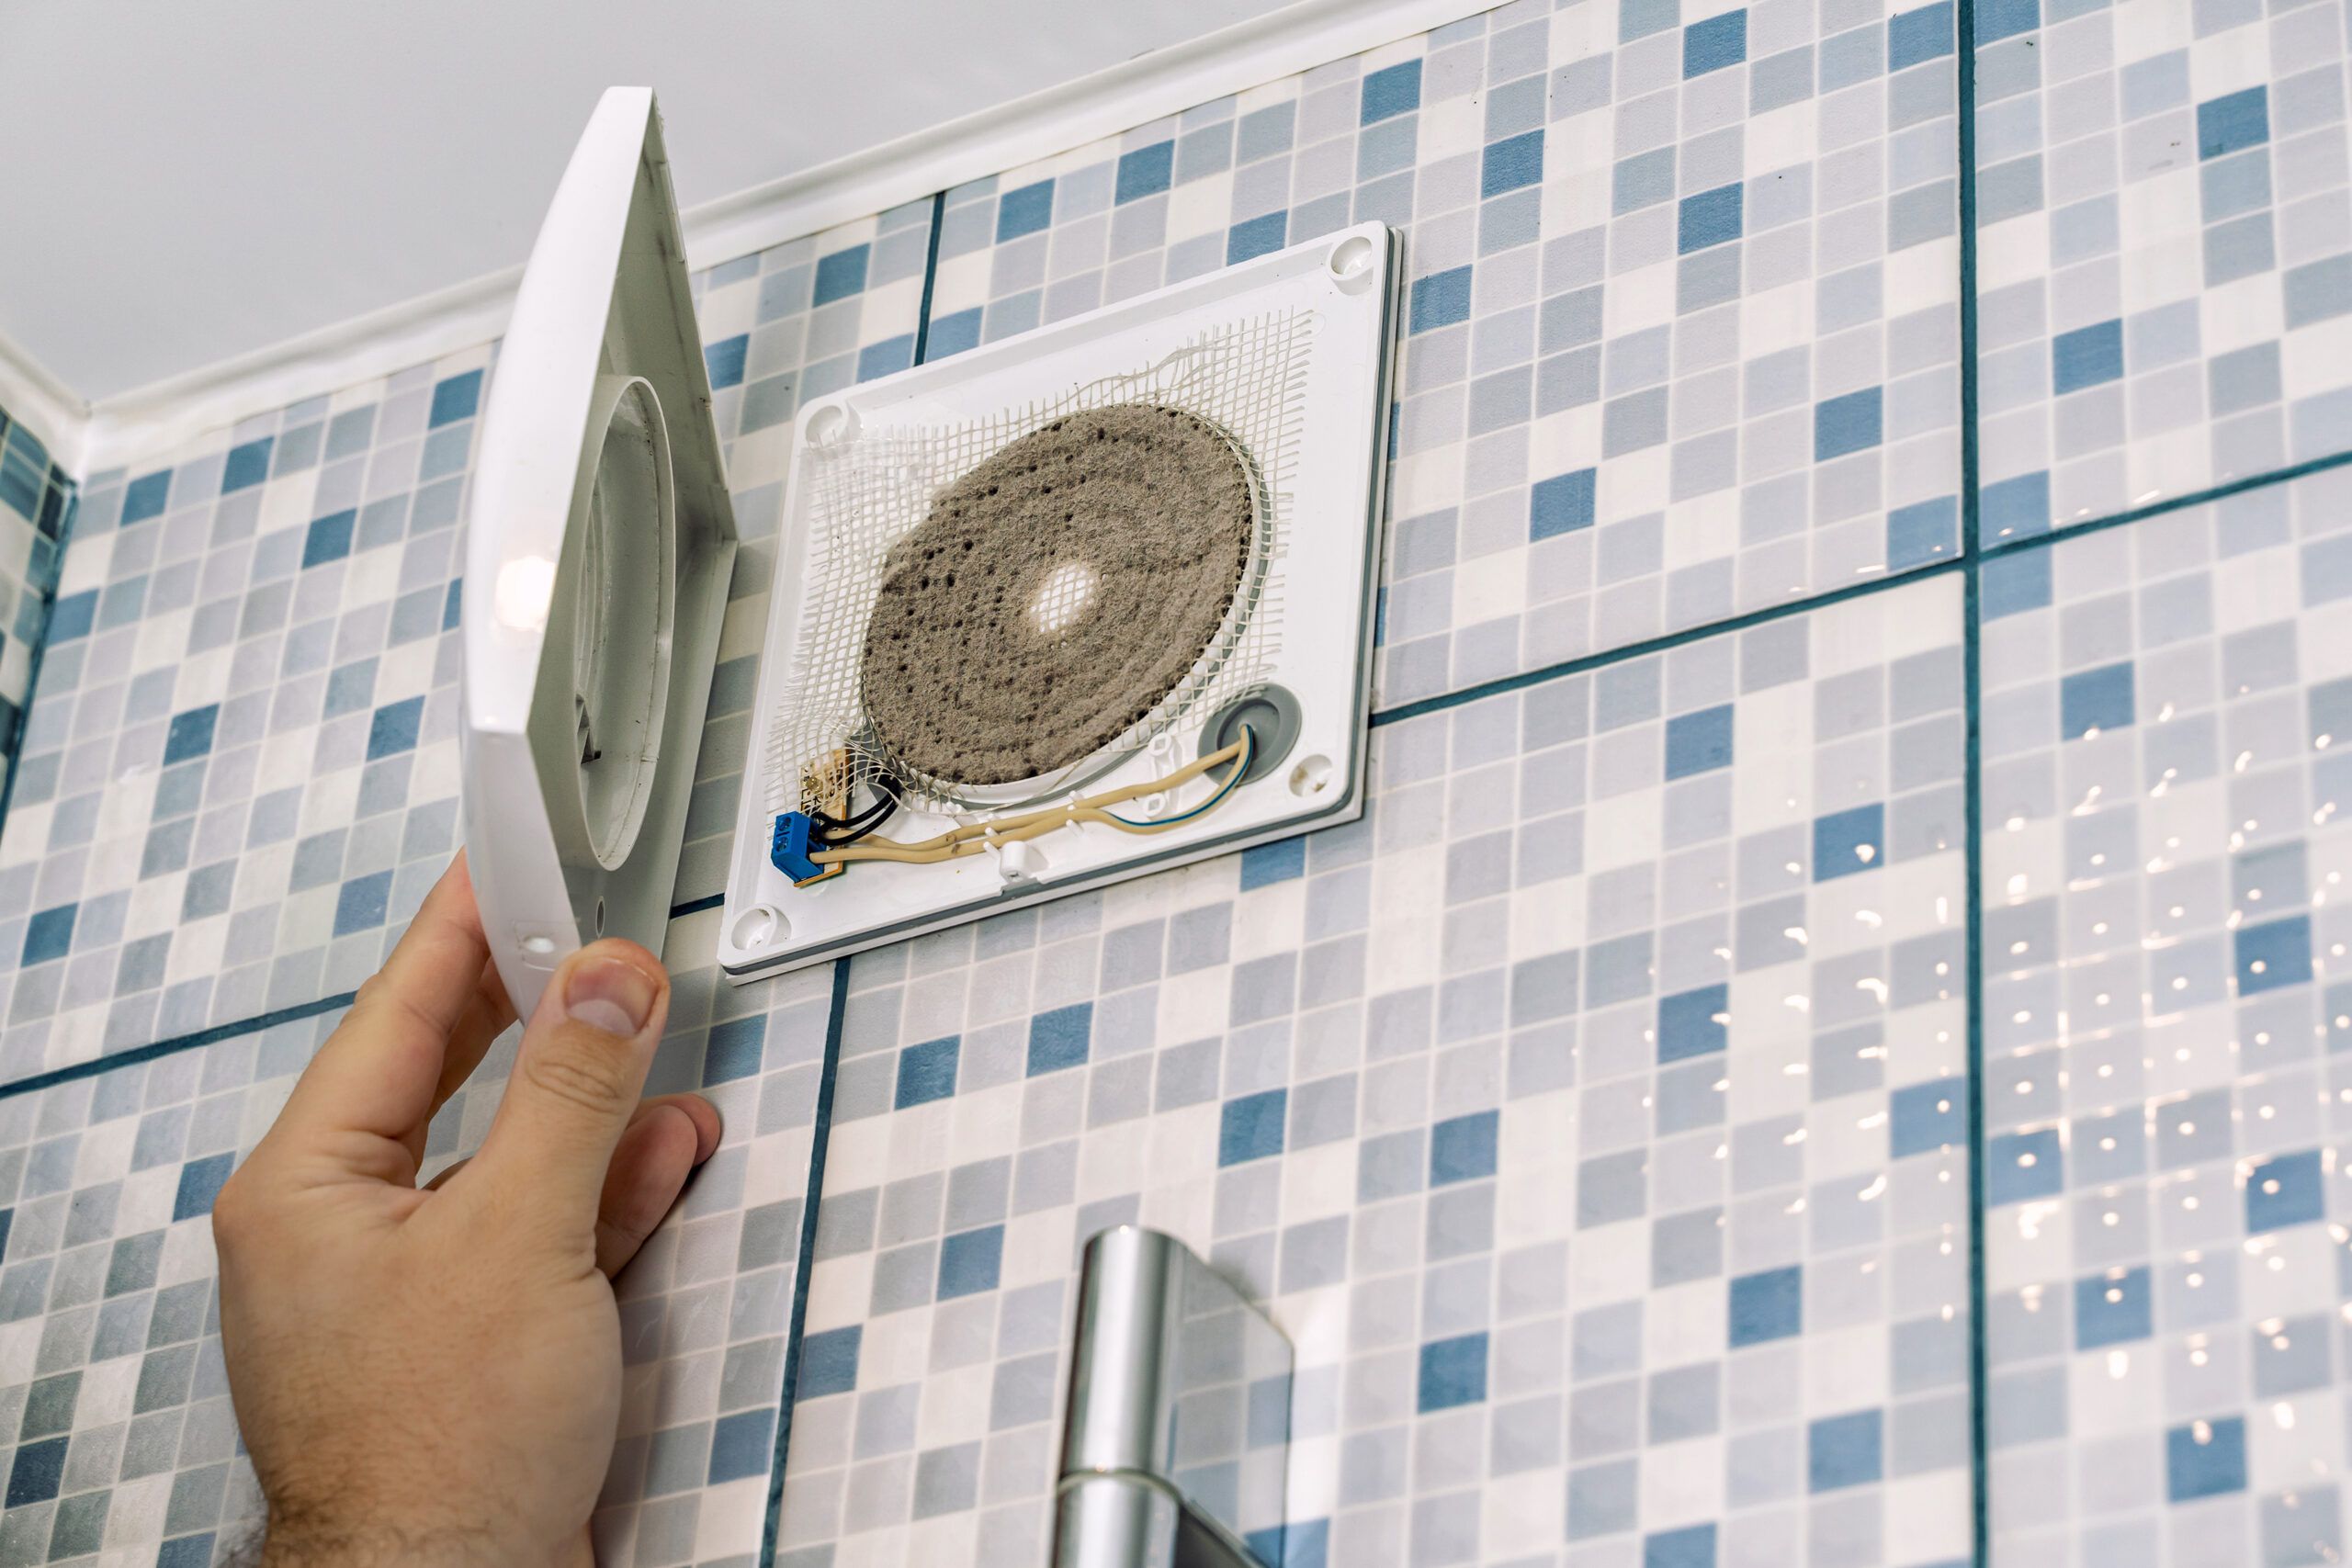
Step 6: Clean the bathroom fan cover
Now that the bathroom fan cover is removed, it’s time to give it a thorough cleaning. Over time, the cover can accumulate dust, dirt, and other debris, which can hinder its function and appearance. Here’s how to clean the bathroom fan cover:
- Prepare a cleaning solution by mixing a mild detergent with warm water in a bucket or basin. Avoid using harsh chemicals or abrasive cleaners, as these can damage the cover.
- Dip a soft cloth or sponge into the cleaning solution, ensuring it is damp but not dripping. Wring out any excess water.
- Gently wipe the surface of the cover, paying special attention to areas with visible dirt or grime. Use a back-and-forth motion or circular motions to effectively clean the entire surface.
- If there are stubborn stains or buildup, you may need to let the cleaning solution sit on the cover for a few minutes to loosen the debris before wiping it away.
- Rinse the cloth or sponge and wring out any excess water. Then, use it to wipe off any residue from the cleaning solution on the cover.
- Alternatively, if the cover is removable and small enough, you can soak it in the cleaning solution for a few minutes before gently scrubbing it with a soft brush to remove any stubborn dirt or stains.
- Once the cover is clean and free of dirt, rinse it thoroughly with clean water to remove any remaining cleaning solution.
- Allow the cover to air dry completely before reattaching it to the fan housing. This will prevent moisture buildup and potential damage.
Remember to refer to the manufacturer’s instructions or user manual for any specific cleaning recommendations or restrictions for your particular bathroom fan cover. By cleaning the cover regularly, you can ensure its optimal performance and maintain a clean and fresh bathroom environment. Once the cover is dry, you can proceed to the next step: reattaching it to the fan housing.
Step 7: Reattach the cover to the fan housing
After cleaning and drying the bathroom fan cover, it’s time to reattach it to the fan housing. Follow these steps to properly reattach the cover:
- Position the cover in alignment with the fan housing, ensuring that it fits snugly and securely.
- If the cover is designed to be screwed on, line up the screw holes on the cover with the corresponding holes on the fan housing.
- Insert the screws into the screw holes and use a screwdriver to tighten them, being careful not to overtighten and strip the screws or damage the cover.
- If the cover is held in place by clips, place the cover against the fan housing and press it firmly, ensuring that the clips align with the corresponding slots or grooves on the housing.
- If the cover features a bayonet mount, line up the tabs or arrows on the cover with the corresponding indicators on the fan housing. Twist the cover in the indicated direction until it locks into place.
- If the cover is spring-loaded, position it against the fan housing and gently push it inwards, compressing the springs until it snaps into place.
- If the cover is magnetic, align it with the fan housing and allow the magnets to securely attach the cover to the housing.
- Once the cover is properly attached, give it a gentle tug or wiggle to ensure that it is securely in place.
It’s important to ensure that the cover is securely reattached to the fan housing to prevent any accidental detachment. Double-check that all screws are tightened, clips are engaged, or the bayonet mount is properly locked. Once you are confident that the cover is securely in place, you can proceed to the next step: turning on the power and testing the fan.
Step 8: Turn on power and test the fan
With the bathroom fan cover reattached, it’s time to turn on the power and test the fan to ensure it is functioning correctly. Here’s how to do it:
- Go back to the circuit breaker panel and locate the breaker that controls the bathroom fan.
- Switch the breaker back to the “On” position to restore power to the fan.
- Return to the bathroom and switch on the fan using the appropriate switch or control.
- Listen for the sound of the fan running and observe the movement of the blades to ensure that it is operating smoothly.
- Feel the airflow coming from the fan to ensure that it is effectively removing odors and excess moisture from the bathroom.
- Observe the fan cover to ensure that it is securely in place and there are no unusual vibrations or noises.
- If the fan is not working or there are any issues, double-check the power connection, inspect the wiring, and troubleshoot any potential problems.
- If everything is functioning as expected, congratulations! You have successfully removed, cleaned, and reattached the bathroom fan cover. Enjoy the improved air circulation and freshness in your bathroom.
It’s important to periodically clean and maintain your bathroom fan cover to ensure its optimal performance. This will help prolong the lifespan of the fan and maintain a clean and healthy bathroom environment. If you encounter any ongoing issues with the fan, it may be necessary to consult a professional for further assistance and troubleshooting.
With the completion of this step, you have successfully finished the process of removing the bathroom fan cover and testing the fan. We hope this guide has been helpful in assisting you with this maintenance task. Remember to always prioritize safety and follow any specific instructions provided by the manufacturer. Happy cleaning!
Read more: How To Remove Vanity Drawers
Conclusion
Removing and cleaning the bathroom fan cover is a simple yet essential task that can greatly improve the functionality and aesthetics of your bathroom. By following the step-by-step instructions in this guide, you can easily remove the cover, clean it thoroughly, and reattach it to the fan housing.
Throughout the process, it’s important to prioritize safety by turning off the power before starting any work. Identifying the type of cover and using the appropriate tools and techniques will ensure a smooth removal process without causing any damage. Taking the time to clean the cover properly will help maintain optimal airflow, remove odors, and reduce excess moisture in your bathroom.
By reattaching the cover securely and testing the fan, you can ensure that it is functioning correctly and effectively circulating the air in your bathroom. Regular maintenance of the fan cover will not only enhance its performance but also contribute to a cleaner and healthier environment.
We hope this guide has provided you with the knowledge and confidence to successfully remove, clean, and reattach your bathroom fan cover. Remember to consult the manufacturer’s instructions or seek professional assistance if you encounter any difficulties or ongoing issues with your fan.
Thank you for reading, and we wish you a pleasant and refreshing experience in your newly cleaned bathroom!
Now that you've mastered removing a bathroom fan cover, why not tackle a bigger project? If you're curious about the time commitment required for a full bathroom makeover, our detailed guide on bathroom renovation provides valuable insights. This article will give you a clear idea of what to expect during the renovation process, helping you plan effectively for a smooth and successful update to your space.
Frequently Asked Questions about How To Remove Bathroom Fan Cover
Was this page helpful?
At Storables.com, we guarantee accurate and reliable information. Our content, validated by Expert Board Contributors, is crafted following stringent Editorial Policies. We're committed to providing you with well-researched, expert-backed insights for all your informational needs.


0 thoughts on “How To Remove Bathroom Fan Cover”