Articles
How To Install A Metal Roof Over Shingles
Modified: October 25, 2024
Learn how to install a metal roof over shingles with our informative articles. Find step-by-step guides, tips, and expert advice for a successful installation.
(Many of the links in this article redirect to a specific reviewed product. Your purchase of these products through affiliate links helps to generate commission for Storables.com, at no extra cost. Learn more)
Introduction
Installing a metal roof over shingles is a popular home improvement project that offers numerous benefits. Metal roofs are known for their durability, longevity, and energy efficiency, making them an attractive option for homeowners looking to upgrade their existing roof. Not only can a metal roof provide enhanced protection against the elements, but it can also add a modern and sleek aesthetic to your home’s exterior.
In this article, we will guide you through the process of installing a metal roof over shingles. We will discuss the benefits of choosing a metal roof, provide a step-by-step guide on preparing your roof for installation, and outline the materials and tools you will need. Whether you are a seasoned DIY enthusiast or a homeowner looking to save money on installation costs, this article will provide you with the knowledge and confidence to tackle this project.
Before we delve into the installation process, it’s important to note that installing a metal roof over shingles is a project that requires careful planning and preparation. If you are unsure about your ability to complete the installation yourself, it is always recommended to consult with a professional roofing contractor.
Now, let’s explore the many benefits of choosing a metal roof for your home.
Key Takeaways:
- Upgrading to a metal roof over shingles offers benefits such as durability, energy efficiency, and increased home value. Proper preparation, precise installation, and sealing are crucial for a successful and long-lasting metal roof.
- Installing a metal roof over shingles is a rewarding project that enhances your home’s aesthetics and provides long-term protection. Prioritize safety, attention to detail, and professional guidance for a seamless and durable installation.
Read more: How To Install 3-Tab Roof Shingles
Benefits of Installing a Metal Roof Over Shingles
When considering a roof replacement, many homeowners are drawn to the advantages offered by metal roofs. Here are some key benefits of installing a metal roof over shingles:
- Durability: Metal roofs are highly durable and can withstand harsh weather conditions such as heavy rain, snow, hail, and high winds. Unlike shingles that can be easily damaged, metal roofs have a longer lifespan, often lasting up to 50 years or more.
- Energy Efficiency: Metal roofs have excellent reflective properties, which can help reduce heat absorption and keep your home cooler in the summer. This can lead to lower energy costs as your cooling system won’t have to work as hard to maintain a comfortable temperature.
- Fire Resistance: Unlike traditional shingles, which are highly flammable, metal roofs are fire-resistant. This can provide homeowners with peace of mind knowing that their home is protected against the risk of fire.
- Environmentally Friendly: Metal roofs are considered to be an eco-friendly roofing option. They are often made from recycled materials and can be recycled at the end of their lifespan. Additionally, metal roofs can help reduce energy consumption, contributing to a more sustainable and energy-efficient home.
- Low Maintenance: Metal roofs require minimal maintenance compared to other roofing materials. They are resistant to moss, mold, and mildew growth, and their smooth surface allows for easy snow and debris removal.
- Increase Home Value: Installing a metal roof can significantly increase the overall value of your home. Potential buyers are often attracted to the durability, energy efficiency, and aesthetic appeal of metal roofs, which can help you recoup your investment when selling your home.
- Curb Appeal: Metal roofs are available in a variety of colors and styles, allowing you to choose a look that complements your home’s architecture and boosts its curb appeal.
With these benefits in mind, it’s clear to see why installing a metal roof over shingles is a wise investment for homeowners. Now that you’re aware of the advantages, let’s move on to the preparation process.
Preparing Your Roof for Metal Installation
Properly preparing your roof before installing a metal roof is crucial to ensure a smooth and successful installation. Here are the steps to follow when preparing your roof:
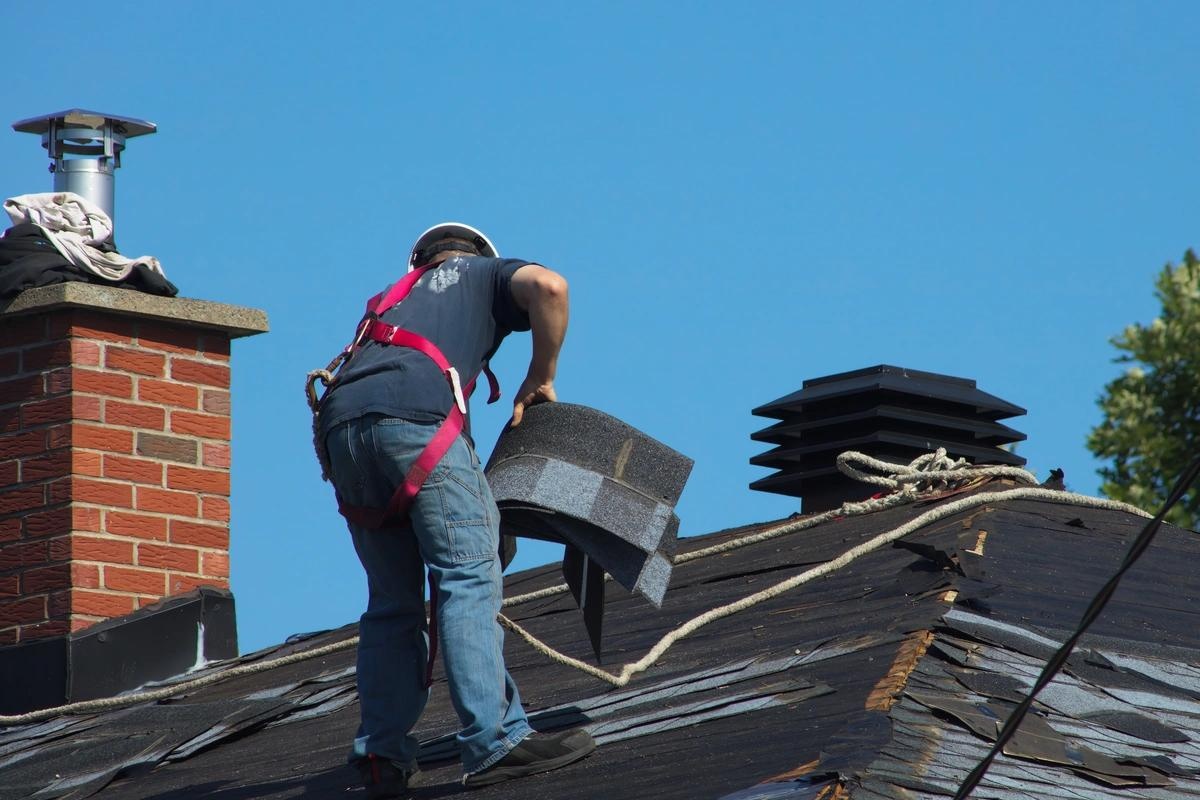
- Inspect the Existing Shingles: Start by inspecting the condition of your existing shingles. Ensure that they are not severely damaged, curled, or missing. If you notice any issues, it’s advisable to replace or repair them before proceeding with the metal installation.
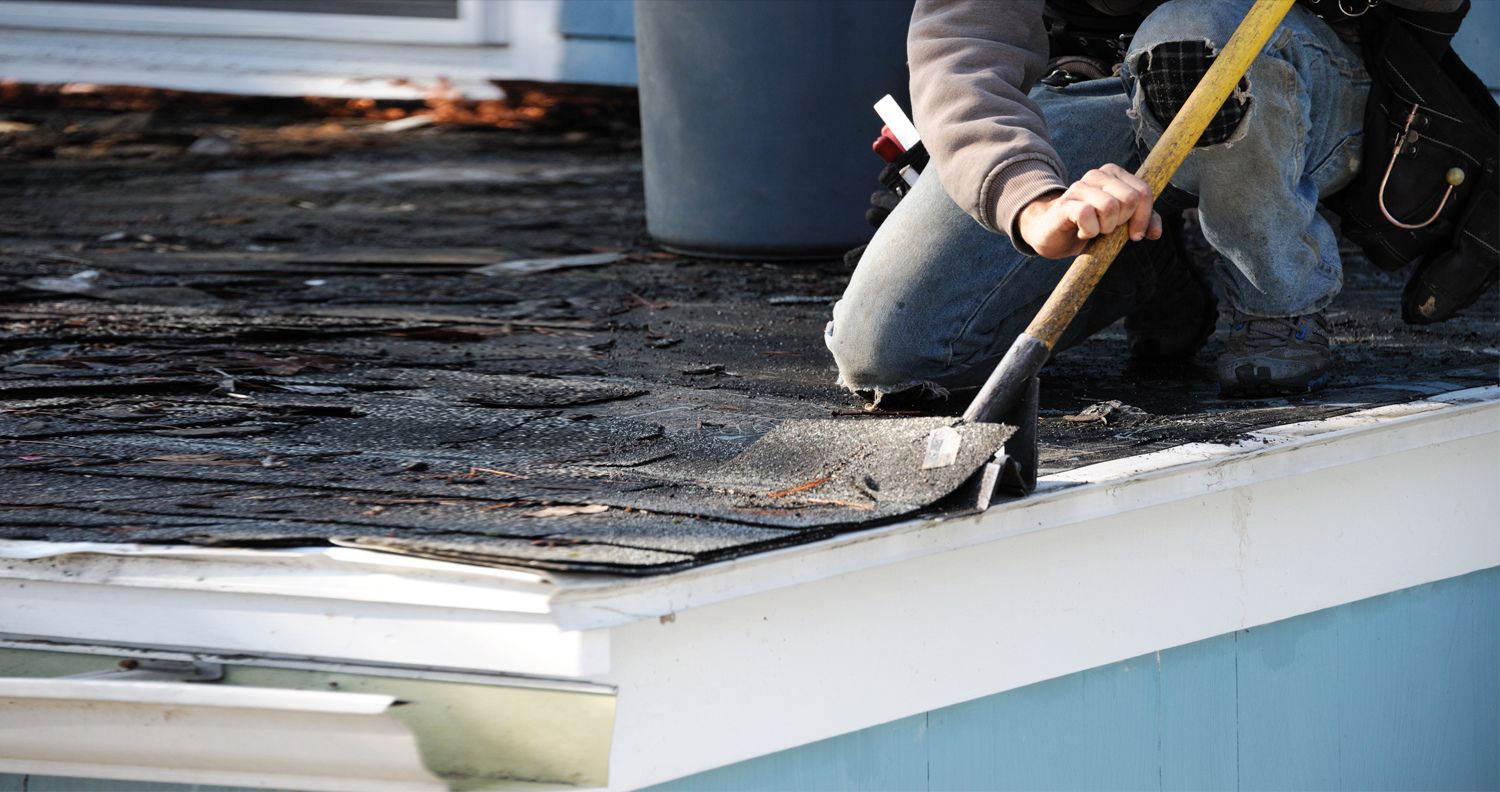
- Clean the Roof: Remove any debris, dirt, or moss from the roof surface. This can be done by using a broom or a pressure washer. Make sure to clean the valleys and flashing areas as well.
- Inspect the Roof Deck: Check the roof deck for any rotting or damaged areas. Replace any weakened plywood or sheathing to provide a solid foundation for the metal roof.
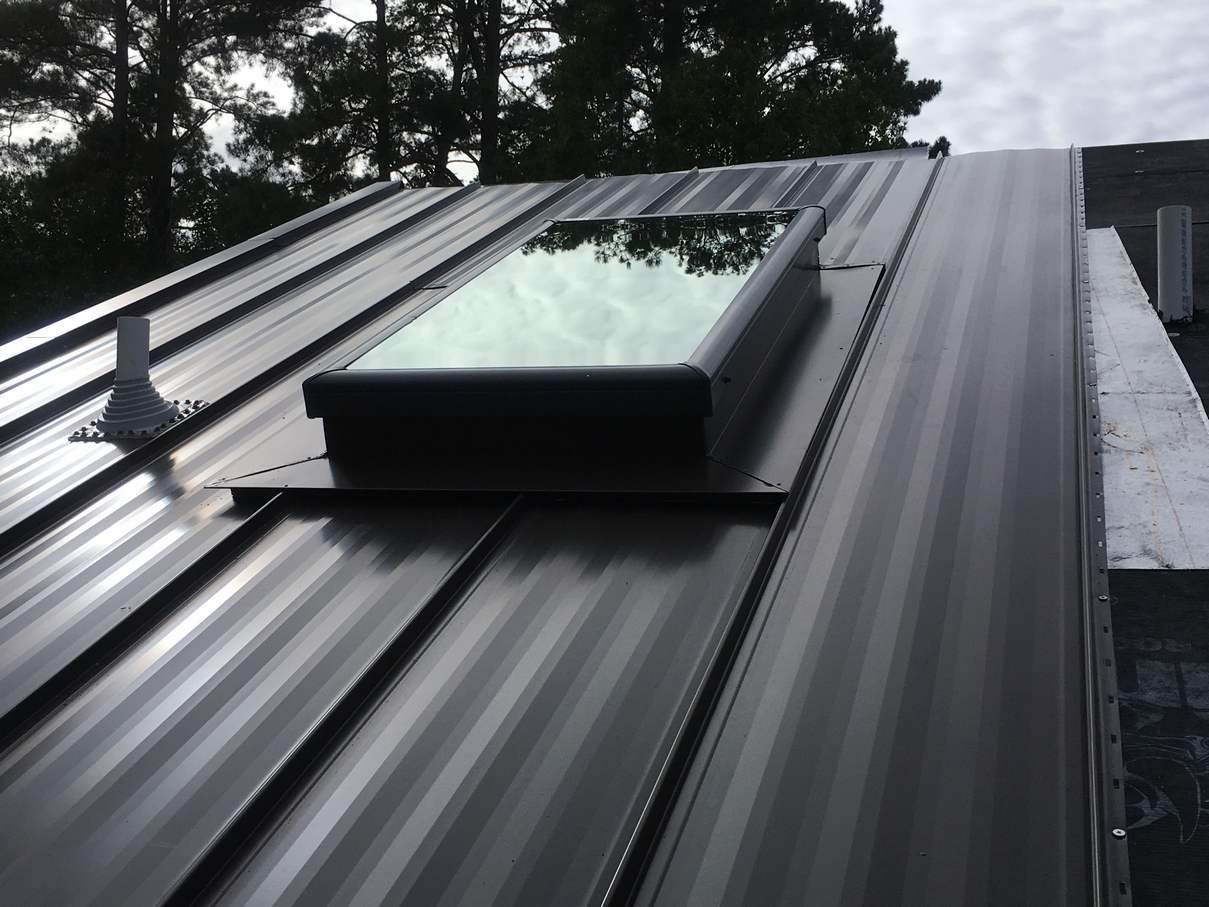
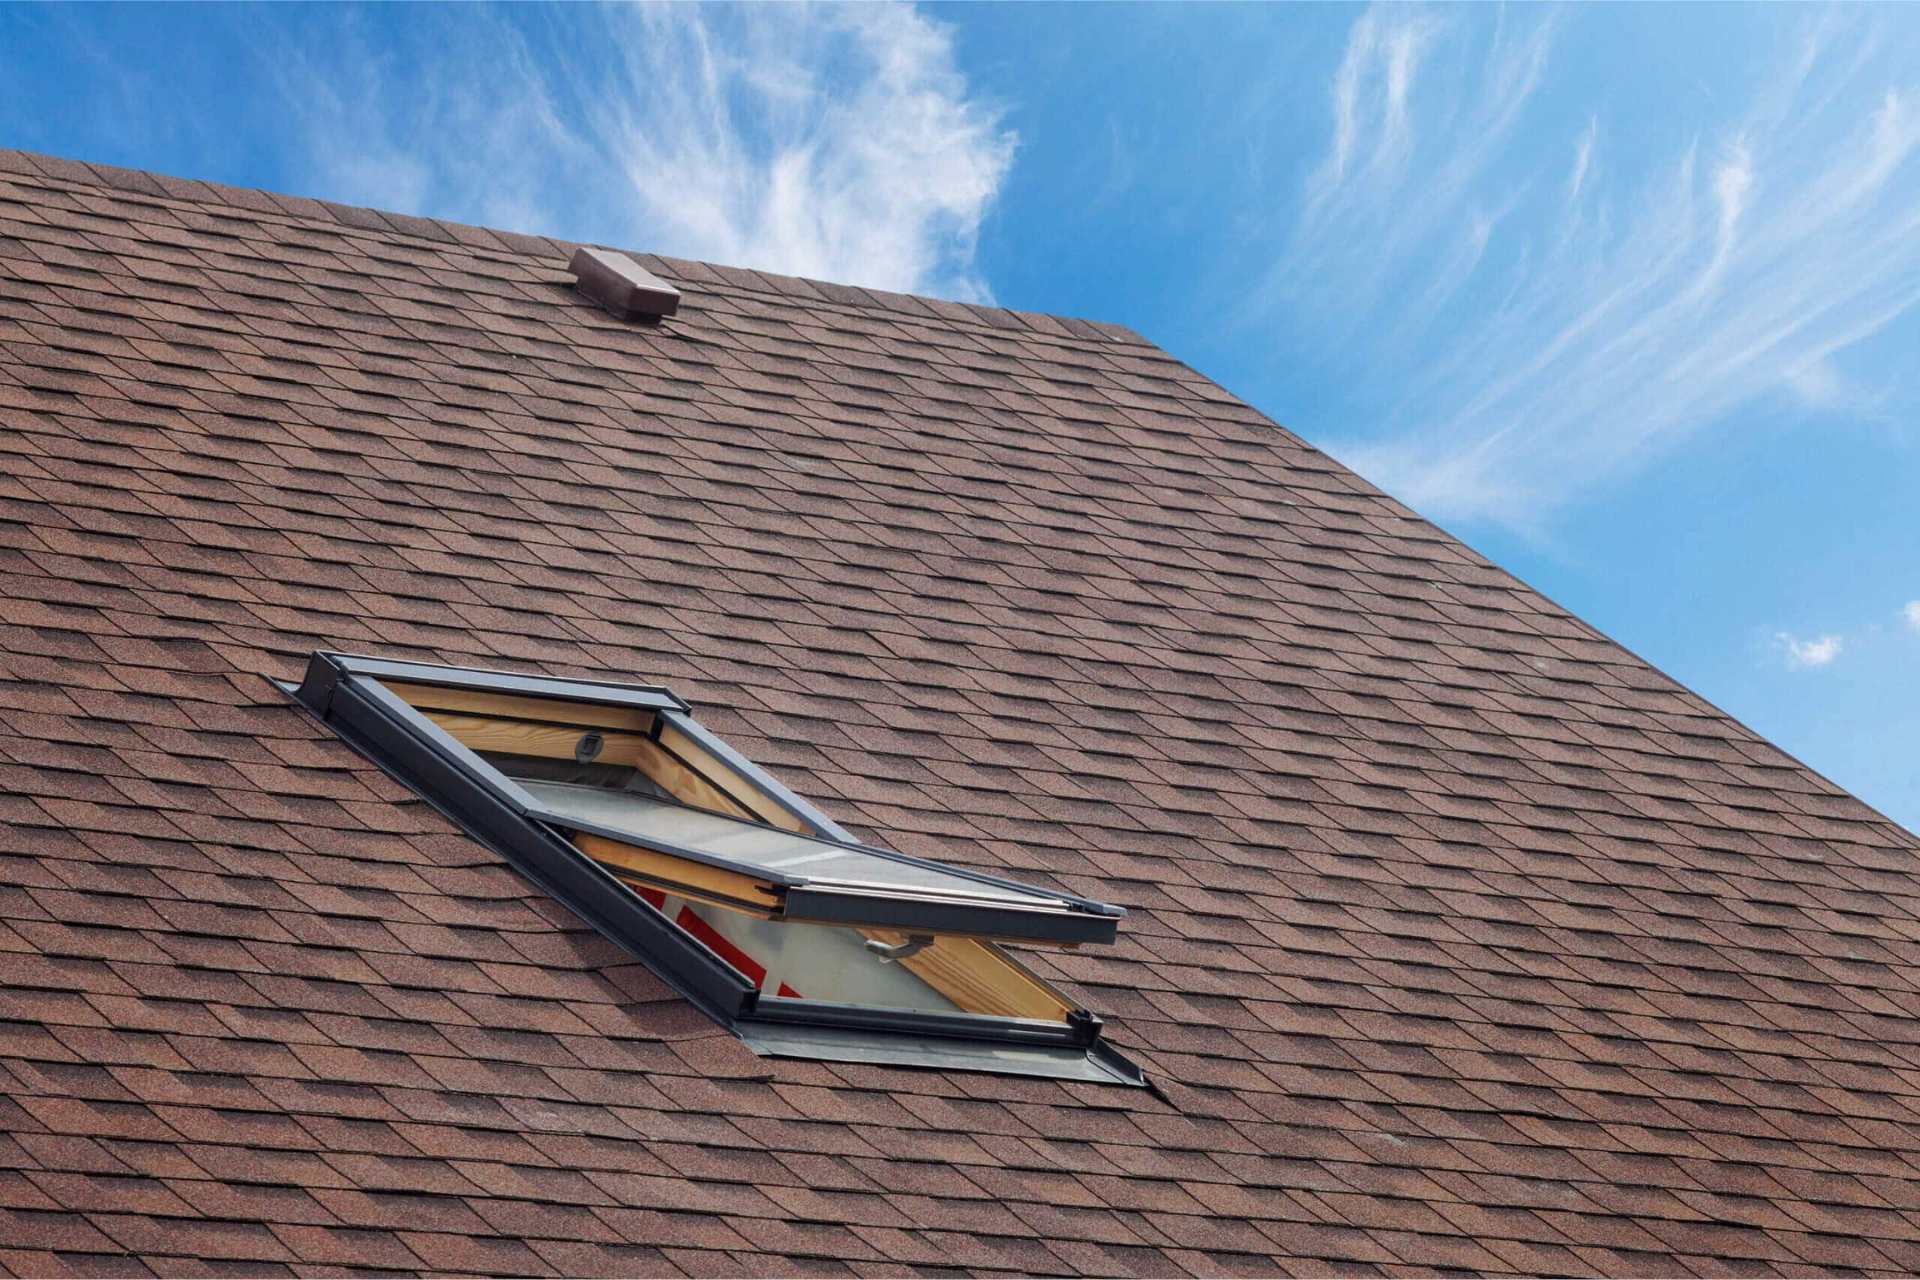
- Repair the Flashing: Inspect the flashing around chimneys, vents, and skylights. Replace any damaged or corroded flashing to ensure proper water drainage and prevent leaks.
- Apply a Moisture Barrier: Installing a moisture barrier, also known as an underlayment, is essential for protecting your roof from moisture and ensuring a watertight seal. There are various types of underlayment available, such as synthetic materials or felt paper. Follow the manufacturer’s instructions to install the underlayment properly.
- Check for Proper Ventilation: Adequate ventilation is crucial for maintaining a healthy roof system. Ensure that your attic has proper ventilation to prevent moisture buildup and prolong the life of your metal roof.
By following these preparation steps, you will create a solid foundation for your metal roof installation. Taking the time to properly inspect and prepare your roof will help ensure a successful and long-lasting installation. Next, let’s discuss the materials and tools you will need for the installation process.
Gathering the Required Materials
Before you begin the installation process, it’s important to gather all the necessary materials and tools. Here’s a list of what you’ll need:
- Metal Panels: Choose high-quality metal panels that are suitable for your climate and aesthetic preferences. Measure your roof to determine the quantity of panels required.
- Underlayment: As mentioned earlier, an underlayment is essential for moisture protection. Select a moisture barrier that meets industry standards and is compatible with your metal roof.
- Fasteners: Use appropriate screws or nails to secure the metal panels to the roof. These fasteners should be made of stainless steel or galvanized steel to prevent corrosion.
- Flashing: Depending on your roof’s configuration, you may need to install flashing around chimneys, vents, and other protrusions. Choose flashing materials that are compatible with your metal roof and provide a watertight seal.
- Ridge Cap: The ridge cap is used to cover the joint between two metal panels at the peak of the roof. Select a ridge cap that matches your metal panels in color and design.
- Safety Equipment: Ensure you have the necessary safety equipment, such as gloves, safety glasses, and a harness if working at heights. Safety should always be a top priority during any roofing project.
- Tools: Gather tools such as a drill/driver, roofing nailer, measuring tape, chalk line, utility knife, and a pry bar. These tools will aid in the installation process and ensure accuracy.
It’s essential to use high-quality materials and tools to ensure a durable and long-lasting metal roof installation. Consult with your local supplier or professional roofing contractor to ensure you have all the necessary materials for your specific project.
With the materials and tools gathered, you’re now ready to proceed with installing the metal roof. In the next section, we will guide you through the step-by-step process of installing the underlayment.
Installing the Underlayment
Installing the underlayment is an essential step in preparing your roof for a metal installation. Here’s a step-by-step guide on how to install the underlayment:
- Clean the Roof: Before installing the underlayment, ensure that the roof surface is clean and debris-free.
- Lay the first course: Start by rolling out the underlayment along the eave of the roof with the bottom edge extending over the drip edge. Secure it in place using roofing nails or staples, ensuring that the underlayment is taut.
- Overlap subsequent courses: For additional weatherproofing, overlap subsequent courses of underlayment by a few inches. Fasten each course securely, ensuring that the seams are properly sealed.
- Continue up the roof: Working your way up the roof, continue installing courses of underlayment until you reach the ridge. Make sure each course is securely fastened and overlaps the previous one.
- Properly seal around protrusions: Cut openings in the underlayment for pipes, vents, and other protrusions. Use appropriate flashing materials to properly seal these areas and prevent water infiltration.
- Secure the top course: When you reach the ridge, overlap the top course of underlayment and secure it in place. This will provide a protective barrier at the peak of the roof.
- Inspect for any gaps or tears: Once the underlayment is installed, carefully inspect the entire roof surface for any gaps or tears. Address any issues by patching or replacing the underlayment as necessary.
Remember to refer to the manufacturer’s instructions for specific installation guidelines for the underlayment you are using. Properly installing the underlayment is crucial for moisture protection and ensuring a watertight seal.
Once the underlayment is in place, you’re ready to move on to the next step: measuring and cutting the metal panels.
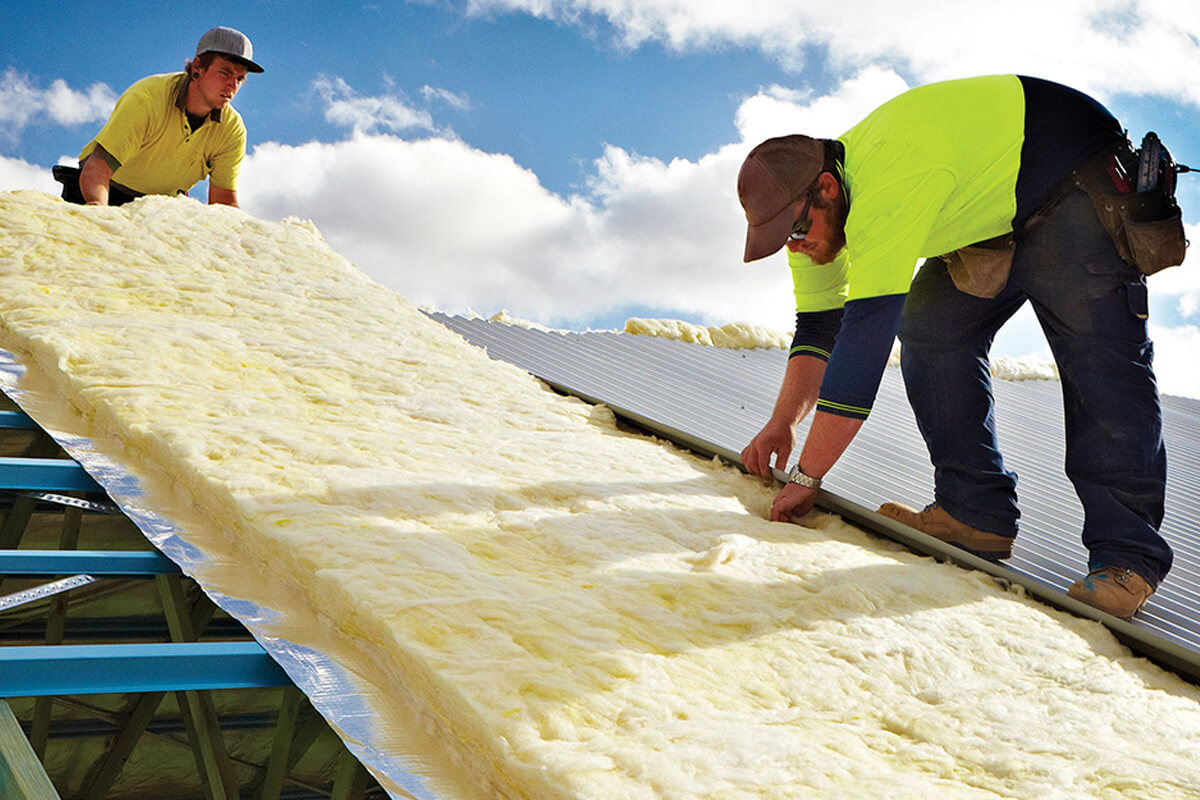
Make sure to install a layer of underlayment over the shingles before installing the metal roof. This will provide an extra barrier against moisture and improve the overall performance of the roof.
Read more: How To Install A Metal Roof On A Shed
Measuring and Cutting the Metal Panels
Accurate measurements and precise cutting are crucial for a proper fit and seamless installation of the metal panels. Follow these steps to measure and cut the panels:
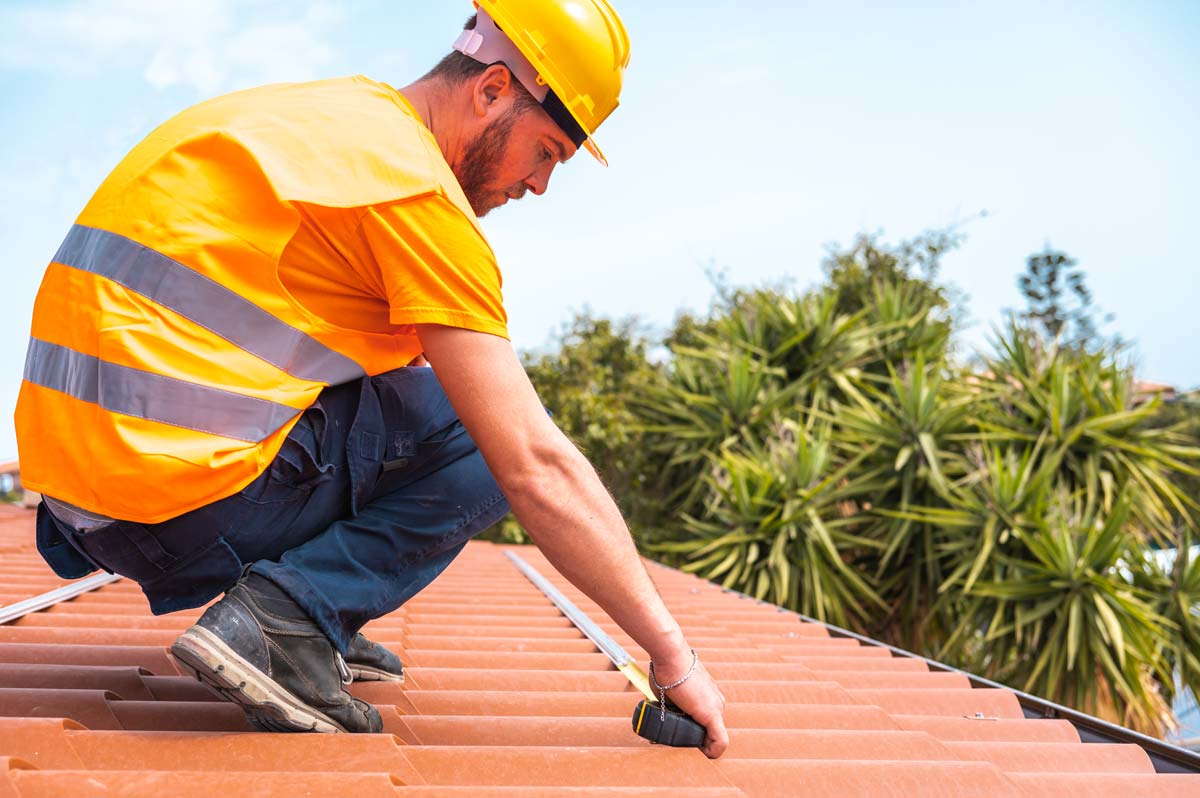
- Start with accurate measurements: Measure the length and width of each section of your roof to determine the size of the panels you will need. Take into account any overhangs or protrusions that may affect the measurements.
- Mark the panels: Using a tape measure, mark the measurements on the underside or protective coating of each metal panel. Ensure that the marks are clear and visible.
- Apply a cutting guide: Place a metal cutting guide or straight edge along the marked line to provide a steady cutting line. Secure it in place so that it doesn’t move during the cutting process.
- Cut the panels: Using a circular saw with a metal-cutting blade or tin snips, carefully cut along the marked line. Take your time to ensure clean and precise cuts, especially around corners or angles.
- Check the fit: After cutting a panel, check the fit by placing it on the corresponding section of the roof. Make any necessary adjustments or recuts to ensure a perfect fit.
- Repeat for remaining panels: Repeat the measuring and cutting process for each section of the roof, taking care to accurately trim the panels to fit.
It’s important to prioritize safety while cutting the metal panels. Use appropriate safety equipment, such as gloves and safety glasses, and take caution to avoid sharp edges. If you’re unsure about the cutting process, consider consulting with a professional or experienced installer.
Once your metal panels are accurately cut and ready, it’s time to proceed with the installation process. In the next section, we will guide you through the steps of installing the metal panels onto your roof.
Installing the Metal Panels
Now that you have properly measured and cut your metal panels, it’s time to install them onto your roof. Follow these steps for a successful installation:
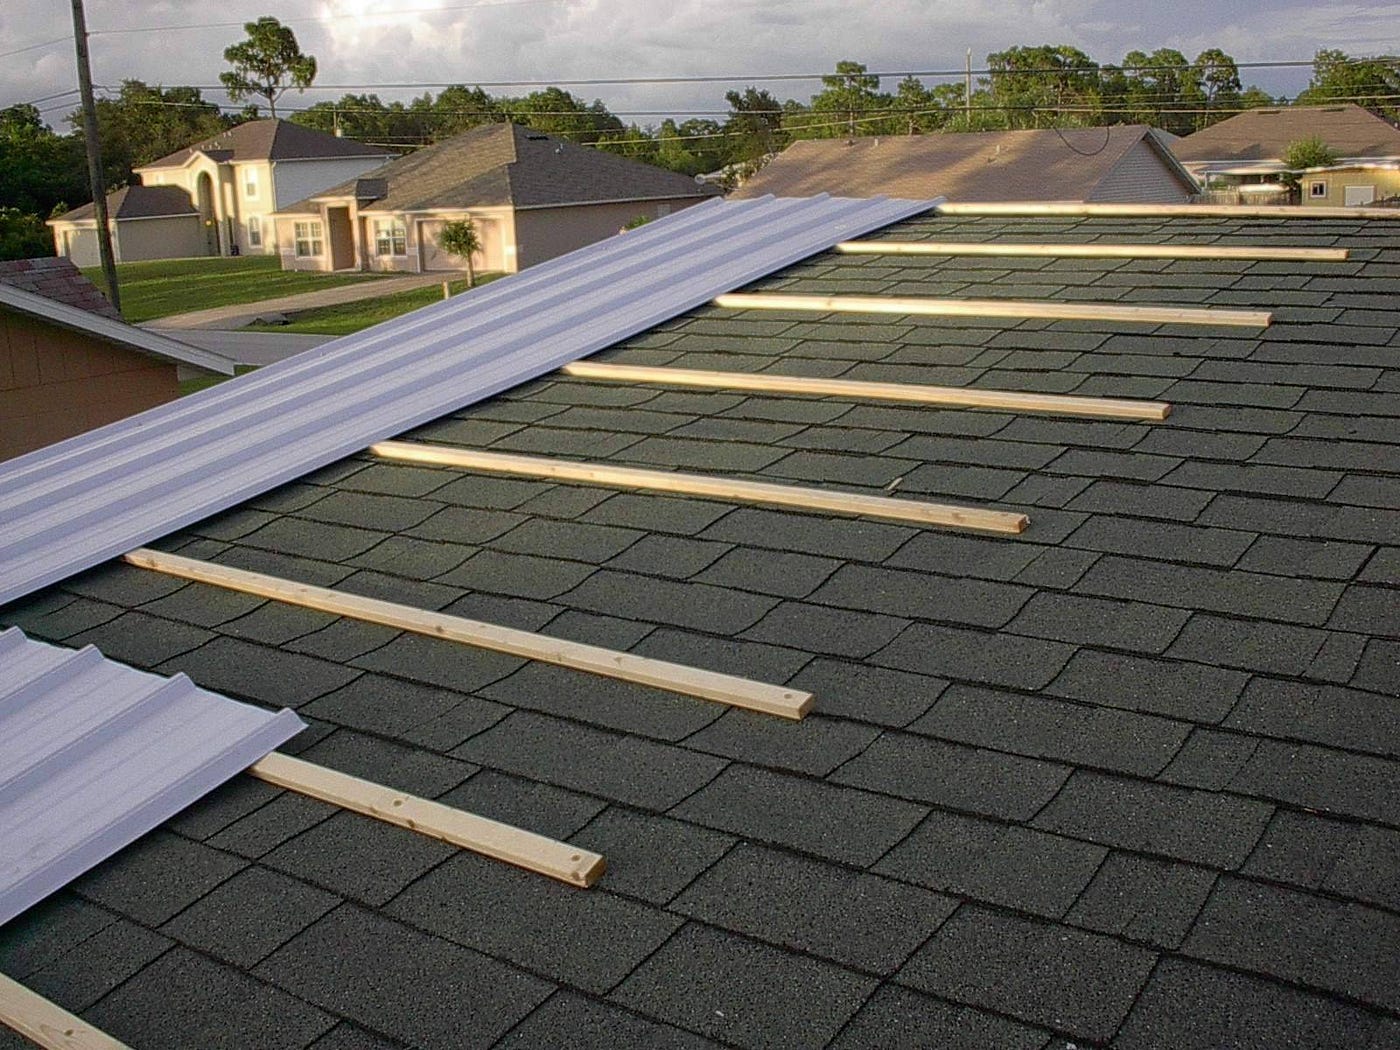
- Start at the eaves: Begin by aligning the first metal panel with the edge of the roof at the eaves. Make sure it overhangs the edge slightly to allow for proper drainage.
- Fasten the panel: Secure the first panel in place by using appropriate fasteners, such as screws or nails, in the pre-drilled holes provided by the panel manufacturer. Place the fasteners along the edge and at regular intervals across the panel.
- Continue with subsequent panels: Align the next metal panel with the previous one, ensuring there is a slight overlap. Fasten it securely in place, following the same process as the first panel.
- Use metal roofing screws/nails: When installing the fasteners, make sure to use screws or nails that are specifically designed for metal roofing. These fasteners are typically made of stainless steel or galvanized steel to prevent corrosion.
- Ensure proper alignment: As you progress with installing the metal panels, regularly check for proper alignment and a consistent overlap between panels. This will ensure a clean and professional-looking installation.
- Trim panels as needed: If necessary, trim panels to fit around obstructions such as chimneys or vents. Use tin snips or a cutting tool specifically designed for metal roofing to make precise cuts.
- Seal joints and seams: Apply a compatible sealant or roofing caulk over the overlapping seams and joints to create a watertight barrier. This will help prevent any water penetration and ensure the longevity of your metal roof.
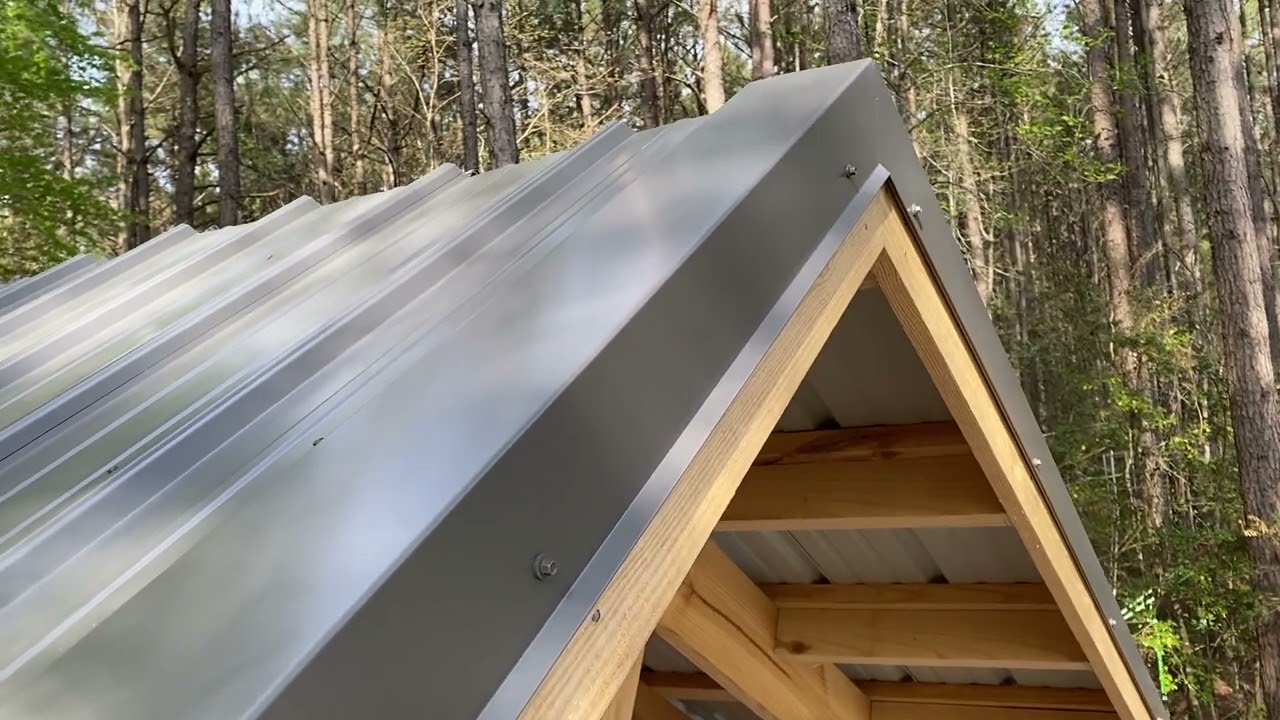
- Install ridge cap: Finally, install the ridge cap along the peak of your roof to provide a finished and protective layer. Secure it in place using fasteners and seal any seams or joints with sealant.
Throughout the installation process, be cautious of your safety and take necessary precautions. Ensure you have proper footing and use safety equipment, such as gloves and safety glasses, to protect yourself from sharp edges and potential falls.
With the metal panels securely in place, your roof is taking shape. In the next section, we will discuss how to secure the metal roof in place for added stability and durability.
Securing the Metal Roof in Place
After successfully installing the metal panels onto your roof, it’s important to secure the roof in place to ensure stability and durability. Here are the steps to follow:
- Tighten fasteners: Go back and check all the fasteners used to secure the metal panels. Use a screwdriver or drill to tighten any screws or nails that may have become loose during the installation process.
- Inspect for gaps or openings: Carefully inspect the roof surface for any gaps or openings between the metal panels. Make sure there are no areas where water could potentially penetrate. If any gaps are found, seal them with an appropriate sealant.
- Check for loose seams: Verify that all seams and joints are securely fastened and sealed. This includes the overlapping seams between panels, as well as the seams of any trim pieces or flashing that were installed.
- Reinforce with screws: For added stability, consider reinforcing the installation by driving screws through the top ridge onto the roof deck. This will help anchor the metal roof firmly in place and minimize movement during strong winds or storms.
- Inspect the ridge cap: Ensure that the ridge cap, which covers the peak of your roof, is properly aligned and fastened. Check that any seams or joints are sealed with an appropriate sealant to prevent water infiltration.
- Remove excess debris: Clean up any excess debris or metal shavings from the installation process. This will prevent them from accumulating and potentially causing damage or clogging gutters in the future.
- Perform a final inspection: Take a step back and thoroughly inspect the entire metal roof installation. Look for any areas that may require extra attention or touch-ups, whether it’s reinforcing fasteners or applying additional sealant.
By taking these steps to secure the metal roof in place, you will ensure its stability and longevity. A well-secured roof will be better able to withstand the elements and provide long-lasting protection for your home.
In the final section, we will discuss the importance of sealing and provide some finishing touches to complete your metal roof installation.
Sealing and Finishing Touches
Sealing the metal roof and adding finishing touches is the final step in the installation process. This step is crucial for weatherproofing and further enhancing the durability of your roof. Follow these steps to properly seal your metal roof:
- Seal the fastener holes: Apply a small amount of roofing sealant or silicone caulk to seal the holes where screws or nails were inserted. This will prevent water from seeping through the fastener holes and compromising the integrity of the roof.
- Check and seal any gaps: Inspect the entirety of the metal roof for any gaps or openings between panels, trim pieces, or flashing. Use an appropriate sealant to seal any gaps to ensure a watertight seal.
- Inspect and seal ridge cap: Verify that the ridge cap is properly aligned and securely fastened. Check for any gaps or openings along the ridge cap and seal them with roofing sealant or caulk.
- Touch up any damaged panels: If any metal panels were damaged during installation, repair or replace them to ensure the integrity of the roof. Use proper tools and techniques to make precise repairs.
- Clean the roof surface: Remove any debris or dirt that may have accumulated during the installation process. Clean the surface of the metal roof using a soft-bristle brush or low-pressure water stream. Avoid using abrasive materials that could scratch or damage the surface.
- Consider applying a protective coating: Depending on the type of metal roof you installed, you may consider applying a protective coating to enhance its longevity. Consult with the manufacturer or a professional to determine the best coating for your metal roof.
- Check for any loose trim pieces: Inspect all trim pieces, such as fascia, drip edge, and flashing, to ensure they are securely fastened. Replace or tighten any loose trim pieces to ensure a neat and tidy appearance.
- Perform a final inspection: Step back and carefully examine the entire metal roof installation. Look for any areas that may need additional sealing or enhancement. Make necessary adjustments or touch-ups to ensure the overall integrity and aesthetics of the roof.
By properly sealing and adding finishing touches to your metal roof, you will enhance its longevity and protect your home from any potential water infiltration. A well-sealed metal roof will provide you with years of reliable and low-maintenance protection.
Congratulations! You have successfully completed the installation of a metal roof over shingles. Your home is now equipped with a durable and aesthetically pleasing roofing solution. Remember to maintain regular inspections and perform any necessary maintenance to ensure the long-term performance of your metal roof.
If you have any doubts or concerns during the installation process, it is always recommended to consult with a professional roofing contractor for expert guidance and assistance.
Now, sit back, relax, and enjoy the benefits of your newly installed metal roof.
Read more: How To Install Gutters On Metal Roof
Conclusion
Installing a metal roof over shingles can be a rewarding home improvement project that offers a multitude of benefits. From increased durability and energy efficiency to enhanced curb appeal and longevity, a metal roof provides homeowners with a reliable and attractive roofing solution.
In this comprehensive guide, we have walked you through the entire process of installing a metal roof over shingles. We discussed the benefits of choosing a metal roof, the importance of preparing your roof, gathering the necessary materials, installing the underlayment, measuring and cutting the metal panels, and securing the roof in place. We also covered the steps to properly seal and add finishing touches to your metal roof installation.
Throughout the process, we emphasized the significance of safety and attention to detail. Proper planning, careful measurements, precise cutting, and accurate installation techniques are crucial for achieving a successful metal roof installation.
Remember, if you have any doubts or concerns about installing a metal roof over shingles, it’s always recommended to consult with a professional roofing contractor. They can provide you with expert advice, ensure proper installation, and address any specific challenges or requirements of your roofing project.
By choosing a metal roof and following the steps outlined in this guide, you can enjoy the durability, energy efficiency, and aesthetics that a metal roof brings to your home. With its long lifespan, low maintenance needs, and resistance to harsh weather conditions, a metal roof is an investment that will pay off for years to come.
So, whether you’re looking to replace an aging roof or simply upgrade the exterior of your home, consider installing a metal roof over shingles. Embrace the numerous benefits it offers and enjoy the peace of mind that comes with a reliable and stylish roofing solution.
Now, it’s time to embark on your metal roof installation journey and transform your home with a durable and stunning roof. Good luck!
Frequently Asked Questions about How To Install A Metal Roof Over Shingles
Was this page helpful?
At Storables.com, we guarantee accurate and reliable information. Our content, validated by Expert Board Contributors, is crafted following stringent Editorial Policies. We're committed to providing you with well-researched, expert-backed insights for all your informational needs.

0 thoughts on “How To Install A Metal Roof Over Shingles”