Articles
How To Replace An Attic Fan Motor
Modified: October 23, 2024
Learn how to replace an attic fan motor with step-by-step instructions and helpful tips in our informative articles on attic fan maintenance and repair.
(Many of the links in this article redirect to a specific reviewed product. Your purchase of these products through affiliate links helps to generate commission for Storables.com, at no extra cost. Learn more)
Introduction
Welcome to our comprehensive guide on how to replace an attic fan motor. Attic fans play a vital role in maintaining proper ventilation and temperature control in your home’s attic space. Over time, the motor of an attic fan may wear out or malfunction, requiring replacement.
Replacing an attic fan motor can be a cost-effective solution, as it allows you to restore the functionality of your fan without having to replace the entire unit. In this article, we will walk you through the step-by-step process of replacing an attic fan motor, ensuring that your attic remains adequately ventilated and free from excess heat and moisture.
Before we dive into the details, it is important to note that working with electrical components poses potential hazards. It is essential to exercise caution and follow safety precautions during the entire replacement process. If you are not confident in your abilities, it is always recommended to seek professional help.
To successfully replace an attic fan motor, you will need the necessary tools and materials. These include:
- Screwdriver
- Wrench or pliers
- Voltage tester
- Multimeter
- New attic fan motor
- Wire nuts
- Electrical tape
Gathering these materials before you begin will help ensure a smooth and efficient replacement process.
Key Takeaways:
- Safety First!
Prioritize safety by disconnecting the power supply, wearing protective gear, and seeking professional help if needed. Following safety precautions ensures a secure and incident-free attic fan motor replacement. - Proper Installation and Maintenance
Carefully install the new motor, test its functionality, and implement regular maintenance. Proper installation and maintenance ensure optimal attic fan performance and longevity, providing efficient ventilation and temperature control.
Read more: How To Replace Bathroom Fan Motor
Tools and Materials Needed
Before you start replacing an attic fan motor, it is essential to gather the necessary tools and materials. Having these items on hand will make the process easier and more efficient. Here is a list of tools and materials you will need:
Tools:
- Screwdriver: You will need a screwdriver to remove the screws that hold the attic fan cover in place and secure the motor.
- Wrench or pliers: These tools are required to disconnect any electrical connections or secure brackets holding the motor.
- Voltage tester: This tool is essential to ensure that the power supply to the attic fan is shut off before you begin working on it.
- Multimeter: A multimeter is used to check the voltage and continuity of electrical connections, ensuring proper installation.
Materials:
- New attic fan motor: It is crucial to have a replacement motor that is compatible with your specific attic fan model and specifications. Make sure to choose a high-quality motor that meets the necessary requirements for your attic space.
- Wire nuts: Wire nuts are used to securely connect electrical wires together during the installation process.
- Electrical tape: This tape provides insulation and helps protect the electrical connections from moisture and potential damage.
Gathering these tools and materials in advance will ensure that you have everything you need to successfully replace your attic fan motor. Additionally, it is always recommended to read the manufacturer’s instructions for any specific tools or materials that may be required for your particular attic fan model.
Step 1: Safety Precautions
Before you begin the process of replacing an attic fan motor, it is crucial to prioritize safety. Dealing with electrical components and working in an attic space can pose potential hazards. By following these safety precautions, you can ensure a safe and incident-free replacement process:
- Turn off the power: Before starting any work, turn off the power supply to the attic fan. Locate the circuit breaker that controls the fan’s circuit and flip it to the off position. For an added layer of safety, use a voltage tester to confirm that there is no electricity flowing to the unit.
- Protective gear: Wear appropriate protective gear such as safety goggles, gloves, and a dust mask to protect yourself from any debris or insulation particles that may be present in the attic.
- Secure footing: Attics can be cramped and may have uneven surfaces. Ensure that you have a sturdy and non-slip surface to stand on while working to prevent any slips or falls.
- Proper lighting: Attics can be dimly lit, so it is important to have adequate lighting to clearly see what you are working on. Use a portable light source or a headlamp to illuminate your workspace.
- Take breaks: Attic work can be physically demanding and may require you to spend a significant amount of time in a confined space. Take regular breaks to avoid fatigue and dehydration.
- Follow manufacturer instructions: Read and follow the manufacturer’s instructions for your specific attic fan model and replacement motor. This will ensure that you are properly adhering to the recommended guidelines and procedures.
- Seek professional help if needed: If you are uncertain about any part of the process or feel uncomfortable working with electrical components, it is always best to seek the assistance of a professional electrician or HVAC technician.
By adhering to these safety precautions, you can minimize the risk of accidents and injuries while replacing your attic fan motor. Remember, safety should always be the top priority when working with electrical systems.
Read more: How To Replace A Range Hood Fan Motor
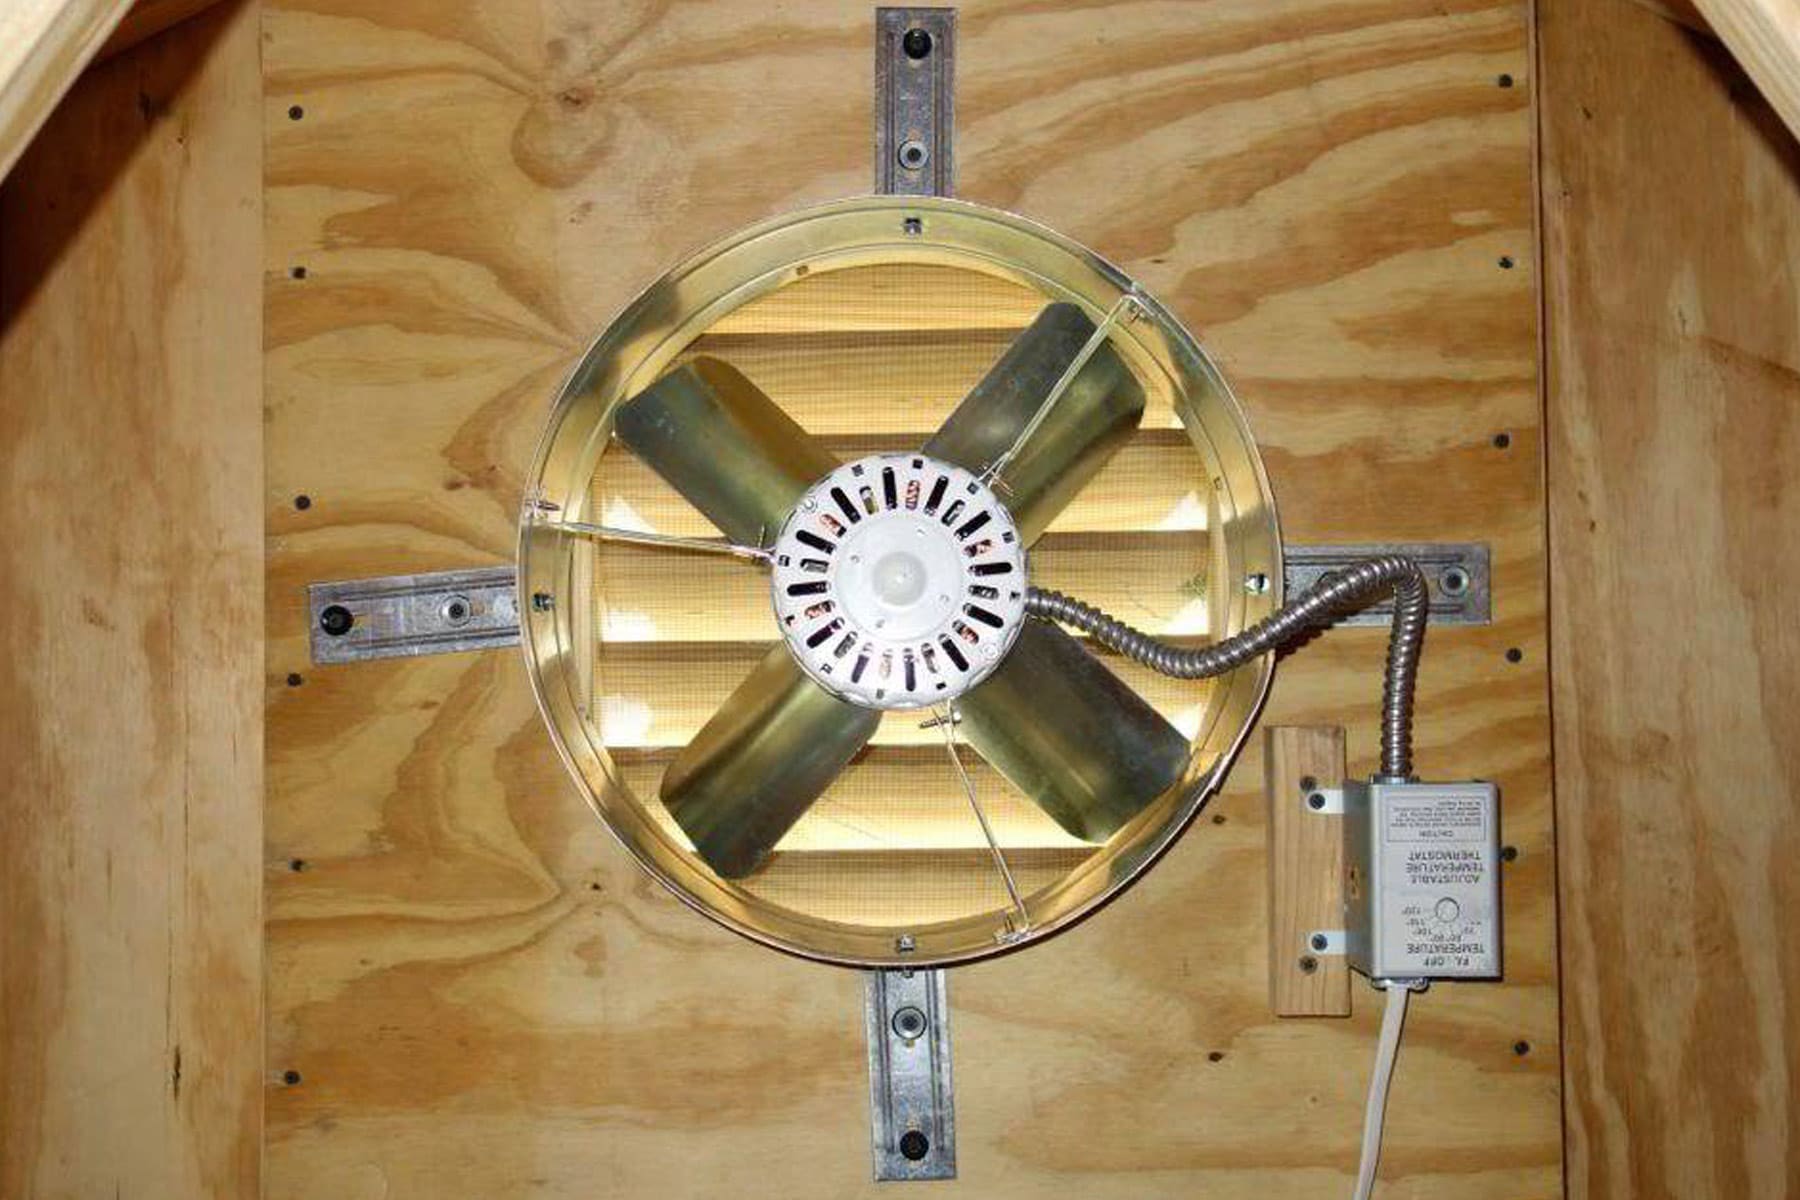
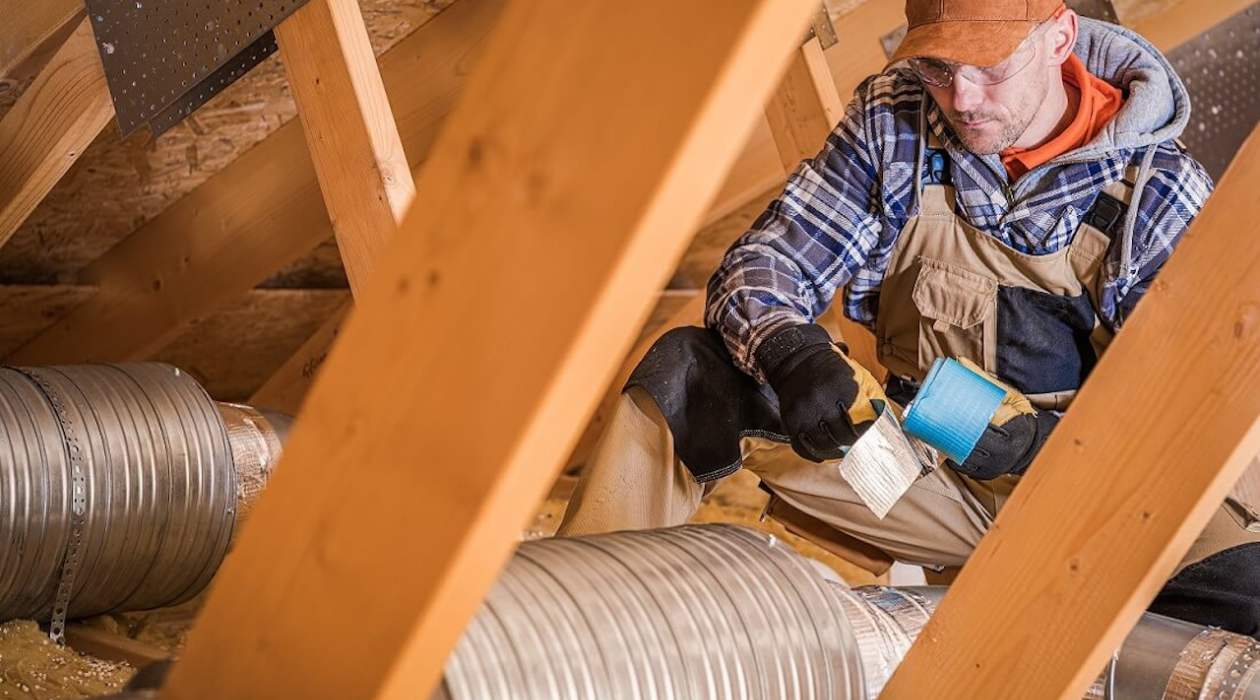
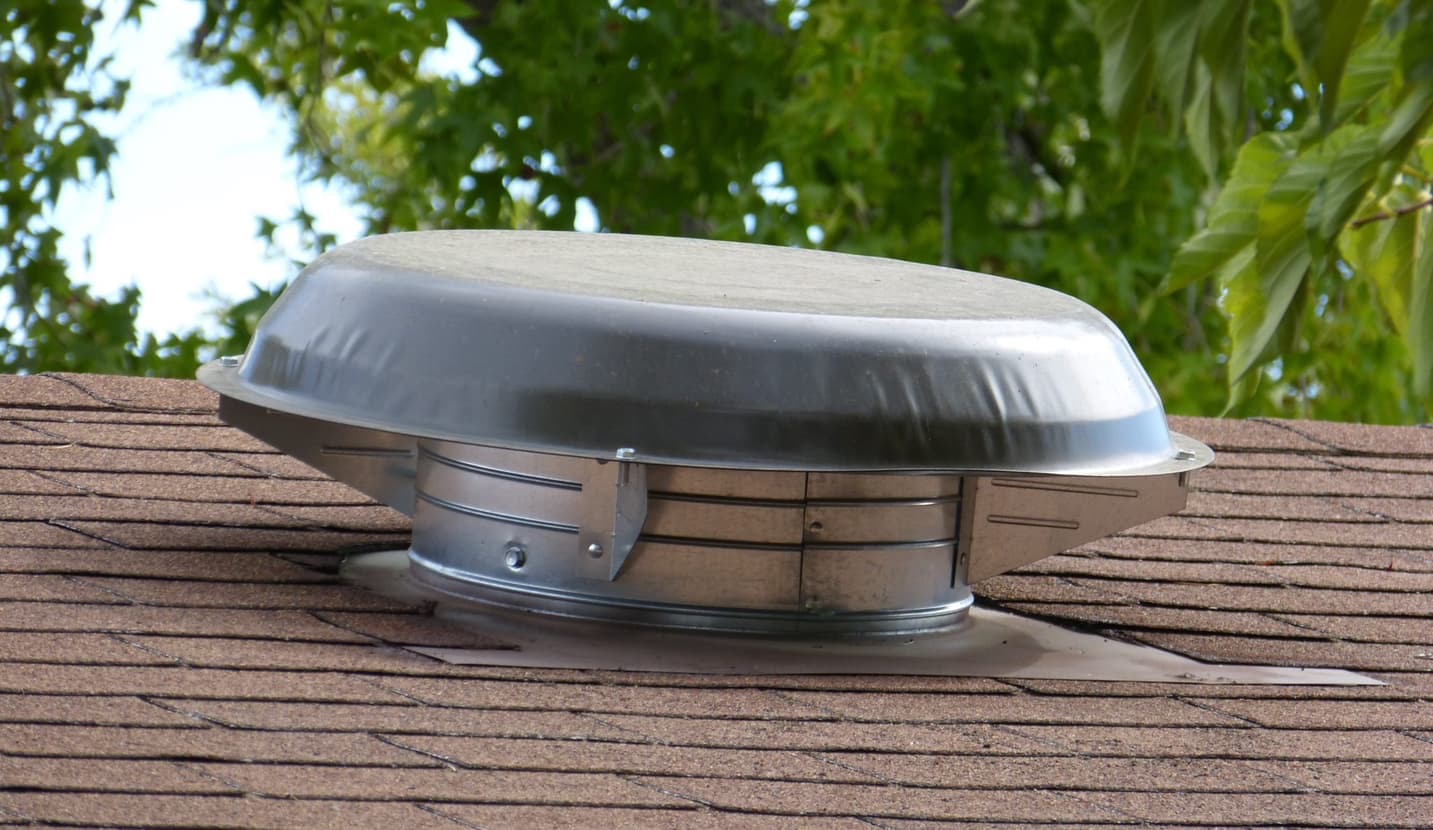
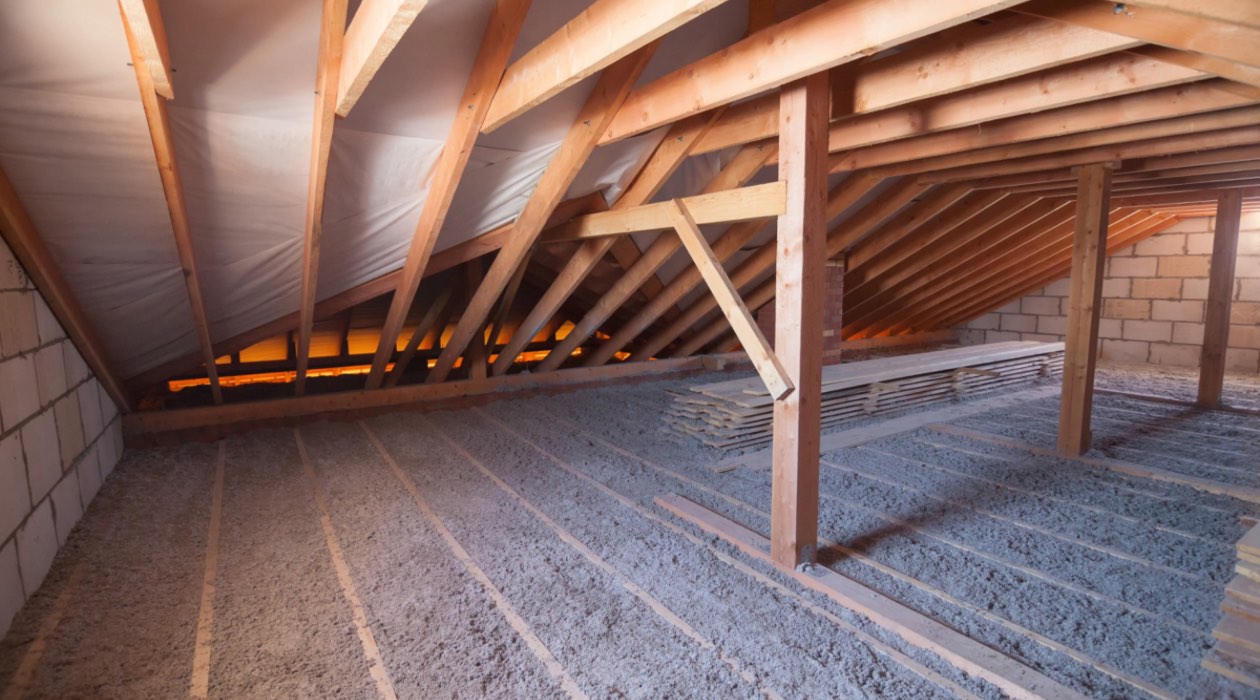
Step 2: Accessing the Attic Fan
Once you have taken the necessary safety precautions, the next step in replacing an attic fan motor is accessing the fan itself. Here are the steps to follow:
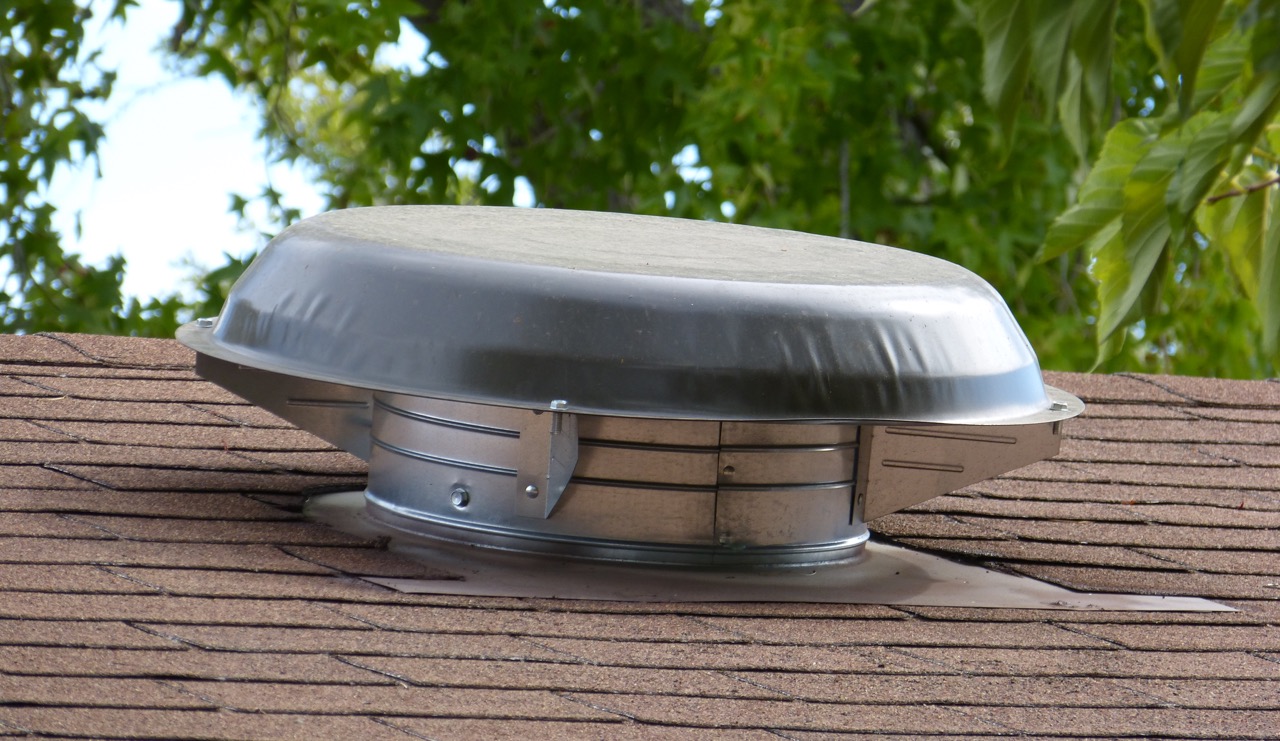
- Locate the attic fan: Depending on the design of your home, the attic fan may be located on the roof or in the ceiling. Find the access point to the attic where the fan is installed.
- Remove the attic fan cover or housing: Using a screwdriver, carefully remove the screws that secure the attic fan cover or housing in place. Set the screws aside in a safe place as you will need them later for reassembly.
- Set up a workspace: Once the fan cover or housing is removed, create a workspace within the attic that allows you to move around comfortably and gives you easy access to the motor.
- Secure the fan cover or housing: To prevent any accidental damage or interference, secure the removed fan cover or housing in a safe location away from your work area.
Accessing the attic fan may vary depending on the specific model and installation of your fan. Some fans may require additional steps, such as disconnecting ductwork or brackets. Consult the manufacturer’s instructions for your particular fan to ensure you are following the correct procedure.
Once you have successfully accessed the attic fan, you are ready to move on to the next step: disconnecting the power supply.
Step 3: Disconnecting the Power Supply
Before you begin working on the attic fan motor, it is crucial to disconnect the power supply to ensure your safety. Follow these steps to properly disconnect the power:
- Locate the circuit breaker: Identify the circuit breaker that controls the power supply to the attic fan. It is typically labeled in the electrical panel. If you are unsure, consult the circuit diagram provided by your home’s electrical system.
- Turn off the power: Flip the switch of the circuit breaker to the “off” position that corresponds to the attic fan. This will cut off the power supply to the fan, preventing any electrical shocks or accidents during the replacement process.
- Test the power supply: Even after turning off the circuit breaker, it is crucial to verify that the power supply to the fan is completely disconnected. Use a voltage tester to check for any remaining electrical current in the fan unit. Make sure the tester is functioning correctly before proceeding.
- Secure the circuit breaker: To prevent accidental power restoration, attach a tag or label to the circuit breaker, indicating that it is undergoing maintenance. This will serve as a reminder for yourself and others to avoid turning it back on until the motor replacement is complete.
Remember, electrical safety is of utmost importance during any repair or replacement work. Double-check the power supply disconnection to ensure the work environment is safe before proceeding with the next steps.
Now that the power supply is safely disconnected, we can move on to the next step: removing the old attic fan motor.
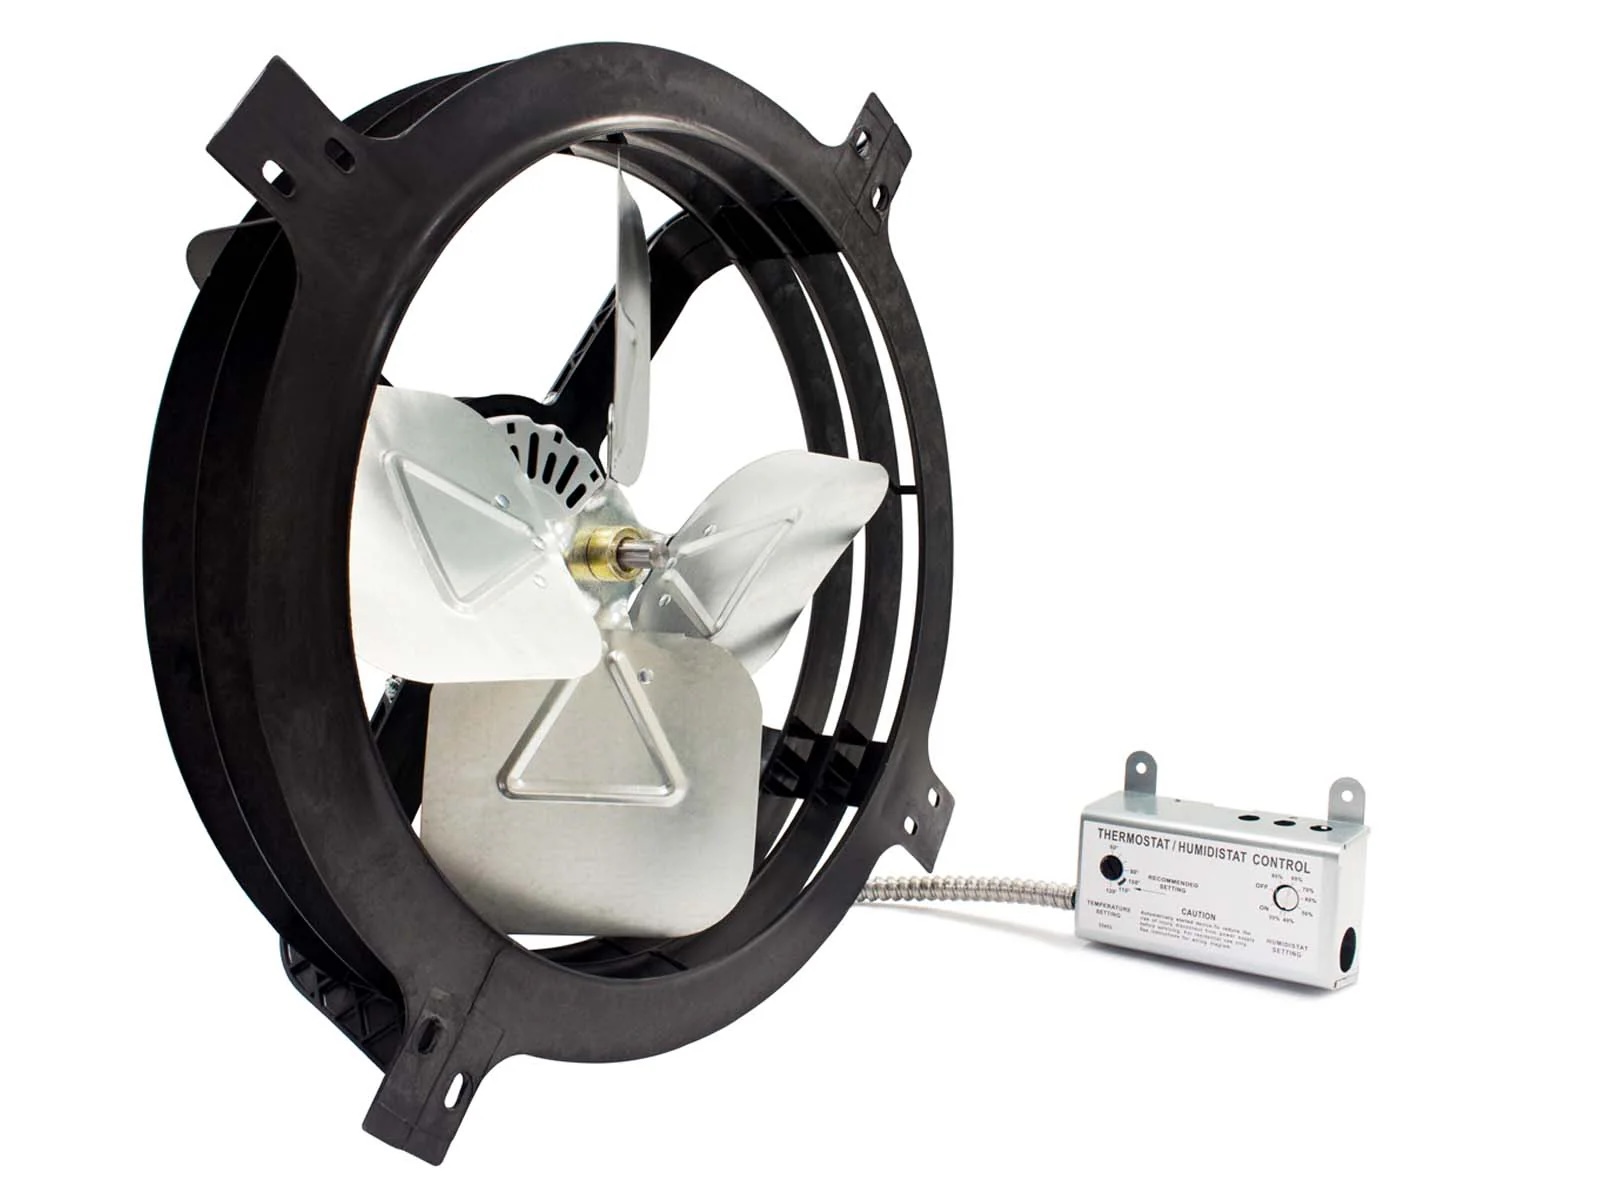
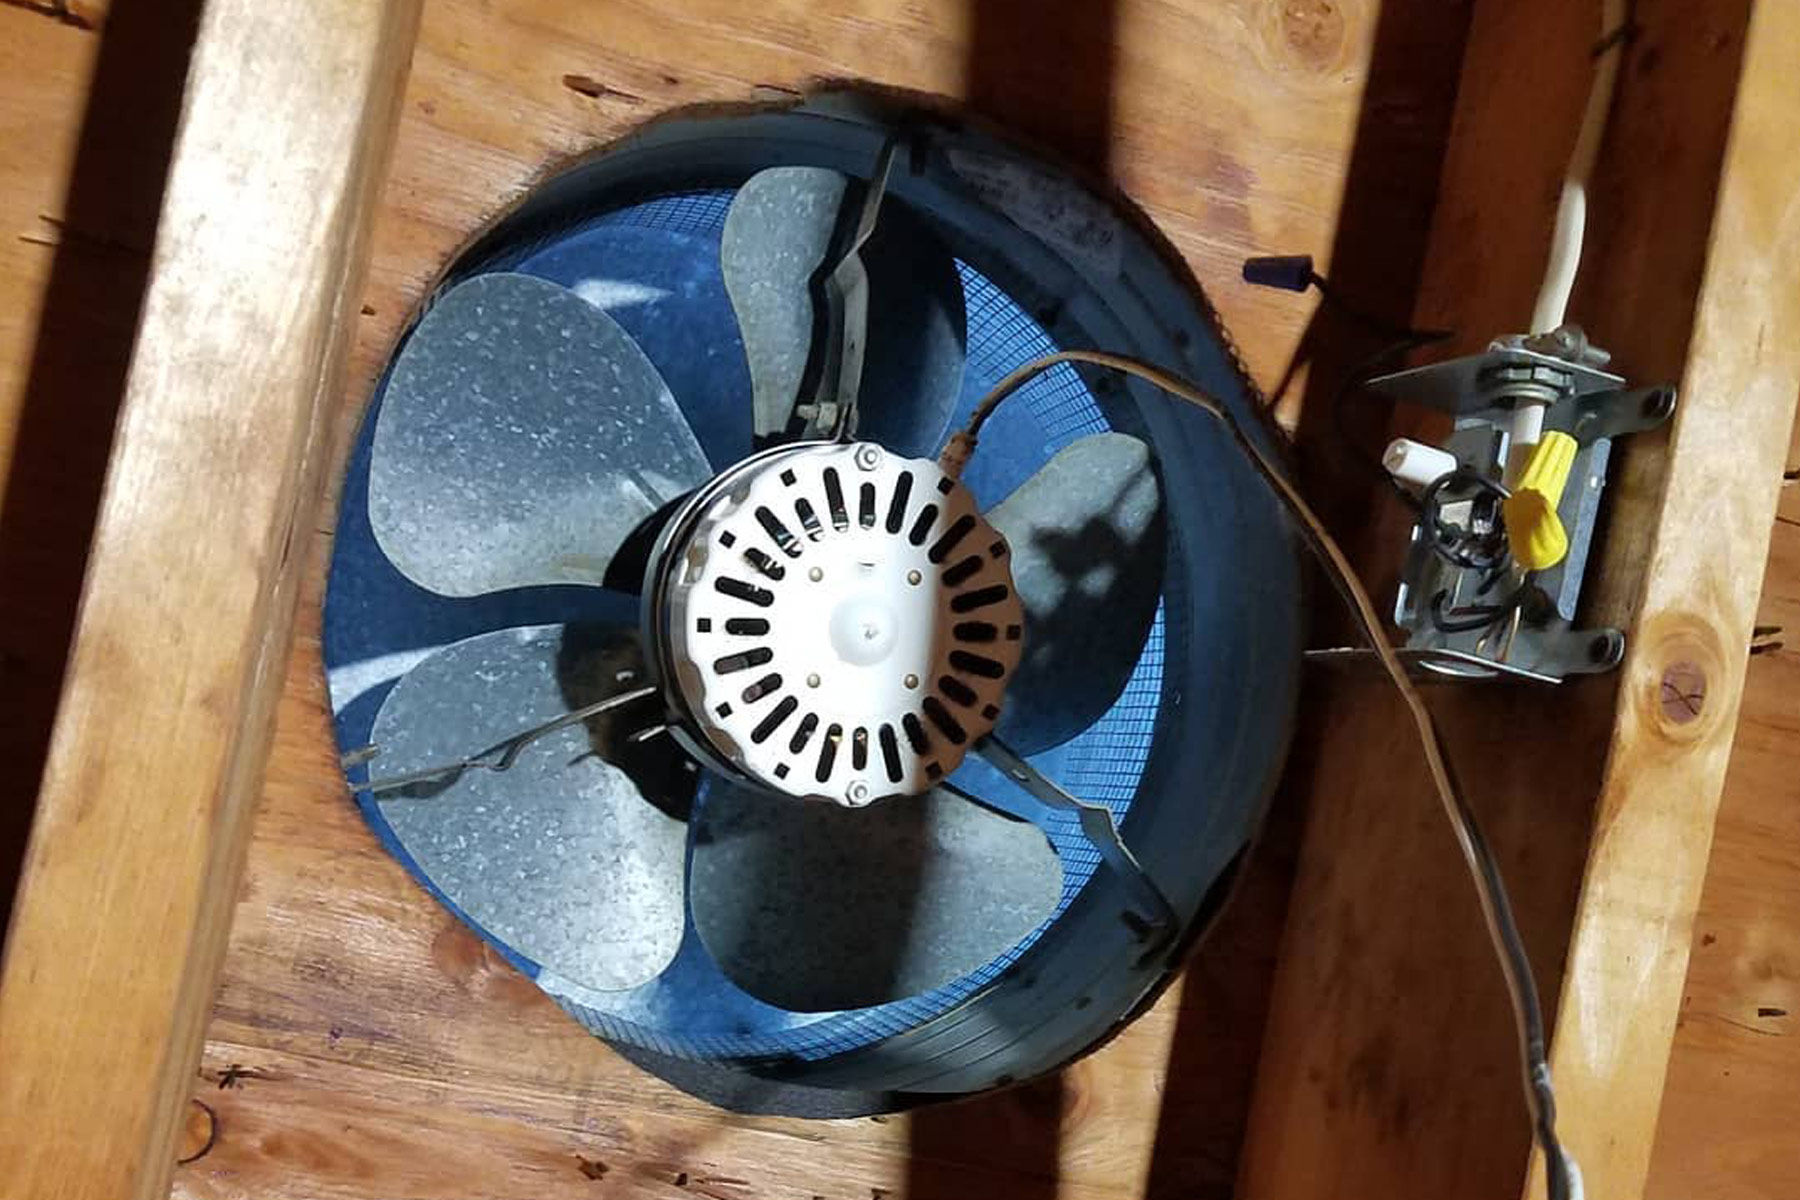
Step 4: Removing the Old Attic Fan Motor
With the power supply safely disconnected, it’s time to remove the old attic fan motor. Follow these steps to remove the motor:
- Identify the motor housing: Locate the motor housing within the attic fan unit. It is typically positioned in the center or towards one end of the fan assembly.
- Disconnect the electrical connections: Carefully disconnect any electrical connections attached to the motor. This may include wires connected to the motor terminals or wire nuts securing the wiring together. Use a wrench or pliers to loosen and remove any nuts or screws holding the wires in place.
- Remove the mounting brackets: If the motor is secured to the fan assembly with mounting brackets, use a screwdriver or wrench to remove the screws or bolts holding the brackets in place. Keep these screws or bolts in a safe place for later use.
- Detach the motor from the fan assembly: Once the electrical connections and mounting brackets have been removed, gently detach the old motor from the fan assembly. Take note of any additional screws or clips attaching the motor to the housing, and remove them as necessary.
- Inspect the motor: Before discarding the old motor, take a moment to inspect it for any signs of damage or wear. This can help you identify the cause of the motor failure and provide insights for preventive measures in the future.
- Set aside the old motor: Place the old motor in a safe and designated area, ensuring it is out of the way and won’t pose a risk of tripping or obstruction during the rest of the replacement process.
Removing the old attic fan motor allows you to clear the way for the installation of the new motor. Make sure to handle the old motor with care and dispose of it properly according to your local regulations.
Now that the old motor is removed, we can move on to the next step: identifying the correct replacement motor.
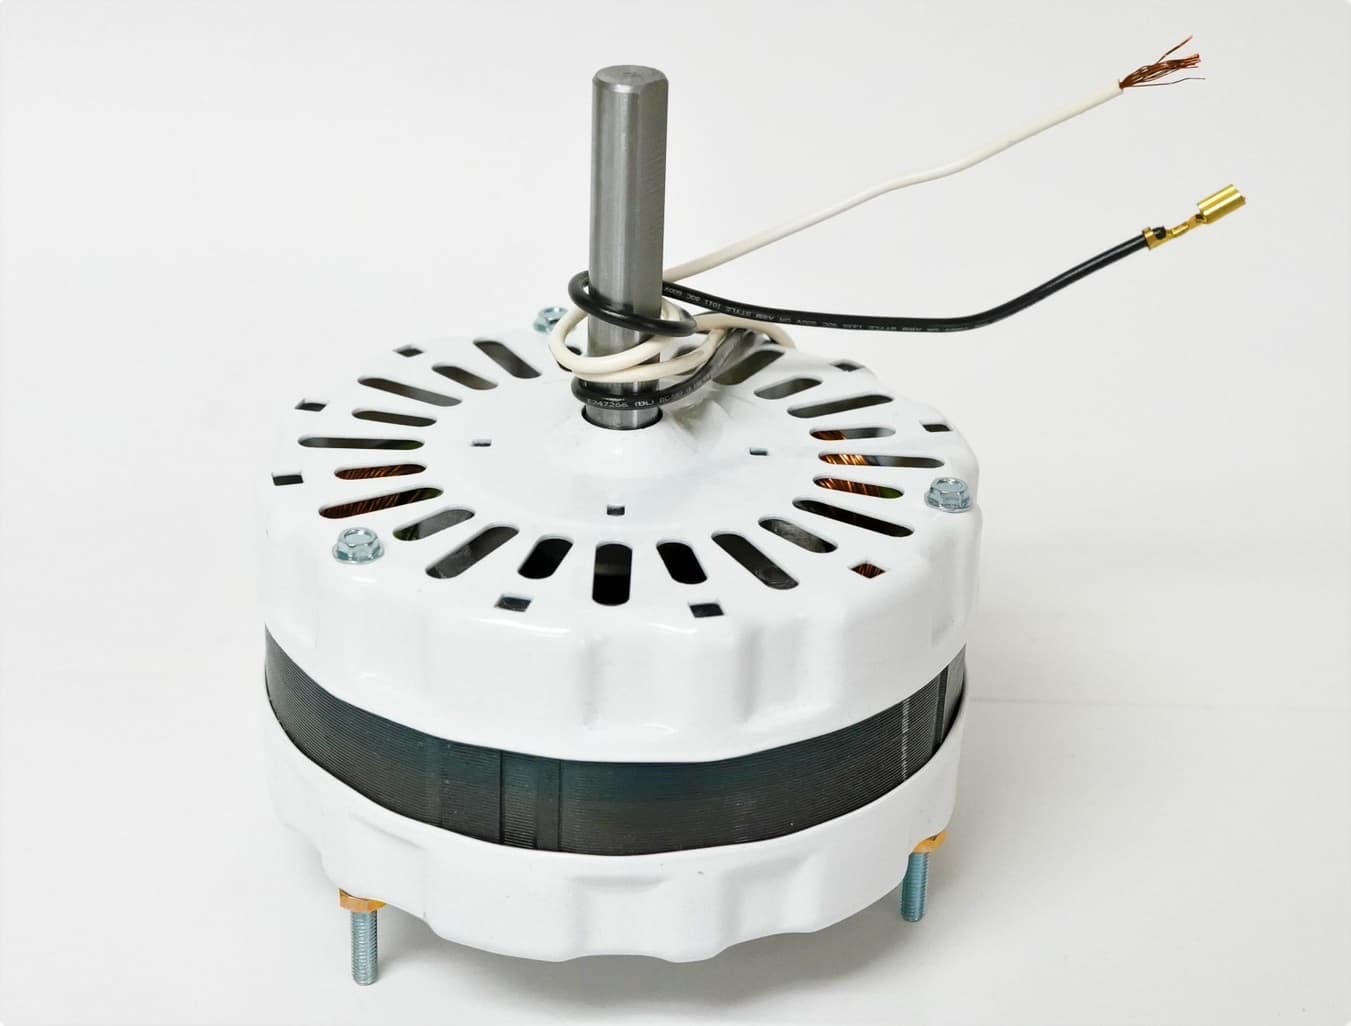
Step 5: Identifying the Correct Replacement Motor
When it comes to replacing an attic fan motor, it is crucial to identify the correct replacement motor that will fit your specific fan model and meet the necessary specifications. Here are the steps to ensure you select the right motor:
- Check the fan model and specifications: Refer to the manufacturer’s documentation or label on the fan unit to gather information about the fan model and specifications. This may include details such as the motor horsepower, voltage, and RPM (revolutions per minute).
- Measure the motor dimensions: Carefully measure the dimensions of the old motor, including the length, width, and height. These measurements will help you find a replacement motor with the correct physical dimensions to fit within the fan assembly.
- Research motor compatibility: Take time to research and compare different replacement motor options available in the market. Check with local HVAC suppliers or consult online resources to find compatible motors for your specific fan model. Look for motors that meet the fan’s specifications and have positive reviews from other customers.
- Consult a professional if necessary: If you are unsure about which replacement motor to choose or need assistance in finding the right one, consider consulting with a professional electrician or HVAC technician. They can provide expert advice and help you find the most suitable motor for your attic fan.
- Purchase the replacement motor: Once you have identified the correct replacement motor, place your order or purchase it from a reliable supplier. Make sure to keep the motor in a safe place until you are ready to install it.
Identifying the correct replacement motor is crucial for a successful installation. Taking the time to research and ensure compatibility will save you from complications and the need for additional replacements down the line.
Now that you have the right replacement motor, we can move on to the next step: installing the new attic fan motor.
Read more: How To Fix An Attic Fan
Step 6: Installing the New Attic Fan Motor
With the correct replacement motor at hand, it’s time to install it in your attic fan. Follow these steps to successfully install the new motor:
- Position the new motor: Carefully position the new motor in the same location where the old motor was situated. Ensure that it aligns properly with the fan assembly and any mounting brackets or holes.
- Secure the motor in place: Use the screws, bolts, or clips provided with the new motor, along with any mounting brackets, to secure the motor in place. Tighten them securely but avoid over-tightening, as it may damage the motor or the fan assembly.
- Connect the electrical wires: Follow the manufacturer’s wiring diagram or instructions to correctly connect the electrical wires to the new motor. Use wire nuts to securely fasten the wires together, making sure there are no loose or exposed connections. Wrap the connections with electrical tape for added protection.
- Double-check the connections: Once all the wires are connected, double-check the connections to ensure they are properly secured. This will help prevent any electrical issues or potential hazards in the future.
- Inspect the motor installation: Take a moment to visually inspect the motor installation to ensure there are no loose components, misalignments, or any signs of damage. Rectify any issues before proceeding.
- Refer to the manufacturer’s instructions: Consult the manufacturer’s instructions or documentation for any specific steps or considerations particular to your new motor model. This will ensure you follow the recommended guidelines for a proper installation.
Properly installing the new attic fan motor is essential for its optimal functionality and longevity. It ensures that the motor operates efficiently while maintaining a safe and secure connection.
Now that the new motor is successfully installed, we can move on to the next step: testing the new motor.
When replacing an attic fan motor, make sure to turn off the power to the fan before starting. Use the proper tools and follow the manufacturer’s instructions for a safe and successful replacement.
Step 7: Testing the New Motor
After installing the new attic fan motor, it is crucial to test its functionality before completing the replacement process. Follow these steps to properly test the new motor:
- Reconnect the power supply: Turn the circuit breaker back on to restore power to the attic fan. Ensure that the power supply to the fan is up and running.
- Switch on the fan: Use the fan control switch or thermostat to activate the attic fan. Listen for any unusual noises or vibrations coming from the motor, as these may indicate potential issues.
- Observe the fan blades: Watch the fan blades as they rotate. Ensure that they are spinning smoothly without any wobbling or imbalance. Verify that the blades are effectively moving air within the attic space.
- Monitor the motor temperature: Pay attention to the temperature of the new motor during operation. It should remain at a reasonable level and not overheat. Overheating can be a sign of motor or electrical issues.
- Check the motor speed: If your attic fan has multiple speed settings, test each speed to ensure the motor performs accordingly. Any discrepancies in speed may indicate a problem with the motor or its wiring.
- Perform a thorough inspection: While the fan is running, visually inspect the motor and its surrounding area for any signs of abnormal behavior, such as sparks, arcing, or excessive heat. These could indicate loose connections or other issues that require immediate attention.
- Ensure proper shut-off: Once you have completed testing the new motor, switch off the fan using the control switch or thermostat. Confirm that the motor comes to a complete stop and there are no residual movements.
Thoroughly testing the new attic fan motor ensures its proper functioning and helps identify any potential issues before they escalate. If you notice any abnormalities or suspect that the motor is not functioning correctly, it is recommended to consult a professional for further inspection.
Now that you have tested the new motor and verified its functionality, we can move on to the next step: securing the motor in place.
Step 8: Securing the Motor in Place
Once you have successfully tested the new attic fan motor, it is important to secure it in place to ensure its stability and proper operation. Follow these steps to securely fasten the motor:
- Inspect the motor installation: Take a moment to visually inspect the motor and its surrounding components. Ensure that all screws, bolts, or clips are properly tightened and that there are no loose parts.
- Tighten mounting brackets: If your attic fan motor is secured to the fan assembly using mounting brackets, use a screwdriver or wrench to tighten any screws or bolts that hold the brackets in place. Ensure they are securely fastened, but be careful not to overtighten and risk damaging the motor or fan assembly.
- Double-check electrical connections: Verify that all electrical connections to the motor, including wires and wire nuts, are securely fastened. Make sure there are no loose or exposed wires that may cause electrical issues or safety hazards.
- Inspect for proper alignment: Confirm that the motor is properly aligned with the fan assembly and any corresponding holes or slots. Adjust the motor position if necessary to ensure a proper fit and smooth operation.
- Reassemble the fan cover or housing: If you had removed the fan cover or housing earlier, reattach it to the attic fan. Use the screws that were previously set aside to secure the cover or housing in place. Ensure that it is positioned correctly and tightly fastened.
- Perform a final inspection: Once the motor is secured, perform a final inspection of the installation. Check for any loose components, misalignments, or signs of damage. Rectify any issues to ensure a safe and efficient operation of the attic fan.
Securing the motor in place is essential to prevent any movement or shifts during operation, ensuring the long-term performance and reliability of the attic fan.
Now that the motor is securely fastened, we can move on to the next step: reconnecting the power supply.
Step 9: Reconnecting the Power Supply
With the motor securely in place, it’s time to reconnect the power supply to the attic fan. Follow these steps to safely restore the power:
- Ensure the fan switch is off: Before reconnecting the power supply, make sure the fan switch or thermostat controlling the attic fan is in the off position.
- Locate the circuit breaker: Identify the circuit breaker that controls the power supply to the attic fan. It should be the same breaker that you turned off earlier during the replacement process.
- Switch on the circuit breaker: Flip the switch of the circuit breaker to the “on” position to restore the power supply to the attic fan. Take note of any indication or sounds from the fan that show it is now receiving power.
- Test the fan: Use the fan switch or thermostat to activate the attic fan and verify that it starts operating properly. Listen for the sound of the fan spinning and feel for the airflow being generated.
- Check for any electrical issues: While the fan is running, be attentive to any flickering lights, tripped breakers, or abnormal noises coming from the attic fan or the motor. These could indicate an electrical problem that requires further investigation.
- Maintain a safe distance: Keep a safe distance from the fan and avoid touching any electrical components or connections while the power supply is restored. This will reduce the risk of electrical shock or injury.
- Ensure proper shut-off: Once you have finished testing the fan operation, switch off the fan using the control switch or thermostat. Ensure that the motor comes to a complete stop before proceeding.
Reconnecting the power supply completes the replacement process and allows the attic fan to function as intended. It is important to carefully follow these steps to ensure a safe and reliable restoration of power.
Now that the power supply is reconnected, we can move on to the final step: performing final checks and maintenance tips.
Read more: How to Install an Attic Fan
Step 10: Final Checks and Maintenance Tips
Before completing the attic fan motor replacement process, it is crucial to perform final checks and implement maintenance tips to ensure the proper functioning and longevity of the fan. Follow these steps for the final checks and maintenance:
- Inspect the entire fan assembly: Conduct a thorough visual inspection of the entire attic fan assembly. Check for any loose components, misalignments, or signs of damage. Rectify any issues before proceeding.
- Check for proper ventilation: Ensure that the attic fan is providing proper ventilation by observing the movement of air and the removal of excess heat or moisture. This will help maintain a conducive attic environment.
- Clean the fan: Over time, dust and debris may accumulate on the fan blades and motor. Regularly clean the fan to prevent any obstruction and ensure optimal performance. Use a soft cloth or brush to gently remove the accumulated dirt.
- Monitor the motor temperature: Regularly monitor the motor temperature during operation. Keep an eye out for any excessive heat that could indicate a potential issue. If you notice abnormal heat, consult a professional to investigate further.
- Listen for unusual noises: Pay attention to any unusual noises coming from the attic fan during operation. Grinding, scraping, or rattling sounds may indicate a problem with the motor or the fan assembly. Address any such issues promptly.
- Establish a maintenance schedule: Set up a regular maintenance schedule for your attic fan. This may include periodically checking the motor and connections, cleaning the fan blades, and ensuring proper lubrication if required. Follow the manufacturer’s recommendations for maintenance intervals.
- Keep the area around the fan clear: Avoid storing any objects or materials near the attic fan that could obstruct its operation or pose a fire hazard. Maintain a clear space around the fan to ensure proper airflow.
- Consider professional servicing: If you have any concerns or are unsure about maintaining the attic fan yourself, consider hiring a professional electrician or HVAC technician to inspect and service the fan regularly. They can provide expert advice and ensure optimal performance.
Performing these final checks and implementing regular maintenance practices will help keep your attic fan in excellent working condition and extend its lifespan.
Congratulations! You have successfully completed the process of replacing an attic fan motor. By following these steps and adhering to safety precautions, you have restored the functionality of your attic fan, ensuring proper ventilation and temperature control in your home’s attic space.
If you have any further concerns or questions, don’t hesitate to reach out to a professional for assistance.
Happy cooling and ventilation!
Conclusion
Replacing an attic fan motor is a task that can be successfully accomplished with the right knowledge, tools, and precautions. By following the steps outlined in this comprehensive guide, you have learned how to safely and effectively replace the motor of your attic fan.
Throughout this process, we emphasized the importance of safety. Before starting any work, it is essential to disconnect the power supply and take necessary precautions to avoid accidents or electrical hazards. Additionally, wearing protective gear and following proper procedures will ensure your well-being during the replacement process.
We discussed the tools and materials needed for the task, including screwdrivers, wrenches, voltage testers, and the new attic fan motor itself. Gathering these materials before starting the project will save you time and allow for a smoother replacement process.
We then covered each step of the replacement process, from accessing the attic fan and disconnecting the power supply to removing the old motor, identifying the correct replacement, and installing the new motor. Each step was explained in detail, providing you with the necessary guidance to carry out each task effectively.
After the new motor is securely installed, we emphasized the importance of testing its functionality and inspecting the entire fan assembly. This allowed you to ensure that the motor is running properly and any potential issues are addressed timely.
To maintain the longevity and efficiency of your newly replaced attic fan motor, we provided final checks and maintenance tips. Regularly inspecting the fan, monitoring temperature, cleaning, and establishing a maintenance schedule will help keep the fan in excellent condition and maximize its performance.
Remember, if you ever feel unsure or uncomfortable performing the replacement yourself, it is always wise to seek the assistance of a professional electrician or HVAC technician.
By successfully completing this attic fan motor replacement process, you have taken a proactive step in ensuring proper ventilation and temperature control in your attic space. Enjoy the benefits of a functioning attic fan and the comfort it brings to your home.
Happy DIYing!
Frequently Asked Questions about How To Replace An Attic Fan Motor
Was this page helpful?
At Storables.com, we guarantee accurate and reliable information. Our content, validated by Expert Board Contributors, is crafted following stringent Editorial Policies. We're committed to providing you with well-researched, expert-backed insights for all your informational needs.


0 thoughts on “How To Replace An Attic Fan Motor”