Home>Articles>How To Replace Water Pump On Evinrude Outboard
Articles
How To Replace Water Pump On Evinrude Outboard
Modified: August 27, 2024
Discover step-by-step articles on replacing the water pump for your Evinrude outboard. Gain valuable insights and expert tips to complete the task efficiently.
(Many of the links in this article redirect to a specific reviewed product. Your purchase of these products through affiliate links helps to generate commission for Storables.com, at no extra cost. Learn more)
Introduction
Having a properly functioning water pump is crucial for the performance and longevity of your Evinrude outboard engine. The water pump is responsible for circulating coolant throughout the engine, preventing overheating and ensuring optimal operation. Over time, the water pump can wear out and require replacement. Fortunately, replacing the water pump on your Evinrude outboard can be a straightforward process with the right tools and instructions.
In this article, we will guide you through the step-by-step process of replacing the water pump on your Evinrude outboard. From preparation to testing the new pump, we will cover all the necessary details to help you complete the task successfully.
Before we begin, it is essential to ensure you have the necessary tools and materials to carry out the water pump replacement. Let’s take a look at what you will need:
Key Takeaways:
- Proper preparation, step-by-step guidance, and attention to detail are crucial for successfully replacing the water pump on your Evinrude outboard. By following the outlined process, you can ensure efficient engine cooling and optimal performance.
- Regular maintenance and inspection of your outboard engine, including the water pump, are essential for preventing overheating and maintaining reliable operation. With the right tools and careful execution, you can enjoy worry-free boating and maximize your engine’s lifespan.
Tools and Materials Needed
Before you start replacing the water pump on your Evinrude outboard, gather the following tools and materials:
- Socket set
- Allen wrench set
- Screwdriver set
- Channel locks
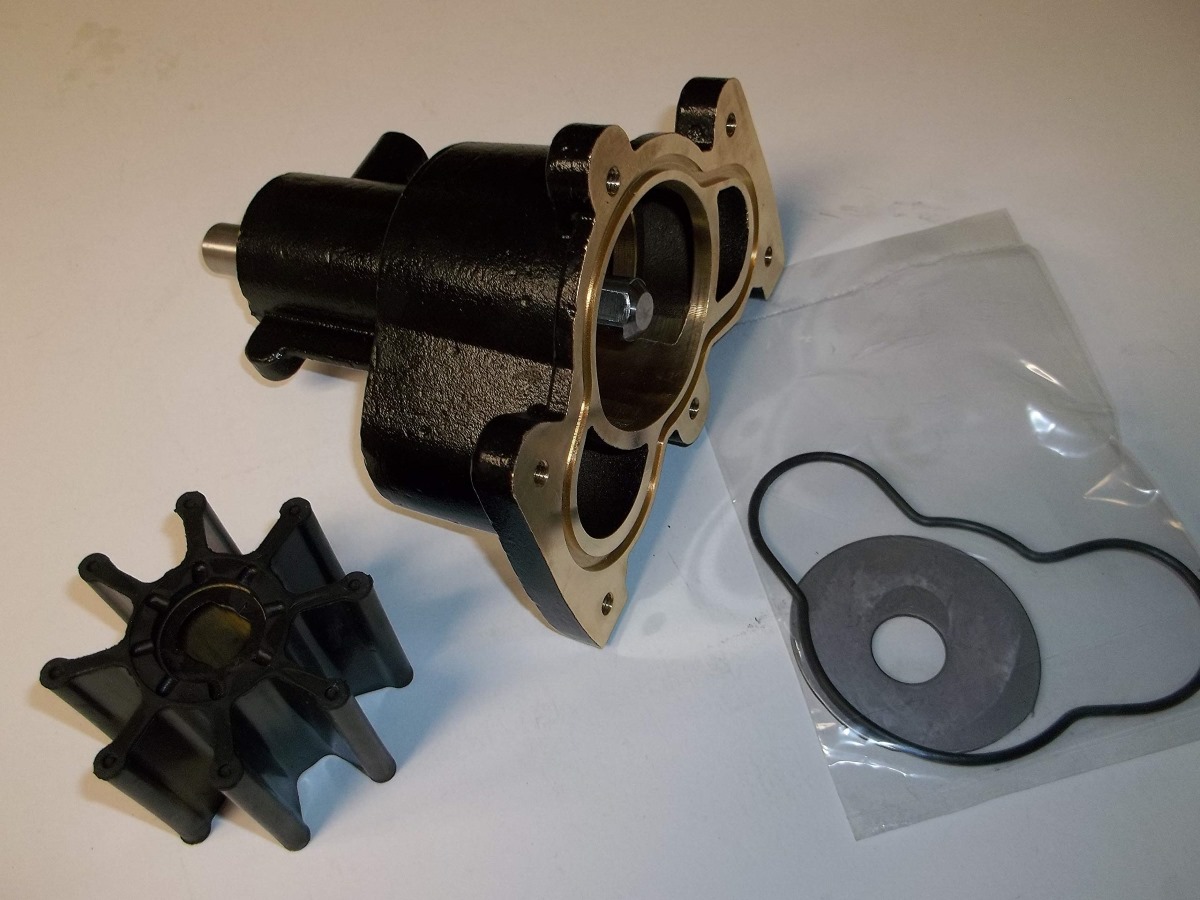
- Replacement water pump kit (make sure it is compatible with your specific Evinrude outboard model)
- Gasket sealant
- Container to catch coolant
- Rags or towels
- Coolant
These tools and materials are essential for a successful water pump replacement. Before you proceed, ensure that you have everything readily available.
Now that we have gathered the necessary tools and materials, let’s move on to the step-by-step process of replacing the water pump on your Evinrude outboard.
Step 1: Preparation
Before diving into the water pump replacement process, it’s essential to prepare your outboard engine and work area. Follow these steps to ensure a smooth and efficient replacement:
- First, make sure your boat is securely docked or positioned on a stable surface. Turn off the engine and disconnect the battery to eliminate any risk of accidental starts.
- Place a container underneath the water pump area to catch any coolant that may drain during the process. This will help prevent any environmental contamination and make for easier cleanup.
- Locate the water pump housing on your Evinrude outboard. Refer to your engine’s manual or consult an online resource for the exact location, as it may vary depending on the model.
- Remove any obstructions around the water pump area, such as hoses or wires, to provide better access for the replacement process.
- Inspect the area for any signs of damage or excessive wear. Take note of any issues you observe, as you may need to address them during the replacement.
- Ensure that you have all the necessary tools and materials mentioned earlier in this article within reach.
By properly preparing your outboard engine and work area, you can save time and minimize any potential complications during the water pump replacement. Once you have completed the preparation, you are ready to move on to the next step: draining the cooling system.
Step 2: Draining the Cooling System
Before you can proceed with replacing the water pump on your Evinrude outboard, it is crucial to drain the cooling system to prevent any spills or contamination. Follow these steps to drain the cooling system:
- Start by locating the drain plug or valve on the lower part of your engine’s coolant system. Refer to your engine’s manual or consult an online resource for the exact location, as it may vary depending on the model.
- Place a container or a suitable drain pan underneath the drain plug or valve to catch the coolant as it drains out.
- Carefully loosen the drain plug or open the valve, allowing the coolant to drain completely into the container. Be cautious as the coolant may be hot and can cause burns.
- While the coolant is draining, take the time to inspect the coolant for any signs of contamination or debris. If necessary, flush the cooling system with fresh water to remove any buildup.
- Once the coolant has finished draining, securely tighten the drain plug or close the valve to prevent any leaks.
Draining the cooling system ensures a clean and safe working environment for the water pump replacement. Proper disposal of the drained coolant is essential to protect the environment, so make sure to follow local regulations and dispose of it responsibly.
With the cooling system drained, you are now ready to move on to the next step: removing the lower unit of your Evinrude outboard.
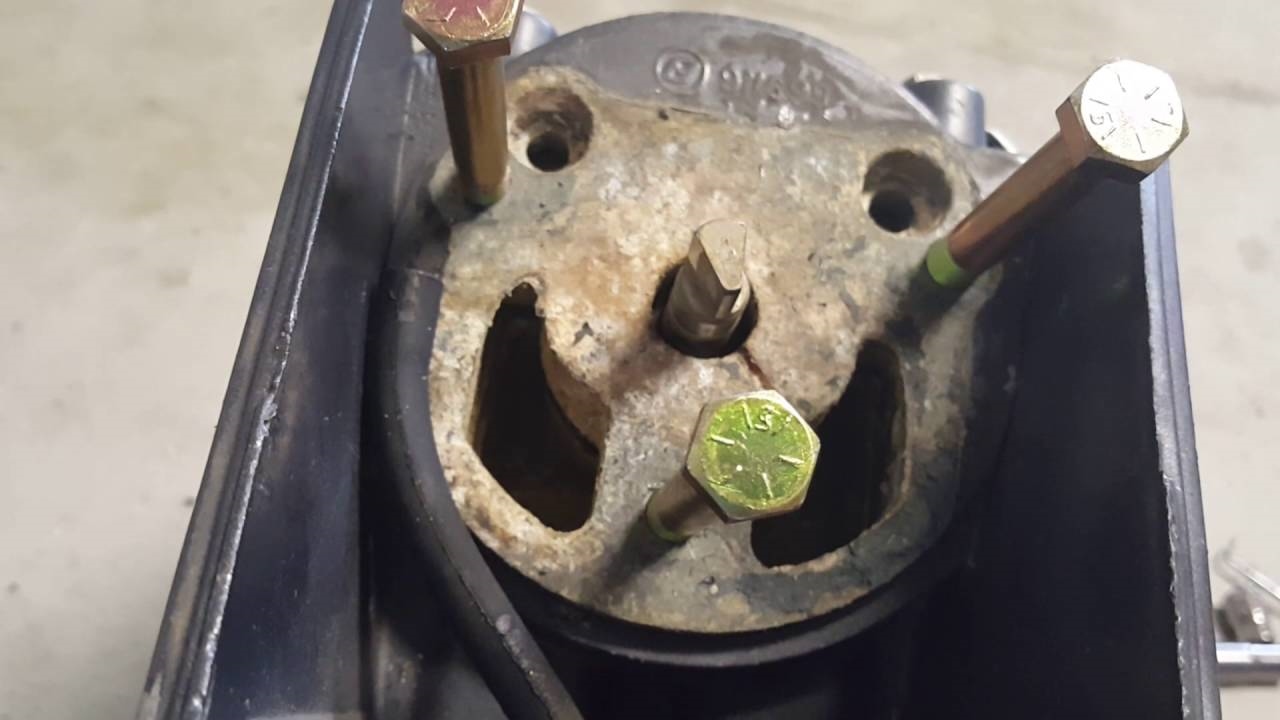
Step 3: Removing the Lower Unit
Removing the lower unit of your Evinrude outboard is necessary to access the water pump housing. Follow these steps to remove the lower unit:
- Start by disconnecting any electrical connections or wiring harnesses that may be connected to the lower unit. Take care to label or note the connections to ensure proper reinstallation later.
- Locate and remove the mounting bolts that secure the lower unit to the rest of the outboard engine. These bolts are typically located on the sides or bottom of the unit. Use the appropriate socket or wrench to loosen and remove them.
- With the mounting bolts removed, carefully lower the lower unit using a suitable lifting device or by hand if it is lightweight. Take caution not to damage any components or wiring harnesses during the removal process.
- Once the lower unit is detached, inspect the drive shaft and shift shaft for any signs of damage or wear. If necessary, take note of any issues for repair or replacement before proceeding.
- Set the lower unit aside in a safe location to prevent any damage.
By removing the lower unit, you create enough space to access the water pump housing and perform the necessary replacement. Remember to handle the lower unit with care to avoid any damage to its components.
With the lower unit removed, you are now ready to proceed to the next step: removing the water pump housing.
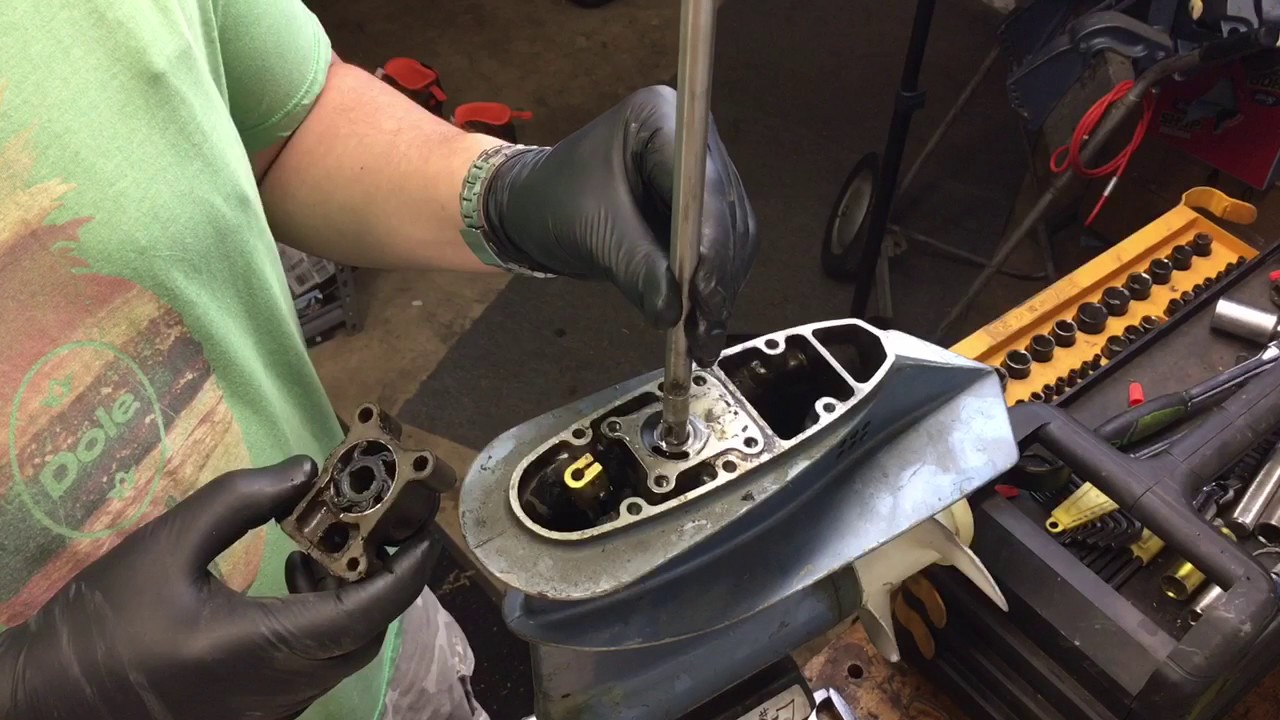
Step 4: Removing the Water Pump Housing
With the lower unit of your Evinrude outboard removed, it’s time to focus on removing the water pump housing. Follow these steps to successfully remove the water pump housing:
- Inspect the water pump housing for any visible bolts or screws securing it in place. These fasteners may be located on the front or sides of the housing.
- Using the appropriate screwdriver or socket, carefully loosen and remove the bolts or screws. Take note of their locations and keep them in a safe place to ensure you can easily reinstall the housing later.
- Once the fasteners are removed, gently pull or wiggle the water pump housing to separate it from the rest of the outboard engine. It may be necessary to use a flat-headed screwdriver to pry it apart gently.
- As you remove the water pump housing, be aware that there may still be some residual coolant inside. Take precautions to catch any spills and avoid contamination of surrounding components.
- Inspect the housing and the area around it for any signs of damage, wear, or excessive corrosion. If necessary, address these issues and make any repairs or replacements before proceeding.
Removing the water pump housing grants access to the impeller and allows for its replacement. Take your time while removing the housing to avoid any damage to the components or surrounding areas.
With the water pump housing removed, you are now ready to move on to the next step: replacing the impeller.
When replacing the water pump on an Evinrude outboard, be sure to consult the manufacturer’s manual for specific instructions and torque specifications. It’s also a good idea to replace the impeller and gaskets at the same time to ensure optimal performance.
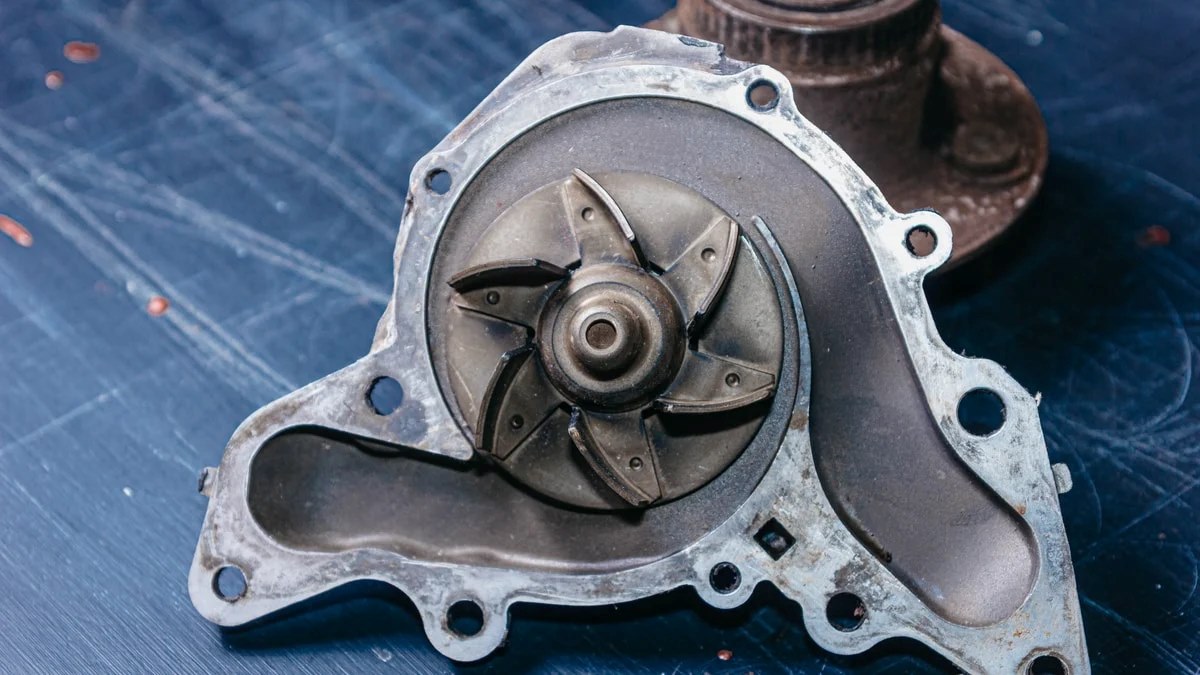
Step 5: Replacing the Impeller
Replacing the impeller is a crucial step in the water pump replacement process. Follow these steps to successfully replace the impeller on your Evinrude outboard:
- Inspect the impeller for any signs of damage, wear, or deterioration. If the impeller appears worn or damaged, it is recommended to replace it with a new one.
- Using a pair of channel locks or pliers, carefully grip the impeller and twist it counterclockwise to remove it from the driveshaft. Take care not to use excessive force to avoid damaging the driveshaft or impeller housing.
- Clean the impeller housing and surrounding area to remove any debris or residue. Ensure that the housing is clean and free from any blockages before proceeding.
- Apply a small amount of gasket sealant to the outer edges of the new impeller. This will help create a tight seal and ensure proper functionality.
- Carefully align the new impeller with the driveshaft and slide it into the impeller housing. Rotate it clockwise to ensure that it is securely in place.
- Inspect the impeller housing to ensure that the impeller is properly seated and there are no obstructions or misalignments.
Replacing the impeller is a critical part of the water pump replacement process. It ensures that the coolant is effectively circulated throughout the engine, preventing overheating and maintaining optimal performance.
With the new impeller installed, you are now ready to proceed to the next step: installing the new water pump housing.
Step 6: Installing the New Water Pump Housing
With the impeller replaced, it’s time to install the new water pump housing. Follow these steps to successfully install the new water pump housing on your Evinrude outboard:
- Inspect the water pump housing gasket for any signs of damage or wear. If necessary, replace the gasket with a new one to ensure a proper seal.
- Clean the mating surfaces of the water pump housing and the engine block to remove any dirt, debris, or residue. This will help ensure a secure and leak-free connection.
- Apply a thin layer of gasket sealant to both sides of the new gasket. This will assist in creating a tight seal and prevent any coolant leaks.
- Carefully align the new water pump housing with the engine block and gasket. Start by hand-tightening the bolts or screws to hold the housing in place.
- Using the appropriate screwdriver or socket, gradually tighten the bolts or screws in a crisscross pattern. This helps ensure even pressure distribution and a proper seal.
- Continue tightening the bolts or screws until they are securely fastened, but be careful not to overtighten as this can damage the gasket or housing.
- Double-check the alignment and tightness of the water pump housing to ensure a snug and leak-free fit.
Installing the new water pump housing is crucial for maintaining the proper circulation and containment of coolant within your Evinrude outboard. A secure and tight connection will help prevent any coolant leaks and ensure optimal performance.
With the new water pump housing installed, you are now ready to proceed to the next step: reassembling the lower unit.
Step 7: Reassembling the Lower Unit
With the water pump housing securely in place, it’s time to reassemble the lower unit of your Evinrude outboard. Follow these steps to successfully reassemble the lower unit:
- Lift the lower unit carefully and align it with the rest of the outboard engine.
- Gently slide the drive shaft back into position, ensuring it properly engages with the upper part of the engine.
- Reinstall the mounting bolts that connect the lower unit to the rest of the outboard engine. Use the appropriate socket or wrench and tighten the bolts securely, but be cautious not to overtighten.
- Reconnect any electrical connections or wiring harnesses that were disconnected earlier. Ensure that each connection is properly aligned and securely fastened.
- Carefully check the area around the lower unit for any loose or forgotten components. Make sure everything is in its proper place before proceeding.
Reassembling the lower unit is a vital step as it ensures that all the components of the outboard engine are properly aligned and secured. Take your time during this process to avoid any mistakes or missed connections.
With the lower unit reassembled, you are now ready to move on to the next step: refilling the cooling system.
Step 8: Refilling the Cooling System
After reassembling the lower unit, it’s time to refill the cooling system of your Evinrude outboard. Follow these steps to successfully refill the cooling system:
- Locate the coolant fill hole or reservoir on the outboard engine. Refer to your engine’s manual or consult an online resource for the exact location, as it may vary depending on the model.
- Carefully remove the coolant fill cap or access panel to gain access to the fill hole.
- Using a funnel or suitable pouring device, slowly pour the appropriate coolant into the fill hole. Refer to your engine’s manual to determine the correct type and amount of coolant needed.
- Monitor the coolant level as you pour to ensure that it reaches the recommended level. Avoid overfilling to prevent any potential overflow or damage to the cooling system.
- Replace the coolant fill cap or access panel once the coolant has been added.
Refilling the cooling system is vital to ensure proper engine operation and prevent overheating. Be mindful of the type and amount of coolant required for your specific engine, as using the wrong coolant can lead to issues.
With the cooling system refilled, you are now ready to move on to the next step: testing the water pump.
Step 9: Testing the Water Pump
After completing the water pump replacement process and refilling the cooling system, it’s essential to test the functionality of the water pump. Follow these steps to test the water pump on your Evinrude outboard:
- Start the outboard engine and let it run for a few minutes. This allows the coolant to circulate through the system and reach the water pump.
- Observe the tell-tale or indicator stream on the side of the engine. This small stream of water should be steady and consistent. If there is no water flow or the flow is weak, it indicates a problem with the water pump.
- If the water flow is absent or insufficient, turn off the engine immediately to prevent any overheating or damage.
- Inspect the water pump housing and connections for any signs of leaks, loose bolts, or misalignment. Tighten any loose bolts and address any apparent issues that could be affecting the water pump’s function.
- If the water pump is not functioning correctly, it may be necessary to repeat the previous steps and ensure that all components are installed and aligned properly.
- If the water pump appears to be working correctly with a steady water flow, you can proceed with running the engine as desired.
Testing the water pump is crucial to ensure that it is operating as intended and efficiently circulating coolant throughout the outboard engine. Any issues with the water pump should be addressed promptly to prevent engine damage and overheating.
Congratulations! You have successfully completed the process of replacing the water pump on your Evinrude outboard. It is now ready for smooth and reliable operation.
Remember, always consult your engine’s manual or seek professional assistance if you have any doubts or concerns during the water pump replacement process.
Safe boating and happy adventuring!
Conclusion
Replacing the water pump on your Evinrude outboard is an essential maintenance task that ensures the proper function and longevity of your engine. By following the step-by-step process outlined in this article, you can successfully replace the water pump and restore the cooling system’s efficiency.
Throughout the process, we covered important steps such as preparation, draining the cooling system, removing the lower unit, removing the water pump housing, replacing the impeller, installing the new water pump housing, reassembling the lower unit, refilling the cooling system, and testing the water pump. Each step is crucial in achieving a successful water pump replacement without any complications.
Remember to always consult your engine’s manual for specific instructions and guidelines that may be unique to your Evinrude outboard model. If you are unsure about any aspect of the water pump replacement, it is recommended to seek the assistance of a qualified professional.
Regular maintenance and inspection of your outboard engine, including the water pump, are essential for its optimal performance, reliability, and safety. By keeping your water pump in good condition, you can prevent overheating, maintain consistent engine temperature, and avoid potential damage that could result from coolant issues.
With the knowledge and guidance provided in this article, you are well-equipped to tackle the task of replacing the water pump on your Evinrude outboard. Take the time to gather the necessary tools and materials, follow each step carefully, and be thorough in your inspection and testing.
By ensuring a properly functioning water pump, you can enjoy worry-free boating, maximize the lifespan of your outboard engine, and experience optimal performance on the water.
Happy boating and smooth sailing!
Frequently Asked Questions about How To Replace Water Pump On Evinrude Outboard
Was this page helpful?
At Storables.com, we guarantee accurate and reliable information. Our content, validated by Expert Board Contributors, is crafted following stringent Editorial Policies. We're committed to providing you with well-researched, expert-backed insights for all your informational needs.

0 thoughts on “How To Replace Water Pump On Evinrude Outboard”