Articles
How To Replace Water Pump On 2011 Chevy Cruze
Modified: August 25, 2024
Learn how to replace the water pump on a 2011 Chevy Cruze with our informative articles. Gain step-by-step guidance and expert tips for a successful DIY project.
(Many of the links in this article redirect to a specific reviewed product. Your purchase of these products through affiliate links helps to generate commission for Storables.com, at no extra cost. Learn more)
Introduction
Welcome to this comprehensive guide on how to replace the water pump on a 2011 Chevy Cruze. The water pump is an integral component of the vehicle’s cooling system, responsible for circulating coolant to regulate the engine’s temperature. Over time, the water pump may develop issues such as leaks or bearing failure, requiring replacement.
This step-by-step guide will walk you through the process of replacing the water pump on your 2011 Chevy Cruze. With the right tools and a little bit of patience, you can save money on labor costs and tackle this task yourself. So, let’s dive in and get started!
Key Takeaways:
- DIY Water Pump Replacement
Save money and gain valuable knowledge by replacing the water pump on your 2011 Chevy Cruze yourself. Follow the comprehensive guide to master each step and ensure a reliable cooling system. - Leak-Free Confidence
Thoroughly test for leaks after replacing the water pump to ensure efficient and reliable performance. Identifying and addressing leaks promptly is crucial for the longevity of your Chevy Cruze’s cooling system.
Read more: How To Change A Water Pump On A Chevy Truck
Tools and Materials Needed
Before we begin the water pump replacement process, it’s essential to gather all the necessary tools and materials. Here’s a list of what you’ll need:
- Socket set
- Wrench set
- Ratchet
- Pliers
- Screwdriver set
- New water pump
- Coolant
- Container for coolant drain
- New gasket
It’s important to ensure that you have the correct tools for the job to ensure a smooth and successful water pump replacement. Having everything prepared before you start will save you time and prevent frustration along the way.
Additionally, make sure to wear appropriate safety gear, such as gloves and safety glasses, to protect yourself from any potential harm.
Once you have gathered all of the necessary tools and materials, you’re ready to move on to the next steps in replacing the water pump on your 2011 Chevy Cruze.
Step 1: Drain the Cooling System
The first step in replacing the water pump on your 2011 Chevy Cruze is to drain the cooling system. This ensures that there is minimal coolant remaining in the system, making it easier and cleaner to remove the water pump.
Here’s how to drain the cooling system:
- Park your vehicle on a flat surface and allow the engine to cool down completely.
- Locate the drain plug on the bottom of the radiator. Place a container under the drain plug to catch the coolant.
- Use a wrench or pliers to loosen the drain plug and slowly allow the coolant to drain into the container.
- Once all the coolant has drained, securely tighten the drain plug.
It’s important to note that coolant is toxic and harmful to the environment, so make sure to properly dispose of it according to your local regulations. Avoid pouring it down the drain or on the ground.
By completing this first step, you have successfully drained the cooling system, and you’re now ready to move on to the next step in replacing the water pump on your 2011 Chevy Cruze.
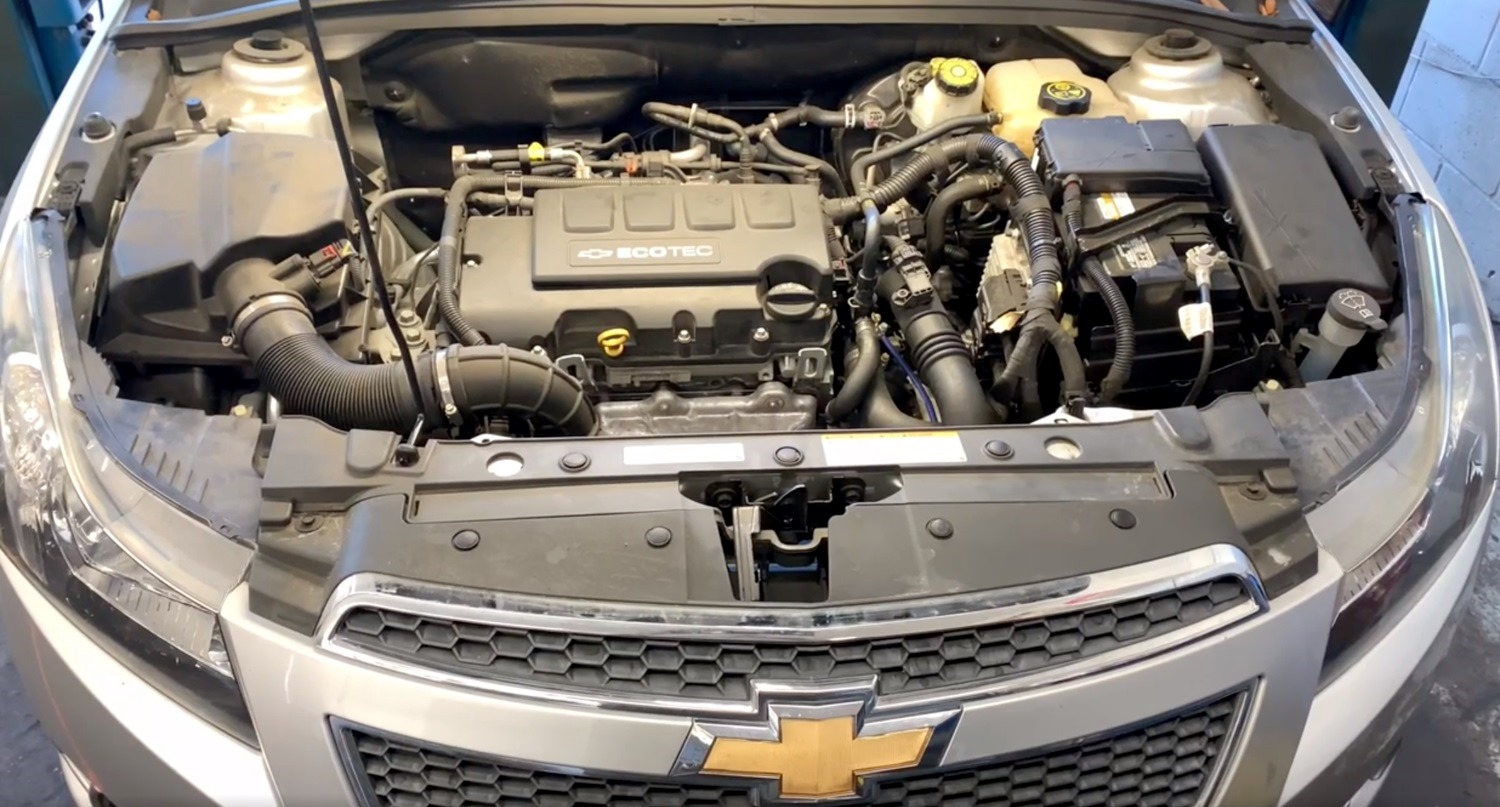
Step 2: Remove the Engine Cover
With the cooling system drained, the next step in replacing the water pump on your 2011 Chevy Cruze is removing the engine cover. The engine cover is located on top of the engine and provides protection and insulation.
Follow these steps to remove the engine cover:
- Locate the retaining clips or screws that secure the engine cover in place.
- Using a screwdriver or pliers, carefully remove the retaining clips or unscrew the screws to release the engine cover.
- Gently lift the engine cover off the engine, ensuring not to bend or damage it in the process.
- Set the engine cover aside in a safe place, away from any potential damage or interference.
Once the engine cover is removed, you will have better access to the components underneath, including the water pump. Take a moment to inspect the engine bay and familiarize yourself with the location of the water pump.
Removing the engine cover may vary slightly depending on the specific model and engine configuration of your 2011 Chevy Cruze. Refer to your vehicle’s owner’s manual for any specific instructions or precautions relating to the engine cover removal process.
With the engine cover safely removed, you’re now ready to move on to the next step in replacing the water pump on your 2011 Chevy Cruze.
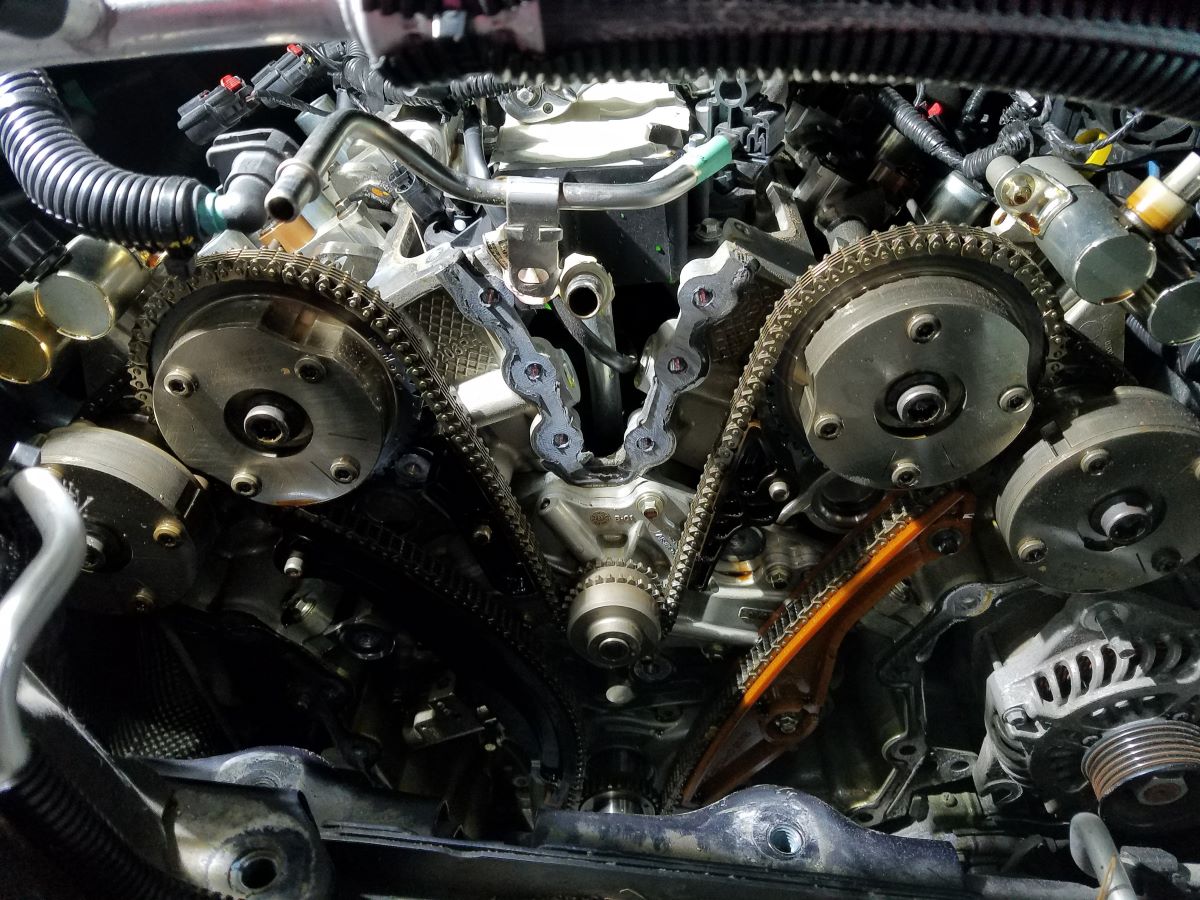
Step 3: Remove the Serpentine Belt
Now that the engine cover is off, the next step in replacing the water pump on your 2011 Chevy Cruze is to remove the serpentine belt. The serpentine belt is responsible for driving multiple engine components, including the water pump.
Follow these steps to remove the serpentine belt:
- Locate the belt tensioner, which is a pulley that keeps tension on the serpentine belt.
- Using a wrench or socket, rotate the belt tensioner in the appropriate direction to release tension on the belt.
- While holding the tensioner in the released position, slide the serpentine belt off one of the pulleys.
- Gently release the tensioner, allowing it to rest against the serpentine belt.
- Carefully remove the serpentine belt from the remaining pulleys.
It’s important to note the routing of the serpentine belt before removing it. Take a picture or make a note of the belt’s path to ensure proper reinstallation later.
Some vehicles may have a belt routing diagram located on the engine compartment or the underside of the hood. If available, refer to this diagram for guidance.
With the serpentine belt removed, you have cleared the way to access the water pump and proceed with the water pump replacement process on your 2011 Chevy Cruze.
Step 4: Remove the Water Pump Pulley
After removing the serpentine belt, the next step in replacing the water pump on your 2011 Chevy Cruze is to remove the water pump pulley. The pulley is connected to the water pump and needs to be removed to access the water pump itself.
Follow these steps to remove the water pump pulley:
- Locate the bolts or screws that secure the water pump pulley to the water pump.
- Using a socket or wrench, loosen and remove the bolts or screws, allowing them to be set aside in a safe place.
- Gently pull the pulley away from the water pump, ensuring not to damage any surrounding components.
- If the pulley does not easily come off, you may need to use a pulley puller tool to remove it. Consult your vehicle’s repair manual or seek professional assistance if needed.
Removing the water pump pulley grants direct access to the water pump, allowing you to proceed with its removal and replacement. Take a moment to inspect the pulley for any signs of damage or wear that may indicate the need for replacement as well.
Keep in mind that the removal process may vary slightly depending on the specific model and engine configuration of your 2011 Chevy Cruze. Refer to your vehicle’s owner’s manual or a repair guide for any specific instructions or precautions related to removing the water pump pulley.
With the water pump pulley successfully removed, you’re now ready to move forward in replacing the water pump on your 2011 Chevy Cruze.
Step 5: Disconnect the Hoses and Electrical Connections
After removing the water pump pulley, the next step in replacing the water pump on your 2011 Chevy Cruze is to disconnect the hoses and electrical connections connected to the water pump. These connections must be removed to allow for the proper removal and installation of the new water pump.
Follow these steps to disconnect the hoses and electrical connections:
- Identify the hoses and electrical connections that are attached to the water pump.
- Using a pair of pliers or a suitable tool, carefully loosen and remove the clamps securing the hoses to the water pump.
- Slide the hoses off the water pump fittings, taking care to catch any coolant that may spill.
- Inspect the hoses for any signs of damage or wear. Replace them if necessary.
- Locate the electrical connections attached to the water pump.
- Disconnect the electrical connectors by gently pulling them apart.
- If needed, mark the electrical connections to ensure proper reinstallation later.
Take note of the specific locations and orientations of the hoses and electrical connections before removing them. This will help ensure correct reinstallation of the new water pump later in the process.
Always exercise caution when handling hoses and electrical connections. Be mindful of any coolant that may spill out during the disconnection process, and avoid damaging or bending any sensitive components.
By successfully disconnecting the hoses and electrical connections, you’re one step closer to completing the water pump replacement on your 2011 Chevy Cruze.
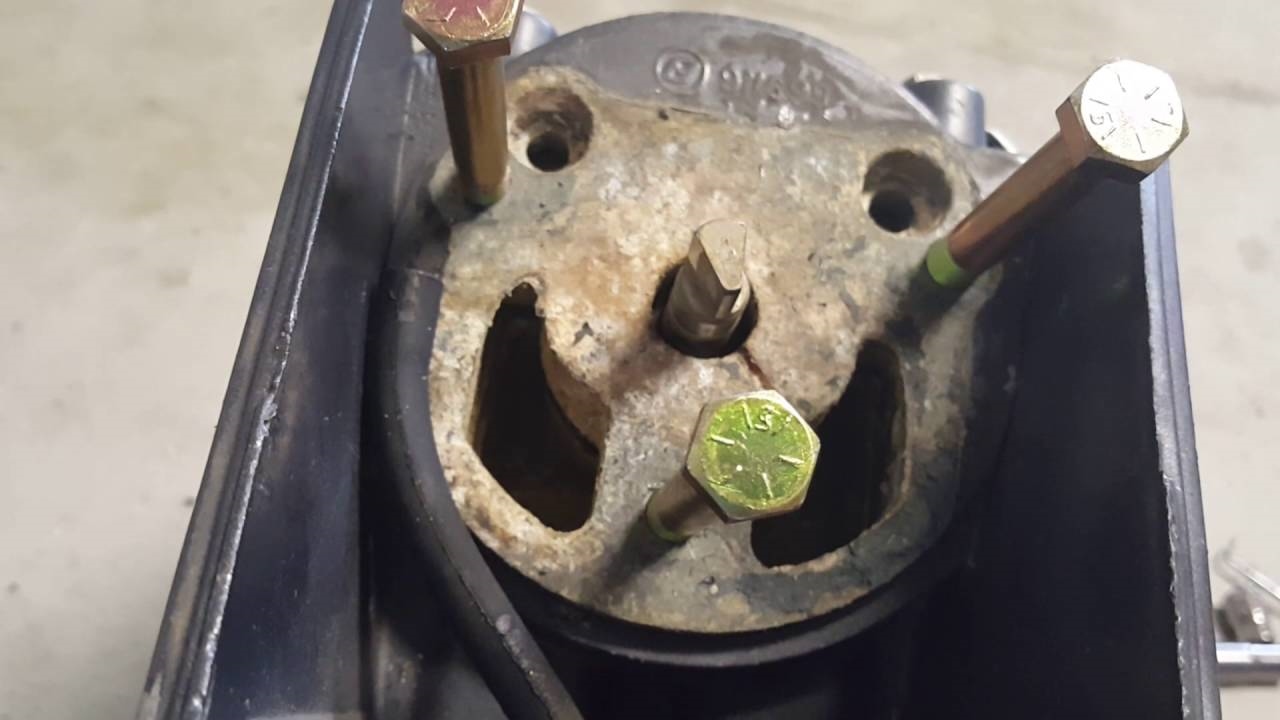
Step 6: Remove the Old Water Pump
With the hoses and electrical connections disconnected, you can now proceed to remove the old water pump from your 2011 Chevy Cruze. Removing the old water pump will create space for the installation of the new one.
Follow these steps to remove the old water pump:
- Inspect the water pump mounting bolts or screws that secure it to the engine.
- Using a socket or wrench, carefully loosen and remove the mounting bolts or screws, setting them aside in a safe place.
- Gently wiggle and pull the old water pump away from the engine, taking care not to damage any surrounding components.
- Be prepared for any remaining coolant or debris to spill out as you remove the water pump.
- Once the old water pump is fully removed, inspect it for any signs of damage or wear that may have been the cause of its failure.
It’s important to examine the old water pump to determine the cause of failure. Look for signs of leaks, corrosion, or bearing damage that may have prompted the need for replacement. This information can help diagnose any underlying issues that need to be addressed to prevent future problems.
Maintain a clean work area during this step to prevent any dirt or debris from entering the engine or cooling system. Make sure to dispose of the old water pump properly in accordance with local environmental regulations.
By successfully removing the old water pump, you’re making progress in the water pump replacement process for your 2011 Chevy Cruze.
When replacing the water pump on a 2011 Chevy Cruze, make sure to drain the coolant first to avoid spills. Also, take note of the position of the old pump before removing it to ensure proper installation of the new one.
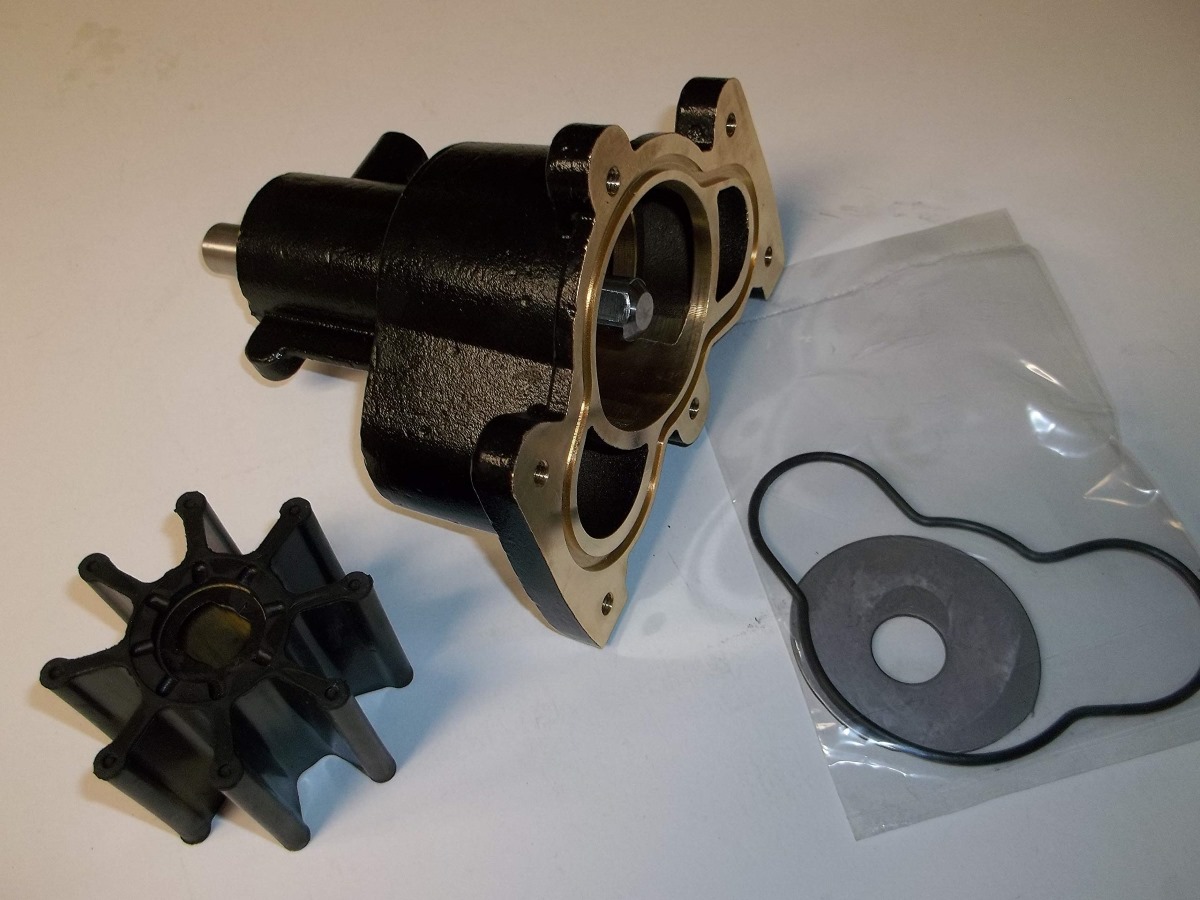
Step 7: Install the New Water Pump
Now that the old water pump has been removed, it’s time to install the new water pump on your 2011 Chevy Cruze. Installing the new water pump will restore proper cooling functionality to the engine, ensuring optimal performance and longevity.
Follow these steps to install the new water pump:
- Take the new water pump and inspect it for any signs of damage or defects.
- Ensure that the mounting surface on the engine is clean and free of debris.
- Apply a thin layer of gasket sealant or silicone to the mounting surface.
- Line up the bolt holes on the new water pump with the corresponding holes on the engine mounting surface.
- Carefully align the new water pump with the mounting surface and push it into place.
- Thread and tighten the mounting bolts or screws by hand to secure the water pump in place.
- Tighten the bolts or screws evenly and to the manufacturer’s recommended torque specifications using a socket or wrench.
Ensure that the new water pump is securely fastened to the engine, but be cautious not to overtighten the bolts or screws, as it may damage the water pump or engine components.
If your new water pump came with a new gasket, make sure to use it during the installation process. The gasket helps ensure a proper seal between the water pump and the engine, preventing any coolant leaks.
By successfully installing the new water pump, you’re one step closer to completing the water pump replacement on your 2011 Chevy Cruze.
Read more: How Much It Cost To Replace Water Pump
Step 8: Reconnect Hoses and Electrical Connections
With the new water pump securely installed, it’s time to reconnect the hoses and electrical connections that were previously disconnected. These connections ensure that coolant flows properly and that the water pump functions as intended.
Follow these steps to reconnect the hoses and electrical connections:
- Identify the hoses and electrical connections that were previously disconnected from the old water pump.
- Attach the hoses to their respective fittings on the new water pump.
- Slide the hose clamps back into place and tighten them securely using pliers.
- Ensure that the hoses are properly aligned and securely attached to prevent any leaks.
- Reconnect the electrical connections by firmly pushing them together until you hear a click or feel them engage.
- If you marked the electrical connections during the removal process, make sure to match them correctly to their corresponding plugs.
Take a moment to visually inspect the connections to make sure they are secure and tight. Double-check that all hoses and electrical connections are properly seated and that there are no gaps or loose fittings.
Properly connecting the hoses and electrical connections ensures the effective operation of the water pump and the cooling system as a whole. It helps maintain the engine’s temperature and prevent any coolant leakage.
By successfully reconnecting the hoses and electrical connections, you’re making significant progress in completing the water pump replacement on your 2011 Chevy Cruze.
Step 9: Replace the Water Pump Pulley
Now that the hoses and electrical connections are securely reconnected, it’s time to replace the water pump pulley on your 2011 Chevy Cruze. The water pump pulley is essential for the proper operation of the water pump and needs to be reinstalled to ensure optimal performance.
Follow these steps to replace the water pump pulley:
- Inspect the water pump pulley for any signs of damage or wear. Replace it with a new one if necessary.
- Align the bolt holes on the water pump pulley with the corresponding holes on the water pump.
- Carefully slide the water pump pulley onto the shaft of the water pump.
- Ensure that the pulley is seated properly and aligned with the other engine components.
- Thread the bolts or screws through the holes in the pulley and into the water pump.
- Tighten the bolts or screws evenly and to the manufacturer’s recommended torque specifications using a socket or wrench.
Make sure not to overtighten the bolts or screws, as it may damage the pulley or water pump. Tightening them evenly helps ensure proper alignment and functionality.
Replacing the water pump pulley completes the installation of the major components of the water pump system. It allows the serpentine belt to be properly positioned during the next step.
By successfully replacing the water pump pulley, you’re one step closer to finishing the water pump replacement on your 2011 Chevy Cruze.
Step 10: Reinstall the Serpentine Belt
With the water pump pulley in place, it’s time to reinstall the serpentine belt on your 2011 Chevy Cruze. The serpentine belt is responsible for driving multiple engine components, including the water pump, and needs to be properly tensioned and aligned for proper function.
Follow these steps to reinstall the serpentine belt:
- Refer to the belt routing diagram located in the engine bay or consult your vehicle’s owner’s manual to ensure proper belt alignment.
- With the diagram or manual as a guide, position the serpentine belt on the appropriate pulleys, ensuring that it follows the correct path.
- Using a wrench or socket, rotate the belt tensioner in the appropriate direction to release tension on the belt.
- While holding the tensioner in the released position, carefully route the serpentine belt onto the remaining pulleys.
- Gently release the tensioner, allowing it to apply tension to the serpentine belt.
- Double-check the alignment of the serpentine belt to ensure that it is properly seated on all pulleys.
Take a moment to visually inspect the serpentine belt to ensure that it is properly aligned and tensioned. Make sure there are no twists or misalignments that could cause the belt to slip or malfunction.
If needed, refer to the belt routing diagram in case you need a visual reference during the installation process. Properly reinstalling the serpentine belt ensures that all engine components are driven efficiently, including the newly replaced water pump.
By successfully reinstalling the serpentine belt, you’re nearing the completion of the water pump replacement on your 2011 Chevy Cruze.
Step 11: Refill the Cooling System
With the major components installed, it’s crucial to refill the cooling system to ensure proper cooling and prevent overheating of your 2011 Chevy Cruze. Refilling the cooling system will bring the coolant levels back to their optimal levels, allowing for efficient heat transfer and engine temperature regulation.
Follow these steps to refill the cooling system:
- Ensure that the drain plug on the radiator is securely tightened to prevent any leaks.
- Locate the coolant reservoir in the engine bay.
- Remove the cap from the coolant reservoir.
- Pour the recommended type and amount of coolant into the reservoir until it reaches the appropriate level indicated on the reservoir or specified in the owner’s manual.
- Slowly add coolant to the radiator through the radiator cap until it reaches the recommended level.
- Monitor the coolant levels in both the reservoir and the radiator to make any necessary adjustments as needed.
It’s important to use the correct type of coolant as specified in your vehicle’s owner’s manual. Different vehicles may require specific types of coolant to maintain optimal performance and prevent damage to the cooling system.
While refilling the cooling system, be cautious of hot engine components and coolant spills. Use a funnel if needed to pour coolant accurately and minimize any potential mess.
By successfully refilling the cooling system, you’re ensuring the proper functioning and longevity of the water pump and cooling system in your 2011 Chevy Cruze.
Step 12: Test for Leaks
After refilling the cooling system, it’s crucial to test for leaks to ensure that the water pump replacement on your 2011 Chevy Cruze was successful. Identifying and addressing any leaks promptly will prevent coolant loss, overheating, and potential damage to the engine.
Follow these steps to test for leaks:
- Start the engine and let it run for a few minutes to allow the coolant to circulate.
- Observe the areas around the water pump, hoses, and connections for any signs of coolant leakage.
- Check for any dripping or pooling of coolant underneath the vehicle.
- Inspect the radiator, coolant reservoir, and any other components of the cooling system for any signs of leaks.
- Monitor the engine temperature gauge to ensure that it stays within the normal operating range.
- If you detect any leaks, shut off the engine immediately and identify the source of the leak.
If you encounter a leak, it may be due to a loose connection, damaged hose, or improperly installed water pump. Inspect the area carefully and address the issue accordingly. It may require tightening a connection, replacing a damaged hose, or reseating the water pump.
Continue to monitor the cooling system, especially during the first few days after the water pump replacement, to ensure that there are no recurring leaks or overheating issues.
By thoroughly testing for leaks and addressing any issues promptly, you can have confidence in the successful water pump replacement on your 2011 Chevy Cruze and the continued proper functioning of the cooling system.
Conclusion
Congratulations! You have successfully completed the water pump replacement on your 2011 Chevy Cruze. By following this comprehensive guide, you were able to remove the old water pump, install a new one, and ensure the proper functioning of the cooling system in your vehicle.
Replacing the water pump is an important maintenance task to prevent overheating and maintain optimal engine performance. By taking on this project yourself, you not only saved money on labor costs but also gained valuable knowledge about your vehicle’s cooling system.
Throughout the process, you learned how to drain the cooling system, remove the engine cover, serpentine belt, water pump pulley, and old water pump. You also mastered the steps of installing the new water pump, reconnecting hoses and electrical connections, and refilling the cooling system.
Always remember to test for leaks, as identifying and addressing them promptly is crucial to ensuring the efficiency and reliability of your vehicle’s cooling system. Regular maintenance and periodic inspections of the water pump and cooling system will help prevent future issues and extend the life of your Chevy Cruze.
If at any point during the water pump replacement process you encountered difficulties or were unsure about any steps, it’s always recommended to consult your vehicle’s owner’s manual or seek professional assistance.
Thank you for using this comprehensive guide. We hope it has been informative and helpful in your water pump replacement journey. Safe travels and enjoy the reliable performance of your 2011 Chevy Cruze!
Now that you've mastered replacing your Chevy Cruze's water pump, you might wonder about the best time for this crucial maintenance. Don't let a faulty pump catch you off guard. Our detailed guide on water pump replacement times will keep your ride smooth and your engine cool. Dive into our next feature to ensure you're up to speed on maintaining your vehicle's peak performance.
Frequently Asked Questions about How To Replace Water Pump On 2011 Chevy Cruze
Was this page helpful?
At Storables.com, we guarantee accurate and reliable information. Our content, validated by Expert Board Contributors, is crafted following stringent Editorial Policies. We're committed to providing you with well-researched, expert-backed insights for all your informational needs.


0 thoughts on “How To Replace Water Pump On 2011 Chevy Cruze”