Home>Articles>How To Replace Water Pump On 2000 Dodge Durango 5.9
Articles
How To Replace Water Pump On 2000 Dodge Durango 5.9
Modified: August 28, 2024
Learn how to replace the water pump on your 2000 Dodge Durango 5.9 with our informative articles. Get step-by-step instructions and expert tips.
(Many of the links in this article redirect to a specific reviewed product. Your purchase of these products through affiliate links helps to generate commission for Storables.com, at no extra cost. Learn more)
Introduction
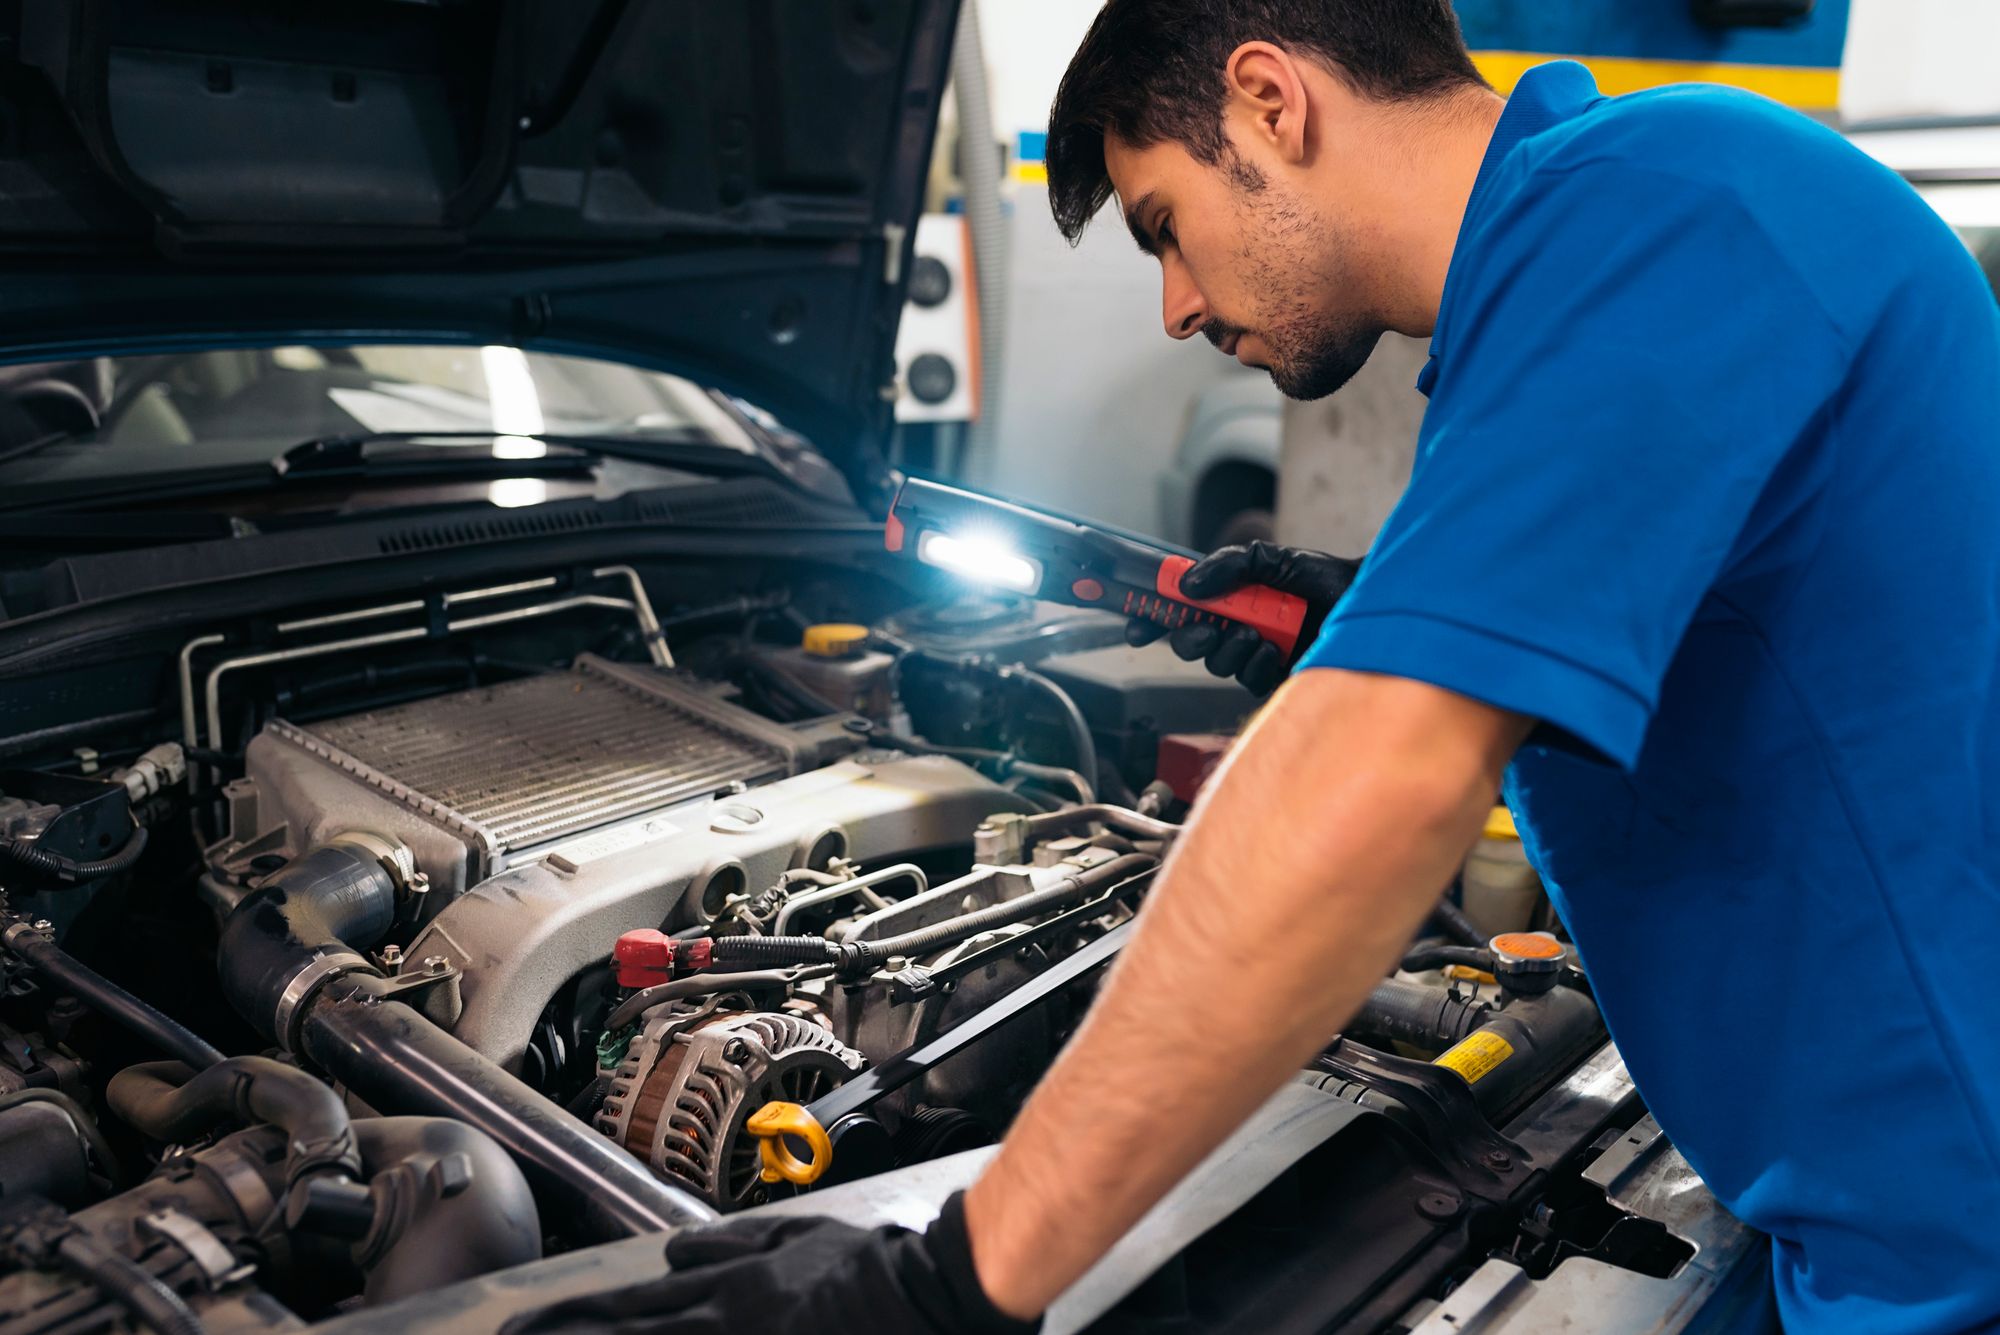
Welcome to our step-by-step guide on how to replace the water pump on a 2000 Dodge Durango 5.9. The water pump is a crucial component of the engine’s cooling system, and over time, it may wear out and fail, leading to overheating and potential engine damage. By following this comprehensive guide, you’ll be able to successfully replace your water pump and ensure the optimal performance of your vehicle.
Before we dive into the step-by-step process, let’s talk about some of the signs that indicate a faulty water pump. These symptoms include overheating, coolant leakage, excessive noise coming from the pump, and engine performance issues. If you’re experiencing any of these problems, it’s likely time to replace your water pump.
Now, let’s gather the necessary tools and materials before beginning the replacement process.
Key Takeaways:
- Proper preparation, including disconnecting the battery, draining the cooling system, and inspecting components, is crucial before replacing the water pump on a 2000 Dodge Durango 5.9. This ensures a safe and efficient process.
- Thorough cleaning and preparation of the engine block, along with the use of RTV silicone sealant, are essential for a secure and effective installation of the new water pump. Following these steps will help maintain the vehicle’s cooling system for optimal performance.
Read more: How To Replace Water Pump Dodge Ram 1500
Tools and Materials Needed
Before you start replacing the water pump on your 2000 Dodge Durango 5.9, make sure you have the following tools and materials ready:
- Socket wrench set
- Combination wrench set
- Pliers
- Screwdriver
- Drain pan
- Coolant (ethylene glycol)
- New water pump
- New gasket
- Threadlocker
- RTV silicone sealant
- Radiator pressure tester
- Coolant funnel
Having these tools and materials handy will ensure a smooth and efficient water pump replacement process. Now that you’re prepared, let’s move on to the step-by-step guide.
Step 1: Preparation
Prior to replacing the water pump on your 2000 Dodge Durango 5.9, it’s important to take some preparatory steps to ensure a safe and efficient process. Here’s what you need to do:
- Make sure your vehicle is parked on a flat surface and the engine is cool. Safety should always be your top priority when working on your vehicle, so make sure to take proper precautions.
- Disconnect the negative terminal of the battery to prevent any electrical mishaps during the replacement process. This will also prevent the fan from accidentally turning on while you’re working on the water pump.
- Place a drain pan underneath the radiator drain plug. Open the drain plug and let the coolant drain completely. Remember to properly dispose of the coolant once you’ve finished.
- Inspect the cooling system hoses to ensure they’re in good condition. If you notice any signs of wear or damage, now is a good time to replace them.
- Inspect the condition of the serpentine belt. If it appears worn or is nearing its recommended replacement interval, consider replacing it while you have access to it during this process.
By taking these preparatory steps, you’ll ensure a smooth and hassle-free water pump replacement process. Now that you’re ready, it’s time to move on to draining the cooling system.
Step 2: Draining the Cooling System
Once you’ve completed the preparation steps, it’s time to drain the cooling system. This will ensure that there is no coolant left in the system and prevent any spills or leaks during the water pump replacement. Here’s how to drain the cooling system on your 2000 Dodge Durango 5.9:
- Locate the radiator drain plug. It is usually located at the bottom of the radiator on one side.
- Place a drain pan underneath the drain plug to catch the coolant.
- Using pliers or a wrench, carefully loosen the drain plug to allow the coolant to flow out. Make sure to control the flow of coolant to avoid any spills.
- Once the coolant has drained completely, tighten the drain plug securely.
- Dispose of the old coolant properly, following local regulations and guidelines. Coolant is toxic and harmful to the environment, so be sure to avoid pouring it down the drain or onto the ground.
- Inspect the drain plug for any damage or signs of wear. Replace it if necessary.
By draining the cooling system, you will ensure a cleaner and safer environment to work in during the water pump replacement. With the cooling system drained, you can now proceed to the next step: removing the serpentine belt.
Step 3: Removing the Serpentine Belt
With the cooling system drained, it’s time to remove the serpentine belt. The serpentine belt is responsible for driving various engine components, including the water pump. Here’s how you can remove it:
- Locate the belt tensioner. It is a spring-loaded pulley that keeps tension on the serpentine belt.
- Using a socket wrench or a belt tensioner tool, rotate the tensioner in the direction indicated by the manufacturer to release the tension on the belt.
- While holding the tensioner in the released position, slip the serpentine belt off one of the pulleys.
- Slowly release the tensioner, allowing it to move back into its original position. Take note of the belt’s routing for later reference when reinstalling the new belt.
- Inspect the serpentine belt for any signs of wear, such as cracks or fraying. If it appears worn or damaged, replace it with a new belt.
By removing the serpentine belt, you’ll gain better access to the water pump and be able to proceed with the replacement process more effectively. With the belt removed, let’s move on to the next step: removing the fan and fan shroud.
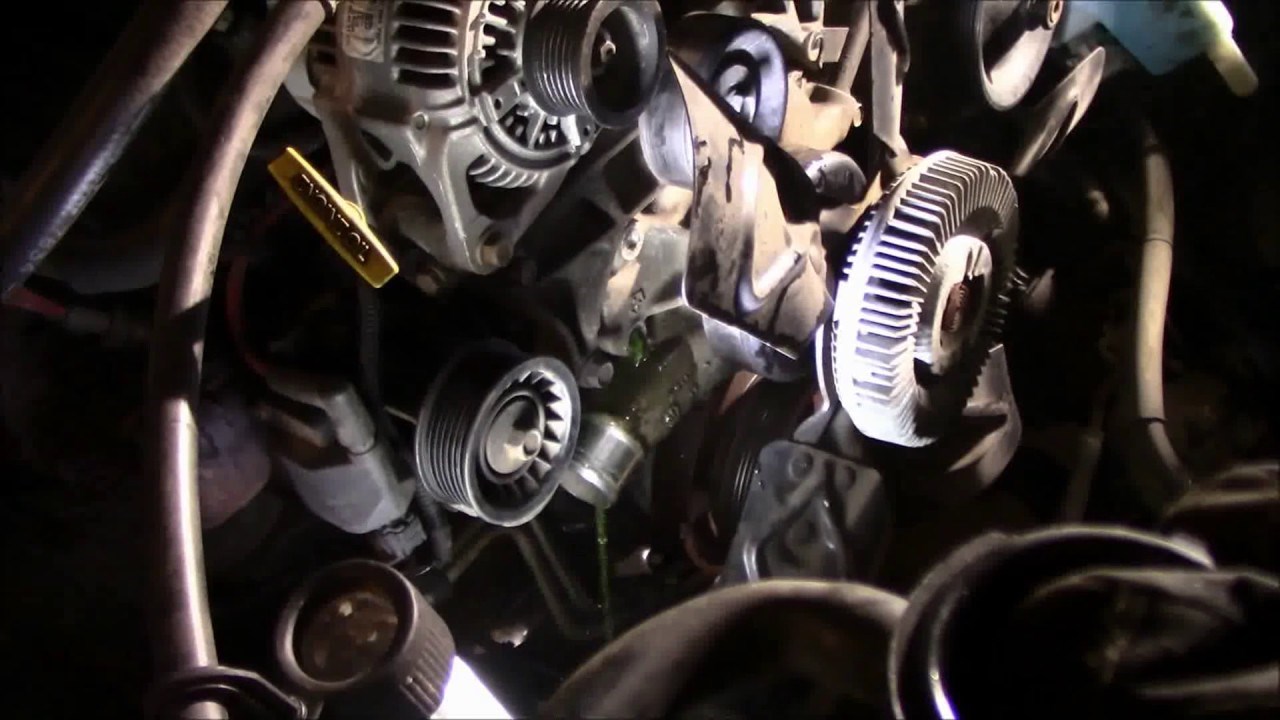
Step 4: Removing the Fan and Fan Shroud
With the serpentine belt out of the way, the next step is to remove the fan and fan shroud. These components may obstruct access to the water pump, so removing them will make the replacement process easier. Here’s what you need to do:
- Locate the fan shroud, which is a plastic cover surrounding the fan. It is usually held in place by a few bolts or clips.
- Using a socket wrench or screwdriver, remove the bolts or clips securing the fan shroud to the radiator.
- Carefully lift and remove the fan shroud, keeping it aside for reinstallation later.
- Take note of the position of the fan and its orientation for proper reinstallation.
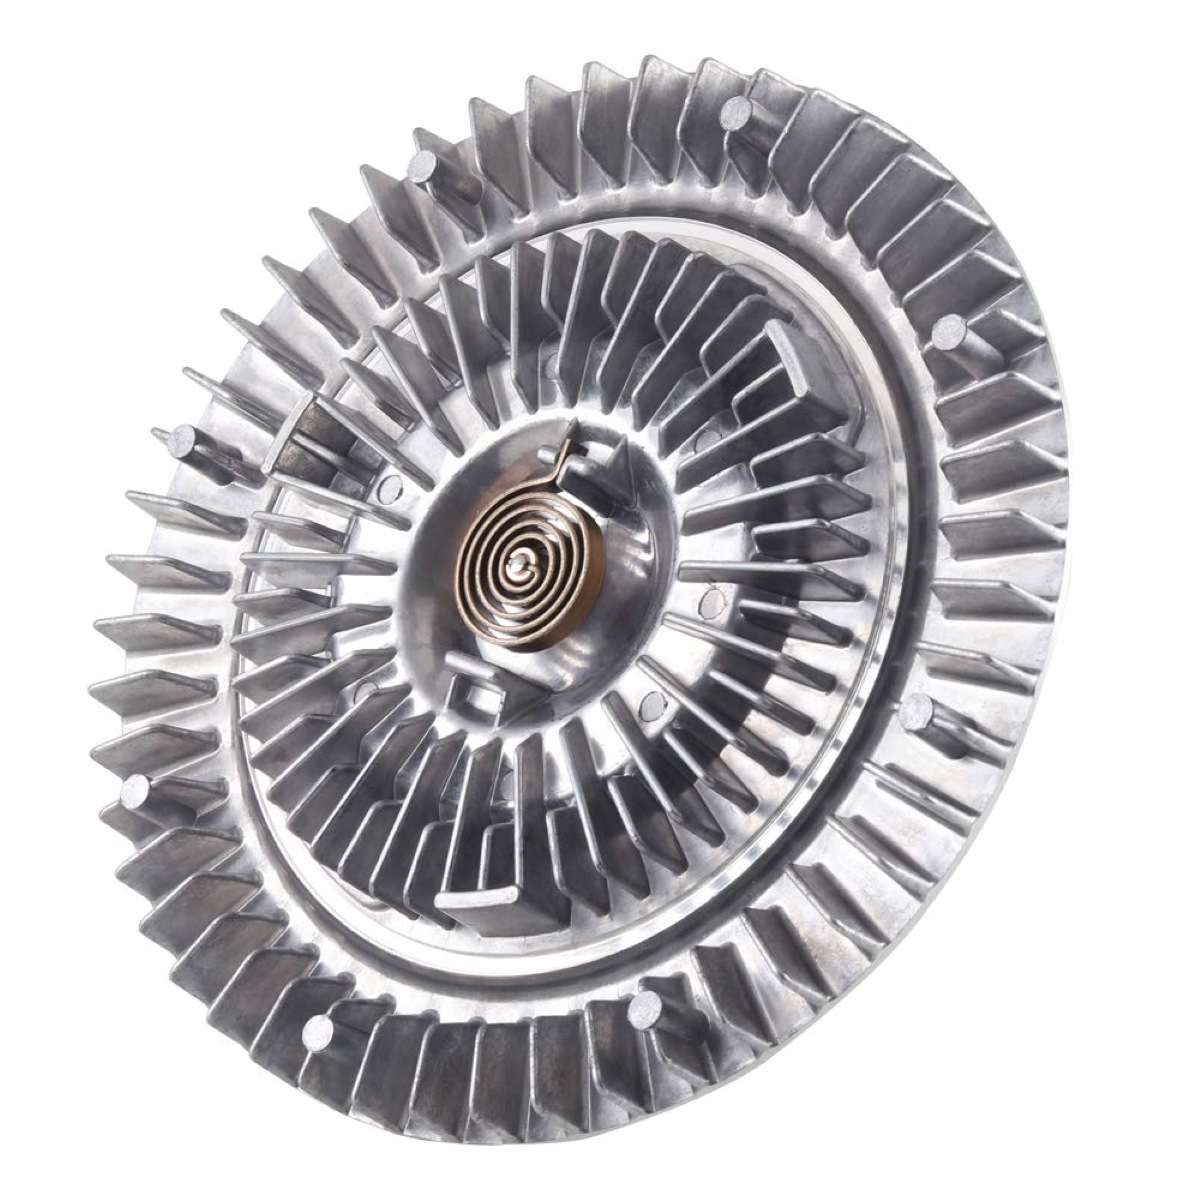
- Locate the fan clutch, which is attached to the water pump. The fan clutch is a mechanism that allows the fan to freewheel when the engine is cool and engage when the engine is hot.
- Using a wrench or a fan clutch tool, loosen the fan clutch from the water pump shaft by turning it counterclockwise.
- Once the fan clutch is loose, carefully lift the fan and fan clutch assembly out of the engine bay and set it aside.
With the fan and fan shroud removed, you now have better access to the water pump. You’ll be able to proceed with the water pump removal in the next step. Stay tuned!
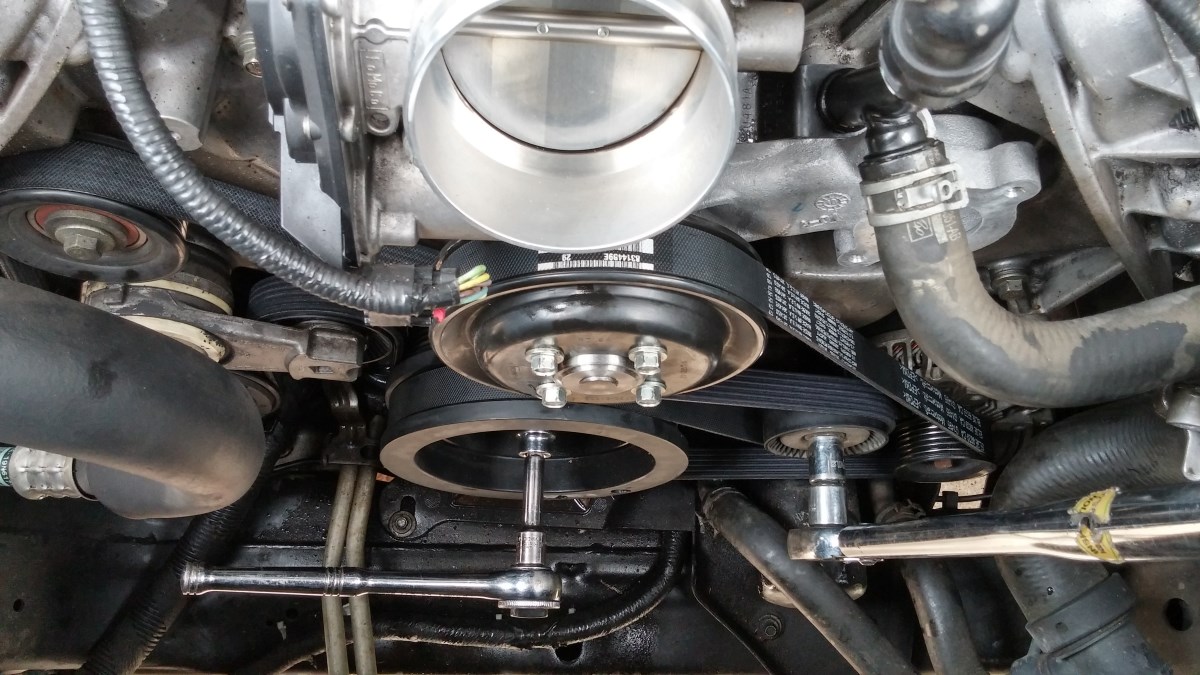
Step 5: Removing the Water Pump Pulley
With the fan and fan shroud out of the way, it’s time to remove the water pump pulley. The pulley is connected to the water pump and needs to be removed before accessing the water pump itself. Follow these steps to remove the water pump pulley:
- Locate the bolts holding the water pump pulley in place. There are usually two or three bolts securing it.
- Using a socket wrench, loosen and remove the bolts from the water pump pulley. Keep the bolts in a safe place for reinstallation later.
- Gently pull the water pump pulley away from the water pump shaft. It might be a bit tight due to rust or corrosion, so you may need to apply some force or use a pulley removal tool.
- Once the pulley is loose, carefully slide it off the water pump shaft and set it aside.
- Inspect the water pump pulley for any signs of wear or damage. If it appears worn or damaged, it’s recommended to replace it with a new one.
By removing the water pump pulley, you’ll have clear access to the water pump itself, which we will tackle in the next step. Make sure to handle the pulley carefully to avoid any damage. Let’s move on to removing the water pump!
When replacing the water pump on a 2000 Dodge Durango 5.9, make sure to drain the coolant first to avoid a mess. Also, take note of the position of the old pump before removing it to ensure proper installation of the new one.
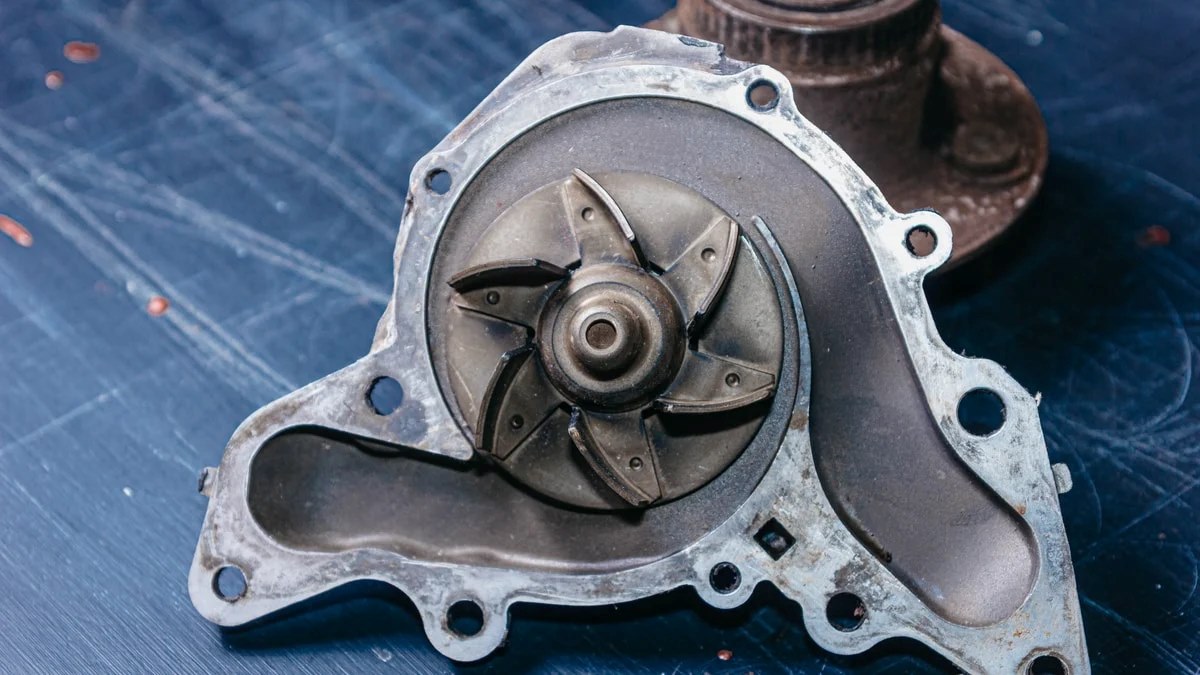
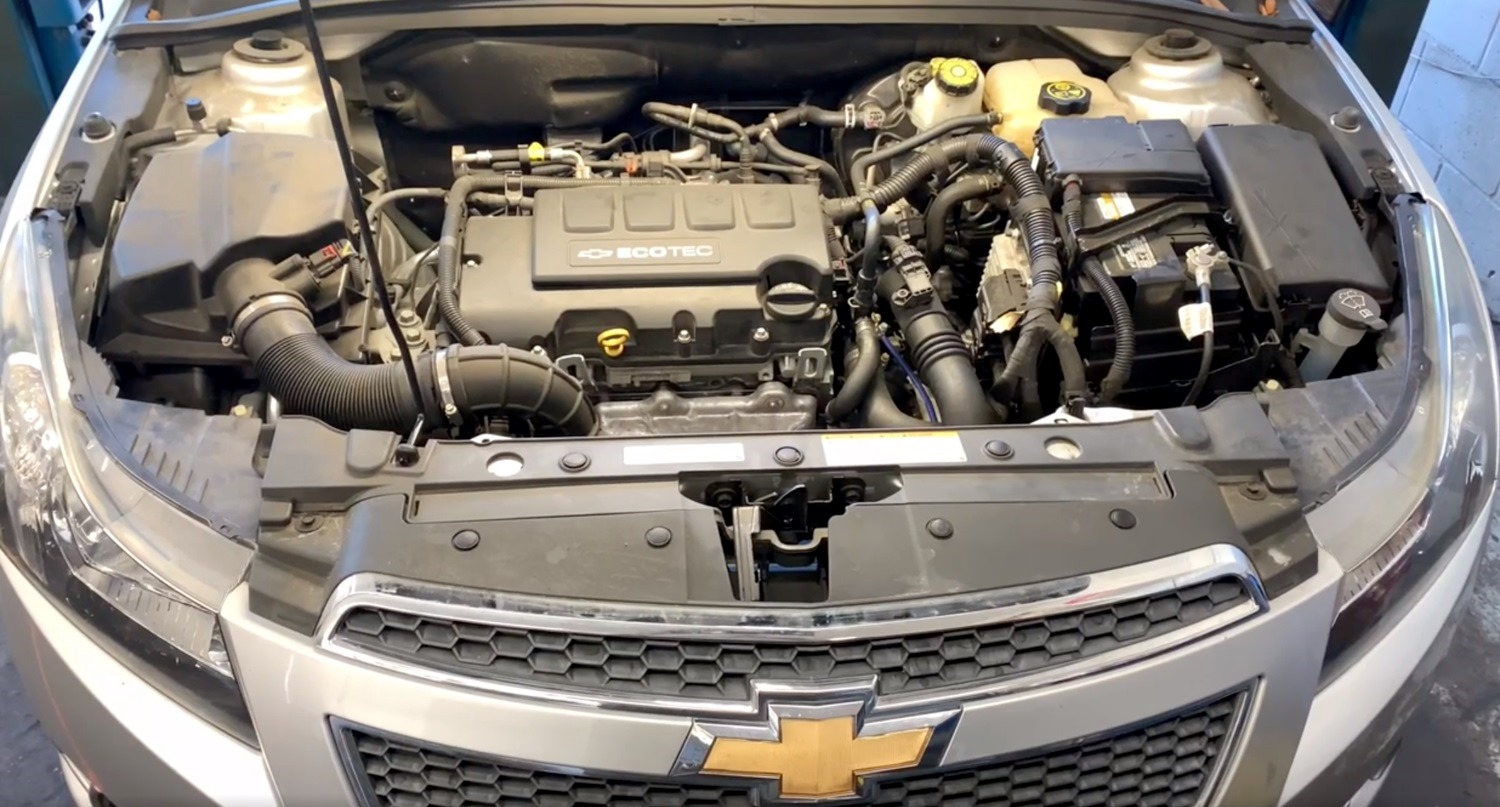
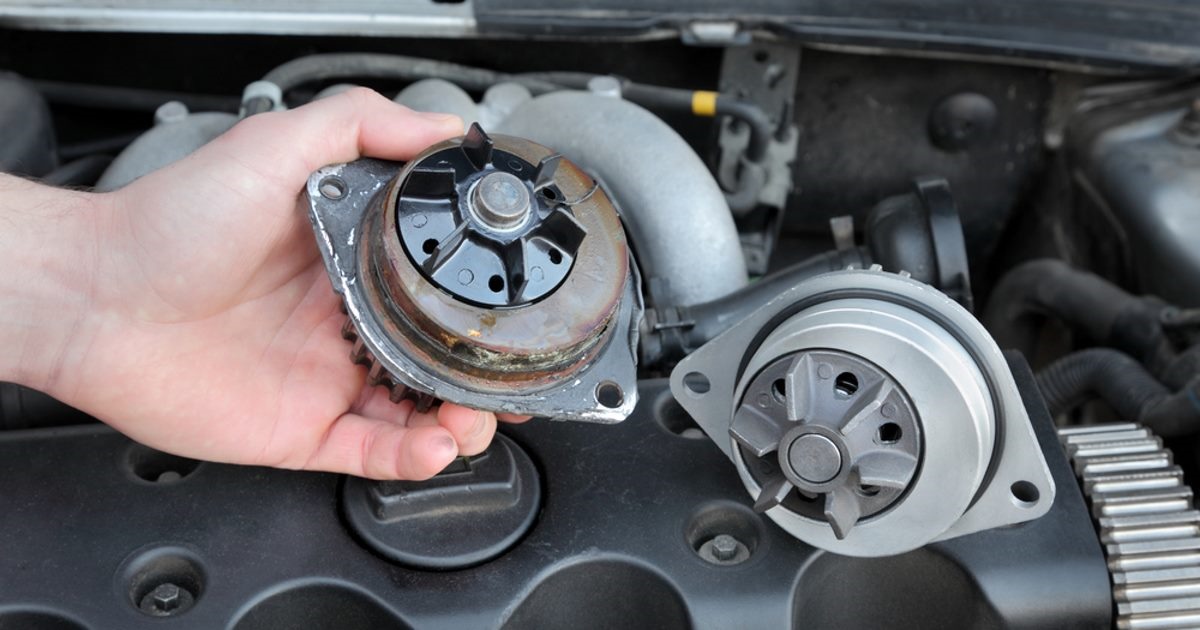
Step 6: Removing the Water Pump
Now that the water pump pulley is out of the way, it’s time to remove the water pump itself. Follow these steps to remove the water pump on your 2000 Dodge Durango 5.9:
- Locate the bolts that secure the water pump to the engine block. There are usually several bolts holding it in place.
- Using a socket wrench or a combination wrench, loosen and remove the bolts from the water pump. Take note of their locations and keep them in a safe place for reinstallation.
- Once the bolts are removed, gently pry the water pump away from the engine block. It might be slightly stuck due to the gasket sealant.
- As you remove the water pump, be prepared to catch any coolant or any residual liquid that may spill out.
- Inspect the water pump for any signs of wear, such as leaks or a damaged impeller. If it appears worn or damaged, it’s crucial to replace it with a new one.
- Clean the surface of the engine block where the water pump was attached. Remove any remaining gasket material or sealant to ensure a clean mating surface for the new water pump.
With the old water pump successfully removed, you’re now ready to clean and prepare the engine block for the installation of the new water pump. We’ll cover that in the next step, so stay tuned!
Step 7: Cleaning and Preparing the Engine Block
With the old water pump removed, it’s important to clean and prepare the engine block before installing the new water pump. This step ensures a proper seal and optimal performance of the new water pump. Follow these steps to clean and prepare the engine block:
- Using a clean rag or a gasket scraper, carefully remove any leftover gasket material or sealant from the surface of the engine block. Ensure that the surface is clean and free of debris.
- If necessary, use a mild solvent or engine degreaser to clean any residue or buildup on the engine block. Be cautious when using chemicals and ensure they are compatible with your engine’s materials.
- Inspect the engine block for any signs of damage or corrosion. If you notice any issues, it’s recommended to address them before proceeding with the water pump installation.
- Apply a thin and even layer of RTV silicone sealant to the mounting surface of the engine block. This will help ensure a proper seal between the new water pump and the engine block.
- Take the new water pump and place it on the engine block, aligning the mounting holes with the holes on the engine block.
- Insert and hand-tighten the bolts into the mounting holes. Ensure that the water pump sits flush against the engine block.
- Tighten the bolts evenly using a socket wrench or a combination wrench. Follow the recommended torque specifications provided by the manufacturer to avoid damaging the water pump or the engine block.
With the engine block cleaned and prepared, and the new water pump securely installed, you’re one step closer to completing the water pump replacement on your 2000 Dodge Durango 5.9. In the next step, we’ll guide you through the process of reassembling the fan, shroud, and serpentine belt. Let’s proceed!
Read more: How To Change Water Pump On 2001 Dodge Ram
Step 8: Installing the New Water Pump
With the engine block cleaned and prepared, it’s time to install the new water pump. Follow these steps to ensure a proper and secure installation of the new water pump:
- Take the new water pump and apply a thin layer of RTV silicone sealant to the gasket surface. This will help ensure a proper seal between the water pump and the engine block.
- Align the new water pump with the mounting holes on the engine block, making sure that the gasket is properly seated.
- Insert and hand-tighten the bolts into the mounting holes. Start with the top and bottom bolts to ensure proper alignment.
- Once all the bolts are in place, tighten them evenly using a socket wrench or combination wrench. Follow the recommended torque specifications provided by the manufacturer to avoid damaging the water pump or the engine block.
- Double-check the alignment and tightness of the bolts to ensure a secure installation.
- Allow the RTV silicone sealant to cure according to the manufacturer’s instructions before moving on to the next step. This will ensure a proper seal and prevent leaks in the cooling system.
With the new water pump successfully installed, you’re making great progress in replacing the water pump on your 2000 Dodge Durango 5.9. In the next step, we’ll guide you through the process of reassembling the fan, shroud, and serpentine belt. Let’s proceed!
Step 9: Reassembling the Fan, Shroud, and Serpentine Belt
Now that the new water pump is installed, it’s time to reassemble the fan, shroud, and serpentine belt. Follow these steps to complete the reassembly process:
- Take the fan and fan clutch assembly and carefully position it back onto the water pump shaft. Make sure it is aligned correctly.
- Tighten the fan clutch by turning it clockwise using a wrench or fan clutch tool. Ensure that it is securely fastened to the water pump shaft.
- Take the fan shroud and align it with the mounting holes on the radiator. Carefully lower it into place.
- Secure the fan shroud to the radiator by tightening the bolts or clips using a socket wrench or screwdriver. Make sure it is securely fastened.
- Take the serpentine belt and carefully slip it back onto the pulleys, following the belt routing diagram that you noted earlier during the removal process.
- Using a socket wrench or belt tensioner tool, rotate the belt tensioner in the direction indicated by the manufacturer to release the tension on the belt. Slip the belt onto the last remaining pulley.
- Slowly release the tensioner, allowing it to move back into its original position and apply tension to the belt. Ensure that the belt is properly aligned on all pulleys.
- Inspect the serpentine belt for proper tension and alignment. Adjust if necessary.
With the fan, shroud, and serpentine belt reassembled, you’ve almost completed the water pump replacement on your 2000 Dodge Durango 5.9. The final step is to refill the cooling system with fresh coolant, which we’ll cover in the next step. Let’s proceed with the last step!
Step 10: Refilling the Cooling System
With the water pump replaced and all components reassembled, it’s time to refill the cooling system with fresh coolant. Follow these steps to properly refill the cooling system:
- Locate the radiator cap or coolant reservoir (depending on your vehicle’s design) and remove it.
- Using a coolant funnel, slowly pour the fresh coolant into the radiator or coolant reservoir until it reaches the recommended level.
- Keep an eye on the radiator or coolant reservoir as you pour the coolant. You may need to wait for trapped air bubbles to escape, and then top it off again to the proper level.
- Once the coolant level is at the proper level, replace the radiator cap or coolant reservoir cap tightly.
- Start the engine and let it run for a few minutes. Monitor the coolant level and temperature gauge to ensure that the engine is running at the correct temperature and that there are no leaks.
- If necessary, add more coolant to bring the level back up to the recommended level.
- Rev the engine a few times to help circulate the coolant throughout the system.
- Double-check all connections for any signs of leaks or loose components. Tighten any bolts or clamps as needed.
- Once everything is secure and the engine is running smoothly, take the vehicle for a short test drive to ensure proper operation.
With the cooling system refilled and the water pump successfully replaced, congratulations on completing the water pump replacement on your 2000 Dodge Durango 5.9! Regularly monitor the coolant level and temperature to ensure that the system is functioning properly. Remember to dispose of the old coolant responsibly to protect the environment. If you encounter any issues or concerns, it’s always best to consult a professional mechanic for further assistance.
Thank you for following our step-by-step guide, and we hope this information was helpful to you. Safe travels!
Conclusion
Replacing the water pump on your 2000 Dodge Durango 5.9 is a task that requires careful attention to detail and proper execution. By following the steps outlined in this comprehensive guide, you have successfully completed the water pump replacement process. You’ve learned how to prepare, drain the cooling system, remove the serpentine belt, fan, and fan shroud, and ultimately, replace the water pump with a new one.
A faulty water pump can lead to engine overheating, coolant leaks, and potential engine damage. By replacing it, you ensure the optimal performance and longevity of your vehicle’s cooling system. Remember to always prioritize safety by parking your vehicle on a flat surface, allowing the engine to cool down, and disconnecting the negative terminal of the battery.
Throughout the process, it’s important to use the appropriate tools and materials and to follow the manufacturer’s instructions and torque specifications. Taking the time to thoroughly clean and prepare the engine block and using RTV silicone sealant when necessary will help create a proper seal for the new water pump.
Once the water pump is installed and all components are reassembled, refill the cooling system with fresh coolant and monitor the coolant level and temperature closely. Conducting a short test drive will help ensure that the system is functioning properly. If you have any concerns or encounter any issues, it’s always best to seek professional assistance.
Congratulations on successfully replacing the water pump on your 2000 Dodge Durango 5.9! By following this comprehensive guide, you’ve gained valuable knowledge and skills in automotive maintenance. Regular maintenance and care will help keep your vehicle running smoothly and efficiently for years to come.
Thank you for following our guide, and we hope this information has been helpful to you. Safe travels and enjoy the enhanced performance of your newly replaced water pump!
Frequently Asked Questions about How To Replace Water Pump On 2000 Dodge Durango 5.9
Was this page helpful?
At Storables.com, we guarantee accurate and reliable information. Our content, validated by Expert Board Contributors, is crafted following stringent Editorial Policies. We're committed to providing you with well-researched, expert-backed insights for all your informational needs.

0 thoughts on “How To Replace Water Pump On 2000 Dodge Durango 5.9”