Home>Articles>How To Pour A Concrete Landing Pad For Your Patio Or Sidewalk
Articles
How To Pour A Concrete Landing Pad For Your Patio Or Sidewalk
Modified: January 9, 2024
Learn the step-by-step process of pouring a sturdy concrete landing pad for your patio or sidewalk in our informative articles. Enhance your outdoor space with our helpful tips and tricks.
(Many of the links in this article redirect to a specific reviewed product. Your purchase of these products through affiliate links helps to generate commission for Storables.com, at no extra cost. Learn more)
Introduction
Pouring a concrete landing pad for your patio or sidewalk is a perfect DIY project that can enhance the functionality and aesthetics of your outdoor space. Whether you want to create a comfortable sitting area or provide a smooth transition between different areas of your yard, a well-constructed landing pad is essential.
In this comprehensive guide, we will walk you through the step-by-step process of pouring a concrete landing pad. From gathering the necessary materials to finishing the surface, we will cover every aspect to ensure that you achieve professional-looking results.
Before we begin, it’s important to note that working with concrete can be physically demanding and requires careful planning. However, with the right tools, materials, and instructions, you can successfully complete this project and enjoy your new landing pad for years to come.
So let’s get started on this rewarding journey and transform your outdoor space into an inviting and functional area!
Key Takeaways:
- Proper site preparation, formwork installation, and gravel base addition are crucial for creating a stable and durable concrete landing pad. Attention to detail and patience during the finishing and curing process ensures a professional and long-lasting result.
- By following the step-by-step instructions and investing time and effort into the DIY project, you can save money and add value to your property. The completed concrete landing pad provides a functional, visually appealing, and long-lasting addition to your outdoor space.
Read more: How To Paint Your Concrete Patio
Materials Required
Before you begin pouring a concrete landing pad, it’s crucial to gather all the necessary materials. By having everything on hand, you can work efficiently and seamlessly throughout the process. Here’s a list of materials you’ll need:
- Concrete mix: Choose a high-quality concrete mix that is suitable for your project. The quantity will depend on the size of the landing pad you plan to create.
- Gravel: You’ll need a layer of compacted gravel as the base for your landing pad. Make sure to calculate the required amount based on the size and thickness of the pad.
- Reinforcement mesh: This is essential to reinforce the concrete and prevent cracking. Purchase a roll of steel reinforcement mesh that is the appropriate size for your landing pad.
- Wood for formwork: Gather straight boards to create the formwork for your landing pad. Make sure they are sturdy and can withstand the pressure of the concrete.
- Wood stakes: These will be used to secure the formwork in place during the pouring process.
- Concrete curing compound: A curing compound helps in the drying and hardening of the concrete, providing long-lasting durability.
- Concrete float: A float is used for finishing the surface of the concrete, giving it a smooth and even appearance.
- Concrete edger: This tool is used to create a neat edge around the landing pad, giving it a professional finish.
- Wheelbarrow: You’ll need a wheelbarrow or similar container to mix and transport the concrete.
- Shovel: A shovel is essential for digging and moving the gravel and concrete mix.
- Trowel: A trowel is used for smoothing and leveling the concrete during the finishing process.
- Protective gear: Lastly, don’t forget to wear protective gear, including gloves, safety glasses, and a dust mask, to ensure your safety during the construction process.
By gathering all these materials before you start, you can save time and avoid unnecessary delays during the project. Now that you have everything you need, let’s move on to the first step: site preparation.
Step 1: Site Preparation
Proper site preparation is essential for a successful concrete landing pad. Before you can start excavating and pouring the concrete, you need to ensure that the area is ready and suitable for construction. Follow these steps to prepare the site:
- Choose the location: Determine the ideal location for your landing pad. Consider factors such as the flow of foot traffic, proximity to other outdoor features, and the overall design of your yard.
- Mark the area: Use stakes and string to mark the perimeter of the landing pad. The dimensions will depend on the size of your project and any specific requirements you have.
- Clear the area: Remove any vegetation, rocks, or debris from the marked area. This will ensure a clean and stable base for the landing pad.
- Check for levelness: Use a level to check the current levelness of the site. If there are any significant slopes or uneven areas, you may need to adjust the site by adding or removing soil.
- Consider drainage: Ensure that there is proper drainage in the area. If the site is prone to pooling water, you may need to improve drainage by creating a slope or installing a drainage system.
Once you have completed these steps, you can move on to the next phase of the project: excavation.
Step 2: Excavation
Excavating the area is a crucial step in preparing the site for your concrete landing pad. It involves digging and removing the top layer of soil to create a level and stable base. Follow these steps for proper excavation:
- Measure and mark the depth: Determine the desired depth of your concrete landing pad. Typically, a depth of 4-6 inches is sufficient, but this may vary depending on your specific project requirements.
- Start digging: Using a shovel or excavator, begin digging within the marked area. Remove the top layer of soil, working gradually to achieve the desired depth. Keep the edges of the excavation area straight and smooth.
- Check for levelness: As you excavate, periodically check for levelness using a level or a slope board. This will help ensure that the pad will be even and properly angled for drainage.
- Remove excess soil: Once you have reached the desired depth, remove any excess soil from the excavation area. Use a wheelbarrow or similar container to transport and dispose of the soil properly.
- Compact the soil: Use a compactor or tamper to compact the soil at the bottom of the excavation. This will help create a stable base for the landing pad and minimize the risk of settling or cracking.
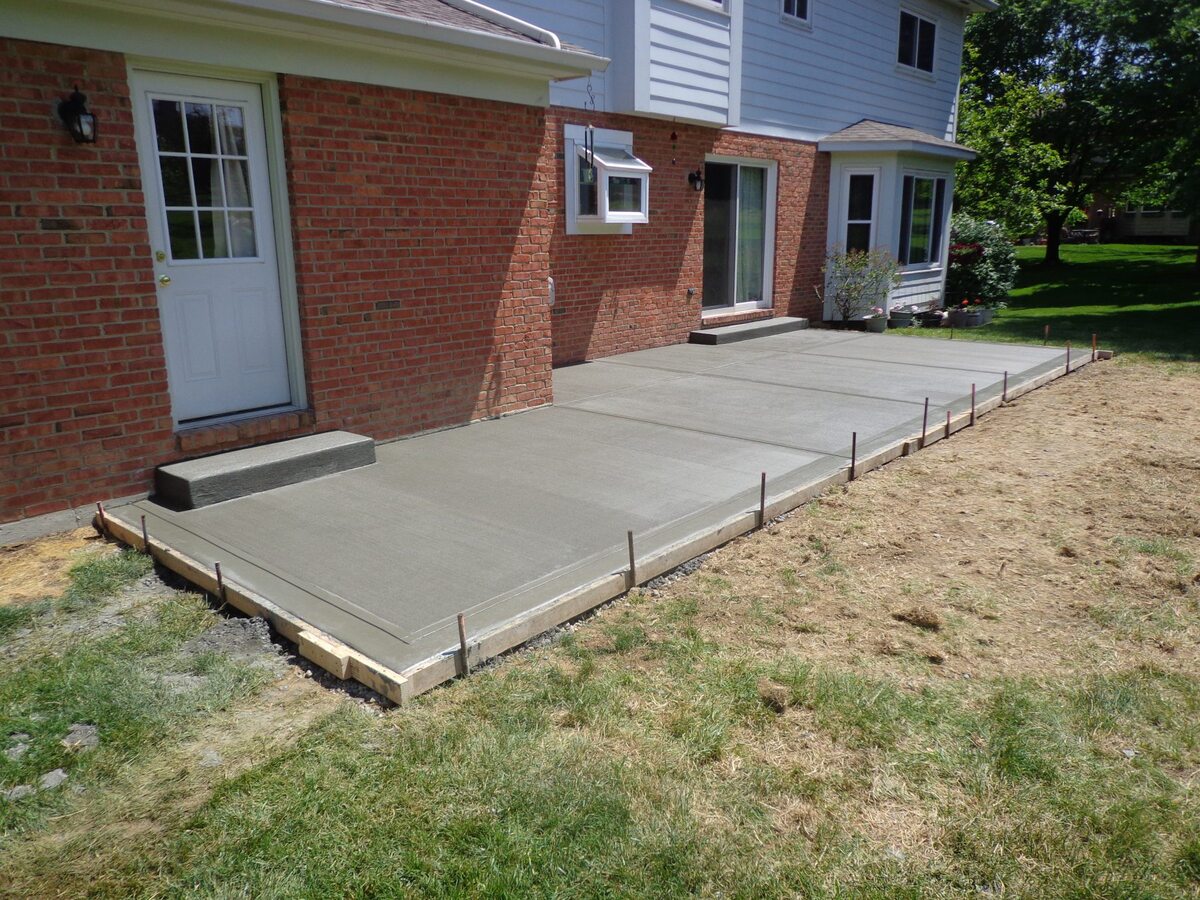
It’s important to note that the depth and size of the excavated area should be slightly larger than the intended dimensions of the landing pad. This allows space for the gravel base and formwork. With the excavation complete, you’re now ready to move on to the next step: installing formwork.
Step 3: Installing Formwork
Formwork is the structure that holds the concrete in place while it sets and hardens. It provides the shape and boundaries for your landing pad. Follow these steps to properly install formwork:
- Measure and cut the boards: Measure the length and width of the landing pad and cut the formwork boards accordingly. Use sturdy and straight boards to ensure stability.
- Create the outer frame: Place the boards along the outer edges of the excavation area, making sure they are aligned with the marked perimeter. Use wood stakes to secure the boards and ensure they are level and straight.
- Add cross braces: To provide additional support and prevent the formwork from shifting, add cross braces inside the outer formwork. Attach them securely to the stakes and boards.
- Create expansion joints: If your landing pad will span a significant area or if it will be adjacent to existing structures, consider adding expansion joints. These allow for natural movement and help prevent cracks in the concrete over time.
- Check for levelness and squareness: Use a level and measuring tape to ensure the formwork is level and square. Adjust the boards and stakes as necessary.
Properly installed formwork is critical for achieving a level and uniform concrete surface. It helps in controlling the placement and shape of the concrete, ensuring consistent results. With the formwork securely in place, you’re now ready to move on to the next step: adding the gravel base.
Read more: How To Pour Concrete Countertops In Place
Step 4: Adding Gravel Base
The gravel base is an essential component of your concrete landing pad. It provides stability, drainage, and helps prevent the concrete from settling. Follow these steps to properly add the gravel base:
- Clean the excavation area: Remove any debris or loose soil from the excavation area to create a clean surface for the gravel.
- Install landscaping fabric (optional): Consider laying down a layer of landscaping fabric to prevent weed growth and improve the long-term stability of the landing pad.
- Add the first layer of gravel: Start by adding a layer of compacted gravel to the excavation area. Use a shovel or wheelbarrow to distribute the gravel evenly, ensuring that it covers the entire area.
- Compact the gravel: Use a compactor or tamper to compact the gravel layer. This will help create a solid and stable base for the concrete. Pay attention to any low spots and add more gravel as needed.
- Add the second layer of gravel: Once the first layer is compacted, add a second layer of gravel. This layer should be slightly thicker than the desired thickness of the landing pad, allowing for compaction and settling.
- Compact the second layer: Again, use a compactor or tamper to compact the second layer of gravel. This will help ensure a firm and even base for the concrete.
- Check for levelness: Use a level and straightedge to check for any low or high spots in the gravel base. Make adjustments as necessary to achieve a level surface.
The gravel base provides a solid foundation and promotes proper drainage, which is crucial for the longevity and stability of your concrete landing pad. With the gravel base in place, you’re now ready to move on to the next step: laying the reinforcement mesh.
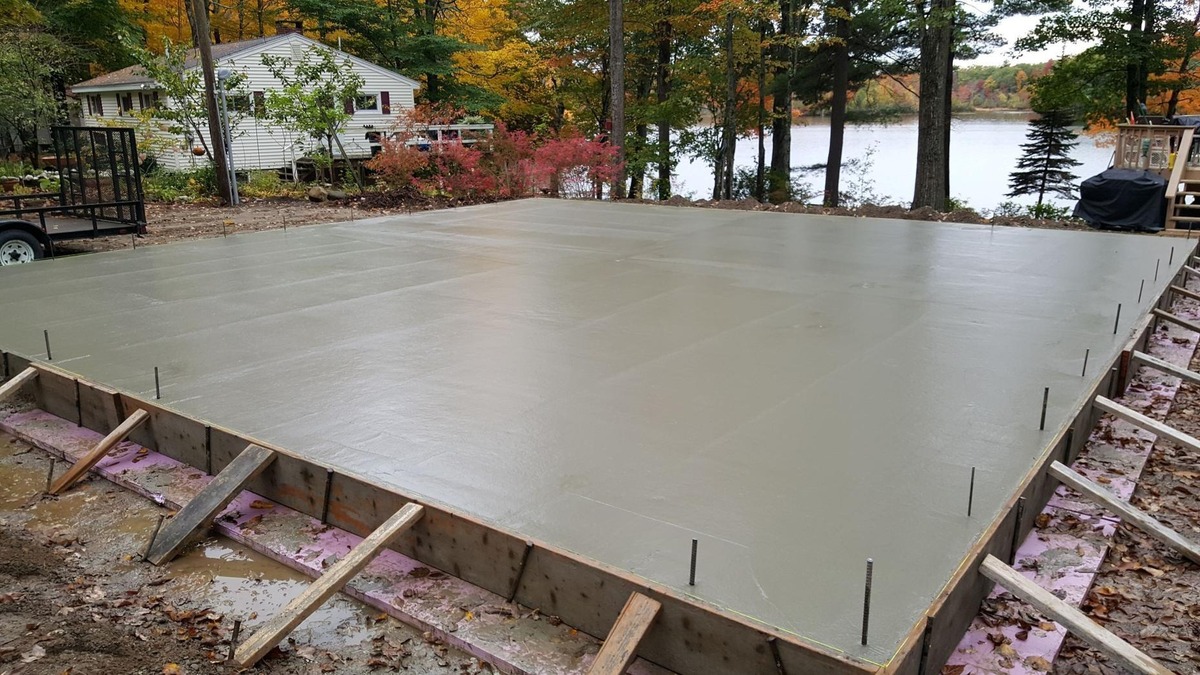
When pouring concrete for a landing pad, make sure to properly level the area and use a sturdy form to contain the concrete. This will ensure a smooth and even surface for your patio or sidewalk.
Step 5: Laying Reinforcement Mesh
Laying reinforcement mesh is an important step in ensuring the strength and durability of your concrete landing pad. The mesh helps to distribute the load and prevents cracking and shifting. Follow these steps to properly lay the reinforcement mesh:
- Measure and cut the reinforcement mesh: Measure the dimensions of your landing pad and cut the reinforcement mesh to fit within the formwork. It should cover the entire area, overlapping if necessary.
- Place the mesh inside the formwork: Carefully position the reinforcement mesh on top of the gravel base, ensuring that it is evenly spread and lies flat. Avoid any wrinkles or folds in the mesh.
- Elevate the mesh (optional): To create a stronger bond between the concrete and the reinforcement mesh, consider elevating the mesh slightly by placing small blocks or spacers underneath in a grid pattern.
- Secure the mesh (optional): If desired, secure the reinforcement mesh to the formwork using wire ties or stakes. This will help keep the mesh in place during the concrete pouring process.
The reinforcement mesh adds structural integrity to the concrete, reducing the risk of cracking and improving its overall strength. With the reinforcement mesh properly laid, you’re now ready to move on to the next step: mixing and pouring the concrete.
Step 6: Mixing and Pouring Concrete
Mixing and pouring the concrete is a critical step in the construction of your landing pad. It’s important to carefully follow the instructions on the concrete mix packaging to ensure proper consistency and strength. Follow these steps to mix and pour the concrete:
- Prepare the concrete mix: In a wheelbarrow or mixing container, combine the concrete mix with water according to the manufacturer’s instructions. Use a shovel or mixer to thoroughly mix the ingredients until you achieve a smooth and workable consistency.
- Start pouring the concrete: With the help of a partner, begin pouring the concrete onto the prepared area. Work systematically to ensure even distribution and complete coverage.
- Level and spread the concrete: Use a screed board or straight edge to level and spread the concrete across the formwork. Move the board in a back-and-forth motion to create a smooth and even surface. Fill any low spots and remove excess concrete as needed.
- Trowel the surface: Once the concrete is spread, use a trowel to smooth and finish the surface. Work from one end to the other, applying light pressure to create a uniform appearance. Feather the edges of the pad to create a seamless transition.
- Remove air bubbles: To remove any air bubbles trapped in the concrete, gently tap the formwork with a rubber mallet. This will help prevent voids and improve the integrity of the finished pad.
It’s important to work efficiently during the pouring process to ensure that the concrete doesn’t start to set before you’re finished. Plan accordingly and have all your tools and materials ready beforehand. With the concrete poured and finished, you’re now ready to move on to the next step: finishing the surface.
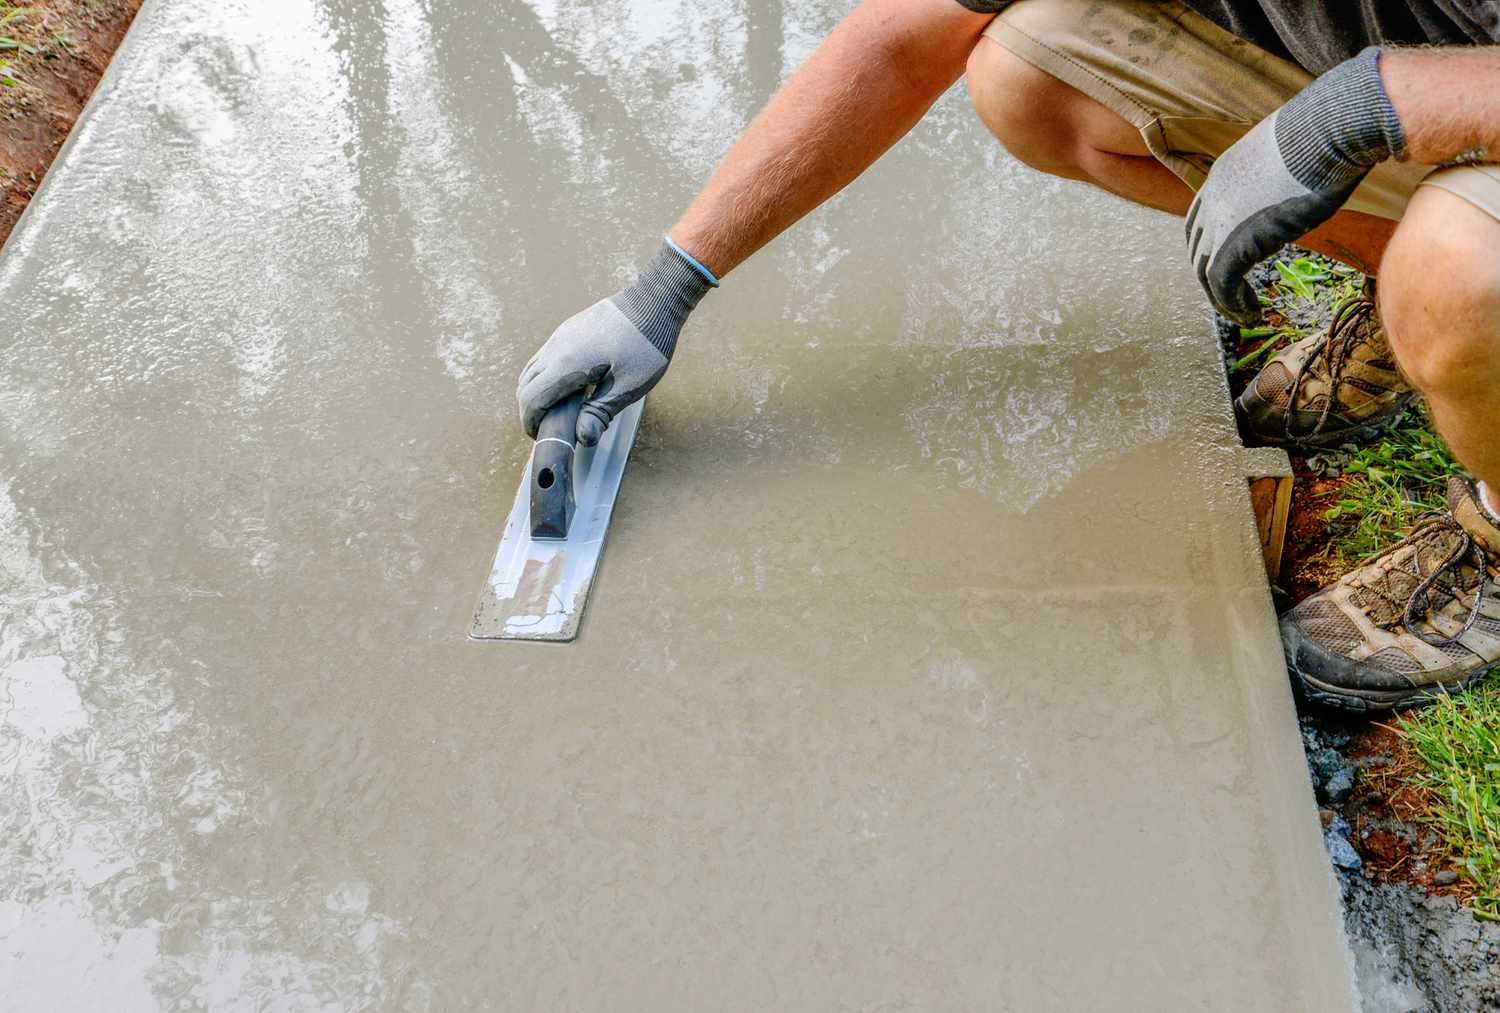
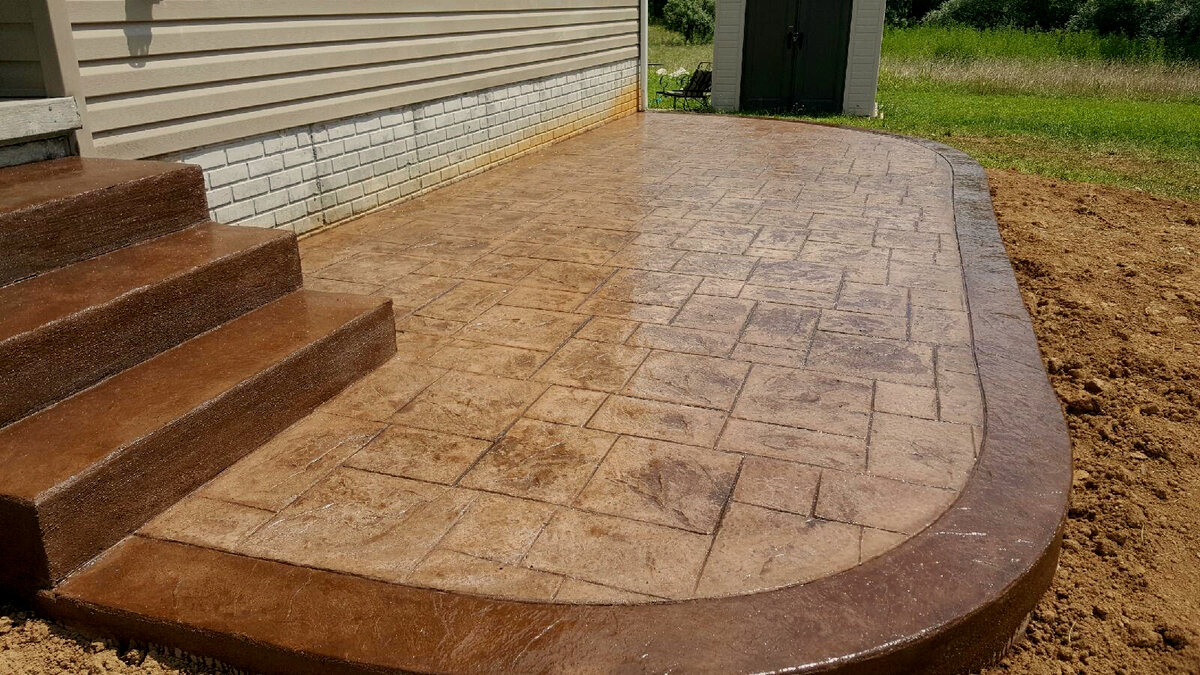
Step 7: Finishing the Surface
Finishing the surface of your concrete landing pad is crucial for achieving a smooth, visually appealing, and durable surface. The finishing process involves several steps to create the desired texture and finish. Follow these steps to properly finish the surface:
- Use a concrete float: After the concrete has been poured, use a concrete float to smooth and level the surface. Move the float in a circular or back-and-forth motion to eliminate any imperfections and create a uniform appearance.
- Edging the pad: To create a neat and professional-looking edge, use a concrete edger tool to round the corners and edges of the landing pad. This will also help prevent chipping and provide a finished look.
- Control joint placement: Consider adding control joints to the surface of the landing pad. These joints allow for natural expansion and contraction of the concrete and help prevent cracks. Use a masonry jointing tool or a straight edge to create clean, shallow grooves.
- Smooth the surface with a trowel: Use a trowel to further smooth the surface of the concrete. Move the trowel in circular or figure-eight motions to remove any remaining imperfections and achieve a smooth finish.
- Apply a curing compound: To promote proper curing and prevent premature drying, apply a concrete curing compound according to the manufacturer’s instructions. This will help strengthen the concrete and protect it from cracking.
Properly finishing the surface of your landing pad is essential for its longevity and visual appeal. Take your time during this step to ensure a high-quality finish. With the surface finished, you’re now ready for the final step: curing and drying.
Read more: How To Pour A Concrete Slab For A Shed
Step 8: Curing and Drying
Curing and drying your concrete landing pad is the final step in the construction process. Curing allows the concrete to achieve maximum strength and durability, while drying ensures that the surface is ready for use. Follow these steps to properly cure and dry your landing pad:
- Cover the concrete: After the finishing process, cover the landing pad with plastic sheeting or a curing compound to prevent moisture loss. This is important to ensure proper hydration and strength development in the concrete.
- Keep the concrete moist: For the next several days, keep the concrete moist by regularly spraying it with water or using a garden hose. This will help prevent rapid drying and cracking. Avoid excessive water that can cause pooling or erosion.
- Protect the surface: Place signs or barricades around the landing pad to prevent accidental traffic or use during the curing period. It’s important to allow the concrete sufficient time to cure and gain strength before subjecting it to heavy loads or foot traffic.
- Monitor the drying process: The drying time will depend on various factors, including weather conditions and the concrete mix used. Allow the concrete to dry naturally and avoid applying any coatings or sealants until it is fully dry.
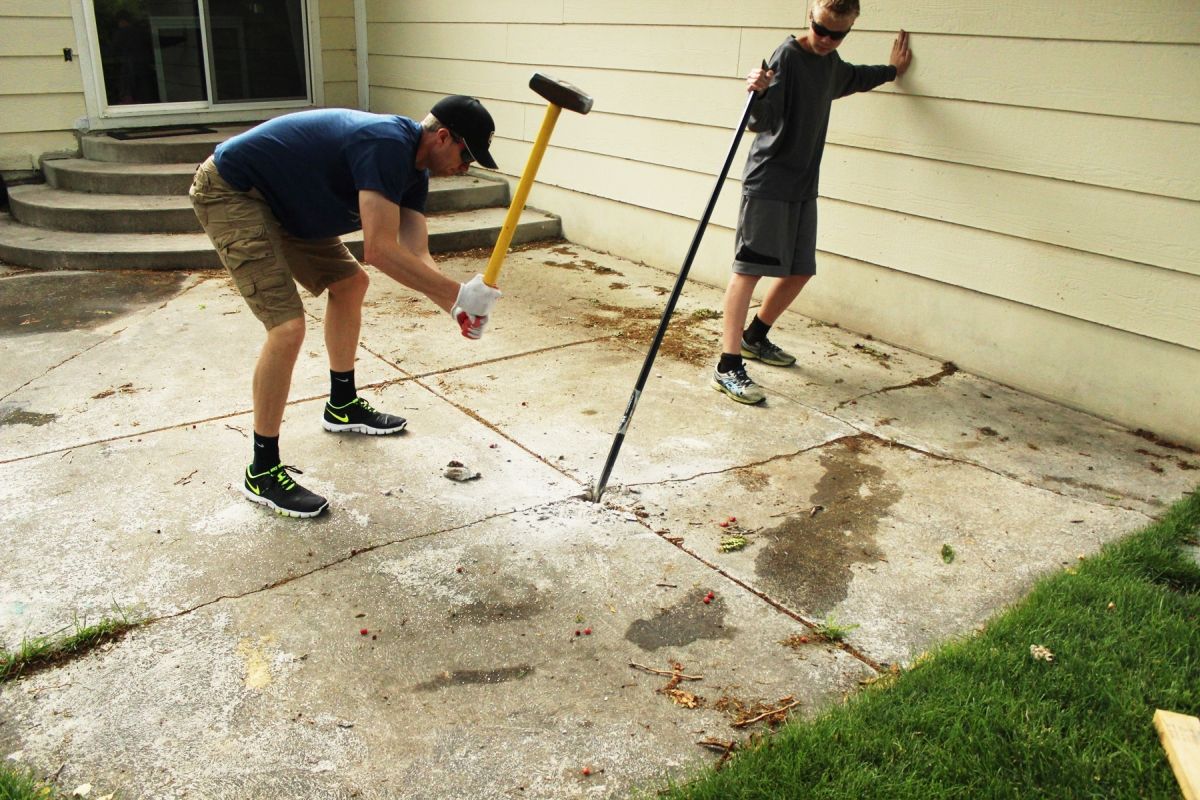
- Inspect for cracks or damage: After the curing and drying process, carefully inspect the landing pad for any cracks or damage. If small cracks appear, fill them with a concrete crack filler specifically designed for this purpose.
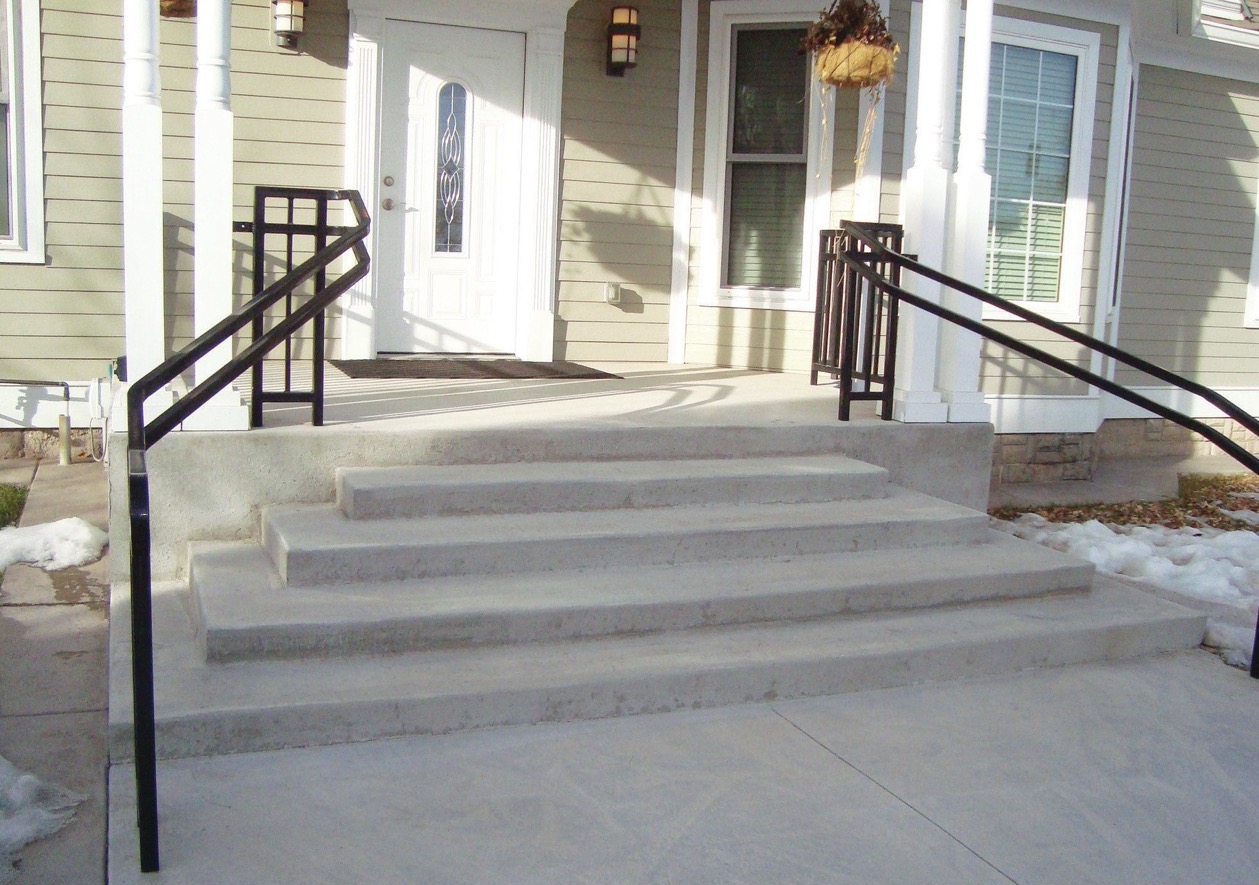
Proper curing and drying are essential for achieving a strong and long-lasting concrete landing pad. It’s important to be patient during this phase and allow sufficient time for the concrete to fully cure and dry before using the pad. With the curing and drying complete, you can now enjoy your beautiful and functional concrete landing pad!
Conclusion
Congratulations! You’ve successfully completed the process of pouring a concrete landing pad for your patio or sidewalk. By following the step-by-step instructions outlined in this guide, you have created a durable, functional, and visually appealing addition to your outdoor space.
From careful site preparation to proper mixing and pouring of the concrete, each step plays a crucial role in ensuring the longevity and quality of your landing pad. By investing time and effort into this DIY project, you have not only saved money but also added value to your property.
Remember, working with concrete requires patience and attention to detail. Take the time to properly prepare the site, install the formwork, and compact the gravel base. By applying the right techniques and using the correct materials, you have created a strong and stable foundation for your landing pad.
During the finishing process, pay attention to smoothing the surface, creating clean edges, and adding control joints. These small details contribute to the overall appearance and durability of the landing pad.
Lastly, the curing and drying phase is crucial for achieving maximum strength and resilience. Allow sufficient time for the concrete to cure and dry before subjecting it to heavy use.
With your concrete landing pad complete, you can now enjoy a functional and beautiful outdoor space. Whether it’s providing a place to relax, creating a smooth transition between sections of your yard, or adding value to your property, your new landing pad will serve you well for years to come.
Remember to maintain your concrete landing pad by regularly cleaning it and inspecting for any signs of damage. With proper care and maintenance, you can ensure its longevity and continue to enjoy its benefits for a long time.
Thank you for following this guide, and we hope you find great satisfaction and enjoyment in your newly poured concrete landing pad!
Frequently Asked Questions about How To Pour A Concrete Landing Pad For Your Patio Or Sidewalk
Was this page helpful?
At Storables.com, we guarantee accurate and reliable information. Our content, validated by Expert Board Contributors, is crafted following stringent Editorial Policies. We're committed to providing you with well-researched, expert-backed insights for all your informational needs.


0 thoughts on “How To Pour A Concrete Landing Pad For Your Patio Or Sidewalk”