Articles
How To Run A Cable Under A Carpet
Modified: October 28, 2024
Learn how to run a cable under a carpet with our informative articles. Discover step-by-step instructions and tips for a seamless installation.
(Many of the links in this article redirect to a specific reviewed product. Your purchase of these products through affiliate links helps to generate commission for Storables.com, at no extra cost. Learn more)
Introduction
Running a cable under a carpet can be a challenging task, but it’s essential for maintaining a neat and organized living space. Whether you want to hide cables for a home theater system, set up a computer workstation, or install network wiring, running cables under the carpet can give your space a clean and clutter-free appearance.
In this article, we will guide you through the step-by-step process of running a cable under a carpet while ensuring safety and avoiding damage to both the cable and the carpet itself. With proper preparation and the right tools, you can complete this task with ease and enjoy a seamless installation.
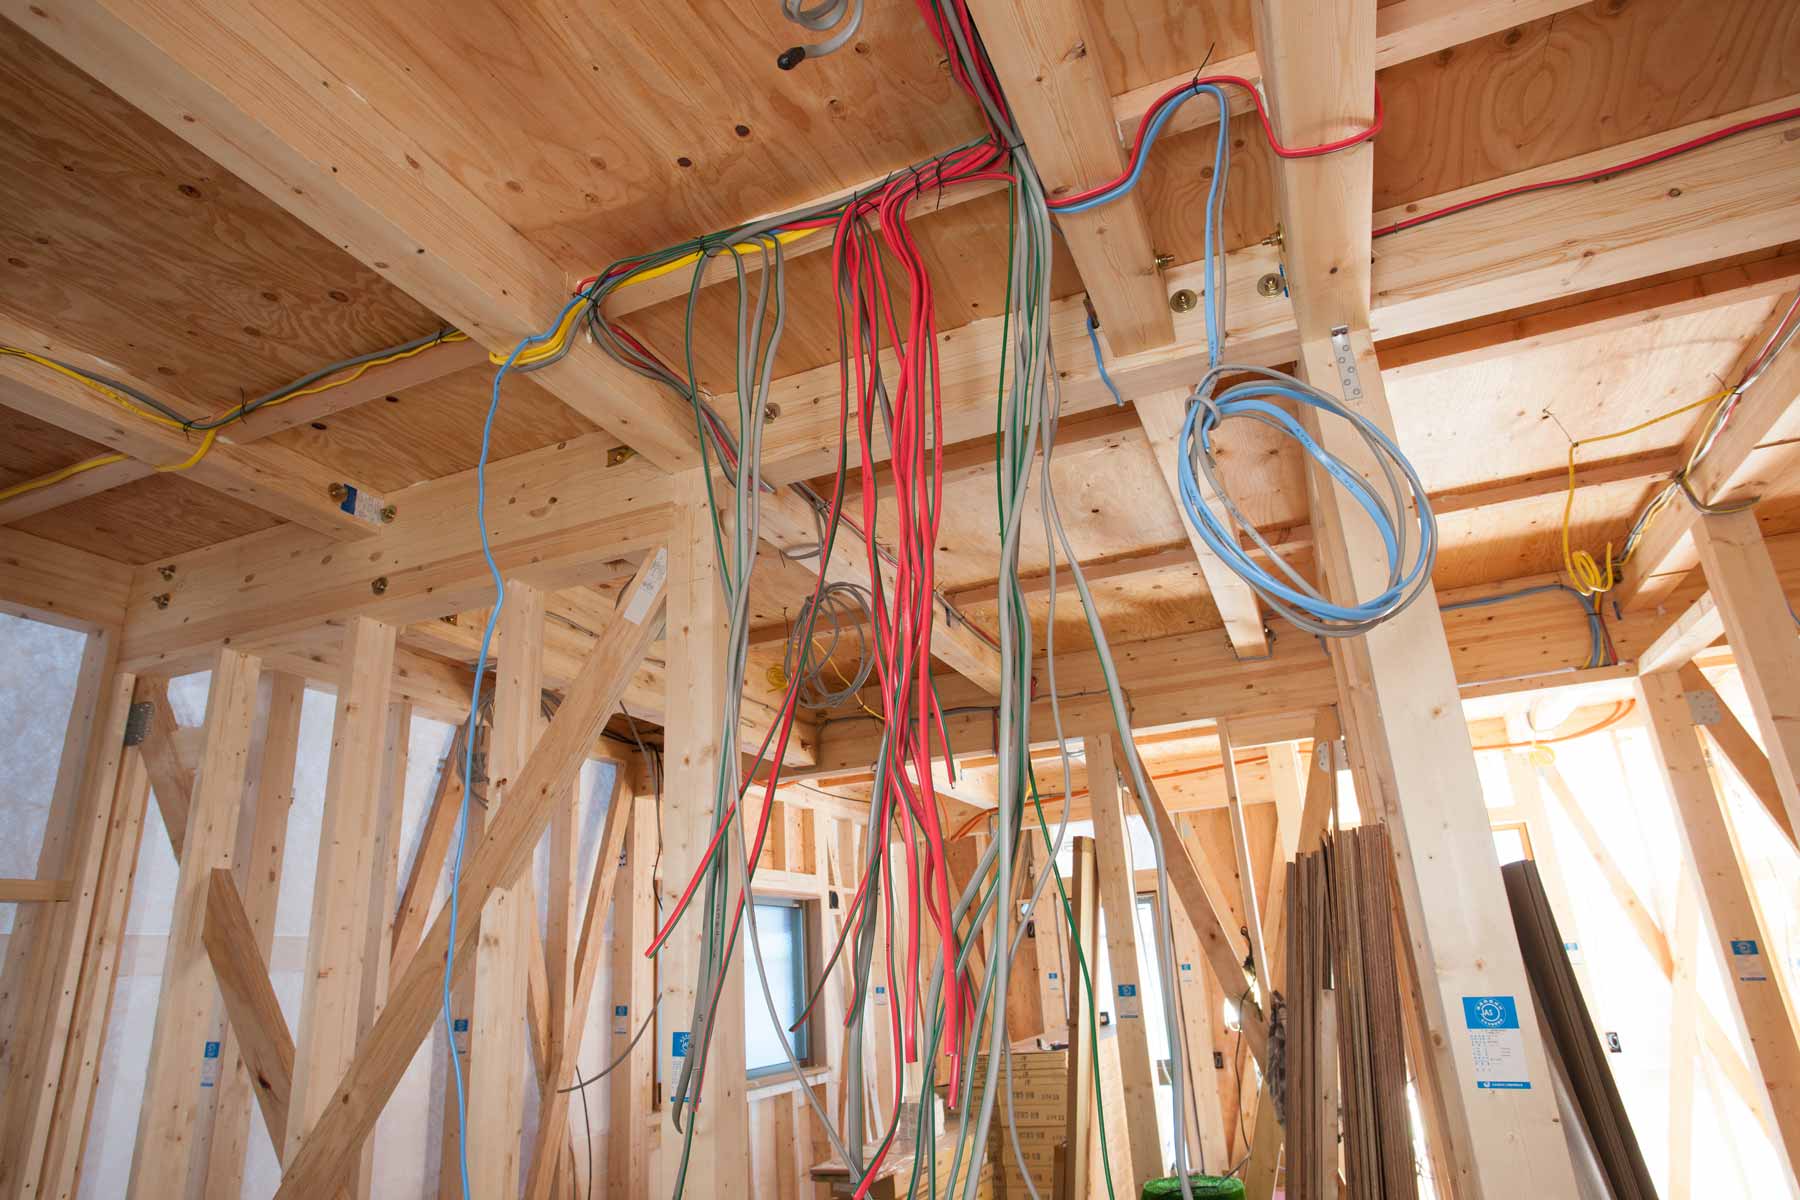
Before you begin, it’s important to note that running cables under a carpet should only be done for low-voltage applications. These can include audio and video cables, network cables, and low-voltage power cables. It is not advisable to run high-voltage electrical cables, such as those used for appliances, under a carpet as it can pose a fire hazard and is against building codes in many areas.
Now that we’ve covered the basics, let’s dive into the preparation and materials needed for running a cable under a carpet.
Key Takeaways:
- Running a cable under a carpet requires careful planning, precise execution, and attention to detail. By following the step-by-step process and utilizing the right tools, you can achieve a clean and clutter-free living space with a hidden cable installation.
- Prioritizing safety, testing the cable’s functionality, and reinstalling the carpet are crucial steps in the process. With patience and the right approach, you can successfully run a cable under a carpet, enhancing the aesthetics and functionality of your space.
Read more: How To Run Electrical Wire On Concrete Wall
Preparation
Before you start running a cable under a carpet, there are a few things you need to consider and prepare. This preparation will ensure a smoother installation process and minimize the chances of damaging the cable or your carpet.
The first step in preparing for running a cable under a carpet is to identify the specific area where you want the cable to run. Take measurements and determine the length of cable you will need so that you can plan accordingly.
Next, assess the condition of your carpet. If your carpet is old, worn out, or delicate, it is recommended to avoid running cables underneath as it may cause damage. If you have any doubts about the condition of your carpet, consult a professional before proceeding.
Additionally, it’s important to consider the type of cable you will be running. Different cables have different thicknesses and connectors, so make sure the cable you choose is suitable for the intended purpose. It’s also a good idea to check the maximum length of the cable and any specific installation requirements provided by the manufacturer.
Another crucial aspect of preparation is clearing the path for the cable. Remove any obstacles such as furniture or other items that may obstruct the cable’s route. Clearing the path will make the installation process much easier and more efficient.
Lastly, gather all the necessary tools and materials. This may include a cable management system, such as adhesive cable clips or cable raceways, to keep the cable in place and organized. You may also need a utility knife or scissors to lift the carpet, as well as tape or a staple gun to secure the cable once it’s in place.
Once you have completed the necessary preparation steps, you are ready to start running the cable under the carpet. In the following sections, we will guide you through the step-by-step process. Remember to take your time and be cautious to avoid any damage to the cable or carpet.
Materials Needed
To successfully run a cable under a carpet, you will need a few essential tools and materials. Having these items on hand before you start the installation process will ensure a smoother and more efficient job. Here are the materials you will need:
- Cable: Select the appropriate type and length of cable for your specific needs.
- Cable management system: This can include adhesive cable clips, cable raceways, or any other cable management solution that will keep the cable in place and organized.
- Utility knife or scissors: These will be used to lift the carpet and create a channel for the cable.
- Tape or staple gun: You will need tape or a staple gun to secure the cable in place once it is laid under the carpet.
- Electrical tape: This can be used to secure and insulate any connections or splices in the cable.
- Flashlight: It’s always helpful to have a flashlight on hand to illuminate the area under the carpet, especially if it is a dimly lit space.
These materials should be easily accessible at most hardware or home improvement stores. Before purchasing the cable, make sure to consult with a professional or do thorough research to ensure you are selecting the right type and length for your specific application.
It is essential to use caution when handling tools and equipment during the installation process. Take your time and be mindful of any sharp blades or potential hazards to avoid accidents or injuries.
With the necessary tools and materials gathered, you are now ready to move on to the step-by-step process of running a cable under a carpet. The following sections will guide you through each step, ensuring a successful installation while maintaining the integrity of your carpet.
Step 1: Assess the Area
The first step in running a cable under a carpet is to assess the area where you intend to install the cable. This assessment will help you plan the route and determine the best course of action for hiding the cable.
Start by identifying the exact locations where you want the cable to run. Take measurements and note the distances between these points. This will help you determine the length of cable you will need for the installation.
Take a close look at the carpet itself. Check for any damages, loose threads, or uneven areas that may need attention before you proceed. It’s important to ensure that the carpet is in good condition and can withstand the cable installation process without suffering any further damage.
Consider the accessibility of the area beneath the carpet. Determine if there are any obstacles, such as furniture or heavy objects, that might hinder the cable installation. If possible, move or temporarily remove these obstacles to make the process easier.
Also, assess the potential risks and hazards in the area. Look for any electrical outlets, ventilation ducts, or other areas where the cable may interfere or pose a safety risk. It’s crucial to avoid running the cable near high-voltage electrical cables or areas that generate heat.
During the assessment, consider the aesthetics of the space. Think about how you can strategically hide the cable to maintain a clean and organized appearance. Look for areas where the cable can align with existing wall edges, baseboards, or furniture to minimize its visibility.
By thoroughly assessing the area, you will have a clear understanding of the space and be better equipped to plan the route and execute a successful cable installation. With this knowledge, you can move on to the next step of clearing the path for the cable.
Step 2: Clear the Path
Once you have assessed the area and planned the route for the cable, the next step is to clear the path. This involves removing any obstacles and ensuring a smooth and obstruction-free path for the cable to be installed under the carpet.
Start by removing any furniture or heavy objects that may be in the way of the cable’s route. This includes chairs, tables, and other items that could obstruct the installation process. Clearing the path will make it easier to maneuver and lay the cable smoothly.
If there are any loose cables or wires in the area, take the time to organize and secure them. Bundling and fastening these cables with zip ties or cable clips will prevent them from tangling and getting in the way during the installation process.
Inspect the floor beneath the carpet for any sharp objects or debris that could potentially damage the cable or the carpet itself. Remove any nails, staples, or other sharp objects that may pose a risk. Vacuum or sweep the area to ensure it is clean and clear of any dirt or debris.
For safety purposes, check the surrounding area for potential hazards, such as tripping hazards or loose floor coverings. Repair or secure any loose tiles or floorboards to ensure a stable and safe environment.
Clearing the path is important not only for the smooth installation of the cable but also for the safety and durability of both the cable and the carpet. Taking the time to remove obstacles and ensure a clean and secure environment will minimize the risk of any potential damage during the installation process.
With the path cleared, you are now ready to move on to the next step – planning the route for the cable under the carpet.
Read more: How To Run Conduit Under Sidewalk
Step 3: Plan the Route
In step three of running a cable under a carpet, you will need to plan the route that the cable will follow. This involves determining the most efficient and discreet path for the cable to be hidden beneath the carpet.
Start by visualizing the desired location where the cable will start and end. Consider the positions of the devices or outlets that the cable will connect to. Measure the distance between these points to determine the length of cable needed.
Next, examine the area under the carpet and identify any existing channels or gaps that can be utilized for routing the cable. These can be areas where the carpet meets the wall, baseboards, or gaps in the flooring. Choosing these existing routes will help in minimizing the visibility of the cable.
If there are no natural paths available, you may need to create a new route. Take into consideration the aesthetic impact of the new route and how it will blend with the surroundings. Look for inconspicuous areas such as corners or along the edges of furniture to keep the cable as hidden as possible.
Keep in mind any potential obstacles or hazards that may be present along the planned route, such as electrical outlets, heating vents, or doors. Make sure the cable avoids these obstacles or is safely routed around them.
When planning the route, consider the flexibility and bending radius of the cable you are using. Some cables are more flexible than others, allowing for easier installation in tight or confined spaces. Be mindful of the capabilities and limitations of the cable to ensure a smooth and hassle-free installation.
By carefully planning the route, you will have a roadmap for the cable installation process. This will help you work efficiently and with precision, ensuring a seamless and professional-looking result. With the route planned, you can move on to gathering the necessary tools and materials for the installation process.
Step 4: Gather Tools and Materials
In step four of running a cable under a carpet, it’s time to gather the necessary tools and materials for the installation process. Having the right equipment at hand will help ensure a smooth and successful cable installation.
Here is a list of tools and materials you will need:
- Utility knife or scissors: You will need these to lift the carpet and create a channel for the cable to pass through.
- Tape or staple gun: You will use these to secure the cable in place once it is laid under the carpet.
- Cable: Select the appropriate type and length of cable for your specific needs.
- Cable management system: This can include adhesive cable clips, cable raceways, or any other cable management solution that will keep the cable organized and secure.
- Flashlight: Having a flashlight on hand will be helpful, especially if the area under the carpet is dimly lit.
- Electrical tape: This can be used to secure and insulate any connections or splices in the cable.
Ensure that the utility knife or scissors are sharp, as they will be used to cut through the carpet fibers and create the channel for the cable. The tape or staple gun should be in good working condition and have enough tape or staples to secure the cable properly.
Make sure you have selected the appropriate type and length of cable for your specific application. Consider the voltage and data requirements, as well as any specific installation instructions provided by the cable manufacturer.
Additionally, have the cable management system ready to keep the cable organized and secure. This can include adhesive cable clips, which will hold the cable in place along its route, or cable raceways that can conceal and protect the cable while providing a clean and organized appearance.
Having a reliable flashlight will help you see clearly under the carpet and ensure accurate installation. Finally, keep electrical tape on hand to secure and insulate any connection points or splices in the cable.
With the necessary tools and materials gathered, you are now ready to move on to step five – lifting up the carpet and creating a channel for the cable. Ensure that you have a clear working space and the necessary safety precautions in place. Let’s proceed with the installation process!
Before running a cable under a carpet, make sure to use a cable protector to prevent damage to the cable and ensure it lays flat to avoid creating a tripping hazard.
Step 5: Lift Up the Carpet
In step five of running a cable under a carpet, you will need to lift up the carpet to create a channel for the cable. This will allow you to neatly conceal the cable beneath the carpet fibers without causing any damage.
Start by locating the starting point of the cable route, as determined in the previous steps. Clear the area of any furniture or objects that may obstruct the lifting process. If there are any seams or edges in the carpet, begin lifting from there to make the process easier.
Carefully insert a flat-edged tool, such as a utility knife or scissors, under the edge of the carpet. Gently lift the carpet to create a gap between the carpet and the floor. Be cautious not to apply too much force or pull too hard, as this may stretch or damage the carpet.
Once you have created a gap, use your hands to lift the carpet further, gradually working along the planned route. Keep in mind that the aim is to create enough space to accommodate both the cable and the cable management solution, if applicable.
If you encounter any resistance or find the carpet difficult to lift, do not force it. Check for any tacks or staples that may be securing the carpet to the floor. Use a pair of pliers or a staple remover to carefully remove these fastenings, ensuring not to damage the carpet or the floor underneath.
As you lift the carpet, be mindful of its alignment and avoid folding or creasing it. Take your time to create a smooth and even channel that will allow for easy placement of the cable. If necessary, use your hands to gently flatten out any wrinkles or creases.
While lifting the carpet, keep a flashlight on hand to illuminate the area below. This will help you see any potential obstacles, such as floor vents or electrical wires, and navigate around them effectively.
In this step, the goal is to create a clear and accessible space beneath the carpet for routing the cable. Take care during the lifting process to prevent any damage to the carpet or yourself. Once you have successfully lifted the carpet, you are ready to move on to step six – creating a channel for the cable.
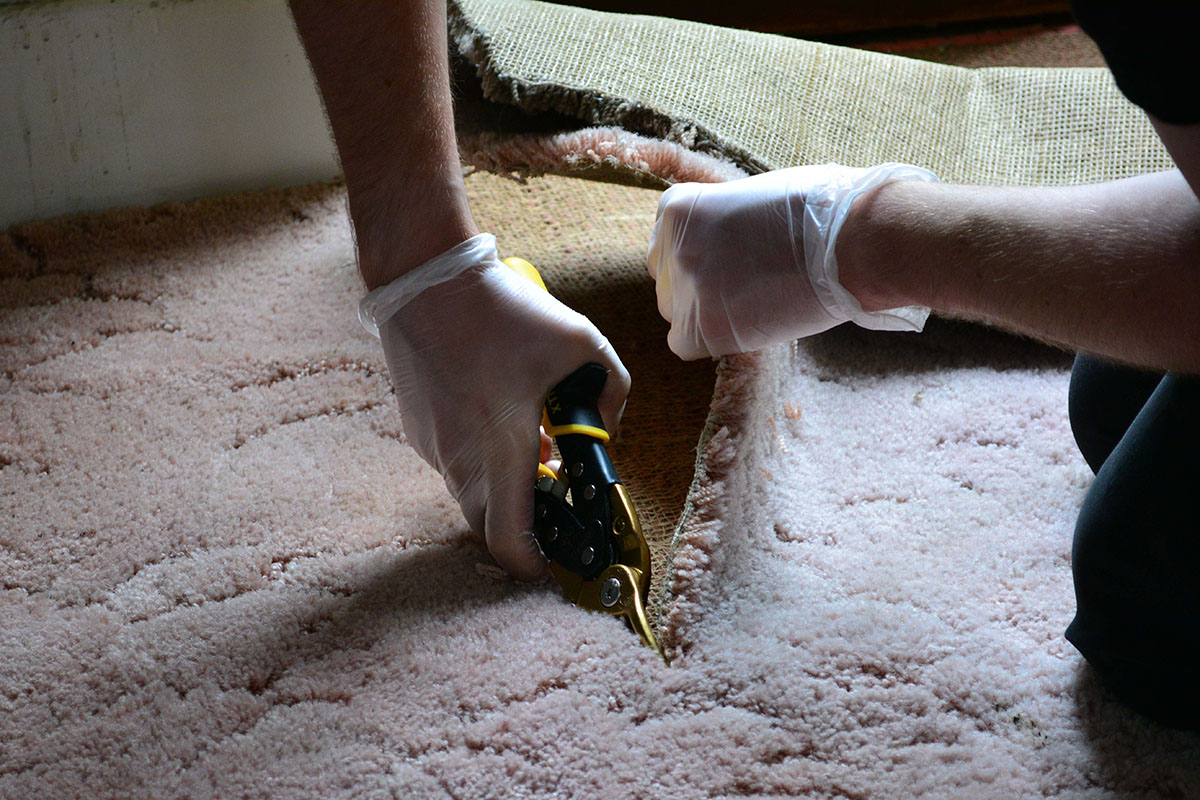
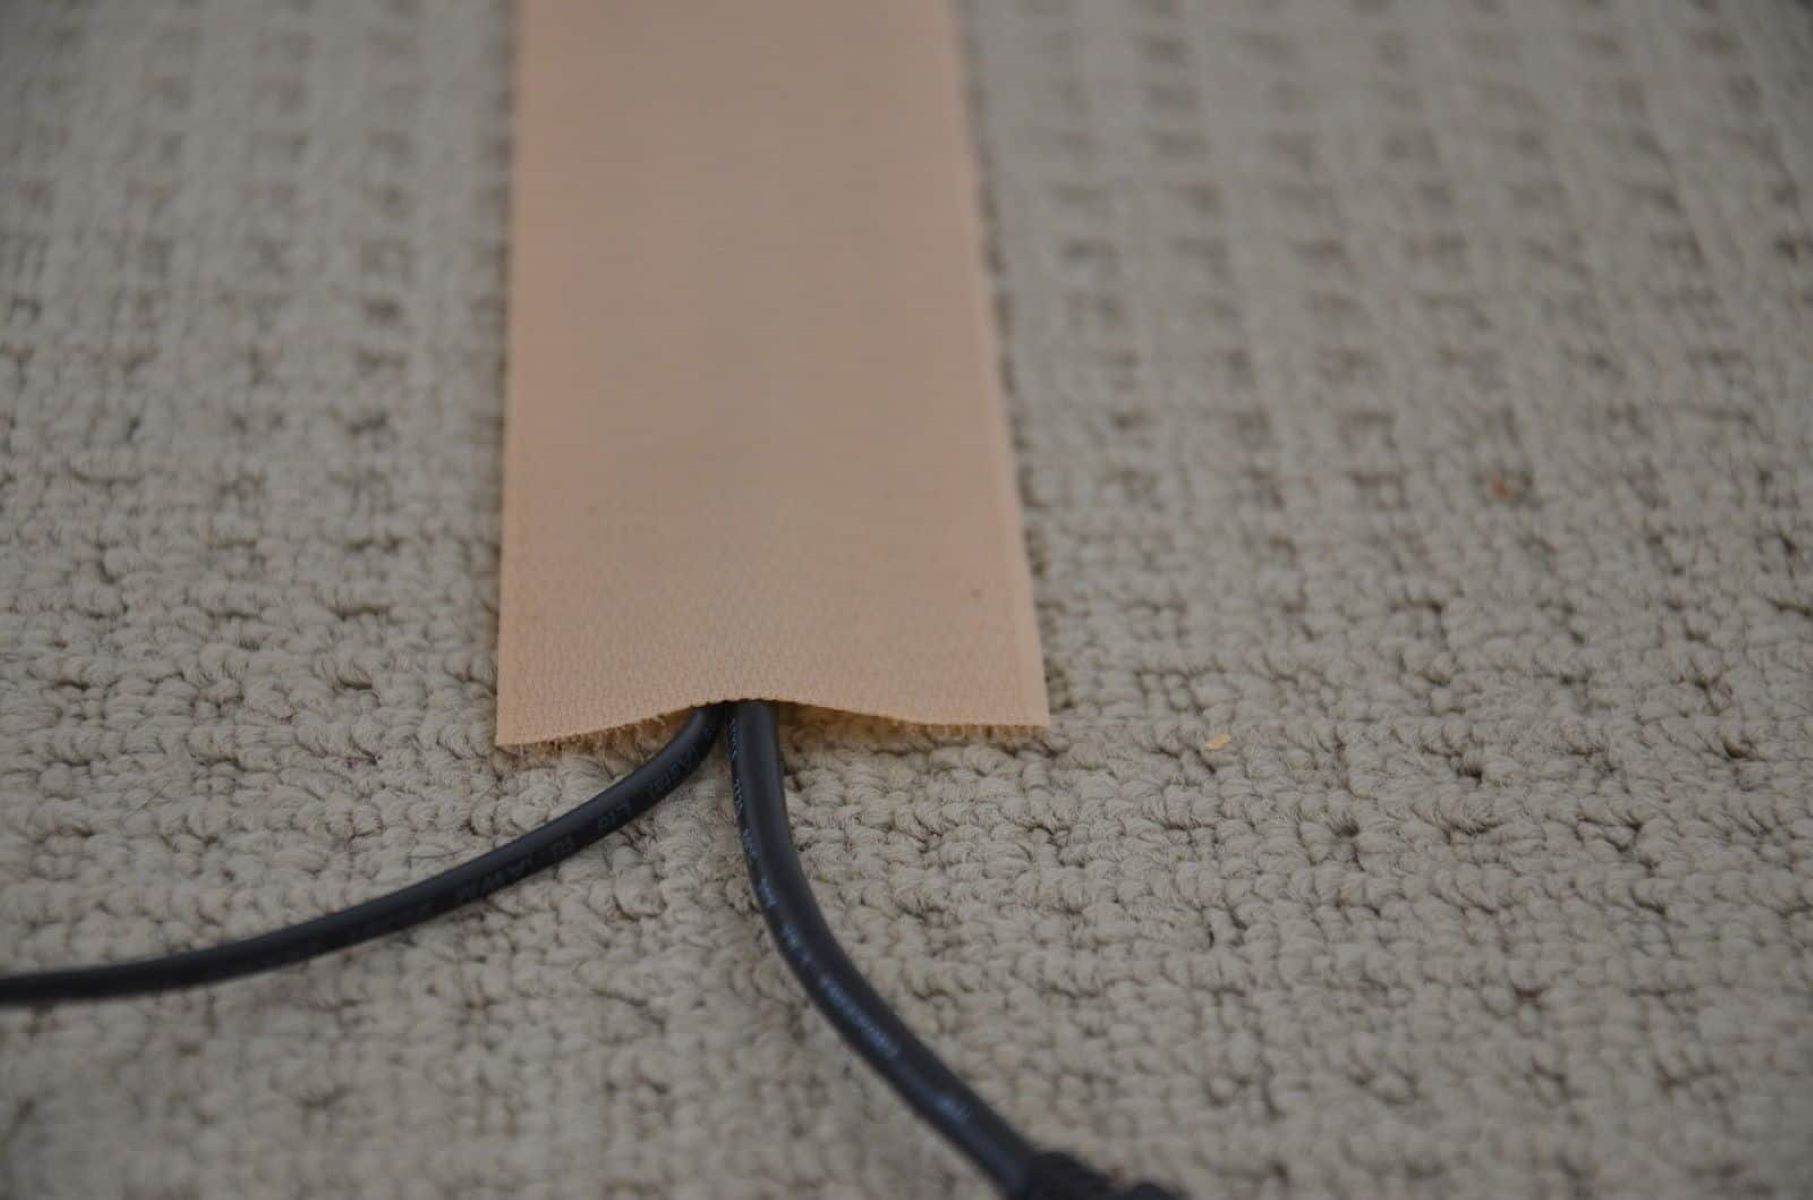
Step 6: Create a Channel
In step six of running a cable under a carpet, you will create a channel for the cable within the gap you’ve created by lifting up the carpet. This channel will provide a secure path for the cable to run through, keeping it hidden and protected.
Start by inspecting the gap beneath the carpet to ensure it is wide enough to accommodate the cable. If needed, gently widen the gap by spreading the carpet fibers apart with your fingers or by using a flat-edged tool.
Take your utility knife or scissors and carefully make a slit or cut along the length of the channel. The cut should be shallow, penetrating only the carpet backing or padding, but not the floor underneath. Make sure to keep the cut straight and neat to ensure a tidy cable installation.
If your cable is thicker or has a bulky connector, you may need to make a slightly larger cut to accommodate it comfortably. Be cautious not to make the slit too wide, as this can affect the integrity of the carpet or create an unsightly gap.
As you create the channel, it’s essential to maintain a consistent depth throughout. Avoid cutting too deeply into the padding or floor underneath, as this may result in an uneven surface or damage to the underlying structure.
Once you have created the channel, check it to ensure it is smooth and free of any obstructions or sharp edges. Take this opportunity to remove any loose threads or debris that may have accumulated during the cutting process.
If you are using a cable management system, such as adhesive cable clips or raceways, attach them to the floor or the wall along the channel. These will help secure the cable in place and maintain a clean and organized appearance.
Creating a channel is a crucial step in the cable installation process as it provides a suitable pathway for the cable, keeping it protected and hidden beneath the carpet. Once you have successfully created the channel, you are ready to move on to step seven – laying the cable within the channel.
Read more: What Electrical Wire To Run Underground
Step 7: Lay the Cable
In step seven of running a cable under a carpet, you will lay the cable within the channel you created. This process will involve carefully positioning the cable along the designated route, ensuring it remains hidden and secure.
Begin by gathering the cable you will be installing and gently feed it into the channel. Take care to avoid any twists or kinks in the cable as you lay it. Slowly guide the cable along the route, paying attention to the original plan you established in earlier steps.
If the cable is longer than the channel, coil the excess cable and place it neatly within the channel. Avoid overstuffing the channel, as this may cause the carpet to become uneven or elevated in that area.
As you lay the cable, be mindful of any obstacles or corners along the route that may require extra attention. If necessary, use your hands or a tool to carefully tuck the cable into place, ensuring it remains hidden beneath the carpet.
If you are using a cable management system, such as adhesive cable clips or raceways, use them to secure the cable along the channel. This will help keep the cable in place and prevent it from shifting or becoming visible.
While laying the cable, periodically check the channel and adjust as needed to ensure the cable is positioned correctly and uniformly. Take your time to achieve a clean and organized installation.
Once the cable is laid, gently press down on the carpet along the channel to help secure it in place. Be careful not to press too hard, as this can create unevenness or damage the carpet fibers.
After laying the cable, take a moment to check the surrounding area for any visible signs of the cable. Adjust as necessary to ensure a seamless and inconspicuous installation.
By successfully laying the cable within the channel, you have completed an essential step in running a cable under a carpet. Now you can move on to step eight – securing the cable along the route.
Step 8: Secure the Cable
In step eight of running a cable under a carpet, you will secure the cable along the route to ensure it remains in place and hidden beneath the carpet. Properly securing the cable will minimize the chances of it shifting or becoming visible over time.
Start by checking the cable along the route to ensure it is positioned correctly and neatly within the channel. Make any necessary adjustments to avoid any gaps or twists in the cable.
If you are using a cable management system, such as adhesive cable clips or raceways, now is the time to affix them to the floor or wall, according to the manufacturer’s instructions. Secure the cable within the cable management system, ensuring it is held firmly in place.
If you are not using a cable management system, you can use tape or a staple gun to secure the cable. Carefully place tape or staples along the length of the channel, attaching the cable to the floor or the carpet padding. Be cautious not to damage the cable or the carpet fibers when using staples.
Consider the location of the cable and the foot traffic in the area. Ensure that it is not placed in a spot that will be frequently stepped on or where furniture may easily shift and put pressure on the cable. Avoid placing any heavy objects directly on top of the cable to prevent damage.
For added protection and organization, use electrical tape to secure and insulate any connections or splices in the cable. This will ensure a clean and secure installation, reducing the risk of any potential signal loss or damage to the cable.
Check the entire length of the cable route to confirm that the cable is securely fastened and properly hidden. Adjust as necessary to ensure a neat and professional-looking installation.
Once the cable is securely in place, gently press down on the carpet along the entire length of the channel to ensure it lies flat and even. This will help maintain the overall appearance of the carpet and ensure the cable remains hidden.
By securing the cable, you have completed a crucial step in running a cable under a carpet. Now you can proceed to step nine – testing and adjusting the cable installation as needed to ensure optimal performance and aesthetics.
Step 9: Test and Adjust
In step nine of running a cable under a carpet, you will test the installed cable to ensure everything is functioning correctly and make any necessary adjustments for optimal performance.
Start by connecting the cable to the appropriate devices or outlets at both ends of the route. Ensure that the connections are secure and that the cable is properly seated in the ports or connectors.
Test the functionality of the cable by turning on the devices or equipment connected to it. Check for proper signal transmission, audio or video quality, and network connectivity, depending on the type of cable you have installed.
If you experience any issues or a lack of signal, first check the cable connections to make sure they are secure. Examine the cable along the route for any kinks, twists, or loose sections that may be hindering the signal or connectivity.
If adjustments are needed, carefully lift the carpet along the affected area and make the necessary modifications. Check for any potential interference, such as nearby electrical cables or appliances, and reroute the cable if needed to minimize interference.
If you need to make changes to the cable route or need additional cable length, use the utility knife or scissors to carefully cut and reposition the cable. Take caution not to damage the carpet or the cable during this adjustment process.
Once adjustments have been made, retest the cable functionality to ensure the issue has been resolved. Continue fine-tuning and adjusting as needed until you achieve the desired performance and functionality.
After the necessary adjustments have been made and the cable is working optimally, carefully press down on the carpet along the entire length of the channel to secure it in place. Ensure a smooth and even appearance while preventing any visible signs of the cable beneath the carpet.
By thoroughly testing and making necessary adjustments, you can ensure a properly functioning cable installation. Now you can move on to the final step – reinstalling the carpet and completing the process of running a cable under a carpet.
Step 10: Reinstall the Carpet
In the final step of running a cable under a carpet, you will reinstall the carpet to bring the installation process to its completion. This step involves carefully placing the carpet back in its original position, ensuring a seamless and tidy finish.
Start by aligning the edges and corners of the carpet with the surrounding areas. Take your time to ensure the carpet is properly positioned and sits flush against adjacent walls or flooring.
Gently press down along the entire length of the channel to secure the carpet in place. Smooth out any wrinkles or uneven areas to maintain an even and visually appealing appearance.
If necessary, use a knee kicker or carpet stretcher to stretch the carpet and remove any excess slack or wrinkles. This will help create a taut and visually appealing carpet surface.
As you reinstall the carpet, pay attention to any seams or edges that may have come loose during the lifting process. Use carpet tape or a strong adhesive to reattach these sections securely.
Ensure that the carpet is evenly distributed and that no areas appear raised or uneven. Walk along the carpet to test its stability and to ensure it stays in place along the channel.
Lastly, inspect the area to ensure there are no visible signs of the cable beneath the carpet. Adjust as needed to achieve a seamless and invisible cable installation.
By reinstalling the carpet, you complete the process of running a cable under a carpet. Take a moment to appreciate your work and the clean and organized appearance you have achieved with a hidden cable installation.
Remember, if you ever need to access or modify the cable in the future, you can follow these steps again to lift the carpet and make the necessary adjustments.
Running a cable under a carpet requires careful planning, attention to detail, and patience. By following these steps, you can successfully hide and secure cables in your living space, creating a clean and clutter-free environment.
Congratulations on completing the process of running a cable under a carpet! Enjoy your beautifully installed cable and the improved aesthetics of your space.
Read more: How To Run Electrical Wire Through Walls
Conclusion
Running a cable under a carpet may seem like a daunting task, but with the right tools, preparation, and careful execution, it can be a manageable project. This comprehensive guide has provided you with step-by-step instructions to successfully run a cable under a carpet while ensuring safety, functionality, and a clean aesthetic.
We started by emphasizing the importance of assessing the area, clearing the path, and planning the route. These initial steps ensure that you have a clear vision and strategy for the cable installation process. By gathering the necessary tools and materials, including cables, cable management systems, utility knives, and tape, you are prepared for a smooth installation.
Lifting the carpet and creating a channel for the cable is a delicate process that requires precision and caution. By following the instructions and avoiding any damage to the carpet or flooring, you can create the perfect pathway for your cable.
Laying and securing the cable along the route is the next crucial step. Whether you choose a cable management system or use tape or staples, the goal is to ensure the cable remains hidden and secure. Testing and adjusting the cable’s functionality allow you to identify and address any issues or interference.
Finally, reinstalling the carpet is the last step in completing the process. With the carpet properly aligned and secured, you can admire the finished result – a cable that is neatly concealed beneath the carpet, leaving your space clean and clutter-free.
Running a cable under a carpet may require time and effort, but it can greatly enhance the aesthetics and functionality of your living space. Remember, always prioritize safety and follow any necessary building codes or regulations in your area.
Congratulations on successfully running a cable under a carpet! Enjoy your organized and visually appealing space, free from the eyesore of exposed cables. Should you need to access or adjust the cable in the future, refer back to this guide for a seamless and hassle-free experience.
Frequently Asked Questions about How To Run A Cable Under A Carpet
Was this page helpful?
At Storables.com, we guarantee accurate and reliable information. Our content, validated by Expert Board Contributors, is crafted following stringent Editorial Policies. We're committed to providing you with well-researched, expert-backed insights for all your informational needs.