Articles
How To Run Ductwork In Basement
Modified: October 19, 2024
Looking for articles on how to run ductwork in your basement? Check out our comprehensive guide to ensure efficient airflow in your home.
(Many of the links in this article redirect to a specific reviewed product. Your purchase of these products through affiliate links helps to generate commission for Storables.com, at no extra cost. Learn more)
Introduction
Welcome to our comprehensive guide on how to run ductwork in the basement. If you are looking to improve the heating and cooling efficiency of your home or planning a basement renovation, ensuring proper airflow through ductwork is essential. By strategically installing ducts in your basement, you can effectively distribute air to different areas of your home, providing comfortable temperatures throughout.
Assessing your basement and planning the layout of the ductwork are critical first steps in this process. Proper planning will help ensure efficient airflow and minimize any potential obstructions or conflicts with existing structures. Once the planning is complete, you will need to gather the necessary tools and materials to begin the installation.
Preparing the basement for the installation is crucial to ensure a seamless process. This will involve clearing the area of any obstacles, securing permits if required, and taking proper safety precautions. With a well-prepared basement, you can confidently move on to installing the main duct runs, which serve as the backbone of the system.
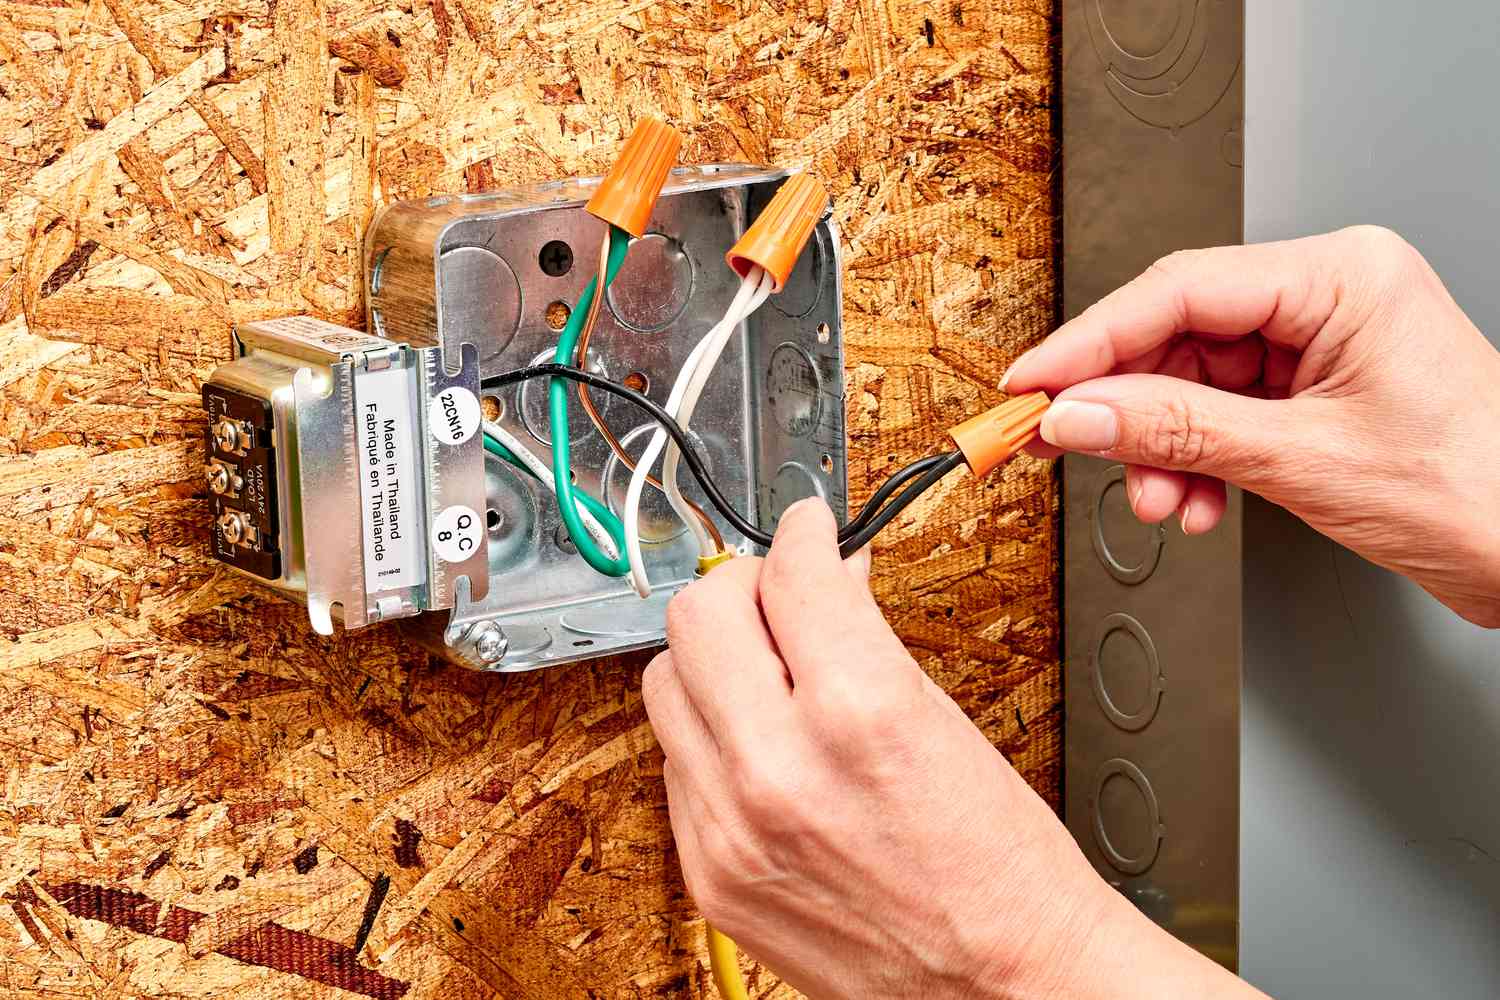
After the main duct runs are in place, it’s time to connect the branch ducts, which will distribute air to different areas of your home. Properly connecting and sealing these branch ducts is essential to maintain efficient airflow. Additionally, insulating the ductwork will help prevent any heat loss or condensation buildup.
The final step in the process involves thoroughly testing and balancing the system to ensure optimal performance. This includes adjusting the airflow and ensuring all connections are secure. By following these steps, you can enjoy the benefits of a properly functioning and efficient ductwork system in your basement.
In this guide, we will walk you through each step of the process in detail, providing useful tips and tricks along the way. By the end, you will have the knowledge and confidence to run ductwork in your basement and improve the comfort and energy efficiency of your home.
Key Takeaways:
- Properly planning and assessing your basement before running ductwork is crucial to ensure efficient airflow, minimize obstacles, and maintain comfortable temperatures throughout your home.
- Gathering the necessary tools and materials, preparing the basement, and following a systematic approach to installing, insulating, and sealing the ductwork are essential for achieving a well-functioning and energy-efficient HVAC system.
Read more: How To Run HVAC Ductwork
Assessing the Basement
Before you begin running ductwork in your basement, it’s important to assess the space and understand its unique characteristics. This step will help you determine the best layout for the ductwork and identify potential challenges or obstacles you may encounter along the way.
First, take a thorough look at the layout of your basement. Measure the dimensions of the space and identify any existing walls, columns, or other structures that may impact the placement of ducts. Consider the ceiling height as well, as this will determine the available space for running ductwork.
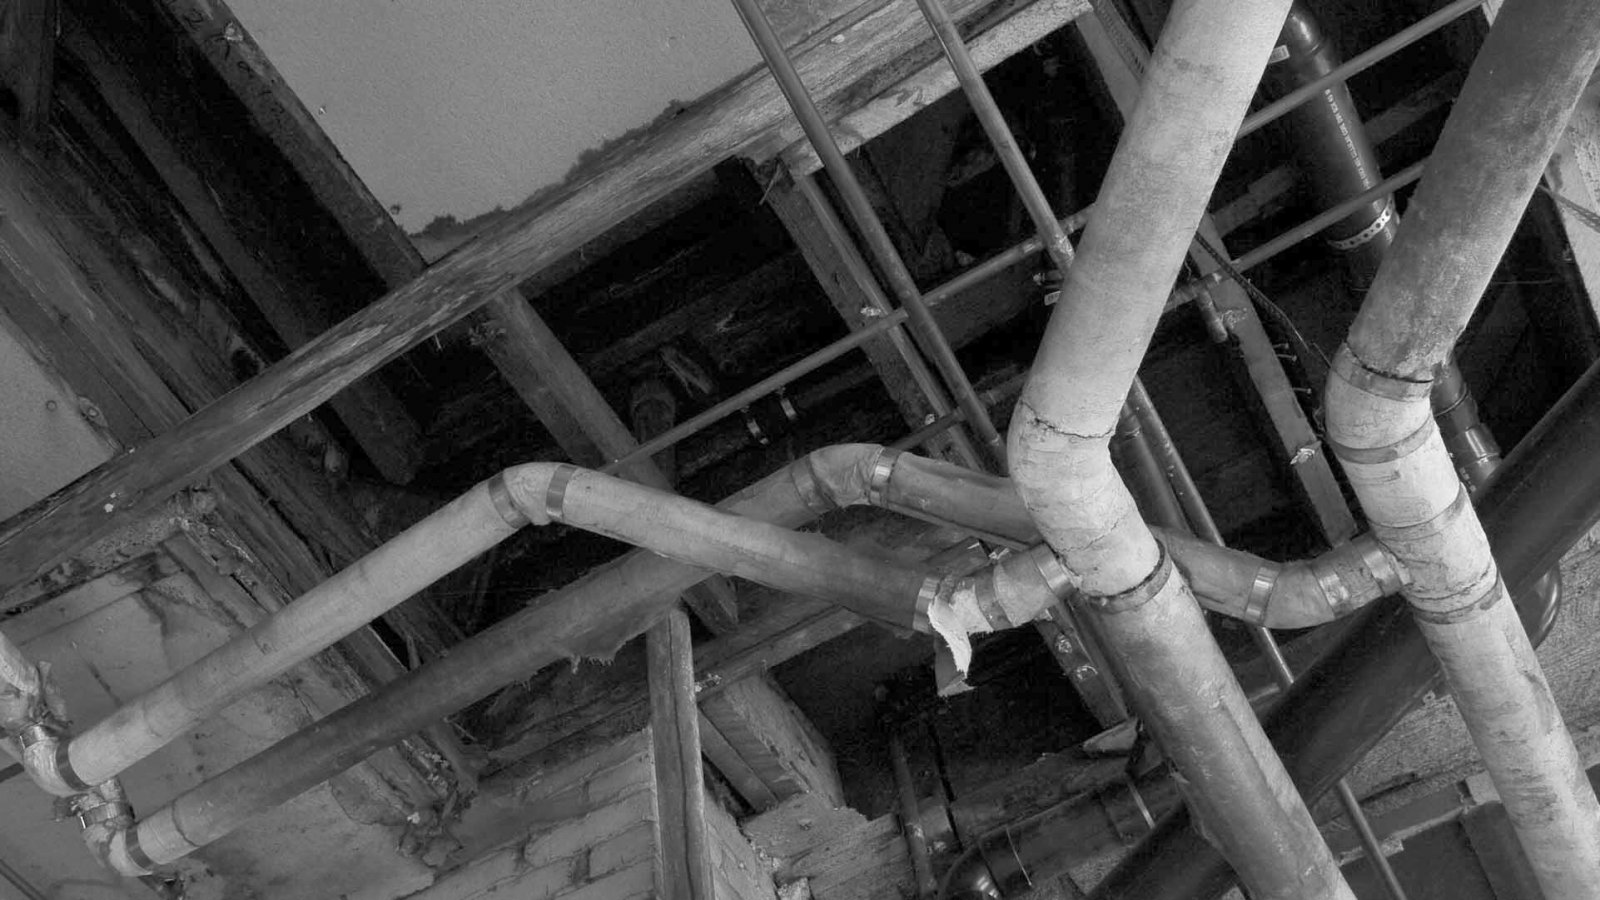
Next, take note of any existing mechanical systems or utilities in the basement, such as water pipes, electrical wiring, or HVAC units. These elements may need to be taken into account when planning the ductwork layout to avoid interference or damage.
Consider the purpose of your basement. Is it primarily a storage area or do you plan to utilize the space as a living area? If you plan to use the basement as a living space, you may need to allocate more ducts to ensure proper heating and cooling throughout the area.
Take into account the location of windows and doors in the basement. These openings can significantly impact the airflow in the space. It’s important to ensure that the ductwork layout takes into consideration the need to supply adequate air to different areas and to avoid any stagnant or uneven airflow.
Lastly, consider any future basement renovations or expansions that may impact the ductwork. It’s wise to plan for potential future changes to avoid the need for major modifications down the line.
By thoroughly assessing your basement, you can gather all the necessary information to plan an efficient and effective ductwork layout. This step will help you avoid potential obstacles and ensure proper airflow throughout your basement and the rest of your home.
Planning the Ductwork Layout
Once you have assessed your basement and gathered all the necessary information, it’s time to plan the layout of the ductwork. This step is crucial to ensure proper airflow and efficient distribution of heat or cool air throughout your home.
Start by sketching a layout of your basement on graph paper or using a computer-aided design (CAD) software. This will allow you to visualize the space and experiment with different ductwork configurations.
Consider the most optimal location for the main duct runs. These will be the larger ducts that move air from the HVAC unit to different areas of your home. Typically, main ducts are installed along the basement ceiling joists or near the basement walls. This allows for easier access and minimizes any interference with existing structures.
Next, plan the branch ducts that will connect to the main duct runs. These smaller ducts will distribute air to specific areas or rooms within your home. Strategically place them to ensure even airflow and proper temperature control in each area.
Take into account the size and length of the ducts. The size of the ducts will depend on the required airflow for each area and the total heating or cooling load of the space. Longer duct runs may require larger duct sizes to compensate for any pressure drop.
Consider the height and proximity of the ducts to the floor. It’s generally recommended to keep the ducts at least 7 feet above the finished basement floor to avoid any potential damage or obstruction.
Take note of any obstacles or obstructions that may affect the placement of ducts, such as columns, beams, or plumbing pipes. Plan the ductwork layout to work around these obstacles while maintaining efficient airflow.
Finally, ensure that the ductwork layout complies with local building codes and standards. Certain regulations may dictate the minimum spacing between ducts, required clearances, and proper fire protection measures.
By carefully planning the layout of your ductwork, you can optimize airflow, maintain comfort, and avoid any potential issues or conflicts during the installation process. It’s worth taking the time to create a well-thought-out layout that will serve your heating and cooling needs effectively.
Gathering the Necessary Tools and Materials
Before you begin the installation process, it’s important to gather all the necessary tools and materials. Having the right equipment on hand will make the ductwork installation smoother and more efficient. Here is a list of essential tools and materials you will need:
Tools:
- Tape measure: for accurate measurements of the ductwork and spacing
- Hacksaw or tin snips: for cutting the ductwork to size
- Duct crimper: for crimping the edges of the ducts to create a secure connection
- Duct knife or utility knife: for cutting insulation and making precise cuts
- Screwdriver: for securing ductwork clamps and fasteners
- Adjustable wrench: for tightening nuts and bolts
- Hammer: for securing hangers or supports
- Drill with metal drill bits: for making holes in the ductwork or basement walls if needed
- Duct tape: for sealing joints and connections
- Mechanical crimping tool: for crimping sheet metal for fittings and transitions
Materials:
- Sheet metal ducts: for the main duct runs and branch ducts
- Duct insulation: to prevent heat loss and condensation buildup
- Duct connector sleeves: for connecting different sections of ductwork
- Duct hangers or supports: to secure the ductwork to the basement ceiling or walls
- Duct clamps: for securing the duct connectors and joints
- Sealant or mastic: for sealing any gaps or seams in the ductwork
- Duct end caps or plugs: to cap off unused duct openings
- Screws or nails: for attaching hangers or supports
- Fire-resistant insulation sleeves: for placing around ductwork passing through walls or floor joists
Make sure to purchase high-quality materials that meet the necessary standards and regulations. It’s also a good idea to buy some extra materials in case of any mistakes or unexpected issues during the installation process.
Having the right tools and materials readily available will save you time and effort during the installation. It will also ensure that the ductwork is installed correctly and securely, leading to better performance and longevity of your HVAC system.
Preparing the Basement for Installation
Before you can start installing the ductwork in your basement, it’s important to properly prepare the space. This preparation will ensure a smooth installation process and help avoid any potential issues or safety hazards. Here are the key steps to follow when preparing your basement:
1. Clear the Area: Remove any furniture, storage items, or other objects from the area where you will be installing the ductwork. Clearing the space will provide you with a clean and unobstructed work area.
2. Secure Permits: Check with your local building department to determine if you need any permits for the ductwork installation. Some areas may require permits to ensure compliance with building codes and safety regulations.
3. Turn Off Power: Shut off the power to any electrical circuits running through the area where you will be working. This will help prevent accidents and ensure your safety during the installation process.
4. Wear Protective Gear: Put on protective gear such as gloves, safety goggles, and a dust mask to protect yourself from any potential hazards or airborne particles.
5. Inspect for Mold or Water Damage: Check for any signs of mold or water damage in your basement. If you find any, it’s important to address the issue before proceeding with the installation. Mold and water damage can compromise the integrity of both the ductwork and your health.
6. Seal Cracks and Air Leaks: Inspect the basement walls and floor for any cracks or gaps that could lead to air leaks. Use sealant or caulk to seal these openings, ensuring that the space is properly sealed before installing the ductwork.
7. Provide Adequate Lighting: Ensure that you have adequate lighting in the basement. This will help you see clearly during the installation process and avoid any accidents or mistakes.
8. Follow Safety Guidelines: Familiarize yourself with proper safety guidelines for working in a basement, such as using proper lifting techniques and taking precautions when working with tools or equipment.
By thoroughly preparing your basement for the installation process, you can create a safe and conducive environment for running ductwork. This preparation will help ensure a successful and efficient installation, enabling you to enjoy improved heating and cooling throughout your home.
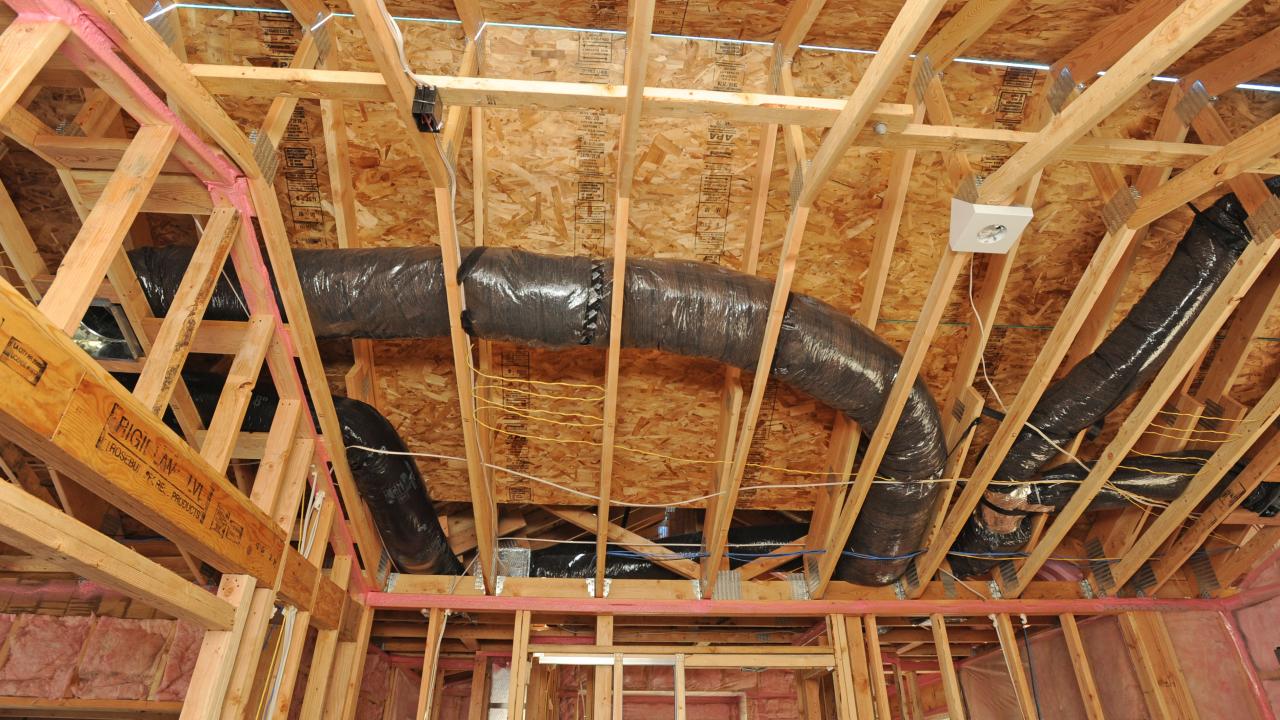
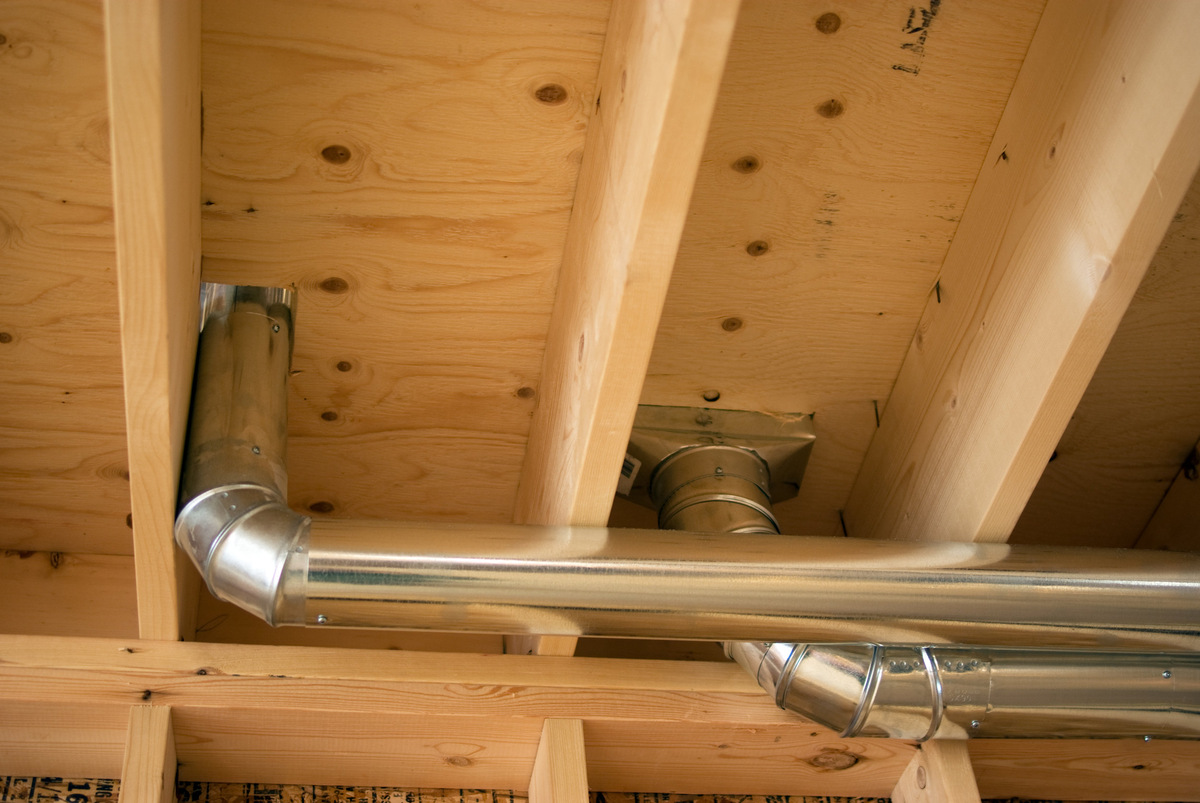
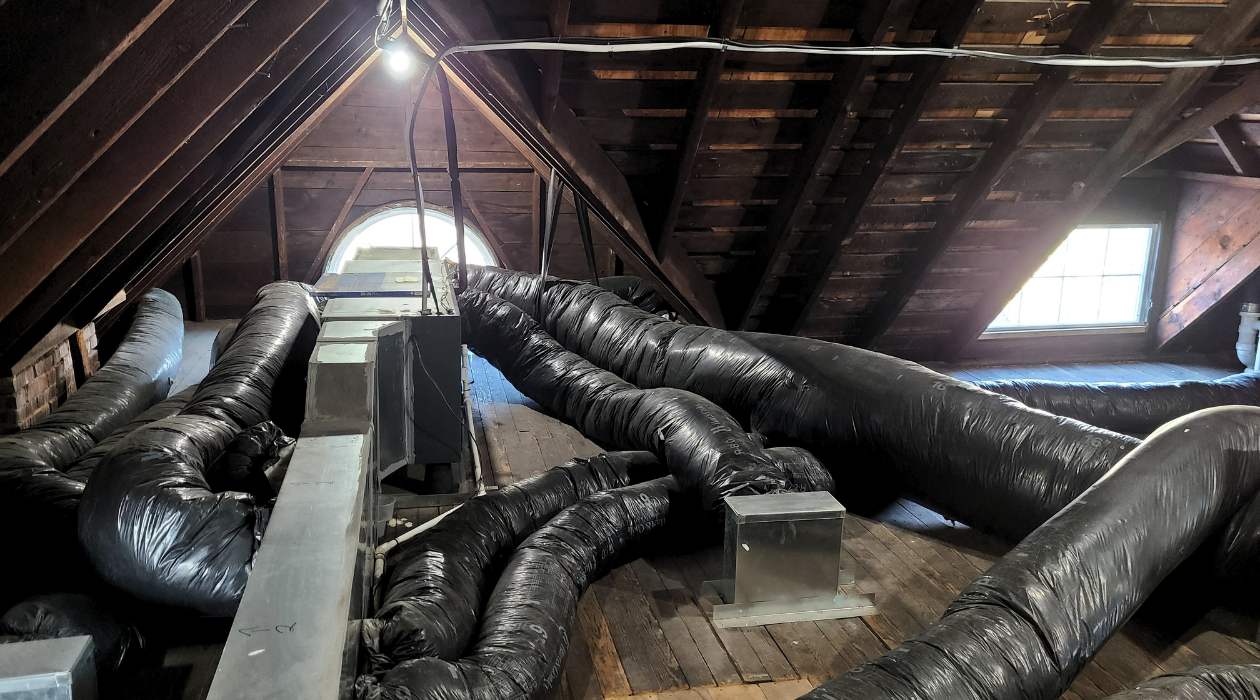
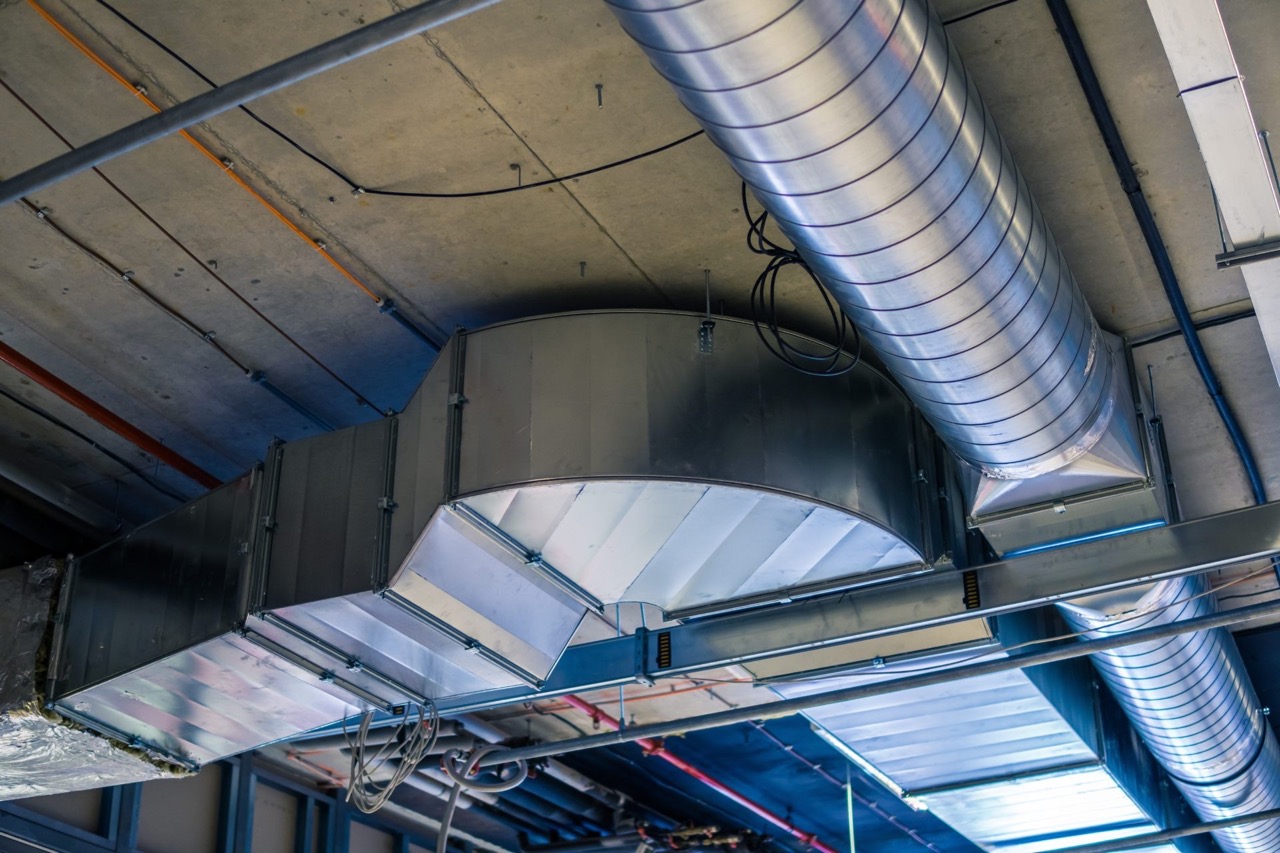
Installing the Main Duct Runs
Once you have prepared the basement, it’s time to start installing the main duct runs. These larger ducts will serve as the backbone of your ductwork system, carrying air from the HVAC unit to different areas of your home. Follow these steps for a successful installation:
1. Measure and Mark: Measure and mark the desired locations for the main duct runs on the basement walls or ceiling. Ensure that the measurements are accurate and align with the planned layout from the previous steps.
2. Cut the Ductwork: Use a hacksaw or tin snips to cut the sheet metal ductwork to the appropriate lengths. Take extra care to make precise cuts to ensure the ducts fit together properly.
3. Attach the Hangers: Securely attach duct hangers or supports to the walls or ceiling at the marked locations. Ensure that the hangers are level and properly aligned to provide stable support for the ductwork.
4. Position the Ducts: Position the cut ductwork onto the installed hangers, making sure they are securely placed. Use screws or nails to attach the ductwork to the hangers for added stability.
5. Connect the Ducts: Connect the different sections of the ductwork using duct connector sleeves. Make sure the ducts fit tightly together, and use duct clamps to secure the connections.
6. Secure the Ductwork: Once the ducts are connected, use additional hangers or supports as necessary to ensure the ductwork is properly secured and doesn’t sag or move.
7. Check for Proper Alignment: Verify that the ductwork is properly aligned and straight. Use a level or tape measure to ensure the ducts are not tilted or unevenly positioned.
8. Create Openings: If required, create openings in the basement walls or floor for the ductwork to pass through. Use a drill with metal drill bits to create these openings, ensuring they are large enough to accommodate the ducts.
9. Insulate the Ductwork: Apply duct insulation around the main duct runs to prevent heat loss and condensation buildup. Properly secure the insulation using adhesive tape or mechanical fasteners as recommended by the manufacturer.
10. Seal the Joints: Use duct tape or mastic to seal any gaps or seams in the main duct runs. This will help maintain proper airflow and prevent air leaks.
By following these steps, you can effectively install the main duct runs in your basement. Remember to take measurements accurately, securely attach the ductwork, and properly insulate and seal the joints. These steps will ensure a well-functioning ductwork system for efficient heating and cooling throughout your home.
When running ductwork in the basement, make sure to insulate the ducts to prevent energy loss and condensation. Use proper supports to secure the ducts and avoid any sagging or bending.
Connecting the Branch Ducts
Once the main duct runs are installed, the next step is to connect the branch ducts. These smaller ducts distribute air from the main ducts to specific areas or rooms in your home. Properly connecting the branch ducts is crucial to ensure efficient airflow and balanced temperature control throughout your space. Follow these steps to connect the branch ducts:
1. Determine the Branch Duct Locations: Refer to your ductwork layout plans to identify the specific areas where the branch ducts will be installed. Measure and mark the locations accordingly.
2. Cut the Branch Ducts: Use a hacksaw or tin snips to cut the branch ducts to the appropriate lengths. Ensure that the cuts are clean and precise for proper fitting.
3. Attach the Branch Duct Connectors: Install branch duct connectors onto the end of the main ducts at the designated branch points. Make sure the connectors fit securely and are properly aligned with the main ducts.
4. Connect the Branch Ducts: Slide one end of the branch ducts into the branch duct connectors. If needed, use duct clamps to secure the connections. Ensure that the branch ducts fit snugly and are properly aligned with the connectors.
5. Secure the Branch Ducts: Use duct hangers or supports to secure the branch ducts in place. Ensure that they are properly aligned and adequately supported to prevent sagging or movement.
6. Insulate the Branch Ducts: Apply duct insulation around the branch ducts to prevent heat loss and condensation. Secure the insulation using adhesive tape or mechanical fasteners as recommended by the manufacturer.
7. Seal the Joints: Use duct tape or mastic to seal any gaps or seams in the branch duct connections. This will ensure proper airflow and prevent air leaks that can negatively impact efficiency.
8. Test the Airflow: Once all the branch ducts are connected, turn on your HVAC system and test the airflow in each area. Check for any uneven airflow or issues with temperature control. Adjust the branch ducts as needed to achieve balanced airflow.
It’s important to ensure proper alignment and secure connections when connecting the branch ducts. This will guarantee efficient airflow to each area of your home, improving comfort and energy efficiency. Take your time to carefully measure, cut, and secure the branch ducts to ensure a well-functioning ductwork system.
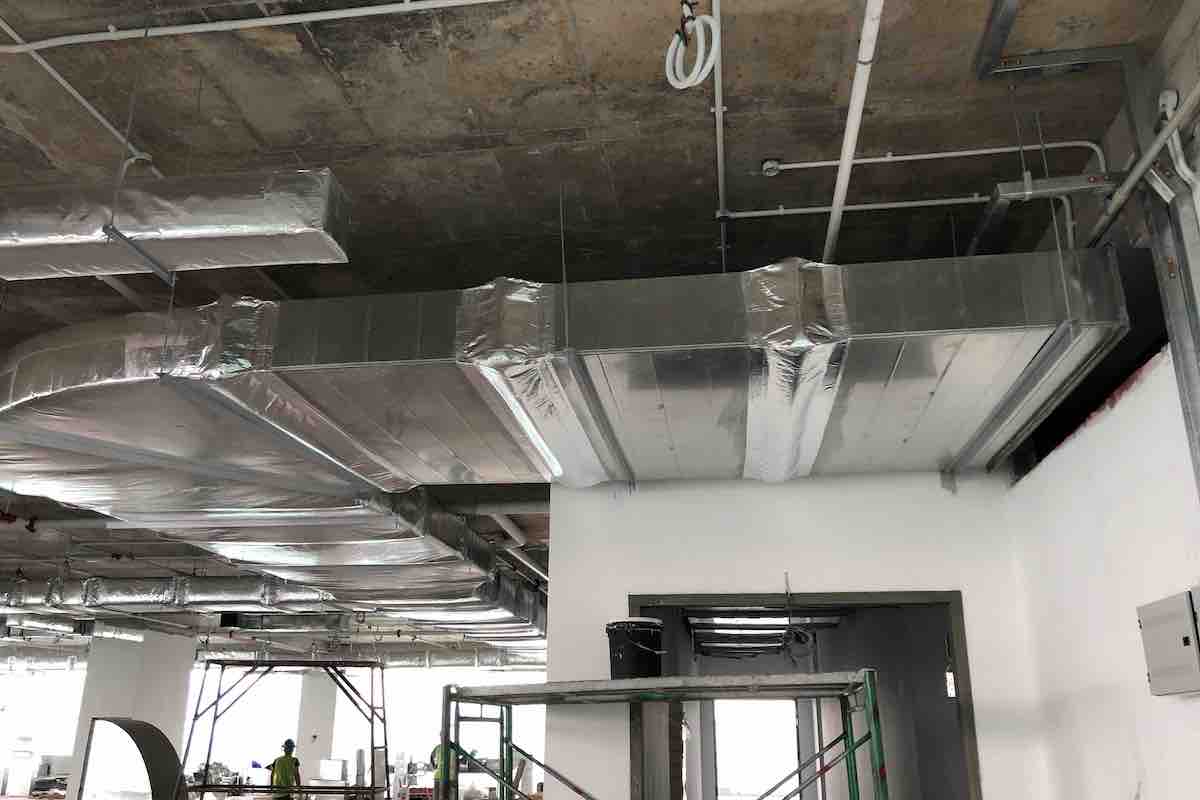
Insulating the Ductwork
Insulating the ductwork is a crucial step in ensuring optimal performance and energy efficiency of your HVAC system. Duct insulation helps prevent heat loss or gain, minimizes condensation buildup, and improves the overall effectiveness of the ductwork. Follow these steps to properly insulate your ductwork:
1. Choose the Right Insulation: Select insulation material that is appropriate for your ductwork. Common options include fiberglass duct board, fiberglass blanket insulation, or foam insulation. Ensure that the insulation meets local building codes and regulations.
2. Measure and Cut the Insulation: Measure the length and diameter of the duct sections that need to be insulated. Cut the insulation material to the appropriate size, leaving a small overlap to ensure complete coverage.
3. Wrap the Insulation: Wrap the insulation around the duct sections, ensuring a tight fit and complete coverage. Use adhesive tape or mechanical fasteners to secure the insulation in place, as recommended by the insulation manufacturer.
4. Insulate All Exposed Areas: Pay close attention to insulating all exposed areas, such as duct connections, joints, and bends. Make sure to seal any gaps or openings to prevent air leaks.
5. Apply Insulation on Supply and Return Ducts: Insulate both the supply ducts, which carry conditioned air from the HVAC system, and the return ducts, which transport air back to the system for reconditioning. Properly insulating both types of ducts helps maintain consistent temperatures and improves system efficiency.
6. Insulate Ductwork Passing Through Unconditioned Areas: If your ductwork passes through unconditioned spaces, such as an attic or crawl space, it’s important to insulate these areas as well. Use insulation sleeves and additional insulation to cover the ductwork in these exposed areas.
7. Seal Seams and Joints: While insulating the ductwork, make sure to seal any seams, joints, or connections. Use adhesive tape or mastic sealant to create an airtight seal, preventing air leakage and further improving energy efficiency.
8. Follow Manufacturer Recommendations: It’s important to follow the specific recommendations and guidelines provided by the insulation manufacturer. This ensures proper installation and maximum effectiveness of the insulation materials.
Insulating your ductwork helps to maintain consistent temperatures, reduce energy waste, and improve indoor air quality. A well-insulated duct system increases the overall efficiency of your HVAC system and saves you money on energy costs. Take the time to properly insulate your ductwork and enjoy the benefits of a well-functioning HVAC system.
Sealing the Ductwork
Properly sealing your ductwork is essential to ensure optimal heating and cooling efficiency in your home. Duct leaks can lead to significant energy waste, uneven airflow, and decreased comfort. Sealing the ductwork helps to prevent air leaks and maintain consistent temperatures throughout your living space. Here are steps to effectively seal your ductwork:
1. Identify and Locate Leaks: Begin by identifying areas where there may be air leaks in the ductwork. Common areas for leaks include connections, joints, seams, and gaps between duct sections. Feel for air leaks or use a smoke pencil to visually detect drafts.
2. Clean the Ductwork: Before sealing, it’s important to clean the ductwork to ensure a proper bond between the sealing materials and the duct surface. Use a vacuum cleaner or a damp cloth to remove any dust, debris, or loose particles.
3. Use Duct Sealant: Choose a suitable duct sealant that is compatible with your duct material. Duct sealants can be in the form of mastic, foil tape, or aerosol sealants. Apply the sealant generously on the identified leak areas, ensuring complete coverage.
4. Seal Connections and Joints: Pay particular attention to sealing the connections and joints between duct sections. Apply a layer of sealant around the joint, ensuring it is evenly distributed. Use foam gaskets or adhesive-backed foil tape to reinforce the seal on difficult-to-reach joints.
5. Seal Small Gaps and Cracks: Use the sealant to fill in any small gaps or cracks in the ductwork. These gaps can often occur around duct penetrations through walls or floors. Apply the sealant to create an airtight seal and prevent air leakage.
6. Inspect and Repair Damaged Ducts: Inspect the ductwork for any signs of damage, such as tears, holes, or loose sections. Repair any damages using appropriate sealing techniques or by replacing the damaged ductwork if necessary.
7. Insulate Sealed Ducts: Once the ductwork is properly sealed, consider adding insulation around the sealed sections. Insulation further helps to prevent heat loss or gain and protects the sealant from any external factors that could compromise its effectiveness.
8. Test for Leaks: After sealing the ductwork, it’s important to test for any remaining leaks. Run your HVAC system and feel for air leaks or use a duct leakage tester to measure any remaining leakage. Address any leaks that are detected and reapply sealant if necessary.
Properly sealing your ductwork not only improves energy efficiency and comfort but also enhances indoor air quality by preventing the spread of airborne contaminants and pollutants. Take the time to seal your ductwork using appropriate sealants and techniques to enjoy a well-functioning HVAC system in your home.
Read more: How To Remove HVAC Ductwork
Testing and Balancing the System
Once you have completed the installation, insulation, and sealing of your ductwork, the final step in the process is to test and balance the system. Testing and balancing help ensure that your HVAC system is functioning optimally, providing even airflow and proper temperature control throughout your home. Follow these steps to test and balance your system:
1. Turn on the HVAC System: Start by turning on your HVAC system and allowing it to run for a few minutes. This will help stabilize the airflow and temperature within the ductwork.
2. Check Airflow: Use a handheld anemometer or an airflow meter to measure the airflow at the supply vents and return grilles in each room or area of your home. Ensure that the airflow is consistent and balanced. Note any significant variations or low airflow areas.
3. Adjust Dampers: Dampers are valves used to control and balance airflow within the ductwork. Adjust the dampers in each branch duct to regulate the airflow to different areas. Increase the airflow where it is low and decrease it where it is excessive, while aiming for a balanced distribution.
4. Test Temperature Differential: Measure the temperature differential between the supply air (coming out of the vents) and the return air (returning to the HVAC system). Use a digital thermometer or temperature probe to get accurate readings. The temperature difference should typically range between 14-20 degrees Fahrenheit (7-11 degrees Celsius).
5. Adjust Thermostat Settings: Adjust the thermostat settings to ensure that the desired temperatures are reached and maintained consistently throughout your home. Monitor the temperature readings in different areas to detect any significant deviations.
6. Consider Zoning: If you have a larger home or multiple stories, consider implementing zoning within your HVAC system. Zoning allows you to control the temperature independently in different zones or areas, providing personalized comfort and improved energy efficiency.
7. Revisit Insulation and Sealing: During the testing and balancing process, pay attention to any leaks, gaps, or inconsistencies in airflow. Revisit the insulation and sealing of your ductwork to address any issues that may arise. Seal any remaining leaks and reinforce insulation as needed.
8. Regular Maintenance: Finally, establish a regular maintenance schedule for your HVAC system. Regularly clean or replace air filters, inspect the ductwork for signs of damage, and schedule professional maintenance to keep the system in optimal condition.
Testing and balancing your HVAC system ensures that the airflow and temperature control are properly calibrated, providing optimal comfort and energy efficiency. Take the time to test and balance your system and make any necessary adjustments to enjoy a well-balanced and efficient HVAC system in your home.
Conclusion
Congratulations! You have now completed the process of running ductwork in your basement. By following the steps outlined in this guide, you have taken significant steps towards improving the heating and cooling efficiency of your home. Properly installed and sealed ductwork ensures better airflow, balanced temperature control, and increased energy savings.
From assessing your basement and planning the ductwork layout to gathering the necessary tools and materials, preparing the basement, and installing the main duct runs, you have successfully navigated through each stage of the process. Connecting the branch ducts, insulating the ductwork, and sealing any leaks or gaps further contribute to ensuring a well-functioning ductwork system.
By testing and balancing the system, you have fine-tuned the airflow, temperature control, and overall performance of your HVAC system. This will result in improved comfort for you and your family, as well as increased energy efficiency and cost savings.
Remember to continue maintaining your HVAC system by regular cleaning and replacing air filters, inspecting the ductwork for any issues, and scheduling professional maintenance. This will help ensure that your ductwork system continues to function optimally and provide the desired comfort levels throughout your home.
Running ductwork in your basement can be a complex process, but with the information and guidance provided in this guide, you can confidently tackle the project and enjoy the benefits it brings. Properly installed and efficient ductwork will not only enhance the comfort of your living space but also increase the overall value of your property.
Thank you for choosing this guide as your resource on how to run ductwork in the basement. We hope that you have found it comprehensive and helpful throughout your installation journey. If you have any further questions or need additional assistance, don’t hesitate to reach out to a professional HVAC technician or contractor who can provide expert guidance tailored to your specific needs.
Frequently Asked Questions about How To Run Ductwork In Basement
Was this page helpful?
At Storables.com, we guarantee accurate and reliable information. Our content, validated by Expert Board Contributors, is crafted following stringent Editorial Policies. We're committed to providing you with well-researched, expert-backed insights for all your informational needs.


0 thoughts on “How To Run Ductwork In Basement”