Articles
What Insulation Is The Best For Ductwork?
Modified: October 28, 2024
Discover the best insulation options for ductwork in this informative article. Find out which materials provide optimal energy efficiency and improve HVAC system performance.
(Many of the links in this article redirect to a specific reviewed product. Your purchase of these products through affiliate links helps to generate commission for Storables.com, at no extra cost. Learn more)
Introduction
When it comes to optimizing the efficiency of your HVAC system and reducing energy loss, proper insulation for ductwork is crucial. Insulating your ductwork can prevent heat gain or loss, reduce condensation, and improve the overall performance of your heating and cooling system. However, with various types of insulation available in the market, it can be challenging to determine which one is the best for your ductwork.
In this article, we will explore the different factors to consider when choosing insulation for ductwork and provide an overview of the most common types of insulation available. We will also discuss the benefits and drawbacks of each type to help you make an informed decision. So, let’s dive in and find out which insulation is the best for your ductwork.
Key Takeaways:
- Choose the Right Insulation: Consider factors like R-value, fire resistance, and moisture resistance when selecting ductwork insulation to optimize energy efficiency and system performance.
- Proper Installation Matters: Follow safety precautions, seal joints, and inspect the insulation to ensure a successful installation that prevents energy loss and maintains indoor comfort.
Read more: What Is HVAC Ductwork
Factors to Consider for Ductwork Insulation
Before you decide on the type of insulation for your ductwork, there are several important factors to consider. These factors will help ensure that you choose the most suitable insulation for your specific needs. Let’s take a closer look at these factors:
- R-Value: The R-value measures the insulation’s resistance to heat flow. It indicates the ability of the insulation material to prevent heat transfer. The higher the R-value, the better the insulation’s thermal performance. Consider the climate in your area and the level of insulation required to maintain the desired temperature inside your ductwork.
- Air leakage: Ductwork insulation should also address issues related to air leakage. Look for insulation materials that also provide effective seals and barriers to prevent air leakage from the ducts. This will help enhance energy efficiency and maintain consistent airflow throughout the system.
- Fire resistance: Since ductwork carries hot or cold air, it is essential to choose insulation materials that have good fire resistance properties. Look for insulation materials with a high fire rating that comply with local building codes and safety regulations.
- Moisture resistance: Ductwork insulation should also be resistant to moisture to prevent the growth of mold and mildew. Moisture can compromise the integrity of the insulation and impact indoor air quality. Choose insulation materials that have good moisture resistance to ensure optimal performance and longevity.
- Space availability: Consider the available space in your ductwork for insulation. Some insulation materials require more space than others. Assess the size and layout of your ductwork to determine the feasibility of installing specific insulation types.
- Installation requirements: Different insulation materials have specific installation requirements. Consider the complexity of the installation process and whether you have the necessary skills or are willing to hire a professional contractor. Some insulation types may require special tools or techniques for installation.
By considering these factors, you can narrow down your options and choose the insulation that best suits your ductwork and budget. Next, let’s explore the different types of insulation commonly used for ductwork.
Types of Insulation for Ductwork
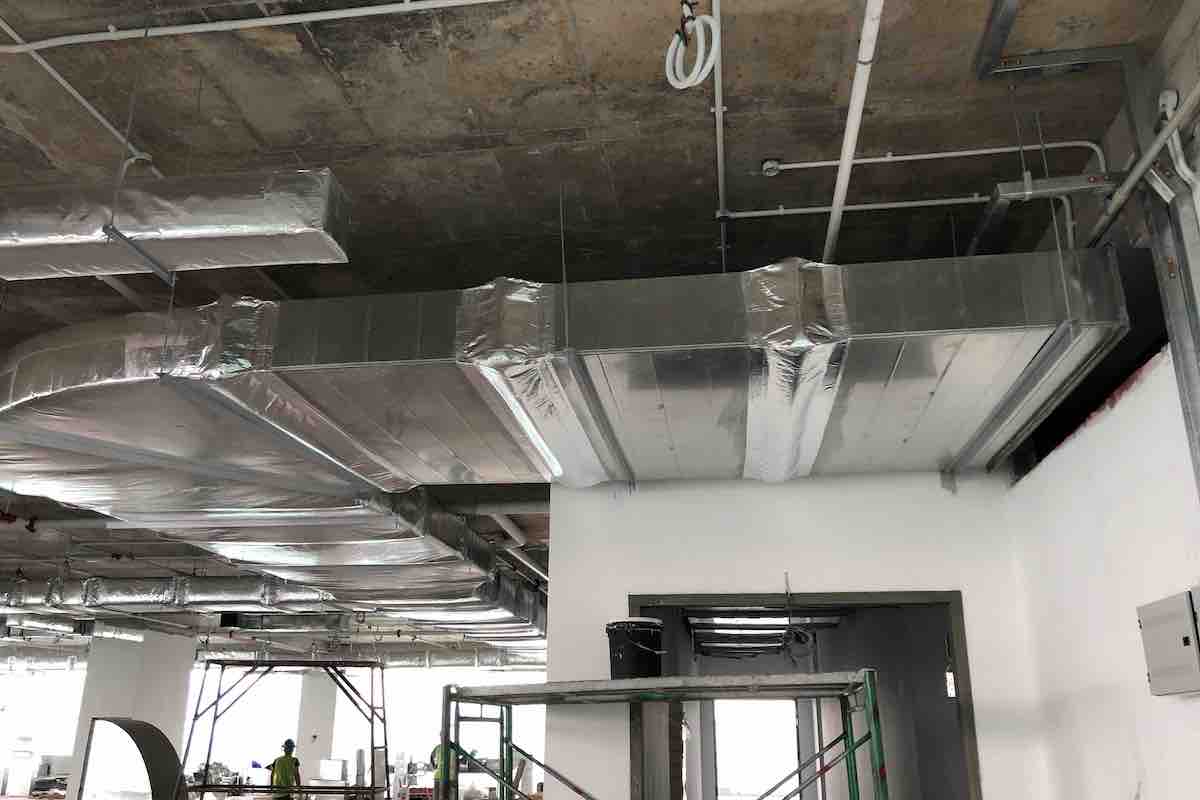
When it comes to insulating your ductwork, there are several types of insulation materials to choose from. Each type has its own unique properties and advantages. Let’s take a look at the most common types of insulation used for ductwork:
- Fiberglass Insulation: Fiberglass insulation is one of the most popular choices for ductwork insulation. It is made of glass fibers that are woven together to create a mat, which is then covered with a protective facing. Fiberglass insulation is affordable, easy to install, and provides good thermal insulation. It is available in various thicknesses and R-values to suit different insulation requirements.
- Mineral Wool Insulation: Mineral wool, also known as rock wool or stone wool, is made from spun fibers of molten rock. It is highly resistant to fire and provides excellent soundproofing properties. Mineral wool insulation is dense and effective in reducing heat transfer. It is suitable for both residential and commercial ductwork applications.
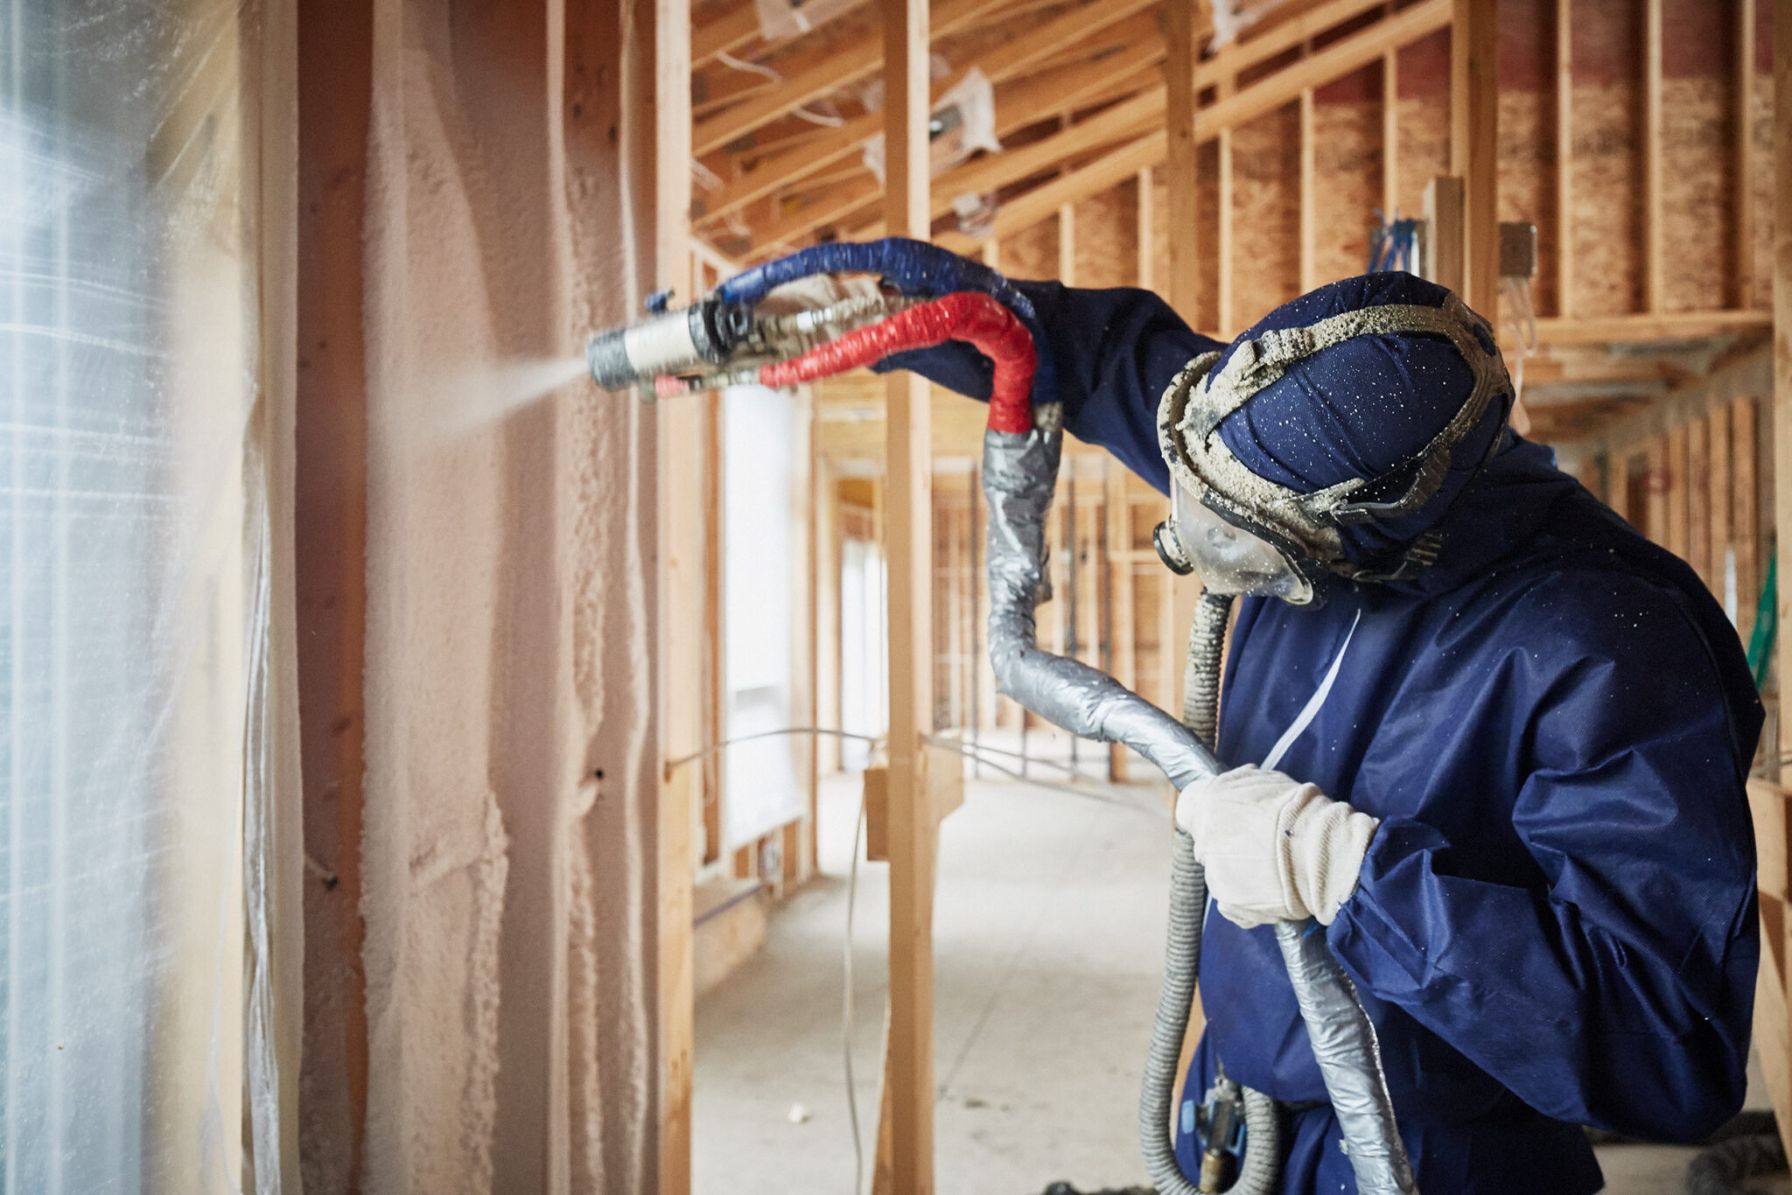
- Foam Board Insulation: Foam board insulation is composed of rigid panels made from polystyrene or polyurethane foam. These panels have high insulating properties and are resistant to moisture and mold. Foam board insulation is lightweight and easy to handle, making it ideal for insulating ductwork in tight spaces or irregular shapes. It offers excellent thermal insulation and helps prevent condensation.
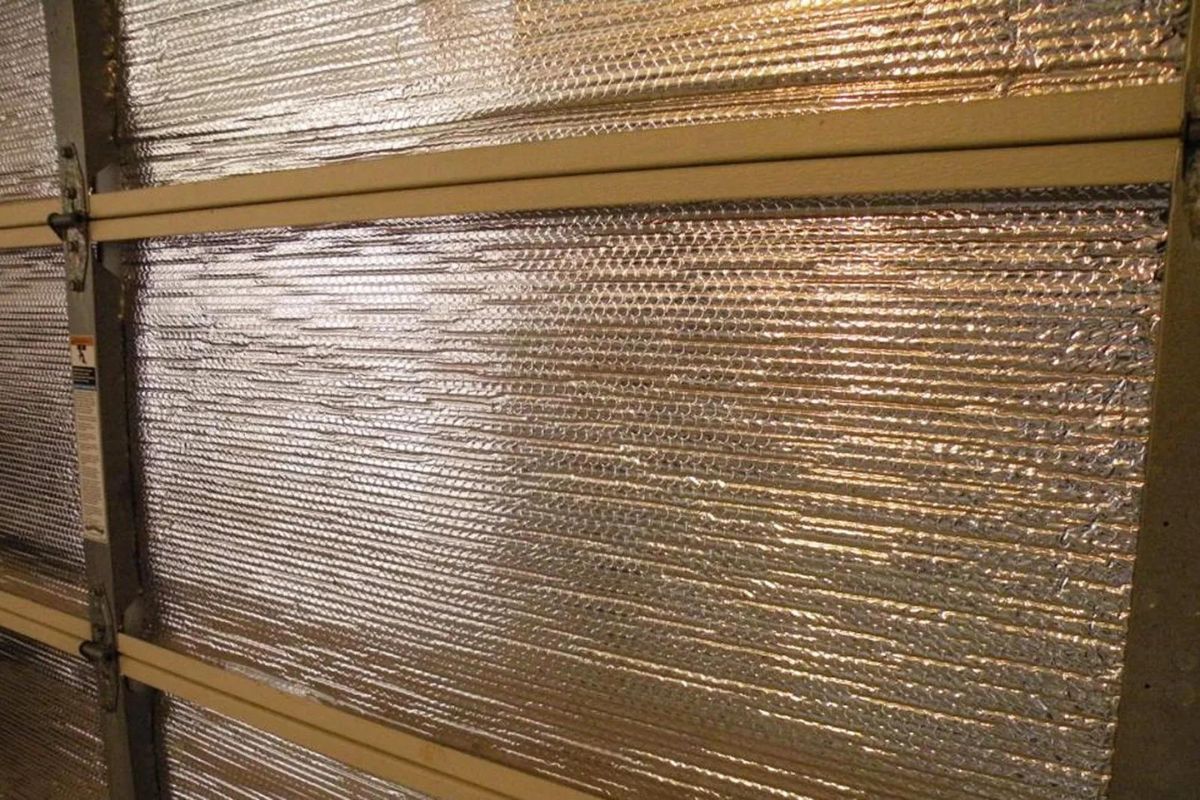
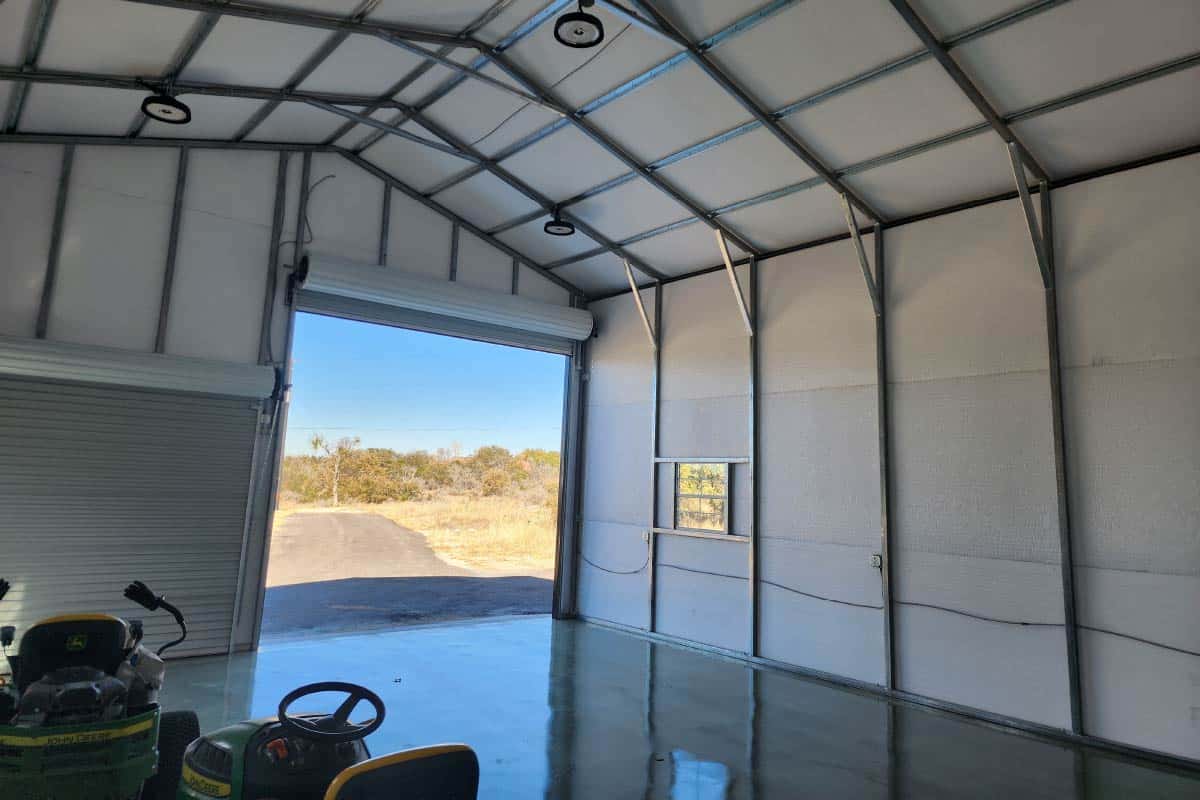
- Reflective Insulation: Reflective insulation consists of a layer of aluminum foil or a metallic coating applied to a substrate material. It works by reflecting radiant heat away from the ductwork, helping to maintain consistent temperatures. Reflective insulation is particularly effective in hot climates where the ducts are exposed to direct sunlight. It can be used in conjunction with other insulation materials for enhanced performance.
These are the main types of insulation used for ductwork. It is important to note that some insulation materials may have specific installation requirements and may require professional assistance. In the next section, we will discuss the benefits and drawbacks of each type of insulation to help you make an informed decision.
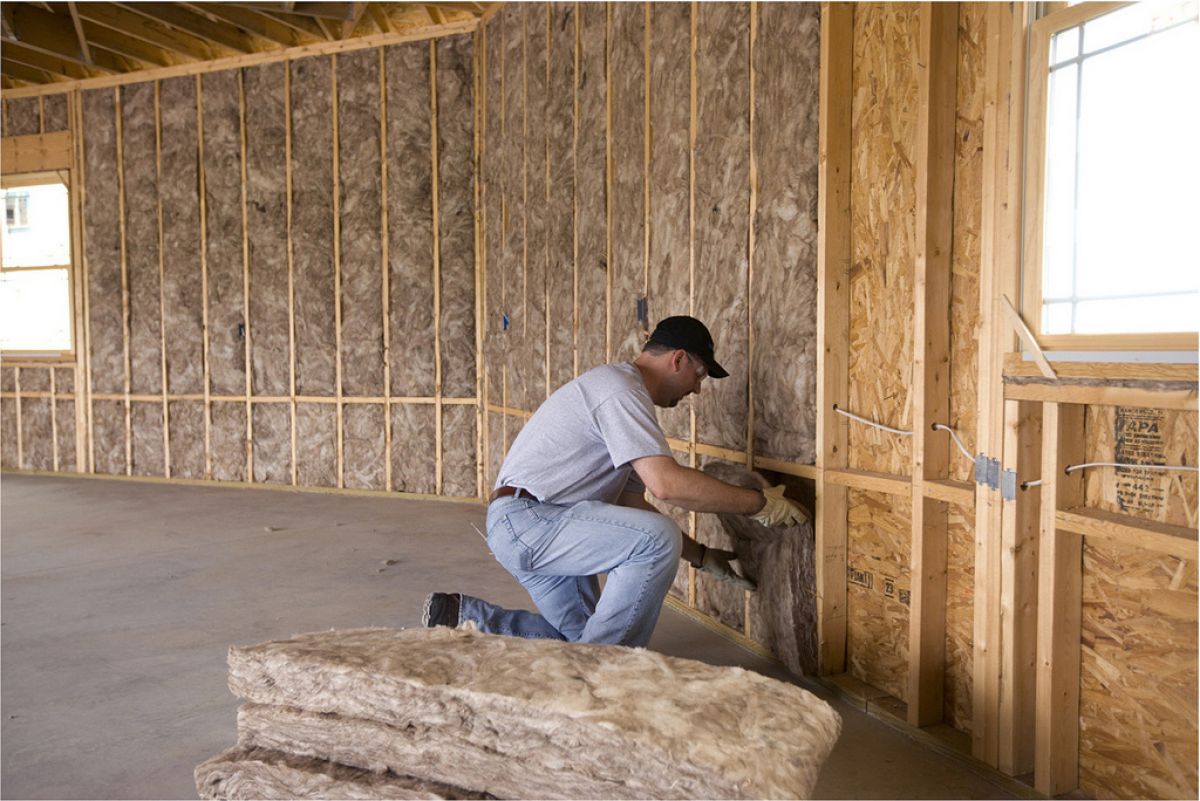
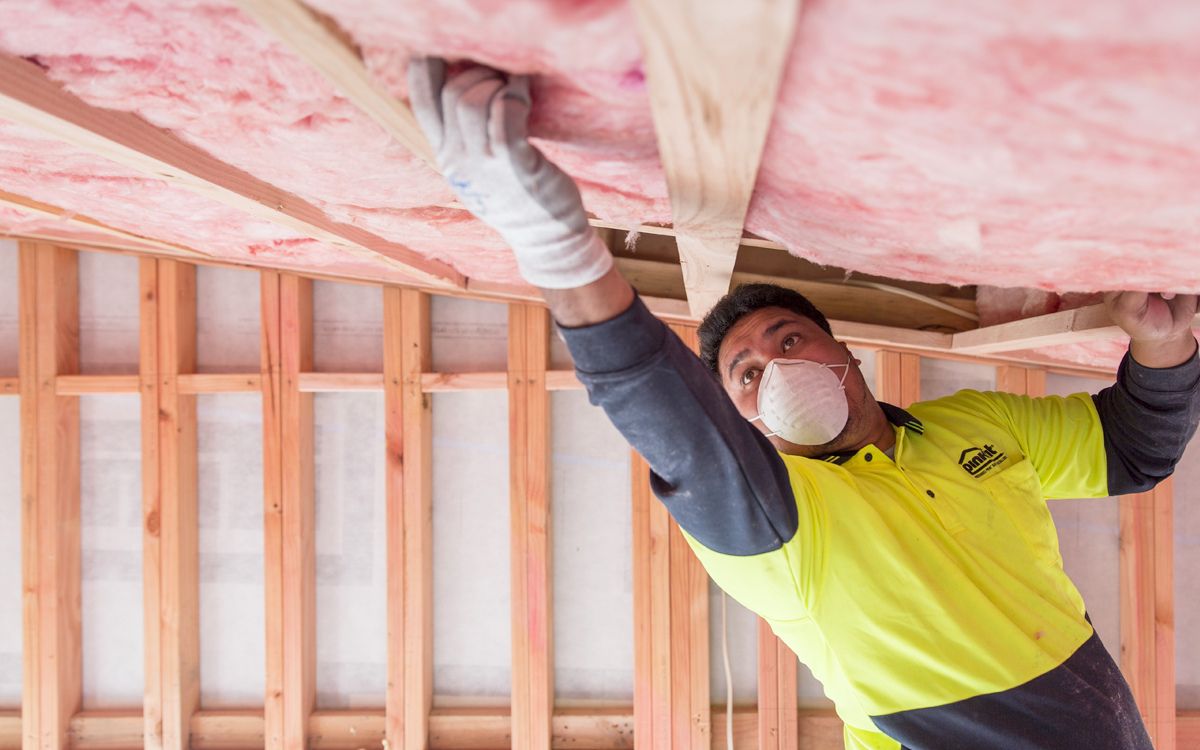
Fiberglass Insulation
Fiberglass insulation is one of the most commonly used types of insulation for ductwork. It is made from glass fibers that are spun and woven together to create a flexible and lightweight material. Fiberglass insulation offers several benefits and is a popular choice for both residential and commercial ductwork. Let’s explore the advantages and drawbacks of using fiberglass insulation:
Benefits of Fiberglass Insulation:
- Thermal Insulation: Fiberglass insulation provides excellent thermal insulation, helping to prevent heat transfer and maintain desired temperatures inside the ductwork. It reduces energy loss and improves energy efficiency.
- Flexibility: Fiberglass insulation is flexible and can easily be fitted around bends and corners in the ductwork. This makes it suitable for various duct configurations and installations.
- Cost-Effective: Fiberglass insulation is generally more affordable compared to other insulation materials, making it a cost-effective option for insulating ductwork.
- Easy Installation: Fiberglass insulation is easy to install, especially in open areas of the ductwork. It is available in pre-cut sheets or rolls, which can be wrapped around the ducts and secured with adhesive or mechanical fasteners.
- Fire Resistance: Many fiberglass insulation products are treated with fire-resistant coatings, providing an added layer of protection against fire hazards.
Read more: What Is The Best Material For Insulation
Drawbacks of Fiberglass Insulation:
- Prone to Moisture Absorption: Fiberglass insulation can absorb moisture if not properly installed or if exposed to high humidity levels. Moisture can reduce its effectiveness and lead to mold or mildew growth.
- Health Concerns: Fiberglass insulation can release fine particles or fibers into the air if not handled properly. These fibers can irritate the skin, eyes, and respiratory system. It is important to wear protective clothing and a mask when installing or working with fiberglass insulation.
- Reduced Effectiveness at Higher Temperatures: Fiberglass insulation may not be as effective in high-temperature environments. It can degrade or lose its insulating properties when exposed to excessive heat.
- Potential for Air Leakage: Fiberglass insulation alone may not provide an adequate barrier against air leakage. It is important to ensure proper sealing and use additional materials, such as tapes or sealants, to prevent air leakage.
Despite these drawbacks, fiberglass insulation remains a popular choice for ductwork insulation due to its affordability, ease of installation, and thermal insulation properties. However, it is essential to address the potential moisture and health concerns associated with fiberglass insulation to ensure a safe and effective installation.
Mineral Wool Insulation
Mineral wool insulation, also known as rock wool or stone wool, is a popular choice for insulating ductwork. It is made from spun fibers of molten rock, typically basalt or slag, which are then formed into flexible or rigid insulation boards. Mineral wool insulation offers several advantages and is commonly used in both residential and commercial applications. Let’s explore the benefits and drawbacks of using mineral wool insulation:
Benefits of Mineral Wool Insulation:
- Fire Resistance: Mineral wool insulation is highly resistant to fire. It has a high melting point, making it an excellent choice for applications where fire safety is a concern.
- Thermal Insulation: Mineral wool provides excellent thermal insulation properties, helping to prevent heat transfer and maintain consistent temperatures within the ductwork. It significantly reduces energy loss and improves overall energy efficiency.
- Soundproofing: Mineral wool insulation also offers excellent soundproofing capabilities, reducing noise transmission through the ductwork. This is particularly beneficial in applications where noise control is important, such as commercial buildings or homes located near busy roads.
- Moisture Resistance: Mineral wool is resistant to moisture, preventing the growth of mold or mildew within the ductwork. It also retains its insulating properties even when exposed to high humidity levels.
- Durable: Mineral wool insulation is long-lasting and resists settling or shrinking over time. It maintains its insulating performance for the lifespan of the ductwork system.
Drawbacks of Mineral Wool Insulation:
- Density: Mineral wool insulation is denser and heavier compared to other insulation materials. This can make it more challenging to handle and install, especially in tight or confined spaces.
- Cost: Mineral wool insulation is generally more expensive than fiberglass insulation. The higher cost may be prohibitive for some budget-conscious consumers.
- Health Concerns: Handling mineral wool insulation requires proper protective equipment, as the fibers can cause skin and respiratory irritation. It is crucial to use gloves, goggles, and a mask when working with mineral wool insulation.
- Prone to Compression: Mineral wool insulation can compress over time, reducing its insulating efficiency. Proper installation techniques should be followed to minimize the risk of compression.
Despite its density and higher cost, mineral wool insulation is an excellent choice for ductwork insulation due to its fire resistance, thermal insulation properties, and soundproofing capabilities. It is important to take necessary precautions when working with mineral wool to ensure a safe and effective installation.
Read more: What Is The Best Insulation For Roofs
Foam Board Insulation
Foam board insulation is a popular choice for ductwork insulation. It is made from rigid panels of polystyrene or polyurethane foam, offering excellent thermal insulation properties. Foam board insulation has several advantages and is commonly used in both residential and commercial applications. Let’s explore the benefits and drawbacks of using foam board insulation:
Benefits of Foam Board Insulation:
- High Insulating Performance: Foam board insulation provides excellent thermal insulation, helping to prevent heat transfer and maintain consistent temperatures within the ductwork. Its high insulating performance significantly reduces energy loss and improves overall energy efficiency.
- Moisture Resistance: Foam board insulation is resistant to moisture, preventing the growth of mold or mildew within the ductwork. It also retains its insulating properties even when exposed to high humidity levels, making it ideal for humid environments.
- Lightweight and Easy to Handle: Foam board insulation is lightweight and easy to handle, making it convenient for installation. The rigid panels can be easily cut to fit the required dimensions of the ductwork, allowing for precise and efficient installation.
- Durable: Foam board insulation is durable and resistant to compression. It retains its shape and insulating properties over time, providing long-lasting performance for the ductwork system.
- Versatility: Foam board insulation can be used in various applications, including both interior and exterior ductwork. It is suitable for insulating ducts in tight spaces, irregular shapes, or areas with limited access.
Drawbacks of Foam Board Insulation:
- Cost: Foam board insulation is generally more expensive compared to other insulation materials, such as fiberglass or mineral wool. The higher cost may be a limiting factor for some individuals or projects with budget constraints.
- Sealing Requirements: Foam board insulation alone may not provide an adequate barrier against air leakage. Proper sealing with tapes or sealants is necessary to prevent air leakage and ensure optimal energy efficiency.
- Special Handling Requirements: Foam board insulation requires special handling precautions, including wearing protective clothing and a mask when cutting or working with the material. The dust or particles released during installation can be harmful if inhaled or ingested.
- Space Considerations: Foam board insulation is thicker compared to other insulation materials, which may require additional space in the ductwork. Ensuring enough space is available for insulation is important to prevent airflow restrictions.
Despite the higher cost and special handling requirements, foam board insulation is an excellent choice for ductwork insulation due to its high insulating performance, moisture resistance, and versatility. Proper installation techniques should be followed to ensure a secure and airtight fit for optimal energy efficiency.
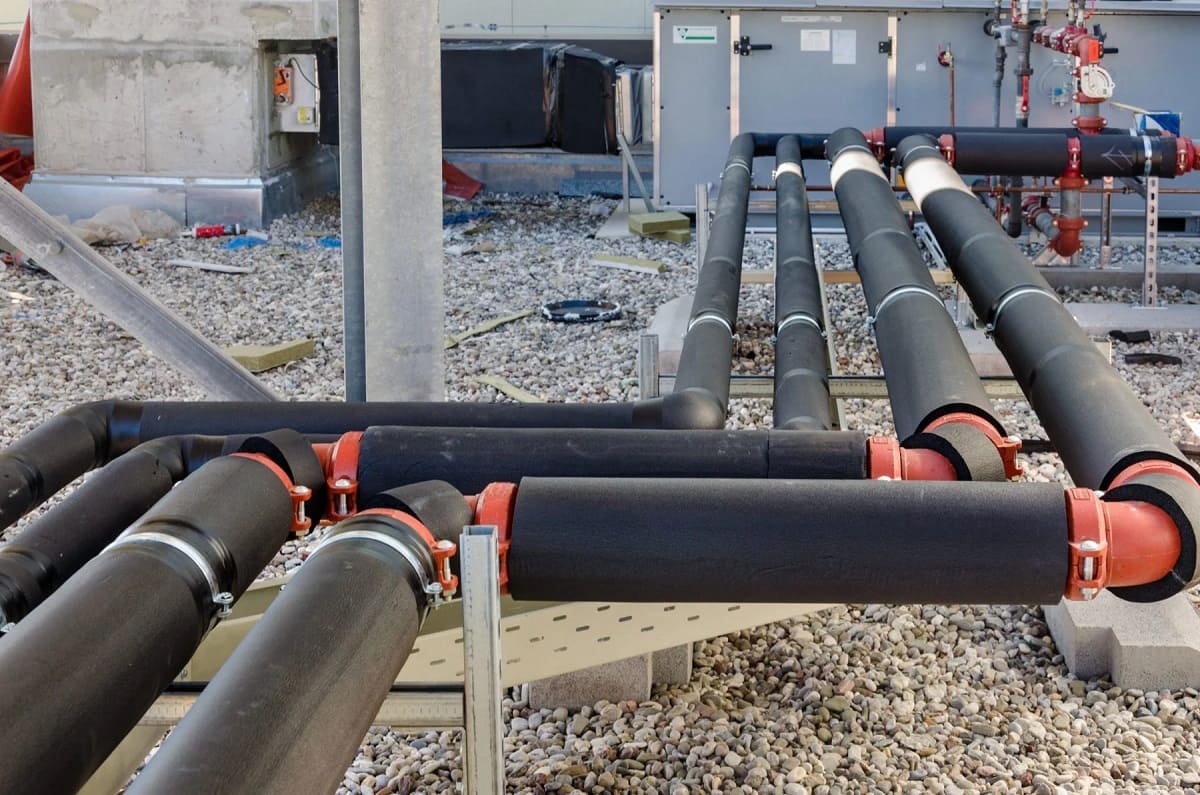
Reflective Insulation
Reflective insulation is a unique type of insulation commonly used for ductwork. It consists of a layer of aluminum foil or a metallic coating applied to a substrate material, such as polyethylene foam or bubble wrap. Reflective insulation works by reflecting radiant heat away from the ductwork, helping to maintain consistent temperatures. Let’s explore the benefits and drawbacks of using reflective insulation:
Read more: What Is The Best Natural Insulation
Benefits of Reflective Insulation:
- Radiant Heat Reflectivity: Reflective insulation is highly effective at reflecting radiant heat away from the ductwork. It acts as a barrier, preventing the transfer of heat into or out of the ducts. This can help maintain more stable temperatures within the ductwork and improve energy efficiency.
- Moisture Resistance: Reflective insulation is typically resistant to moisture, preventing the growth of mold or mildew within the ductwork. It can also help reduce condensation on the duct surfaces, improving indoor air quality and preventing potential damage.
- Easy Installation: Reflective insulation is easy to install. It is often available in rolls or sheets that can be cut to size and wrapped around the ductwork. Adhesive or tape can be used to secure the insulation in place.
- Space-Saving: Reflective insulation is relatively thin and lightweight compared to other insulation materials. This makes it ideal for situations where space is limited or when insulating tight areas within the ductwork.
- Compatibility with Other Insulation: Reflective insulation can be used in combination with other insulation materials for enhanced insulation performance. By adding a layer of reflective insulation to existing insulation, you can further reduce heat transfer and improve overall energy efficiency.
Drawbacks of Reflective Insulation:
- Limited Insulating Value: Reflective insulation primarily focuses on reflecting radiant heat and may not provide as much insulation against conductive or convective heat transfer. Its effectiveness may vary depending on the specific conditions and the amount of radiant heat present.
- Dependence on Air Space: Reflective insulation requires an air gap or space on one or both sides to effectively reflect radiant heat. If the insulation comes into direct contact with a surface, such as the duct, its reflective properties may be diminished.
- Scratch or Tear Vulnerability: The aluminum foil or metallic coating on reflective insulation can be prone to scratching or tearing during installation or handling. Care should be taken to avoid damage to the reflective surface.
- Higher Cost: Reflective insulation may be more costly compared to traditional insulation materials. The higher upfront cost may be a consideration for those on a budget.
Despite its limitations, reflective insulation offers unique benefits for ductwork insulation, particularly in hot climates or when addressing radiant heat transfer. By understanding its advantages and drawbacks, you can determine whether reflective insulation is the right choice for your specific ductwork insulation needs.
Benefits and Drawbacks of Different Insulation Types
When it comes to insulating your ductwork, there are various insulation types to choose from, each with its own set of benefits and drawbacks. Understanding these advantages and disadvantages can help you make an informed decision regarding the best insulation for your ductwork. Let’s examine the benefits and drawbacks of the different insulation types we’ve discussed:
Fiberglass Insulation:
Benefits:
- Good thermal insulation
- Affordable
- Easy installation
- Available in various thicknesses and R-values
- Fire-resistant options available
Drawbacks:
- Potential for moisture absorption
- Potential health concerns if not handled properly
- Reduced effectiveness at higher temperatures
- May require additional materials for proper sealing
Read more: How To Remove HVAC Ductwork
Mineral Wool Insulation:
Benefits:
- Excellent fire resistance
- Good thermal insulation
- Provides effective soundproofing
- Moisture-resistant
- Durable and long-lasting
Drawbacks:
- Density makes it heavier and harder to handle
- Higher cost compared to other insulation types
- Special precautions required during installation
- Potential for compression over time
Foam Board Insulation:
Benefits:
- High insulating performance
- Moisture-resistant
- Lightweight and easy to handle
- Durable and resistant to compression
- Suitable for tight spaces and irregular shapes
Drawbacks:
- Higher cost compared to other insulation types
- Proper sealing required to prevent air leakage
- Special handling requirements
- Thicker profile may require more space in the ductwork
Reflective Insulation:
Benefits:
- Effective at reflecting radiant heat
- Moisture-resistant
- Easy and lightweight installation
- Space-saving
- Compatible with other insulation materials
Drawbacks:
- Limited insulation value against conductive or convective heat transfer
- Dependence on air space for effectiveness
- Vulnerable to scratching or tearing
- Higher cost compared to traditional insulation materials
It’s important to consider the specific requirements of your ductwork and your budget when evaluating the benefits and drawbacks of each insulation type. Additionally, factors such as climate, space availability, and installation requirements should also be taken into account. By carefully considering these factors, you can select the insulation type that best meets your needs and ensures optimal performance and energy efficiency for your ductwork system.
Choosing the Best Insulation for Ductwork
When it comes to selecting the best insulation for your ductwork, there are several factors to consider. By carefully assessing these factors, you can make an informed decision that saves energy, improves system performance, and meets your specific requirements. Here’s a guide to help you choose the best insulation for your ductwork:
Read more: How To Install Ductwork For Range Hood
Consider Your Needs:
Start by understanding your specific needs and goals. Consider factors such as your climate, the desired temperature control inside the ductwork, and the level of insulation required. These considerations will help determine the required R-value and insulation performance necessary for your ductwork system.
Evaluate Insulation Properties:
Research and compare the insulation properties of different materials. Look for materials that offer good thermal insulation, fire resistance, moisture resistance, and soundproofing capabilities. Consider the advantages and drawbacks of each insulation type discussed in the previous sections.
Assess Installation Requirements:
Consider the complexity of the installation process and your ability or willingness to perform the installation yourself. Some insulation types may require professional assistance, specialized tools, or specific installation techniques. Evaluate the space availability in your ductwork and ensure there is enough room for the chosen insulation material.
Budget Considerations:
Take into account your budget for ductwork insulation. Different insulation types have varying costs associated with materials and installation. Balance your desired insulation performance with your budget constraints to find a suitable solution.
Read more: What Insulation Is Best For Garage Walls
Seek Professional Advice:
If you are unsure about which insulation type to choose or the specific requirements for your ductwork system, consult with a professional HVAC technician or insulation contractor. They will assess your ductwork, consider your needs, and recommend the most appropriate insulation solution.
Consider Complementary Insulation:
In some cases, combining different insulation types can yield better results. For example, using reflective insulation in conjunction with fiberglass or foam board insulation can enhance thermal performance and energy efficiency. This can be particularly beneficial if you have specific requirements, such as high-temperature environments or significant radiant heat transfer.
By considering these factors and seeking professional advice if needed, you can choose the best insulation for your ductwork that provides optimal thermal insulation, moisture resistance, fire resistance, and overall energy efficiency.
Installation Process for Ductwork Insulation
The installation of ductwork insulation requires proper techniques and attention to detail to ensure an effective and efficient insulation system. While the specific steps may vary based on the type of insulation chosen, here is a general overview of the installation process for ductwork insulation:
1. Prepare the Ductwork:
Before beginning the insulation installation, it is important to clean the ductwork thoroughly to remove any dirt, dust, or debris. This will help ensure proper adhesion and a clean surface for the insulation material.
Read more: What Is The Best Kind Of Attic Insulation
2. Measure and Cut the Insulation Material:
Measure the dimensions of the ductwork accurately to determine the required length and width of the insulation material. Use a utility knife or appropriate cutting tool to cut the insulation sheets or rolls to the correct size. Ensure that the insulation fits snugly around the ductwork.
3. Apply Adhesive or Fasteners:
If necessary, apply adhesive or use mechanical fasteners to secure the insulation material in place. Follow the manufacturer’s instructions for the specific type of insulation being used. Adhesive should be applied evenly to ensure proper adhesion to the ductwork surface.
4. Seal Joints and Seams:
Properly seal any joints or seams in the insulation material to prevent air leakage and ensure maximum energy efficiency. Use appropriate sealing materials, such as foil tape or mastic, to create a tight seal. Pay close attention to corners, edges, and connections to ensure no gaps are present.
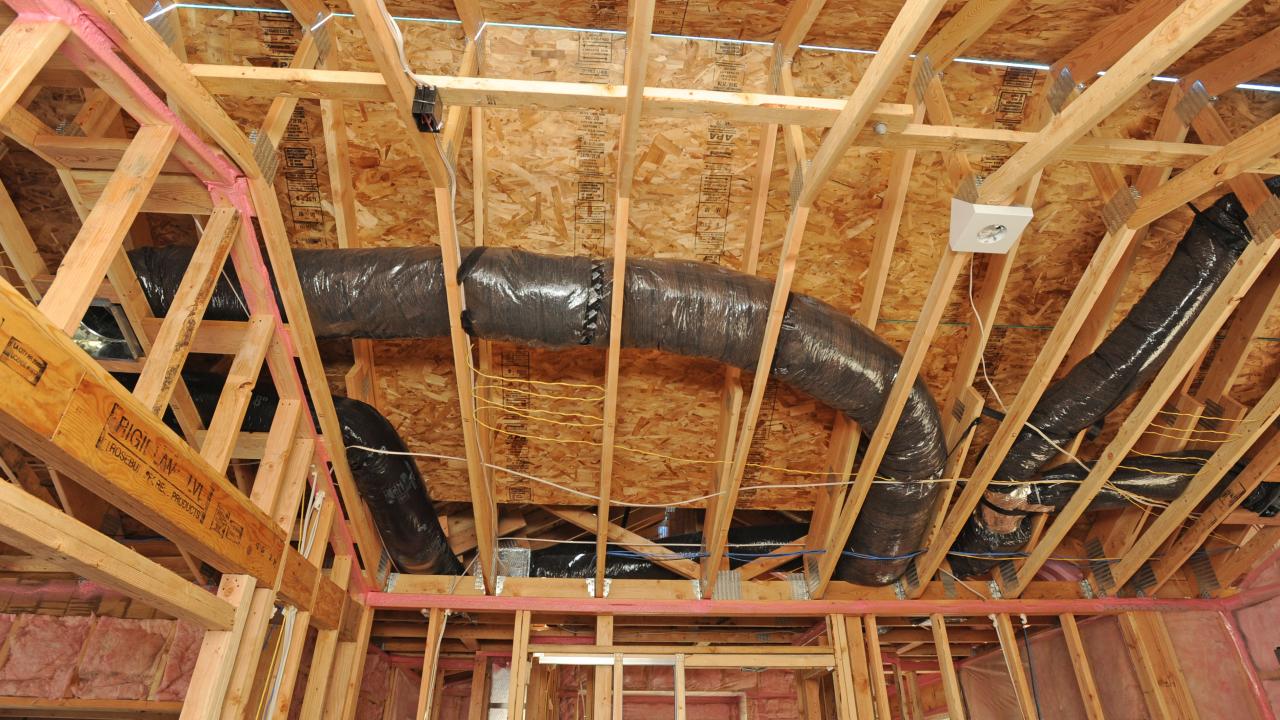
5. Insulate Duct Connections and Plenums:
In addition to insulating the main sections of the ductwork, it is important to insulate duct connections and plenums. These areas are vulnerable to heat transfer and should be adequately covered with insulation material to maintain consistent temperatures throughout the system.
6. Consider Vapor Barrier and Reflective Insulation:
If using insulation materials that require a vapor barrier, ensure that it is properly installed. The vapor barrier should be placed on the warm side of the insulation. If using reflective insulation, make sure there is an air gap on one or both sides of the reflective surface to allow for effective heat reflection.
7. Inspect and Test the Insulation:
Once the insulation installation is complete, inspect the entire ductwork system to ensure the insulation is properly installed, secure, and sealed. Test the ductwork system for air leakage by conducting a pressure test or using smoke pencils to identify any areas of concern.
8. Follow Safety Precautions:
During the installation process, it is important to follow safety precautions, particularly when working with certain insulation types such as fiberglass. Wear appropriate protective clothing, including gloves, goggles, and a mask, to protect against skin irritation and respiratory issues associated with insulation materials.
Remember, the proper installation of ductwork insulation is essential for maximizing energy efficiency, preventing heat loss or gain, and ensuring optimal performance of the HVAC system. If you are unsure about the installation process, it is recommended to seek assistance from a professional insulation contractor or HVAC technician.
Conclusion
Insulating your ductwork is crucial for optimizing the efficiency of your HVAC system and reducing energy loss. By choosing the right insulation for your ductwork, you can prevent heat gain or loss, reduce condensation, and improve overall system performance. Throughout this article, we have explored the factors to consider when selecting ductwork insulation, the different types of insulation available, and their respective benefits and drawbacks.
Fiberglass insulation is a popular and affordable option, offering good thermal insulation and ease of installation. Mineral wool insulation provides excellent fire resistance and soundproofing capabilities, making it a suitable choice for those concerned with safety and noise control. Foam board insulation offers high insulation performance, moisture resistance, and lightweight installation for tight spaces. Reflective insulation is effective at reflecting radiant heat and is particularly beneficial in hot climates.
When choosing the best insulation for your ductwork, be sure to consider your specific needs, evaluate the insulation properties, assess installation requirements, and factor in your budget. Seeking professional advice can also help ensure that you make an informed decision and achieve optimal results.
Once you have selected the appropriate insulation, it is important to follow proper installation techniques. This includes preparing the ductwork, accurately measuring and cutting the insulation material, securing it in place with adhesive or fasteners, sealing joints and seams to prevent air leakage, and insulating duct connections and plenums. Conducting a thorough inspection and testing for air leakage will help ensure a successful installation.
Ultimately, proper ductwork insulation is not only beneficial for energy efficiency and cost savings, but also for maintaining a comfortable indoor environment. It reduces temperature fluctuations, improves airflow, and contributes to better indoor air quality by preventing moisture buildup and mold growth.
In conclusion, by understanding the different types of ductwork insulation available and considering the specific requirements of your ductwork system, you can make an informed decision and optimize the performance and energy efficiency of your HVAC system for years to come. Ensure proper installation procedures are followed and regularly maintain your ductwork insulation to reap the long-term benefits it provides.
Frequently Asked Questions about What Insulation Is The Best For Ductwork?
Was this page helpful?
At Storables.com, we guarantee accurate and reliable information. Our content, validated by Expert Board Contributors, is crafted following stringent Editorial Policies. We're committed to providing you with well-researched, expert-backed insights for all your informational needs.
0 thoughts on “What Insulation Is The Best For Ductwork?”