Articles
How To Seal Cedar Fence
Modified: August 28, 2024
Discover the best method for sealing your cedar fence with our informative articles. Protect your investment and keep your fence looking beautiful.
(Many of the links in this article redirect to a specific reviewed product. Your purchase of these products through affiliate links helps to generate commission for Storables.com, at no extra cost. Learn more)
Introduction
When it comes to enhancing the durability and aesthetics of your cedar fence, one of the most effective methods is to seal it. Sealing not only protects the wood from moisture, UV rays, and other external elements but also adds a beautiful finish that accentuates the natural beauty of the cedar. By following a few simple steps, you can seal your cedar fence and ensure it stays looking great for years to come.
In this article, we will guide you through the process of sealing a cedar fence, from gathering the necessary materials to maintaining the sealed surface. By the end, you will have all the knowledge you need to transform your cedar fence into a long-lasting and visually appealing asset for your property.
Before we dive into the steps, it’s important to note that sealing a cedar fence is a project that requires some preparation and careful execution. However, with the right tools and a little bit of patience, you can easily achieve professional-looking results.
So, let’s get started on the journey to sealing your cedar fence!
Key Takeaways:
- Sealing your cedar fence is a multi-step process that involves gathering materials, cleaning, sanding, priming, and applying sealant. Proper maintenance is crucial to preserve the fence’s beauty and durability for years to come.
- Choosing the right sealant and applying it correctly is essential for protecting your cedar fence from the elements. Regular maintenance, including cleaning, resealing, and addressing any damage, is key to ensuring the longevity of your sealed cedar fence.
Read more: How To Seal A Fence
Step 1: Gather the necessary materials
Before you begin the process of sealing your cedar fence, it’s important to gather all the necessary materials. By having everything you need on hand, you can ensure a smooth and efficient sealing process. Here are the materials you will need:
- Pressure washer or hose
- Bristle brush or scrub brush
- Sandpaper or sanding block
- Primer
- Cedar fence sealant
- Paint roller or brush
- Paint tray
- Drop cloth or plastic sheet
- Protective gloves
- Eye goggles
- Dust mask
The Pressure washer or hose will be used to clean the cedar fence, while the brush will help remove any dirt or debris. The sandpaper or sanding block is necessary to smoothen the surface of the wood. Primer is essential to ensure proper adhesion of the sealant, and the cedar fence sealant will protect the wood from weathering.
Using a paint roller or brush, you will apply the sealant to the fence. The paint tray will make it easier to dip the roller or brush into the sealant, while the drop cloth or plastic sheet will help protect the surrounding area from any accidental spills or splatters.
Lastly, don’t forget to wear protective gloves, eye goggles, and a dust mask for safety purposes. This will protect your skin, eyes, and respiratory system from any potential hazards during the sealing process.
Once you’ve gathered all these materials, you are ready to move on to the next step of cleaning the cedar fence.
Step 2: Clean the cedar fence
Before you start sealing your cedar fence, it’s crucial to ensure that the surface is clean and free from any dirt, grime, or debris. Cleaning the fence thoroughly will allow the sealant to adhere properly and provide maximum protection to the wood. Here are the steps to follow:
- Begin by using a pressure washer or a hose with a high-pressure nozzle to remove any loose dirt or debris from the fence. Start at the top and work your way down, using sweeping motions to cover each section evenly. Pay extra attention to areas with stubborn stains or mold.
- If the pressure washer doesn’t fully remove any stubborn dirt or stains, you can use a bristle brush or scrub brush to scrub the fence gently. Dip the brush into a mild detergent solution or a specialized fence cleaner and scrub the affected areas in a circular motion.
- Rinse the fence thoroughly with clean water to remove any residual detergent or cleaner. Ensure that all soap suds are completely washed off.
- Allow the fence to dry completely before proceeding to the next step. This step is crucial as any moisture on the surface can interfere with the adhesion and effectiveness of the sealant.
By cleaning your cedar fence thoroughly, you provide a clean canvas for the sealant to adhere to. This not only ensures better protection but also enhances the overall appearance of your fence. Once the fence is dry, you can proceed to the next step: sanding the surface.
Step 3: Sand the surface
After cleaning your cedar fence, the next step is to sand the surface. Sanding helps to smoothen any rough areas, remove imperfections, and create a clean and even surface for better adhesion of the sealant. Here’s how to sand your cedar fence:
- Start by choosing the appropriate grit sandpaper or sanding block. Coarser grits like 80 or 100 are suitable for removing rough spots or old sealant, while finer grits like 120 or 150 are ideal for refining the surface.
- Using smooth, even strokes, sand the entire surface of the cedar fence. Make sure to sand along the grain of the wood to avoid causing any damage or scratches. Pay particular attention to areas that appear uneven or rough.
- If there are any areas with splinters, use a gentle back-and-forth motion to sand them down, ensuring they are smooth to the touch. Be careful not to oversand and remove too much of the wood.
- Once you have sanded the entire fence, use a dry cloth or brush to remove any dust or debris produced during the sanding process. This will ensure a clean surface for the next steps of priming and sealing.
Sanding the surface of your cedar fence not only helps to create a smooth finish but also allows the sealant to adhere more effectively to the wood. It also helps to open up the pores of the wood, allowing the sealant to penetrate deeper and provide better protection against the elements.
After sanding, you are ready to move on to the next step of the sealing process: applying the primer.
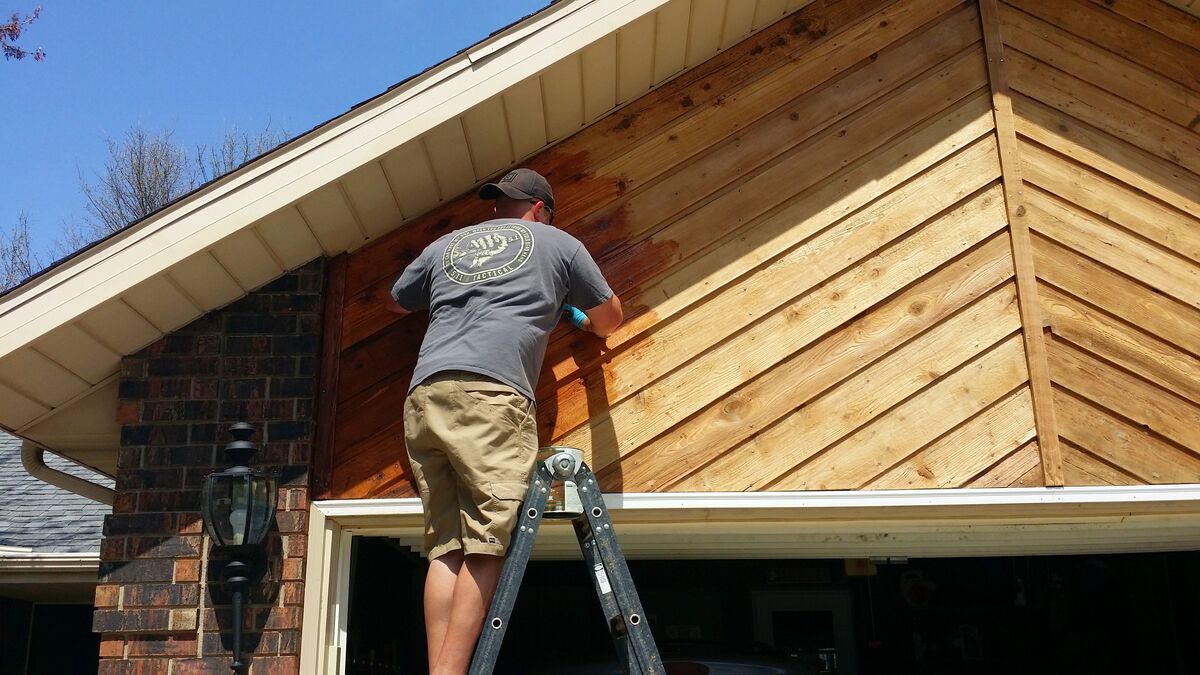
Step 4: Apply the primer
Applying a primer is essential before sealing a cedar fence, as it helps to improve the adhesion of the sealant and enhance the overall durability of the wood. The primer acts as a barrier between the wood and the sealant, ensuring that the sealant adheres properly and provides long-lasting protection. Here’s how to apply the primer:
- Choose a high-quality exterior wood primer that is suitable for cedar. Look for a primer that is specifically designed to penetrate the wood and provide excellent adhesion.
- Before applying the primer, ensure that the cedar fence surface is clean and dry. Remove any remaining dust or debris with a brush or cloth.
- Pour the primer into a paint tray or container.
- Using a paintbrush or roller, start applying the primer to the cedar fence. Begin at the top and work your way down, applying an even coat of primer to each section. Ensure that the primer is spread evenly and covers the entire surface.
- Pay extra attention to any knots or rough areas on the fence, as these may require additional primer for optimal coverage and protection.
- Allow the primer to dry completely according to the manufacturer’s instructions. This typically takes a few hours, but it’s important to check the drying time specified on the primer can.
- Once the primer is fully dry, inspect the cedar fence to ensure that the primer has created a solid and even base for the sealant.
The primer helps to seal the pores of the wood and creates a smoother surface for the sealant to be applied. It enhances the performance and longevity of the sealant, providing a strong and reliable barrier against moisture, UV rays, and other environmental factors.
After the primer has dried, you are ready to proceed to the next step: choosing and applying the sealant.
Apply a high-quality exterior wood sealant to your cedar fence to protect it from moisture, UV rays, and rot. Make sure to follow the manufacturer’s instructions for proper application and reapplication.
Read more: How Long Will Cedar Fence Last
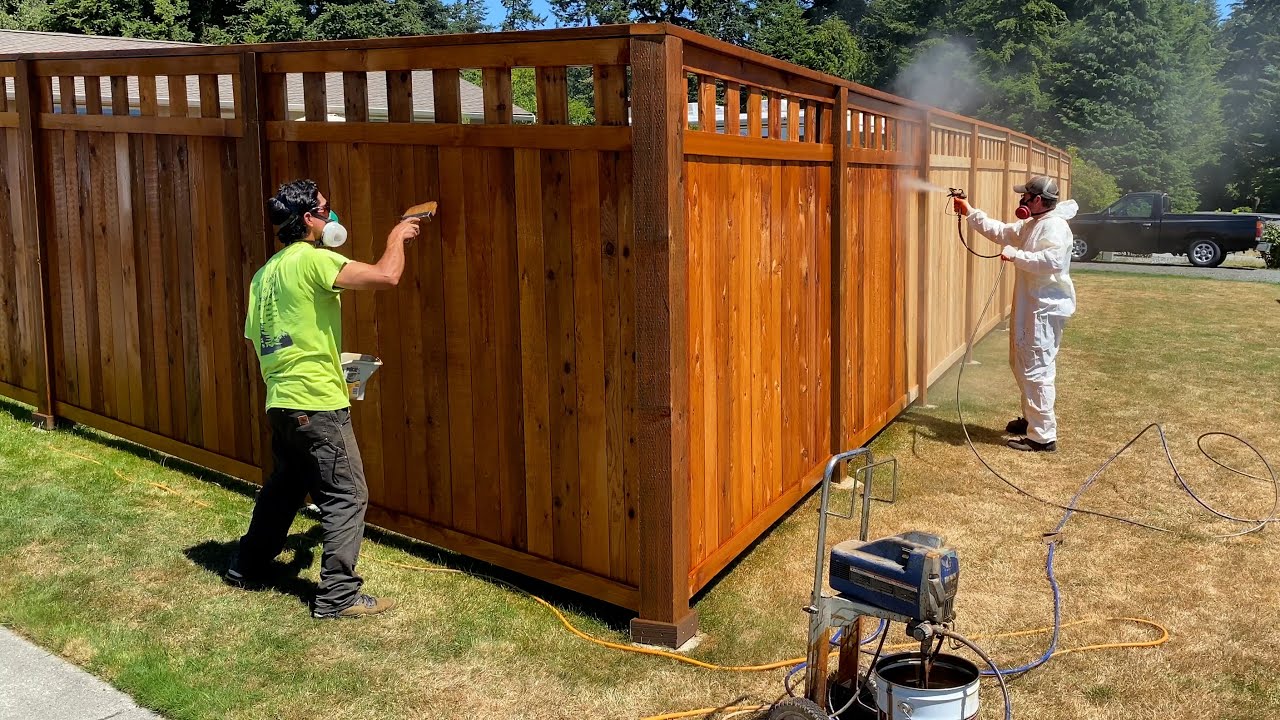
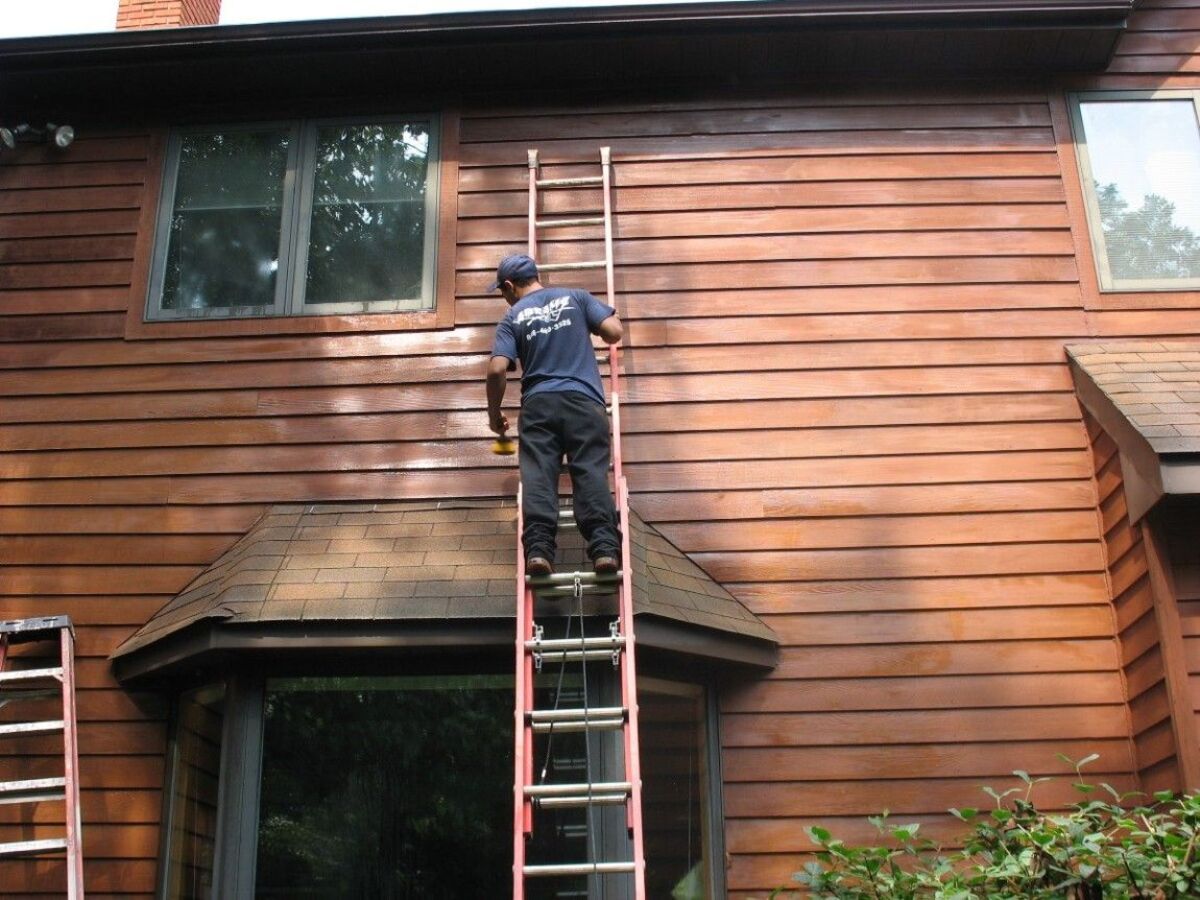
Step 5: Choose and apply the sealant
Choosing the right sealant for your cedar fence is crucial to ensure optimal protection and longevity. There are various types of sealants available, including transparent, semi-transparent, and solid color options. Consider the level of protection and the desired aesthetic effect when making your selection. Here’s how to choose and apply the sealant:
- Read the labels and product descriptions to find a sealant that is specifically designed for cedar or exterior wood. Look for a sealant that offers UV protection, water repellency, mildew resistance, and durable finish.
- If you prefer to maintain the natural look of the cedar, opt for a transparent or semi-transparent sealant that allows the wood’s natural grain and color to show through. If you want to add color or a more solid appearance, choose a solid color sealant that complements your preferred aesthetic.
- Before applying the sealant, ensure that the primer is dry and the weather conditions are suitable. Avoid sealing in rainy or humid weather, as it may affect the drying process and the final finish.
- Pour the sealant into a paint tray or container.
- Using a paintbrush or roller, start applying the sealant to the cedar fence. Begin at the top and work your way down, following the direction of the wood’s grain. Apply an even and generous coat of sealant, ensuring that the wood is fully covered and saturated.
- Pay attention to any knots, cracks, or areas of the fence that are more exposed to the elements, as these may require an additional coat of sealant for extra protection.
- Allow the first coat of sealant to dry completely according to the manufacturer’s instructions. This typically takes around 24 hours, but it’s important to check the drying time specified on the sealant can.
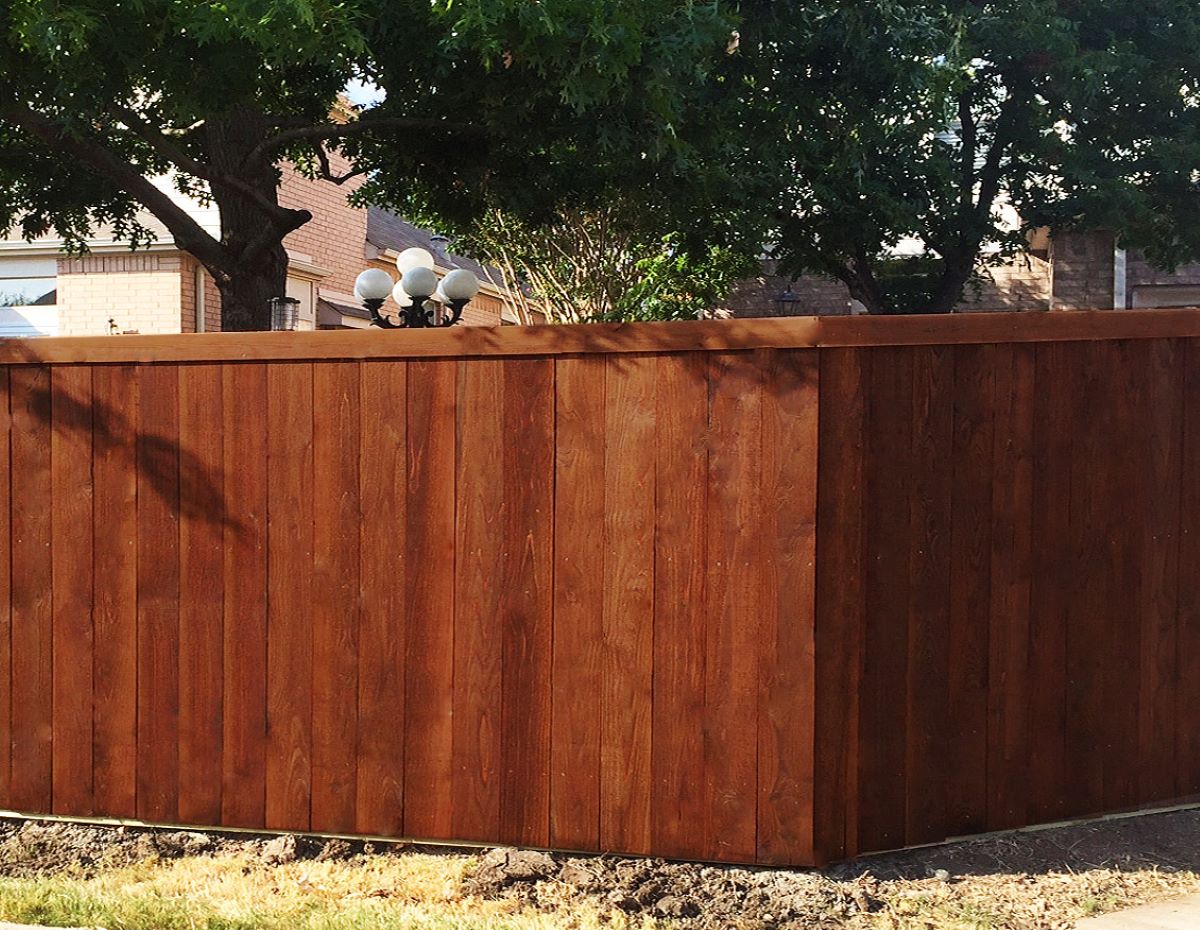
Applying a high-quality sealant to your cedar fence helps to create a protective barrier against moisture, UV rays, and other environmental factors. It enhances the natural beauty of the wood, prevents rotting and warping, and extends the lifespan of your fence.
If desired, you can apply a second coat of sealant for added protection and durability. However, it’s important to note that the second coat should be applied only after the first coat has dried completely.
Once the sealant is dry, you can admire your newly sealed cedar fence. But remember, maintenance is key to keeping it in pristine condition for years to come.
Step 6: Let the sealant dry
After applying the sealant to your cedar fence, it’s important to allow it sufficient time to dry and cure effectively. Drying the sealant properly will ensure that it forms a strong protective layer on the wood, providing the best possible defense against the elements. Follow these guidelines to let the sealant dry:
- Check the label or manufacturer’s instructions for the recommended drying time. The drying time may vary depending on the type of sealant and weather conditions.
- Avoid touching or disturbing the freshly applied sealant during the drying process. Keeping the area undisturbed allows the sealant to settle and form a smooth, even protective layer on the cedar fence.
- Consider weather conditions when determining the drying time. If the weather is humid, it may take longer for the sealant to dry completely. Optimal drying conditions are warm and dry weather with low humidity.
- Keep the fence protected from rain, sprinklers, or other sources of moisture during the drying period. Moisture can interfere with the drying process and affect the performance of the sealant.
- Monitor the sealant’s appearance as it dries. It should gradually become more transparent or take on the desired color, depending on the type of sealant used.
- Allow at least 24 hours for the first coat of sealant to dry. For a second coat, follow the recommended drying time specified by the manufacturer.
Proper drying of the sealant is essential for the ultimate effectiveness of the sealing process. It ensures that the sealant adheres firmly to the cedar fence, creating a protective barrier that guards against moisture, sun damage, and other environmental factors.
Once the sealant is completely dry, you can move on to the next step, which is applying a second coat of sealant (optional) to further enhance your cedar fence’s protection and appearance.
Step 7: Apply a second coat (optional)
Applying a second coat of sealant to your cedar fence is an optional step that can provide additional protection and enhance the longevity of the seal. Adding a second coat can help to further seal the wood, increase durability, and improve the overall appearance of your fence. Here’s how to apply a second coat of sealant:
- Ensure that the first coat of sealant is completely dry. Refer to the manufacturer’s instructions for the recommended drying time.
- Inspect the first coat of sealant and the overall condition of your cedar fence. Look for any missed areas, uneven coverage, or spots that may require additional protection.
- If you decide to apply a second coat, gently stir or shake the sealant can to ensure that the contents are well mixed.
- Use the same application method you used for the first coat – whether it’s a paintbrush or roller – to apply the second coat evenly to the cedar fence. Make sure to follow the direction of the wood’s grain for a smooth and consistent application.
- Pay attention to any areas that may require extra coverage or protection, such as knots, cracks, or exposed sections of the fence.
- Allow the second coat of sealant to dry thoroughly according to the recommended drying time specified by the manufacturer.
A second coat of sealant can help to further enhance the protective barrier on your cedar fence, fortifying it against moisture, UV rays, and other environmental factors. It can also deepen the color and richness of the sealant, providing a more appealing aesthetic result.
However, it’s important to note that applying a second coat is optional and depends on your personal preference and the condition of your fence. If you are satisfied with the coverage and appearance after the first coat, you can skip this step and move on to the next step: maintaining your newly sealed cedar fence.
Step 8: Maintain the sealed cedar fence
Proper maintenance is key to ensuring that your newly sealed cedar fence remains in excellent condition for years to come. By implementing a regular maintenance routine, you can extend the lifespan of the sealant and preserve the beauty of your fence. Follow these guidelines to maintain your sealed cedar fence:
- Regularly inspect your fence for any signs of damage or wear. Look for cracks, splintering, or peeling of the sealant. Promptly address any issues to prevent further damage.
- Clean your fence periodically to remove dirt, dust, and other debris. Use a gentle cleanser or specialized fence cleaner, along with a soft brush or cloth, to avoid scratching or damaging the sealant.
- Trim any nearby vegetation or bushes that may come into contact with your fence. Overhanging branches or plants can hold moisture against the wood, potentially leading to mold or rot.
- Reapply a fresh coat of sealant as needed. Over time, the sealant may wear off and require reapplication. Follow the manufacturer’s guidelines regarding when to reseal, typically every 2-3 years for transparent or semi-transparent sealants, and every 4-5 years for solid color sealants.
- If you notice any mildew or mold growth on your fence, clean it with a mildew remover specifically formulated for wood surfaces. Follow the instructions carefully and rinse thoroughly afterwards.
- Protect your fence from excessive exposure to the sun by providing shade through the use of awnings, umbrellas, or strategically placed plants. UV rays can cause the sealant to fade and degrade over time.
- During the winter months, remove any snow or ice that accumulates on your fence. The weight of snow or ice can cause stress on the wood and the sealant.
By implementing these maintenance practices, you can ensure that your sealed cedar fence remains strong, beautiful, and well-protected. Regular maintenance will help preserve the integrity of the sealant and extend the lifespan of your fence, allowing you to enjoy its natural beauty and functionality for many years to come.
Congratulations! You have successfully sealed and maintained your cedar fence, creating a durable and visually appealing outdoor barrier for your property.
Read more: When To Stain A New Cedar Fence
Conclusion
Sealing your cedar fence is a worthwhile investment that can significantly enhance its durability and aesthetics. By following the steps outlined in this article, you can protect your fence from the damaging effects of moisture, UV rays, and other external elements, while also maintaining its natural beauty.
From gathering the necessary materials and cleaning the fence to applying the primer, sealant, and optional second coat, each step plays a crucial role in ensuring a successful sealing process. By taking the time to properly prepare and execute each step, you can achieve professional-looking results and extend the lifespan of your cedar fence.
Remember to regularly maintain your sealed cedar fence by performing routine inspections, cleaning as needed, and reapplying sealant as recommended. By implementing a consistent maintenance routine, you can ensure that your fence remains in top-notch condition for years to come.
A sealed cedar fence not only provides functional benefits, such as weather resistance and increased lifespan, but it also adds charm and character to your outdoor space. It serves as a statement piece that enhances the overall appearance of your property and helps create a welcoming and secure environment.
So, seize the opportunity to transform your cedar fence into a long-lasting and visually appealing asset. With the knowledge and guidance provided in this article, you have all the tools to embark on the journey of sealing and maintaining your cherished cedar fence.
Go ahead and take the first step towards a beautifully sealed cedar fence that will not only enhance the value of your property but also bring you years of enjoyment and pride.
Frequently Asked Questions about How To Seal Cedar Fence
Was this page helpful?
At Storables.com, we guarantee accurate and reliable information. Our content, validated by Expert Board Contributors, is crafted following stringent Editorial Policies. We're committed to providing you with well-researched, expert-backed insights for all your informational needs.


0 thoughts on “How To Seal Cedar Fence”