Articles
How To Take Care Of Cedar Siding
Modified: August 31, 2024
Learn how to properly maintain and protect your cedar siding with our informative articles. Discover expert tips and tricks to keep your siding looking beautiful for years to come.
(Many of the links in this article redirect to a specific reviewed product. Your purchase of these products through affiliate links helps to generate commission for Storables.com, at no extra cost. Learn more)
Introduction
Welcome to the comprehensive guide on how to take care of cedar siding. Cedar siding is a popular choice for homeowners due to its natural beauty, durability, and resistance to rot and insects. Whether you have already installed cedar siding or are considering it for your home, it is essential to understand how to properly maintain and protect it to ensure its long-term beauty and functionality. In this article, we will walk you through the step-by-step process of taking care of cedar siding, from understanding its benefits to troubleshooting common issues.
Cedar siding is known for its distinct grain patterns and rich color variations, making it a visually appealing choice for any home or building. Beyond its aesthetics, cedar siding offers numerous benefits that make it a smart investment. It is naturally resistant to decay, rot, and insects, reducing the risk of structural damage and the need for costly repairs. Additionally, cedar siding has excellent insulation properties, helping to keep your home comfortable and energy-efficient.
Before diving into the care and maintenance of cedar siding, it is crucial to properly prepare for its installation. This includes selecting the right type of cedar siding, preparing the surface, and ensuring the proper tools and materials are on hand. Taking these initial steps will set the foundation for a successful and long-lasting cedar siding installation.
Throughout this guide, we will provide you with the necessary knowledge and practical steps to keep your cedar siding looking its best for years to come. We will cover everything from cleaning and protecting cedar siding from weather damage to the ongoing maintenance needed to preserve its beauty. Additionally, we will address common issues that may arise and provide troubleshooting tips for overcoming them.
By following the advice and techniques outlined in this guide, you will be able to maintain the integrity and appearance of your cedar siding, prolonging its lifespan and enhancing the overall value and curb appeal of your home. So, let’s get started with understanding cedar siding and its benefits.
Key Takeaways:
- Proper care and maintenance of cedar siding, including regular cleaning, sealing gaps, and protecting from weather damage, can ensure its longevity, beauty, and functionality for years to come.
- Identifying and addressing common issues such as moisture damage, mold growth, and insect infestation is crucial for preserving the integrity and aesthetic appeal of cedar siding. Regular inspections and timely repairs are essential.
Read more: How Much Is Cedar Siding
Understanding Cedar Siding
Cedar siding is a popular choice for homeowners due to its natural beauty, durability, and versatility. It is made from cedar wood, which is known for its exceptional qualities and aesthetic appeal.
Cedar wood has several unique characteristics that make it an excellent material for siding. First and foremost, cedar is naturally resistant to decay and rot. This resistance is due to the presence of natural oils and tannins in the wood, which act as preservatives and protect the wood from moisture and insect damage.
In addition to its resistance to decay, cedar wood is also highly durable. It has a strong cellular structure that allows it to withstand harsh weather conditions, including extreme temperatures, high humidity, and UV rays from the sun. This durability ensures that cedar siding will last for many years without losing its structural integrity.
Cedar siding is available in a variety of styles, including shingles, clapboards, and shakes. Shingles are thin, uniform pieces of cedar that are installed horizontally, while clapboards are wider and can be installed either horizontally or vertically. Shakes, on the other hand, are thicker and have a more rustic appearance, as they are typically hand-split and have a rough texture.
Cedar siding is also prized for its natural beauty. The wood has a warm, reddish-brown hue that weathers over time to a beautiful silver-gray patina. Many homeowners appreciate the natural variations in color and grain pattern that cedar wood offers, giving each piece of siding a unique and rustic look.
Another advantage of cedar siding is its ability to insulate and regulate temperature. Cedar wood has excellent natural insulating properties, helping to keep your home cool in the summer and warm in the winter. This can result in energy savings and a more comfortable living environment.
When properly maintained, cedar siding can last for several decades. Regular maintenance and care, including cleaning, staining or painting, and sealing, are crucial to preserving its beauty and durability. In the next sections, we will delve into the specific steps required to care for and maintain cedar siding.
Benefits of Cedar Siding
Choosing cedar siding for your home comes with a multitude of benefits that make it a popular choice among homeowners. From its natural beauty to its durability and eco-friendliness, cedar siding offers numerous advantages. Here are some key benefits of using cedar siding:
- Enhanced Aesthetic Appeal: Cedar siding adds a touch of natural beauty and warmth to any home. The rich color variations and distinct wood grain patterns of cedar create a visually appealing exterior that stands out. Whether you prefer a traditional or contemporary look, cedar siding provides a timeless elegance that complements various architectural styles.
- Durability and Longevity: Cedar is renowned for its durability and longevity. It is naturally resistant to decay, rot, and insect damage, making it an excellent choice for exterior siding. With proper maintenance and care, cedar siding can last for several decades, saving you money on repair and replacement costs in the long run.
- Insulation and Energy Efficiency: Cedar siding has natural insulation properties, which help regulate temperature and improve energy efficiency in your home. It acts as a natural barrier that keeps your home warm in winter and cool in summer. This insulation effect can reduce heating and cooling costs, making cedar siding an eco-friendly and cost-effective choice.
- Minimal Maintenance: Another advantage of cedar siding is its low maintenance requirements. Unlike other types of siding, cedar does not require frequent painting or staining. With proper sealing and regular cleaning, cedar siding can maintain its natural beauty for years to come. Occasional inspection and minor repairs are usually sufficient to keep cedar siding in top condition.
- Environmentally Friendly: If you’re conscious about reducing your environmental footprint, cedar siding is an eco-friendly option. Cedar is a renewable resource that is sustainably harvested from responsibly managed forests. Compared to other building materials, cedar has a lower carbon footprint and is biodegradable, making it a greener choice for your home.
- Improved Home Value: Cedar siding is highly valued by homebuyers due to its aesthetic appeal and reputation for durability. Installing cedar siding can increase the curb appeal of your home and potentially raise its market value. If you ever decide to sell your property, the presence of cedar siding can be a significant selling point.
Overall, cedar siding offers a range of benefits, ranging from its natural beauty and durability to its environmental sustainability and energy efficiency. By choosing cedar siding for your home, you can enjoy a visually stunning exterior, long-lasting protection, and a positive impact on both your wallet and the environment.
Preparing for Cedar Siding Installation
Before installing cedar siding on your home, proper preparation is essential to ensure a successful and long-lasting installation. Follow these steps to prepare for cedar siding installation:
- Evaluate your existing siding: Start by assessing the current condition of your home’s exterior. If you have existing siding, determine if it needs to be removed before installing cedar siding or if it can serve as a suitable base for the new siding. In some cases, additional preparation or repairs may be necessary.
- Select the right type of cedar siding: Cedar siding comes in various styles, such as shingles, clapboards, and shakes. Consider the architectural style of your home and personal preferences when choosing the type of cedar siding. Each style has its own unique look and installation requirements.
- Prepare the surface: Ensure that the surface where the cedar siding will be installed is clean, smooth, and free from any debris or loose materials. Remove any old caulk, paint, or other substances that might interfere with the proper installation of the cedar siding.
- Address any underlying issues: Before installing cedar siding, it’s crucial to address any underlying issues such as rot, mold, or water damage. Repair or replace any damaged areas of the exterior to ensure a solid foundation for the cedar siding and prevent further damage in the future.
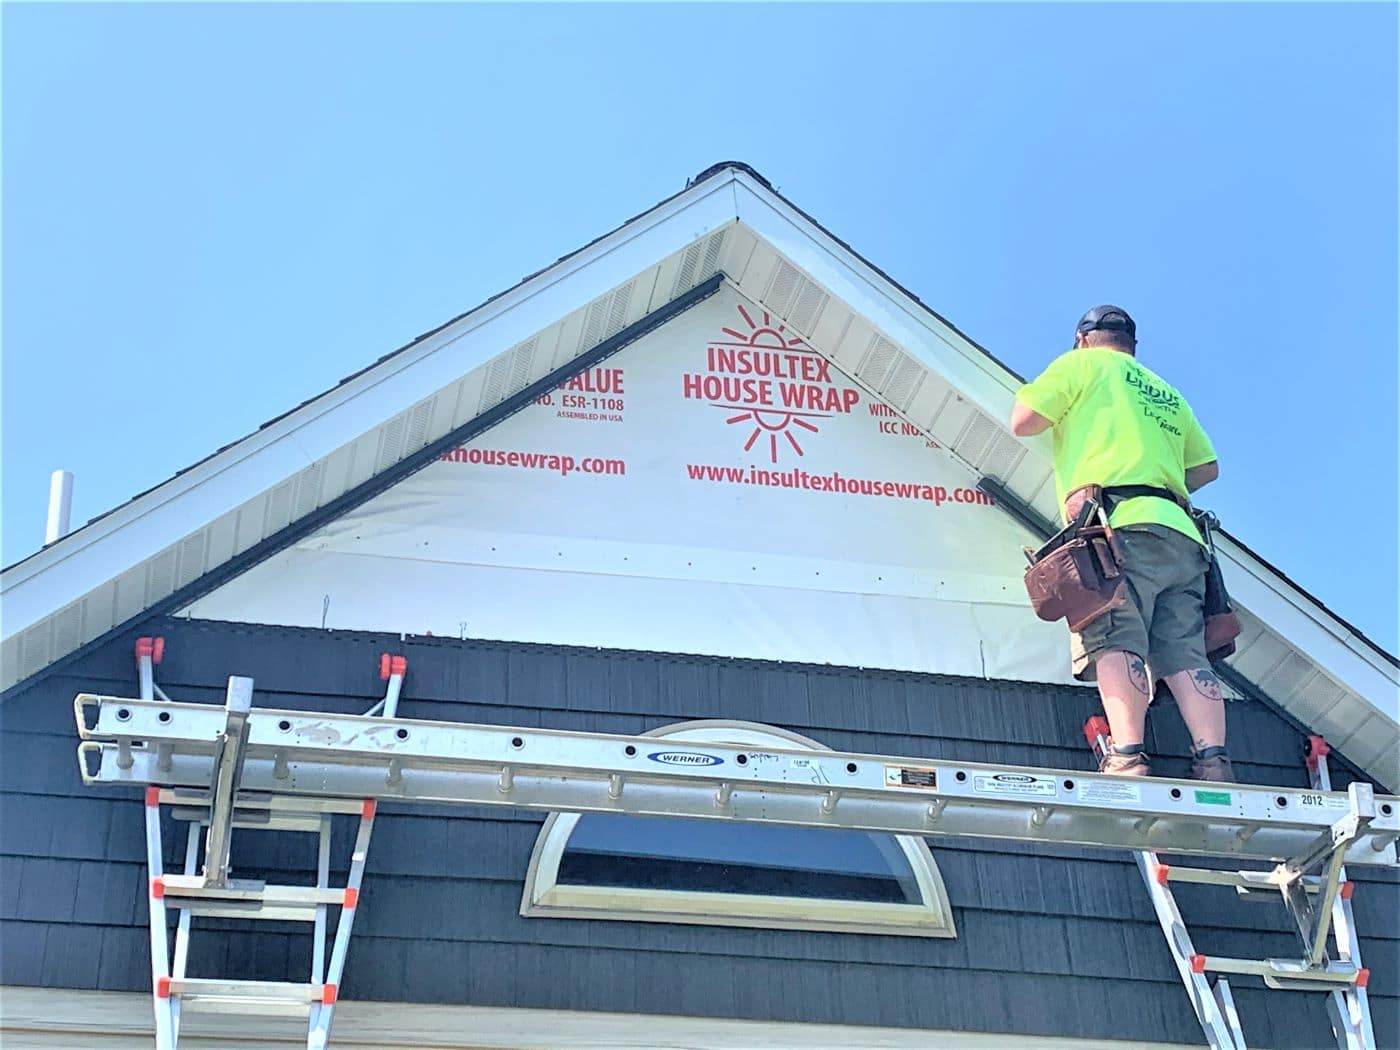
- Apply a moisture barrier: To protect your home from moisture intrusion, it is recommended to install a moisture barrier between the existing sheathing and the cedar siding. Waterproofing membranes or building wraps can serve as effective moisture barriers to prevent water from seeping into the walls and causing damage.
- Choose the right fasteners: Select the appropriate fasteners based on the type of cedar siding you are installing. Stainless steel or galvanized nails are often recommended for cedar siding due to their resistance to rust and corrosion. Make sure the length and thickness of the nails are suitable for the thickness of the cedar siding.
- Take proper measurements: Accurate measurements are crucial to ensure the cedar siding fits properly and looks aesthetically pleasing. Measure the length and width of each wall, taking into consideration any openings, corners, or architectural features. Plan the installation carefully to minimize waste and optimize the use of materials.
- Gather the necessary tools and materials: Before starting the installation, gather all the tools and materials needed, including a hammer or nail gun, a saw, a level, a tape measure, a caulk gun, and caulking. Ensure you have all the necessary nails, trim pieces, and any additional items required for your specific installation.
By properly preparing for cedar siding installation, you can set the stage for a smooth and successful project. Taking the time to evaluate your existing siding, choose the right type of cedar siding, prepare the surface, address any underlying issues, apply a moisture barrier, select the right fasteners, take accurate measurements, and gather the necessary tools and materials will help ensure a beautiful and durable result. Once the preparation is complete, you can proceed with the step-by-step installation process.
Tools and Materials Needed
When embarking on a cedar siding installation project, it is important to have the necessary tools and materials on hand to ensure a smooth and efficient process. Here is a list of the essential tools and materials you will need:
Read more: How To Wash Cedar Siding
Tools:
- Hammer or Nail Gun: Used to secure the cedar siding to the exterior wall. A nail gun can speed up the installation process.
- Saw: To cut the cedar siding to the desired lengths and angles.
- Level: To ensure the cedar siding is installed straight and level.
- Tape Measure: For accurate measurements of the walls and cedar siding pieces.
- Caulk Gun: To apply caulk to seal gaps between the cedar siding and other surfaces.
- Ladder or Scaffolding: Depending on the height of your home, you will need a ladder or scaffolding to reach higher areas for installation.
- Screwdrivers or Drill: Depending on the type of fasteners you choose, you may require a screwdriver or drill to secure the cedar siding.
- Chalk Line: Useful for marking guidelines and ensuring a straight installation.
- Utility Knife: Used for trimming excess cedar siding and making precise cuts.
- Gloves, Safety Glasses, and Ear Protection: Protective gear to ensure your safety during the installation process.
Materials:
- Cedar Siding: Choose the desired type and style of cedar siding based on your preferences and the architectural style of your home.
- Moisture Barrier: A waterproofing membrane or building wrap to protect the walls from moisture intrusion.
- Nails or Fasteners: Stainless steel or galvanized nails are commonly used for cedar siding due to their resistance to rust and corrosion. Select the appropriate length and thickness based on the thickness of the cedar siding.
- Trim Pieces: Depending on your design preferences and the specific areas of installation, you may need trim pieces to finish off the edges and corners of the cedar siding.
- Stain or Paint: If desired, you will need stain or paint to enhance the durability and appearance of the cedar siding. Choose a high-quality product specifically designed for wood siding.
- Caulk: To seal gaps and joints between cedar siding pieces and other surfaces to prevent moisture infiltration.
- Primer: If you are planning to paint the cedar siding, a primer may be required to ensure proper adhesion of the paint.
- Masonry Anchors (if applicable): If you are installing cedar siding over a masonry wall, you may need masonry anchors to secure the siding to the wall.
Having the right tools and materials readily available before starting your cedar siding installation will help streamline the process and ensure a successful outcome. It is always recommended to double-check the specific requirements of your project and consult with professionals or experts if needed.
Step-by-Step Guide to Taking Care of Cedar Siding
Cedar siding is a beautiful and durable choice for your home’s exterior, but it requires regular care and maintenance to prolong its lifespan and keep it looking its best. Follow this step-by-step guide to properly take care of your cedar siding:
Step 1: Regular Cleaning
Regular cleaning is essential to remove dirt, grime, and other debris that can accumulate on your cedar siding. Use a soft brush or a low-pressure power washer to gently scrub the surface. Avoid using high-pressure washers, as they can damage the wood fibers. Start from the top and work your way down to prevent water from seeping behind the siding.
Read more: What Is Cedar Shake Siding
Step 2: Inspect for Damage
Regularly inspect your cedar siding for any signs of damage, such as cracks, splits, or rot. Pay close attention to areas that are exposed to moisture or direct sunlight. If you notice any damage, repair or replace the affected pieces as soon as possible to prevent further deterioration and water penetration.
Step 3: Stain or Paint
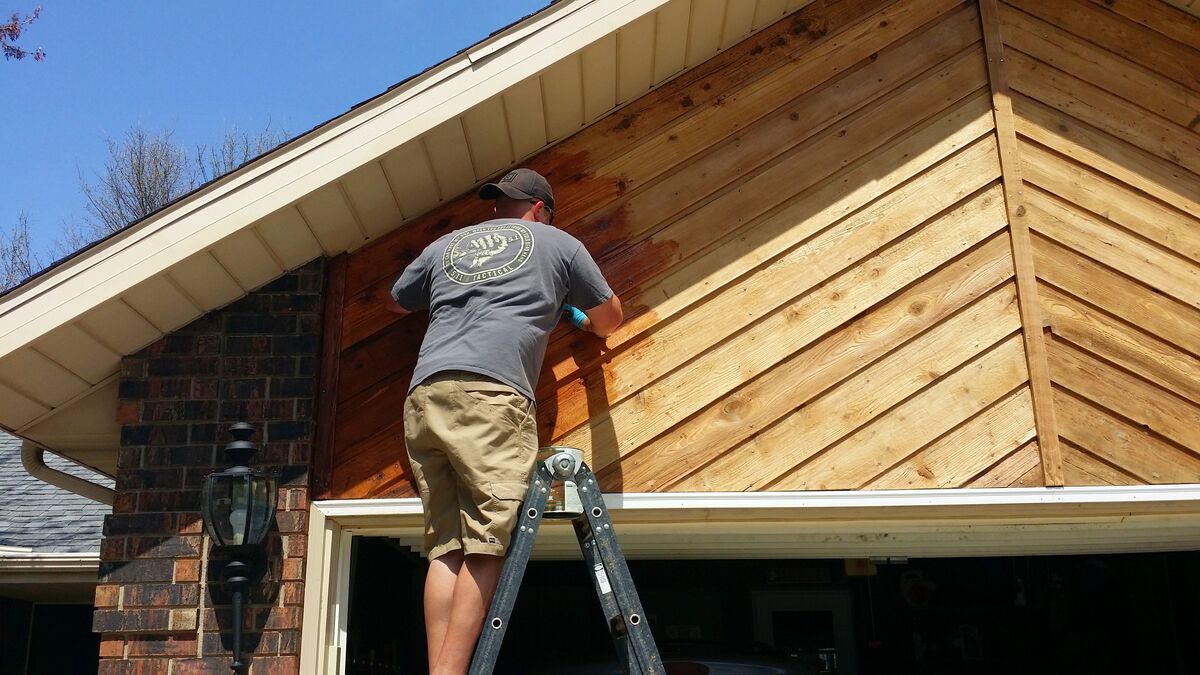
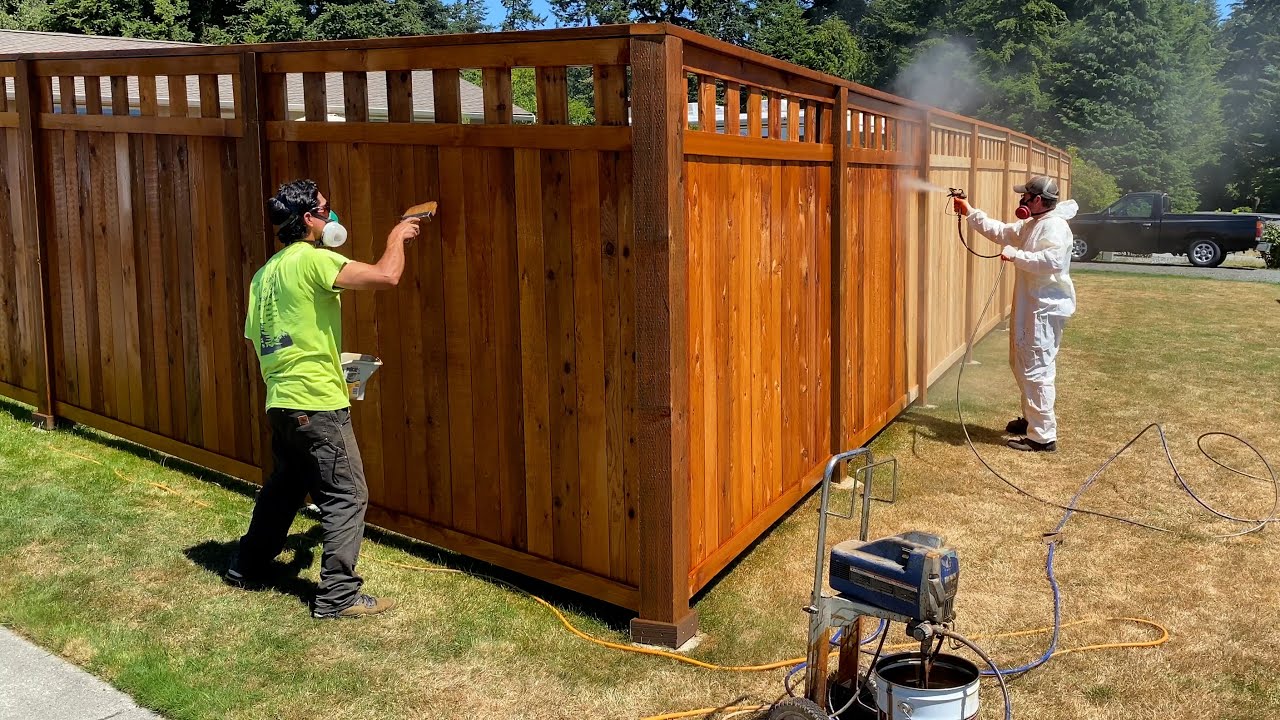
Cedar siding can be left unfinished to naturally weather to a silver-gray patina, or it can be stained or painted to maintain its original color. If you prefer to maintain the natural wood color, apply a high-quality wood stain that contains UV protection. If you choose to paint the cedar siding, make sure to use an exterior-grade paint specifically designed for wood siding and follow the manufacturer’s instructions.
Step 4: Seal Gaps and Joints
To protect your cedar siding from moisture intrusion, seal any gaps or joints between the siding and other surfaces. Use a high-quality exterior caulk that is specifically designed for use with wood siding. Apply the caulk in a smooth and even line to create a watertight seal. Regularly check the caulked areas for any signs of deterioration and reapply caulk as needed.
Step 5: Trim Vegetation
Trim any vegetation around your cedar siding, including shrubs, trees, and vines. Overgrown vegetation can trap moisture against the siding and promote mold and mildew growth. Ensure that there is proper airflow and clearance around the siding to prevent moisture-related issues.
Read more: How To Restore Weathered Cedar Siding
Step 6: Check for Pest Infestations
Inspect your cedar siding for signs of pests, such as termites or carpenter ants. Look for small holes, sawdust, or crumbling wood. If you suspect an infestation, contact a professional pest control service to assess and treat the issue promptly.
Step 7: Regular Maintenance
In addition to the above steps, regular maintenance is key to preserving your cedar siding’s beauty and durability. This includes keeping gutters clean to prevent water overflow onto the siding, clearing debris from the siding’s surface, and periodically reapplying a protective layer of stain or paint as needed.
By following this step-by-step guide and incorporating regular maintenance into your routine, you can ensure that your cedar siding remains in excellent condition and continues to enhance the aesthetic appeal of your home for years to come.
Cleaning Cedar Siding
Regular cleaning is an essential part of maintaining the beauty and longevity of your cedar siding. Dirt, grime, and environmental pollutants can accumulate on the surface over time, dulling its appearance and potentially causing damage. Follow these steps to effectively clean your cedar siding:
Step 1: Gather the Necessary Supplies
Before you begin, gather the necessary supplies for cleaning your cedar siding. You will need a soft-bristle brush, a bucket of warm water, mild soap or detergent, and a garden hose.
Step 2: Prep the Work Area
Before starting, clear any objects or furniture near the siding to prevent damage or obstruction during the cleaning process. Cover nearby plants or shrubs with plastic sheets or tarps to protect them from any cleaning solutions or debris.
Step 3: Wet the Siding
Begin by wetting the cedar siding using a garden hose with a gentle spray attachment. Thoroughly wet the entire surface, including hard-to-reach areas or corners.
Step 4: Prepare the Cleaning Solution
In a bucket of warm water, add a small amount of mild soap or detergent. Avoid using harsh chemicals or abrasive cleaners, as they can damage the cedar siding. Mix the solution until it forms a soapy mixture.
Step 5: Scrub the Surface
Dip the soft-bristle brush into the soapy water solution and start scrubbing the cedar siding. Work in small sections, using gentle, circular motions to lift dirt, grime, and stains. Pay attention to areas with noticeable buildup, such as around windows or in shaded spots.
Read also: 13 Unbelievable Cedar Siding For 2025
Step 6: Rinse Thoroughly
After scrubbing a section, rinse it thoroughly with clean water from the garden hose. Start from the top and work your way down to ensure that all soapy residue is removed. Make sure to rinse off any remaining dirt or debris, ensuring a clean surface.
Step 7: Repeat if Necessary
If your cedar siding has stubborn stains or heavy grime, you may need to repeat the cleaning process on those areas. Use extra care and gently scrub the affected areas until the stains are removed. Rinse thoroughly after each round of cleaning.
Step 8: Allow to Dry
Once you have finished cleaning and rinsing the entire cedar siding, allow it to air dry naturally. Avoid direct sunlight and excessive moisture during the drying process. Take this opportunity to inspect the siding for any potential issues, such as loose boards or damaged areas.
Regularly cleaning your cedar siding will help maintain its appearance, prevent damage, and prolong its lifespan. Aim to clean your siding once or twice a year, depending on the level of dirt or environmental factors in your area. By investing a little time and effort into cleaning, you can keep your cedar siding looking fresh and vibrant for years to come.
Protecting Cedar Siding from Weather Damage
Cedar siding is naturally resistant to decay and rot, but it is still important to protect it from the elements to ensure its longevity and maintain its beauty. Weather damage, such as moisture infiltration and sun exposure, can cause the wood to deteriorate over time. By following these steps, you can effectively protect your cedar siding from weather damage:
Read more: When To Replace Cedar Shingle Siding
1. Apply a Water-Repellent Finish
Cedar siding can benefit from the application of a water-repellent finish, such as a clear or tinted sealant or a specialized wood preservative. These finishes create a protective barrier on the surface of the wood, helping to prevent moisture intrusion. Make sure to choose a product specifically designed for cedar siding and follow the manufacturer’s instructions for application.
2. Regularly Inspect and Maintain the Finish
Inspect the water-repellent finish on your cedar siding annually and touch up any areas that show signs of wear or erosion. Reapply the finish as needed to ensure continuous protection against moisture. Regular maintenance and reapplication will help preserve the integrity of the finish and extend its effectiveness in repelling water.
3. Ensure Proper Ventilation
Proper ventilation is essential to prevent moisture from building up and causing damage to your cedar siding. Ensure that there is adequate airflow behind the siding by using a breathable underlayment or leaving a gap between the siding and the wall. Ventilation helps prevent the growth of mold, mildew, and rot that can occur from trapped moisture.
4. Clear Debris and Vegetation
Regularly remove leaves, dirt, and other debris that may accumulate around your cedar siding. Debris can trap moisture against the siding, leading to rot and other damage. Clear any vegetation or overgrown plants near the siding to allow proper air circulation and minimize the risk of moisture-related issues.
Read more: How To Install Vinyl Cedar Shake Siding
5. Protect from Direct Sun Exposure
Direct and prolonged exposure to sunlight can cause fading and drying of cedar siding over time. Consider using UV-protective finishes or stains that contain additives to shield the wood from harmful UV rays. Keep in mind that even with UV protection, occasional reapplication may be necessary to maintain its effectiveness.
6. Maintain Gutters and Downspouts
Ensure that your gutters and downspouts are properly maintained and functioning well. Clean and clear them regularly to prevent water overflow, which can lead to water seeping behind the cedar siding. This will help minimize the risk of water-related damage and maintain the integrity of your siding.
7. Keep the Siding Elevated from the Ground
Avoid direct contact between your cedar siding and the ground or other surfaces that can retain moisture. Install the siding with a suitable gap between the bottom edge and the ground to allow for proper drainage and ventilation. Avoid placing objects against the siding that can create a damp environment.
8. Schedule Professional Inspections
Consider having your cedar siding professionally inspected every few years, especially if you live in an area with extreme weather conditions. Professional inspectors can assess the condition of the siding, identify potential issues, and provide recommendations for maintenance or repairs.
By following these steps and implementing proper protective measures, you can significantly extend the lifespan and performance of your cedar siding. Regular maintenance and proactive steps to prevent weather damage will ensure that your cedar siding continues to enhance the beauty and value of your home for years to come.
Read more: Where Can I Buy Cedar Siding
Maintaining Cedar Siding
Proper maintenance is crucial to ensure the longevity and beauty of your cedar siding. By implementing routine care and attention, you can keep your siding in excellent condition for years to come. Here are some key steps to effectively maintain your cedar siding:
1. Regularly Inspect for Damage
Take the time to inspect your cedar siding regularly for any signs of damage, such as cracks, splits, or rot. Pay close attention to areas that are exposed to moisture or direct sunlight. If you notice any issues, address them promptly to prevent further deterioration and water penetration. Repair or replace damaged pieces as needed.
2. Clean and Wash Annually
Cleaning your cedar siding annually helps remove dirt, stains, and mildew that may have accumulated. Use a soft-bristle brush or a low-pressure power washer to gently scrub the siding. Avoid using high-pressure washers, as they can damage the wood fibers. Start from the top and work your way down, rinsing with clean water to remove soap residue.
3. Consider Staining or Painting
Cedar siding can be left unfinished to naturally weather to a silver-gray patina, or it can be stained or painted to maintain its original color. If you prefer to maintain the natural wood color, apply a high-quality wood stain that contains UV protection. If you choose to paint the cedar siding, make sure to use an exterior-grade paint specifically designed for wood siding and follow the manufacturer’s instructions.
4. Reapply Protective Finish as Needed
Over time, the protective finish on your cedar siding may wear off due to weather exposure. Monitor the condition of the finish and reapply as needed to maintain its effectiveness in repelling water and protecting the wood. Follow the manufacturer’s instructions for application and make sure to thoroughly clean the siding before applying a new coat.
5. Seal Gaps and Joints
To prevent moisture intrusion, regularly inspect and seal any gaps or joints between the cedar siding and other surfaces. Using a high-quality exterior caulk that is specifically designed for wood siding, fill in any gaps or cracks. This will help prevent water infiltration and potential damage to the underlying structure.
6. Trim Vegetation
Trim any vegetation around your cedar siding, including shrubs, trees, and vines. Overgrown vegetation can trap moisture against the siding and promote mold and mildew growth. Ensure that there is proper airflow and clearance around the siding to prevent moisture-related issues.
7. Protect from Furniture or Grill Heat
Avoid placing furniture, grills, or other items directly against the cedar siding, as they can cause heat damage or discoloration. Use appropriate spacers or mats to create a barrier between the siding and these objects, allowing for proper air circulation and preventing potential damage.
Read more: How To Take Care Of Wood Siding
8. Schedule Professional Maintenance
Consider scheduling professional maintenance for your cedar siding every few years. Professional contractors can assess the condition of the siding, perform necessary repairs or treatments, and provide expert recommendations for long-term maintenance. Their expertise and specialized tools can help ensure the ongoing beauty and performance of your cedar siding.
By following these maintenance steps and giving your cedar siding the attention it deserves, you can extend its lifespan and retain its aesthetic appeal. Regular inspections, cleaning, staining or painting, reapplying protective finishes, sealing gaps, trimming vegetation, protecting against heat, and seeking professional maintenance will help you maintain a beautiful and durable cedar siding for years to come.
Common Issues and Troubleshooting
While cedar siding is known for its durability, it can still experience some common issues over time. Being aware of these issues and knowing how to troubleshoot them will help you address any problems that may arise. Here are some common issues you may encounter with cedar siding and tips for troubleshooting:
1. Moisture Damage and Rot
Excessive moisture exposure can lead to rot and decay in cedar siding. To prevent and address this issue, ensure proper ventilation behind the siding, promptly repair any damaged or cracked pieces, and regularly inspect and maintain the protective finish. If you notice signs of rot, such as soft or discolored wood, it may be necessary to replace the affected sections of siding.
2. Mold and Mildew Growth
Mold and mildew can develop on cedar siding, especially in areas that are consistently damp or shaded. To remove mold and mildew, mix a solution of water and mild detergent or a specialized mildew cleaner. Scrub the affected areas gently with a soft brush and rinse thoroughly. To prevent future growth, improve ventilation, trim vegetation that shades the siding, and consider applying a mold and mildew resistant treatment.
3. Discoloration and Fading
Cedar siding may experience discoloration and fading over time due to sun exposure. To minimize this issue, consider applying a UV-protective finish or stain that contains additives to shield the wood from harmful UV rays. Regularly cleaning the siding and maintaining the protective finish will also help preserve its original color.
4. Insect Infestation
Cedar is naturally resistant to insects, but it is not completely immune. Wood-boring insects like termites and carpenter ants can still cause damage over time. Regularly inspect your siding for signs of insect activity, such as small holes or sawdust. If an infestation is suspected, contact a professional pest control service to assess the situation and take appropriate measures for eradication.
5. Cracking and Splitting
Cracks and splits can occur in cedar siding due to age, weathering, or improper installation. Regularly inspect your siding for any signs of cracking or splitting. For minor cracks, fill them with an exterior-grade wood filler or putty and sand it down. For larger splits, consider replacing the affected pieces. It is also important to ensure proper installation, including allowing for expansion and contraction of the wood during temperature changes.
6. Peeling Paint or Stain
If you notice peeling or flaking paint or stain on your cedar siding, it may be due to improper surface preparation or low-quality coating products. To address this issue, remove any loose or peeling paint or stain, sand the surface, and apply a high-quality, exterior-grade coating product that is compatible with cedar siding. Follow the manufacturer’s instructions for proper application.
Read more: How Long Does It Take For Floor Paint To Dry
7. Warping or Cupping
Warped or cupped cedar siding can occur due to changes in moisture content or improper installation. To prevent this issue, ensure proper moisture control behind the siding and proper installation techniques. If you notice signs of warping or cupping, it may be necessary to replace the affected pieces to maintain the overall integrity and aesthetics of the siding.
When troubleshooting any issues with your cedar siding, it is essential to address them promptly to prevent further damage. Regular inspections, proper maintenance, timely repairs, and seeking professional assistance when needed will help you troubleshoot and resolve common issues, ensuring the long-term beauty and performance of your cedar siding.
Conclusion
Cedar siding is a popular choice among homeowners due to its natural beauty, durability, and resistance to rot and insects. By understanding the importance of proper care and maintenance, you can ensure that your cedar siding remains in excellent condition for years to come.
In this comprehensive guide, we have covered the key aspects of taking care of cedar siding. We started by understanding cedar siding, its benefits, and the necessary preparation for installation. We then delved into the essential tools and materials needed and provided a step-by-step guide to taking care of cedar siding.
We discussed the importance of regular cleaning, inspecting for damage, and sealing gaps and joints. We highlighted the significance of protecting cedar siding from weather damage by applying water-repellent finishes, ensuring proper ventilation, and maintaining gutters and downspouts. Additionally, we emphasized the necessity of protecting cedar siding from direct sun exposure and maintaining a safe distance from heat sources.
We also addressed common issues that may arise with cedar siding, such as moisture damage, mold and mildew growth, discoloration and fading, insect infestation, cracking and splitting, peeling paint or stain, and warping or cupping. Additionally, we provided troubleshooting tips for each issue to help you address and resolve them effectively.
In conclusion, by following the steps outlined in this guide and incorporating regular maintenance into your routine, you can ensure that your cedar siding retains its beauty, durability, and functionality for many years. From proper cleaning and protection to addressing common issues, taking care of your cedar siding will not only enhance the curb appeal of your home but also extend the lifespan of this natural and sustainable material.
Remember, each cedar siding installation and maintenance situation may have unique requirements and considerations. It’s important to consult with professionals or experts for specific advice and guidance based on your circumstances. With proper care and attention, your cedar siding will continue to be a source of pride and admiration, adding value and charm to your home for generations to come.
Frequently Asked Questions about How To Take Care Of Cedar Siding
Was this page helpful?
At Storables.com, we guarantee accurate and reliable information. Our content, validated by Expert Board Contributors, is crafted following stringent Editorial Policies. We're committed to providing you with well-researched, expert-backed insights for all your informational needs.
0 thoughts on “How To Take Care Of Cedar Siding”