Articles
How To Store Cricut Supplies
Modified: August 17, 2024
Learn practical tips and tricks for organizing and storing Cricut supplies with our informative articles. Simplify your crafting process and keep your workspace clutter-free!
(Many of the links in this article redirect to a specific reviewed product. Your purchase of these products through affiliate links helps to generate commission for Storables.com, at no extra cost. Learn more)
Introduction
When it comes to your Cricut supplies, having an organized storage solution is essential. Whether you are a beginner or an experienced Cricut enthusiast, having a system in place for storing your Cricut machines, cartridges, tools, materials, and projects will not only keep your craft space tidy but also make it easier for you to find what you need when you’re ready to create.
Choosing the right storage solution for your Cricut supplies will depend on factors such as the size of your collection, your available space, and your personal preferences. In this article, we will explore various storage options and provide tips and ideas for organizing and storing different types of Cricut supplies.
From storing Cricut machines to organizing cartridges and mats, and from keeping track of tools and accessories to storing vinyl and paper materials, we will cover it all. Additionally, we will discuss the importance of properly maintaining and caring for your Cricut supplies to ensure their longevity.
By implementing the strategies and ideas presented in this article, you will not only keep your Cricut supplies in top condition but also make your crafting experience more enjoyable and efficient. So, let’s dive in and discover how to store your Cricut supplies like a pro!
Key Takeaways:
- Keep your Cricut supplies organized and accessible by choosing the right storage solutions, maintaining your machines, and categorizing your project ideas. Proper care and organization enhance your crafting experience and creativity.
- Protect the quality and longevity of your Cricut supplies by storing materials in suitable environments, following manufacturer recommendations, and staying organized. Maintaining your supplies ensures optimal performance and successful crafting endeavors.
Read more: How To Store Cricut Pens
Choosing the Right Storage Solution
When it comes to choosing the right storage solution for your Cricut supplies, several factors should be taken into consideration. The size of your collection, the available space in your craft area, and your personal preferences all play a role in determining the best storage option for you.
One popular storage solution for Cricut machines is a dedicated storage tote or bag. These specially designed totes have compartments and padding to securely hold your Cricut machine and accessories. They are portable and convenient, allowing you to easily transport your Cricut machine to crafting events or store it away when not in use.
If you have a larger collection of Cricut machines or want a more permanent storage solution, consider investing in a craft cabinet or shelving unit. These can provide ample storage space for your Cricut machines, cartridges, and other supplies. Look for cabinets or shelves with adjustable compartments or drawers, allowing you to customize the storage layout to fit your needs.
For organizing Cricut cartridges and mats, storage binders or cases are popular options. These usually have transparent pockets or sleeves where you can slide in your cartridges or mats, making it easy to see and access your collection. Some storage binders even come with labeling options, making it simple to categorize and find the cartridges you need.
When it comes to storing your Cricut tools and accessories, consider using a tool caddy or organizer. These usually have multiple compartments to neatly store items like scissors, spatulas, weeding tools, and pens. Look for organizers with dividers or adjustable sections, so you can customize the layout to fit your specific tools.
For keeping your Cricut vinyl and iron-on materials organized, consider using clear plastic bins or containers. These allow you to quickly see and access your different types and colors of vinyl. It’s also a good idea to label the bins or use dividers inside to separate the different materials. Additionally, storing your vinyl in a cool and dry environment will help maintain its quality.
When it comes to storing Cricut paper and cardstock, consider using a paper organizer or paper tower. These specially designed storage solutions have compartments or slots where you can store your paper and cardstock in an upright position, reducing the chances of bending or creasing. Alternatively, you can use a file cabinet with labeled folders or clear plastic sleeves to store your paper.
Lastly, it’s important to have a system for organizing and storing your Cricut project ideas and inspiration. Consider using a binder or folder with plastic sleeves to store your printed project ideas, magazine clippings, and notes. You can also create digital folders on your computer to store website bookmarks and digital files related to your Cricut projects.
Remember, the key is to choose a storage solution that suits your needs and preferences. It’s important to have a system in place that allows you to keep your Cricut supplies organized, easily accessible, and protected from dust and damage. By choosing the right storage solution, you can maximize your creativity and enjoy a clutter-free crafting space.
Storing Cricut Machines
When it comes to storing your Cricut machines, it’s important to prioritize their protection and keep them in a safe and secure location. Here are some tips for properly storing your Cricut machines:
1. Clean and Remove Accessories: Before storing your Cricut machine, make sure to clean it thoroughly and remove any accessories, such as blades or pens. Use a soft cloth or brush to remove any dust or debris that may have accumulated. This will help prevent any potential damage or build-up over time.
2. Use a Dust Cover or Storage Bag: To protect your Cricut machine from dust or scratches, consider using a dust cover or a storage bag specifically designed for Cricut machines. These covers and bags provide an extra layer of protection and can be easily removed when you are ready to use your machine.
3. Choose a Stable and Dry Location: Find a stable and dry location to store your Cricut machine. Avoid areas with excessive moisture or extreme temperatures, as these conditions can potentially damage the electrical components of your machine.
4. Consider a Storage Tote or Cabinet: If you prefer a more portable or organized storage solution, consider using a storage tote or cabinet specifically designed for Cricut machines. These storage options often have compartments and padding to securely hold your machine and accessories, making it easier to transport or store your machine neatly.
5. Adhere to Manufacturer’s Recommendations: It’s always a good idea to follow the manufacturer’s recommendations for storing your specific Cricut machine model. Check the user manual or the manufacturer’s website for any specific instructions regarding storage and maintenance.
6. Store in an Upright Position: Ideally, store your Cricut machine in an upright position to avoid any potential damage to the internal components. This will help prevent any stress on the machine’s mechanisms and ensure its longevity.
7. Keep Away from Direct Sunlight: Avoid storing your Cricut machine in direct sunlight, as exposure to prolonged sunlight can cause the plastic or rubber parts to fade or deteriorate over time.
By following these tips, you can ensure that your Cricut machine remains in excellent condition and is ready to use whenever you need it. Proper storage not only protects your investment but also ensures that your machine operates smoothly and reliably for years to come.
Organizing Cricut Cartridges and Mats
When it comes to organizing your Cricut cartridges and mats, having a system in place can help you easily locate and access the ones you need for your projects. Here are some tips for organizing your Cricut cartridges and mats:
1. Storage Binders or Cases: Consider using storage binders or cases specifically designed for Cricut cartridges. These usually have transparent pockets or sleeves where you can slide in your cartridges. This allows you to easily see and browse through your collection, making it simple to find the cartridge you need. Some storage binders even come with labeling options, allowing you to categorize and sort your cartridges.
2. Labeling System: Implement a labeling system to easily identify and locate your cartridges. Use labels with the cartridge names or create your own system, such as color-coding or numbering, to quickly find what you’re looking for. You can also create an inventory list or spreadsheet to keep track of your cartridges and their corresponding content.
3. Alphabetical Order: Organize your cartridges in alphabetical order to make it easier to find specific ones. Arrange them in your storage binder or case accordingly, or use dividers to separate different sections.
4. Dedicated Storage Drawer or Shelf: If you have a larger collection of cartridges, consider dedicating a drawer or shelf specifically for their storage. Use dividers or small bins to keep them separated and organized within the space.
5. Mats Storage Rack or Holder: Cricut mats are an essential part of the cutting process, and keeping them organized is important. Consider using a mats storage rack or holder to keep your mats neatly stored and easily accessible. These racks usually have slots or compartments to hold different mat sizes.
6. Vertical Storage: Storing your mats in a vertical position is recommended to prevent them from warping or losing their flatness. You can use a magazine holder or create your own system using bookends or binder clips to keep the mats upright.
7. Clean and Store Properly: Before storing your mats, make sure they are clean and free from debris. Gently remove any leftover material or adhesive residue and allow them to dry completely. Once clean, store your mats in a cool and dry area to maintain their quality and longevity.
Remember, organizing your Cricut cartridges and mats not only helps you maximize your creativity but also saves you time and effort in searching for specific items. Find a system that works best for you and your collection, and enjoy the convenience of having your cartridges and mats neatly organized and easily accessible.
Storing Cricut Tools and Accessories
Properly storing your Cricut tools and accessories is essential to keep them organized, accessible, and in good condition. Here are some tips for storing your Cricut tools and accessories:
1. Tool Caddy or Organizer: Invest in a tool caddy or organizer specifically designed to hold Cricut tools and accessories. These organizers usually have multiple compartments or pockets to neatly store items like scissors, spatulas, weeding tools, pens, and more. Look for organizers with dividers or adjustable sections, so you can customize the layout to fit your specific tools.
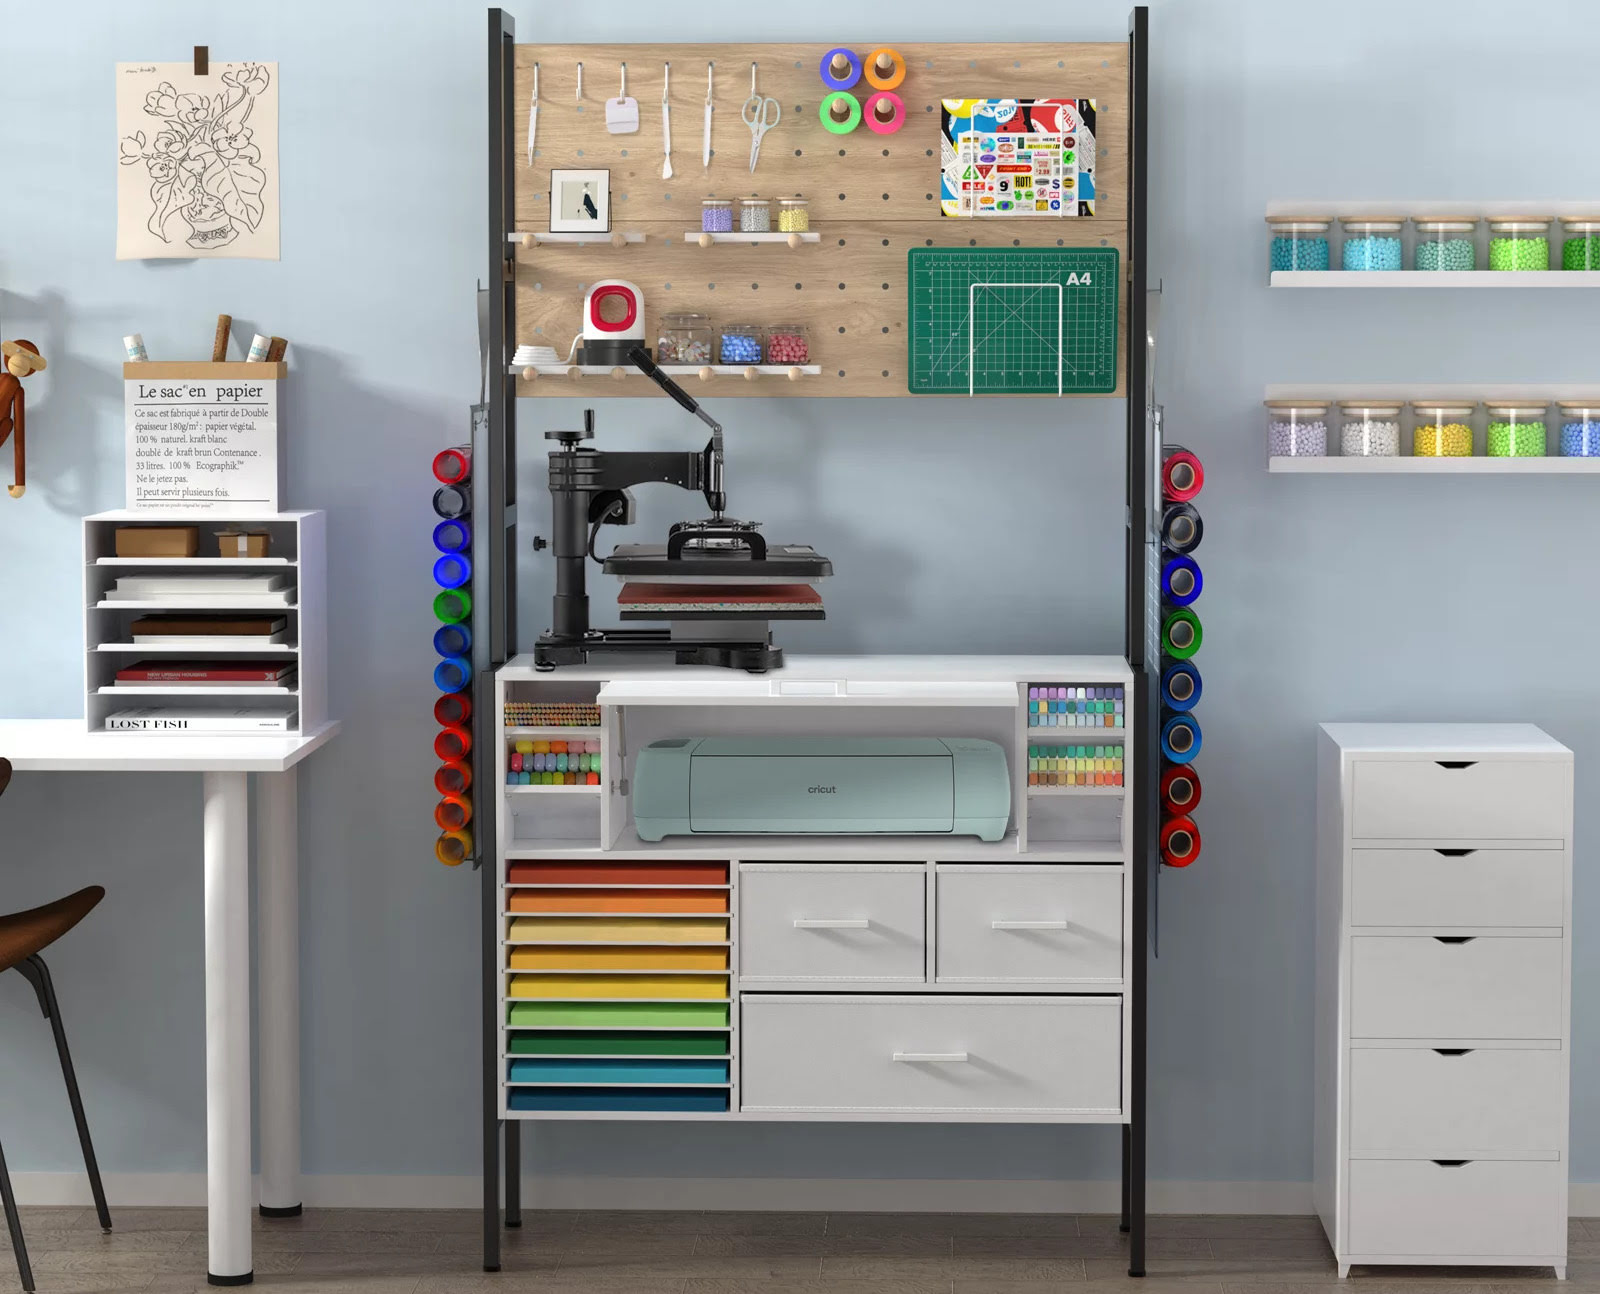
2. Wall-mounted Storage: If space is limited, consider utilizing wall-mounted storage options for your Cricut tools. Install a pegboard or attach hooks or rails to the wall to hang your tools. This not only keeps them organized but also makes them easily accessible while freeing up valuable workspace.
3. Magnetic Strips or Containers: Magnetic strips or containers are great solutions for storing Cricut tools with metal parts, such as tweezers or scissors. Attach a magnetic strip to the wall or inside a cabinet, and place your metal tools on it for easy access and visibility.
4. Drawer Dividers or Trays: If you prefer to store your tools in a drawer, use dividers or trays to keep them organized and prevent them from rolling around. Customize the compartments to fit your tools and arrange them based on size or type for added convenience.
5. Portable Tool Case: If you often take your Cricut tools on the go or attend crafting events, consider investing in a portable tool case. These cases are designed to hold your tools securely and protect them during transport. Look for cases with foam or padded interiors to prevent any damage.
6. Labeling System: Implement a labeling system to easily identify your tools and accessories. Use labels or color-coded tags to designate specific tools for particular purposes, such as cutting, weeding, or writing. This will save you time and effort when searching for the tool you need.
7. Keep Sharp Blades Covered: If you have spare blades for your Cricut machine, be sure to keep them in their original packaging or protective covers. This will not only prevent accidental cuts but also help maintain the sharpness of the blades for longer periods of time.
Remember, organizing and storing your Cricut tools and accessories not only keeps your workspace clutter-free but also extends the lifespan of your tools. Find a storage solution that suits your needs and preferences, and enjoy the convenience of having your tools readily available whenever you need them.
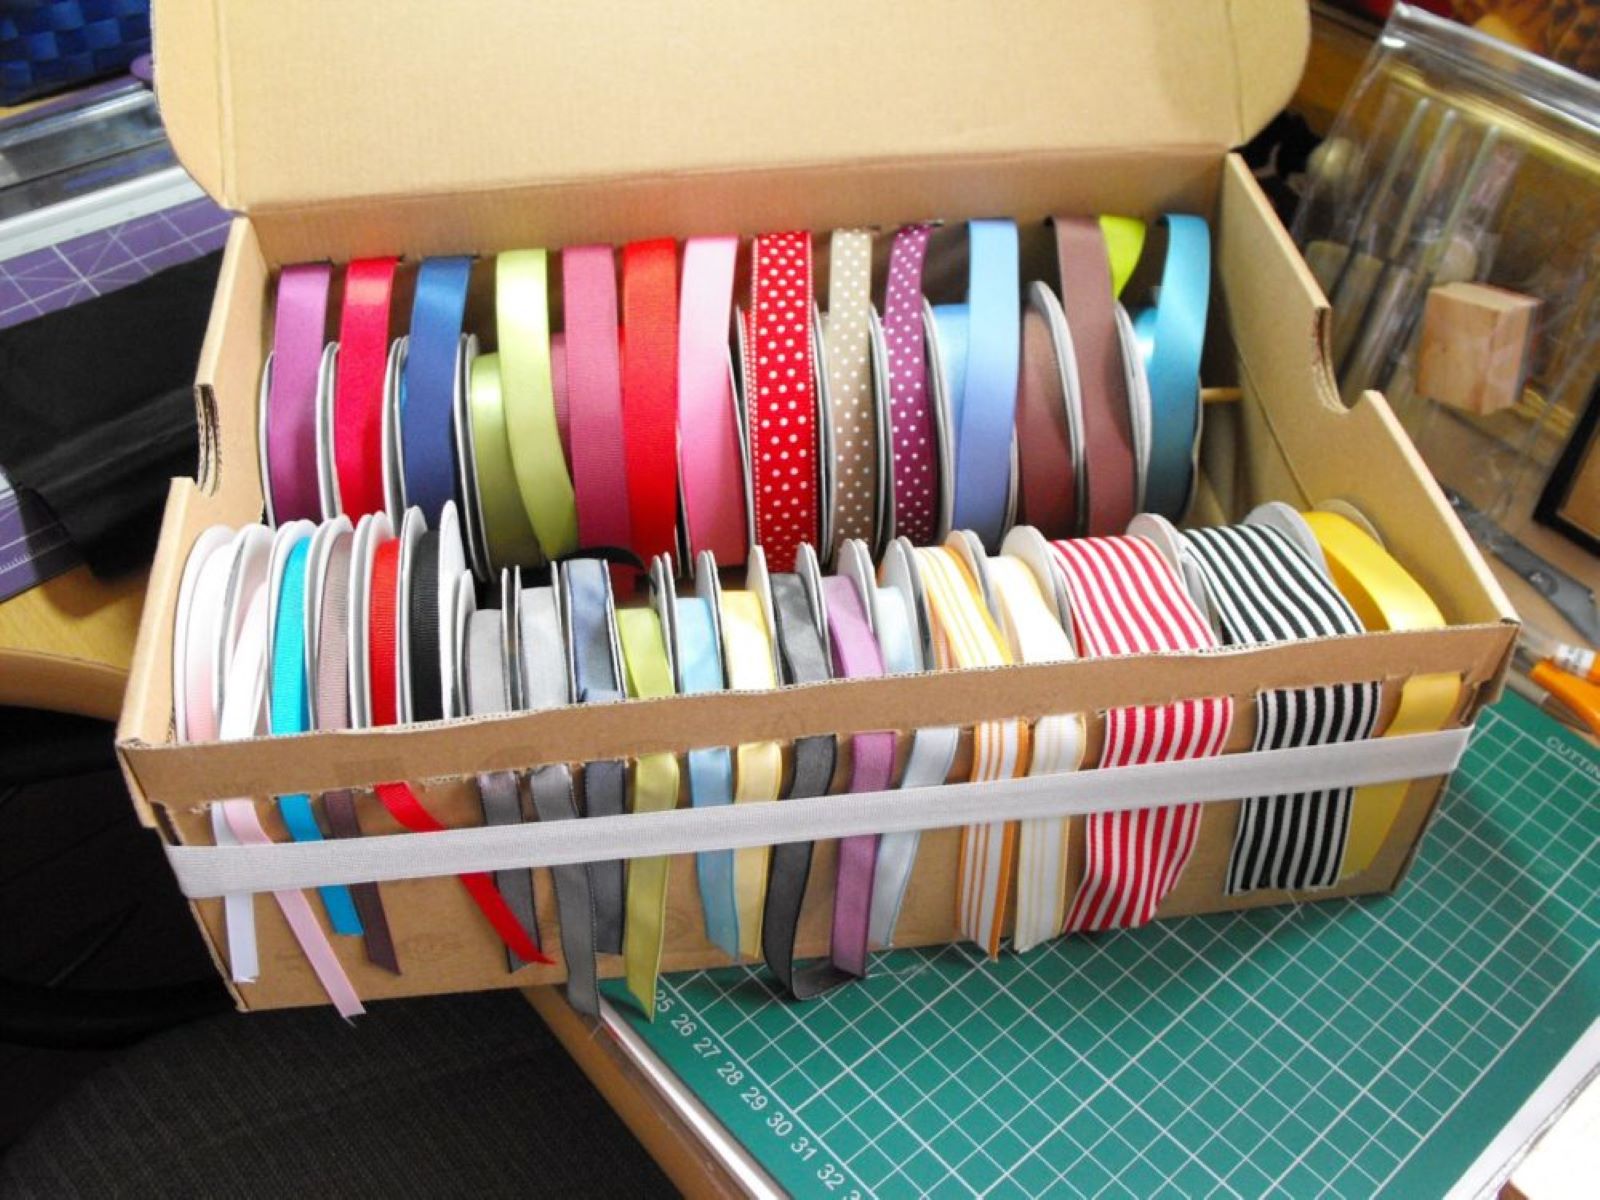
Store your Cricut supplies in clear, stackable containers to easily see and access your materials. Label each container for quick identification.
Read more: How To Store Cricut Mats
Keeping Cricut Vinyl and Iron-on Materials
Properly storing Cricut vinyl and iron-on materials is crucial to maintain their quality and ensure optimal performance for your projects. Here are some tips for keeping your Cricut vinyl and iron-on materials in great condition:
1. Clear Plastic Bins or Containers: Consider using clear plastic bins or containers to store your Cricut vinyl and iron-on materials. Clear bins allow you to see the different colors and types of materials at a glance, making it easier to find what you need for your projects. Label the bins or use dividers to separate the different materials, such as adhesive vinyl, heat transfer vinyl, and iron-on glitter sheets.
2. Store in a Cool and Dry Environment: It’s important to store your Cricut vinyl and iron-on materials in a cool and dry environment to prevent them from becoming damaged or warped. Exposure to humidity or high temperatures can affect the adhesive properties of the vinyl or cause the iron-on material to peel. Avoid storing them in areas like basements, attics, or near water sources.
3. Avoid Direct Sunlight: Exposure to direct sunlight can cause vinyl and iron-on materials to fade or discolor over time. Store your materials out of direct sunlight to maintain their vibrant colors and longevity. If possible, choose an opaque storage container or keep the bins covered with a cloth or opaque lid.
4. Roll or Stack Properly: For adhesive vinyl, rolling it is the best way to store it to prevent creases or wrinkles. Start from one end and roll it tightly, securing it with a rubber band or hook and loop strap. For iron-on materials, you can either roll them or stack them flat, depending on the quantity and available space. If stacking, ensure that there is a protective sheet or parchment paper between each sheet to prevent sticking.
5. Use Dehumidifiers or Moisture Absorbers: If you live in a humid climate, it’s a good idea to use dehumidifiers or moisture absorbers in your storage area. These will help reduce excess moisture in the air and prevent your vinyl and iron-on materials from becoming damp or hard to work with.
6. Prioritize First In, First Out: When using your vinyl or iron-on materials, practice the first in, first out method. This means using the oldest materials first to ensure that nothing goes to waste. Rotate your stock regularly to avoid materials sitting unused for extended periods of time.
7. Consider Material-specific Storage: Different types of vinyl or iron-on materials may require specific storage methods. For example, heat transfer glitter vinyl may benefit from being stored with a backing sheet or in a container that provides extra protection to prevent the glitter from shedding.
By following these tips, you can ensure that your Cricut vinyl and iron-on materials remain in top condition, ready to be used for your creative projects. Proper storage not only preserves their quality but also helps you stay organized and efficient in your crafting endeavors.
Storing Cricut Paper and Cardstock
Properly storing your Cricut paper and cardstock is essential to prevent damage, keep them in good condition, and easily access them for your projects. Here are some tips for storing Cricut paper and cardstock:
1. Paper Organizers or Paper Towers: Consider using paper organizers or paper towers specifically designed to hold and organize your Cricut paper and cardstock. These storage solutions often have compartments or slots where you can store your paper in an upright position, reducing the chances of bending or creasing. Look for organizers with adjustable slots or dividers, allowing you to customize the layout to fit your different sizes and types of paper.
2. File Folders or Clear Plastic Sleeves: Another option for storing your Cricut paper and cardstock is to use file folders or clear plastic sleeves. Label the folders or sleeves with the type, color, or pattern of the paper, making it easier to identify and access the specific paper you need for your projects. Place them in a file cabinet or a storage box for easy organization and protection.
3. Separate by Type and Size: When organizing your Cricut paper and cardstock, separate them by type and size. Keep different types, such as patterned paper, cardstock, or specialty paper, in separate sections or compartments. Within each section, organize them by size or color for easy navigation and selection.
4. Store in a Flat and Dry Location: It’s important to store your Cricut paper and cardstock in a flat and dry location to prevent warping or damage. Avoid storing them in an area prone to humidity or extreme temperature changes, such as basements or attics. Opt for a climate-controlled craft room or storage area instead.
5. Avoid Direct Sunlight: Sunlight can fade the colors and cause your paper and cardstock to yellow over time. Keep your paper away from direct sunlight and store them in opaque containers or cabinets to provide protection from light exposure.
6. Use Acid-Free Storage: Consider using acid-free paper storage options, such as acid-free folders or acid-free plastic sleeves. Acid-free storage materials help prevent yellowing or deterioration of your paper and cardstock, ensuring that they remain in good condition for longer periods.
7. Prioritize First In, First Out: Similar to other crafting supplies, practice the first in, first out approach with your paper and cardstock stock. Use the oldest sheets first to prevent them from sitting in your storage for too long unused. This way, you can maximize the lifespan of your paper and cardstock.
By following these tips, you can ensure that your Cricut paper and cardstock stay organized, protected, and ready to use for your creative projects. Having a well-organized storage system for your paper and cardstock not only saves you time but also maintains the quality of your materials, allowing you to achieve the best results in your crafts.
Organizing Cricut Project Ideas and Inspiration
Organizing your Cricut project ideas and inspiration is essential to stay inspired, keep track of your creative pursuits, and easily access project references when you need them. Here are some tips for organizing your Cricut project ideas and inspiration:
1. Create a Project Ideas Binder: Start by creating a binder dedicated to storing your Cricut project ideas. Use clear plastic sleeves or sheet protectors to hold printed project ideas, magazine clippings, or inspiration notes. Organize them by category, theme, or difficulty level, making it easy to find specific project ideas when you’re ready to create.
2. Digital Folders or Online Platforms: If you prefer a digital approach, create folders on your computer or cloud storage for organizing your digital project ideas. Save images, links, or files related to your Cricut projects in these folders. You can also utilize online platforms or project management tools to organize and categorize project ideas, such as Pinterest or Trello.
3. Label and Categorize: Whether using a physical binder or digital folders, label and categorize your project ideas for easy reference. Use dividers or tabs to separate project ideas by themes, occasions, or techniques. For digital folders, add descriptive labels to files or use tags to help you quickly search and find specific projects.
4. Notebook or Sketchbook: Keep a dedicated notebook or sketchbook to jot down and sketch out your project ideas. Use this space to brainstorm, make design notes, or create rough sketches. Having a central place for all your project ideas allows you to visualize your designs and revisit them later for inspiration.
5. Project Tracking Spreadsheet: Consider creating a project tracking spreadsheet to keep a record of your completed projects. Include details such as project name, materials used, techniques applied, and any future notes or improvements. This helps you track your progress, identify your favorite projects, and refer back to specific projects for future reference.
6. Inspiration Boards or Walls: Create an inspiration board or designate a section of your craft room wall to pin or display project ideas, color palettes, or inspirational images. Use corkboards, magnetic boards, or string up a wire with clips to hang or attach your visuals. Having a visual display of your project ideas can spark creativity and serve as a constant reminder of what you want to achieve.
7. Digital Bookmarking: If you come across project ideas, tutorials, or inspiration online, use the bookmarking feature on your web browser to save them for later. Create folders or tags within your bookmarks to keep them organized and easily accessible. This way, you can revisit the websites or links when you need guidance or inspiration for specific projects.
By utilizing these organizational strategies, you can effectively store, categorize, and access your Cricut project ideas and inspiration. Having a well-organized system allows you to stay inspired and streamline the creative process, making your Cricut crafting experience even more enjoyable and efficient.
Maintaining and Caring for Cricut Supplies
Maintaining and caring for your Cricut supplies is essential to ensure their longevity, optimal performance, and the best possible results in your crafting projects. Here are some tips for maintaining and caring for your Cricut supplies:
1. Clean and Dust Regularly: Regularly clean your Cricut machine, tools, and accessories to remove any dust, debris, or adhesive residue. Use a soft cloth or brush to gently wipe down the surfaces. Remember to unplug your machine before cleaning to avoid any accidents or damage.
2. Follow Manufacturer’s Recommendations: It’s important to follow the manufacturer’s recommendations regarding the care and maintenance of your Cricut supplies. Read the user manual or visit the manufacturer’s website for specific instructions on cleaning, lubricating, or replacing parts, if necessary.
3. Protect and Store Properly: Store your Cricut supplies in a clean and dry environment, away from excessive moisture, direct sunlight, or extreme temperatures. Use dedicated storage solutions, such as totes, cases, or cabinets, to protect your machines, cartridges, tools, and materials from dust, scratches, or accidental damage.
4. Replace Blades and Mats: As you use your Cricut machine, the blades and mats will eventually wear out. Regularly check and replace the cutting blades when they become dull or damaged to ensure clean and precise cuts. Similarly, replace mats when they lose their stickiness or become too marked up to provide proper cutting support.
5. Use Proper Cutting Techniques: When using your Cricut machine, make sure to use proper cutting techniques to avoid unnecessary strain or damage. Follow the recommended settings and pressure levels for different materials. Avoid forcing materials through the machine or cutting too deeply, as this can lead to blade misalignment or damage.
6. Store Vinyl in a Cool and Dry Place: Cricut vinyl is sensitive to temperature and humidity. To maintain its quality and adhesive properties, store your vinyl in a cool and dry place. Avoid exposing it to excessive heat or moisture, as this can cause the vinyl to warp, curl, or lose its adhesion.
7. Keep Tools Sharp and Clean: Periodically check and sharpen your Cricut tools, such as blades or scissors, to ensure clean and precise cuts. Clean them regularly to remove any adhesive residue or debris, as this can affect their performance. Use appropriate cleaning methods recommended by the manufacturer.
8. Stay Up-to-Date with Firmware Updates: Cricut periodically releases firmware updates for its machines. Stay up-to-date with these updates to ensure your machine operates at its best. Check the manufacturer’s website or sign up for notifications to receive the latest firmware updates.
9. Adhere to Material Guidelines: Different materials require different settings, pressure levels, and techniques when using the Cricut machine. Always refer to the material guidelines provided by Cricut to ensure proper cutting and prevent any damage to your machine or materials.
By implementing these care and maintenance practices, you can prolong the life of your Cricut supplies and ensure optimal performance. Regular cleaning, proper storage, and adherence to manufacturer’s guidelines will help you enjoy successful and satisfying crafting experiences with your Cricut machine and supplies.
Read more: How To Store Cricut Vinyl
Conclusion
Properly organizing, storing, and maintaining your Cricut supplies is not only essential for a clutter-free craft space but also for enhancing your crafting experience. By following the tips and strategies outlined in this article, you can keep your Cricut machines, cartridges, tools, materials, and project ideas organized, accessible, and in excellent condition.
Choosing the right storage solutions, such as totes, cabinets, binders, or organizers, ensures that your Cricut supplies are protected from dust, damage, and the elements. Storing your Cricut machines in a secure and stable location, keeping blades and mats refreshed, and organizing tools and accessories in proper caddies or holders are all important steps in maintaining their longevity and optimal performance.
When it comes to materials like vinyl, iron-on, paper, and cardstock, proper storage in cool, dry environments is crucial. Utilizing clear plastic bins, paper organizers, or vertical storage systems allows for easy access and protects your materials from warping, fading, or moisture damage. Categorizing and labeling your project ideas and inspiration, whether in physical binders or digital folders, ensures that you have a constant source of creativity at your fingertips.
Additionally, caring for your Cricut supplies through regular cleaning, following manufacturer recommendations, using proper cutting techniques, and staying up-to-date with firmware updates ensures their optimal performance and extends their lifespan. Proper care and maintenance also help you achieve the best results in your creative projects, preventing any issues or frustrations that may arise from neglecting your supplies.
In conclusion, organizing, storing, and maintaining your Cricut supplies is an investment in your creativity and crafting journey. By implementing these strategies, you can enjoy a well-organized craft space, easily find what you need, and create projects with precision and confidence. So, put these tips into practice and take your Cricut crafting to the next level!
Frequently Asked Questions about How To Store Cricut Supplies
Was this page helpful?
At Storables.com, we guarantee accurate and reliable information. Our content, validated by Expert Board Contributors, is crafted following stringent Editorial Policies. We're committed to providing you with well-researched, expert-backed insights for all your informational needs.
0 thoughts on “How To Store Cricut Supplies”