Articles
How To Store Old Photos In Boxes
Modified: August 17, 2024
Learn the best way to store your old photos in boxes with these helpful articles. Preserve your precious memories for years to come.
(Many of the links in this article redirect to a specific reviewed product. Your purchase of these products through affiliate links helps to generate commission for Storables.com, at no extra cost. Learn more)
Introduction
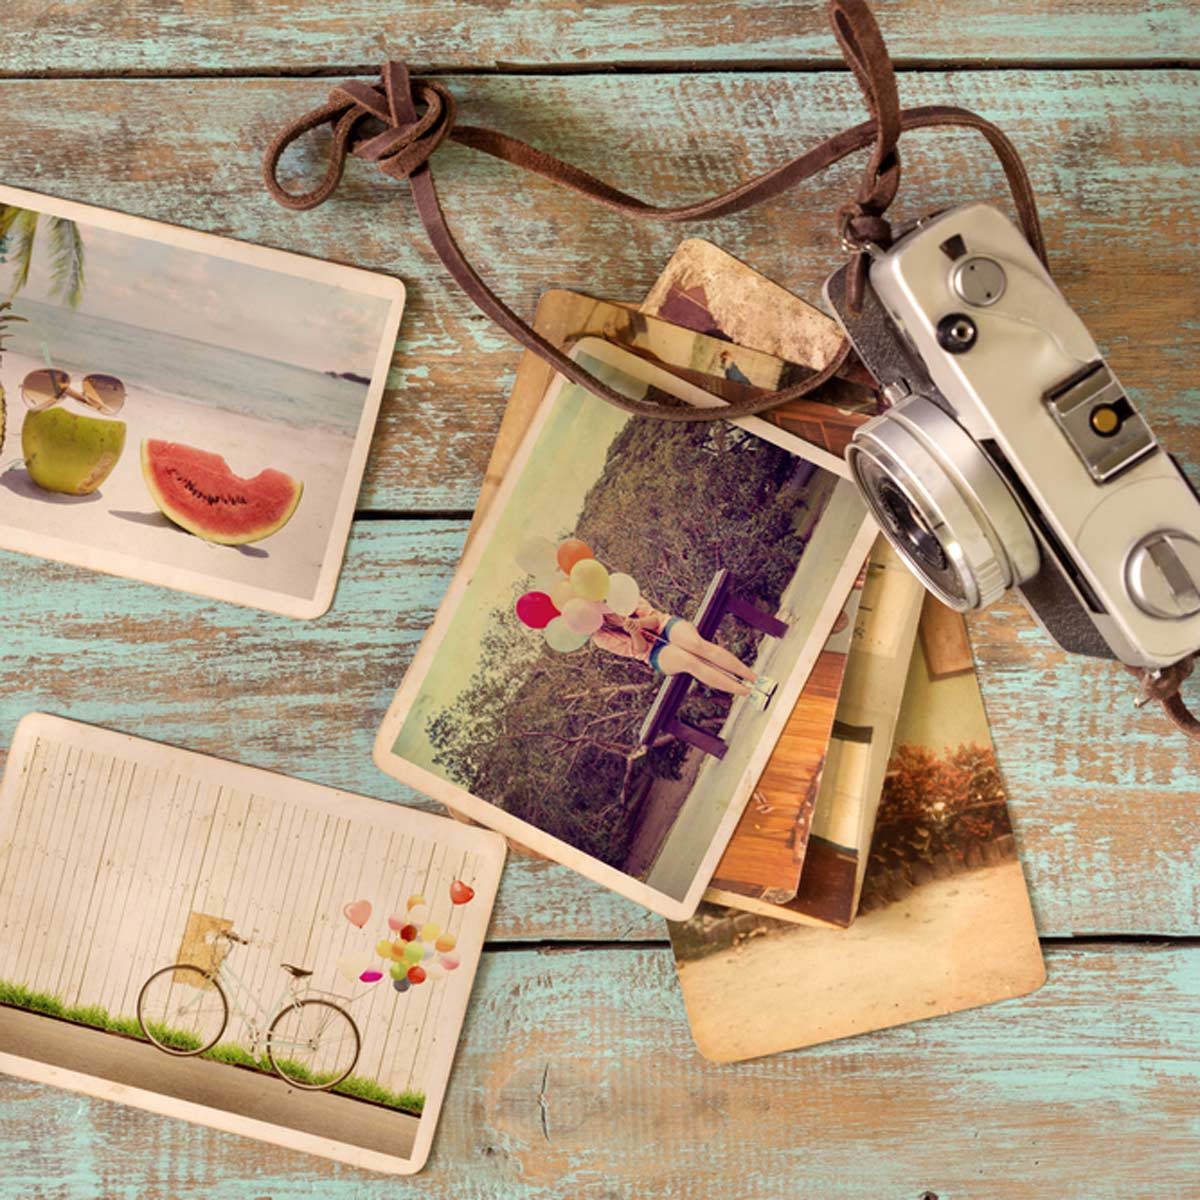
Preserving cherished memories captured in old photos is a timeless tradition. Whether they are family portraits, vacation snapshots, or candid moments frozen in time, these photographs hold significant sentimental value. However, without proper storage and protection, these precious mementos can deteriorate over time, losing their color, clarity, and overall quality.
That is why it is crucial to store old photos in boxes to ensure their longevity and maintain their condition. The right storage method not only safeguards against damage but also allows for easy organization and retrieval of your photo collection. In this article, we will explore the importance of properly storing old photos and provide practical tips on how to store them in boxes.
By following these steps, you can keep your cherished memories safe for future generations to enjoy.
Key Takeaways:
- Preserve cherished memories by storing old photos in acid-free boxes, protecting them from light, humidity, and contaminants. Organize, label, and maintain your collection to ensure longevity and easy retrieval.
- Safeguard old photos with archival materials, protective sleeves, and desiccant packs in a cool, dry environment. Regularly inspect and handle photos with care to preserve their quality for future generations.
Read more: How To Store Old Photo Albums
Importance of Properly Storing Old Photos
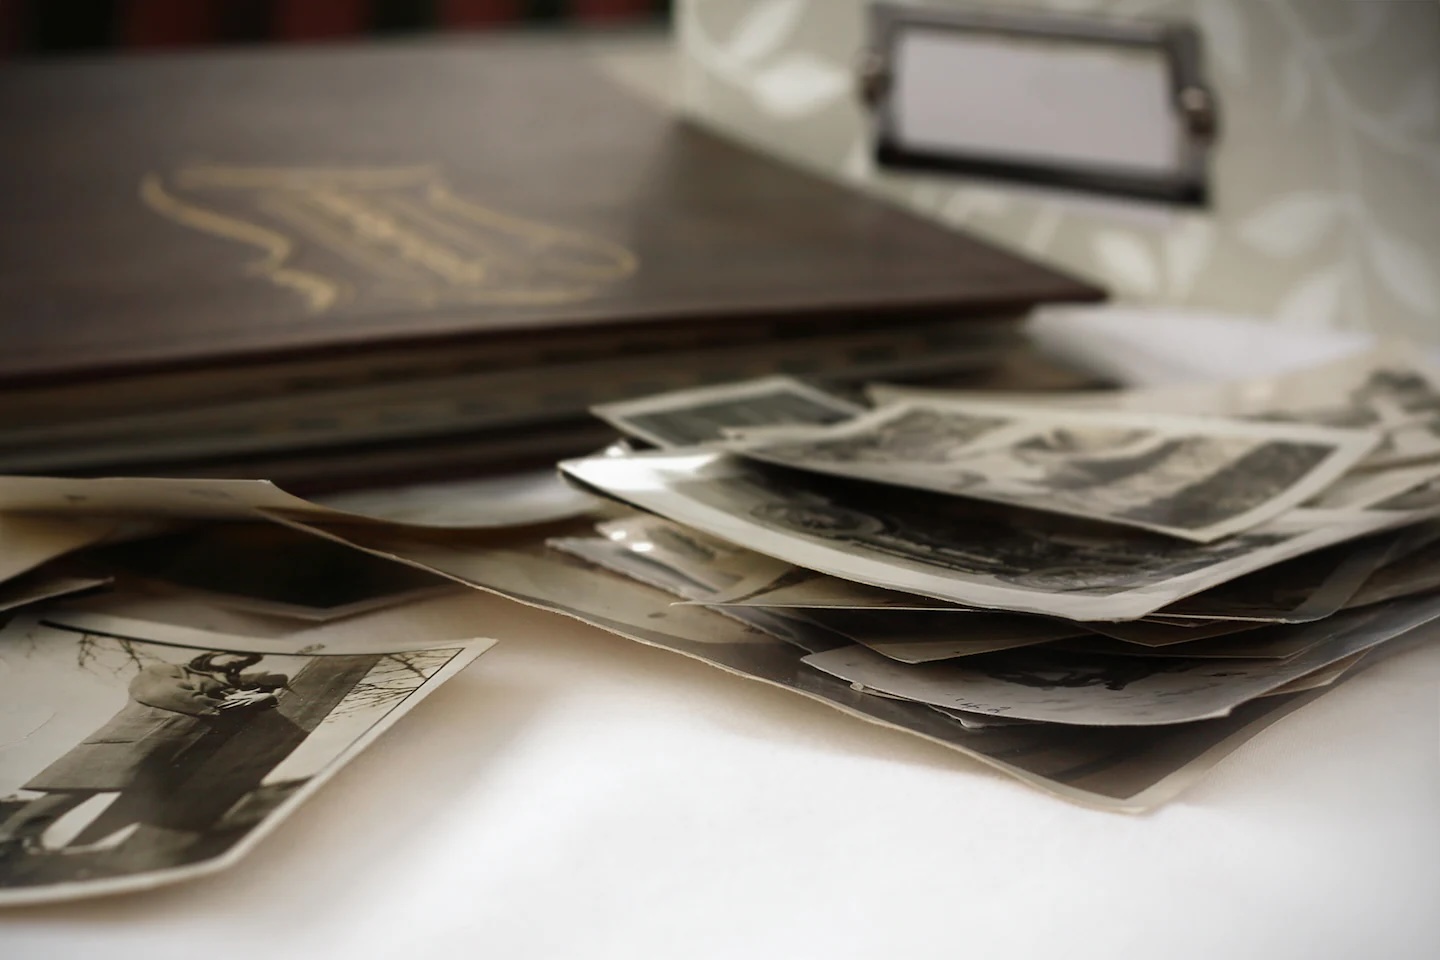
Old photos are irreplaceable treasures that chronicle our personal history and capture moments that hold special significance in our lives. They serve as a tangible connection to our past, providing a glimpse into the lives of our ancestors and the experiences they lived through. Preserving these photos is not just about preserving the physical print; it’s about preserving the memories and emotions associated with them.
Improper storage can have detrimental effects on the condition of old photos. Exposure to light, humidity, temperature fluctuations, and contaminants can cause fading, discoloration, mold growth, and deterioration of the photo paper. Without proper care, these precious pieces of history can be lost forever.
Properly storing old photos ensures their longevity and helps maintain their quality. By following a few simple guidelines, you can protect your photos for generations to come:
- Preserve the Originals: Old photos are delicate and susceptible to damage. Make photocopies or digital scans of your most valuable and fragile prints, and store the originals in a safe place to minimize handling and exposure.
- Protect from Light: Light, especially ultraviolet (UV) light, can cause fading and discoloration. Store photos in boxes that block out light or keep them in a dark area such as a basement or closet. For display, use UV-protective frames or glass.
- Control Temperature and Humidity: Fluctuations in temperature and humidity can accelerate deterioration. Store photos in an environment with stable temperature and humidity levels. Avoid areas prone to moisture like basements, attics, and bathrooms.
- Avoid Exposure to Contaminants: Keep photos away from sources of potential damage such as smoke, direct sunlight, chemicals, and food or beverages.
- Handle with Care: When handling photos, make sure your hands are clean and dry to avoid transferring oils and dirt onto the prints. Hold the photos by the edges or use gloves to prevent damage.
By following these guidelines, you can ensure that your old photos remain in excellent condition and continue to evoke cherished memories for years to come.
Choosing the Right Box for Photo Storage
When it comes to storing old photos, choosing the right box is crucial for preserving their condition. The wrong type of box can expose your photos to damaging elements and lead to deterioration over time. Here are some factors to consider when selecting a box for photo storage:
- Material: Opt for acid-free and lignin-free boxes. Acidic materials can cause photos to become discolored and brittle.
- Size: Choose a box that accommodates your photo collection comfortably. Too small of a box can cause damage when photos are squeezed together, while a box that is too big can allow for movement and increase the risk of bent or damaged photos.
- Sturdiness: Look for a box that is sturdy and durable enough to protect your photos from external impacts and accidental drops.
- Cover: Consider whether you prefer a box with a hinged lid or a removable lid. A hinged lid provides easy access, while a removable lid allows for stacking boxes and efficient storage.
- Archival-quality: If you are storing valuable or delicate photos, consider investing in archival-quality boxes designed specifically for long-term preservation. These boxes are made of high-quality materials that offer extra protection against moisture, light, and other damaging factors.
- Acid-free dividers: Some boxes come with dividers to help organize and separate your photos. If you choose a box with dividers, ensure that they are also acid-free and will not cause any damage to your photos.
When selecting a box for photo storage, it is essential to invest in high-quality materials that offer maximum protection. Look for boxes specifically designed for archival purposes and ensure they are free from harmful chemicals that could accelerate photo deterioration. Remember, the right box will provide the necessary protection and organization to keep your photos safe for years to come.
Selecting Acid-Free and Archival Materials
When it comes to storing old photos, using acid-free and archival materials is paramount. Acidic materials can cause irreversible damage to your photos over time, leading to discoloration, brittleness, and deterioration. Here are some essential acid-free and archival materials to consider:
- Photo Albums: Choose photo albums that are specifically labeled as acid-free and archival quality. These albums are made with materials that do not contain acid or lignin, ensuring the long-term preservation of your photos. Acid-free photo albums typically have pages made of polypropylene or polyester and do not contain any adhesives that can harm your photos.
- Archival Sleeves: For individual photo protection, consider using archival sleeves made of acid-free and PVC-free materials. These clear sleeves allow you to slide your photos in, providing an extra layer of protection against dust, fingerprints, and environmental factors.
- Archival Photo Mounting Corners: If you prefer to display your photos in a scrapbook or album, use archival photo mounting corners. These acid-free adhesive corners are designed to hold your photos securely without causing any damage or staining.
- Archival Tissue Paper: Place sheets of archival tissue paper between photos to prevent them from sticking together and to protect against any residual acids or contaminants.
- Archival Boxes: As mentioned earlier, choose acid-free and lignin-free boxes specifically designed for photo storage. These boxes offer a safe and protective environment for your photos, shielding them from harmful elements. Avoid using regular cardboard boxes or plastic containers, as they can emit acids and expose your photos to additional risks.
- Handling Gloves: When handling your photos, wear nitrile or cotton gloves to prevent oils from your hands transferring onto the prints. This step helps to maintain their condition and avoid any potential damage caused by fingerprints or dirt.
By using acid-free and archival materials, you ensure that your photos are protected from the damaging effects of acidity and environmental factors. Invest in high-quality materials designed for long-term preservation to safeguard the integrity and longevity of your cherished photo collection.
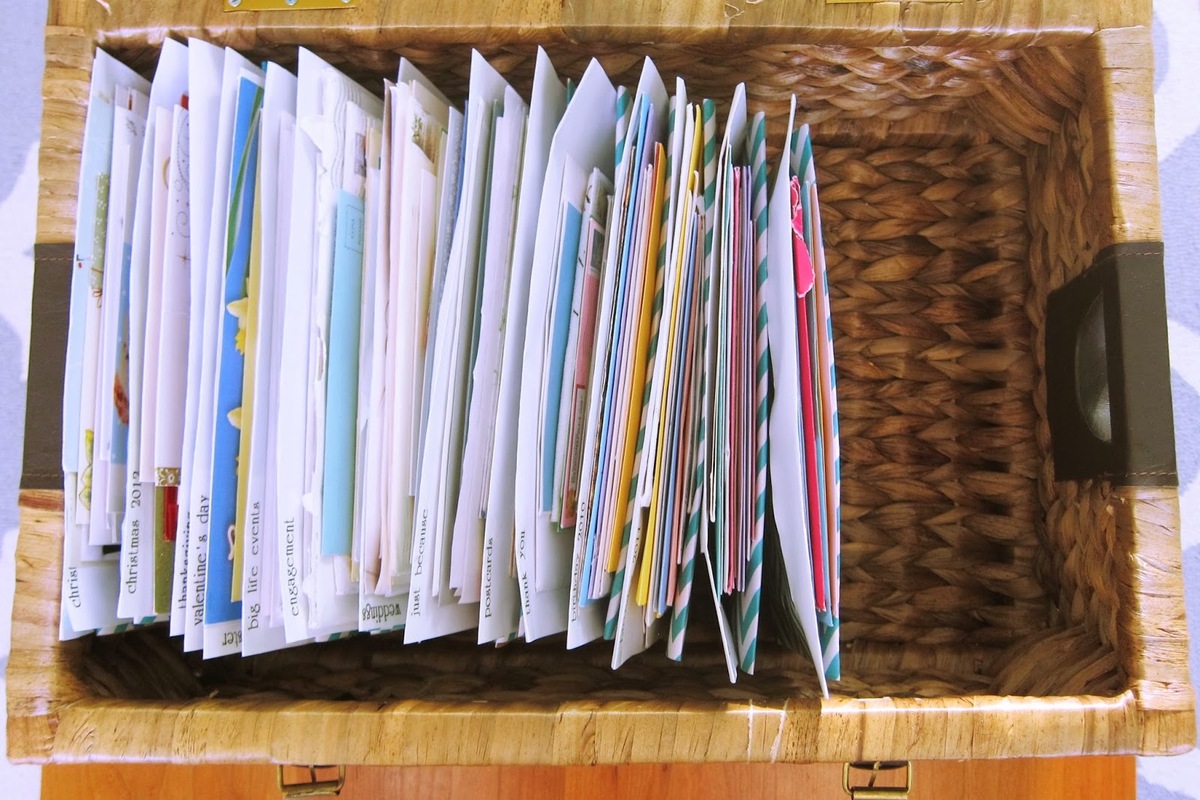
Organizing and Labeling Your Photo Collection
Organizing and labeling your photo collection is essential for easy retrieval and preservation. Without proper organization, it can be challenging to locate specific photos when you want to revisit or share them with others. Here are some tips to help you effectively organize and label your photo collection:
- Sort by Theme or Date: Start by categorizing your photos into different themes or events, such as family, vacations, holidays, or special occasions. You can also organize them chronologically by date. Determine a system that works best for you and aligns with how you would naturally search for specific photos.
- Create a Catalog: Consider creating a catalog or inventory of your photo collection. This can be a physical notebook, a digital spreadsheet, or specialized software. Include details such as date, location, people, and any other relevant information that will help you quickly identify and locate specific photos.
- Labeling: On the back of each photo, use a pencil or archival-quality pen to label important details, such as the date, location, and names of the people in the photo. Be sure to write lightly to avoid damaging the front of the photo. Alternatively, you can use acid-free adhesive labels or captions printed on acid-free paper that can be affixed to the back of the photo.
- Organize in Albums or Boxes: Once you have categorized your photos and labeled them, place them in appropriate albums or archival boxes. Use dividers or separate envelopes within the album or box to further organize and separate each category. This will make it easier to retrieve specific photos when needed.
- Digitize Your Collection: Consider digitizing your photo collection for easy access and backup. Scan your photos using a high-quality scanner or use a reputable photo scanning service. Organize and store the digital copies on a secure hard drive or online cloud storage. This allows you to preserve and share your photos without worrying about loss or damage.
- Backup Your Digital Files: Whether you choose to digitize your photos or store them in their physical form, it is crucial to have a backup system in place. Regularly back up your digital files to multiple storage devices or cloud services to prevent loss in case of hardware failure or damage.
By implementing effective organization and labeling techniques, you will be able to easily navigate and share your photo collection, preserving the memories captured in each image for generations to come.
Read more: How To Store Old Photos Digitally
Preparing Photos for Storage
Before placing your photos in storage boxes, it’s essential to prepare them properly to ensure their long-term preservation. Taking a few simple steps can help prevent damage and maintain the quality of your photos. Here are some tips for preparing photos for storage:
- Clean Your Photos: Start by gently removing any dust or debris from the surface of your photos. Use a soft, lint-free cloth or a brush specifically designed for delicate surfaces. Avoid using water or cleaning solutions, as they can damage the photos.
- Repair Damaged Photos: If you come across photos with tears, creases, or other damage, consider getting them professionally restored before storing them. A professional photo restorer can mend the damage and ensure the photo is stable for long-term storage.
- Remove Adhesive Residue: If your photos have any sticky residue from previous albums or adhesive tapes, carefully remove it using a mild adhesive remover. Be cautious and test a small area first to make sure the remover does not damage the photo.
- Ensure Your Hands are Clean and Dry: Before handling your photos, wash your hands thoroughly to remove any oils and dirt. Dry them completely to avoid transferring any residue onto the photos. Consider wearing clean cotton gloves for added protection.
- Be Mindful of Humidity: If you live in a humid environment, allow your photos to acclimate to the room’s humidity before placing them in storage. This will help prevent moisture damage or sticking of the photos to each other.
- Consider Individual Sleeves or Enclosures: For added protection, place each photo in individual archival-quality polypropylene or polyester sleeves. These clear sleeves provide a barrier against dust, fingerprints, and potential damage during handling.
- Avoid Staples and Paperclips: Do not use staples, paperclips, or any metal fasteners to group or hold your photos together. These metals can corrode over time and cause irreparable damage to your photos. Instead, use acid-free photo corners or archival-quality adhesive to secure your photos in albums or mount them on acid-free paper.
- Allow Ink to Dry: If you have recently printed photos or received prints from the lab, make sure the ink is completely dry before storing them. Stacking or placing photos together when the ink is still wet can lead to smudging and sticking.
Taking the time to properly prepare your photos for storage ensures their protection and longevity. By following these steps, you minimize the risk of damage and maintain the quality of your cherished memories for years to come.
When storing old photos in boxes, use acid-free and lignin-free materials to prevent deterioration. Place photos in archival sleeves or envelopes to protect them from damage. Keep the boxes in a cool, dry, and dark environment to preserve the photos for longer periods.
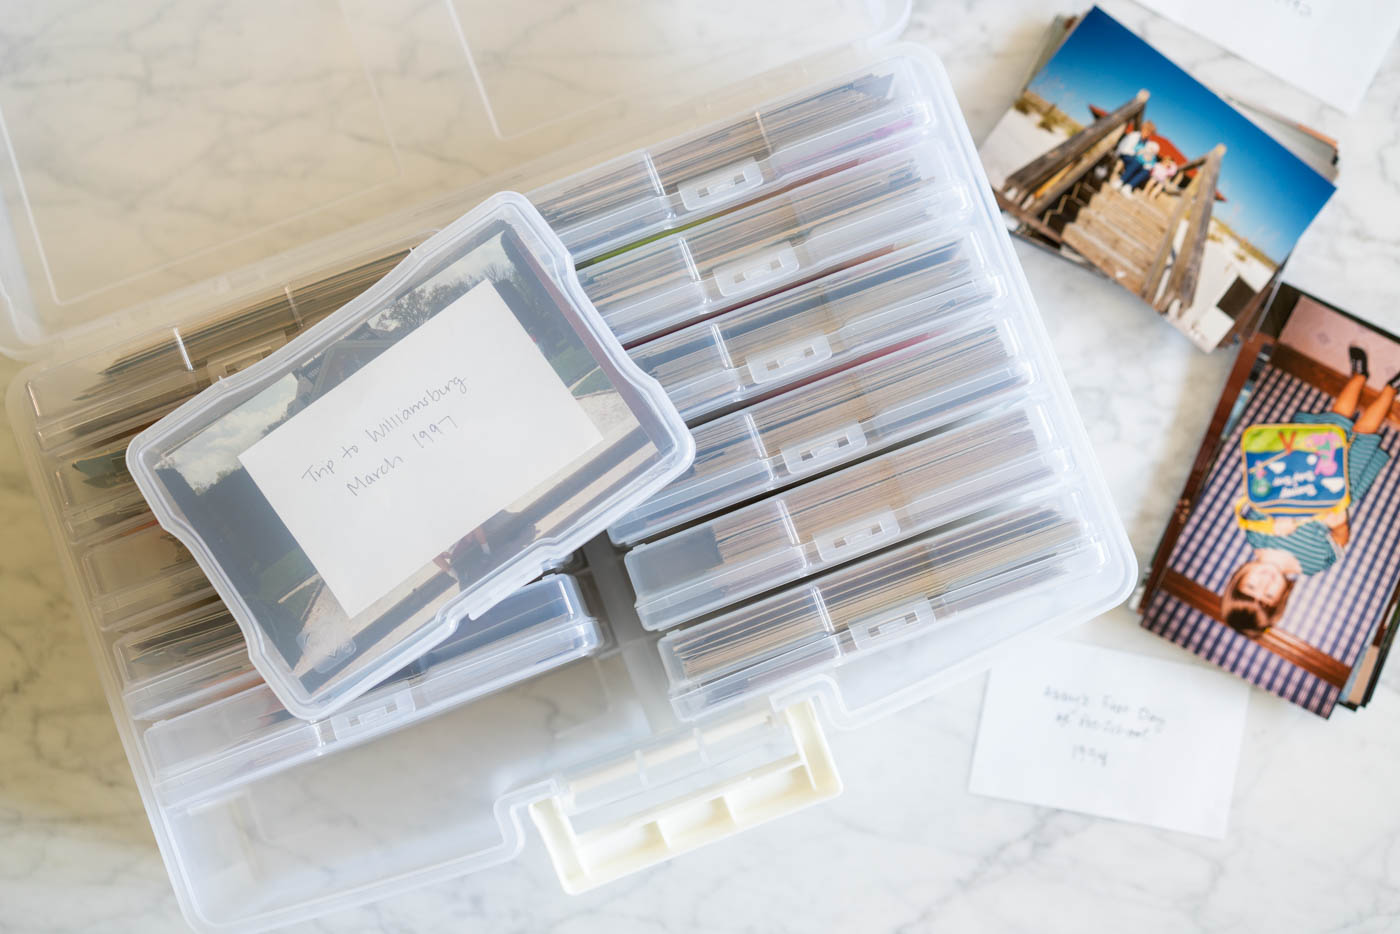
Placing Photos in Boxes
Once you have prepared your photos for storage, it’s time to safely place them in boxes. Properly arranging and organizing your photos in boxes will help protect them from light, dust, and physical damage. Follow these steps to ensure your photos are stored securely:
- Choose the Right Box: Select a sturdy, acid-free, and archival-quality box that is slightly larger than your largest photo. This ensures there is enough space and prevents excessive pressure on the photos.
- Line the Bottom of the Box: Place a layer of acid-free archival tissue or acid-free paper at the bottom of the box as a protective barrier. This helps prevent direct contact between the photos and the box.
- Arrange Photos in a Flat Position: Stack your photos in a flat position, one on top of the other, with the oldest photos at the bottom and the most recent ones at the top. Avoid stuffing the box to the point where the photos are tightly packed, as this can cause bending or curling.
- Use Dividers: If you want to organize your photos by category or date, consider using acid-free, archival-quality dividers. These dividers help separate sections of the box and make it easier to locate specific photos within the collection.
- Maintain a Uniform Size and Orientation: Keep your photos uniform in size and orientation when placing them in the box. This creates a neat and organized appearance and maximizes space efficiency.
- Add Acid-Free Tissue Paper: Insert sheets of acid-free archival tissue paper between layers of photos to provide additional protection and prevent them from sticking together.
- Label the Box: Label the outside of the box with clear and descriptive information, indicating the contents, date range, and any other relevant details. This makes it easy to locate specific photo collections in the future.
- Store the Box in a Cool, Dry Place: Find a suitable storage area that is cool, dry, and away from direct sunlight. Avoid basements, attics, or areas prone to extreme temperature fluctuations or high humidity levels.
- Avoid Overfilling: Do not overfill the box, as it can put pressure on the photos and increase the risk of damage. Leave a slight space at the top of the box to ensure easy removal of photos without pulling or bending them.
- Handle with Care: When retrieving photos from the box, make sure your hands are clean and dry. Gently slide the photos out one by one, avoiding any bending or creasing.
By following these steps, you can ensure that your photos are safely stored in boxes, protecting them from external elements and preserving their condition for years to come.
Using Protective Sleeves or Enclosures
When it comes to storing and preserving old photos, using protective sleeves or enclosures is an effective way to provide an extra layer of protection against dust, fingerprints, and environmental factors. These sleeves or enclosures also help minimize the risk of physical damage such as bending or tearing. Here’s how you can use them to safeguard your precious photos:
- Choose Acid-Free and Archival-Quality Sleeves: Opt for sleeves made from acid-free and PVC-free materials. These materials are safe for long-term storage as they do not contain harmful chemicals that can damage the photos over time. Look for sleeves made of polypropylene or polyester, which are known for their archival qualities.
- Select the Right Size: Use sleeves that are slightly larger than your photos to ensure they fit comfortably without bending or causing strain on the edges. Snug-fitting sleeves provide the best protection.
- Slide the Photos into the Sleeves: Gently slide each photo into an individual sleeve, ensuring it is centered and aligned properly. Avoid touching the surface of the photo directly to minimize the risk of fingerprints or smudging. The archival-quality sleeves will create a barrier between the photo and any potential contaminants.
- Use Reinforced Corners: Consider using sleeves or enclosures with reinforced corners to provide extra protection against bending or tearing. These reinforced corners help preserve the integrity of the photo and prevent damage during handling or storage.
- Secure the Sleeves: If the sleeves have an adhesive strip or flap, gently seal it to keep the photo securely in place. Ensure that the adhesive is acid-free and safe for long-term archival storage. Alternatively, you can use acid-free photo corners or mounts to secure the photos within the sleeves.
- Label Sleeves: If desired, label the outside of the sleeves with relevant information such as the date, location, or names of individuals in the photo. Use an archival-quality pen or pencil to write lightly on the sleeve to avoid potential damage.
- Place Sleeved Photos in Storage: After placing each photo in its protective sleeve, carefully store them in acid-free storage boxes or albums. Organize the sleeves in a flat, upright position to minimize stress on the photos and ensure easy retrieval when needed.
- Handle with Care: When handling photos in protective sleeves, ensure your hands are clean and dry to avoid transferring oil or dirt onto the sleeves or photos. Hold the sleeves by the edges or use clean cotton gloves for added protection.
- Regularly Inspect the Sleeves: Periodically check the sleeves for any signs of deterioration, such as yellowing, brittleness, or sticking. If you notice any damage or degradation, replace the sleeves with new archival-quality ones to maintain the long-term protection of your photos.
By using protective sleeves or enclosures, you can safeguard your photos from potential damage while also preserving their quality and longevity. These extra layers of protection ensure that your cherished memories remain intact for years to come.
Adding Desiccant Packs to Absorb Moisture
Moisture is one of the biggest enemies when it comes to preserving old photos. Excessive humidity can lead to mold growth, deterioration, and fading of the images. To protect your precious photos from moisture damage, you can add desiccant packs to your storage containers. Desiccant packs are small sachets filled with moisture-absorbing substances that help maintain a dry environment. Here’s how you can effectively use desiccant packs to safeguard your old photos:
- Choose the Right Desiccant Packs: Look for desiccant packs specifically designed for archival storage. Silica gel is a common desiccant used for photo preservation, as it effectively absorbs moisture and helps maintain a low humidity level. Ensure that the desiccant packs you use are non-toxic, indicating that they are safe for use around photos.
- Calculate the Proper Amount: Determine the appropriate number of desiccant packs based on the size of your storage container. As a general guideline, use one desiccant pack for every 5-10 square inches of storage space. However, it is always recommended to follow the instructions provided by the manufacturer of the desiccant packs.
- Place Desiccant Packs Strategically: Position the desiccant packs strategically within the storage container to maximize their effectiveness. Spread them out evenly, ensuring they are not in direct contact with the photos. Placing them near the top or in the corners of the container is often the most effective method.
- Monitor and Replace: Regularly monitor the desiccant packs to ensure they are still active and absorbing moisture. Depending on the specific type and conditions, desiccant packs may need to be replaced or reactivated periodically. Follow the manufacturer’s instructions regarding the lifespan of the desiccant packs and the proper disposal or reactivation methods.
- Keep Desiccant Packs Sealed: To maintain their efficiency, keep the desiccant packs sealed until you are ready to use them. Only remove the packs just before placing them in the storage container to minimize their exposure to moisture in the air.
- Store in a Controlled Environment: While desiccant packs help absorb moisture, it is also crucial to store your photos in a controlled environment. Choose a cool, dry place with stable temperature and humidity levels to complement the use of desiccant packs. This further reduces the risk of moisture-related damage to your photos.
- Label the Container: It is helpful to label the storage container with a note indicating the presence of desiccant packs. This serves as a reminder to handle the container with care and not to open it unnecessarily, as the desiccant packs play a crucial role in maintaining the photos’ condition.
By adding desiccant packs to your storage containers, you can create a moisture-free environment that helps protect your old photos from the damaging effects of humidity. Taking this extra step ensures that your treasured memories remain safe and well-preserved for years to come.
Read more: How To Store Photos For Free
Keeping Boxes in a Cool and Dry Environment
The storage environment plays a critical role in preserving the condition of your old photos. To ensure their longevity, it’s important to store photo boxes in a cool and dry environment. Exposure to excessive heat, humidity, or fluctuations in temperature can lead to damage such as mold growth, fading, and deterioration. Here are some guidelines for keeping your photo boxes in an optimal storage environment:
- Avoid High Humidity Areas: Choose a storage area that is not susceptible to high humidity levels. Basements, attics, and bathrooms are generally more prone to moisture, which can cause irreparable damage to your photos. Opt for a living space or a dedicated storage area with stable humidity levels.
- Control Temperature Fluctuations: Photos are sensitive to temperature fluctuations, which can cause the emulsion on the prints to expand and contract, leading to cracks or warping. Avoid storing photo boxes in areas subject to extreme temperature changes, such as near direct sunlight or close to heating or cooling sources.
- Maintain a Stable Environment: Aim for a storage area that maintains a consistent temperature and humidity level. The ideal temperature for photo storage generally ranges from 60-75°F (15-24°C), with a relative humidity of around 35-50%. Using a hygrometer and thermometer can help you monitor and maintain the appropriate conditions.
- Use Climate-Controlled Storage: If you live in an area with extreme climate conditions or high humidity levels, consider investing in a climate-controlled storage unit. These units provide stable temperature and humidity levels, protecting your photos from environmental damage.
- Avoid Exposure to Sunlight: UV rays from sunlight can cause fading and discoloration of your photos. Store your photo boxes in a location away from direct sunlight or use UV-filtering window coverings to protect against harmful light exposure.
- Keep Away from Air Vents and Ducts: Avoid placing photo boxes near air vents, heating ducts, or areas with high airflow. Air from these sources can carry dust, pollutants, and moisture, which can damage your photos over time.
- Consider Desiccant Packs: As mentioned earlier, using desiccant packs in your photo storage boxes can help absorb excess moisture and maintain a drier environment. These packs are particularly useful in areas with higher humidity levels.
- Regularly Monitor the Storage Area: Periodically check the storage area for any signs of moisture, leaks, or other environmental issues. If you notice any problems, address them promptly to prevent damage to your photo collection.
- Keep the Storage Area Clean: Maintain cleanliness in the storage area by regularly dusting and vacuuming. Minimizing dust and debris helps prevent them from settling on your photos and potentially causing scratches or other damage.
- Ensure Adequate Ventilation: Proper air circulation is important to prevent the buildup of moisture in the storage area. Make sure there is adequate ventilation to keep the air fresh and prevent the formation of condensation.
By keeping your photo boxes in a cool and dry storage environment, you provide optimal conditions for preserving the quality and longevity of your old photos. This proactive approach ensures your cherished memories remain safe and protected for future generations to enjoy.
Regularly Inspecting and Maintaining Your Photo Collection
Regular inspection and maintenance are crucial for preserving the condition and quality of your photo collection. By routinely checking your photos, you can identify any signs of damage or deterioration early on and take appropriate measures to mitigate further harm. Here are some important steps to follow when inspecting and maintaining your photo collection:
- Inspect for Physical Damage: Take the time to thoroughly examine each photo for any signs of physical damage such as tears, creases, or discoloration. Pay close attention to the edges and corners of the prints, as they are more vulnerable to damage.
- Check for Mold or Mildew: Inspect your photos for any signs of mold or mildew growth. Look for discoloration, fuzzy patches, or a musty smell. If you notice any indication of mold, it’s crucial to address the issue promptly to prevent further spread and damage to neighboring photos.
- Handle with Clean Hands: Before touching your photos, ensure that your hands are clean and dry. Oils, lotions, or debris on your hands can transfer onto the photos and potentially cause damage or staining.
- Reinforce Corners or Edges: If you notice any loose corners or edges on your photos, consider reinforcing them with archival-quality adhesive or photo corners. This helps prevent further tearing and secures the photos within their protective sleeves or enclosures.
- Address Damaged Photos: If you discover any photos with significant damage, such as severe tears or discoloration, it may be necessary to consult a professional photo restorer. They have the expertise and tools to restore damaged photos and ensure their long-term preservation.
- Ensure Proper Storage: Regularly check the storage boxes or albums for any signs of wear or damage. Inspect the integrity of the containers, such as loose corners or cracks, and replace them if necessary. Ensure that the storage area maintains the recommended temperature and humidity levels, as discussed earlier.
- Monitor the Storage Environment: Keep an eye on the storage area for any changes in temperature, humidity, or potential environmental hazards. Early detection of issues allows you to take corrective actions promptly, minimizing the risk of damage to your photo collection.
- Update Catalogs or Inventories: If you maintain a catalog or inventory of your photo collection, periodically update it to include new additions or changes in categorization. This ensures that your records remain accurate and up to date for easy reference.
- Consider Digitization: Digital copies of your photos serve as backups and provide an additional layer of protection. Periodically review and update your digital files, ensuring they are properly backed up and stored on multiple devices or cloud platforms.
- Handle Photos with Care: When removing or reorganizing photos, handle them with utmost care to prevent bending, tearing, or other damage. Always grasp them by the edges or use clean gloves to minimize contact with the surface of the photos.
By regularly inspecting and maintaining your photo collection, you can ensure that your treasured memories are preserved in the best possible condition. Stay proactive in caring for your photos, and promptly address any issues to ensure their continued longevity and enjoyment for years to come.
Conclusion
Preserving old photos is more than just storing them in boxes; it is about safeguarding the memories and capturing the essence of our personal history. By following the guidelines outlined in this article, you can ensure that your cherished photos remain in excellent condition and stand the test of time.
From choosing the right box and using acid-free and archival materials to organizing, labeling, and preparing your photos for storage, each step plays a crucial role in maintaining their quality. Adding desiccant packs to absorb moisture and keeping the storage environment cool and dry further protects your photos from the potential risks of humidity and temperature fluctuations.
Regularly inspecting and maintaining your photo collection allows you to detect damage early on and take necessary steps to mitigate further harm. By handling your photos with care, conducting periodic checks, and addressing any issues promptly, you can ensure their continued preservation and enjoyment for years to come.
Remember, your old photos hold not just images, but stories, emotions, and connections to our past. By taking the time to properly store and protect them, you are preserving a vital part of your personal and family history, allowing future generations to connect with their roots and relive the moments captured in those timeless images.
So, invest the effort and attention in storing your old photos with care. Your dedication will ensure that these valuable treasures remain beautifully preserved, allowing their significance to be passed down through the generations.
Frequently Asked Questions about How To Store Old Photos In Boxes
Was this page helpful?
At Storables.com, we guarantee accurate and reliable information. Our content, validated by Expert Board Contributors, is crafted following stringent Editorial Policies. We're committed to providing you with well-researched, expert-backed insights for all your informational needs.


0 thoughts on “How To Store Old Photos In Boxes”