Articles
How To Store IPhone Photos On ICloud
Modified: January 5, 2024
Learn how to store your iPhone photos on iCloud with these helpful articles. Ensure your precious memories are safely backed up and easily accessible.
(Many of the links in this article redirect to a specific reviewed product. Your purchase of these products through affiliate links helps to generate commission for Storables.com, at no extra cost. Learn more)
Introduction
Welcome to the digital age where capturing every special moment with our smartphones has become the norm. With the ever-improving camera capabilities of iPhones, it’s no surprise that we accumulate a plethora of photos. However, the challenge lies in finding a reliable and secure method for storing and managing these precious memories. That’s where iCloud comes into the picture.
iCloud is Apple’s cloud storage service that provides seamless integration across all your Apple devices. It offers a range of features, including the ability to store and sync your iPhone photos across multiple devices, protecting them from loss or damage. In this article, we’ll dive into the world of iCloud and explore how you can store your iPhone photos on this versatile platform.
By utilizing iCloud’s photo storage functionality, you can ensure that your cherished photos are safely backed up and easily accessible whenever and wherever you need them. Whether you want to free up space on your iPhone or seamlessly transfer photos to your iPad or Mac, iCloud has got you covered.
So let’s get started and discover how you can leverage iCloud to store and manage your iPhone photos in a hassle-free and organized manner. From enabling iCloud Photo Library to managing your storage settings and accessing your photos on other devices, we’ll cover the essential steps to optimize your iCloud experience.
Key Takeaways:
- Embrace the convenience of iCloud Photo Storage to securely back up and access your iPhone photos across all Apple devices, ensuring seamless integration, automatic backups, and ample storage space for your cherished memories.
- Optimize your photo management experience by creating albums, editing, and sharing photos effortlessly with iCloud, while troubleshooting common issues to ensure seamless access to your cherished memories across all Apple devices.
Read more: How To Store Photos On ICloud But Not IPhone
Understanding iCloud and its Benefits
iCloud is Apple’s cloud storage and computing service that provides users with a centralized platform to store and access their data, including photos, videos, documents, and more. It offers a range of benefits that make it an attractive option for iPhone users.
One of the key advantages of iCloud is its seamless integration across all your Apple devices. By signing in with your Apple ID, you can access your iCloud account and all its contents from your iPhone, iPad, Mac, or even the iCloud website. This means you can easily view, edit, or delete your photos from any device, ensuring that you have your memories at your fingertips.
Another significant benefit of iCloud is its automatic backup functionality. When enabled, iCloud automatically backs up your iPhone photos and other data regularly, ensuring that even if you lose or damage your device, your valuable memories are safely stored in the cloud. This feature provides peace of mind and protects against the risk of losing photos due to hardware failures or accidents.
iCloud also offers ample storage space for your photos and other files. By default, you get 5GB of free storage, but you can upgrade to a higher storage plan if needed. This means you can store a large collection of photos without worrying about running out of space on your iPhone. Additionally, iCloud’s storage plans are flexible, allowing you to choose the amount that suits your needs and upgrade or downgrade as necessary.
Moreover, iCloud seamlessly syncs your photos across all your devices. This means that when you capture a photo on your iPhone, it will automatically appear in the Photos app on your iPad or Mac. This synchronization ensures that you have access to your entire photo library from any device, making it convenient to view, edit, and share your photos wherever you are.
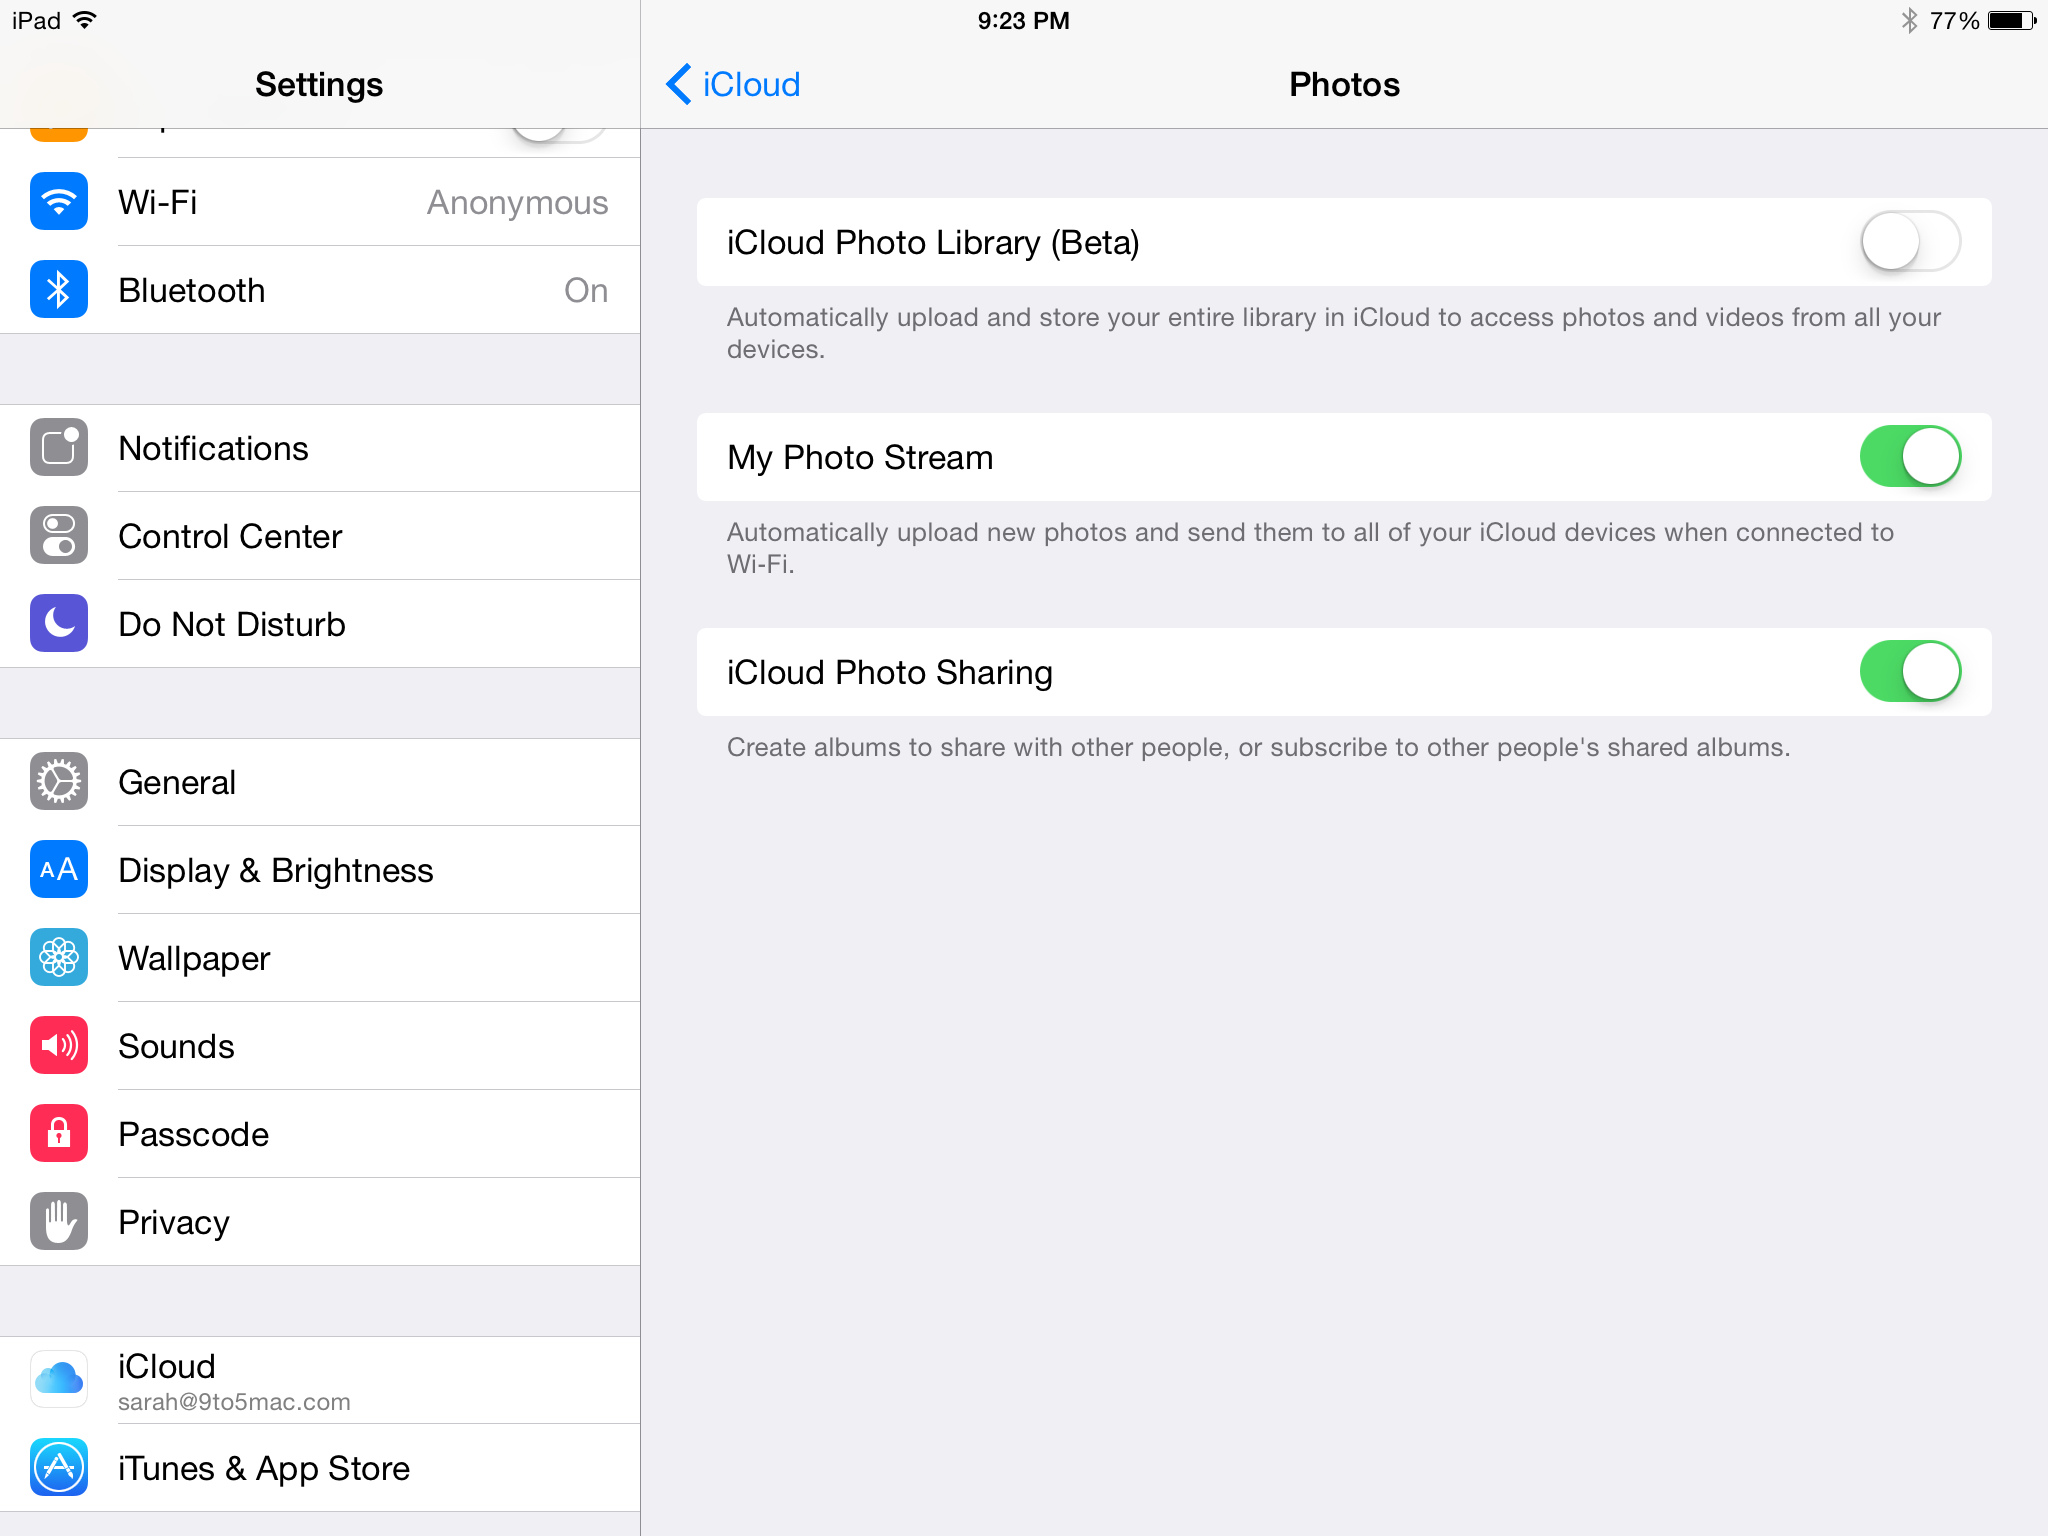
Lastly, iCloud offers advanced features such as iCloud Photo Library and iCloud Photo Sharing. iCloud Photo Library stores all your photos and videos in their full resolution, giving you the option to optimize device storage by storing smaller versions on your iPhone while keeping the originals in the cloud. iCloud Photo Sharing allows you to create shared albums and invite family and friends to contribute their photos, making it easy to collaborate and create shared experiences.
Overall, iCloud provides a reliable, secure, and convenient solution for storing and managing your iPhone photos. With its seamless integration, automatic backups, ample storage space, photo synchronization, and advanced features, iCloud offers a comprehensive solution that caters to the diverse needs of iPhone users.
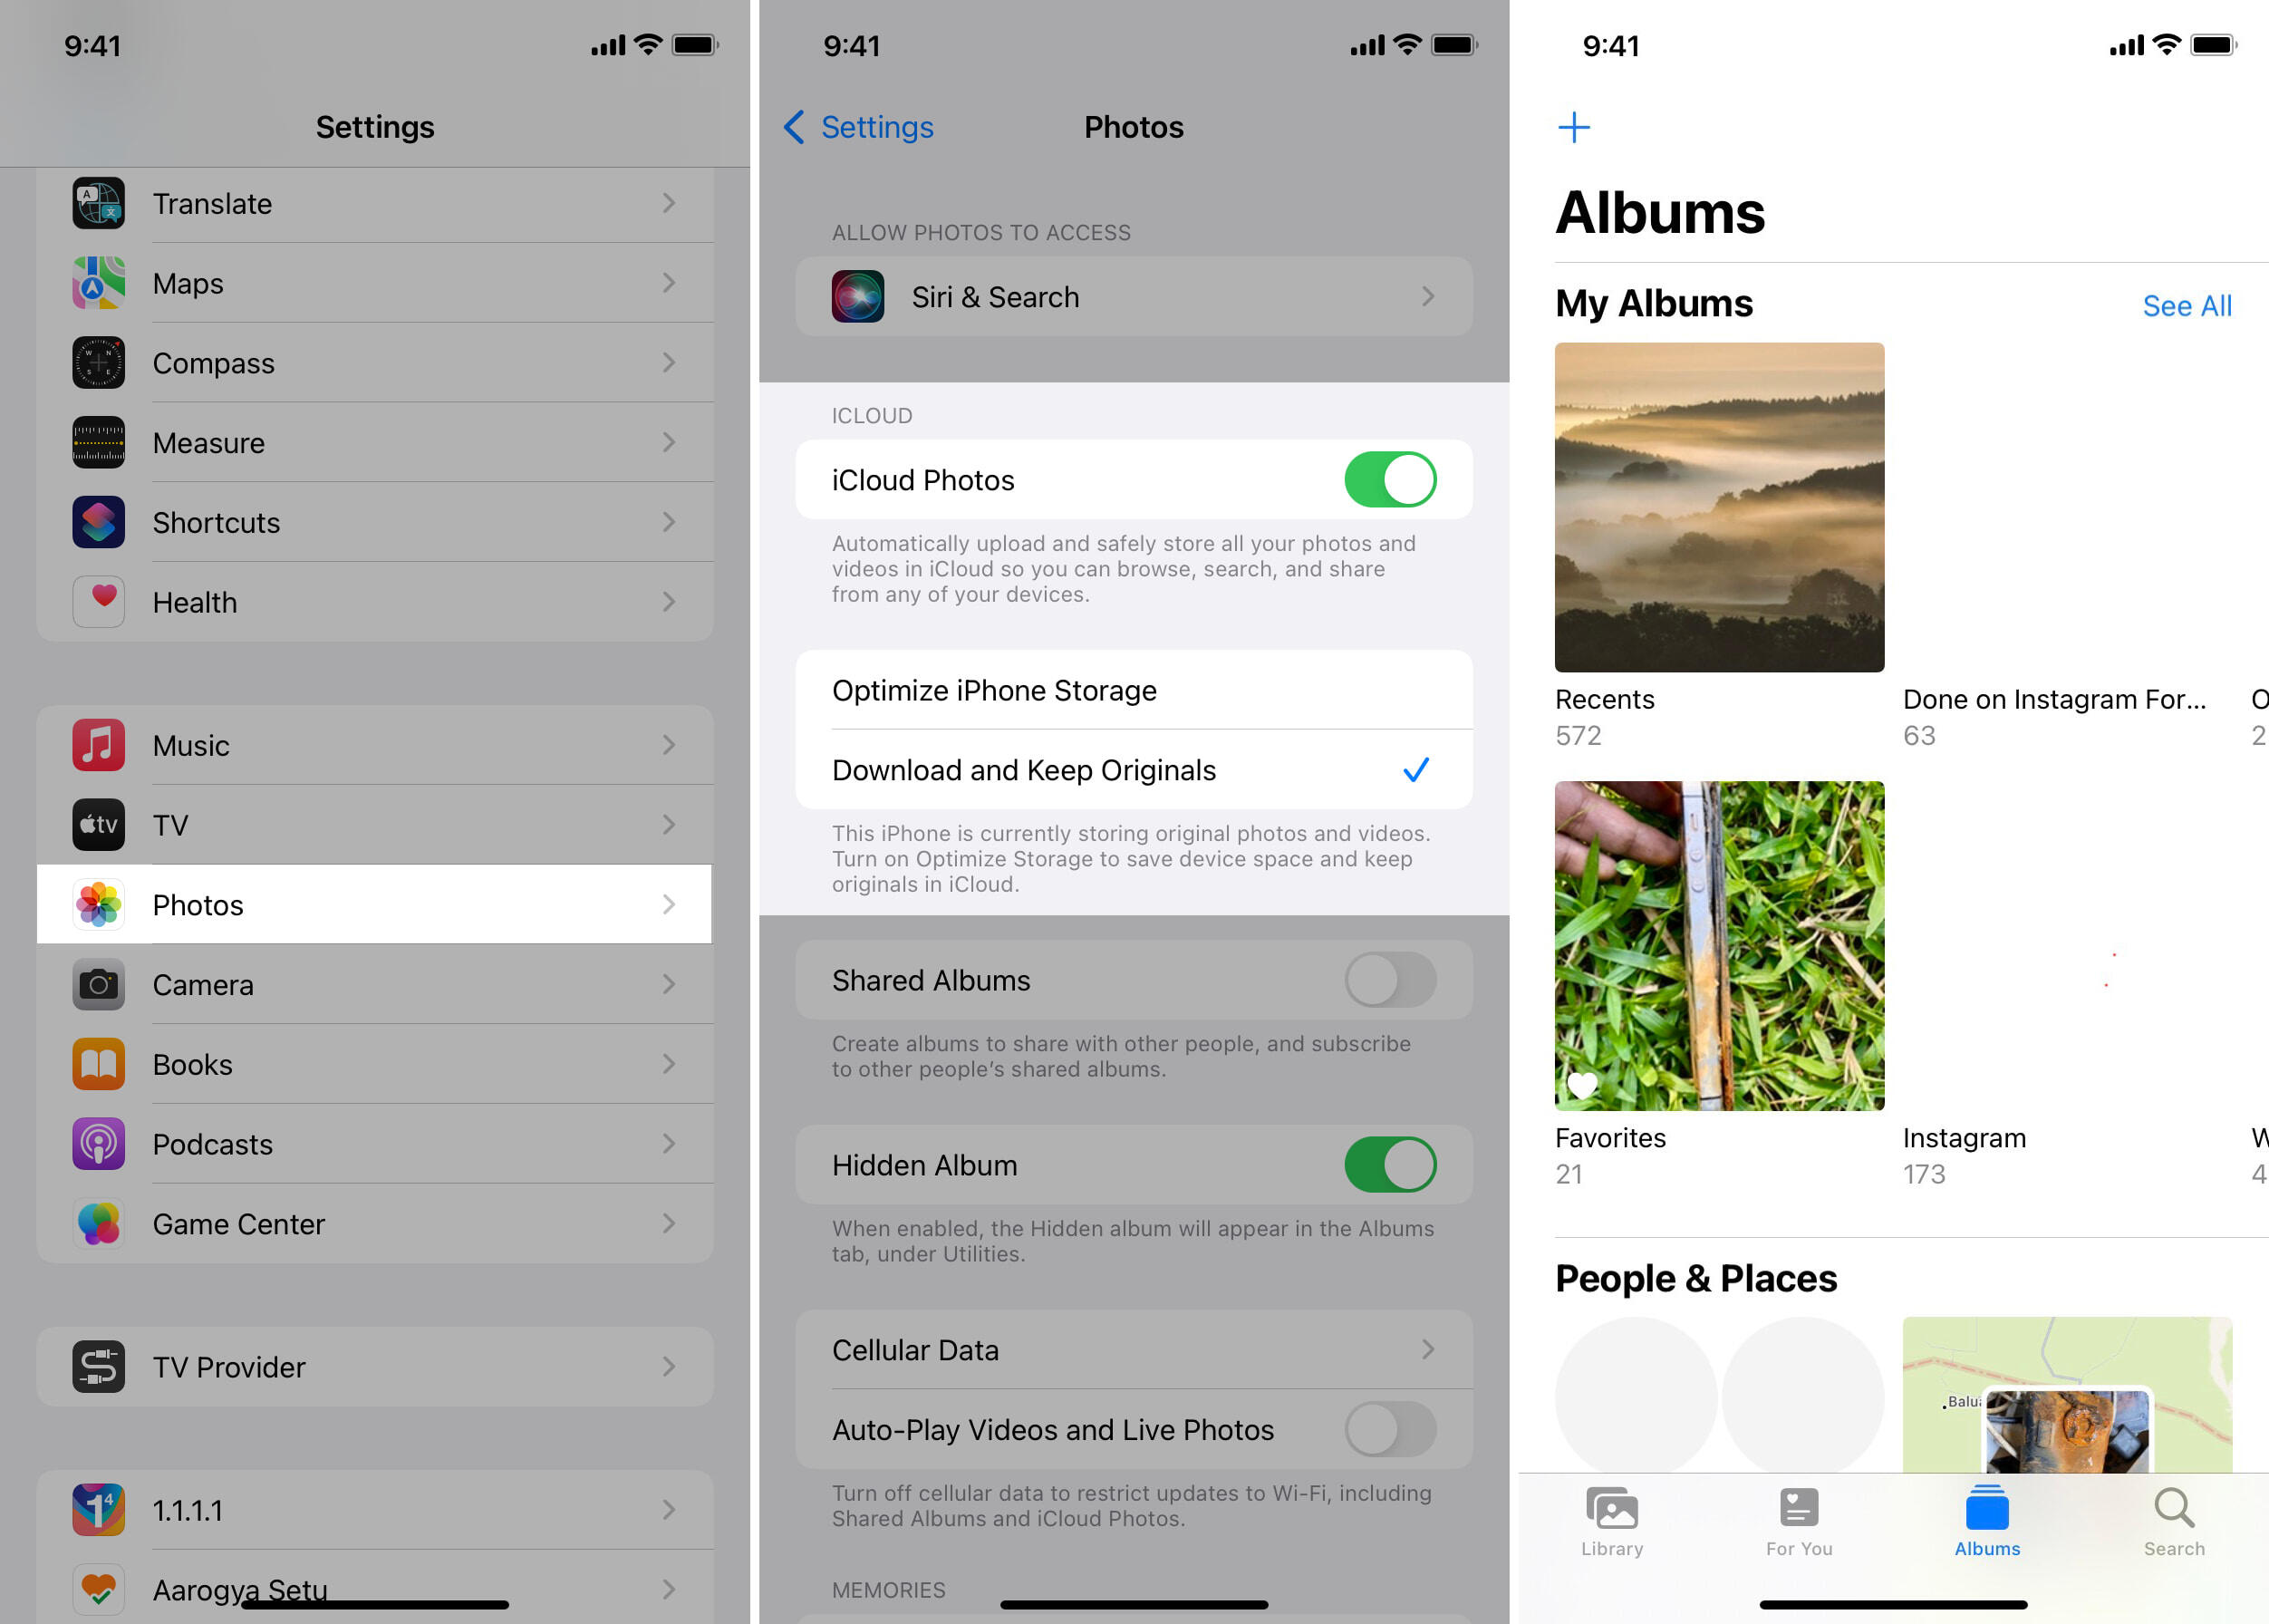
Enabling iCloud Photo Library
Enabling iCloud Photo Library is the first step to store your iPhone photos on iCloud. This feature allows you to upload your entire photo library to the cloud, making it accessible across all your Apple devices.
To enable iCloud Photo Library, follow these steps:
- Open the “Settings” app on your iPhone.
- Tap on your name at the top of the screen to access your Apple ID settings.
- Select “iCloud” from the list of options.
- Scroll down and tap on “Photos”.
- Toggle the switch next to “iCloud Photo Library” to enable it.
Once iCloud Photo Library is enabled, your iPhone will start uploading your photos to iCloud. The upload process may take some time, especially if you have a large photo library, so it’s advisable to be connected to Wi-Fi and ensure that your iPhone is plugged in and locked to prevent interruptions.
It’s worth noting that when you enable iCloud Photo Library, your iPhone will start optimizing storage by keeping smaller versions of your photos on your device while storing the original, full-resolution versions in iCloud. This helps save space on your iPhone while ensuring that you have access to the original photos whenever needed.
If you want to download the original, full-resolution versions of your photos to your iPhone, you can do so by tapping on a photo and waiting for it to download. You can also enable the “Download and Keep Originals” option in the iCloud Photo Library settings. Keep in mind that downloading the original photos will consume more storage space on your iPhone.
Enabling iCloud Photo Library is an essential step in leveraging the power of iCloud to store and manage your iPhone photos. It ensures that your entire photo library is securely backed up in the cloud and easily accessible across all your Apple devices.
Adjusting Storage Settings on iPhone
Managing storage settings on your iPhone is crucial to ensure that you have enough space for your photos and other important data. By adjusting these settings, you can optimize your iPhone’s storage and make efficient use of iCloud for storing your photos. Here are some ways to adjust storage settings on your iPhone:
- Offloading Unused Apps: One way to free up space on your iPhone is by offloading unused apps. This feature allows your iPhone to automatically remove rarely used apps while keeping their data intact. To enable this, go to “Settings” > “General” > “iPhone Storage” and enable the “Offload Unused Apps” option. This will help create more space for your photos without losing any important data.
- Optimizing iPhone Storage: If you have enabled iCloud Photo Library and are low on iPhone storage, you can optimize your photos to save space. This feature allows your iPhone to keep smaller versions of your photos on the device while storing the original, full-resolution versions in iCloud. To enable this, go to “Settings” > “Photos” and toggle on the “Optimize iPhone Storage” option. Your iPhone will automatically manage the storage of your photos, ensuring that you have enough space for your needs.
- Reviewing and Deleting Photos: Another way to manage your iPhone storage is by reviewing and deleting unnecessary photos. Open the “Photos” app, go to the “Albums” tab, and browse through your photo library. You can select multiple photos and tap on the trash bin icon to delete them. Remember to check the “Recently Deleted” album as well, as deleted photos are stored there for 30 days before being permanently removed.
- Clearing App Caches: Some apps on your iPhone may accumulate a significant amount of cache over time, taking up valuable storage space. You can clear app caches by going to “Settings” > “General” > “iPhone Storage” and scrolling through the list of apps displayed. Tap on an app to see the option to “Offload App” or “Delete App”, and below that, you will find the “Offload App” option to clear its cache.
- Utilizing iCloud Photo Sharing: If you are running low on iPhone storage but still want to share your photos with others, you can use iCloud Photo Sharing. This feature allows you to create shared albums and invite others to contribute their photos. By doing so, you can save space on your iPhone while still enjoying collaborative photo sharing.
By adjusting these storage settings on your iPhone, you can effectively manage your storage space and make the most of iCloud’s photo storage capabilities. Whether it’s offloading unused apps, optimizing iPhone storage, reviewing and deleting photos, clearing app caches, or utilizing iCloud Photo Sharing, these steps will help you maintain a well-organized and clutter-free iPhone photo library.
Uploading Photos to iCloud
Once you have enabled iCloud Photo Library and adjusted your storage settings on your iPhone, you can start uploading your photos to iCloud. Uploading your photos to iCloud ensures that they are securely backed up and accessible across all your Apple devices. Here’s how you can upload photos to iCloud:
- Automatic Upload: By enabling iCloud Photo Library, your iPhone will automatically start uploading new photos to iCloud whenever your device is connected to Wi-Fi and charging. This ensures that your photos are backed up in real-time without any manual effort on your part. Simply capture photos with your iPhone’s camera, and they will be seamlessly uploaded to iCloud.
- Upload Existing Photos: If you have a collection of photos already stored on your iPhone, you can manually upload them to iCloud. Open the “Photos” app on your iPhone and go to the “Albums” tab. Choose the album that contains the photos you want to upload, and tap on the “Select” button. Select the photos you want to upload by tapping on them, and then tap on the share icon (the square with an arrow pointing up). From the share sheet, select “Save to Files” and choose your iCloud Drive as the destination. This will upload the selected photos to your iCloud Drive.
- Using iCloud.com: Another method to upload photos to iCloud is by using the iCloud website on your computer. Open a web browser and go to icloud.com. Sign in with your Apple ID and password. Once you are logged in, click on the “Photos” app. You can then drag and drop photos from your computer onto the iCloud Photos interface to upload them. Alternatively, you can click on the upload icon (the cloud with an arrow pointing up) and browse for the photos you want to upload.
When uploading photos to iCloud, it’s important to have a stable internet connection and sufficient iCloud storage space. Larger photo files may take some time to upload, so it’s advisable to be patient and let the upload process complete without interruptions.
By uploading your photos to iCloud, you can ensure that your valuable memories are safely stored in the cloud and accessible across all your Apple devices. Whether it’s automatically uploading new photos, manually uploading existing photos from your iPhone, or using the iCloud website on your computer, these methods allow you to take full advantage of iCloud’s photo storage capabilities.
To store iPhone photos on iCloud, go to Settings > [your name] > iCloud > Photos and turn on iCloud Photos. This will automatically upload and store your photos in iCloud.
Managing Photos on iCloud
Once you have uploaded your photos to iCloud, it’s essential to know how to manage and organize them effectively. With iCloud, you can easily organize, edit, and delete photos, ensuring that your photo library remains well-structured and clutter-free. Here are some tips for managing photos on iCloud:
- Creating Albums: To keep your photos organized, you can create albums in the “Photos” app on your iPhone or the iCloud website. Simply select the photos you want to include in an album, tap on the share icon, and choose the “Add to Album” option. You can create new albums or add photos to existing albums. This allows you to group photos based on events, locations, themes, or any other criteria you prefer.
- Deleting Photos: If there are photos you no longer need, you can delete them from your iCloud photo library. In the “Photos” app on your iPhone, select the photo or multiple photos you want to delete, tap on the trash bin icon, and confirm the deletion. Deleted photos are moved to the “Recently Deleted” album, where they will be stored for 30 days before being permanently removed. This gives you a chance to recover accidentally deleted photos if needed.
- Editing Photos: iCloud allows you to edit your photos directly within the “Photos” app on your iPhone or iPad. You can crop, rotate, adjust brightness, contrast, and color, apply filters, and enhance your photos with various editing tools. The changes you make will be synced across all your devices, ensuring consistency in your edited photos.
- Searching for Photos: iCloud provides a powerful search feature that allows you to find specific photos quickly. You can search based on keywords, dates, locations, and even recognized objects or people in your photos. Simply tap on the search tab in the “Photos” app and enter your search query. iCloud will display relevant photos based on your search criteria.
- Sharing Photos: iCloud makes it easy to share your photos with others. You can create shared albums and invite family and friends to contribute their photos. To share a photo or album, select it in the “Photos” app, tap on the share icon, and choose the sharing method, such as AirDrop, Messages, or social media platforms. This allows you to collaborate and create shared experiences with your loved ones.
- Managing Storage: As your photo library grows, you may need to manage your iCloud storage. If you’re running out of storage space, you can upgrade to a higher storage plan. Alternatively, you can optimize storage on your iPhone by enabling the “Optimize iPhone Storage” option in the “Photos” settings. This will keep smaller versions of your photos on your device while storing the original, full-resolution versions in iCloud. You can also review and delete unnecessary photos to free up space.
By following these tips, you can effectively manage your photos on iCloud, ensuring that your photo library remains organized, edited to your liking, and easily accessible. Whether it’s creating albums, deleting photos, editing, searching, sharing, or managing storage, these features will streamline your photo management process and enhance your overall iCloud experience.
Accessing Photos on Other Devices
One of the significant advantages of storing your photos on iCloud is the ability to access them on all your Apple devices. Whether you want to view your photos on your iPad, Mac, or even the iCloud website, iCloud ensures that your photos are readily available wherever you go. Here’s how you can access your photos on other devices:
- iPhone/iPad: To access your iCloud photos on your iPhone or iPad, open the “Photos” app. By default, you will see the “Photos” tab, which displays all your photos and videos in chronological order. You can browse through your library, view specific albums, or use the search feature to find specific photos based on keywords, dates, or locations. Any changes you make, such as deleting photos or creating albums, will be synced across all your devices via iCloud.
- Mac: On your Mac, open the “Photos” app. Here, you can access your entire iCloud photo library, organize photos into albums, and edit them using the built-in editing tools. The “Photos” app on your Mac offers a comprehensive interface that allows you to browse, search, and manage your photos effortlessly. Any changes you make on your Mac will be reflected on your other Apple devices as well.
- iCloud Website: If you don’t have access to your iPhone or Mac, you can still view and manage your photos on any computer by visiting the iCloud website (icloud.com). Sign in with your Apple ID and password, then click on the “Photos” app icon. The iCloud website provides a user-friendly interface where you can browse, search, and download your photos. You can also create albums, share photos, and perform basic editing tasks right from the website.
- iCloud Photo Sharing: In addition to accessing your photos on your personal devices, you can also share your photos with others using iCloud Photo Sharing. Once you create a shared album, you can invite family and friends to contribute their photos, and they can access and view the shared album on their Apple devices. This enables collaboration and makes it easy to share memories with your loved ones, even if they don’t have your photos stored on their own devices.
With these methods, you can access your photos on different Apple devices, ensuring that your photo library is easily accessible, no matter where you are. Whether you prefer the convenience of your iPhone or iPad, the versatility of your Mac, or the accessibility of the iCloud website, iCloud ensures that your photos are just a few taps or clicks away.
Troubleshooting iCloud Photo Storage Issues
While iCloud is a reliable platform for storing and managing your photos, you may occasionally encounter issues or errors that hinder the smooth operation of iCloud photo storage. Here are some common issues and troubleshooting steps to help resolve them:
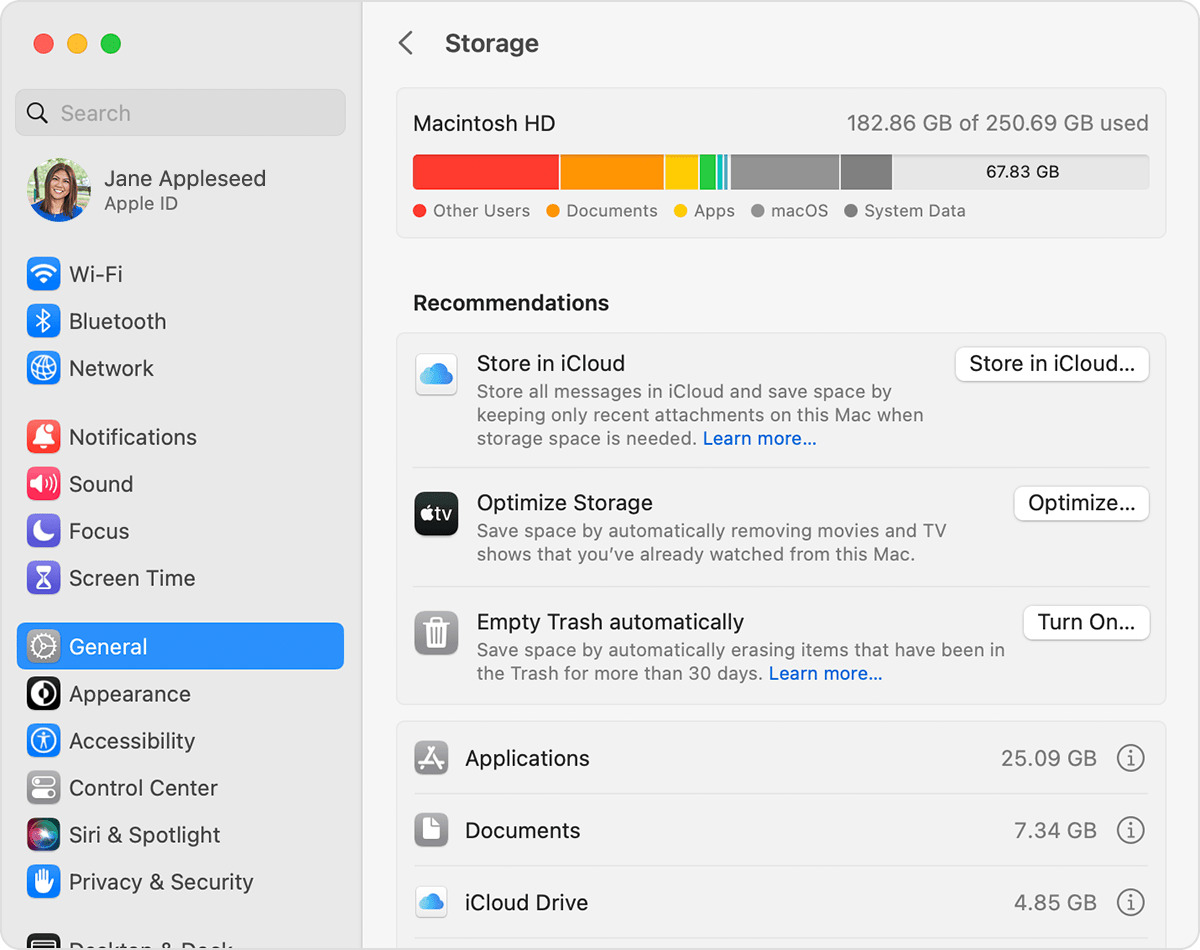
- Insufficient iCloud Storage: If you receive a notification indicating that your iCloud storage is full, you will need to upgrade your storage plan or manage your existing storage to free up space. To upgrade your storage plan, go to “Settings” > [Your Name] > “iCloud” > “Manage Storage” > “Change Storage Plan”. Alternatively, you can optimize your iPhone storage or review and delete unnecessary photos to free up space.
- Photos Not Syncing: If you notice that your photos are not syncing across your devices, ensure that you have a stable internet connection and that iCloud Photo Library is enabled on all your devices. Check that you are signed in with the same Apple ID on all devices. Additionally, make sure that your devices are connected to Wi-Fi and charging, as uploading and syncing photos may require a significant amount of power and data.
- Photos Missing on a Device: If you can’t find specific photos on a particular device, ensure that iCloud Photo Library is enabled on that device. Open the “Settings” app, go to “[Your Name]” > “iCloud” > “Photos” and toggle on “iCloud Photo Library”. Wait for the device to download and sync the missing photos from iCloud. If the issue persists, try signing out of iCloud and signing back in on the device to refresh the connection.
- Slow Upload or Download Speeds: If you’re experiencing slow upload or download speeds for your iCloud photos, first check your internet connection and ensure that it is stable. If the issue persists, consider optimizing your Wi-Fi settings or trying a different network. Additionally, check the storage capacity of your iCloud account and make sure you have sufficient space for the photos you’re trying to upload or download.
- Failed Uploads or Downloads: If you encounter failed uploads or downloads of your photos, check your internet connection and ensure that it is stable and not interrupted. If the issue persists, force quit the “Photos” app on your device and reopen it to refresh the app. You can also try restarting your device or signing out and back into your iCloud account. If the problem continues, contact Apple Support for further assistance.
If you continue to experience issues with iCloud photo storage, it’s recommended to ensure that your devices are running the latest version of iOS or macOS. Apple regularly releases updates that include bug fixes and performance improvements, which can help resolve any known issues with iCloud. Additionally, contacting Apple Support for personalized assistance can be beneficial in troubleshooting more complex or persistent issues.
By following these troubleshooting steps and keeping your devices and software up to date, you can address common issues with iCloud photo storage and enjoy seamless access to your photos across all your Apple devices.
Conclusion
In this digital age, our iPhones have become our go-to devices for capturing and storing cherished memories. With the help of iCloud, storing and managing your iPhone photos has never been easier. By enabling iCloud Photo Library and adjusting storage settings on your iPhone, you can ensure that your photos are securely backed up and accessible across all your Apple devices.
iCloud offers a range of benefits, including seamless integration across devices, automatic backups, ample storage space, photo synchronization, and advanced features like iCloud Photo Sharing. With iCloud, you can organize and access your photos effortlessly, edit them to your liking, and share them with others, creating shared memories and experiences.
By following the steps outlined in this article, you can successfully upload your photos to iCloud, manage them effectively, and troubleshoot any issues that may arise along the way. Whether you access your photos on your iPhone, iPad, Mac, or even the iCloud website, iCloud ensures that your photo library is just a few taps or clicks away.
Remember to optimize your storage, create albums, delete unnecessary photos, and utilize the various features offered by iCloud to make the most of your photo management experience. It’s also important to keep your devices and software up to date to ensure compatibility and access to the latest features and improvements from Apple.
So, embrace the power of iCloud Photo Storage and unlock the potential of storing and managing your iPhone photos in a secure and seamless manner. Preserve your memories, share your experiences, and access your photos anytime, anywhere with the convenience and reliability of iCloud.
Frequently Asked Questions about How To Store IPhone Photos On ICloud
Was this page helpful?
At Storables.com, we guarantee accurate and reliable information. Our content, validated by Expert Board Contributors, is crafted following stringent Editorial Policies. We're committed to providing you with well-researched, expert-backed insights for all your informational needs.


0 thoughts on “How To Store IPhone Photos On ICloud”