
Articles
How To Store Thousands Of Printed Photos
Modified: January 7, 2024
Learn how to efficiently store and organize thousands of printed photos with these helpful articles. Preserve your precious memories for years to come.
(Many of the links in this article redirect to a specific reviewed product. Your purchase of these products through affiliate links helps to generate commission for Storables.com, at no extra cost. Learn more)
Introduction
Preserving memories is an essential part of our lives, and one of the most common ways to do so is through printed photographs. However, as the years go by, these prints can accumulate and become challenging to organize and store properly. In this article, we will explore effective strategies for storing thousands of printed photos, ensuring their longevity and easy access.
Organizing and storing printed photos is not only about keeping them safe but also about providing a way to relive cherished memories. Whether it’s a wedding, a family vacation, or the candid moments that make up our everyday lives, having a well-organized photo collection allows us to revisit these special moments at any given time.
One of the first steps to successfully store a large number of printed photos is to categorize them. By organizing photos into specific categories such as family events, vacations, birthdays, or holidays, you can easily locate and browse through the desired photos when the need arises.
The next step is to sort the photos chronologically within each category. This method will help maintain a sense of order and make it easier to navigate through the collection in a timeline-based manner. Sorting photos by date also enhances the context and provides a more immersive experience when reliving past memories.
Once you have organized and sorted your printed photos, it’s time to choose the right storage method. Photo albums and scrapbooks are a classic choice for storing printed photos. They not only provide a visually appealing way to showcase your photos but also protect them from dust, moisture, and physical damage. Make sure to use acid-free and lignin-free albums or sleeves to prevent yellowing of the photos over time.
If you have a significant number of photos and prefer a more compact storage solution, photo storage boxes are an excellent choice. These boxes are designed to hold multiple photos and protect them from external elements. You can also use dividers or index cards within the box to further categorize the photos and make them easier to navigate.
Key Takeaways:
- Preserve and organize your printed and digital photos by categorizing, sorting chronologically, and utilizing photo albums, scrapbooks, or storage boxes. Digitize your printed photos and back up digital files to ensure long-lasting enjoyment of your cherished memories.
- Cloud storage and external hard drives offer secure and accessible options for backing up digital photos. Regularly organize, back up, and protect your photo collection to safeguard against data loss and hardware failures, ensuring peace of mind and easy access to your memories.
Read more: How To Store Large Photo Prints
Organizing Printed Photos by Category
Organizing printed photos by category is an effective method to easily access and browse through specific events or themes. By grouping similar photos together, you can quickly locate the ones you are looking for and create a more organized photo collection.
To begin organizing your printed photos by category, start by identifying common themes or events within your collection. These can include family gatherings, vacations, birthdays, holidays, or any other significant moments captured in your photos.
Once you have identified the categories, allocate a specific area or storage container for each one. This can be separate photo albums, scrapbooks, or labeled storage boxes. Ensure that the chosen storage method provides adequate protection from dust, moisture, and physical damage.
Next, go through your collection and sort the photos into their respective categories. You can do this physically by laying out the photos and manually placing them into the designated albums or boxes. Alternatively, you can create digital folders on your computer and sort the scanned copies of the photos accordingly.
As you sort the photos, consider labeling them with the event or theme, as well as the date if possible. This will further enhance the organization and make it easier to locate specific photos in the future.
If you have a large number of photos within a specific category, consider further sub-categorizing them. For example, if you have a “Vacation” category, you can create sub-categories based on the location or the year of the vacation. This will allow for more granular organization and quicker retrieval of specific photos.
Organizing printed photos by category not only facilitates easy access but also helps create a narrative within your photo collection. As you browse through the photos, you can see the progression of events and relive the memories associated with each category. It also provides an excellent opportunity to share and pass down these memories to future generations, as they can easily navigate through the organized collection.
Remember to regularly review and update your categorized photo collection to ensure that it remains accurate and organized. As new photos are added, make sure to place them in the appropriate category and label them accordingly. By maintaining an organized system, you can enjoy your printed photos for years to come and make the most of your cherished memories.
Sorting Photos Chronologically
Sorting photos chronologically is a key aspect of organizing your collection and creating a coherent timeline of your memories. By arranging your printed photos in chronological order, you can easily track the progression of events and enjoy a more immersive experience when browsing through your collection.
To begin sorting photos chronologically, it is essential to have some reference points or dates associated with the photos. This can be achieved by checking the date printed on the back of the photo or relying on your memory and any notes or captions you may have written.
Start by selecting a set of photos from a specific category, such as a family vacation or a birthday celebration. Lay the photos out in front of you and examine them one by one, identifying any clues or indications of the chronological order.
If the photos have dates written on the back, arrange them in order based on those dates. If there are no dates, rely on your memory or any contextual details within the photos themselves. Look for visual cues such as changes in clothing styles, hairstyles, or the aging of individuals in the photos.
As you sort the photos, consider the continuity of events within each category. Ensure that there is a smooth flow from one photo to the next, capturing the essence of the story or the event being depicted.
Once you have arranged the first set of photos chronologically, move on to the next set and repeat the process. Gradually build up the chronological sequence for each category, maintaining consistency and accuracy throughout the process.
Keep in mind that sorting photos chronologically is an ongoing task, especially if you regularly add new photos to your collection. Make it a habit to organize new photos as soon as possible, inserting them into the correct chronological order within the respective category.
This approach to sorting photos not only helps you create a timeline of your memories but also offers a more immersive experience when viewing your collection. Seeing events unfold in the correct order enhances the storytelling aspect of your photos and allows you to relive those cherished moments in a more meaningful way.
By taking the time to sort your printed photos chronologically, you not only enhance the organization of your collection but also create a visual narrative of your life’s timeline. It becomes easier to go back in time and revisit specific events or experiences, triggering nostalgic memories and bringing joy to yourself and those you share the photos with.
Using Photo Albums and Scrapbooks
Photo albums and scrapbooks are classic and versatile methods for storing and showcasing your printed photos. They not only provide a safe and organized way to preserve your memories but also allow for creative customization and personalization.
When using photo albums, look for acid-free and lignin-free albums or sleeves. These archival quality materials help protect your photos from yellowing, fading, and other forms of damage. Acid and lignin can deteriorate the quality of your prints over time, so it is important to choose albums that are specifically designed for long-term preservation.
Choose albums with clear, plastic pockets to safely hold your photos. This eliminates the need for adhesive and prevents any damage that could occur from glues or tapes. The clear pockets also allow you to easily view and admire your photos without having to remove them from the album.
When adding photos to the album, consider arranging them in a logical order. Start by placing the photos in chronological order, following the timeline you have established. You can also organize them thematically or based on different events or people. If you have captions or notes associated with the photos, consider placing them next to the corresponding images to provide additional context.
Scrapbooking takes photo albums a step further by allowing you to incorporate additional elements and decorations. Alongside the photos, you can include handwritten notes, decorative papers, stickers, and other memorabilia. This personal touch adds creativity and individuality to your scrapbook pages and enhances the storytelling aspect of your photo collection.
As you create your scrapbook pages, consider using acid-free adhesives and pens to ensure the long-term preservation of your materials. Acid-free glue sticks, double-sided tape, and photo-safe adhesive dots are great options for securely attaching your photos and decorations without causing any harm.
Remember to include any relevant information or memories associated with the photos in your scrapbook. You can add captions, write journal entries, or even incorporate quotes that resonate with the theme or emotion of the photos. This not only makes your scrapbook more engaging but also provides future generations with the context and stories behind the images.
Whether you choose photo albums or scrapbooks, the key is to regularly maintain and update them. As you acquire new photos or memories, be diligent in adding them to your albums or creating new scrapbook pages. This way, your collection remains current and continues to be a personal reflection of your life’s journey.
Using photo albums and scrapbooks allows you to showcase your printed photos in a tangible and creative way. The act of flipping through the pages and reliving your memories can bring a sense of joy and nostalgia that digital formats often cannot replicate. So, take the time to curate and personalize your photo albums and scrapbooks, creating a beautiful keepsake that can be cherished for years to come.
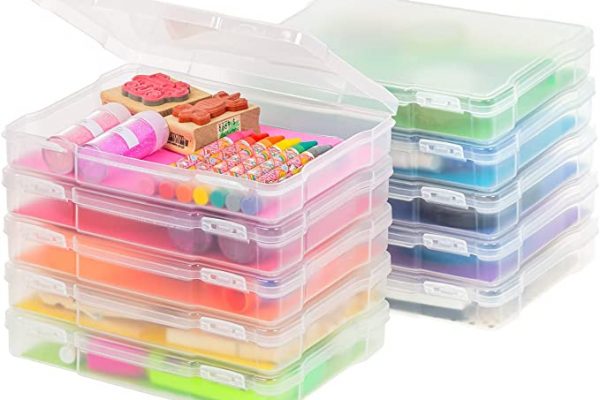
Using Photo Storage Boxes
Photo storage boxes are an excellent option for organizing and storing a large number of printed photos. These boxes provide a compact and efficient way to keep your photos safe and protected from dust, moisture, and physical damage.
When choosing a photo storage box, look for one that is made from archival-quality materials. Acid-free and lignin-free boxes are ideal, as they prevent deterioration and yellowing of your prints over time. The box should also have a tight-fitting lid to ensure that it stays securely closed and protects the contents from any external elements.
Before placing your photos into the storage box, consider sorting them into categories or sub-categories based on events, themes, or time periods. This will help you easily locate specific photos when needed. You can use dividers, index cards, or small labeled envelopes to further organize and separate the photos within the box.
When handling your photos, make sure to clean your hands to avoid transferring oils, dirt, or moisture onto the prints. This will help maintain the quality and longevity of your photos. You can also consider wearing clean, white cotton gloves to handle the photos, especially if they are fragile or valuable.
Place your sorted and categorized photos into acid-free envelopes or sleeves before placing them inside the photo storage box. This provides an extra layer of protection and prevents any direct contact between the photos, reducing the risk of damage from sticking or rubbing against each other.
If you have a significant number of photos, consider using photo storage boxes with a stacking design. This allows you to stack multiple boxes on top of each other, utilizing vertical space and making it easier to store and access your photo collection. Make sure to label each box clearly to quickly identify the contents inside.
Another benefit of using photo storage boxes is their portability. You can easily transport your photo collection without worrying about individual albums or scrapbooks getting damaged. This is especially useful if you need to bring your photos to family gatherings, reunions, or other events where sharing memories is important.
Keep in mind that while photo storage boxes are an effective option for storing printed photos, they are not the most visually interactive method. Unlike photo albums or scrapbooks, you won’t be able to see the photos at a glance. However, this storage method is perfect for those who prioritize space-saving and easy, efficient organization.
Using photo storage boxes allows you to keep your printed photos safe and protected while maximizing space and maintaining an organized collection. It provides a practical solution for storing large quantities of photos and ensures that your cherished memories are well-preserved for years to come.
Read more: How To Store Photos For Free
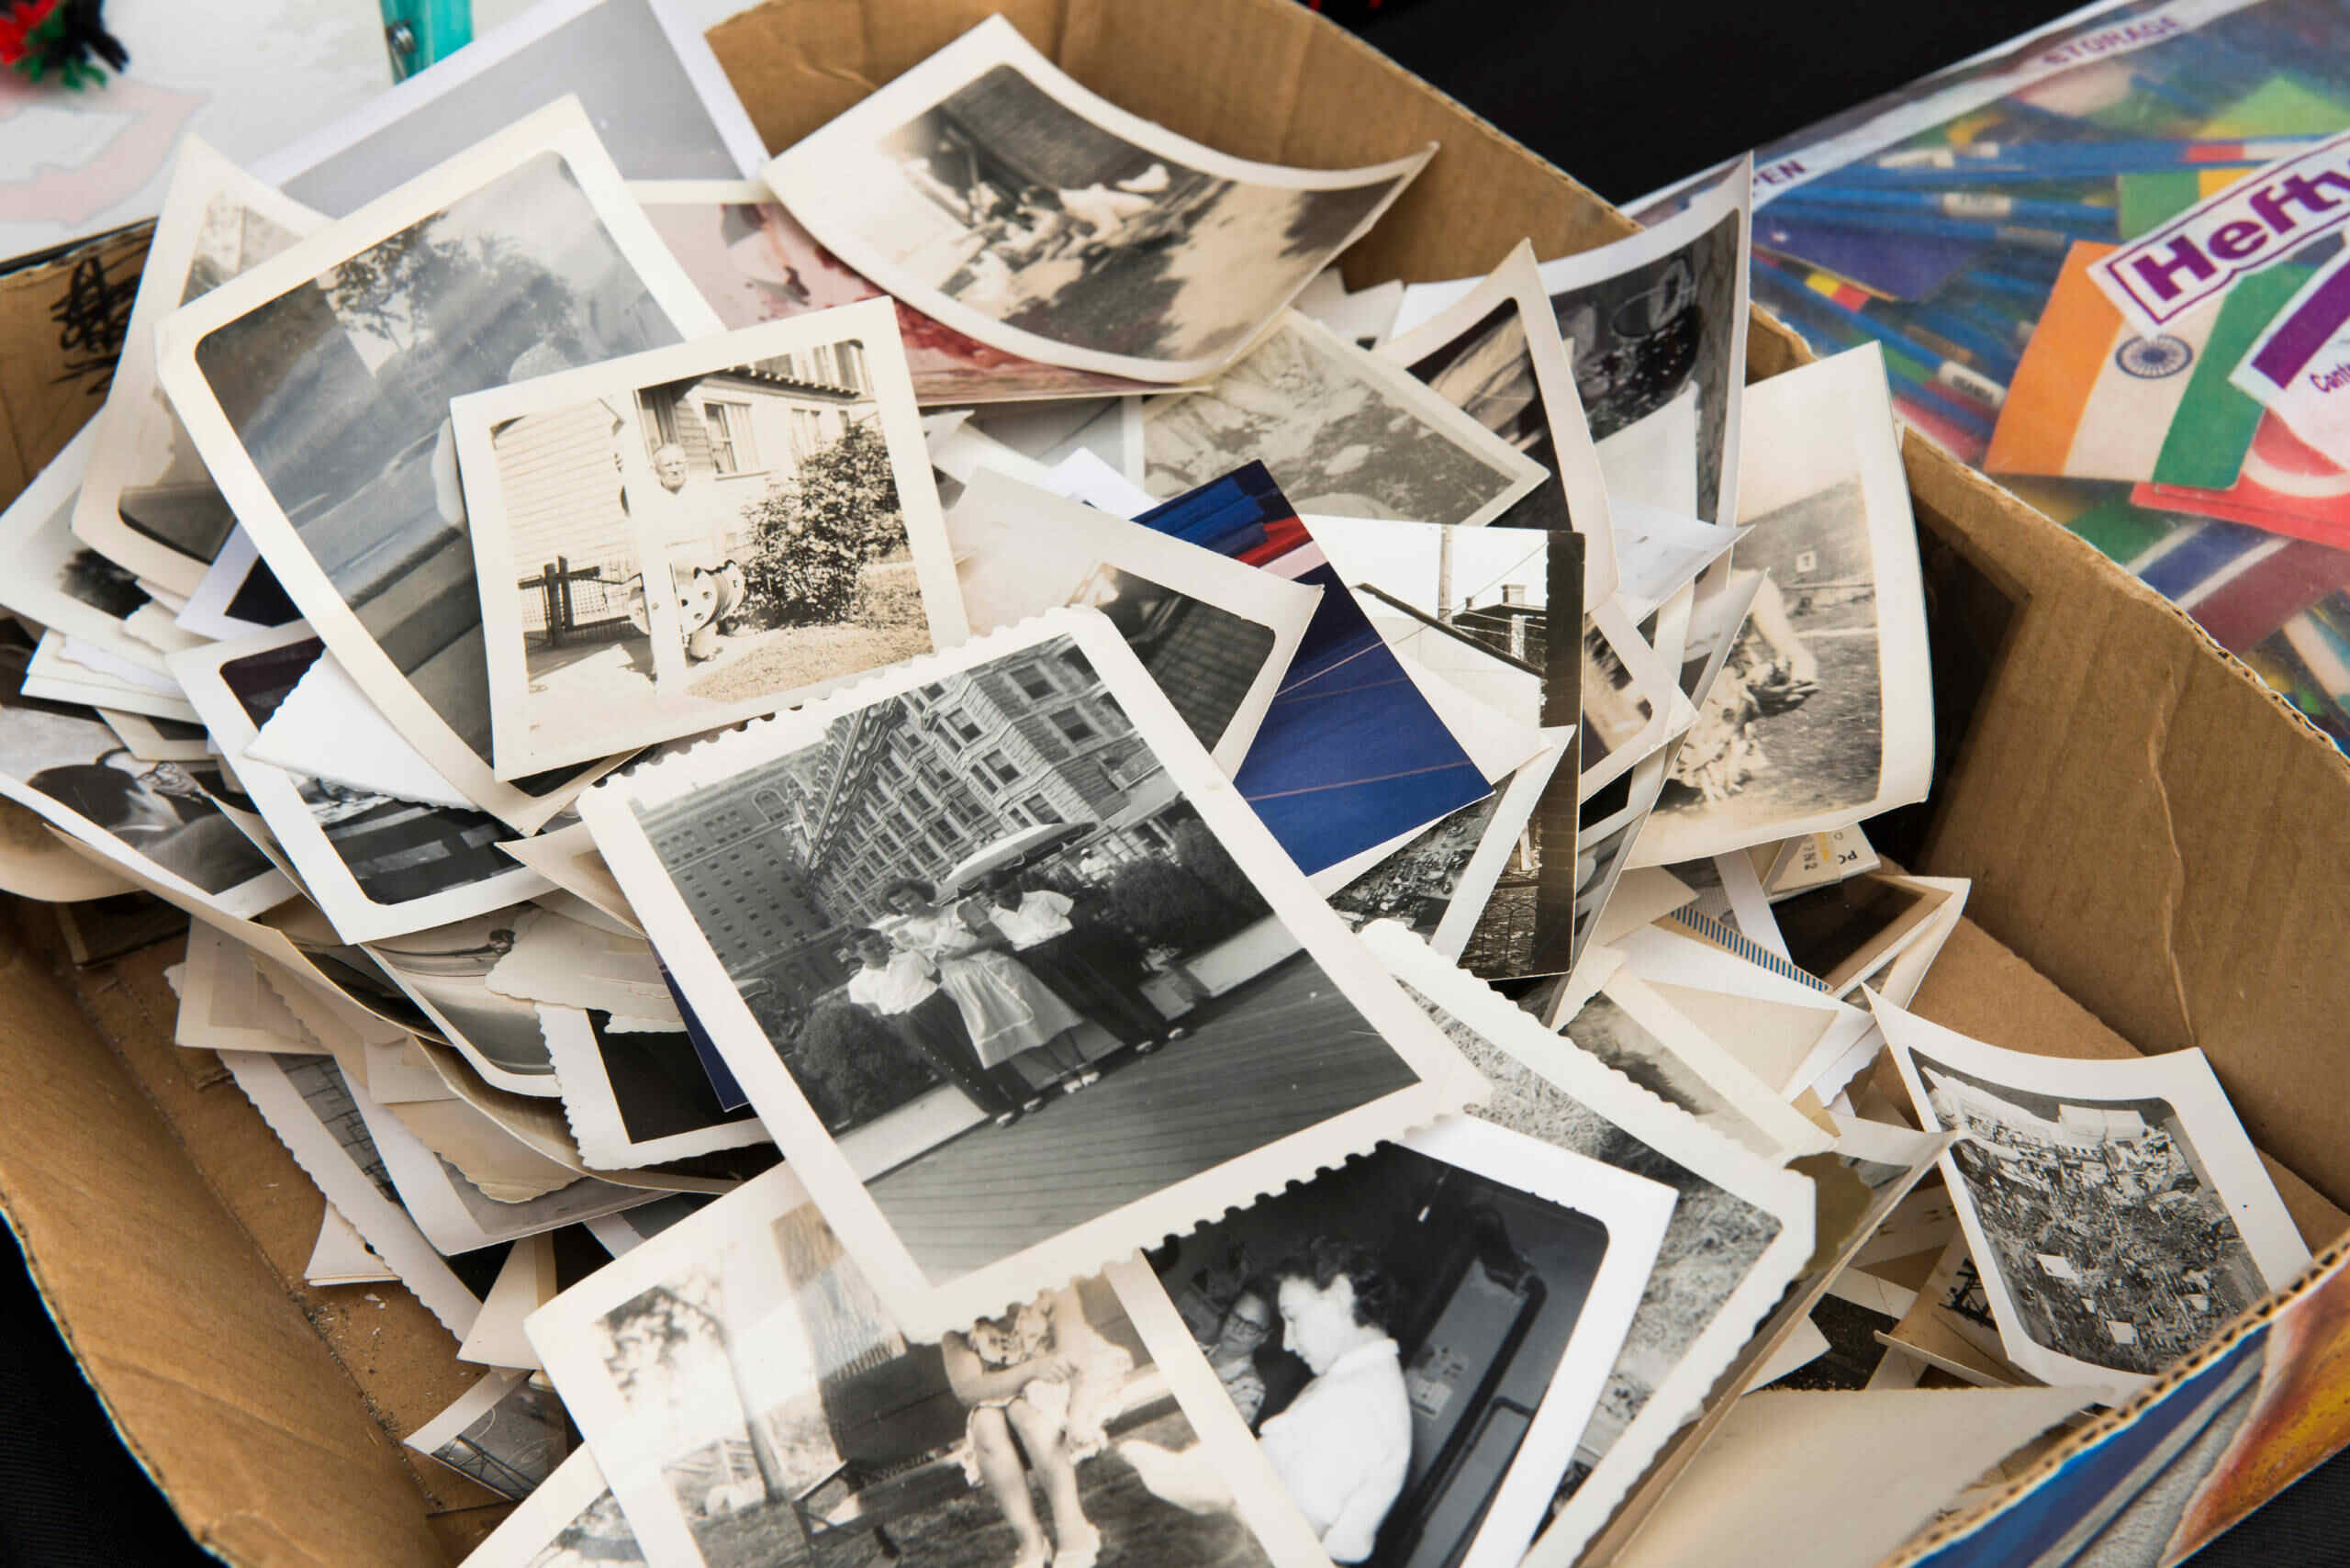
Digitizing Printed Photos
Digitizing your printed photos is a valuable process that allows you to preserve and easily access your memories in a digital format. By converting your physical prints into digital files, you can safeguard them from physical damage, loss, or deterioration over time.
There are several methods you can use to digitize your printed photos, depending on your preference and available equipment. Let’s explore two popular options: scanning photos with a flatbed scanner and using a smartphone app to capture photos.
If you have access to a flatbed scanner, it is an excellent tool for digitizing your printed photos. Start by cleaning the scanner glass to ensure that no dust or debris gets captured in the scan. Then, place your photo face down on the scanner bed, aligning it with the edges. Close the scanner lid gently to avoid any damage to the photo.
When scanning, choose a resolution that balances quality and file size. For most purposes, a resolution of 300 to 600 dots per inch (DPI) is sufficient. Scan in color, even for black and white photos, to capture the full range of tones and details.
If your printed photos are delicate or easily damaged, consider placing a sheet of clear or white acid-free paper between them and the scanner lid to provide an extra layer of protection.
Another option for digitizing your printed photos is to use a smartphone app specifically designed for photo scanning. These apps use the camera on your smartphone to capture the photo and automatically enhance the image quality.
To use a photo scanning app, simply open the app and follow the instructions provided. Place your photo on a clean, well-lit surface and align it within the guidelines of the app. The app will automatically detect the edges of the photo and capture a high-quality, digital version. Some apps even allow you to scan multiple photos at once, saving you time and effort.
Once you have digitized your printed photos, it is crucial to back up the digital files to ensure their safety. There are various ways to back up your photos, such as using cloud storage or external hard drives.
Cloud storage services provide a convenient and secure way to store and access your digital photo collection. You can choose from a range of cloud storage options, such as Google Drive, Dropbox, or iCloud, depending on your preference and storage needs. Upload your digitized photos to the cloud, ensuring that they are safely stored and accessible from any device with an internet connection.
External hard drives are another popular choice for backing up digital photos. These portable devices offer large storage capacities and allow you to have physical copies of your digital files. Be sure to choose a reliable brand and regularly back up your digitized photos to the external hard drive.
By digitizing your printed photos, you give yourself peace of mind knowing that your precious memories are preserved and accessible in a digital format. Whether you choose to scan them with a flatbed scanner or use a smartphone app, the process of digitization ensures that your photos are safe from physical damage and easily shareable with family and friends.
Remember to properly store and organize your digital photo files, ensuring that they are backed up using reliable methods. By following these steps, you can enjoy your memories for years to come, without worrying about the deterioration or loss of your cherished printed photos.
Scan and digitize your printed photos to save space and preserve them for the long term. Use a high-quality scanner and organize the digital files in a secure and easily accessible location.
Scanning Photos with a Flatbed Scanner
Scanning photos with a flatbed scanner is a common and efficient method to digitize your printed photo collection. This process allows you to preserve your photos in a digital format, making them easily accessible, shareable, and protected from physical damage.
To begin scanning your photos, ensure that you have a flatbed scanner and the necessary software installed on your computer. Clean the scanner glass with a soft, lint-free cloth to remove any dust or debris that could affect the quality of your scans.
Place your photo face down on the scanner bed, aligning it with the edges. For delicate or fragile photos, consider placing a sheet of clear or white acid-free paper between the photo and the scanner lid to provide an additional layer of protection.
Close the scanner lid gently, ensuring that the photo is securely pressed flat against the scanner bed. This will help prevent any blurry or distorted scans.
Launch the scanning software on your computer and follow the provided instructions to start the scanning process. Select the appropriate settings, such as resolution and file format, based on your preferences and intended use of the scanned photos.
For most purposes, a resolution between 300 and 600 dots per inch (DPI) is suitable for achieving a balance between image quality and file size. Higher resolutions may be necessary for enlargements or printing purposes.
Choose the appropriate color mode depending on the type of photo you are scanning. Select color for colored photos and grayscale for black and white or sepia-toned photos. This will ensure that the scanned image accurately represents the original photo’s colors or tones.
If your scanning software offers additional enhancement options, such as dust removal or color correction, take advantage of these features to improve the quality of your scans.
Once you have scanned a photo, save it to your preferred location on your computer, ensuring that you choose a descriptive file name. Organize your digital photo collection by creating folders or directories, categorizing them by event, date, or any other system that makes sense to you.
Remember to regularly save your progress during the scanning process to avoid losing any scanned photos due to unforeseen technical issues.
After scanning a batch of photos, review the digital files to ensure that the scans meet your expectations. If necessary, you can edit and enhance the images using photo editing software to improve the colors, brightness, or remove any imperfections.
Lastly, it is essential to back up your scanned photos to ensure their safety. Consider storing them on external hard drives, cloud storage services, or both, to have multiple copies and protect against data loss.
Scanning photos with a flatbed scanner provides a reliable and efficient way to digitize your printed photos. By preserving your photos in a digital format, you can easily share and access them, ensuring that your precious memories are safely preserved for years to come.
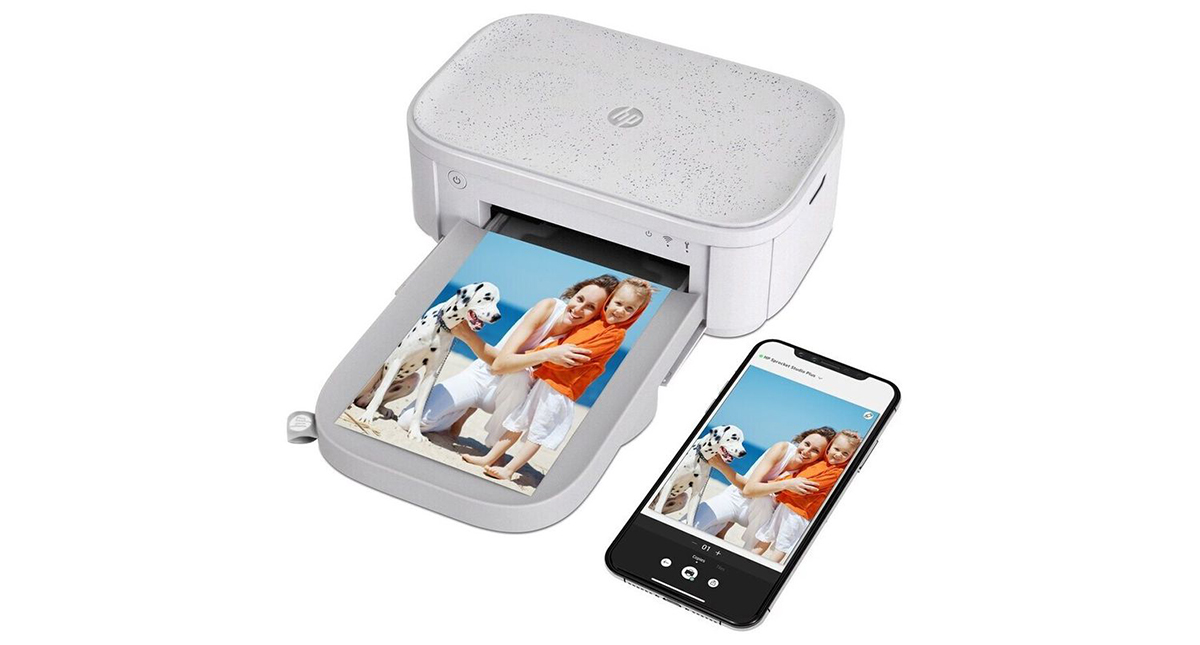
Using a Smartphone App to Capture Photos
Using a smartphone app to capture photos is a convenient and accessible method to digitize your printed photos. With the advancements in smartphone camera technology, you can now capture high-quality digital versions of your printed photos with ease.
To begin, you will need to find and install a reliable photo scanning app on your smartphone. There are several apps available for both iPhone and Android devices, each offering different features and functionalities. Look for apps that are highly rated and have positive reviews from users.
Once you have chosen a photo scanning app, open it and allow the app to access your smartphone’s camera. Familiarize yourself with the app’s instructions and settings before you start scanning.
To capture a photo using the app, place your printed photo on a clean, well-lit surface with minimal glare. Align the edges of the photo within the guidelines provided by the app, ensuring that the entire photo is within the frame.
Some apps have built-in cropping tools or automatic edge detection to help accurately capture the photo. Follow the app’s instructions to capture the image, which may involve tapping the screen or pressing a capture button within the app.
After capturing the photo, the app will automatically enhance the image quality to improve clarity, color accuracy, and remove any glare or blemishes. You may have the option to manually adjust the image settings or apply additional enhancements if desired.
Review the scanned photo on your smartphone’s screen to ensure that it meets your expectations. If necessary, you can retake the photo or make minor adjustments using the editing tools within the app.
Once you are satisfied with the scanned photo, save it to your smartphone’s photo library or to a specific location within the app. Consider organizing your digital photo collection by creating albums or folders, categorizing them based on events, dates, or any other system that makes sense to you.
It is important to regularly back up your scanned photos to ensure their safety and longevity. You can back them up to cloud storage services, such as Google Photos, Dropbox, or iCloud, or transfer them to your computer for further backup and organization.
Using a smartphone app to capture photos offers convenience and simplicity, allowing you to quickly digitize your printed photos on-the-go. The process is user-friendly, and the results are often impressive, making it a popular choice for those looking to quickly and easily convert their physical prints into digital files.
Remember to choose a well-reviewed app, take your time to properly position and capture each photo, and regularly backup your scanned photos to ensure their preservation for years to come.
Backing Up Digital Photos
Backing up your digital photos is crucial to ensure their safety and prevent the risk of losing them due to hardware failures, accidental deletions, or other unforeseen circumstances. By creating duplicate copies of your digital photo files, you can have peace of mind knowing that your cherished memories are protected.
There are several effective methods for backing up digital photos, including utilizing cloud storage services and using external hard drives. Let’s explore these options in more detail:
Cloud Storage for Digital Photos: Cloud storage services provide a convenient and secure way to store your digital photo collection. Popular options include Google Drive, Dropbox, iCloud, and Amazon Photos. These services offer varying amounts of free storage space, with the option to upgrade to paid plans for additional capacity.
To back up your digital photos to the cloud, simply upload the files to your chosen cloud storage service. Depending on the service, you may be able to organize your photos into folders or albums for easy access and management. Cloud storage ensures that your photos are stored off-site, protecting them from physical damage or loss in the event of a computer failure or disaster.
External Hard Drives for Digital Photos: External hard drives are physical devices that connect to your computer and provide additional storage space. They offer a cost-effective option for backing up your digital photo collection. When choosing an external hard drive, consider factors such as storage capacity, reliability, and portability.
To back up your digital photos to an external hard drive, simply connect the drive to your computer and transfer the photo files to the designated storage area on the drive. It is recommended to organize your photos into folders or subfolders to facilitate easy navigation and retrieval. Once the backup is complete, store the external hard drive in a safe place, preferably separate from your computer, to further protect against data loss.
Combining both cloud storage and external hard drives can provide an extra layer of protection. By having duplicate copies of your digital photos stored in different locations, you decrease the risk of losing them in case of a single failure or accident.
Regularly scheduled backups are essential to ensure that your digital photo collection stays up to date. Consider establishing a backup routine, such as a monthly or quarterly schedule, to consistently back up new additions and changes to your photo files.
Additionally, consider implementing a versioning system that allows you to keep multiple versions of your digital photos. This can be useful in case you accidentally delete or make unintended changes to a photo, as it provides the option to restore a previous version.
Remember to periodically verify the integrity of your backed-up photos to ensure that the files are not corrupted and are easily accessible. It is also a good practice to periodically test the restoration process to ensure that you can retrieve your photos successfully if needed.
By backing up your digital photos, you safeguard your cherished memories and protect them from the risk of loss or damage. Taking the time to establish a solid backup strategy and routinely implementing it will provide you with peace of mind and allow you to enjoy your photo collection for years to come.
Read more: How To Print 5X7 Photos On HP Printer
Cloud Storage for Digital Photos
Cloud storage has revolutionized the way we store and access our digital photos. It offers a convenient and secure solution for backing up and organizing your photo collection. With cloud storage, you can store your digital photos remotely and access them from any device with an internet connection.
There are various popular cloud storage services available that cater specifically to storing and managing digital photos. Some well-known options include Google Photos, Dropbox, iCloud, and Amazon Photos. These services offer different storage capacities, features, and pricing plans to suit your needs.
Cloud storage removes the need for physical storage devices, such as hard drives or external memory cards. Instead, your digital photos are stored on servers maintained by the cloud storage provider. This eliminates the risk of data loss due to hardware failures, accidental deletions, or physical damage to your storage devices.
Backing up your digital photos to the cloud is a relatively simple process. Most cloud storage services provide applications for computers, smartphones, and tablets that allow you to upload your digital photo files directly to your cloud storage account. You can choose to upload individual photos or entire folders, depending on your preference.
Once your photos are uploaded to the cloud, they are securely stored and protected with encryption mechanisms. This ensures that your photos are safe from unauthorized access and provides an additional layer of security.
One of the greatest advantages of cloud storage for digital photos is the ability to access and manage your collection from anywhere with an internet connection. Whether you are on your computer at home, using a smartphone on the go, or on a tablet while traveling, you can easily view, download, and share your photos with family and friends.
Cloud storage also offers helpful features to aid in organizing and managing your digital photo collection. Many services provide automatic organization based on date, location, and even facial recognition technology, making it easier to search and locate specific photos. You can also create albums, tag photos with keywords, and add comments or captions to enhance the organization and usability of your collection.
Sharing your digital photos becomes effortless with cloud storage. You can generate links or invite others to access specific albums or photos, allowing you to easily share memories with friends and family. This removes the need for physical copies or the hassle of transferring files via email or other means.
When choosing a cloud storage service for your digital photos, consider factors such as storage capacity, ease of use, compatibility with your devices, and privacy features. Review the terms of service and privacy policy to ensure that your photos are protected and that you maintain control over your own content.
It is essential to regularly back up your digital photos to the cloud and keep your storage account updated with any newly added photos. By routinely uploading your photos to the cloud, you can maintain a complete and up-to-date backup of your digital photo collection.
Overall, cloud storage for digital photos offers a flexible, secure, and accessible solution for backing up, organizing, and sharing your cherished memories. Embrace the convenience and peace of mind that comes with cloud storage and enjoy the reassurance that your digital photos are safely stored and readily available whenever you need them.
External Hard Drives for Digital Photos
External hard drives are an excellent solution for storing and backing up your digital photo collection. These portable storage devices provide large capacities and a convenient method to keep your photos safe and accessible offline.
When choosing an external hard drive for your digital photos, consider factors such as storage capacity, speed, reliability, and compatibility with your devices. Look for reputable brands known for producing high-quality drives that offer durability and data protection.
Once you have selected an external hard drive, connect it to your computer using the appropriate cable. Most external hard drives connect via USB, ensuring compatibility with a wide range of devices.
Create a dedicated folder or directory on your external hard drive specifically for your digital photo collection. This will help you keep your photos organized and easily accessible when needed.
To back up your digital photos, simply copy and paste the photo files from your computer or any other storage locations onto the external hard drive. Alternatively, you can use backup software that automates the process and ensures regular updates of your photo files.
Consider organizing your photos into folders or subfolders based on events, dates, or any other system that makes sense to you. This will facilitate easy navigation and retrieval of specific photos in the future.
External hard drives offer large storage capacities, allowing you to store a significant amount of photos in one place. This is particularly useful for those with extensive photo collections or professional photographers who generate a large number of digital image files.
It is important to protect your external hard drive from physical damage and potential data loss. Handle the drive with care, avoid dropping it, and store it in a safe and secure location when not in use.
Consider keeping a duplicate external hard drive as an additional backup. Having two copies of your digital photo collection provides an extra layer of protection against data loss. You can store the duplicate drive in a different physical location to guard against theft, accidents, or natural disasters.
Perform regular backups of your digital photos to ensure that any changes or new additions are included in the backup. Establish a backup routine that suits your needs and schedule, whether it’s daily, weekly, or monthly, to ensure that your photo collection is continuously protected.
Keep in mind that external hard drives are sensitive to physical damage and may fail over time. To mitigate the risk, consider periodically checking the health of your external hard drive and running diagnostics to identify any potential issues.
Ultimately, external hard drives offer a reliable and portable solution for backing up and storing your digital photo collection. They provide the flexibility to access and transfer your photos offline, ensuring that your cherished memories remain secure and accessible for years to come.
Conclusion
Preserving and organizing your printed and digital photos is essential for ensuring that your cherished memories can be enjoyed for years to come. Whether you have thousands of printed photos or a vast collection of digital images, the strategies discussed in this article offer effective ways to store, protect, and access your photos.
By organizing your printed photos by category and sorting them chronologically, you create a seamless and immersive experience when browsing through your collection. Photo albums and scrapbooks provide visually appealing ways to showcase your printed photos while protecting them from dust and physical damage. Alternatively, photo storage boxes offer a compact option for those with a large number of photos.
Digitizing your printed photos through scanning with a flatbed scanner or using smartphone apps allows you to safely store and easily share your memories in a digital format. Backing up your digital photos to cloud storage services and external hard drives ensures that you have redundant copies, protecting against data loss and hardware failures.
In conclusion, preserving and organizing your photo collection is a labor of love. It allows you to relive cherished memories, share them with future generations, and safeguard them against the risks of time and accidents. By following the strategies presented in this article, you can create a well-organized and resilient photo collection that will stand the test of time.
Remember to regularly review and update your organizational system, back up your digital photos consistently, and protect your physical prints from damage. By doing so, you can enjoy your photos with peace of mind, knowing that your memories are preserved and easily accessible whenever you want to revisit them.
Frequently Asked Questions about How To Store Thousands Of Printed Photos
Was this page helpful?
At Storables.com, we guarantee accurate and reliable information. Our content, validated by Expert Board Contributors, is crafted following stringent Editorial Policies. We're committed to providing you with well-researched, expert-backed insights for all your informational needs.


0 thoughts on “How To Store Thousands Of Printed Photos”