Home>Home Appliances>Lighting Appliances>How To Remove An Old Ceiling Light Box
Lighting Appliances
How To Remove An Old Ceiling Light Box
Modified: August 20, 2024
Learn how to safely remove an old ceiling light box with our step-by-step guide. Upgrade your lighting appliances with ease and confidence.
(Many of the links in this article redirect to a specific reviewed product. Your purchase of these products through affiliate links helps to generate commission for Storables.com, at no extra cost. Learn more)
Introduction
Removing an old ceiling light box is a common task when renovating a room or upgrading to a new lighting fixture. Whether you're looking to modernize your home's aesthetic or simply replace a worn-out fixture, understanding the process of removing an old ceiling light box is essential for a successful upgrade. This comprehensive guide will walk you through the step-by-step process, ensuring that you can confidently tackle this project with ease.
By following these instructions, you'll be able to safely and efficiently remove the old ceiling light box and prepare the space for a new fixture. Before diving into the removal process, it's crucial to gather the necessary tools and materials to ensure a smooth transition. From turning off the power to disconnecting the wires and installing a new ceiling light box, each step is crucial in achieving a seamless and professional outcome.
Whether you're a seasoned DIY enthusiast or a novice looking to expand your home improvement skills, this guide will equip you with the knowledge and confidence to tackle this project. With a clear understanding of each step, you'll be able to navigate the removal process with precision and care, setting the stage for a successful installation of your new ceiling light fixture.
Now, let's dive into the step-by-step process of removing an old ceiling light box, empowering you to transform your space with a fresh and updated lighting solution.
Key Takeaways:
- Safety First!
Before removing an old ceiling light box, always turn off the power and confirm it’s off with a voltage tester. Label the breaker to prevent accidental power restoration, prioritizing safety throughout the process. - Step-by-Step Success
Removing an old ceiling light box and installing a new fixture is achievable by following the detailed steps. From disconnecting wires to securing the new box, each step sets the stage for a successful upgrade.
Read more: How To Remove Ceiling Light
Step 1: Turn off the power
Before beginning any work on the old ceiling light box, it is absolutely crucial to ensure that the power supply to the fixture is completely turned off. This step is essential for your safety and to prevent any electrical mishaps during the removal process.
To start, head to your electrical panel or fuse box and locate the circuit breaker that controls the power supply to the ceiling light. If your home has older wiring, you may need to find the corresponding fuse instead. Once you've identified the correct circuit or fuse, switch it off to cut off the electricity to the light fixture.
To provide an extra layer of safety, it's advisable to use a non-contact voltage tester to verify that the power has indeed been turned off. This small, handheld device can detect the presence of electrical current, allowing you to confirm that the wires are not live before proceeding with the removal.
After ensuring that the power is off and double-checking with a voltage tester, it's important to label the circuit breaker or fuse to indicate that it should not be turned back on while you're working on the ceiling light box. This simple yet crucial step can prevent accidental power restoration and safeguard you from potential electrical hazards.
By taking the time to turn off the power and confirm its absence, you're prioritizing safety and setting the stage for a smooth and secure removal process. With the electricity safely disconnected, you can proceed to the next steps with confidence, knowing that you've taken the necessary precautions to protect yourself and your home.
Remember, safety should always be the top priority when working with electrical components. By diligently following this initial step to turn off the power, you're laying a solid foundation for a successful and risk-free removal of the old ceiling light box.
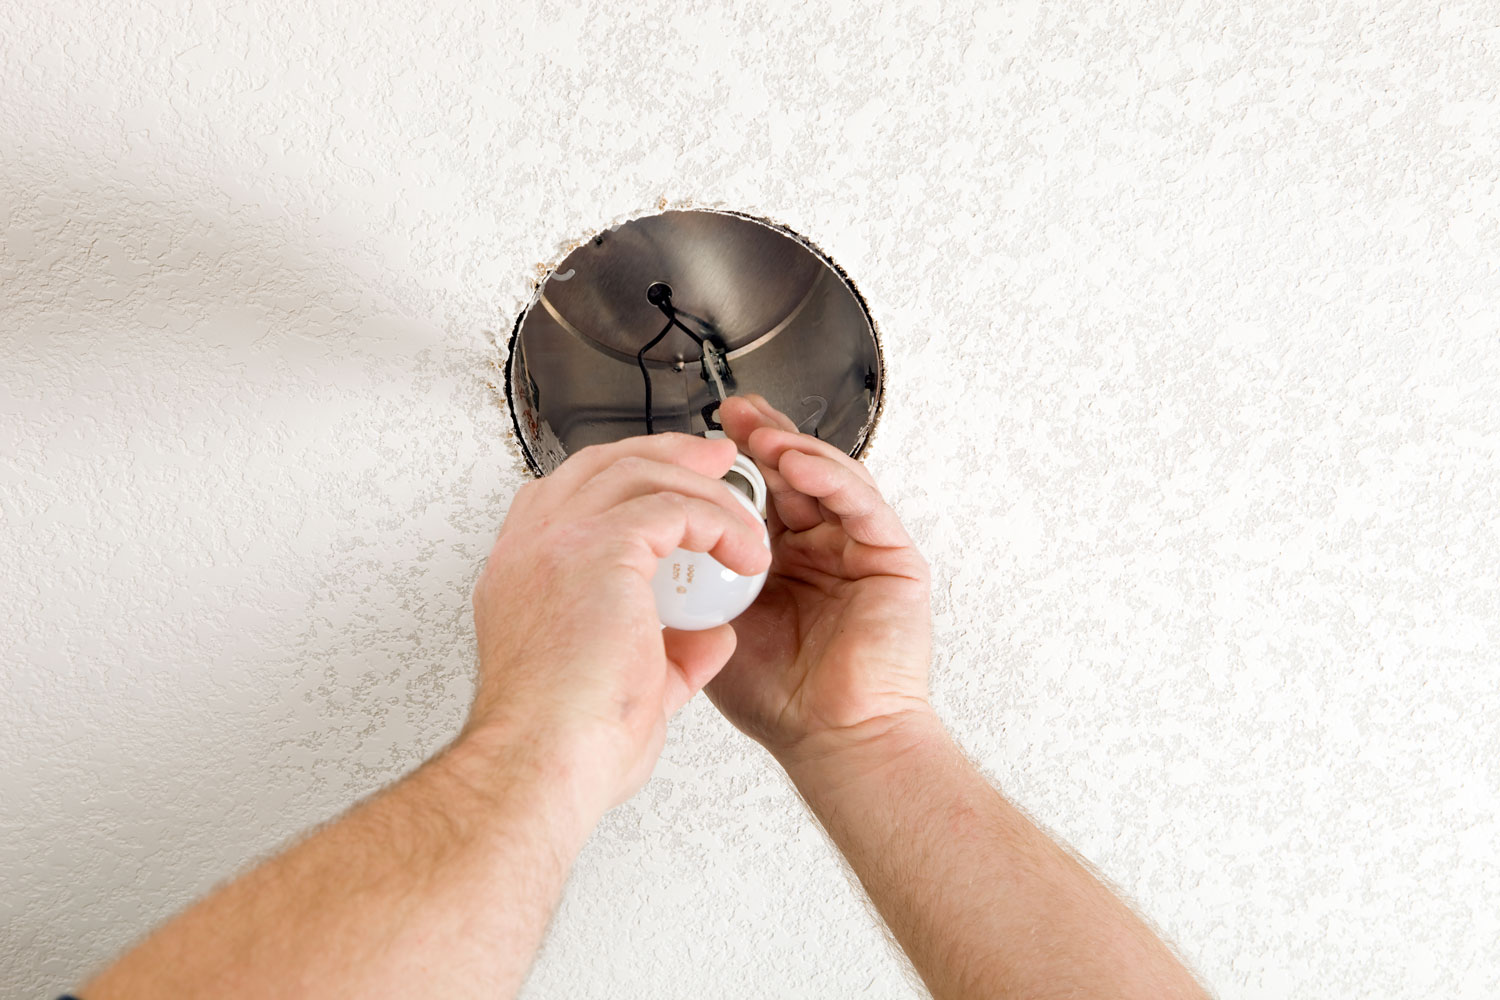
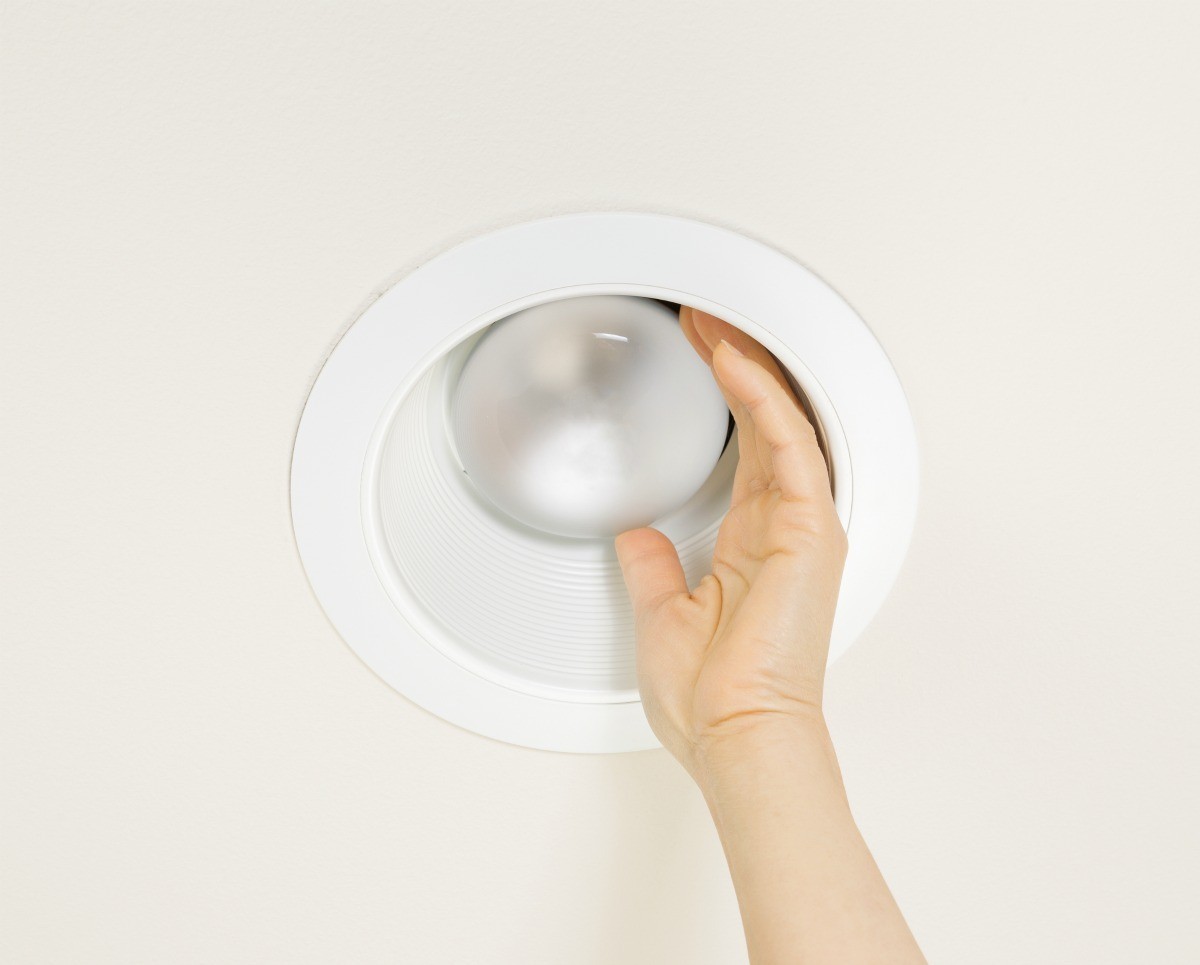
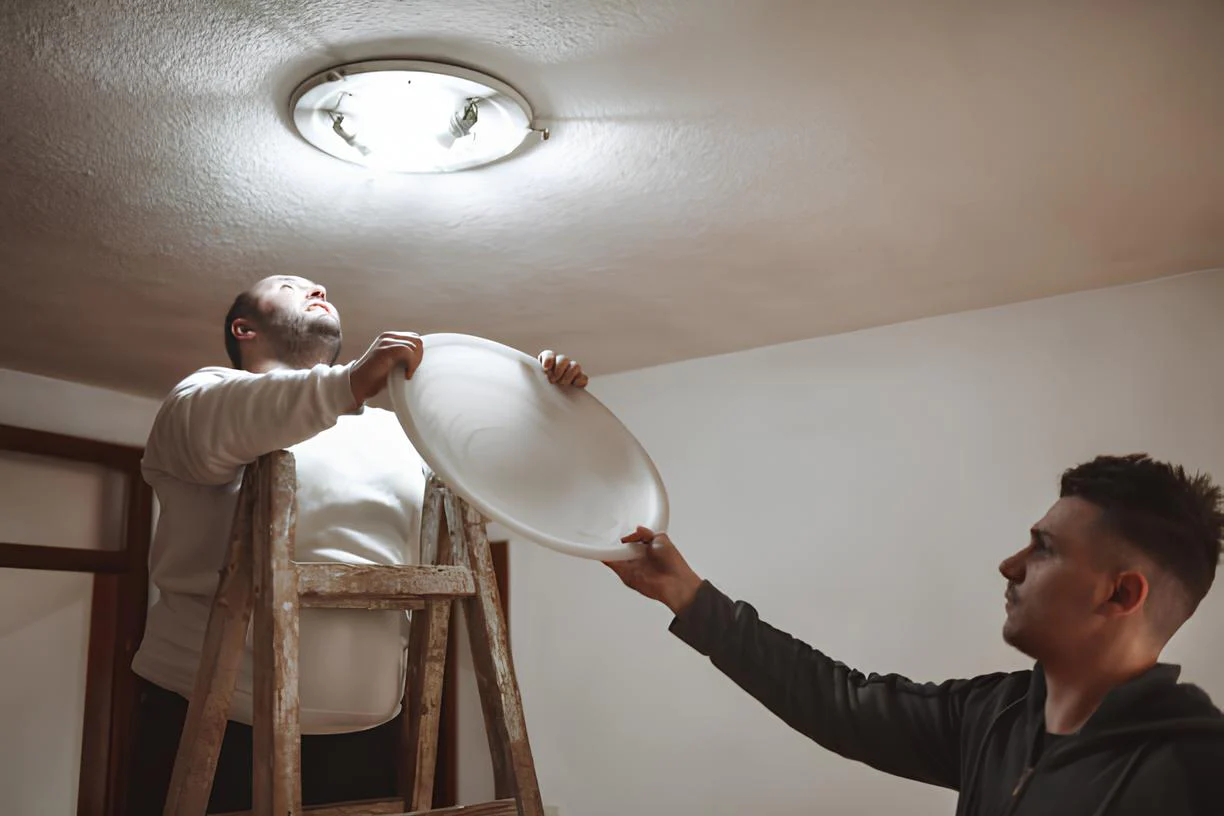
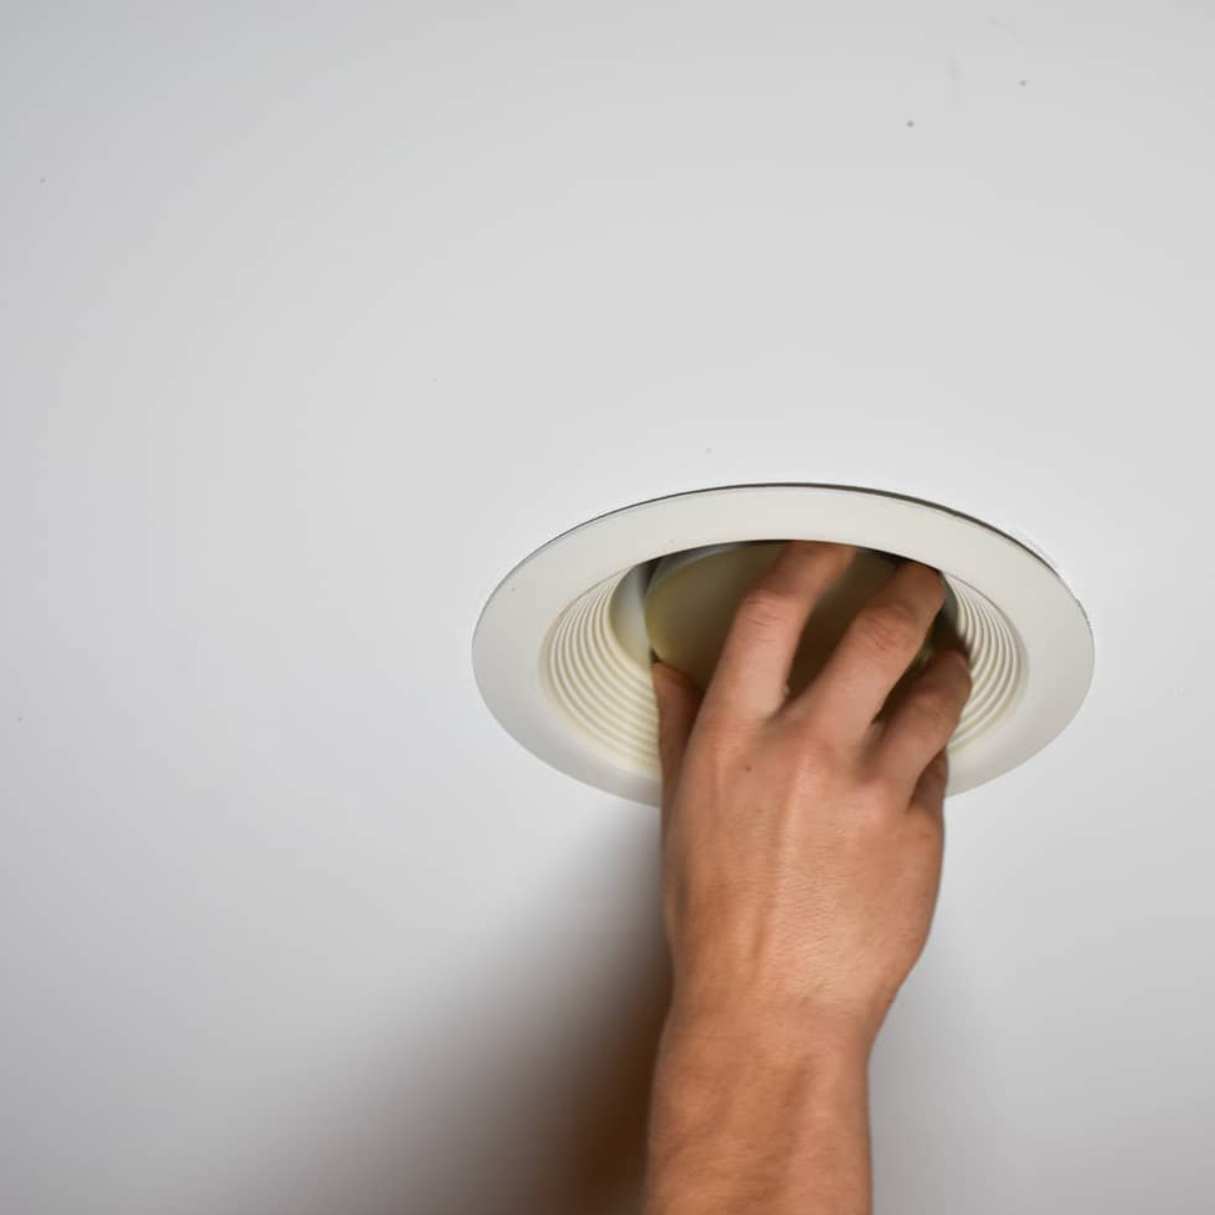
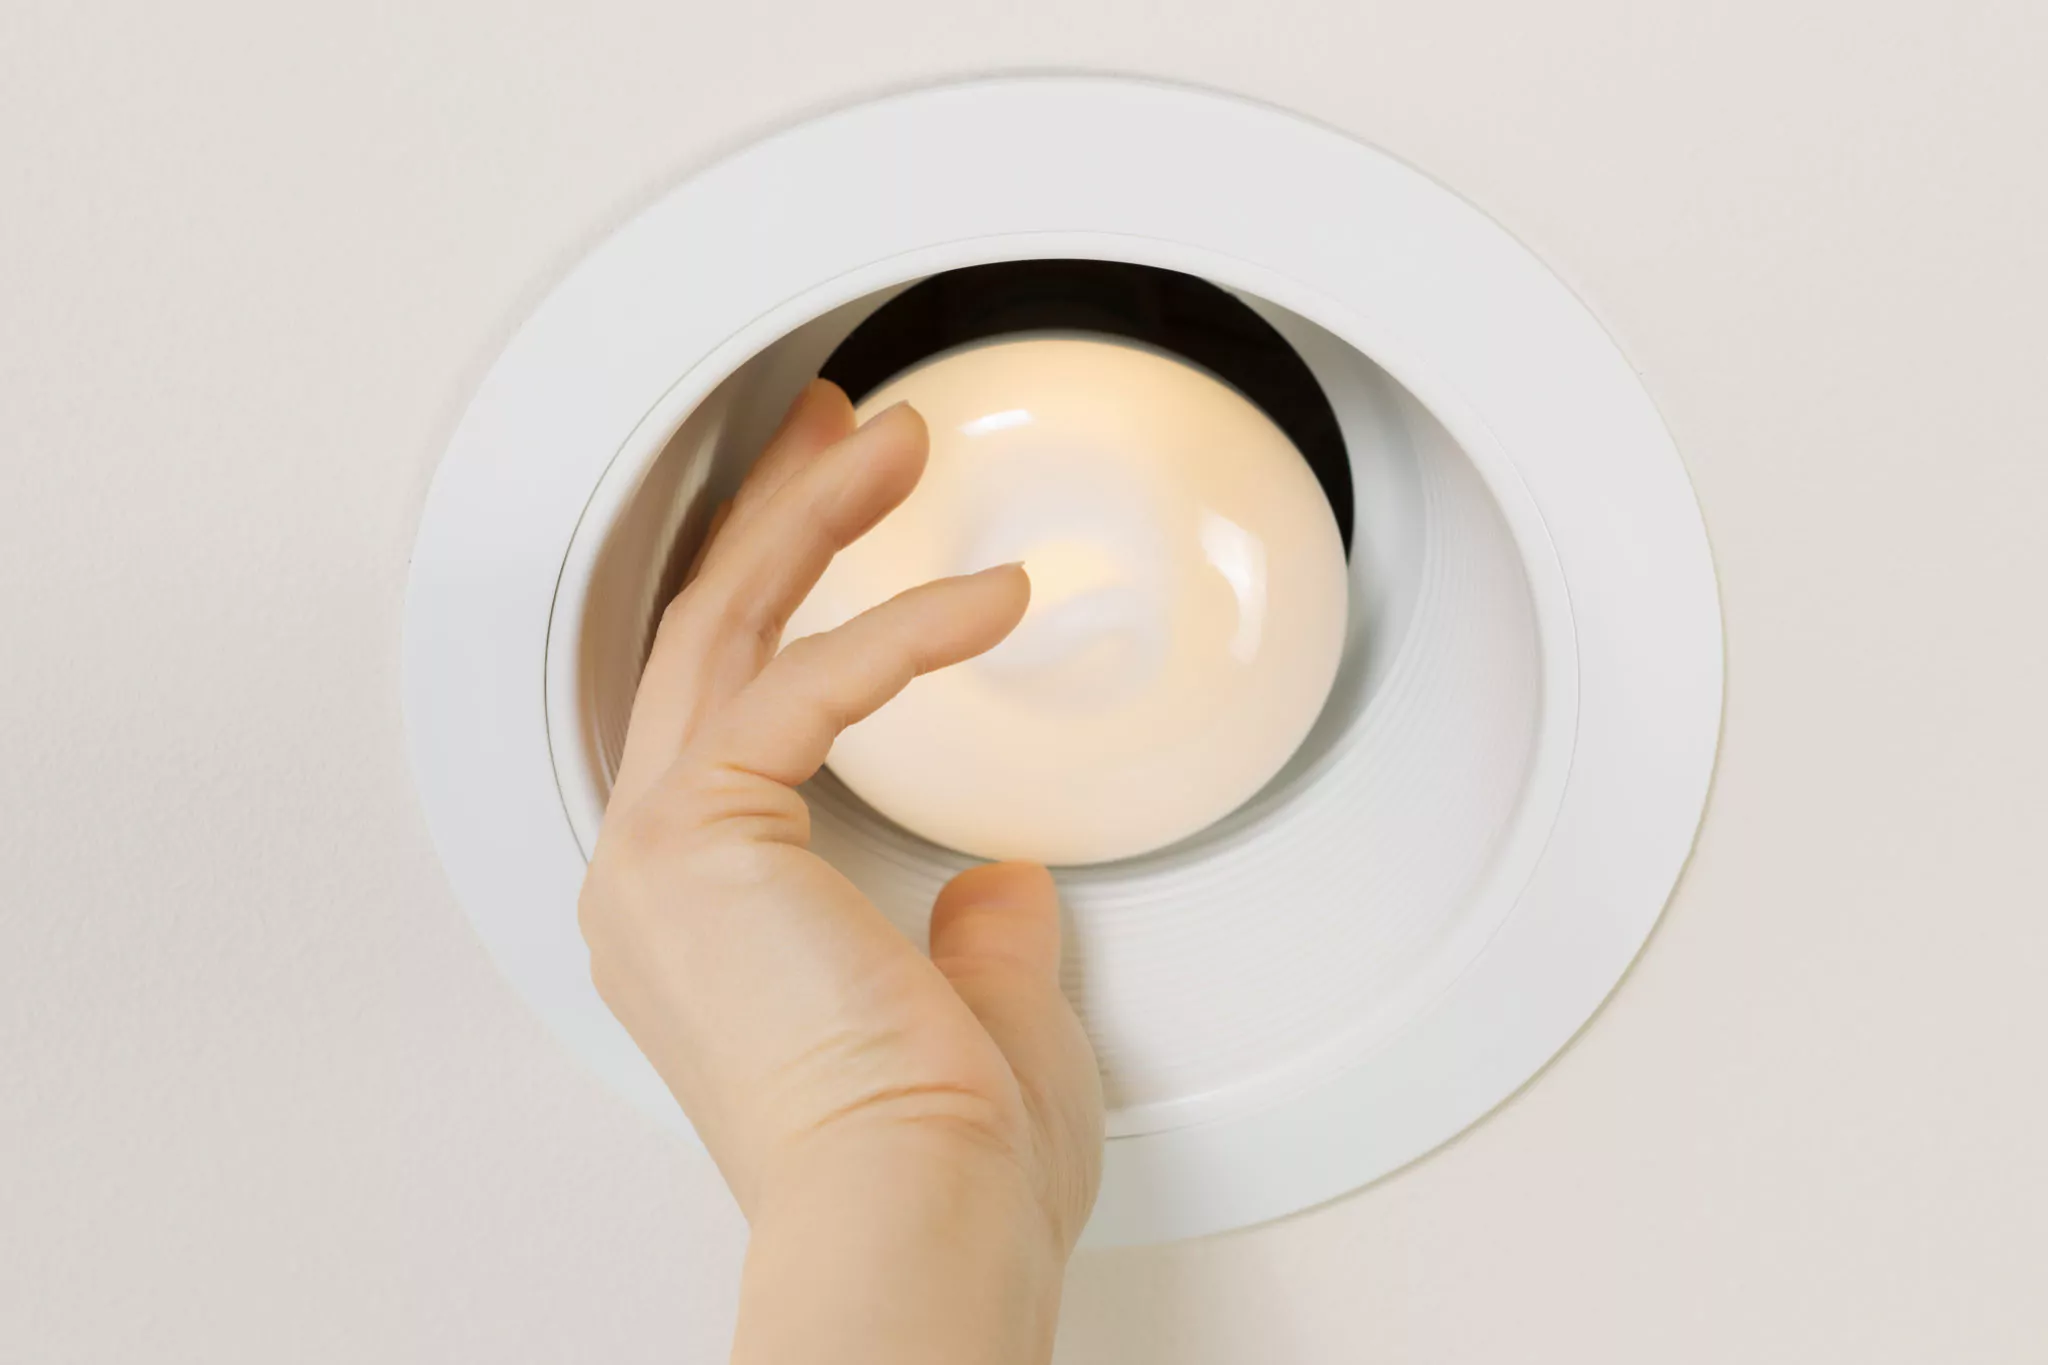
Step 2: Remove the old light fixture
With the power safely turned off, you can now proceed to remove the old light fixture from the ceiling. This step requires careful attention to detail and a systematic approach to ensure a smooth removal process.
-
Remove the Light Bulbs: Start by unscrewing and removing any light bulbs from the fixture. Set them aside in a safe place to prevent breakage.
-
Detach the Fixture: Depending on the type of fixture, you may need to unscrew it from the mounting bracket or ceiling. Use a screwdriver to loosen the screws or bolts holding the fixture in place. If the fixture is particularly heavy, it's advisable to have someone assist you in supporting its weight as you detach it from the ceiling.
-
Inspect the Wiring: Once the fixture is detached, carefully lower it to expose the wiring. Take note of how the wires are connected to the electrical box, as this will be helpful when installing the new fixture.
-
Disconnect the Wires: Using a voltage tester, ensure that there is no electrical current running through the wires. Once confirmed, proceed to disconnect the wires by unscrewing the wire nuts and separating the connections. Keep the wires separated and away from any metal components to prevent accidental contact.
-
Remove the Mounting Bracket: If the old fixture was secured to a mounting bracket, unscrew and remove the bracket from the ceiling. This step is essential to prepare the ceiling for the installation of a new light box.
-
Inspect the Ceiling: With the old fixture and mounting bracket removed, take a moment to inspect the ceiling area. Clean any dust or debris that may have accumulated, ensuring a clean and smooth surface for the installation of the new ceiling light box.
By following these detailed steps, you can effectively remove the old light fixture from the ceiling, setting the stage for the subsequent tasks involved in replacing the ceiling light box. With the fixture safely removed and the wiring disconnected, you're now ready to proceed to the next phase of this project.
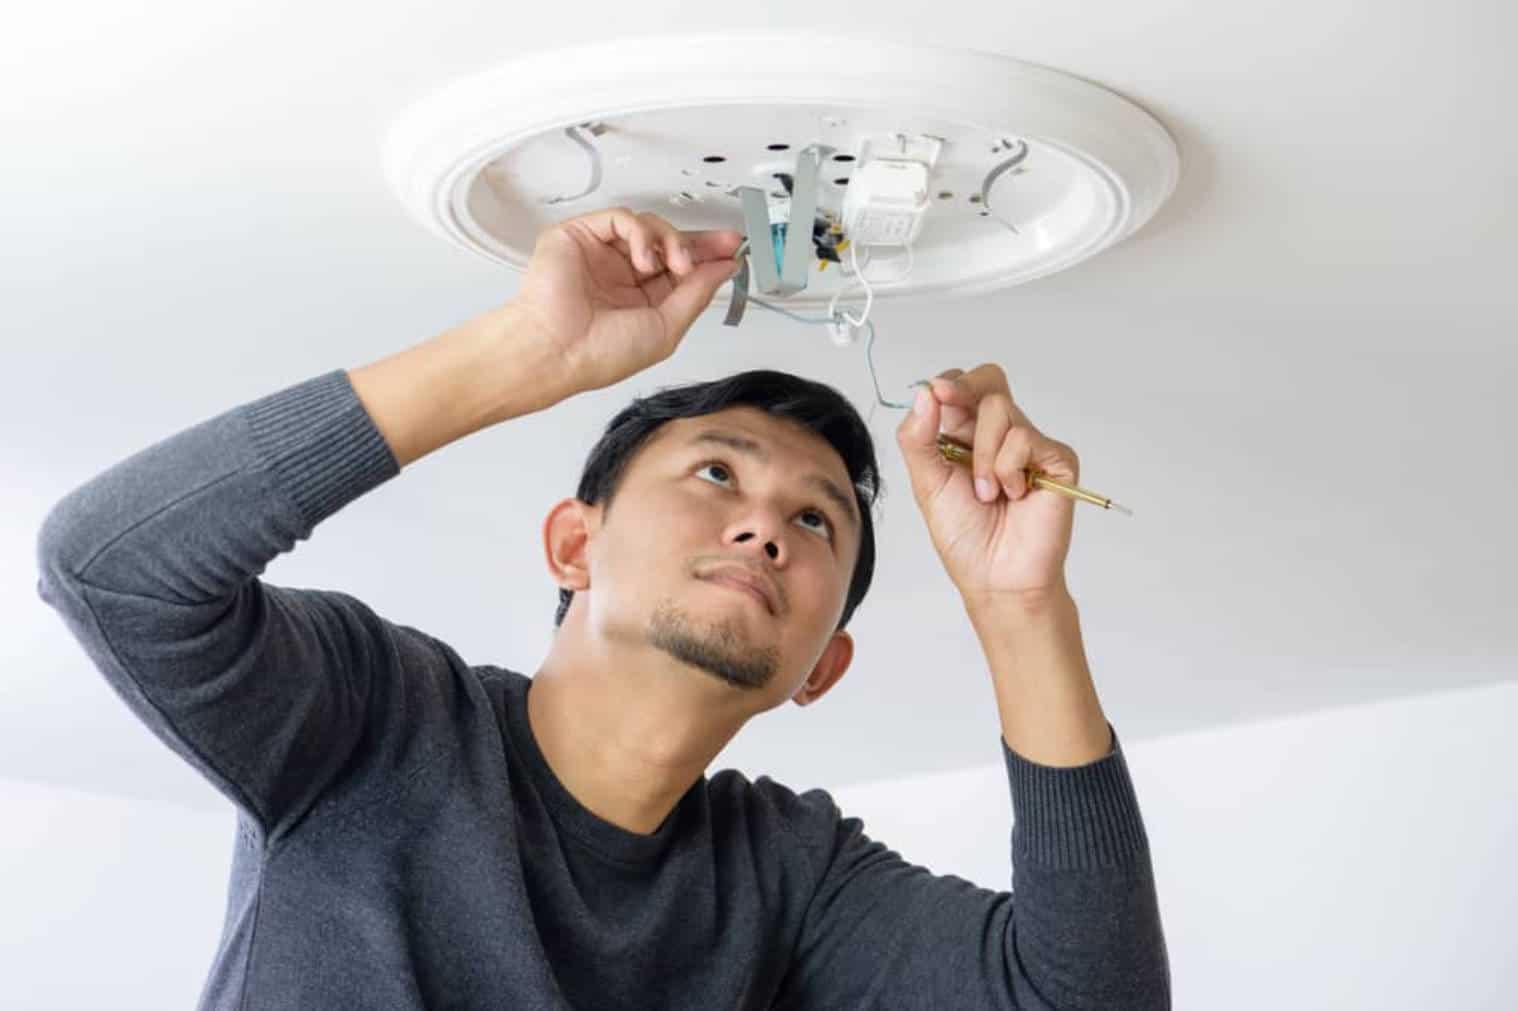
Step 3: Disconnect the wires
Disconnecting the wires is a critical step in the process of removing an old ceiling light box. It requires careful attention to detail and a methodical approach to ensure the safe and proper disconnection of the electrical components. By following the steps outlined below, you can confidently navigate this phase of the removal process, setting the stage for a successful transition to a new ceiling light box.
-
Prepare the Workspace: Before proceeding with the disconnection of wires, it's essential to create a clear and safe workspace. Ensure that the area beneath the ceiling light box is free of any obstructions, and consider laying down a protective covering to catch any debris or small components that may fall during the disconnection process. Additionally, having a stable and secure ladder or step stool to access the ceiling area is crucial for safely reaching the wiring.
-
Identify the Wires: Once you have a clear workspace, identify the wires connected to the old ceiling light box. Typically, you will encounter three main wires: the black (hot) wire, the white (neutral) wire, and the bare copper (ground) wire. It's important to exercise caution and avoid touching the wires until you have confirmed that the power is off using a voltage tester.
-
Use a Voltage Tester: Before proceeding with the disconnection, use a voltage tester to verify that there is no electrical current running through the wires. This step is crucial for ensuring your safety and preventing any potential electrical hazards. By confirming the absence of electrical current, you can proceed with confidence, knowing that it is safe to disconnect the wires.
-
Disconnect the Wires: Once the absence of electrical current has been confirmed, carefully unscrew the wire nuts that secure the connections between the wires. Take note of how the wires are connected, as this will be helpful when installing the new ceiling light box. As you disconnect the wires, handle them with care and avoid allowing them to come into contact with any metal components to prevent accidental contact.
-
Secure the Disconnected Wires: After disconnecting the wires, it's important to secure them to prevent them from accidentally falling back into the electrical box. Consider using wire nuts to cap each individual wire, keeping them separated and insulated. This precautionary measure helps to maintain a safe and organized workspace as you proceed with the removal process.
By diligently following these steps to disconnect the wires, you can ensure a safe and systematic approach to this crucial phase of removing an old ceiling light box. With the wires safely disconnected and secured, you're now ready to proceed to the subsequent steps, bringing you closer to the successful installation of a new ceiling light box.
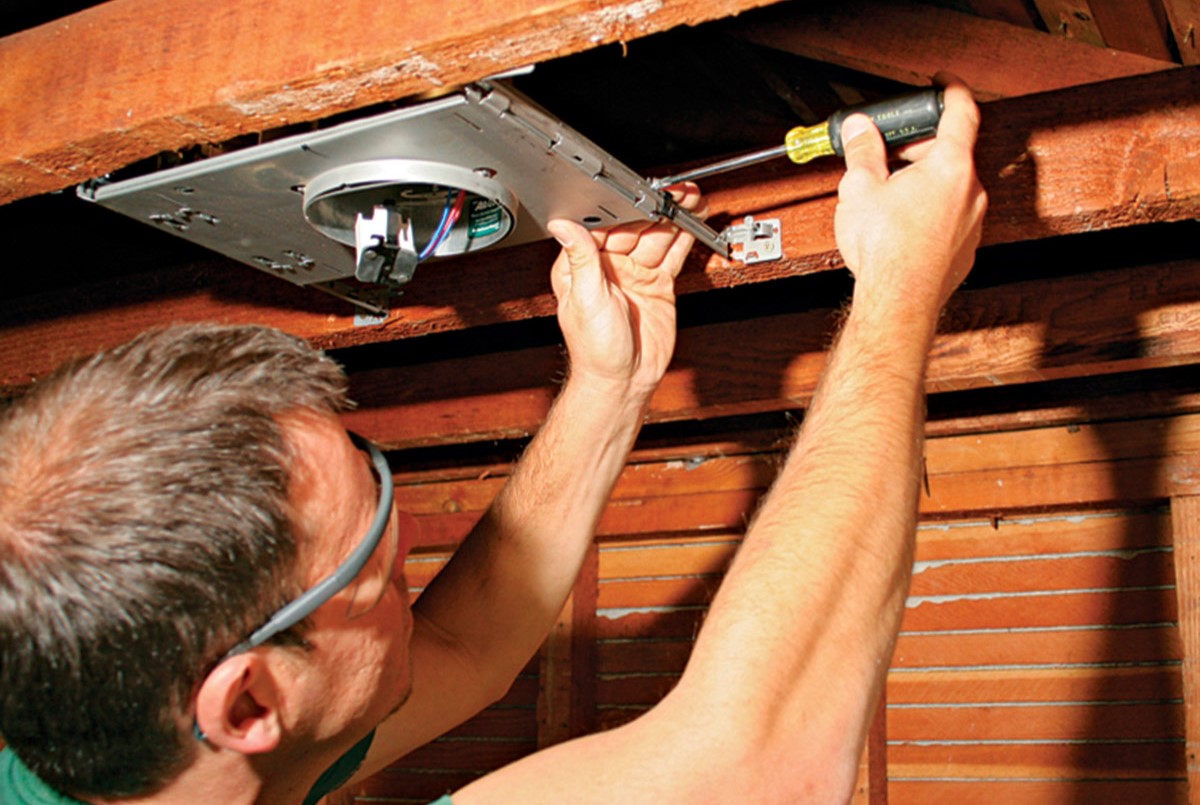
Step 4: Remove the old ceiling light box
Removing the old ceiling light box is a pivotal step in the process of upgrading your lighting fixture. This task requires careful attention to detail and a methodical approach to ensure a seamless transition to a new ceiling light box. By following the steps outlined below, you can confidently navigate this phase of the removal process, setting the stage for a successful installation of your updated lighting solution.
-
Assess the Mounting Mechanism: Begin by assessing how the old ceiling light box is mounted. In some cases, the box may be attached to a bracket or directly secured to the ceiling joists. Understanding the mounting mechanism will guide you in determining the best approach for removal.
-
Loosen the Mounting Screws or Nails: If the ceiling light box is secured with screws or nails, use a screwdriver or pry bar to carefully loosen and remove them. Take care to support the weight of the box as you work to prevent it from unexpectedly falling.
-
Disconnect the Box from Wiring: With the mounting hardware removed, carefully lower the old ceiling light box to access the wiring connections. If the box is attached to the electrical wiring, use caution and ensure that the wires are not under tension. If necessary, have a helper assist you in holding the box as you disconnect it from the wiring.
-
Inspect for Additional Fastenings: In some instances, the old ceiling light box may have additional fastenings securing it to the ceiling structure. Inspect the surrounding area to ensure that all fastenings are identified and removed before attempting to lift the box away.
-
Remove the Old Box: Once all fastenings and wiring connections have been addressed, carefully lift and remove the old ceiling light box from the ceiling. Take care to avoid any abrupt movements that could cause damage to the surrounding ceiling material.
-
Prepare the Ceiling for the New Box: After removing the old box, take a moment to inspect the ceiling area. Clean any debris or remnants from the previous installation to ensure a clean and level surface for the installation of the new ceiling light box.
By meticulously following these steps to remove the old ceiling light box, you can effectively prepare the space for the installation of a new fixture. With the old box safely removed and the ceiling area prepped, you're now ready to proceed to the subsequent steps, bringing you closer to the successful installation of your updated ceiling light.
Before removing an old ceiling light box, make sure to turn off the power at the circuit breaker. Use a voltage tester to double-check that the power is off before starting any work.
Read more: How To Remove A Dome Ceiling Light
Step 5: Install a new ceiling light box
Installing a new ceiling light box marks a pivotal phase in the process of upgrading your lighting fixture. This step requires precision and attention to detail to ensure a secure and stable foundation for the new fixture. By following the steps outlined below, you can confidently navigate this phase of the installation process, setting the stage for a successful transition to your updated lighting solution.
-
Select the Appropriate Box: Begin by selecting a new ceiling light box that is compatible with the weight and design of your new fixture. Consider the material and weight capacity of the box to ensure it can adequately support the new fixture without compromising safety.
-
Position the Box: With the new box in hand, position it over the opening in the ceiling, aligning it with the electrical wiring. Ensure that the box is centered and level to maintain a balanced and aesthetically pleasing installation.
-
Secure the Box: Once the box is properly positioned, secure it to the ceiling structure using appropriate fasteners. If the box is designed to attach to ceiling joists, use screws to firmly anchor it in place. For retrofit or remodeling boxes, follow the manufacturer's instructions for securing the box to the ceiling.
-
Connect the Wiring: Carefully feed the electrical wiring through the designated openings in the new ceiling light box. Take note of the wire color coding to ensure the correct connections. Securely fasten the wiring to the box, following the manufacturer's guidelines for proper installation.
-
Grounding the Box: If the new ceiling light box includes a grounding screw or terminal, ensure that the bare copper ground wire is securely attached. Proper grounding is essential for safety and helps protect against electrical hazards.
-
Test for Stability: Once the box is installed and the wiring connections are secure, gently test the stability of the box by applying light pressure. Ensure that it is firmly anchored to the ceiling and does not exhibit any wobbling or movement.
-
Prepare for Fixture Installation: With the new ceiling light box securely in place, take a moment to review the manufacturer's instructions for installing the specific light fixture. Prepare any additional components or hardware required for the fixture installation, ensuring a seamless transition from the box to the fixture.
By meticulously following these steps to install a new ceiling light box, you can establish a solid foundation for the subsequent installation of your updated lighting fixture. With the box securely in place and the wiring connections established, you're now ready to proceed to the final phase of this project, bringing you closer to the successful completion of your ceiling light upgrade.
Step 6: Connect the new wires
Connecting the new wires is a crucial step in the process of upgrading your lighting fixture. This phase requires precision and attention to detail to ensure a secure and reliable electrical connection, setting the stage for the successful installation of your updated ceiling light.
-
Prepare the Wiring: Before connecting the new wires, ensure that the electrical wiring is neatly organized and free from any damage or fraying. Trim any excess insulation from the wire ends to expose a sufficient length for secure connections. Additionally, confirm that the wire colors align with the standard coding: black for hot, white for neutral, and bare copper for ground.
-
Match and Connect the Wires: Begin by matching the corresponding wires from the new ceiling light fixture to the electrical wiring in the ceiling. Typically, the fixture will include labeled or color-coded wires to facilitate this process. Securely connect the black (hot) wire from the fixture to the black (hot) wire in the ceiling, the white (neutral) wire to the white (neutral) wire, and the bare copper (ground) wire to the grounding wire in the ceiling.
-
Use Wire Connectors: To establish secure and insulated connections, utilize wire connectors (also known as wire nuts) to join the wires. Twist the exposed ends of the fixture wires with the corresponding ceiling wires in a clockwise direction, ensuring a tight and reliable connection. Once twisted together, cap the connections with appropriately sized wire nuts, covering the exposed ends and providing insulation.
-
Tug Test: After securing the wire connections with wire nuts, perform a gentle tug test on each wire to ensure that they are firmly joined. This test helps verify the integrity of the connections and ensures that the wires are securely fastened. If any connections feel loose or insecure, re-evaluate the twisting and re-cap the wires with new wire nuts as needed.
-
Position the Wires: Once the connections are verified and secure, carefully position the connected wires within the new ceiling light box. Avoid overcrowding the box with excessive wiring, and ensure that the wires are neatly arranged to allow for the installation of the light fixture without obstruction.
By diligently following these steps to connect the new wires, you can establish a reliable and safe electrical connection, setting the stage for the successful installation of your updated ceiling light. With the wires securely connected and positioned, you're now ready to proceed to the final phase of this project, bringing you closer to the completion of your ceiling light upgrade.
Step 7: Install the new light fixture
Installing the new light fixture is the culminating step in the process of upgrading your ceiling lighting, bringing your vision of a refreshed and modernized space to fruition. This phase requires meticulous attention to detail and a methodical approach to ensure a seamless and secure installation. By following the steps outlined below, you can confidently navigate this final phase of the project, setting the stage for the successful completion of your ceiling light upgrade.
-
Prepare the Fixture: Before proceeding with the installation, carefully unpack the new light fixture and familiarize yourself with its components. Review the manufacturer's instructions to understand the assembly and mounting requirements specific to your fixture. Ensure that all necessary hardware and components are readily accessible for a smooth installation process.
-
Mounting the Fixture: Position the new light fixture over the installed ceiling light box, aligning it with the mounting screws or bracket. Depending on the design of the fixture, you may need to secure it using screws, bolts, or a locking mechanism provided by the manufacturer. Take care to support the weight of the fixture as you secure it to the ceiling, ensuring a stable and level mounting.
-
Connect the Wiring: With the fixture securely mounted, proceed to connect the wiring to the corresponding electrical connections in the ceiling. Match the labeled or color-coded wires from the fixture to the black (hot), white (neutral), and bare copper (ground) wires in the ceiling. Utilize wire connectors to establish secure and insulated connections, following the same process as when connecting the new wires to the ceiling light box.
-
Secure the Fixture: Once the wiring connections are established, carefully tuck the connected wires into the ceiling light box, ensuring that they do not interfere with the positioning of the fixture. Secure any additional components or decorative elements included with the fixture, such as decorative covers or shades, according to the manufacturer's instructions.
-
Test the Fixture: Before completing the installation, restore power to the circuit and test the functionality of the new light fixture. Turn on the light switch to verify that the fixture illuminates as intended. Additionally, inspect the fixture for any signs of flickering, dimming, or irregular operation, which may indicate loose connections or wiring issues.
By meticulously following these steps to install the new light fixture, you can bring your vision of an updated and stylish ceiling lighting to life. With the fixture securely mounted, wired, and tested, you have successfully completed the installation process, culminating in a transformed and revitalized space.
Conclusion
Congratulations on successfully completing the process of removing an old ceiling light box and installing a new light fixture! By diligently following the step-by-step guide outlined in this comprehensive resource, you have not only enhanced your space with a modernized lighting solution but also demonstrated your capability in tackling home improvement projects with confidence and precision.
As you reflect on the journey from turning off the power to carefully disconnecting the old wiring, removing the outdated ceiling light box, and seamlessly installing a new fixture, it's evident that your dedication to safety and attention to detail have been instrumental in achieving a successful outcome. Your commitment to following best practices for electrical work, including verifying the absence of electrical current and securely connecting the wiring, underscores the importance of prioritizing safety and precision in every step of the process.
Furthermore, your ability to select a suitable new ceiling light box, position it securely, and connect the wiring with care has contributed to the creation of a safe and aesthetically pleasing lighting installation. The thoroughness with which you approached each phase of the project reflects your dedication to achieving a professional and polished result, setting a high standard for future home improvement endeavors.
As you bask in the glow of your newly installed light fixture, take pride in the knowledge and skills you've acquired throughout this project. Your willingness to engage in hands-on tasks and your commitment to learning and applying best practices in home improvement are commendable. Whether you embarked on this project as a DIY enthusiast or as someone seeking to expand their skill set, your successful completion of the ceiling light upgrade serves as a testament to your capability and determination.
Moving forward, the experience gained from this project will undoubtedly serve as a valuable foundation for future endeavors in home improvement and DIY projects. The confidence and proficiency you've demonstrated in navigating the complexities of electrical work and installation tasks will empower you to take on new challenges with assurance and competence.
As you enjoy the enhanced ambiance and functionality of your updated lighting fixture, take a moment to appreciate the transformation you've brought to your space. Your dedication to quality workmanship and your commitment to safety have not only resulted in a beautifully installed ceiling light but have also enriched your understanding of home improvement practices.
With this successful project behind you, you're well-equipped to embark on future endeavors, armed with the knowledge, skills, and confidence to continue elevating your living environment through thoughtful and skillful home improvement projects. Cheers to your accomplishment and to the bright future of your newly illuminated space!
Frequently Asked Questions about How To Remove An Old Ceiling Light Box
Was this page helpful?
At Storables.com, we guarantee accurate and reliable information. Our content, validated by Expert Board Contributors, is crafted following stringent Editorial Policies. We're committed to providing you with well-researched, expert-backed insights for all your informational needs.


0 thoughts on “How To Remove An Old Ceiling Light Box”