Articles
How To Take Out A Sink Stopper
Modified: February 28, 2024
Learn how to remove a sink stopper with this helpful article. Follow our step-by-step guide to easily unclog your sink and keep your plumbing running smoothly.
(Many of the links in this article redirect to a specific reviewed product. Your purchase of these products through affiliate links helps to generate commission for Storables.com, at no extra cost. Learn more)
Introduction
Removing a sink stopper may seem like a daunting task, but with the right tools and a little know-how, you can easily take out a sink stopper yourself. Whether you need to clean the stopper, unclog the drain, or replace it with a new one, this step-by-step guide will walk you through the process. By following these instructions, you’ll be able to tackle the task with confidence and have your sink flowing freely in no time.
Before diving into the details, it’s important to note that there are different types of sink stoppers, including pop-up stoppers, lift-and-turn stoppers, and push-and-pull stoppers. The method of removal may vary slightly depending on the type of stopper you have, but we’ll cover all the bases to ensure you’re covered, regardless of the specific type.
To get started, let’s gather the necessary tools.
Key Takeaways:
- Easily remove, clean, and reinstall sink stoppers with basic tools and step-by-step guidance, ensuring a clog-free and properly functioning sink for a hygienic and efficient space.
- Identifying the type of sink stopper and following specific removal and cleaning instructions will help maintain optimal sink performance, saving time and money while ensuring a clean and clutter-free sink area.
Read more: How To Get The Sink Stopper Out
Step 1: Gather the necessary tools
Before you begin, it’s important to gather the necessary tools to make the process easier and more efficient. Here’s what you’ll need:
- Adjustable wrench
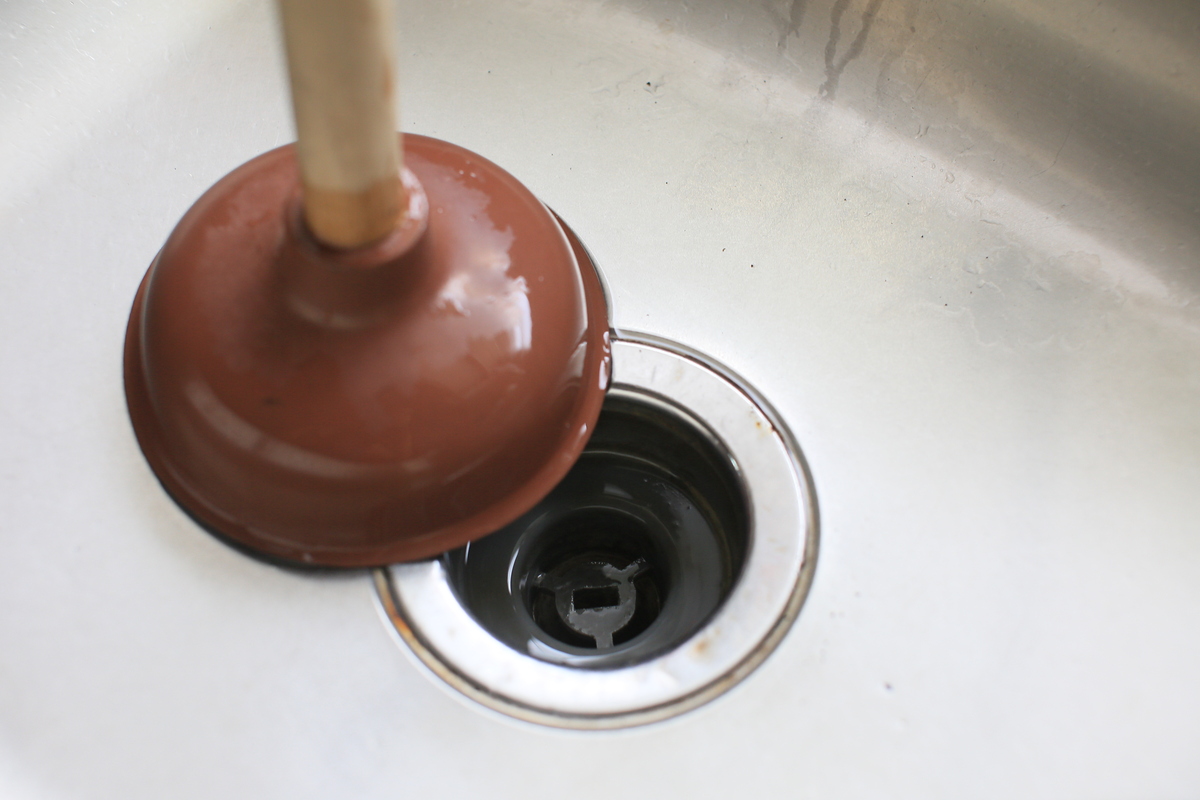
- Plunger or drain snake
- Bucket or container
- Rubber gloves
- Cleaning supplies
An adjustable wrench is essential for removing the nut that holds the sink stopper in place. Make sure to choose an adjustable wrench that fits comfortably in your hand and can be adjusted to the right size.
A plunger or drain snake can come in handy if you encounter any clogs while removing the sink stopper. These tools will help you clear out any debris that may be causing the blockage.
It’s always a good idea to have a bucket or container nearby to catch any water or debris that may come out of the sink when removing the stopper. This will prevent any mess and make cleanup easier.
Wearing rubber gloves is important to protect your hands from any dirt, grime, or chemicals that you may encounter during the removal process. It’s better to be safe than sorry!
Lastly, gather some cleaning supplies to give the sink stopper a good scrubbing. This can include a mild detergent, a brush or sponge, and some vinegar or baking soda for a natural cleaning solution.
Once you have all the necessary tools in place, you’re ready to move on to the next step: clearing out the sink area.
Step 2: Clear out the sink area
Before you begin removing the sink stopper, it’s important to clear out the sink area to create a clean and clutter-free workspace. Here’s what you need to do:
- Remove any objects or items from the sink. This includes dishes, utensils, and any other items that may be sitting in the sink.
- Wipe down the sink surface. Use a damp cloth or sponge to wipe down the sink bowl, faucet, and surrounding areas. This will remove any dirt, soap scum, or debris that may interfere with the removal process.
- Position a bucket or container underneath the sink. This will catch any water or debris that may come out when you remove the sink stopper. It will prevent any mess and make cleanup easier.
- Ensure the water supply is turned off. Before proceeding, make sure to turn off the water supply to the sink. This will prevent any accidental leaks or spills during the removal process.
By clearing out the sink area and creating a clean workspace, you’ll have a better view and access to the sink stopper. This will make the removal process smoother and more efficient.
Once you have completed these steps, you’re ready to move on to the next step: identifying the type of sink stopper you have.
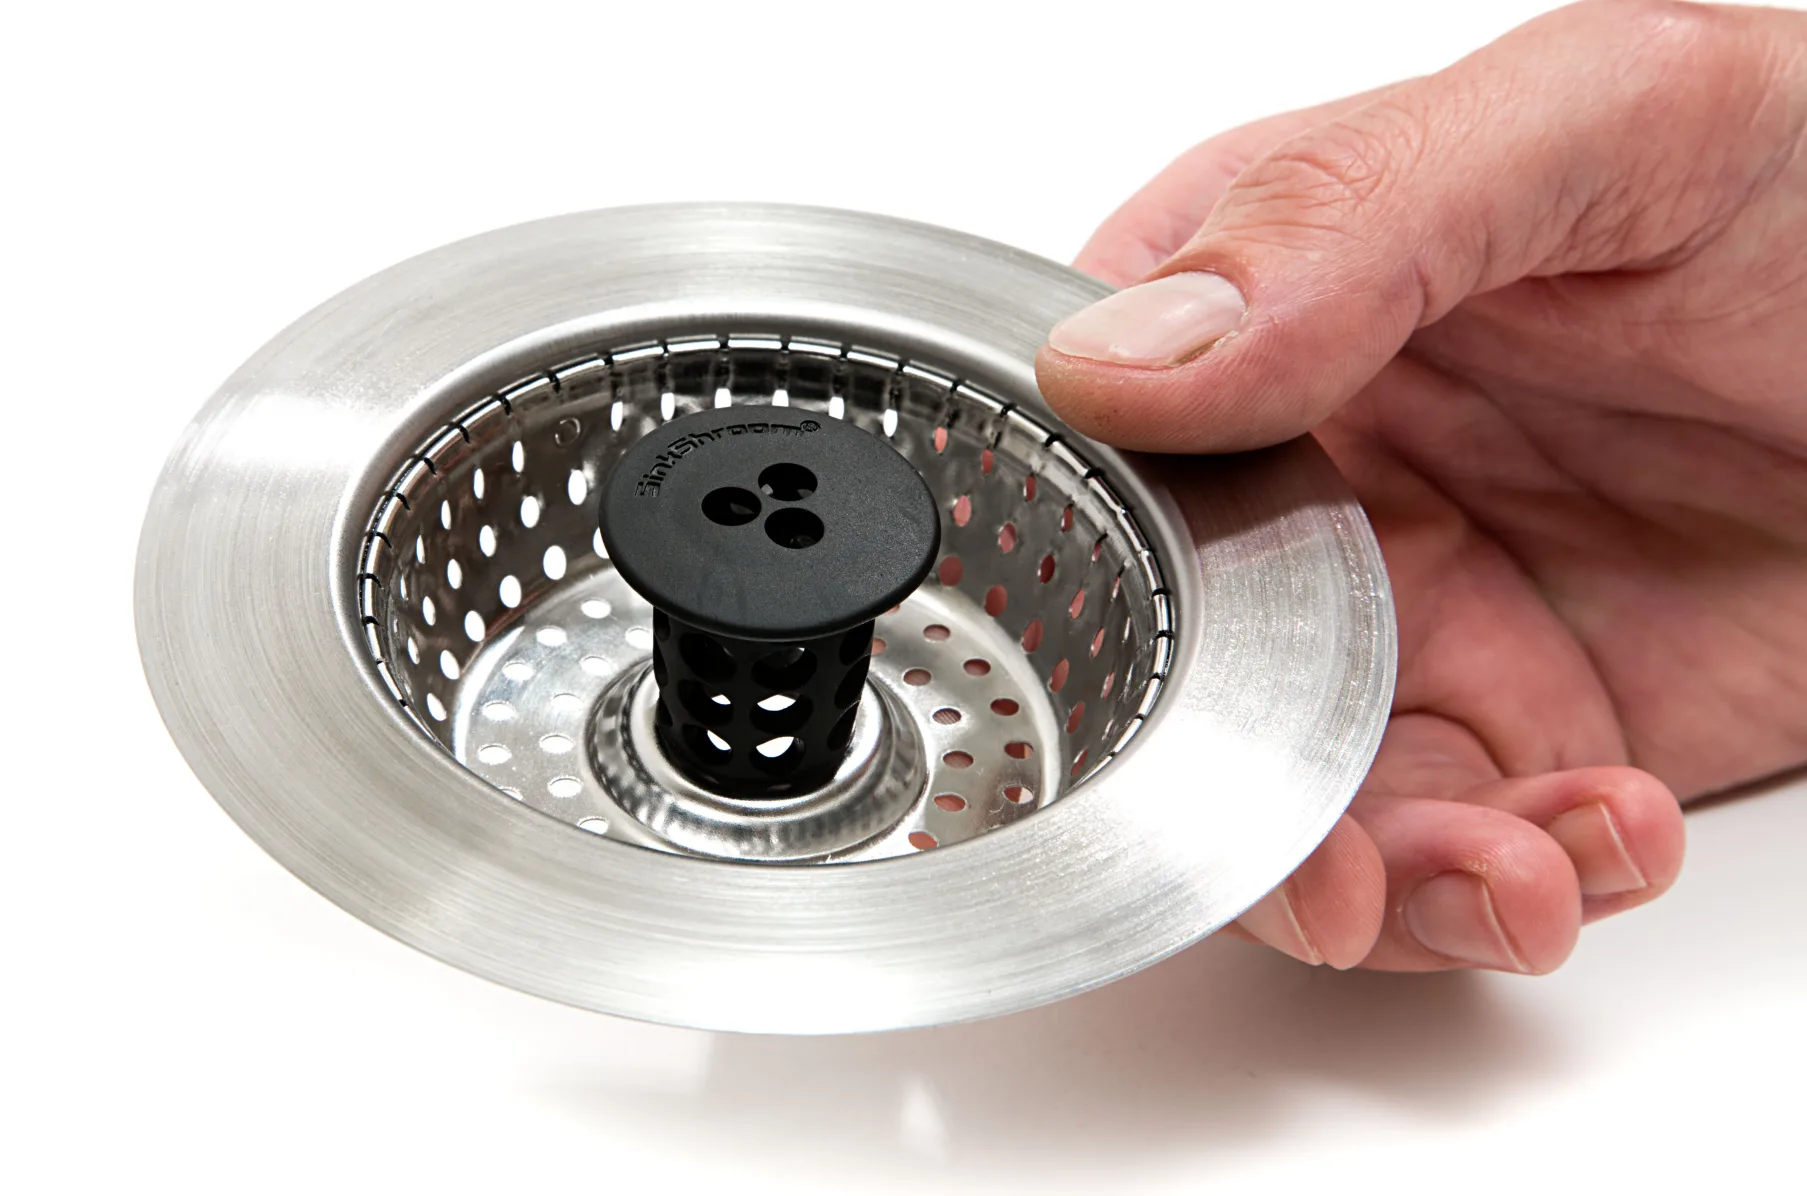
Step 3: Identify the type of sink stopper
Before you can remove the sink stopper, it’s important to identify the type of stopper you have. There are three common types: pop-up stoppers, lift-and-turn stoppers, and push-and-pull stoppers. Each type requires a slightly different approach for removal. Here’s how to identify each type:
- Pop-up stoppers: These stoppers are commonly found in bathroom sinks. They have a knob or lever located on the front or back of the faucet. The knob or lever is used to raise and lower the stopper as needed.
- Lift-and-turn stoppers: These stoppers are often found in bathtubs or some bathroom sinks. They feature a stopper cap that you can lift and turn to open or close the drain.
- Push-and-pull stoppers: These stoppers are also commonly found in bathroom sinks. They have a knob or rod that you can push down or pull up to open or close the drain.
Identifying the type of sink stopper you have is essential because it will determine the specific removal method you need to follow. Different types of stoppers require different techniques to disengage them from the drain. This step will ensure that you approach the removal process correctly and avoid any potential damage to the stopper or the sink.
Take a close look at your sink stopper to determine its type. Once you have identified it, you’re ready to move on to the next step: removing a pop-up sink stopper, if applicable.
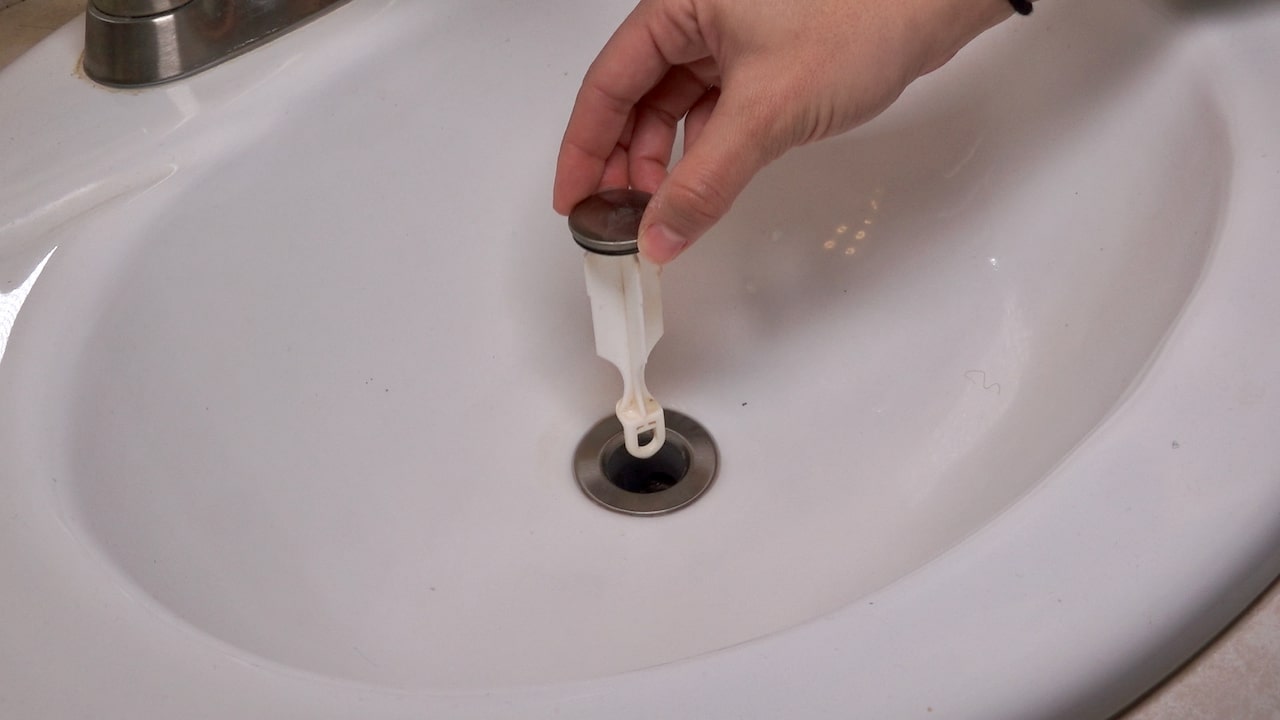
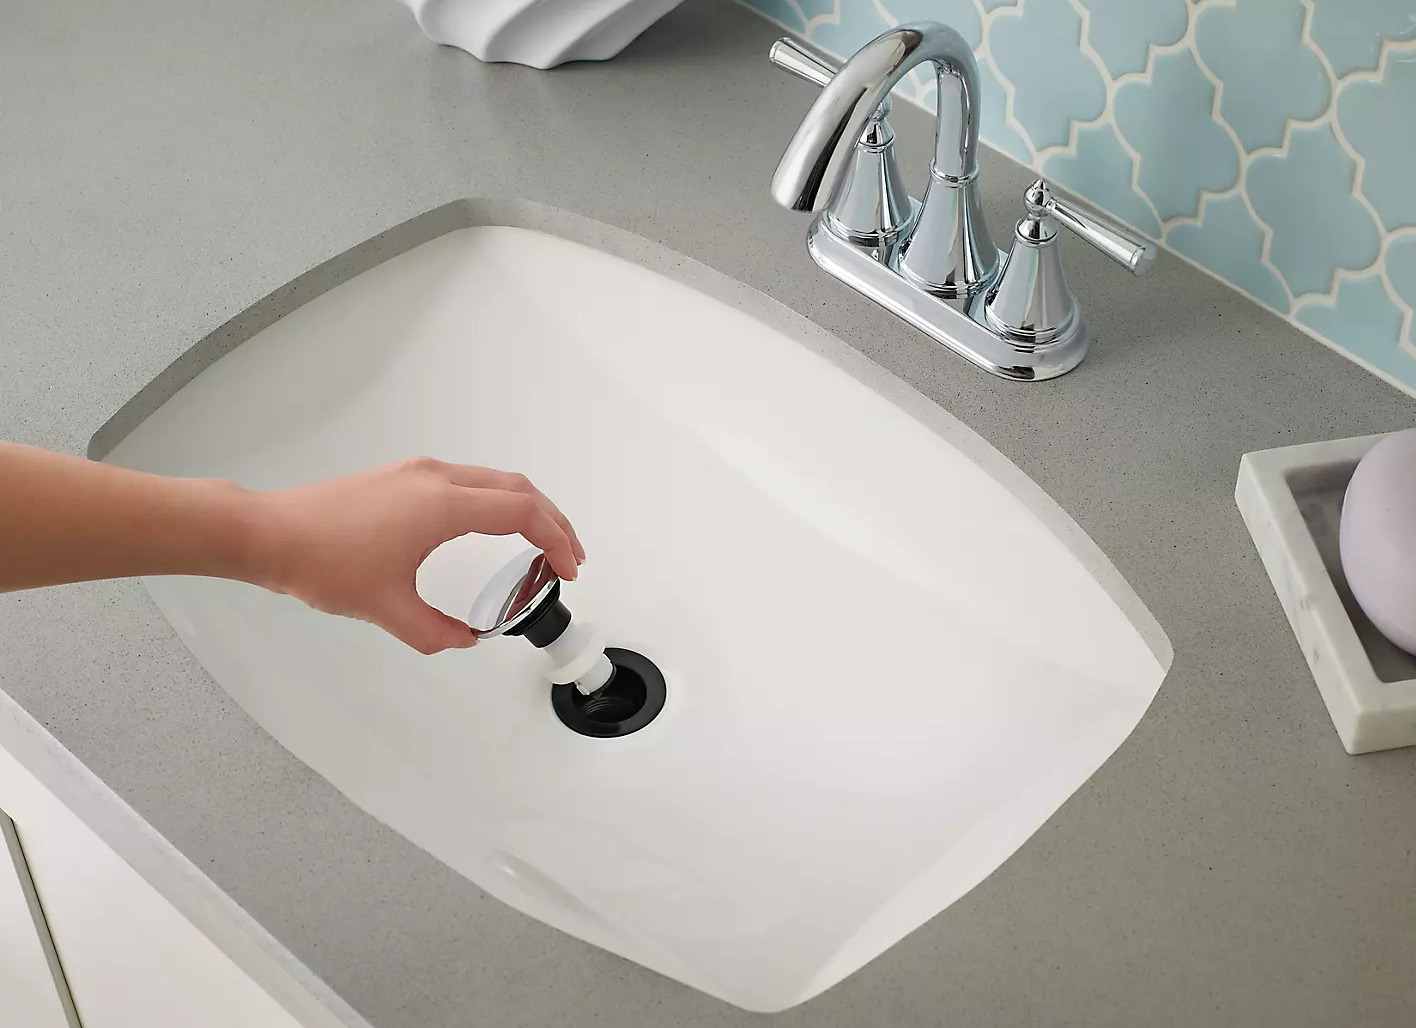
Step 4: Removing a pop-up sink stopper
If you have a pop-up sink stopper, follow these steps to remove it:
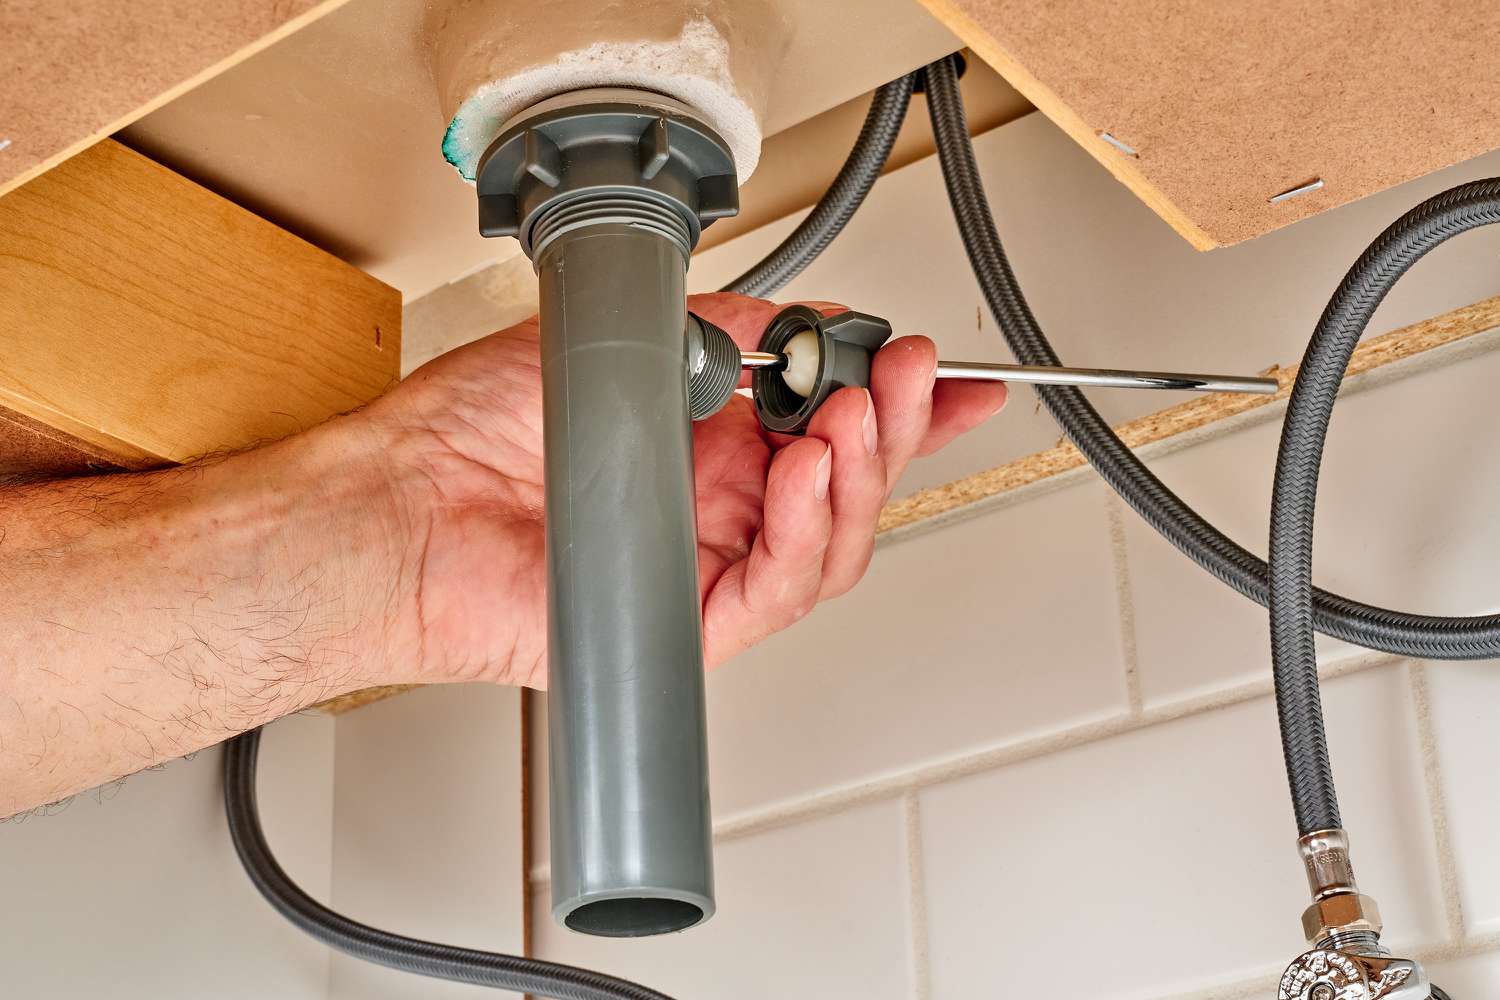
- Locate the pivot rod. Look underneath the sink and find the horizontal bar that connects the pop-up stopper to the lift rod. It’s usually located near the back of the sink.
- Loosen the pivot rod nut. Use an adjustable wrench to loosen and unscrew the nut that holds the pivot rod in place. It’s typically located on the top of the drain pipe. Keep turning counterclockwise until the nut is loose enough to remove.
- Remove the pivot rod. Once the nut is loose, carefully pull out the pivot rod from the drain pipe. Be gentle to avoid any damage to the drain or the stopper.
- Detach the stopper. With the pivot rod removed, you can now detach the pop-up stopper from the drain pipe. Simply lift it out of the drain hole, and it should come off easily.
Once you have successfully removed the pop-up sink stopper, you can proceed with cleaning it, unclogging the drain if necessary, or replacing it with a new stopper. Make sure to clean the stopper thoroughly before reinserting it or installing a new one to ensure proper functionality.
If you don’t have a pop-up sink stopper and instead have a lift-and-turn or a push-and-pull stopper, skip this step and move on to the next step that corresponds to your specific type of stopper.
To remove a sink stopper, locate the pivot rod under the sink and unscrew the nut holding the rod in place. Then, pull the rod and stopper out of the drain.
Read more: How To Take A Sink Out
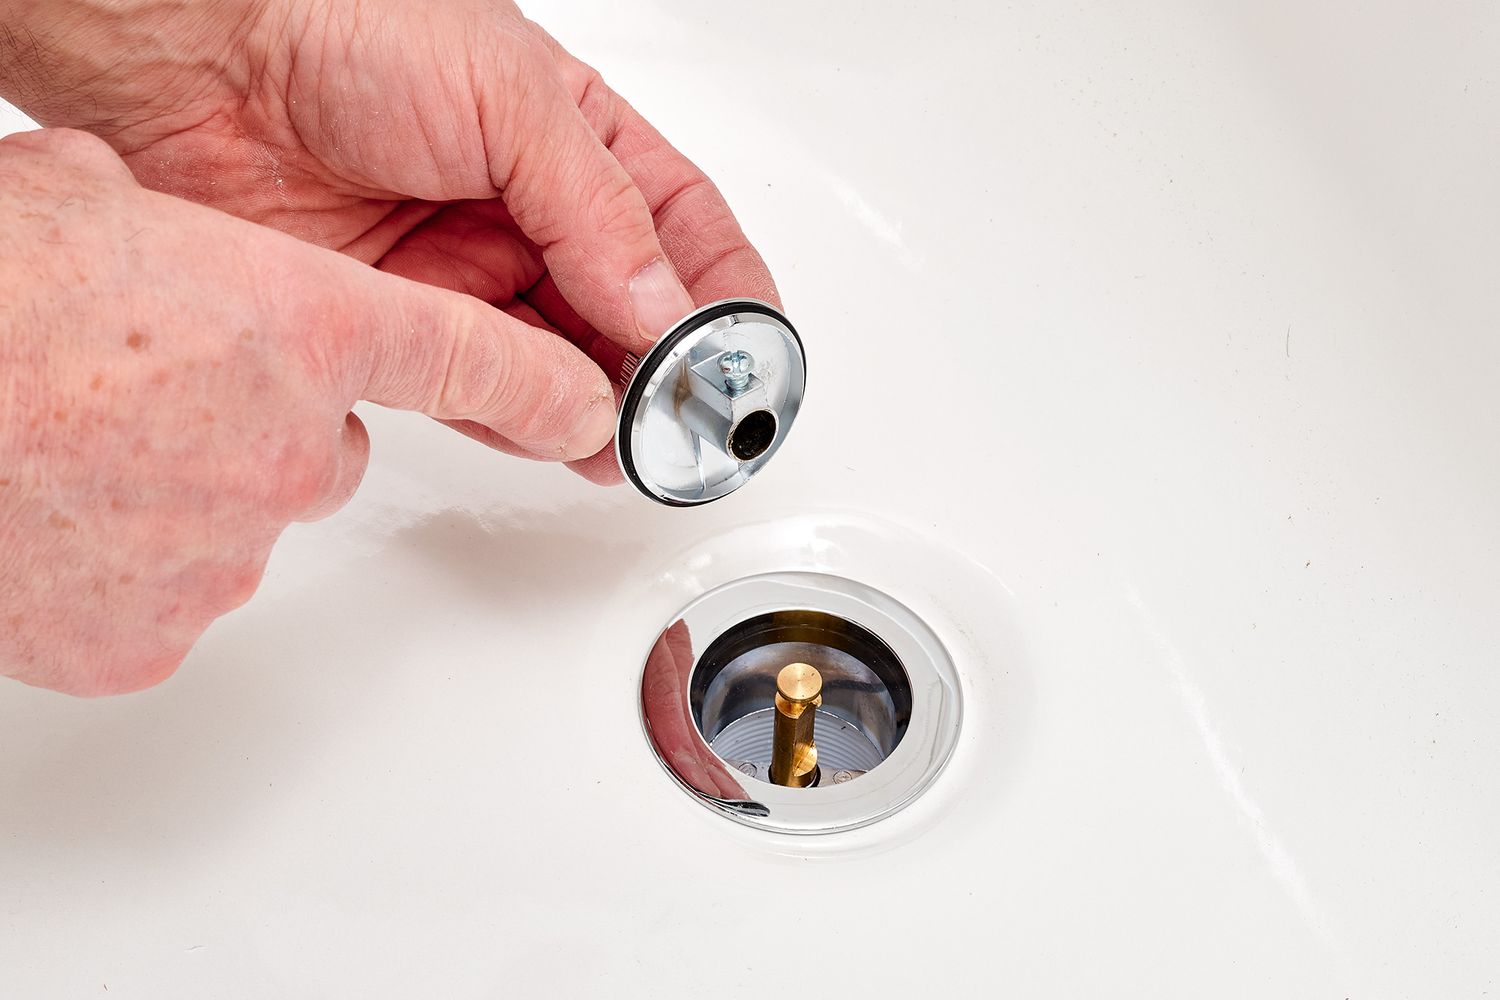
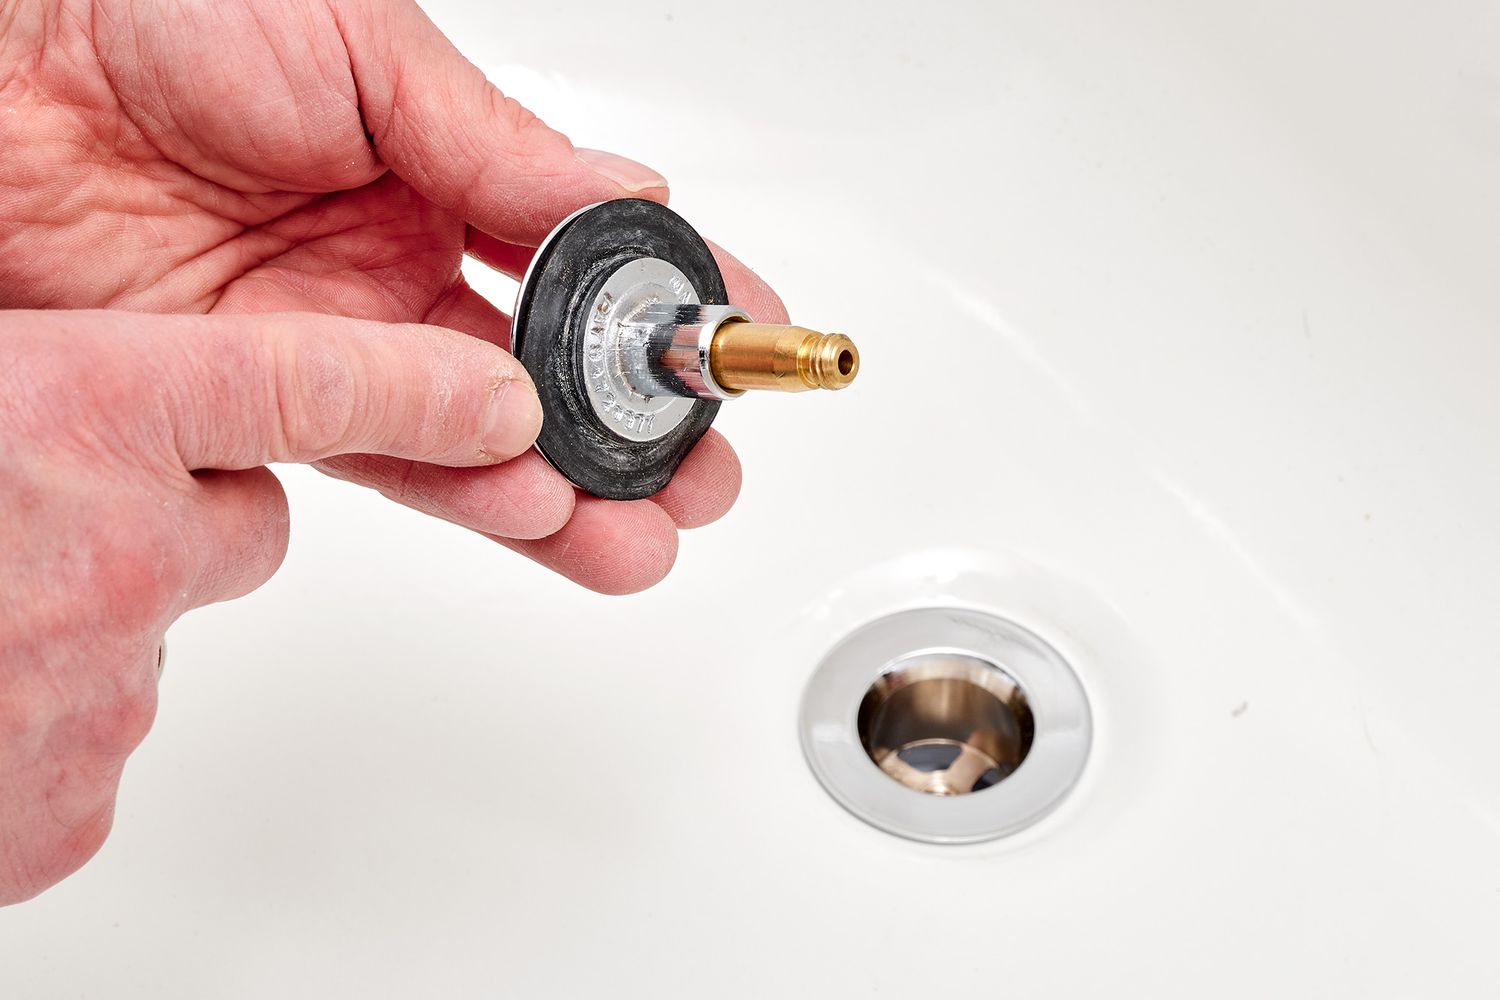
Step 5: Removing a lift-and-turn sink stopper
If you have a lift-and-turn sink stopper, follow these steps to remove it:
- Look for the stopper cap. The stopper cap is usually located in the center of the stopper. It may have a small screw or cross-shaped indentation on the top.
- Turn the stopper cap counterclockwise. Use your fingers or a screwdriver to turn the stopper cap counterclockwise until it becomes loose. Be gentle, as excessive force can cause damage to the stopper or the sink.
- Remove the stopper cap. Once the stopper cap is loose, lift it off the stopper and set it aside. You should now see the exposed drain opening.
- Unscrew the stopper body. Now that the stopper cap is removed, you’ll need to unscrew the stopper body. Hold the body firmly with one hand and turn it counterclockwise to loosen and unscrew it from the drain. Keep turning until the stopper body is completely detached.
- Take out the stopper. With the stopper body removed, you can now easily lift the lift-and-turn stopper out of the drain opening. Be careful not to drop it into the sink or down the drain.
Once you have successfully removed the lift-and-turn sink stopper, you can proceed with cleaning it, unclogging the drain if needed, or replacing it with a new stopper. Remember to clean the stopper thoroughly before reinstalling it or installing a new one to ensure proper functionality.
If your sink has a different type of stopper, such as a pop-up or push-and-pull stopper, refer to the previous or next step, depending on your specific type, to continue with the removal process.
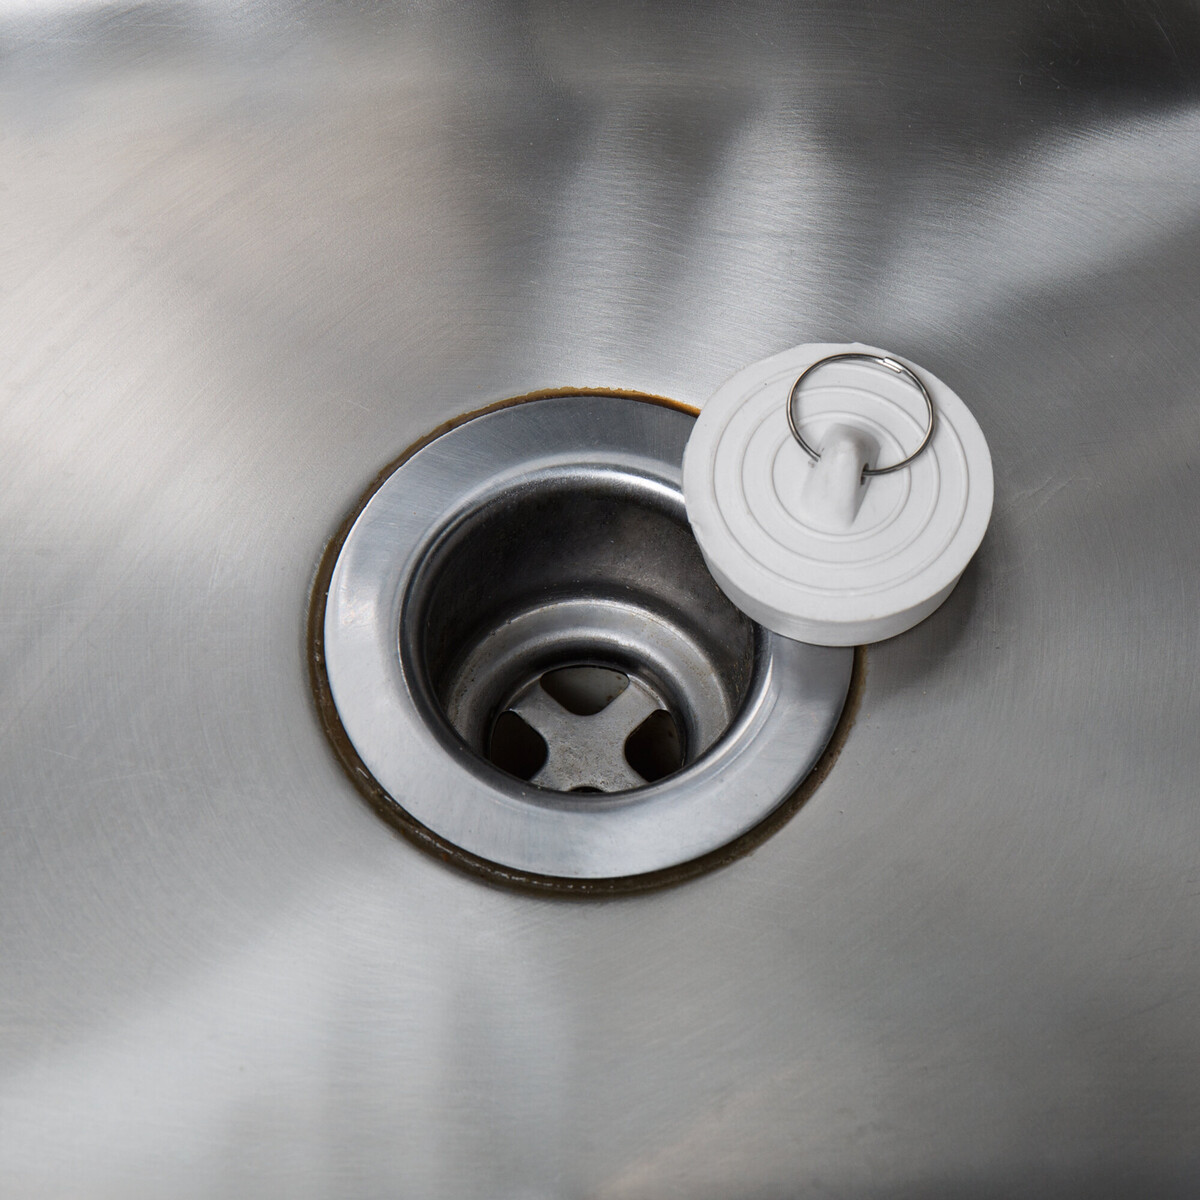
Step 6: Removing a push-and-pull sink stopper
If you have a push-and-pull sink stopper, follow these steps to remove it:
- Locate the knob or rod. The knob or rod is usually located near the back of the sink, and it is used to operate the push-and-pull mechanism of the stopper.
- Grasp the knob or rod firmly. Hold onto the knob or rod with your hand and give it a gentle pull upwards. This will disengage the stopper from the drain and allow you to lift it out.
- Pull the stopper out. With a firm grip on the knob or rod, continue pulling upwards until the stopper is completely removed from the drain. Be careful not to drop it into the sink or down the drain.
- Inspect the drain opening. After removing the push-and-pull stopper, take a moment to inspect the drain opening. Clear away any debris or buildup that may be present using a cloth or brush. This will ensure that the drain is clear and ready for use.
Once you have successfully removed the push-and-pull sink stopper, you can proceed with cleaning it, unclogging the drain if necessary, or replacing it with a new stopper. Make sure to clean the stopper thoroughly before reinserting it or installing a new one to ensure proper functionality.
If your sink has a different type of stopper, such as a pop-up or lift-and-turn stopper, refer to the previous or next step, depending on your specific type, to continue with the removal process.
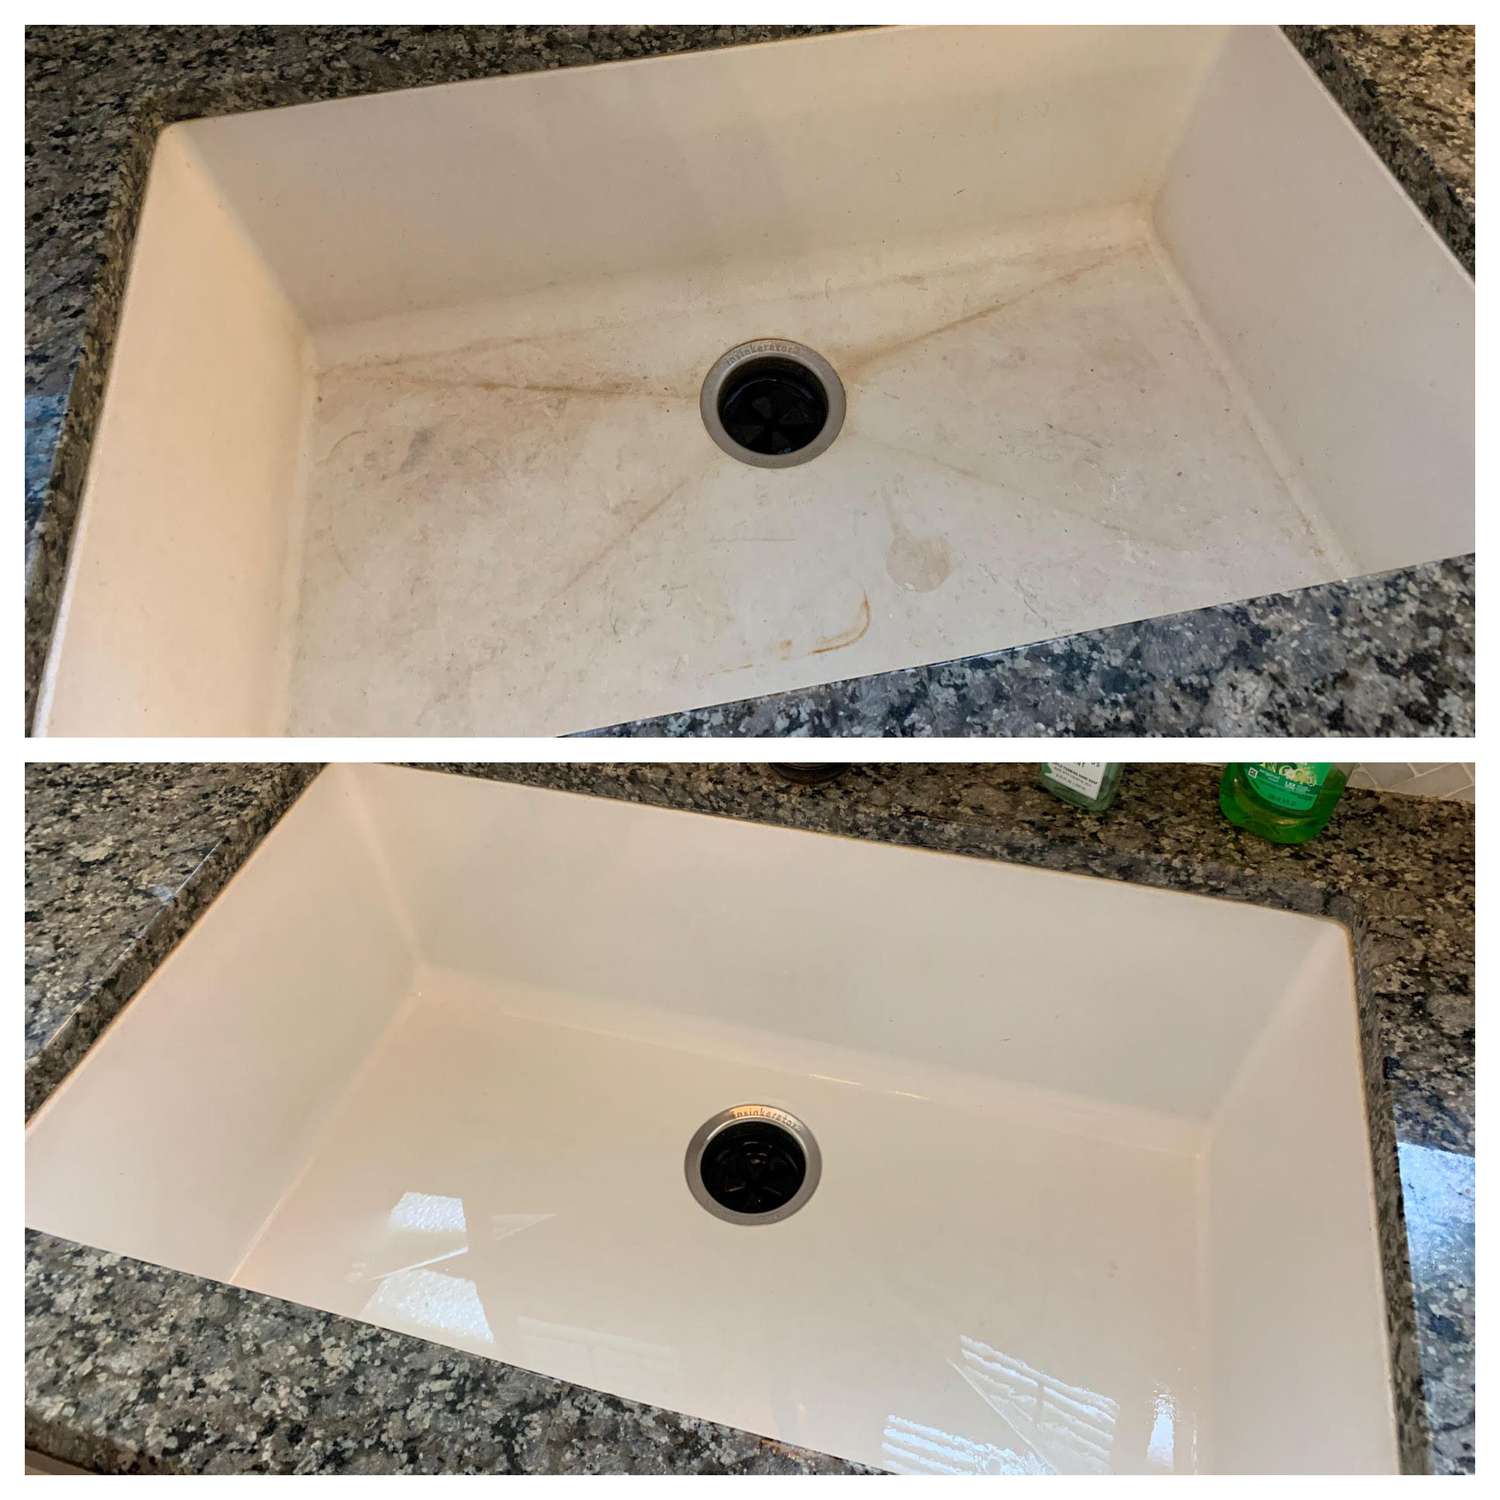
Step 7: Cleaning and maintaining the sink stopper
Now that you have successfully removed the sink stopper, it’s time to clean and maintain it. Proper cleaning and maintenance will not only keep the stopper functioning effectively but also prevent unpleasant odors and clogs in the drain. Follow these steps:
- Inspect the stopper for any debris or buildup. Take a close look at the stopper to see if there is any grime, hair, or soap scum clinging to it. Use your finger or a cloth to remove any visible debris.
- Prepare a cleaning solution. Fill a bucket or sink with warm water and add a mild detergent or vinegar to create a cleaning solution. You can also sprinkle baking soda over the stopper to help remove stubborn stains and odors.
- Submerge the stopper in the cleaning solution. Place the sink stopper into the cleaning solution and let it soak for a few minutes. This will help to loosen any dirt or residue that may be stuck on the stopper.
- Scrub the stopper. Take a brush or sponge and gently scrub the surface of the stopper to remove any remaining dirt or buildup. Pay special attention to the crevices and hard-to-reach areas to ensure a thorough cleaning.
- Rinse the stopper. Once you have thoroughly cleaned the stopper, rinse it under running water to remove any soap or cleaning residue. Ensure that all the cleaning solution is washed away before proceeding.
- Inspect the drain pipe. While the stopper is removed, take a moment to inspect the drain pipe for any additional debris or clogs. Use a flashlight if needed to get a better view. If you notice any buildup, use a plunger or a drain snake to clear the blockage.
Regularly maintaining and cleaning the sink stopper will help prevent clogs and ensure proper water flow in your sink. By following these steps, you’ll be able to keep the stopper in good condition and extend its lifespan.
With the cleaning process complete, you’re now ready to move on to the final step: reinstalling the sink stopper.
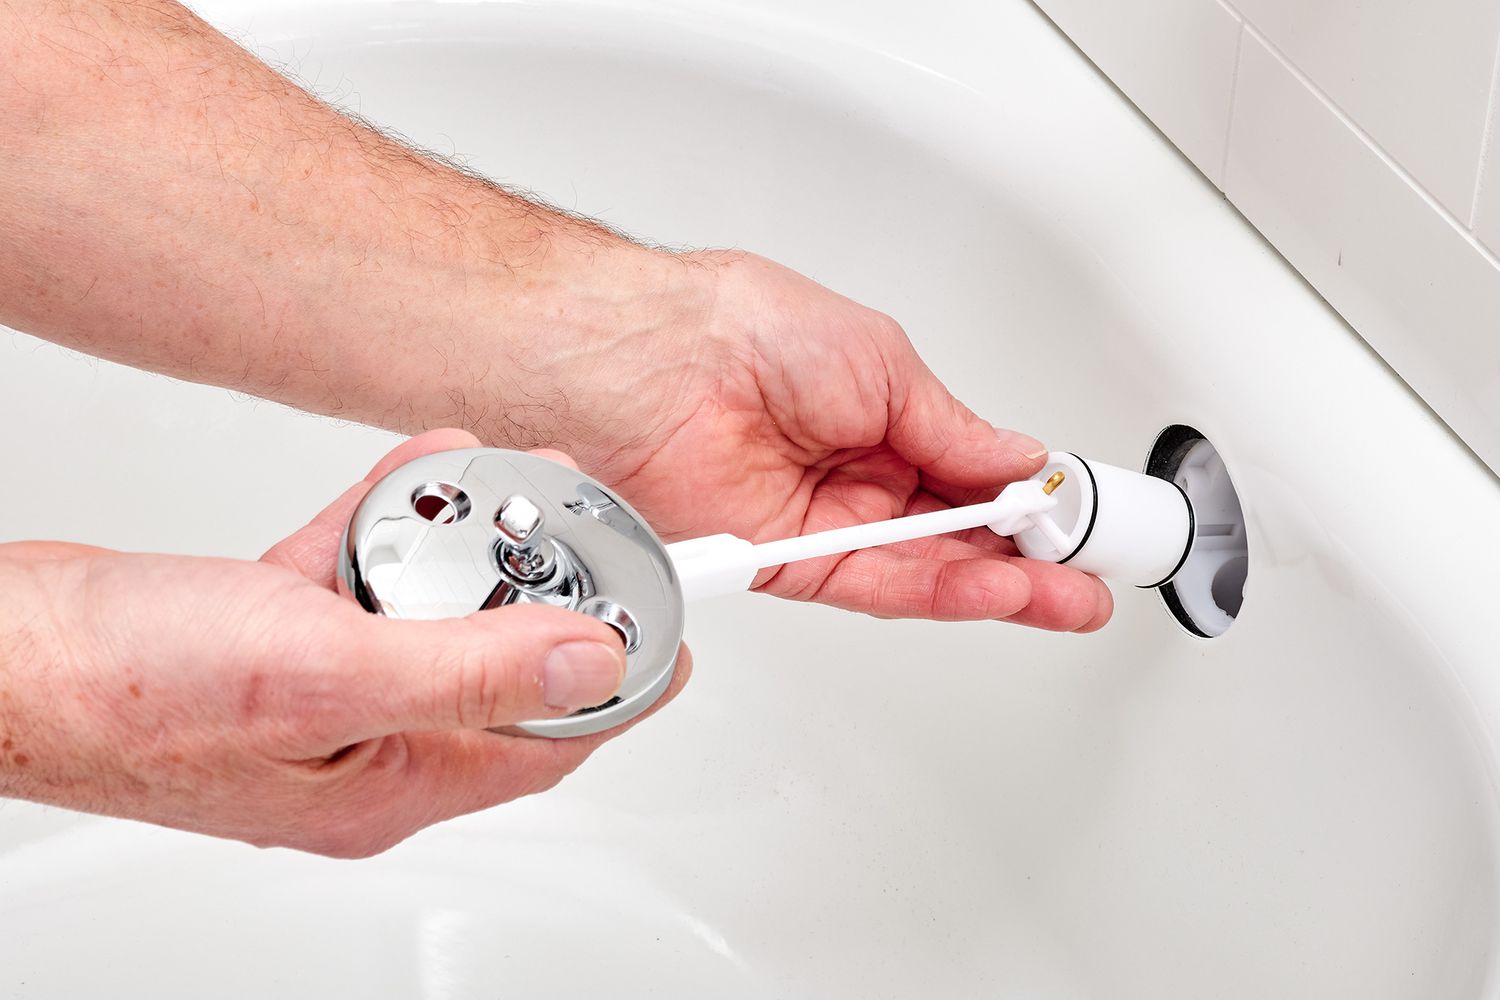
Step 8: Reinstalling the sink stopper
After cleaning and maintaining the sink stopper, it’s time to reinstall it. Follow these steps to properly reinstall the stopper:
- Inspect the stopper and drain opening. Before reinstallation, take a moment to ensure that both the stopper and the drain opening are clean and free from debris. This will ensure a proper fit and functionality.
- Align the stopper with the drain opening. Position the stopper over the drain opening, making sure it is aligned properly. For pop-up stoppers, insert the pivot rod into the drain pipe and attach it securely with the nut. For lift-and-turn and push-and-pull stoppers, simply place the stopper into the drain opening.
- Test the stopper. Once the stopper is in place, test it by operating the knob, lever, or rod, depending on the type of stopper you have. Ensure that the stopper opens and closes smoothly and that it forms a watertight seal when closed.
- Check for proper drainage. After reinstalling the stopper, let some water flow into the sink to check if it drains properly. If you notice any slow drainage or leaks, double-check the alignment of the stopper and make any necessary adjustments.
- Secure any attachments. For pop-up stoppers, make sure the pivot rod and nut are properly tightened and secure. This will ensure that the stopper functions smoothly and stays in place.
By following these steps, you’ll be able to effectively reinstall the sink stopper and restore its proper function. Remember to perform regular maintenance and cleaning to prevent clogs and maintain optimal performance in the future.
Congratulations! You have successfully completed the process of removing, cleaning, and reinstalling the sink stopper. By doing it yourself, you have saved time and money while ensuring the proper functioning of your sink.
Always refer to the manufacturer’s instructions for specific guidance on your type of sink stopper and seek professional assistance if needed.
With the sink stopper reinstalled, you can now enjoy a clean and properly functioning sink. Sit back and admire your handy work!
Read more: How To Take Sink Drain Out
Conclusion
Taking out a sink stopper may seem like a daunting task, but with the right tools and knowledge, you can easily accomplish it. Whether your goal is to clean the stopper, unclog the drain, or replace it with a new one, following the steps outlined in this guide will help you navigate the process with ease.
By gathering the necessary tools, clearing out the sink area, and identifying the type of sink stopper you have, you set the foundation for a successful removal process. From there, you can follow the specific instructions for removing a pop-up, lift-and-turn, or push-and-pull sink stopper.
Once the stopper is removed, take the time to clean and maintain it properly before considering reinstalling it. Regularly cleaning and inspecting the stopper will help prevent clogs and keep your sink flowing smoothly. Additionally, maintaining a clean and clutter-free sink area will contribute to a more hygienic and pleasant space overall.
Finally, reinstalling the sink stopper correctly ensures proper functionality and a watertight seal. Making sure the stopper aligns with the drain opening and testing its operation will help to ensure efficient drainage and prevent any leaks.
By following these steps and performing routine maintenance on your sink stopper, you can keep your sink clean, functional, and free from clogs. Remember to consult the manufacturer’s instructions for specific guidance and seek professional assistance if necessary.
Now, armed with the knowledge and confidence to take out a sink stopper, you can tackle this task whenever you need to with ease. So go ahead, give your sink the attention it deserves, and enjoy a well-functioning and efficient sink for years to come!
Frequently Asked Questions about How To Take Out A Sink Stopper
Was this page helpful?
At Storables.com, we guarantee accurate and reliable information. Our content, validated by Expert Board Contributors, is crafted following stringent Editorial Policies. We're committed to providing you with well-researched, expert-backed insights for all your informational needs.


0 thoughts on “How To Take Out A Sink Stopper”