Home>Articles>How To Tell If Your Water Pump Or Thermostat Is Faulty

Articles
How To Tell If Your Water Pump Or Thermostat Is Faulty
Modified: August 27, 2024
Learn how to determine if your water pump or thermostat is the culprit behind your vehicle's cooling system issues. Read informative articles on diagnostic techniques and troubleshooting tips.
(Many of the links in this article redirect to a specific reviewed product. Your purchase of these products through affiliate links helps to generate commission for Storables.com, at no extra cost. Learn more)
Introduction
Having a properly functioning cooling system in your vehicle is crucial to prevent engine overheating and maintain optimal performance. The water pump and thermostat are two key components of this system, and if either of them fails, it can lead to serious issues.
In this article, we will discuss how to tell if your water pump is bad or if your thermostat is malfunctioning. We will cover the symptoms, causes, diagnostic tests, and steps to address these problems. Additionally, we will provide some preventive measures to ensure the longevity of your water pump and thermostat.
By understanding the signs of a faulty water pump or thermostat, you can take timely action to prevent further damage to your vehicle and avoid costly repairs.
Key Takeaways:
- Recognize the Signs
Understanding the symptoms of a failing water pump or thermostat, such as overheating, leaks, and unusual noises, empowers timely action to prevent engine damage and costly repairs. - Proactive Maintenance
Implementing preventive measures, including regular coolant flushes, high-quality coolant use, and professional inspections, can prolong the lifespan and efficiency of water pumps and thermostats, ensuring a reliable vehicle cooling system.
Read more: How To Tell If Your House Water Pump Is Bad
Symptoms of a Bad Water Pump
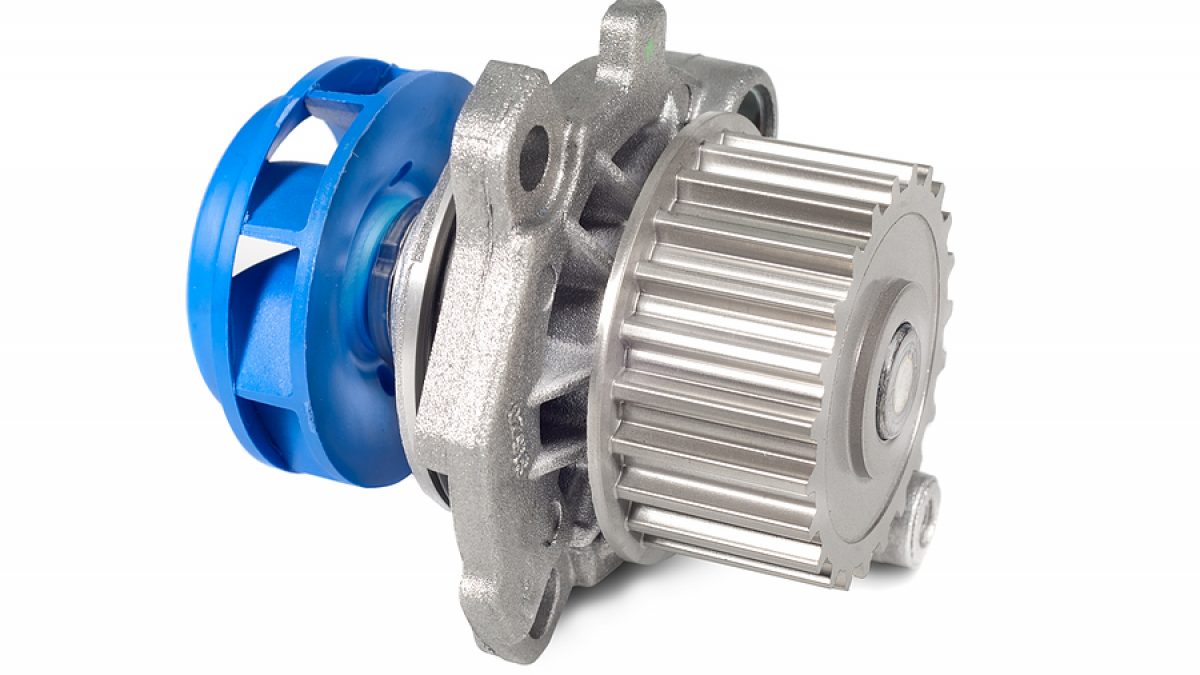
The water pump is responsible for circulating the coolant throughout the engine, ensuring that it stays at the appropriate temperature. When the water pump starts to fail, it can lead to various symptoms that indicate a problem. Here are some common signs of a bad water pump:
- Overheating Engine: One of the most noticeable symptoms of a bad water pump is an engine that constantly overheats. If the water pump is not functioning properly, it may not be able to pump enough coolant through the engine to maintain optimal temperatures.
- Coolant Leak: A leak coming from the water pump can indicate a failure in the seals or gaskets. You may notice coolant puddles underneath your vehicle or a low coolant level in the reservoir.
- Loud Noise: A failing water pump can produce a grinding or whining noise. This noise may become more pronounced as you accelerate or rev the engine.
- Steam or Smoke: If the water pump is completely worn out or has a severe leak, it can cause coolant to leak onto hot engine parts, resulting in steam or smoke being emitted from the engine bay.
- High Coolant Temperature: If the temperature gauge on your dashboard shows unusually high coolant temperatures, it may be an indication of a malfunctioning water pump.
- Engine Misfire: A failing water pump can lead to an uneven distribution of coolant, causing certain areas of the engine to overheat. This can result in engine misfires or a decrease in overall performance.
If you notice any of these symptoms, it is important to have your water pump inspected and repaired as soon as possible to prevent further damage to your engine.
Symptoms of a Bad Thermostat
The thermostat is a crucial component of the engine’s cooling system. It regulates the flow of coolant to maintain the optimal operating temperature. When the thermostat malfunctions, it can lead to issues with engine performance and cooling efficiency. Here are some common symptoms of a bad thermostat:
- Engine Overheating: If the thermostat gets stuck in the closed position, it can restrict the flow of coolant, leading to engine overheating. You may notice the temperature gauge on your dashboard indicating high coolant temperatures.
- Low Engine Temperature: Conversely, if the thermostat gets stuck in the open position, it allows too much coolant flow, resulting in an engine that runs colder than normal. This can lead to poor fuel efficiency and decreased engine performance.
- Inconsistent Temperature: A faulty thermostat may cause the engine temperature to fluctuate rapidly, going from hot to cold and vice versa. This inconsistency can affect the overall performance and longevity of your engine.
- Coolant Leaks: A deteriorated or failed thermostat can result in coolant leaks if the seals or gaskets are compromised. You may notice puddles of coolant under your vehicle.
- Poor Heater Performance: If your vehicle’s heater takes longer than usual to provide warm air or does not get warm at all, it could be a sign of a malfunctioning thermostat. The thermostat plays a role in regulating the flow of coolant to the heater core.
- Check Engine Light: In some cases, a failing thermostat can trigger the check engine light on your dashboard. A diagnostic scan can help identify the specific issue.
If you experience any of these symptoms, it is advisable to have your thermostat inspected and replaced if necessary. A properly functioning thermostat is essential for maintaining appropriate engine temperatures and preventing damage from overheating or inefficient cooling.
Causes of a Bad Water Pump
The water pump is a mechanical component, and like any other part, it can fail due to various reasons. Understanding the causes of a bad water pump can help you take preventive measures and address the issue promptly. Here are some common causes of water pump failure:
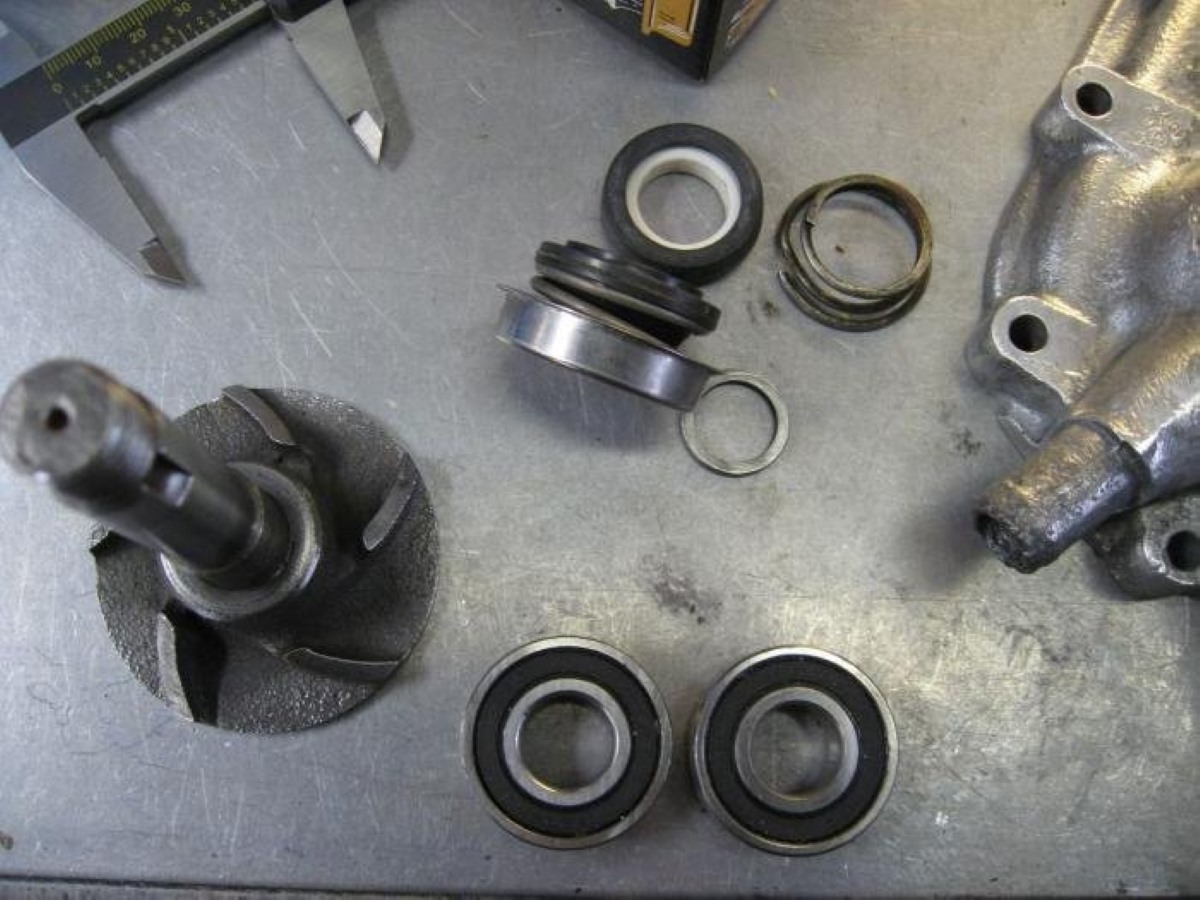
- Age and Wear: Over time, the bearings, seals, and impeller inside the water pump can wear out due to constant use and exposure to heat. As the water pump ages, the likelihood of failure increases.
- Insufficient Fluid Maintenance: Neglecting the maintenance of the cooling system, such as not regularly flushing and replacing the coolant, can lead to a buildup of debris and contaminants in the water pump. This can cause the impeller to become clogged or damaged, resulting in reduced efficiency or complete failure.
- Contaminated Coolant: If the coolant used in your vehicle is contaminated with rust, dirt, or other particles, it can accelerate the wear and tear on the water pump components. This can lead to premature failure.
- Overheating: Consistently driving with an overheated engine can put excessive strain on the water pump, causing it to wear out prematurely. High temperatures can cause the seals to deteriorate or the bearings to fail.
- Manufacturer Defects: In some cases, water pump failure can be attributed to manufacturing defects or faulty components. These instances are less common but can occur, especially with inferior quality or cheaply produced water pumps.
- Improper Installation: If a water pump is not installed correctly, such as incorrect alignment or inadequate tightening of bolts, it can lead to premature failure. It is crucial to follow the manufacturer’s recommendations and use proper installation techniques.
Regular maintenance, including routine inspections of the water pump, can help detect any issues early on and prevent major failures. It is also important to use high-quality coolant and follow recommended service intervals to minimize the risk of water pump failure.
Causes of a Bad Thermostat
The thermostat plays a vital role in regulating the flow of coolant through the engine to maintain optimal temperatures. When the thermostat fails, it can lead to cooling system problems and potential engine damage. Here are some common causes of a bad thermostat:
- Stuck Closed: One of the most common causes of thermostat failure is when it gets stuck in the closed position. This prevents the flow of coolant, causing the engine to overheat. Stuck closed thermostats can be caused by debris, rust, or a malfunctioning thermostat spring.
- Stuck Open: On the other hand, a thermostat that gets stuck in the open position allows too much coolant to flow through the engine, resulting in lower operating temperatures. This can lead to poor fuel efficiency, decreased engine performance, and increased wear on engine components.
- Debris and Contaminants: The presence of debris, rust, or other contaminants in the coolant can cause the thermostat to malfunction. These particles can interfere with the movement of the thermostat valves, leading to sticking or improper operation.
- Excessive Heat: Exposing the thermostat to prolonged periods of extreme heat can cause the internal components to warp or become damaged. This can disrupt the proper functioning of the thermostat and result in inaccurate temperature regulation.
- Age and Wear: Like any mechanical component, the thermostat can deteriorate over time due to wear and tear. The constant exposure to heat can cause the thermostat’s seals to degrade or the spring to lose its tension, leading to failure.
- Incorrect Installation: Improper installation of the thermostat, such as using an incorrect or low-quality thermostat, can lead to early failure. It is essential to use the appropriate thermostat for your vehicle and follow the manufacturer’s recommended installation procedures.
Regular maintenance, including coolant flushes and inspections, can help prevent thermostat failure. It is also important to use high-quality coolant and keep the cooling system free from debris. If you notice any symptoms of a bad thermostat, it is advisable to have it inspected and replaced if necessary to avoid further damage to your engine.
Diagnostic Tests for a Bad Water Pump
When experiencing symptoms that could indicate a problem with your vehicle’s water pump, it is important to perform diagnostic tests to confirm the issue. Here are some common diagnostic tests for a bad water pump:
- Visual Inspection: Begin by visually inspecting the water pump for any signs of leaks, such as coolant puddles or stains around the pump housing. Look for cracks, corrosion, or damage to the pump housing or pulley.
- Coolant Pressure Test: A coolant pressure test can help identify any leaks in the cooling system. By pressurizing the system, you can pinpoint the source of the leak, which could be the water pump.
- Coolant Flow Test: This test checks the flow of coolant through the water pump. You will need a cooling system pressure tester and a flow meter. By connecting the flow meter to the inlet and outlet hoses of the water pump, you can measure the flow rate to determine if the water pump is moving coolant effectively.
- Temperature Gauge Test: Monitor the temperature gauge on your dashboard during normal driving conditions. If the gauge indicates high coolant temperatures, it could be an indication of a failing water pump.
- Listen for Noise: Pay attention to any unusual noises coming from the water pump area, such as grinding or whining sounds. These noises can indicate a failing water pump and should be investigated further.
- Belt and Pulley Inspection: Inspect the water pump belt and pulley for any signs of wear, damage, or misalignment. A loose or worn out belt can cause the water pump to malfunction.
- Consult a Mechanic: If you are unsure about performing these tests yourself or if the diagnostic results are inconclusive, it is recommended to consult a qualified mechanic. They have the expertise and specialized tools to accurately diagnose a faulty water pump.
By performing these diagnostic tests, you can determine whether your water pump is the source of the problem and take appropriate action to address it, whether that involves repair or replacement.
Diagnostic Tests for a Bad Thermostat
When you suspect that your vehicle’s thermostat is malfunctioning, it is important to perform diagnostic tests to confirm the issue. Here are some common diagnostic tests for a bad thermostat:
- Coolant Temperature Test: Use an infrared thermometer or a diagnostic scan tool to measure the temperature of the coolant as it flows through the engine. Compare the reading to the temperature specified by the manufacturer. If the thermostat is not opening or closing properly, it will affect the coolant temperature.
- Visual Inspection: Inspect the thermostat housing for any signs of leaks, such as coolant puddles or stains. Check for visible damage or corrosion on the housing or thermostat itself.
- Coolant System Pressure Test: Perform a pressure test on the cooling system to check for any leaks. If the pressure drops or fluctuates, it may indicate a faulty thermostat or another issue within the cooling system.
- Thermostat Function Test: Remove the thermostat and place it in a pot of boiling water. Monitor the thermostat to see if it opens fully. If it remains closed or partially open, it indicates a faulty thermostat that needs to be replaced.
- Heat Gun Test: Use a heat gun to warm up the thermostat or the surrounding area. Observe if the thermostat responds by opening. If there is no response, it suggests a malfunctioning thermostat.
- Check Coolant Flow: With the engine running and at operating temperature, observe the flow of coolant through the radiator or radiator hoses. If there is no flow or slow circulation, it could be a sign of a stuck closed thermostat.
- Consult a Mechanic: If you are unsure about performing these tests yourself or if the diagnostic results are inconclusive, it is advisable to seek the assistance of a qualified mechanic. They have the expertise and specialized tools to accurately diagnose a faulty thermostat.
Performing these diagnostic tests can help you determine if the thermostat is the cause of your cooling system issues. If the tests confirm a faulty thermostat, it is recommended to replace it as soon as possible to ensure proper engine temperature regulation and avoid potential engine damage.
Common Signs of Water Pump Failure
The water pump is a critical component of your vehicle’s cooling system. It circulates coolant through the engine to prevent overheating and maintain optimal temperatures. When the water pump starts to fail, it can lead to serious issues. Here are some common signs of water pump failure that you should be aware of:
- Overheating Engine: One of the most noticeable signs of a failing water pump is an engine that consistently overheats. If the water pump is not functioning properly, it may not be able to circulate enough coolant through the engine to regulate the temperature.
- Coolant Leak: A leaking water pump is a clear indication of a problem. You may notice coolant puddles underneath your vehicle, especially near the front of the engine. If you consistently have to top up the coolant level, it could be a sign of a water pump leak.
- Grinding or Whining Noise: A failing water pump can produce unusual noises, such as a grinding or whining sound. These noises may become more pronounced as you accelerate or rev the engine. It typically indicates a problem with the bearings or impeller inside the water pump.
- Visible Rust or Corrosion: Inspect the water pump for any visible signs of rust or corrosion. These can indicate a deteriorating water pump that may soon fail. Rust and corrosion compromise the performance and longevity of the water pump.
- Wobble or Play in the Water Pump Pulley: Excessive movement or play in the water pump pulley can indicate a failing water pump. If you notice this while inspecting the water pump, it is a clear indication that it needs to be replaced.
- Engine Overheating at Idle: If the engine tends to overheat when idling or in stop-and-go traffic, it may be a sign of water pump failure. The reduced coolant flow at lower engine speeds can cause inadequate cooling, leading to overheating.
If you notice any of these signs, it is important to address the issue promptly to prevent further damage to your engine. A failing water pump can lead to engine overheating, which can cause severe engine damage if left unresolved.
If your car is overheating and you suspect a bad water pump or thermostat, check for coolant leaks, listen for unusual noises from the water pump, and test the thermostat for proper opening and closing.
Common Signs of Thermostat Failure
The thermostat is a crucial component in your vehicle’s cooling system, responsible for regulating the flow of coolant to maintain optimal operating temperatures. When the thermostat fails, it can lead to engine performance issues and potential overheating. Here are some common signs of thermostat failure to look out for:
- Engine Overheating: One of the most noticeable signs of a failing thermostat is an engine that consistently overheats. If the thermostat gets stuck in the closed position, it restricts the flow of coolant, causing the engine to overheat rapidly.
- Low Engine Temperature: Conversely, if the thermostat gets stuck in the open position, it allows too much coolant to flow, resulting in an engine that runs colder than normal. This can lead to poor fuel efficiency and decreased engine performance.
- Temperature Fluctuations: A malfunctioning thermostat can cause erratic temperature fluctuations in the engine. You may notice the temperature gauge rapidly going from hot to cold or vice versa, indicating a problem with the thermostat’s operation.
- Coolant Leaks: A failed thermostat can result in coolant leaks, typically noticeable around the housing or gasket. If you see coolant puddles under your vehicle or observe a significant drop in coolant levels, it may indicate thermostat failure.
- Poor Heater Performance: If your vehicle’s heater takes longer than usual to provide warm air or does not get warm at all, it could be a sign of a malfunctioning thermostat. The thermostat regulates the flow of coolant to the heater core, affecting the heating functionality.
- Check Engine Light: In some cases, a failing thermostat can trigger the check engine light on your dashboard. If the onboard diagnostic system detects an issue with the thermostat or the coolant temperature, it will illuminate the check engine light.
If you experience any of these signs, it is important to address the issue promptly. Continued driving with a faulty thermostat can lead to engine damage due to overheating or inefficient cooling. It is advisable to have a qualified mechanic inspect and replace the thermostat if necessary to restore proper cooling system functionality.
Read more: How To Tell If A Water Pump Is Pumping
How to Determine if the Water Pump is Faulty
When experiencing cooling system issues, it’s important to determine if the water pump is the culprit. Here are some steps to help you determine if the water pump is faulty:
- Check for Coolant Leaks: Inspect the area around the water pump for any signs of coolant leaks. Look for puddles under your vehicle or stains around the water pump housing. Leaking coolant can indicate a failed water pump.
- Listen for Unusual Noises: Pay attention to any unusual noises coming from the water pump area. A failing water pump can produce grinding, whining, or squeaking sounds. These noises may become more pronounced as you accelerate or rev the engine.
- Check the Temperature Gauge: Monitor the temperature gauge on your dashboard during normal driving conditions. If the gauge indicates consistently high coolant temperatures, even after the engine has warmed up, it could be a sign of a failing water pump.
- Inspect the Water Pump Pulley: Visually inspect the water pump pulley for any wobbling or play. Excessive movement or play in the pulley can indicate a failing water pump. The pulley should rotate smoothly and without looseness.
- Observe Coolant Flow: With the engine running and at operating temperature, check the flow of coolant through the radiator or radiator hoses. If there is no flow or slow circulation, it could be a sign of a stuck closed water pump not circulating the coolant properly.
- Perform a Coolant Pressure Test: A coolant pressure test can help identify any leaks or issues within the cooling system, including the water pump. By pressurizing the system, you can identify any abnormalities or leaks that may be associated with a faulty water pump.
If you notice any of these signs or suspect a problem with your water pump, it is advisable to have it inspected by a qualified mechanic. They can perform more in-depth tests and provide a professional diagnosis. Remember, a faulty water pump should be addressed promptly to prevent engine overheating and potential damage.
How to Determine if the Thermostat is Faulty
If you suspect that your vehicle’s thermostat is not functioning properly, there are several steps you can take to determine if it is indeed faulty. Here’s how to determine if the thermostat is at fault:
- Monitor Engine Temperature: Pay attention to the temperature gauge on your dashboard while driving. If the engine temperature stays too low or too high consistently, it could be an indication of a faulty thermostat.
- Check for Rapid Temperature Fluctuations: Observe if the temperature gauge fluctuates rapidly, going from hot to cold and back again. Inconsistent temperature readings can signify a malfunctioning thermostat.
- Inspect the Thermostat Housing: Visually inspect the thermostat housing for any signs of coolant leaks, corrosion, or damage. Coolant stains or visible coolant around the housing can indicate a faulty thermostat or a leaking gasket.
- Perform a Temperature Test: With the engine fully warmed up, carefully touch the upper radiator hose. If the hose is cool or only warm to the touch, it suggests that the thermostat may be stuck in the closed position and not allowing coolant flow.
- Use a Diagnostic Scan Tool: Use a diagnostic scan tool to check for any trouble codes related to the thermostat. The scan tool can provide specific information about the thermostat’s performance and any potential issues detected by the vehicle’s onboard computer.
- Inspect Coolant Flow: Observe the flow of coolant through the radiator or radiator hoses with the engine running at operating temperature. If there is no flow or very little movement, it could indicate a thermostat that is stuck closed.
- Perform a Thermostat Function Test: Remove the thermostat from the engine and place it in a pot of boiling water. Observe if the thermostat opens fully in the boiling water. If it remains closed or partially open, it indicates a faulty thermostat that needs to be replaced.
If you encounter any of these signs or suspect a problem with your thermostat, it is recommended to have it inspected by a qualified mechanic. They can perform more comprehensive tests and accurately diagnose the issue. Remember, a faulty thermostat can lead to engine overheating or poor performance, so it should be addressed promptly to maintain the proper functioning of your vehicle’s cooling system.
Steps to Replace a Faulty Water Pump
If you determine that your vehicle’s water pump is faulty and needs replacement, here are the general steps to follow:
- Prepare the Vehicle: Park your vehicle in a well-ventilated and safe location. Ensure that the engine is cool before beginning any work. Gather the necessary tools and materials for the replacement process.
- Drain the Coolant: Place a drain pan underneath the radiator drain plug. Open the plug and allow the coolant to drain completely. Dispose of the old coolant properly according to local regulations.
- Remove Serpentine Belt: Loosen the belt tensioner and remove the serpentine belt from the water pump pulley. Take note of the belt routing for proper reinstallation later on.
- Remove Components: Depending on your vehicle’s make and model, you may need to remove other components obstructing access to the water pump. This could include any attached hoses, brackets, or wiring harnesses.
- Disconnect Hoses: Disconnect the hoses attached to the water pump. These hoses are typically secured by clamps. Use pliers or a screwdriver to loosen and remove the clamps, then carefully detach the hoses from the water pump.
- Remove Water Pump: Inspect the water pump mounting bolts and remove them using a wrench or socket set. Gently pry the water pump away from the engine block. Be careful not to damage the mating surfaces.
- Clean surfaces: Thoroughly clean the mounting surface on the engine block to remove any remaining gasket material or debris. This will ensure a good seal when installing the new water pump.
- Install the New Water Pump: Apply a small amount of silicone gasket sealant to the mating surface of the new water pump. Position the new water pump in place and secure it with the mounting bolts. Tighten the bolts to the manufacturer’s specifications.
- Reconnect Hoses and Components: Reconnect the hoses and components that were removed earlier. Ensure all clamps are securely tightened, and double-check that all connections are properly made.
- Reinstall Serpentine Belt: Route the serpentine belt back onto the water pump pulley and other pulleys according to the belt routing diagram. Use the belt tensioner to apply tension to the belt.
- Refill the Coolant: Refill the cooling system with a compatible coolant mixture. Refer to your vehicle’s manual for the correct coolant type and proper filling procedure. Start the engine and run it for a few minutes, checking for any coolant leaks.
- Test and Verify: Once everything is reassembled and the coolant has been filled, run the engine and check for proper operation. Observe the temperature gauge to ensure it stays within the appropriate range.
Please note that these steps provide a general guideline. The specific process may vary depending on your vehicle’s make, model, and engine configuration. It is always recommended to consult the vehicle’s service manual or seek professional assistance if you are unsure or uncomfortable with performing the replacement yourself.
Steps to Replace a Faulty Thermostat
If you have determined that your vehicle’s thermostat is faulty and needs replacement, here are the general steps to follow:
- Prepare the Vehicle: Park your vehicle in a safe and well-ventilated area. Allow the engine to cool before starting any work. Gather the necessary tools and materials for the replacement process.
- Drain the Coolant: Place a drain pan under the radiator drain plug to catch the coolant. Open the drain plug and allow the coolant to fully drain out. Properly dispose of the old coolant according to local regulations.
- Locate the Thermostat Housing: Locate the thermostat housing, which is typically connected to the engine block and associated with the upper radiator hose. It may be secured with bolts or clamps.
- Remove Components Obstructing Access: Depending on your vehicle’s make and model, you may need to remove certain components to access the thermostat housing. This could include air intake ducts, engine covers, or coolant hoses.
- Disconnect Hoses: Use pliers or a screwdriver to loosen the clamps securing the hoses to the thermostat housing. Carefully remove the hoses from the housing, taking note of their orientation for proper reinstallation later.
- Remove Thermostat Housing: Loosen and remove the bolts or clamps securing the thermostat housing to the engine. Gently pry the housing away from the engine block, exposing the old thermostat.
- Remove the Old Thermostat: Take note of the orientation and position of the old thermostat. Carefully remove it from the housing, ensuring not to damage the housing or mating surfaces.
- Clean Surfaces: Thoroughly clean the mating surfaces of the thermostat housing and engine block. Remove any remnants of the old gasket or sealant to ensure a proper seal with the new thermostat.
- Install the New Thermostat: Place the new thermostat into the housing, aligning it correctly with the markings or notches. Apply a thin layer of gasket sealant to both sides of the new gasket. Position the gasket and thermostat housing back onto the engine block.
- Reconnect Hoses and Components: Reattach the hoses to the thermostat housing, ensuring they are properly aligned and secured with their respective clamps. Reinstall any components that were removed to access the thermostat housing.
- Refill the Coolant: Refill the cooling system with the appropriate coolant mixture as specified by your vehicle’s manufacturer. Start the engine and allow it to run for a few minutes, monitoring for any leaks or abnormal temperature fluctuations.
- Test and Verify: Once everything is reassembled and the coolant is filled, test the vehicle to verify the thermostat replacement. Observe the temperature gauge to ensure the engine maintains a stable temperature range.
It’s important to note that these steps provide a general guideline. The specific process may vary depending on your vehicle’s make, model, and engine configuration. It’s always recommended to consult your vehicle’s service manual or seek professional assistance if you are unsure or uncomfortable with performing the replacement yourself.
Read more: How To Tell If Your Thermostat Is Stuck Open
Preventive Measures for Water Pump and Thermostat Maintenance
Taking preventive measures for water pump and thermostat maintenance can help prolong their lifespan and ensure the proper functioning of your vehicle’s cooling system. Here are some important preventive measures to consider:
- Regular Coolant Flushes: Follow the manufacturer’s recommendations for coolant flush intervals. Flushing the coolant helps remove debris, contaminants, and air pockets that can put strain on the water pump and thermostat.
- Use High-Quality Coolant: Always use the recommended type of coolant specified by your vehicle’s manufacturer. Using high-quality coolant can help prevent corrosion, rust, and scaling, which can impact the water pump and thermostat’s performance.
- Inspect and Replace the Thermostat Gasket: During thermostat replacement or maintenance, inspect the gasket for any signs of wear or damage. Replace the gasket if necessary to ensure a proper seal and prevent leaks.
- Check the Belt Tension: Regularly check the tension of the serpentine belt that drives the water pump. A loose or worn-out belt can lead to underperformance of the water pump, causing cooling system issues.
- Inspect for Coolant Leaks: Routinely inspect the water pump, thermostat housing, and associated hoses for any signs of coolant leaks. Address any leaks promptly to prevent further damage and ensure the cooling system operates efficiently.
- Maintain Proper Operating Temperature: Avoid prolonged periods of engine overheating or extreme cold temperatures, as these can place stress on both the water pump and thermostat. Maintain regular monitoring of the temperature gauge and address any abnormal readings promptly.
- Follow Regular Maintenance Schedule: Adhere to the recommended maintenance schedule outlined in your vehicle’s owner’s manual. This includes routine inspections, fluid flushes, and component replacements to keep the cooling system in optimal condition.
- Professional Inspections: Periodically have your vehicle’s cooling system inspected by a qualified mechanic. They can identify any potential issues with the water pump, thermostat, or other components and recommend necessary repairs or replacements.
- Replace Components as Needed: If the water pump or thermostat shows signs of wear, deterioration, or impending failure, it is advisable to replace these components proactively rather than waiting for a complete breakdown.
By implementing these preventive measures, you can help maintain the longevity and performance of your water pump and thermostat. Proper maintenance and regular inspections can help identify and address potential issues before they escalate into more significant problems, ensuring the reliability of your vehicle’s cooling system.
Conclusion
Proper maintenance and timely identification of issues related to the water pump and thermostat are crucial for the smooth functioning of your vehicle’s cooling system. Understanding the symptoms, causes, and diagnostic tests for a bad water pump or thermostat can help you take proactive measures and avoid costly repairs.
Common signs of a bad water pump include engine overheating, coolant leaks, unusual noises, and high coolant temperature. On the other hand, symptoms of a bad thermostat may include engine overheating, low engine temperature, erratic temperature fluctuations, coolant leaks, and poor heater performance.
If you suspect a problem with your water pump or thermostat, it is essential to perform diagnostic tests to confirm the issue. These tests can include visual inspection, coolant pressure tests, temperature gauge checks, and listening for abnormal noises.
Replacing a faulty water pump involves draining the coolant, removing the serpentine belt, disconnecting hoses, removing the old pump, cleaning surfaces, installing the new pump, and reassembling the components. Similarly, replacing a faulty thermostat requires draining the coolant, locating the thermostat housing, removing components, disconnecting hoses, removing the old thermostat, installing the new thermostat, and reassembling everything.
To prevent water pump and thermostat failures, it is crucial to follow preventive maintenance measures. These measures include regular coolant flushes, using high-quality coolant, inspecting and replacing gaskets, checking belt tension, inspecting for coolant leaks, maintaining proper operating temperature, and following the recommended maintenance schedule for your vehicle.
By implementing these preventive measures and promptly addressing any issues with the water pump or thermostat, you can ensure the optimal performance and longevity of your vehicle’s cooling system, ultimately enhancing the overall reliability and efficiency of your vehicle.
In conclusion, a well-maintained water pump and thermostat are essential components for a properly functioning cooling system. Regular inspections, proper diagnostics, and timely repairs or replacements will help keep your vehicle’s engine cool, prevent overheating, and reduce the risk of expensive repairs down the road.
Frequently Asked Questions about How To Tell If Your Water Pump Or Thermostat Is Faulty
Was this page helpful?
At Storables.com, we guarantee accurate and reliable information. Our content, validated by Expert Board Contributors, is crafted following stringent Editorial Policies. We're committed to providing you with well-researched, expert-backed insights for all your informational needs.




0 thoughts on “How To Tell If Your Water Pump Or Thermostat Is Faulty”