Articles
How To Test Windshield Washer Pump
Modified: January 6, 2024
Learn how to test your windshield washer pump easily with these informative articles. Improve your understanding and troubleshooting skills for a clear and functional windshield.
(Many of the links in this article redirect to a specific reviewed product. Your purchase of these products through affiliate links helps to generate commission for Storables.com, at no extra cost. Learn more)
Introduction
Welcome to this comprehensive guide on how to test your windshield washer pump. The windshield washer pump is a crucial component in your vehicle’s washer system, responsible for spraying washer fluid onto your windshield to ensure clear visibility while driving. Over time, the washer pump may experience issues such as a lack of fluid spray or no response at all when activating the washer function.
In this article, we will provide you with step-by-step instructions on how to test your windshield washer pump and troubleshoot any issues you may encounter. By following these guidelines, you can save time and money by identifying and resolving the problem yourself.
Before we proceed, it is important to note that each car model may have slight variations in terms of the washer pump’s location and testing procedure. Therefore, it is always recommended to consult your vehicle’s owner manual for specific instructions tailored to your make and model. With that said, let’s dive into the general information about the windshield washer pump and the necessary safety precautions to take before testing.
Key Takeaways:
- Ensure safety by following recommended precautions before testing your windshield washer pump. Disconnect the power supply, wear protective gear, and work in a well-ventilated area to minimize risks.
- Regularly testing and maintaining your windshield washer pump can help identify and resolve issues, ensuring clear visibility while driving and prolonging the pump’s lifespan.
Read more: How To Drain Windshield Washer Fluid
General Information about Windshield Washer Pump
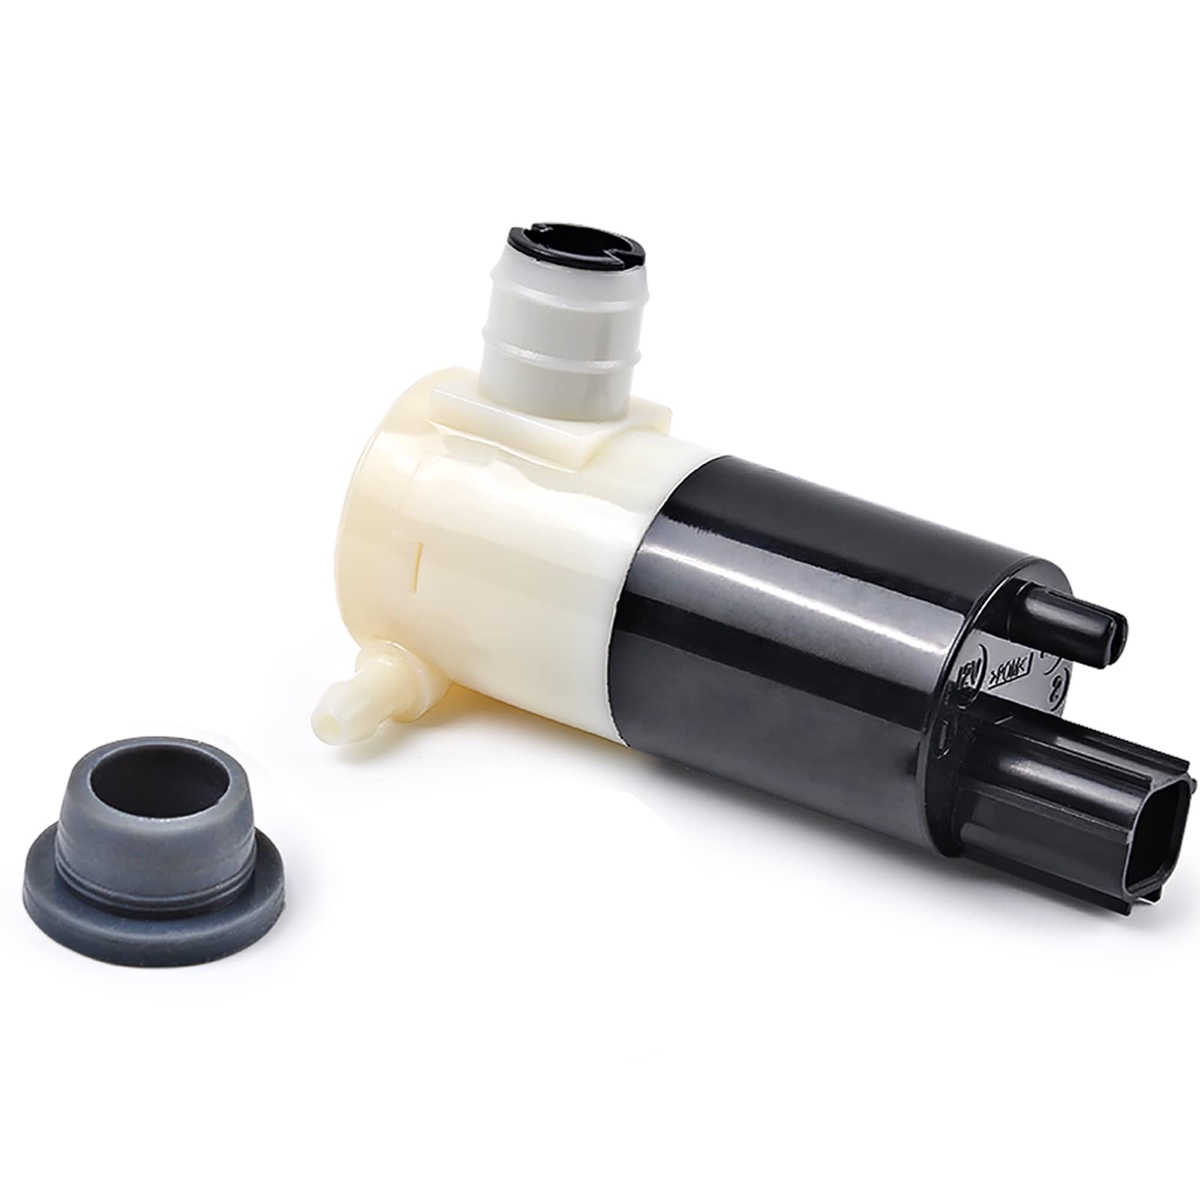
The windshield washer pump is a small electric motor that is responsible for delivering washer fluid from the reservoir to the windshield. It is typically located near the windshield washer fluid reservoir, which is often found under the hood of the car.
When you activate the washer function from inside the vehicle using the control lever or switch, an electrical signal is sent to the washer pump. This signal tells the pump to start pumping fluid through the hoses and onto the windshield through the washer jets, clearing away dirt, grime, and other debris that may hinder your visibility.
Most washer pumps are designed to be self-priming, meaning they can draw fluid from the reservoir without the need for aftermarket priming. They are also designed to withstand extreme temperatures and operate reliably in various weather conditions.
While windshield washer pumps are generally durable, they can experience issues over time due to wear and tear or clogging. These issues can result in a weak or non-existent spray of washer fluid onto the windshield, indicating that it may be time to test the pump and troubleshoot the problem.
Testing the windshield washer pump is a relatively simple process that can be done with basic tools and a little bit of patience. By following the step-by-step instructions provided in this guide, you can determine if the pump is functioning properly or if it requires further attention or replacement.
Now that you have a general understanding of the windshield washer pump’s function and purpose, let’s move on to the safety precautions you should take before attempting to test the pump.
Safety Precautions
Before testing your windshield washer pump, it is essential to prioritize your safety and take the necessary precautions. Working with electrical components and tools can pose risks if not done properly. Here are some safety measures to follow:
- Ensure that your vehicle is turned off and the key is removed from the ignition before starting any work. This will prevent any accidental activation of the washer pump or other electrical components.
- Wear protective gloves and safety glasses to protect your hands and eyes from any potential hazards.
- Work in a well-ventilated area to avoid inhaling any hazardous fumes from the washer fluid or other chemicals.
- Disconnect the negative terminal of the vehicle’s battery to prevent any electrical shocks or short circuits during the testing process.
- Read and follow the safety instructions provided by the manufacturer of the washer fluid or any other chemicals you may be using.
By adhering to these safety precautions, you can minimize the risk of accidents or injuries while testing your windshield washer pump. Your safety should always be your top priority.
Now that you are aware of the safety measures to take, let’s move on to the tools and materials you will need for the testing process.
Tools and Materials Needed
When testing your windshield washer pump, it is important to have the right tools and materials on hand to ensure a smooth and efficient testing process. Here is a list of items you will need:
- Multimeter: This device will be used to measure the electrical current and voltage of the washer pump.
- Socket set or wrench: Depending on the location of the washer pump, you may need a socket set or wrench to remove any necessary components or access panels.
- Small container: You will need a small container to catch washer fluid during the testing process.
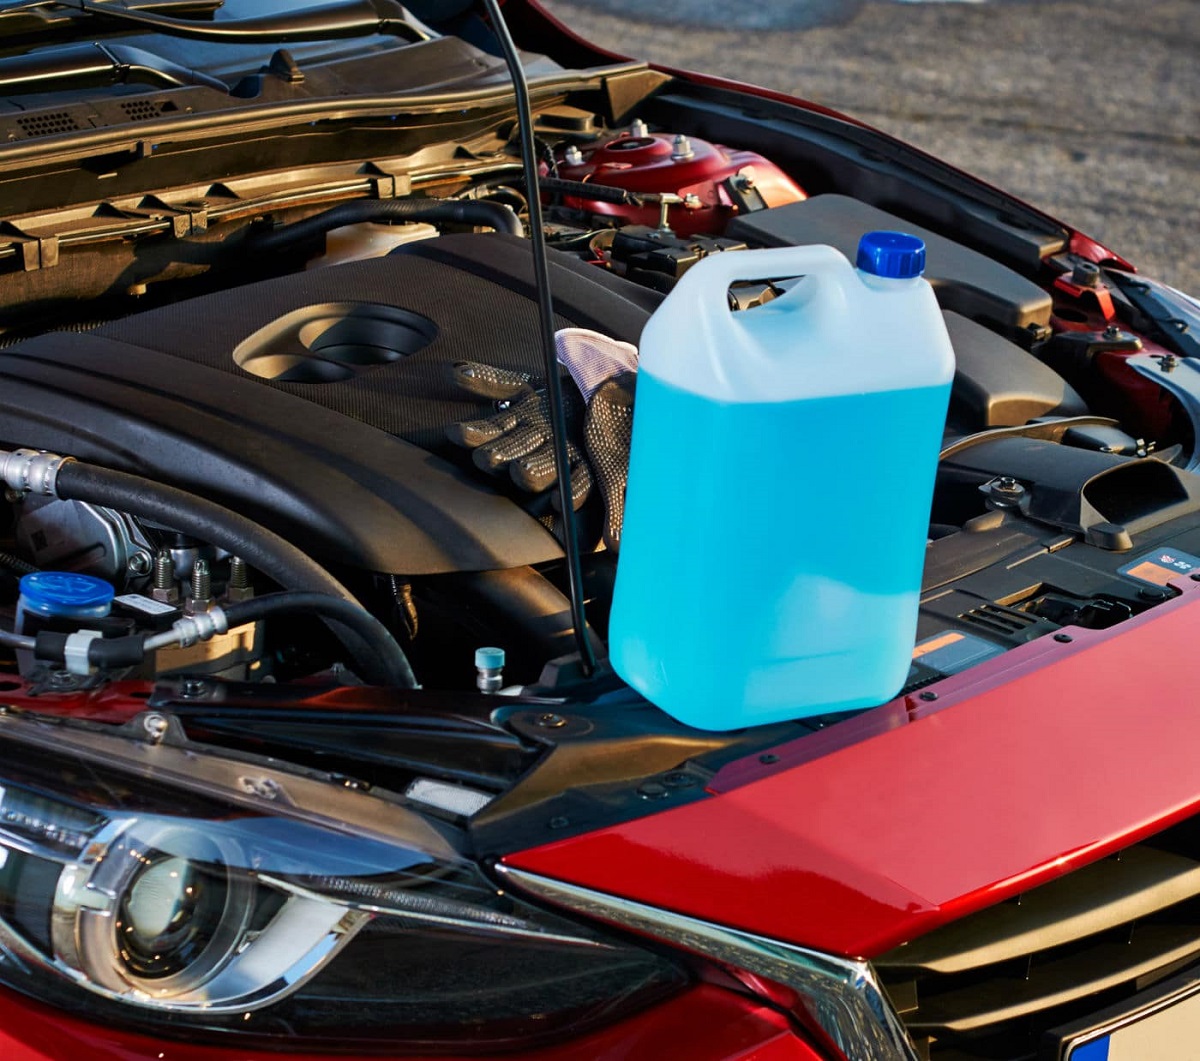
- Replacement washer fluid: In case you need to refill the washer fluid reservoir after testing.
- Clean cloth or paper towels: These will be handy for cleaning any spills or messes.
- Safety gloves and glasses: To protect your hands and eyes during the testing process.
- Owner’s manual: Consult your vehicle’s owner’s manual for specific instructions and diagrams related to the location of the washer pump.
Make sure to gather all the necessary tools and materials before you begin testing your windshield washer pump. This will help you avoid any unnecessary interruptions or delays during the process.
Now that you’re equipped with the right tools and materials, let’s move on to the step-by-step instructions for testing your windshield washer pump.
Step-by-Step Instructions
Testing your windshield washer pump involves several steps to help identify any issues or malfunctions. Follow these step-by-step instructions to test your washer pump:
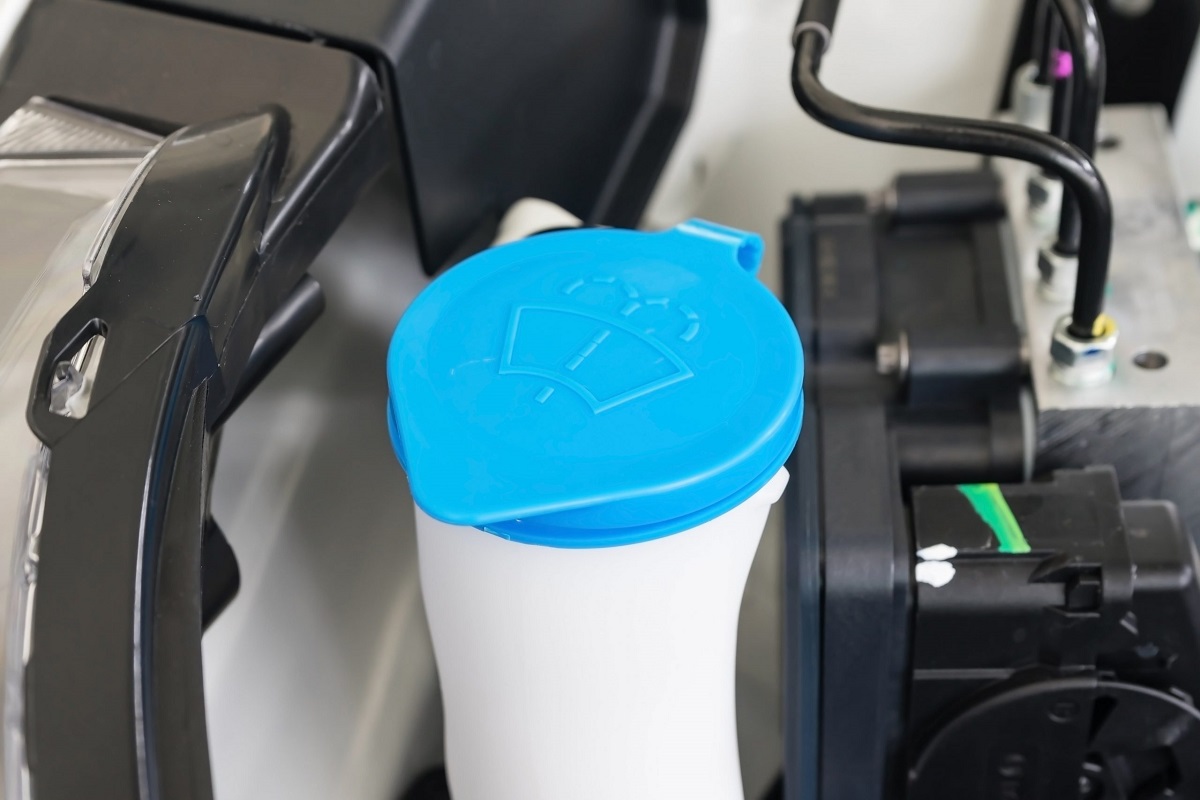
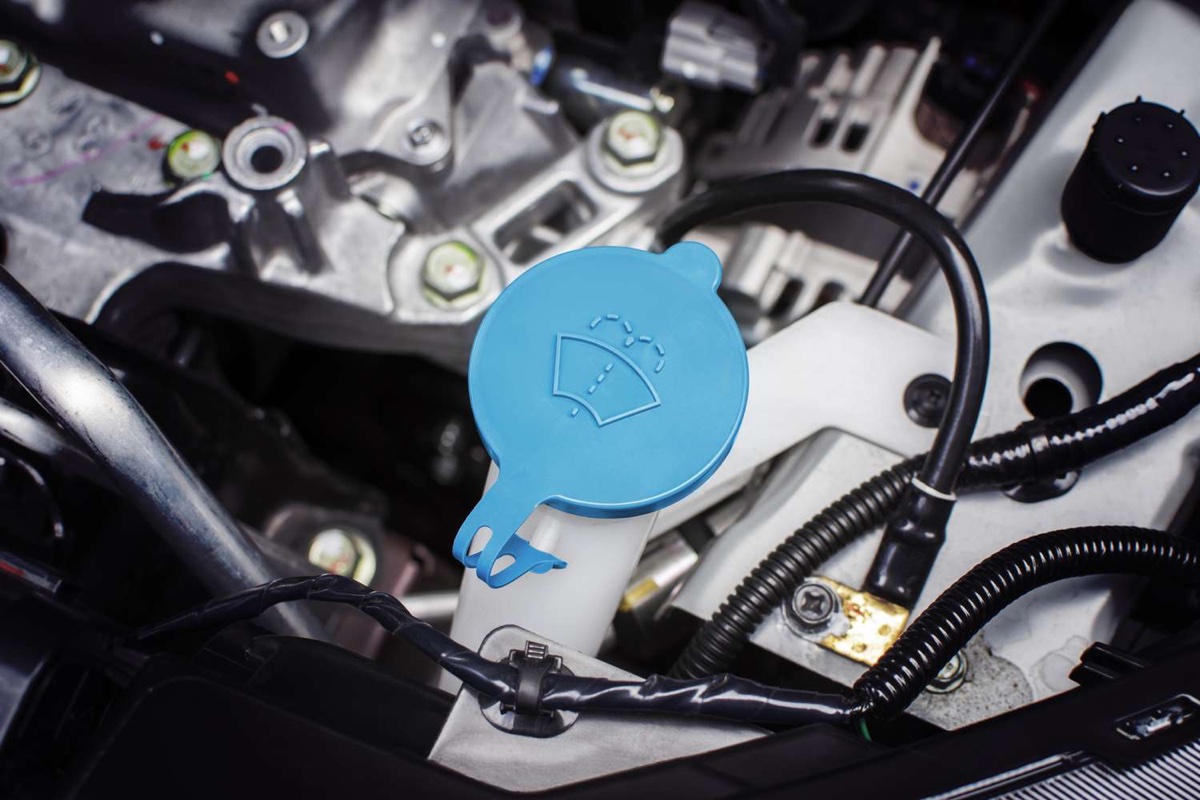
- Locate the windshield washer fluid reservoir: Open the hood of your vehicle and locate the washer fluid reservoir. It is usually a translucent container with a cap marked with a windshield wiper symbol.
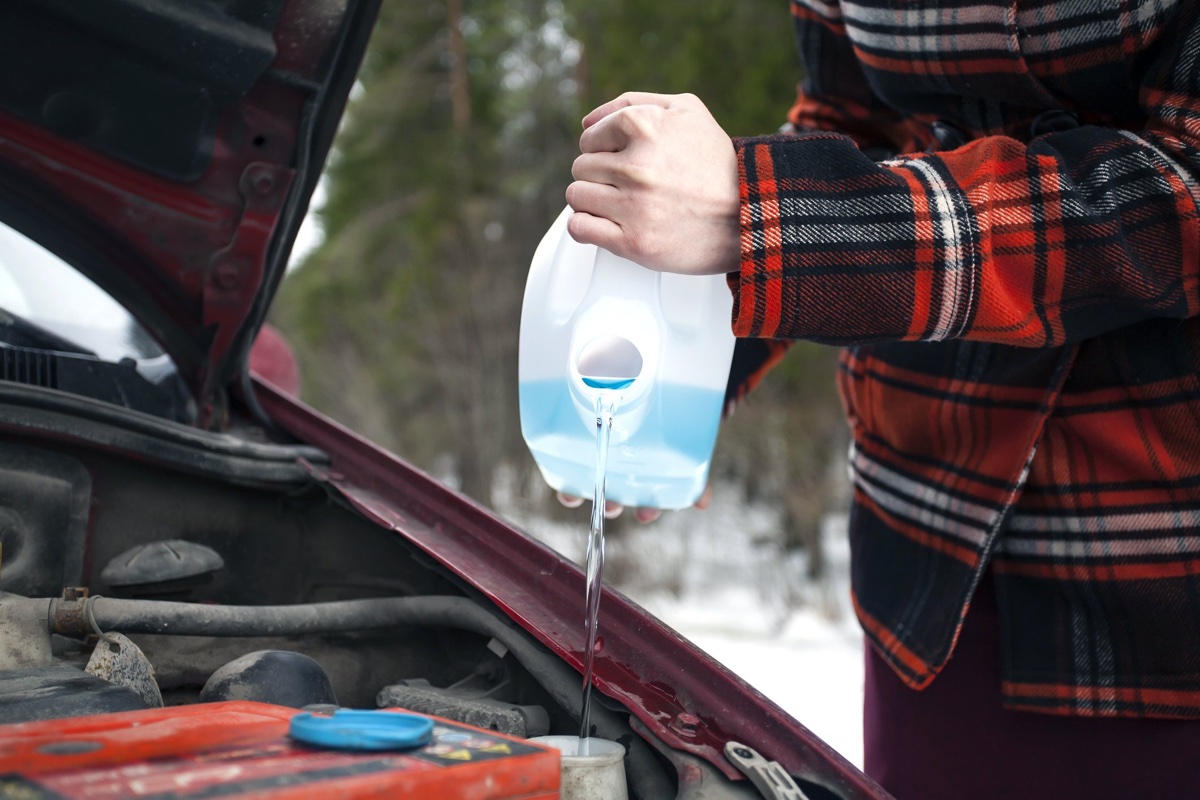
- Inspect the fluid level: Check the fluid level in the reservoir and ensure it is adequate. If it is low, fill it up with the appropriate washer fluid.
- Disconnect the power supply: Locate the electrical connector or wiring harness connected to the washer pump and disconnect it. This will prevent any accidental activation while testing.
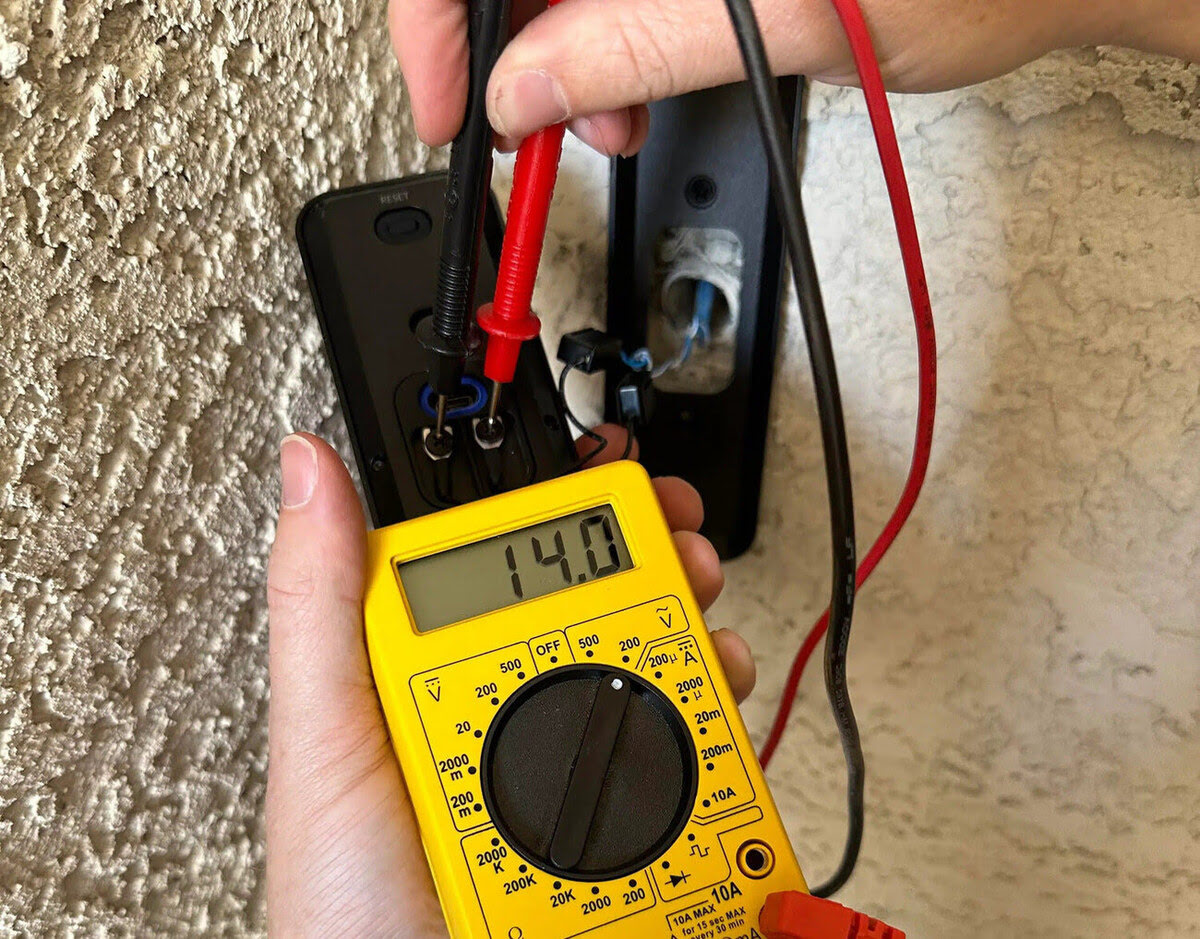
- Set up the multimeter: Turn on the multimeter and set it to the voltage or continuity testing mode.
- Test the power supply: Connect the multimeter probes to the wiring harness or terminals of the power supply. If the multimeter displays a voltage reading when the washer function is activated, the power supply is functioning correctly. If there is no voltage reading, check the fuse and wiring connections for any issues.
- Test the pump motor: Reconnect the power supply and activate the washer function while listening for any noise or vibration from the washer pump. If you hear the pump motor running, it indicates that the motor is operational. If there is no noise or vibration, it may be a sign of a faulty motor.
- Test the pump pressure: Disconnect the hose leading from the pump to the windshield and place it in a small container. Activate the washer function and check if the pump sprays fluid into the container with sufficient pressure. Weak or no spray may indicate a clogged or malfunctioning pump.
- Troubleshooting and further steps: If you encounter any issues or if the tests indicate a problem, consult your vehicle’s owner’s manual or seek professional assistance to diagnose and address the specific issue with your windshield washer pump.
Remember to consult your vehicle’s owner’s manual for any additional instructions or variations specific to your make and model. By following these step-by-step instructions, you can effectively test your windshield washer pump and identify any potential problems.
Now that you have completed the testing process, let’s move on to some troubleshooting tips to help you resolve common issues with your windshield washer pump.
When testing a windshield washer pump, start by checking the fuse and relay. If those are working, use a multimeter to test for power at the pump when the washer switch is activated. If there’s power but no pump action, the pump may need to be replaced.
Read more: How To Test Water Pump
Testing the Power Supply
Testing the power supply of your windshield washer pump is an essential step to ensure that it is receiving the necessary electrical current. Here are the steps to test the power supply:
- Locate the electrical connector: Locate the electrical connector or wiring harness that connects to the windshield washer pump. It is usually located near the pump or along the path of the wiring.
- Disconnect the electrical connector: Carefully disconnect the electrical connector from the pump. This will isolate the power supply from the pump, allowing you to test it separately.
- Set up the multimeter: Turn on your multimeter and set it to the voltage testing mode. Ensure that the multimeter probes are connected properly for accurate readings.
- Test for voltage: Place the multimeter probes on the exposed terminals of the disconnected electrical connector. Make sure the probes are in contact with the metal terminals and not the plastic connectors.
- Activate the washer function: Have someone activate the washer function from inside the vehicle while you monitor the multimeter readings. If the multimeter displays a voltage reading, the power supply is functioning correctly.
- Interpret the readings: The voltage reading will vary depending on the specific vehicle and its electrical system. Consult your vehicle’s owner’s manual for the recommended voltage range, which is typically between 12 to 14 volts.
If the multimeter does not display any voltage reading, the power supply is not functioning properly. This could be due to a blown fuse, loose wiring connections, or other electrical issues. Check the fuse panel and wiring connections for any signs of damage or loose connections. If necessary, consult a professional to diagnose and resolve the power supply issue.
Once you have confirmed that the power supply is working correctly, you can proceed to test the pump motor to ensure its proper functionality. Follow the next section to learn how to test the pump motor.
Testing the Pump Motor
The pump motor is the driving force behind the windshield washer pump, so it is crucial to ensure it is functioning properly. Here are the steps to test the pump motor:
- Reconnect the electrical connector: After testing the power supply, reconnect the electrical connector to the pump. Make sure it is securely attached.
- Prepare for testing: Set up in a quiet environment where you can hear any noise or vibration from the pump motor.
- Activate the washer function: Have someone inside the vehicle activate the washer function while you listen for any noise or vibration from the pump motor.
- Listen for motor operation: If you hear the pump motor running and feel vibrations, it indicates that the motor is operational.
- Noise or vibration issues: If you don’t hear any noise or vibration from the motor, it may be an indication of a faulty motor. In such cases, it is recommended to seek professional assistance for further diagnosis and repair.
If the pump motor is functioning properly, you can proceed to test the pump pressure to ensure that the fluid is being sprayed onto the windshield with sufficient force. Move on to the next section to learn how to test the pump pressure.
Note: Some vehicles may have a combined pump motor and pump assembly, which means if the motor is faulty, the entire assembly needs to be replaced. Refer to your vehicle’s owner’s manual or consult with a professional for specific instructions related to your vehicle’s pump motor.
Testing the Pump Pressure
Testing the pump pressure will help determine if the windshield washer pump is spraying fluid onto the windshield with sufficient force. Follow these steps to test the pump pressure:
- Position a small container: Place a small container or bottle under the disconnected hose leading from the pump to the windshield.
- Activate the washer function: Have someone inside the vehicle activate the washer function while you observe the fluid flow.
- Check the spray pattern: Observe the fluid flow as it sprays into the container. The spray should be strong and steady, indicating adequate pressure.
- Inspect for weak or no flow: If there is a weak spray or no flow at all, it may indicate a clogged pump or a malfunctioning pressure mechanism. In such cases, further troubleshooting or professional assistance may be required.
If the pump pressure is strong and the fluid is spraying onto the windshield with sufficient force, it indicates that the pump is working correctly. You can proceed to reattach the hose and refill the washer fluid reservoir.
However, if you encounter any issues with the pump pressure during the testing process, refer to the troubleshooting tips in the next section for potential solutions.
Troubleshooting Tips
If you encounter any issues while testing your windshield washer pump or if the tests indicate a problem, try these troubleshooting tips to identify and resolve common issues:
- Check the washer fluid level: Ensure that the washer fluid reservoir is adequately filled with the appropriate washer fluid. A low fluid level can result in weak or no spray.
- Inspect for clogs: Examine the hoses, nozzles, and pump for any signs of clogging. Use a small pin or needle to remove any obstructions that may be blocking the flow of washer fluid.
- Check for leaks: Inspect the hose connections and the pump housing for any signs of leaks. A leaking pump can result in insufficient pressure and reduced performance.
- Test the washer switch or control lever: If the tests indicate a functional pump, but there is no response when activating the washer function, the issue may lie with the switch or control lever. Consult your vehicle’s owner’s manual for instructions on testing or replacing these components.
- Inspect the wiring connections: Check the wiring connections between the pump and the electrical power source. Loose or corroded connections can disrupt the power supply to the pump.
- Verify fuse integrity: Check the fuse related to the washer pump in the fuse box. A blown fuse can prevent the pump from receiving power. Replace the fuse if necessary.
- Seek professional assistance: If you have gone through the troubleshooting tips and are still unable to resolve the issue, it may be best to consult a professional mechanic or technician who can diagnose and repair the problem accurately.
These troubleshooting tips cover common issues that may arise with windshield washer pumps. However, it is important to note that specific problems may require different solutions. Consult your vehicle’s owner’s manual or seek professional help if you are unsure about troubleshooting or repairing your windshield washer pump.
With these troubleshooting tips, you can confidently address any issues with your windshield washer pump and ensure optimal performance.
Read more: How To Unclog Windshield Washer Nozzle
Conclusion
Testing your windshield washer pump is a straightforward process that can help identify any issues and ensure clear visibility while driving. By following the step-by-step instructions provided in this guide, you can effectively test your washer pump and troubleshoot common problems that may arise.
Remember to prioritize safety by following the recommended safety precautions before testing your pump. Disconnect the power supply, wear protective gloves and glasses, and work in a well-ventilated area to avoid any accidents or injuries.
Throughout the testing process, ensure that the power supply is functioning correctly, the pump motor is operational, and the pump pressure is sufficient to spray the fluid onto the windshield. If any issues arise during the testing, refer to the troubleshooting tips to help identify and resolve the problem.
By maintaining a properly functioning windshield washer pump, you can ensure optimum visibility while driving in various weather conditions. Regularly checking and testing your washer pump can also help prolong its lifespan and save you from costly repairs in the long run.
If you encounter complex issues or are unsure about performing the testing yourself, it is always advisable to consult a professional mechanic or technician for assistance. They have the expertise and experience to solve any problems or provide necessary repairs.
We hope this guide has helped you understand how to test your windshield washer pump effectively. By taking the time to test and maintain this essential component, you can drive with confidence and a clear view of the road ahead.
Frequently Asked Questions about How To Test Windshield Washer Pump
Was this page helpful?
At Storables.com, we guarantee accurate and reliable information. Our content, validated by Expert Board Contributors, is crafted following stringent Editorial Policies. We're committed to providing you with well-researched, expert-backed insights for all your informational needs.


0 thoughts on “How To Test Windshield Washer Pump”