Home>Furniture & Design>Bathroom Fixtures>How To Update A Shower Tile

Bathroom Fixtures
How To Update A Shower Tile
Modified: August 27, 2024
Learn how to update your shower tile with our expert tips and advice. Find the best bathroom fixtures and design ideas for a stunning bathroom renovation.
(Many of the links in this article redirect to a specific reviewed product. Your purchase of these products through affiliate links helps to generate commission for Storables.com, at no extra cost. Learn more)
Introduction
Welcome to the ultimate guide on updating shower tile! Your shower is a sanctuary, a place to rejuvenate and refresh. Over time, the tiles in your shower may start to show signs of wear and tear, diminishing the overall aesthetic appeal of your bathroom. Fear not, for updating your shower tile is a fantastic way to revitalize your bathroom space and infuse it with a fresh, modern look.
In this comprehensive guide, we will walk you through each step of the process, from assessing the condition of your current shower tile to choosing new tile, removing the old tile, installing the new tile, grouting and sealing, and adding those final touches that will bring your updated shower to life.
Whether you're a seasoned DIY enthusiast or a novice looking to embark on your first home improvement project, this guide is designed to provide you with the knowledge and confidence to tackle the task at hand. By the end of this journey, you'll be equipped with the skills and expertise to transform your shower into a stunning oasis that reflects your personal style and elevates the ambiance of your entire bathroom.
So, roll up your sleeves, gather your tools, and let's dive into the exciting world of shower tile updates! Whether you're aiming for a sleek, contemporary look or a timeless, classic feel, this guide will empower you to bring your vision to life and create a shower space that exudes elegance and charm. Let's get started!
Key Takeaways:
- Revitalize your shower space by updating the tile with a fresh, captivating aesthetic. From assessing the condition to meticulous installation, transform your shower into a visually stunning oasis that reflects your unique style.
- Infuse your bathroom with enduring elegance and functionality by choosing, installing, and grouting new shower tile. Embrace the satisfaction of a job well done and revel in the beauty of your transformed shower space.
Read more: How To Update Fireplace Tile
Assessing the Condition of the Shower Tile
Before diving into the process of updating your shower tile, it’s crucial to assess the current condition of the tiles. This step will help you determine the extent of the update needed and ensure that your new tile installation is a resounding success.
Start by carefully examining each tile for any signs of damage, such as cracks, chips, or discoloration. Pay close attention to the grout lines as well, as they are prone to mold, mildew, and staining over time. Additionally, assess the integrity of the substrate behind the tiles, which could be drywall, cement board, or another material. Any signs of water damage or deterioration in the substrate should be addressed before proceeding with the update.
Next, evaluate the overall aesthetic appeal of the current tile. Does it align with your desired style and color scheme? Consider whether the existing tile size and layout complement the design vision you have for your updated shower. This is the perfect opportunity to envision the transformation you wish to achieve and identify any specific features or patterns you’d like to incorporate in the new tile design.
Furthermore, assess the functionality of the current tile. Are there any areas where the grout has deteriorated, leading to water infiltration? Are the tiles securely adhered to the substrate, or do they exhibit signs of loosening or detachment? These factors will help you determine the level of preparation required before installing the new tile.
Finally, take note of the existing fixtures and accessories in the shower, such as faucets, showerheads, and shelves. Consider whether these elements complement the current tile and whether any adjustments or replacements are necessary to harmonize with the updated tile design.
By thoroughly assessing the condition of your shower tile, you’ll gain valuable insights that will inform the subsequent steps of the update process. This proactive approach sets the stage for a seamless and successful transformation, ensuring that your updated shower tile not only exudes beauty but also functions impeccably for years to come.
Preparing the Shower Tile for Update
Once you’ve assessed the condition of the existing shower tile, it’s time to prepare the space for the exciting update that lies ahead. Proper preparation is essential for ensuring a smooth and durable installation of the new tile, setting the stage for a stunning transformation that will elevate the ambiance of your entire bathroom.
Begin by clearing the shower area of any personal items, such as shampoo bottles, soap dishes, and loofahs. Removing these items will provide unobstructed access to the tile surfaces and streamline the preparation process. Additionally, protect any surrounding surfaces, such as the shower floor and walls outside the tile area, with drop cloths or plastic sheeting to prevent dust and debris from spreading during the preparation and removal phases.
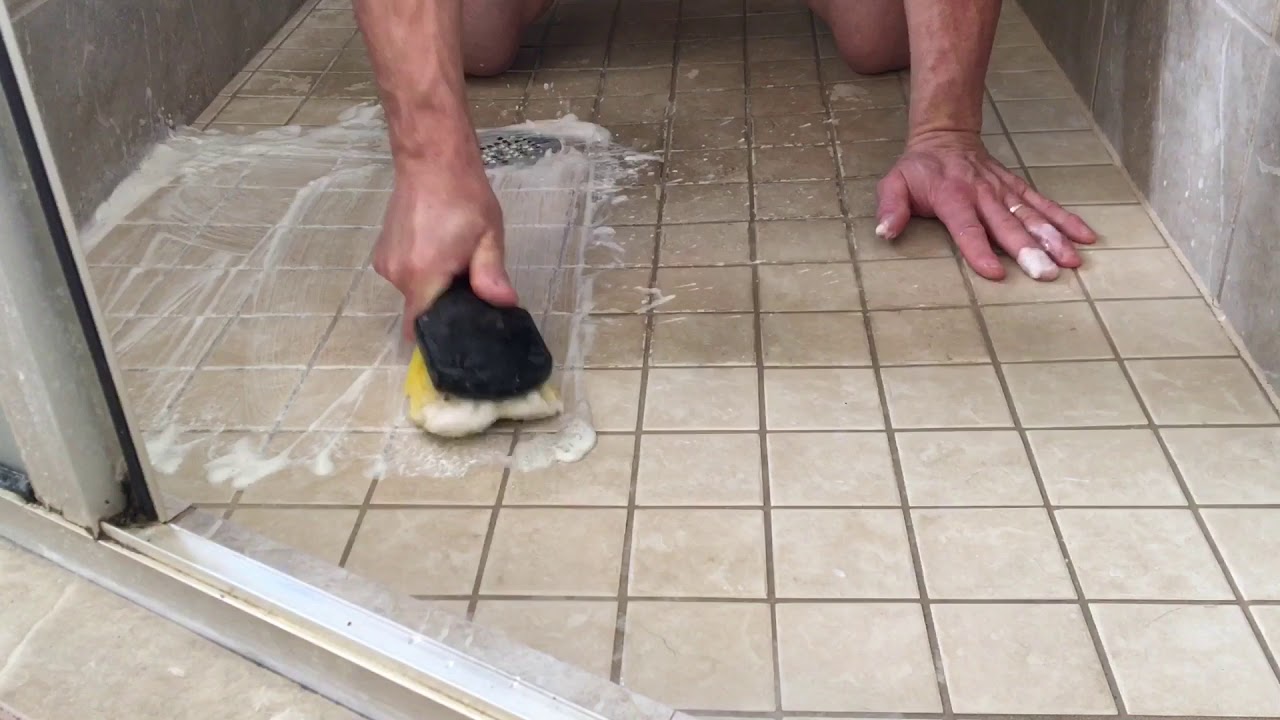
Next, it’s time to address the existing tile and grout. Start by thoroughly cleaning the tile surfaces and grout lines to remove any soap scum, mineral deposits, and mildew. A solution of water and white vinegar or a specialized tile and grout cleaner can be used, along with a scrub brush or sponge. This cleaning step is crucial for promoting strong adhesion of the new tile and ensuring a pristine foundation for the update.
After cleaning, inspect the grout lines for any signs of deterioration or cracking. If the grout is compromised, it may need to be repaired or replaced before proceeding with the new tile installation. Additionally, consider applying a bonding primer to the existing tile and grout to enhance the adhesion of the new tile mortar, especially if the current tile surface is non-porous or glossy.
If the assessment revealed any water damage or deterioration in the substrate behind the tile, it’s essential to address these issues before installing the new tile. This may involve repairing or replacing the substrate material, such as drywall or cement board, to ensure a stable and secure foundation for the updated tile.
By diligently preparing the shower tile for the upcoming update, you’ll create a clean, sound, and receptive canvas for the installation of the new tile. This meticulous approach sets the stage for a successful and visually stunning transformation, ensuring that your updated shower exudes both beauty and longevity.
Choosing New Shower Tile
Embarking on the journey of updating your shower tile presents an exciting opportunity to infuse your bathroom with a fresh, captivating aesthetic. The selection of new shower tile is a pivotal step in this transformative process, allowing you to express your personal style and create a captivating ambiance that resonates with your design vision.
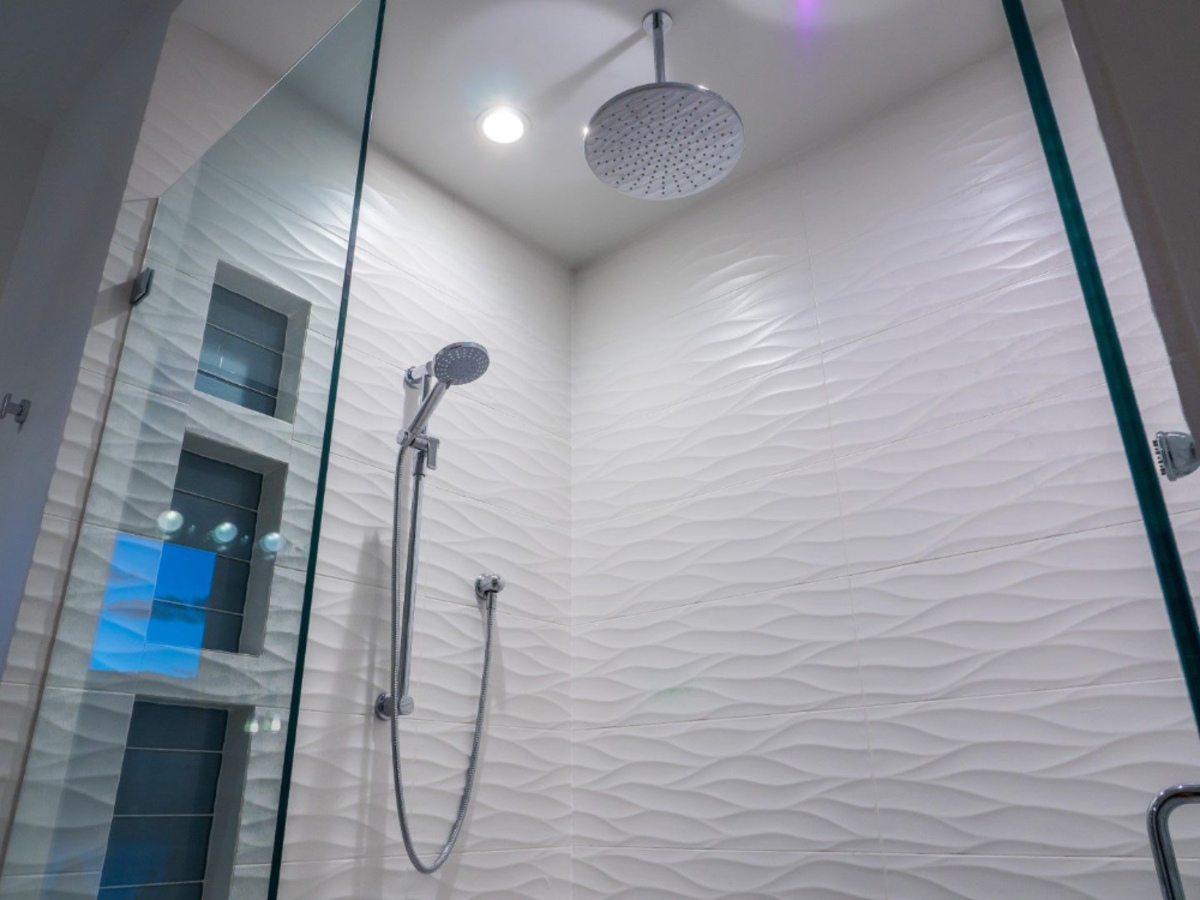
When choosing new shower tile, consider the overall aesthetic you wish to achieve. Are you drawn to the timeless elegance of subway tiles, or do you envision a bold statement with intricate mosaic patterns? The style, color, and texture of the tile will play a significant role in shaping the ambiance of your updated shower, so take the time to explore various options and envision how each choice aligns with your desired look.
Consider the size and layout of the new tile as well. Larger tiles can create a sense of openness and continuity, while smaller tiles offer intricate detail and visual interest. The layout, whether it’s a traditional grid pattern, herringbone, or another configuration, can further enhance the visual impact of the tile and complement the overall design of your bathroom.
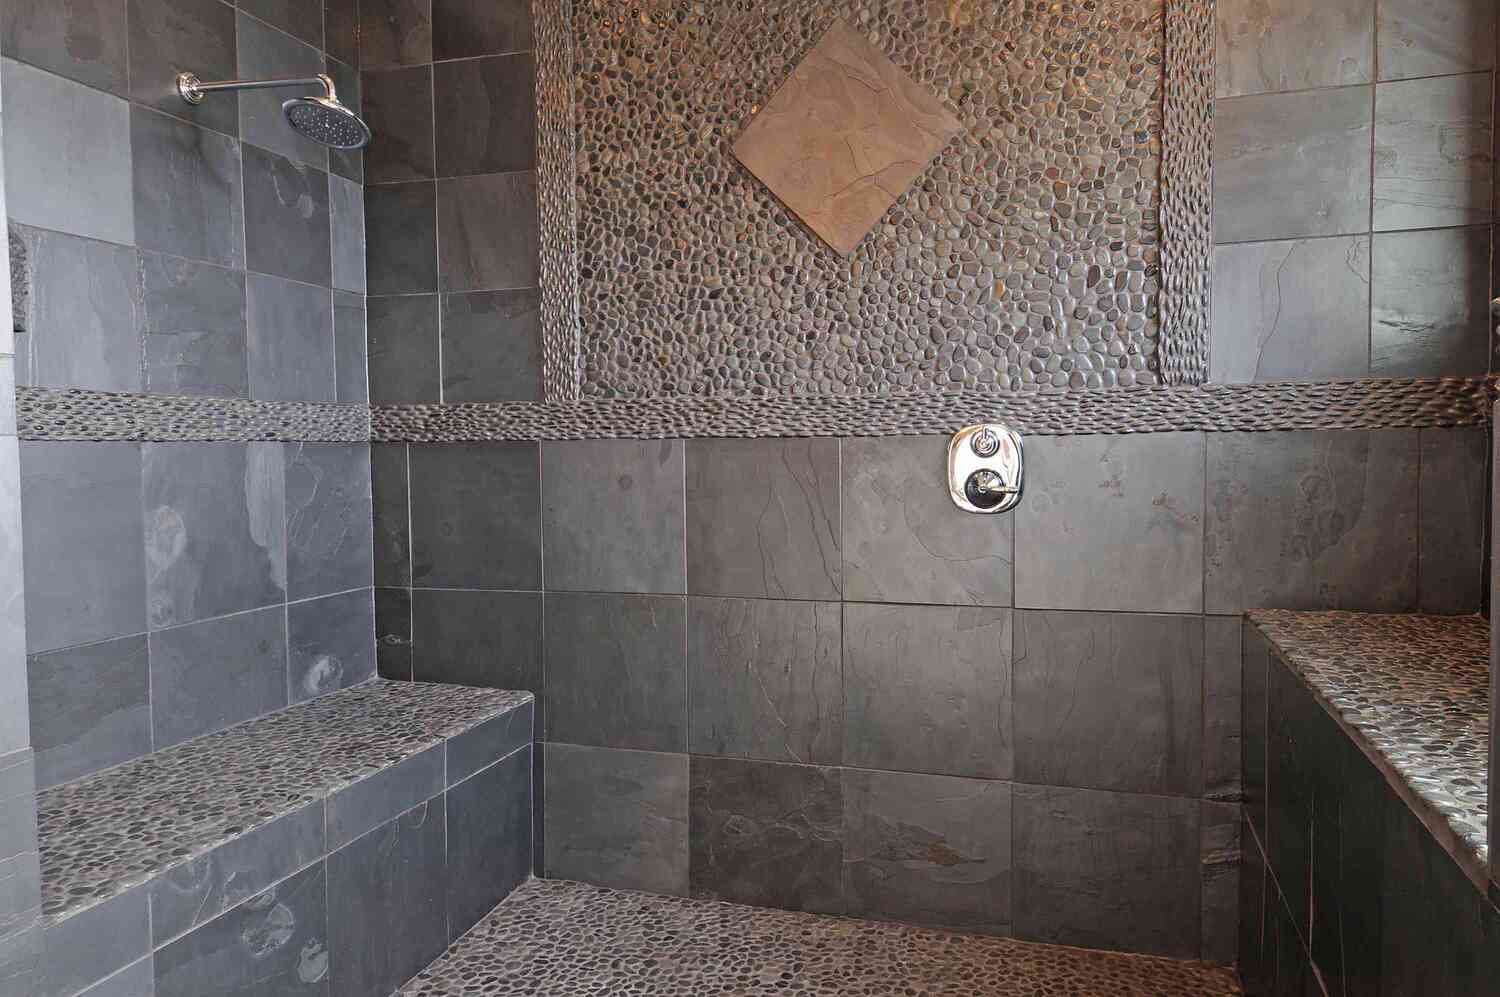
Furthermore, take into account the material of the new shower tile. Ceramic and porcelain tiles are popular choices for their durability and versatility, while natural stone tiles, such as marble or travertine, exude a luxurious and timeless appeal. Each material brings its unique characteristics, so weigh the benefits of each option against your specific preferences and practical considerations.
It’s essential to ensure that the chosen tile is suitable for use in a wet environment, such as a shower. Look for tiles with low water absorption and a high slip resistance rating to promote safety and longevity in your updated shower. Additionally, consider the maintenance requirements of the tile material and choose a option that aligns with your lifestyle and upkeep preferences.
As you explore the myriad possibilities for new shower tile, don’t hesitate to seek inspiration from design resources, such as home improvement magazines, websites, and social media platforms. Visualizing the potential of each tile option within your unique bathroom space will guide you toward a selection that harmonizes with your style and elevates the ambiance of your shower.
By thoughtfully choosing new shower tile, you’ll set the stage for a captivating and personalized update that breathes new life into your shower space. The careful consideration of style, size, layout, and material will culminate in a stunning transformation that reflects your individuality and enhances the allure of your entire bathroom.
Removing Old Shower Tile
As you embark on the journey of updating your shower tile, the process of removing the old tile marks a pivotal phase in the transformation of your bathroom space. While it may seem daunting, with the right approach and tools, you can effectively and safely remove the old tile, setting the stage for the installation of your captivating new shower tile.
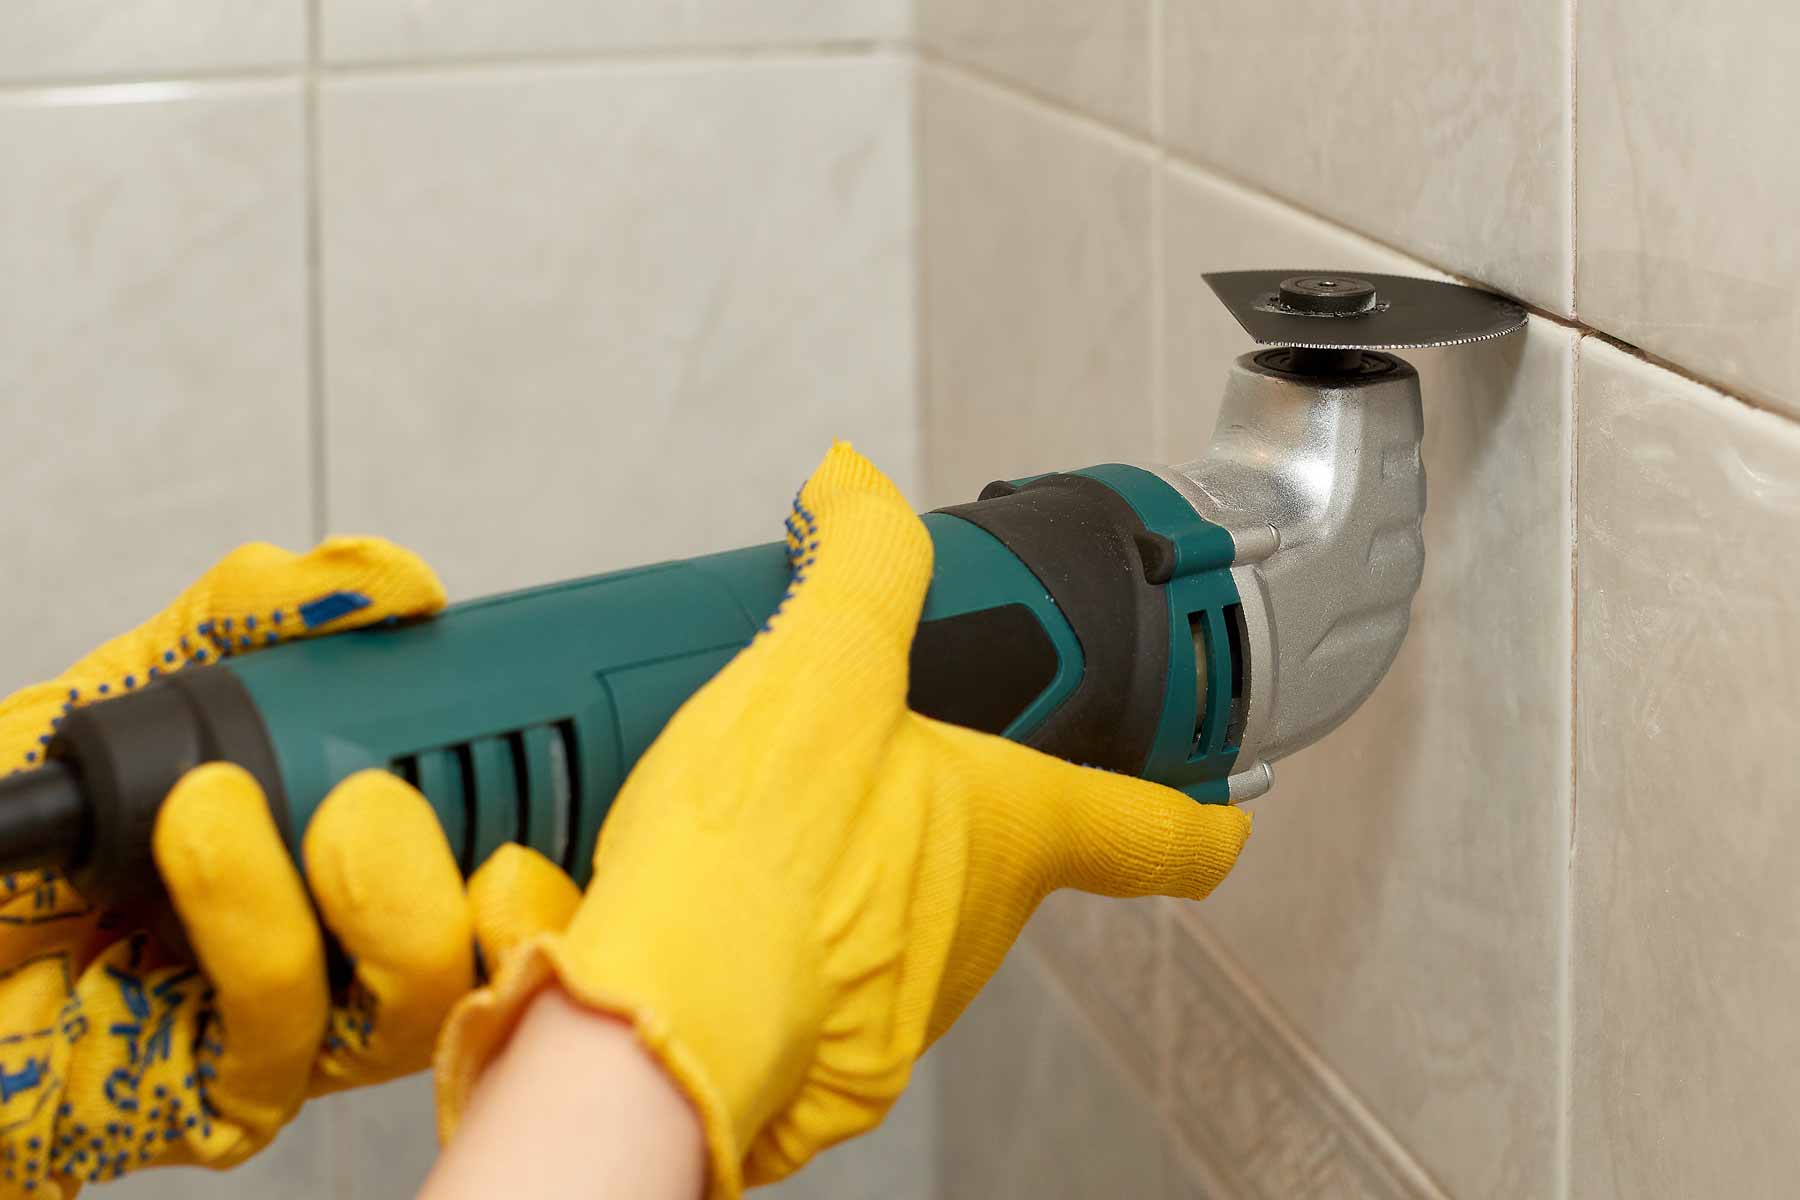
Before diving into the removal process, it’s essential to gather the necessary tools and protective gear. Equip yourself with safety goggles, work gloves, and a dust mask to shield against debris and ensure a safe working environment. Additionally, you’ll need a variety of tools, including a hammer, chisel, pry bar, and a grout removal tool or oscillating multi-tool with a grout blade.
Start by focusing on the grout lines between the tiles. Using the grout removal tool or oscillating multi-tool, carefully cut through the grout to create clean, straight lines along the edges of the tiles. This step is crucial for loosening the tiles and facilitating their removal without damaging the surrounding surfaces.
Once the grout lines are cleared, it’s time to begin removing the tiles themselves. Using the hammer and chisel, gently tap the tiles to loosen them from the substrate. Work methodically, starting from the top row of tiles and progressing downward, to avoid creating unnecessary damage to the underlying surface. If stubborn tiles resist removal, the pry bar can be used to carefully leverage them away from the substrate.
Throughout the removal process, exercise caution to prevent injury and minimize damage to the surrounding walls and substrate. Take your time and work diligently, ensuring that each tile is removed with care and precision. As you progress, periodically clear away debris and inspect the substrate for any signs of damage or deterioration that may need to be addressed before installing the new tile.
Once all the tiles are removed, thoroughly clean the substrate to prepare it for the installation of the new shower tile. Remove any residual adhesive or grout, and ensure that the surface is smooth, level, and free of debris. This meticulous preparation will set the stage for a seamless and durable installation of the captivating new tile.
By approaching the task of removing old shower tile with patience and precision, you’ll pave the way for a successful and visually stunning update. The careful removal of the old tile sets the stage for the next phase of the process, bringing you one step closer to transforming your shower into a captivating oasis that reflects your unique style and vision.
Use a grout saw to remove old grout, then clean the tiles with a mildew remover. Apply new grout with a grout float, and seal the grout once it’s dry to prevent future mold and mildew.
Installing New Shower Tile
With the old shower tile successfully removed and the substrate meticulously prepared, the time has come to embark on the exhilarating phase of installing new shower tile. This pivotal step in the update process offers a canvas for creativity and precision, allowing you to bring your design vision to life and infuse your shower space with captivating beauty.
Before diving into the installation, ensure that you have gathered all the necessary tools and materials. You’ll need tile adhesive or mortar, a notched trowel, tile spacers, a tile cutter or wet saw, a level, and sponges for cleaning. Additionally, be sure to select a high-quality grout that complements your chosen tile and aligns with your design preferences.
Begin by applying a layer of tile adhesive or mortar to the substrate using the notched trowel, working in small sections to ensure that the adhesive remains workable. The size of the sections will depend on the drying time of the adhesive and the speed at which you can install the tiles while maintaining a consistent application of the adhesive.
As you place each tile, use tile spacers to maintain uniform spacing and ensure precise alignment. Check the level of each tile to guarantee that they are installed evenly and securely. If any adjustments are needed, gently reposition the tiles before the adhesive sets, ensuring a flawless installation that exudes professionalism and visual appeal.
If you encounter areas that require smaller or irregularly shaped tiles, use a tile cutter or wet saw to achieve the necessary cuts with precision. Measure each cut carefully and make gradual adjustments as needed to ensure that the tiles fit seamlessly within the design layout.
Once all the tiles are in place and the adhesive has set according to the manufacturer’s instructions, it’s time to grout the spaces between the tiles. Apply the grout using a rubber grout float, pressing it firmly into the spaces and ensuring that all joints are thoroughly filled. Work diagonally across the tiles to prevent grout from being dislodged, and use a damp sponge to remove excess grout from the tile surfaces while smoothing the grout lines.
After allowing the grout to set for the specified time, use a clean, dry cloth to buff away any remaining grout haze from the tile surfaces, revealing the stunning beauty of your newly installed shower tile. Take pride in the meticulous craftsmanship and attention to detail that have culminated in a visually captivating and professionally executed update.
By approaching the installation of new shower tile with precision and dedication, you’ve brought your design vision to life and transformed your shower into a captivating oasis that reflects your unique style. The installation phase marks a significant milestone in the update process, setting the stage for the final touches that will elevate the ambiance of your entire bathroom.
Grouting and Sealing the Shower Tile
As you near the completion of updating your shower tile, the essential steps of grouting and sealing play a pivotal role in enhancing the durability, aesthetics, and longevity of your newly installed tile. These final touches elevate the visual impact of the tile while fortifying its resilience against moisture, ensuring that your updated shower exudes beauty and functionality for years to come.
Commence the grouting process by ensuring that the spaces between the tiles are clean and free of any debris or adhesive residue. Select a high-quality grout that aligns with your design vision and complements the color and texture of your chosen tile. Mix the grout according to the manufacturer’s instructions, achieving a smooth and consistent texture that is ready for application.
Using a rubber grout float, apply the grout to the spaces between the tiles, pressing it firmly and ensuring that all joints are thoroughly filled. Work diagonally across the tiles to prevent grout from being dislodged, and use the grout float to remove any excess grout while smoothing the grout lines. It’s essential to work efficiently and meticulously, as grout sets relatively quickly, and any delay in cleaning the excess grout can lead to stubborn residue on the tile surfaces.
After allowing the grout to set for the specified time, use a damp sponge to gently clean the tile surfaces, removing any remaining grout residue and smoothing the grout lines. Take care not to disturb the grout in the joints, ensuring that the surface is clean and the grout lines are uniform and visually appealing.
Once the grout has fully cured, it’s time to apply a high-quality sealer to the grout lines. The sealer serves as a protective barrier, guarding the grout against moisture, mold, and staining. Select a sealer specifically formulated for use in wet environments, such as showers, and follow the manufacturer’s instructions for application and drying times.
Apply the sealer to the grout lines using a small brush or applicator, ensuring thorough coverage and allowing the sealer to penetrate the grout. After the initial application, wipe away any excess sealer from the tile surfaces, taking care to achieve a clean and uniform finish. Allow the sealer to cure according to the manufacturer’s guidelines, ensuring that it forms a resilient shield that fortifies the grout against the rigors of daily use.
By meticulously grouting and sealing the shower tile, you have fortified the beauty and longevity of your updated shower, ensuring that it exudes enduring elegance and functionality. These final touches represent the culmination of your dedication and craftsmanship, elevating your shower into a captivating oasis that reflects your unique style and attention to detail.
Final Touches and Clean-Up
As the exhilarating journey of updating your shower tile draws to a close, the final touches and clean-up phase offer the opportunity to elevate the ambiance of your entire bathroom while ensuring that the update process concludes with meticulous attention to detail and a pristine, inviting space.
Begin by inspecting the newly installed shower tile, ensuring that all grout lines are clean and uniform, and that the tile surfaces are free of any residual adhesive or grout haze. Use a clean, dry cloth to gently buff the tile surfaces, revealing the stunning beauty of your meticulously installed and grouted tile. Take pride in the craftsmanship and precision that have culminated in a visually captivating and professionally executed update.
If your shower features any fixtures or accessories, such as faucets, showerheads, or shelves, take this opportunity to ensure that they are clean and free of any debris or residue from the update process. A gentle cleaning with a mild solution of water and soap can restore the luster of these elements, further enhancing the overall appeal of your updated shower space.
After completing the final touches, turn your attention to the clean-up phase. Clear away any debris, tools, and protective coverings from the shower area, ensuring that the surrounding surfaces are free of dust and residue. Use a damp cloth or sponge to wipe down the walls and floor surrounding the shower, ensuring that any stray grout or adhesive is removed, and the space is left immaculate and inviting.
As you conclude the clean-up, take a moment to bask in the transformative beauty of your updated shower. The meticulous attention to detail and dedication to craftsmanship have culminated in a captivating oasis that reflects your unique style and vision. The final touches and clean-up phase represent the crowning moments of your journey, ensuring that your updated shower exudes enduring elegance and allure.
With the completion of the final touches and clean-up, your updated shower stands as a testament to your creativity and dedication, infusing your bathroom with a fresh, captivating ambiance that resonates with your unique style. Embrace the satisfaction of a job well done and revel in the beauty of your transformed shower space, knowing that your vision and craftsmanship have brought to life a stunning oasis that will be enjoyed for years to come.
Conclusion
Congratulations on successfully completing the exhilarating journey of updating your shower tile! The transformative process you’ve embarked upon has not only revitalized your shower space but has also infused your entire bathroom with a fresh, captivating ambiance that reflects your unique style and attention to detail.
From the initial assessment of the existing tile to the meticulous installation, grouting, and sealing of the new tile, each phase of the update process has been a testament to your creativity, dedication, and craftsmanship. By approaching the task with precision and enthusiasm, you’ve created a visually stunning oasis that exudes enduring elegance and functionality.
As you revel in the beauty of your updated shower, take pride in the knowledge that your efforts have not only transformed a functional space but have also elevated the ambiance of your entire bathroom. The captivating allure of your new shower tile reflects your individuality and design vision, creating an inviting sanctuary that rejuvenates and refreshes.
Embrace the satisfaction of a job well done and take a moment to appreciate the transformation you’ve achieved. Your updated shower stands as a testament to your creativity and dedication, infusing your home with a fresh, captivating ambiance that resonates with your unique style.
As you move forward, may your updated shower serve as a daily reminder of the transformative power of creativity and craftsmanship. Whether you’re indulging in a luxurious shower or simply admiring the beauty of your newly updated space, know that your vision and dedication have brought to life a stunning oasis that will be enjoyed for years to come.
Thank you for embarking on this exciting journey of updating your shower tile. Your commitment to excellence and attention to detail have created a space that not only reflects your personal style but also enriches the daily experience of your home. Here’s to the beauty, functionality, and enduring allure of your updated shower!
Frequently Asked Questions about How To Update A Shower Tile
Was this page helpful?
At Storables.com, we guarantee accurate and reliable information. Our content, validated by Expert Board Contributors, is crafted following stringent Editorial Policies. We're committed to providing you with well-researched, expert-backed insights for all your informational needs.


0 thoughts on “How To Update A Shower Tile”