Home>Furniture & Design>Bathroom Fixtures>How To Clean A Porcelain Shower Tile
Bathroom Fixtures
How To Clean A Porcelain Shower Tile
Published: January 16, 2024
Learn effective techniques for cleaning porcelain shower tiles and maintaining bathroom fixtures with our helpful guide. Keep your bathroom looking fresh and clean.
(Many of the links in this article redirect to a specific reviewed product. Your purchase of these products through affiliate links helps to generate commission for Storables.com, at no extra cost. Learn more)
Introduction
Welcome to the ultimate guide on how to clean porcelain shower tiles. Porcelain tiles are a popular choice for shower walls and floors due to their durability, water resistance, and aesthetic appeal. Over time, soap scum, hard water stains, and mildew can accumulate on these tiles, diminishing their beauty and cleanliness. However, with the right materials and techniques, you can restore your porcelain shower tiles to their original luster without causing any damage.
In this comprehensive guide, we will walk you through the step-by-step process of effectively cleaning your porcelain shower tiles. From preparing the shower area to maintaining the cleanliness of the tiles, we will cover everything you need to know to keep your shower looking pristine. Whether you’re dealing with stubborn stains, grime buildup, or simply want to maintain the beauty of your porcelain tiles, this guide has got you covered.
By following these expert tips, you can ensure that your porcelain shower tiles remain sparkling clean and free from unsightly blemishes. Say goodbye to dingy, lackluster tiles and hello to a rejuvenated shower space that exudes cleanliness and elegance. Let’s dive into the materials you’ll need to get started on this transformative cleaning journey.
Key Takeaways:
- Keep your porcelain shower tiles sparkling clean by using mild detergent, vinegar, and baking soda. Regular maintenance and ventilation can prevent mold and mildew, ensuring a pristine shower space for years to come.
- Prepare your shower area by removing personal items, ventilating the space, and protecting metal fixtures. Follow the step-by-step cleaning process to restore the luster of your porcelain tiles and maintain their cleanliness with proactive measures.
Read more: How To Clean An Old Shower Tile
Materials Needed
Before embarking on the cleaning process, it’s essential to gather the necessary materials to ensure a thorough and effective cleaning of your porcelain shower tiles. Here’s a list of the items you’ll need:
- Mild detergent or pH-neutral cleaner: Choose a gentle, non-abrasive detergent or pH-neutral cleaner specifically formulated for cleaning porcelain tiles. Avoid using harsh chemicals or acidic cleaners, as they can damage the tiles over time.
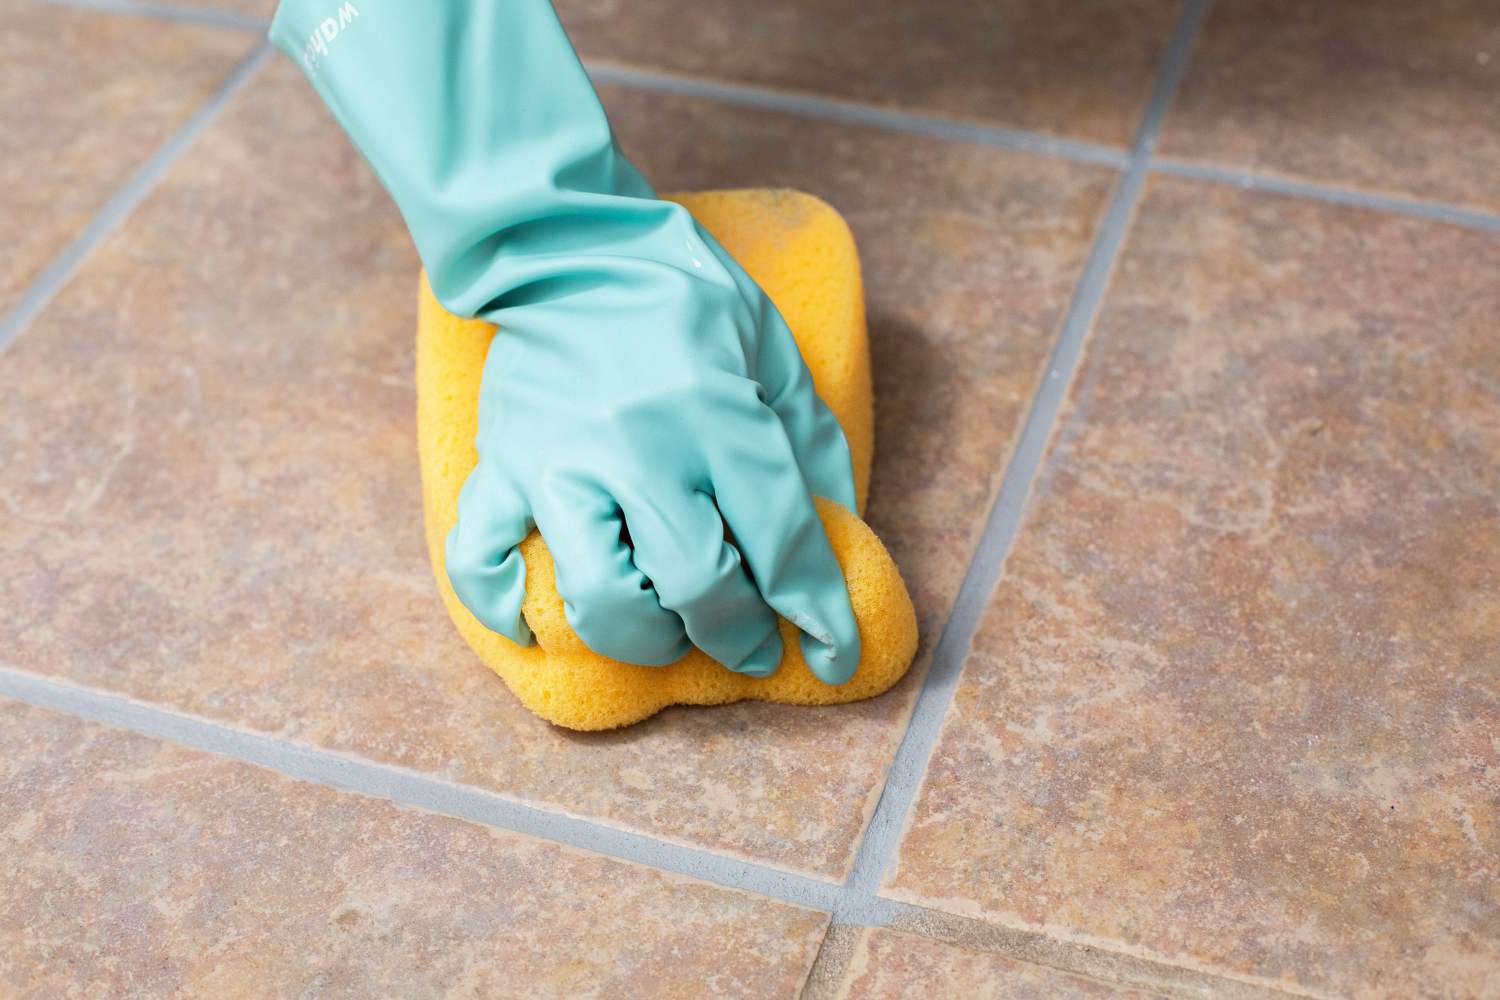
- Soft-bristled brush or sponge: Opt for a soft-bristled brush or sponge to avoid scratching the surface of the porcelain tiles while effectively removing dirt and grime.
- Vinegar or lemon juice: These natural acidic agents can help break down soap scum and mineral deposits on the tiles. Dilute vinegar with water in a 1:1 ratio for an effective, eco-friendly cleaning solution.
- Baking soda: A versatile and gentle abrasive, baking soda can aid in lifting tough stains and mildew from grout lines and tile surfaces.
- Microfiber cloth or towel: Use a microfiber cloth or towel to dry the tiles after cleaning, leaving behind a streak-free, polished finish.
- Protective gloves: It’s advisable to wear protective gloves to shield your hands from prolonged exposure to cleaning agents and to maintain hygiene during the cleaning process.
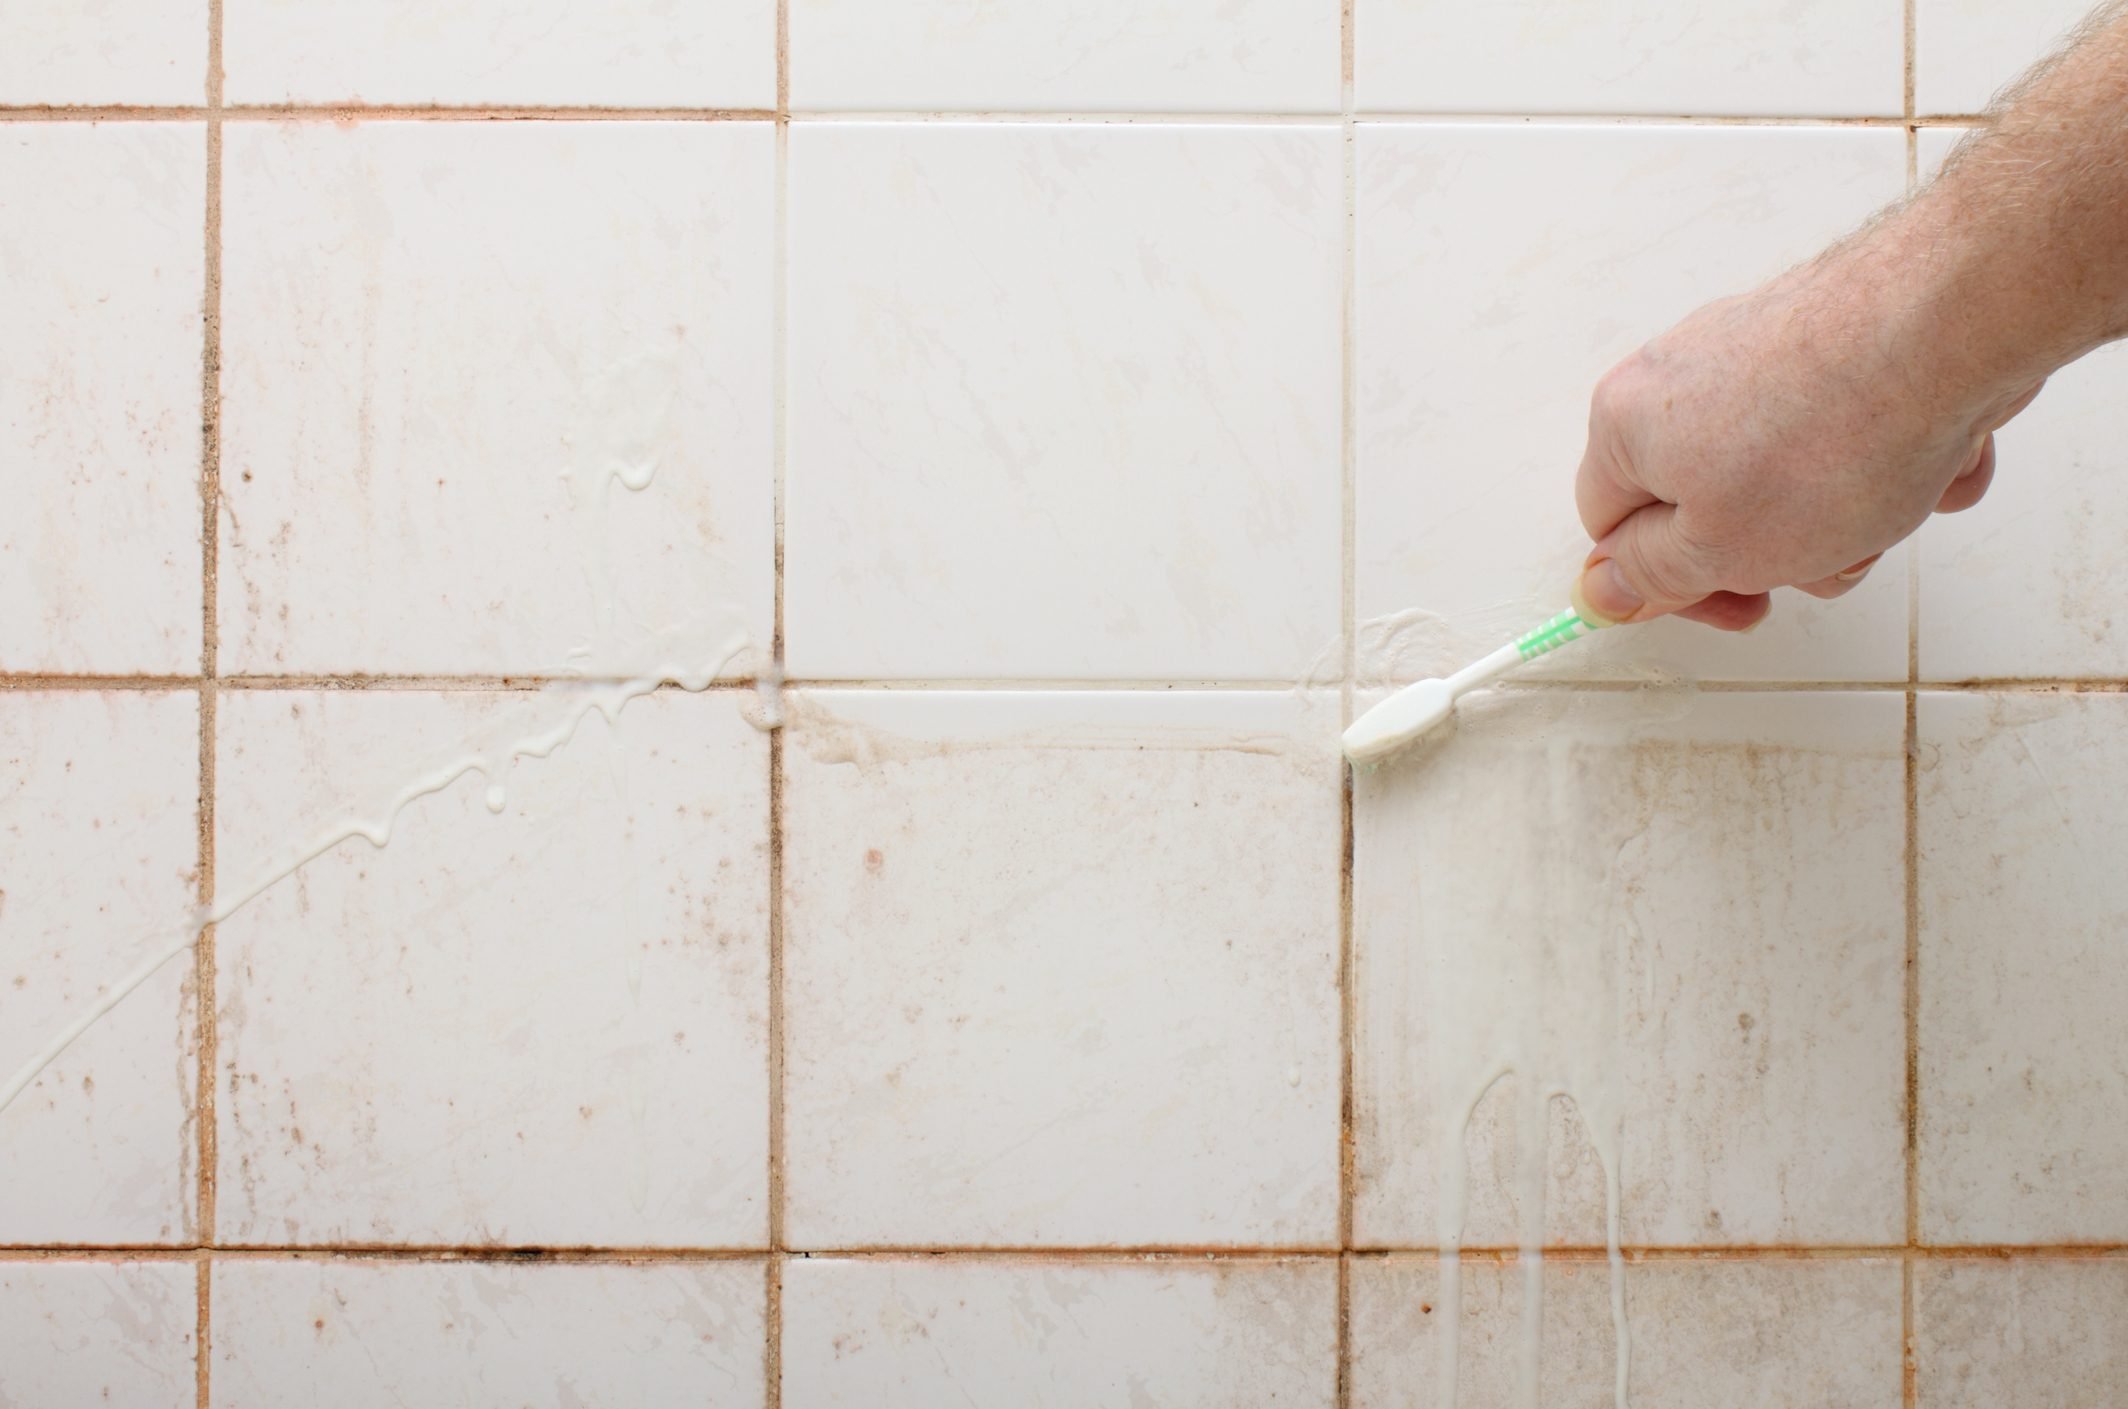
- Old toothbrush: A small, old toothbrush can be handy for reaching tight corners, grout lines, and intricate tile patterns that require detailed cleaning.
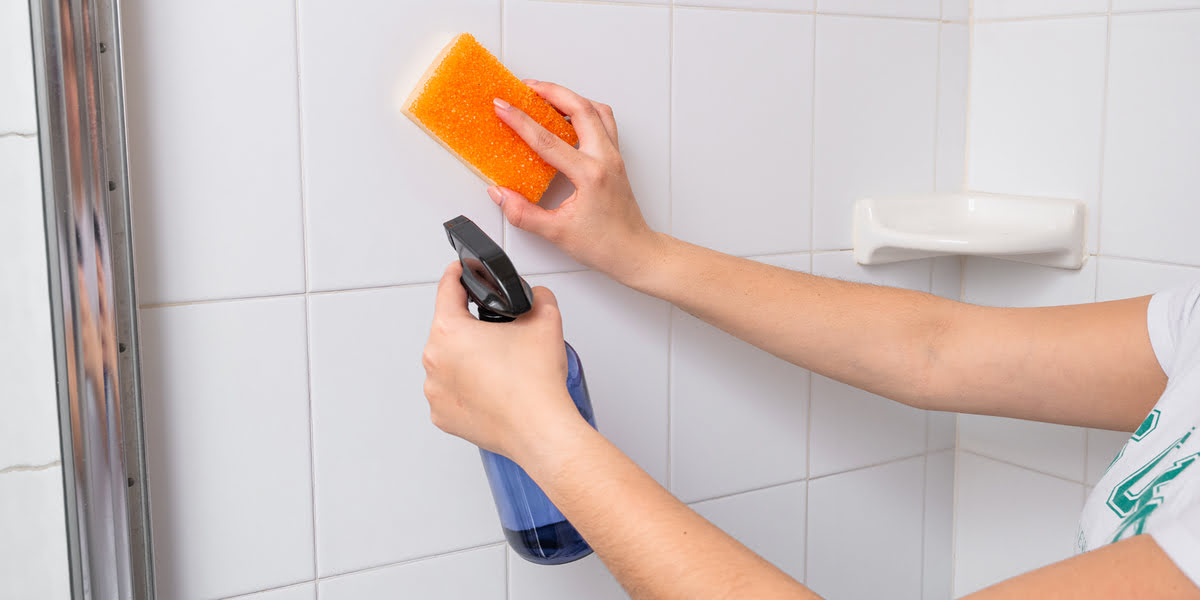
- Bucket or spray bottle: Prepare a solution of water and cleaning agent in a bucket or spray bottle for convenient application to the tiles.
- Grout sealer (optional): If your shower tiles have grout lines, consider using a grout sealer to protect the grout from moisture and staining after cleaning.
Equipped with these essential materials, you’re ready to tackle the task of cleaning your porcelain shower tiles effectively and safely. Now that you have everything you need, let’s move on to the first step: preparing the shower for cleaning.
Step 1: Preparing the Shower
Before diving into the actual cleaning process, it’s important to prepare the shower area to facilitate a thorough and efficient cleaning of the porcelain tiles. Follow these steps to ensure that the shower is ready for the cleaning process:
- Remove any personal items: Clear the shower area of any personal items such as shampoo bottles, soap dishes, and loofahs. This will provide unobstructed access to the tiles and prevent the accidental spilling of cleaning solutions on these items.
- Rinse the tiles with water: Use a handheld showerhead or a bucket of water to thoroughly rinse the tiles and grout lines. This initial rinsing helps remove loose dirt, soap residue, and surface debris, preparing the tiles for the cleaning solution.
- Ventilate the area: Ensure that the shower area is well-ventilated by opening windows or turning on an exhaust fan. Adequate ventilation helps in drying the tiles efficiently after the cleaning process and prevents the accumulation of moisture, which can lead to mold and mildew growth.
- Protect metal fixtures: If your shower contains metal fixtures such as faucets, showerheads, or handles, consider covering them with a protective layer of masking tape or plastic wrap. This precaution prevents the cleaning solution from causing any damage or discoloration to the metal surfaces.
By following these preparatory steps, you’ll create an optimal environment for cleaning your porcelain shower tiles, ensuring that the cleaning process is smooth and effective. With the shower area primed for cleaning, you’re now ready to move on to the next crucial step: cleaning the tiles to restore their pristine appearance.
Step 2: Cleaning the Tiles
Now that the shower area is prepared, it’s time to delve into the core of the cleaning process: restoring the luster of your porcelain shower tiles. Follow these steps to effectively clean the tiles and eliminate stubborn stains and grime:
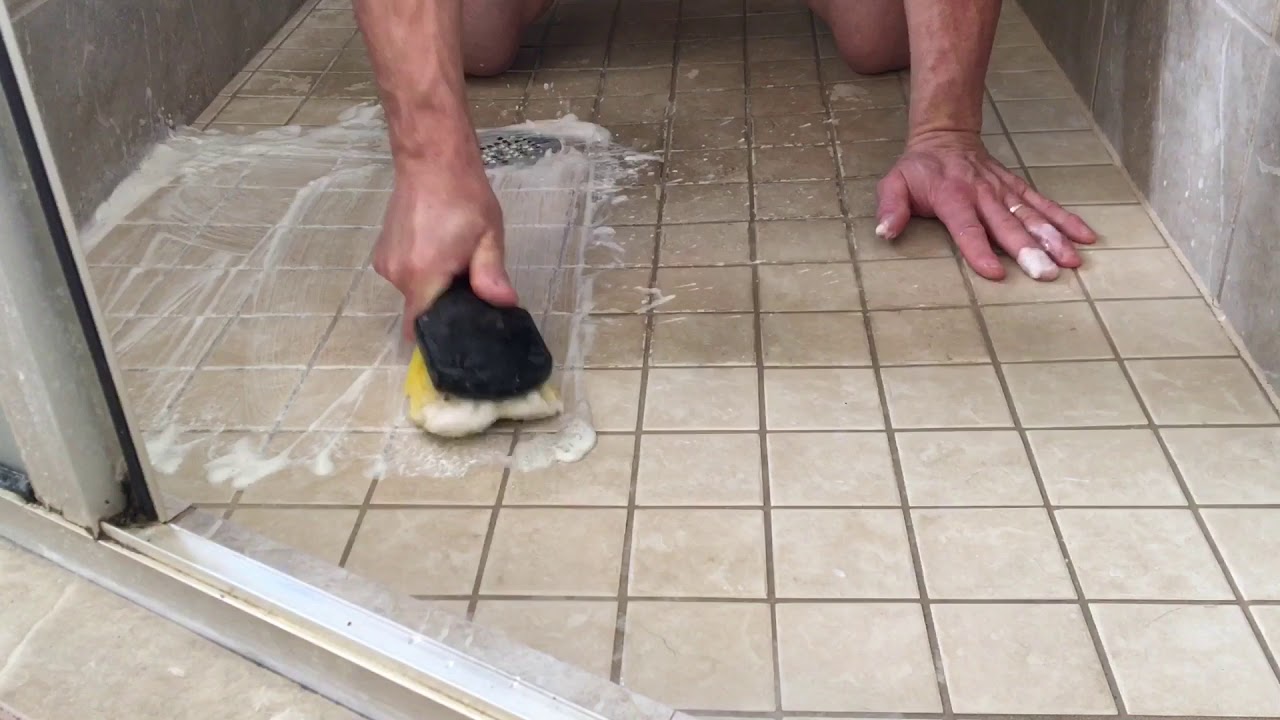
- Prepare the cleaning solution: In a bucket or spray bottle, mix a small amount of mild detergent or pH-neutral cleaner with water according to the product’s instructions. Alternatively, you can create a natural cleaning solution by diluting vinegar with water in a 1:1 ratio. For targeted stain removal, make a paste using baking soda and water.
- Apply the cleaning solution: Using a sponge or soft-bristled brush, apply the cleaning solution to the porcelain tiles, focusing on areas with visible stains, soap scum, or mildew. Allow the solution to sit for a few minutes to loosen the dirt and grime without drying on the surface.
- Scrub the tiles: Gently scrub the tiles and grout lines with the sponge or brush, using circular motions to dislodge stubborn deposits and ensure even coverage of the cleaning solution. Pay attention to corners, edges, and textured surfaces that may trap dirt and require thorough cleaning.
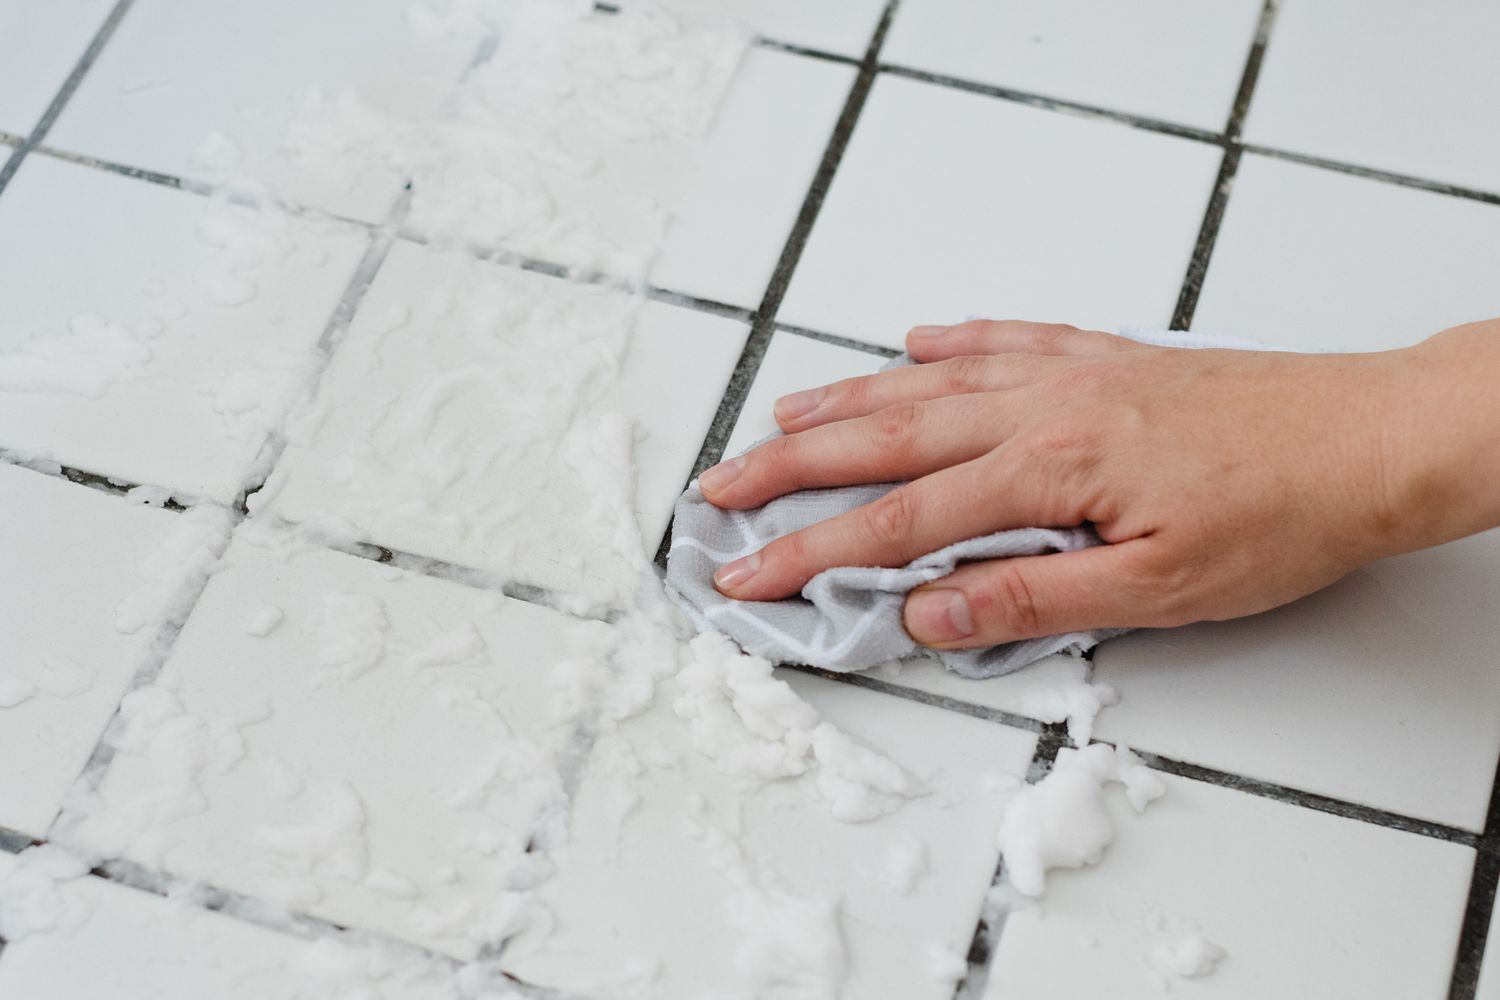
- Address stubborn stains: For persistent stains or discoloration, apply a paste of baking soda and water directly to the affected areas. Use an old toothbrush to gently scrub the paste into the stains, allowing the mild abrasive action of the baking soda to lift the discoloration.
- Clean the grout lines: If your shower tiles have grout lines, pay special attention to cleaning the grout using the same cleaning solution and a small brush. Work methodically along the grout lines to remove any accumulated grime and restore their original color.
By diligently following these steps, you can effectively lift dirt, grime, and stains from your porcelain shower tiles, revitalizing their appearance and ensuring a hygienic bathing environment. Once the tiles are thoroughly cleaned, it’s time to proceed to the next step: rinsing and drying the tiles to reveal their renewed brilliance.
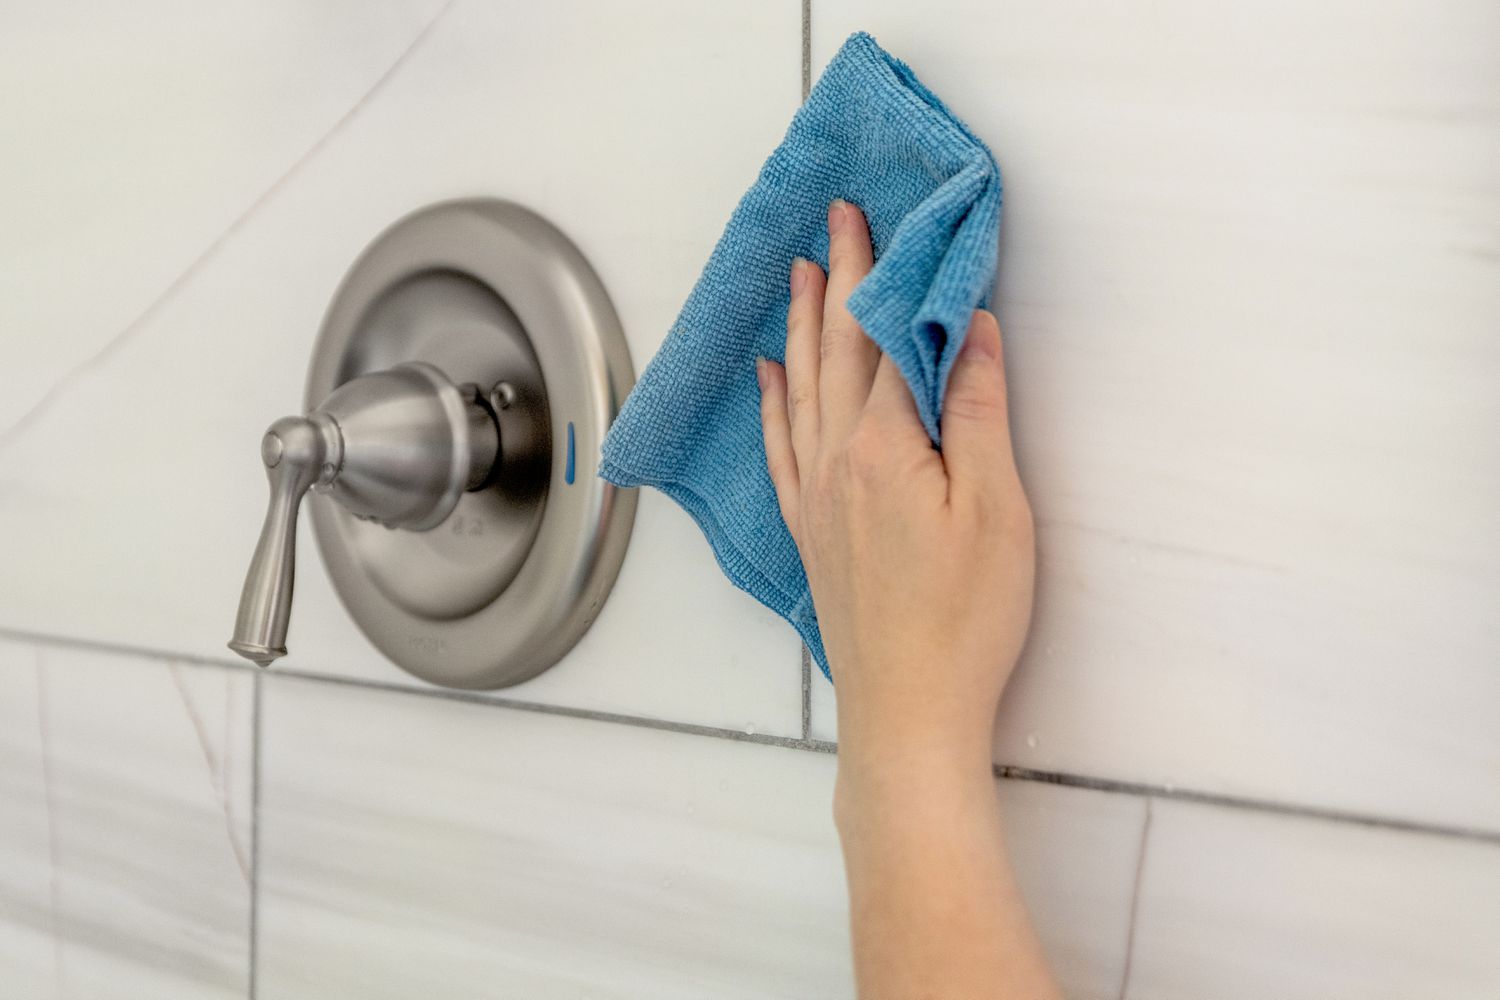
Use a non-abrasive cleaner and a soft sponge or cloth to gently scrub the porcelain shower tiles. Avoid harsh chemicals or abrasive tools that can damage the surface. Rinse thoroughly with water and dry with a clean towel to prevent water spots.
Step 3: Rinsing and Drying
After successfully cleaning the porcelain shower tiles, it’s crucial to complete the process by rinsing away the cleaning solution and ensuring that the tiles are thoroughly dried. Follow these steps to achieve a sparkling, streak-free finish:
- Rinse the tiles: Using a handheld showerhead or a bucket of clean water, thoroughly rinse the tiles and grout lines to remove any residual cleaning solution and loosened dirt. Ensure that all traces of the cleaning solution are completely washed away, leaving behind a clean and residue-free surface.
- Dry the tiles: Use a soft, absorbent microfiber cloth or towel to dry the tiles, starting from the top and working your way down. Wipe the tiles in a gentle, sweeping motion to prevent water spots and streaks, ensuring that the entire surface is thoroughly dried.
- Address remaining spots: If any water spots or streaks are visible after drying, lightly buff the tiles with a dry microfiber cloth to achieve a polished, spot-free appearance. Pay attention to textured or patterned tiles to ensure that all crevices are dry and free from water marks.
- Inspect the tiles: Take a moment to inspect the tiles for any lingering stains or areas that may require additional attention. If necessary, spot-clean any remaining blemishes using a targeted application of the cleaning solution and gentle scrubbing, followed by rinsing and drying.
By meticulously following these steps, you can ensure that your porcelain shower tiles are not only impeccably clean but also free from water spots and streaks, achieving a flawless, refreshed appearance. With the tiles thoroughly rinsed and dried, it’s time to explore the final step: maintaining the cleanliness of your porcelain shower tiles to prolong their pristine condition.
Read more: How To Clean A Stone Shower Tile
Step 4: Maintaining the Cleanliness
Maintaining the cleanliness of your porcelain shower tiles is essential for preserving their beauty and longevity. By implementing regular maintenance practices, you can prevent the accumulation of grime, soap scum, and mineral deposits, ensuring that your shower remains a pristine oasis. Follow these proactive steps to sustain the cleanliness of your porcelain shower tiles:
- Regular cleaning routine: Establish a regular cleaning schedule to prevent the buildup of dirt and grime. A weekly or bi-weekly gentle cleaning using a mild detergent or pH-neutral cleaner can effectively remove surface impurities before they become ingrained.
- Use a squeegee: After each shower, use a squeegee to remove excess water from the tiles and glass surfaces. This simple practice helps prevent water spots and mineral deposits, reducing the frequency of deep cleaning sessions.
- Address spills promptly: In the event of shampoo, conditioner, or soap spills, promptly wipe the affected areas to prevent the substances from drying on the tiles and causing stubborn stains or residue.
- Maintain grout lines: Periodically inspect and maintain the cleanliness of grout lines to prevent mold and mildew growth. Consider applying a grout sealer to protect the grout from moisture and staining, enhancing its longevity and cleanliness.
- Ventilate the shower: After each use, ensure that the shower area is adequately ventilated to promote efficient drying and prevent the accumulation of moisture, which can lead to mold and mildew. Leave the shower door or curtain open, and run an exhaust fan if available.
- Periodic deep cleaning: Conduct a thorough deep cleaning of the porcelain shower tiles as needed, focusing on areas prone to soap scum, mineral deposits, and grime. Implement the cleaning process outlined in this guide to rejuvenate the tiles and maintain a pristine shower environment.
By incorporating these proactive measures into your shower maintenance routine, you can uphold the cleanliness and allure of your porcelain shower tiles, ensuring that they remain a source of pride and comfort in your bathroom. With a commitment to regular maintenance, you can enjoy a consistently clean and inviting shower space for years to come.
Conclusion
Congratulations on completing the transformative journey of cleaning and maintaining your porcelain shower tiles. By following the comprehensive steps outlined in this guide, you’ve not only restored the luster of your tiles but also equipped yourself with the knowledge to sustain their cleanliness for the long term. Your dedication to maintaining a pristine shower environment will undoubtedly enhance the comfort and aesthetic appeal of your bathroom.
Remember, the key to preserving the beauty of your porcelain shower tiles lies in regular maintenance, proactive cleaning practices, and prompt attention to spills and stains. By incorporating these strategies into your cleaning routine, you can mitigate the accumulation of grime, soap scum, and mineral deposits, ensuring that your shower remains a refreshing sanctuary.
As you revel in the renewed brilliance of your porcelain shower tiles, consider sharing your newfound expertise with friends and family who may benefit from these valuable cleaning insights. Empowering others to elevate the cleanliness and allure of their bathroom spaces is a rewarding way to pay forward the knowledge you’ve gained.
With your porcelain shower tiles gleaming and your bathroom exuding a sense of pristine elegance, take pride in the dedication and care you’ve invested in maintaining this vital part of your home. Embrace the tranquility and comfort of your rejuvenated shower space, and revel in the enduring beauty of your porcelain tiles.
Thank you for embarking on this cleaning journey with us. May your bathroom continue to radiate cleanliness and sophistication, enriching your daily routine with a touch of luxury and serenity.
Frequently Asked Questions about How To Clean A Porcelain Shower Tile
Was this page helpful?
At Storables.com, we guarantee accurate and reliable information. Our content, validated by Expert Board Contributors, is crafted following stringent Editorial Policies. We're committed to providing you with well-researched, expert-backed insights for all your informational needs.


0 thoughts on “How To Clean A Porcelain Shower Tile”