Articles
How To Use Laser Level To Hang Pictures
Modified: October 27, 2024
Learn how to use a laser level for hanging pictures with this informative article. Get step-by-step instructions and expert tips to achieve perfectly aligned frames.
(Many of the links in this article redirect to a specific reviewed product. Your purchase of these products through affiliate links helps to generate commission for Storables.com, at no extra cost. Learn more)
Introduction
Welcome to the world of picture hanging! Whether you are an avid home decorator or just looking to add a personal touch to your living space, hanging pictures can instantly transform the look and feel of any room. However, achieving that perfectly aligned and straight display can be quite challenging. This is where a laser level becomes your best friend. In this article, we will explore how to use a laser level to hang pictures with precision and ease.
But first, let’s understand what a laser level is and why it is such a valuable tool in the world of picture hanging.
Key Takeaways:
- Using a laser level for picture hanging ensures precision, saves time, and minimizes wall damage. It’s a user-friendly tool that helps create visually appealing and well-organized displays with ease.
- Preparation, selecting the right laser level, and careful alignment are crucial for hanging pictures accurately. Consider factors like wall type, lighting, and room layout for a captivating display.
What is a Laser Level?
A laser level is a versatile tool used to create a perfectly level and straight reference line on a surface. It uses laser technology to project a highly visible beam onto walls, floors, and other surfaces. This beam serves as a guide for aligning and positioning objects with precise accuracy.
Laser levels come in various forms, from simple handheld devices to more advanced self-leveling models. They can emit both horizontal and vertical lines, and some models even have additional features such as plumb dots or angles. Laser levels are commonly used in construction, carpentry, and interior design. However, they are also invaluable when it comes to hanging pictures.
Using a laser level for picture hanging ensures that your frames are perfectly straight, evenly aligned, and evenly spaced. This not only enhances the overall aesthetic appeal of your display but also saves you time and frustration from constant readjustments.
Now that we know the benefits of using a laser level, let’s dive into the process of how to effectively use a laser level to hang pictures.
Why Use a Laser Level to Hang Pictures?
Hanging pictures without a laser level can often result in uneven displays, crooked frames, and unnecessary nail holes in your walls. By utilizing a laser level, you can overcome these challenges and achieve a professional and polished look in your home or office.
Here are some reasons why using a laser level to hang pictures is beneficial:
- Precision and Accuracy: The laser level projects a straight and level line that serves as a reference for positioning your pictures. This ensures that your frames are perfectly aligned and evenly spaced, creating a visually pleasing display.
- Time-Saving: With a laser level, you can quickly and easily establish your desired height and alignment for multiple pictures at once. This saves you the time and effort of measuring and aligning each frame individually.
- Minimize Damage to Walls: Using a laser level helps you minimize the number of nail holes in your walls. By accurately placing the nails or hooks based on the laser reference line, you reduce the chances of making unnecessary holes and potentially damaging the wall surface.
- Versatility: Laser levels can emit both horizontal and vertical lines, allowing you to hang pictures in various orientations and arrangements. Whether you’re creating a gallery wall or simply hanging a single frame, a laser level can accommodate your needs.
- User-friendly: Laser levels are designed to be user-friendly, even for those with minimal experience in picture hanging. They often come with clear instructions and intuitive controls, making the process much simpler than using traditional manual levels or measuring tools.
By using a laser level to hang pictures, you can achieve professional results with ease and confidence. With the precise alignment and accuracy that a laser level provides, your picture displays will look visually appealing, balanced, and well-organized.
Preparation
Before you begin using a laser level to hang pictures, it’s important to take some preparatory steps to ensure a smooth and successful process. Here are some key preparation tips:
- Clean the Walls: Start by cleaning the walls where you intend to hang your pictures. Dust, dirt, and grime can affect the adhesive properties of hooks or interfere with the laser level’s accuracy. Use a mild detergent or a wall-safe cleaning solution to remove any dirt or stains.
- Gather Your Tools: Apart from the laser level, gather other essential tools such as a tape measure, pencil, hammer, nails or hooks, and picture-hanging hardware. Having these tools on hand will make the process more convenient and efficient.
- Choose the Right Hanging Hardware: Consider the weight and size of your pictures when selecting the appropriate hanging hardware. Heavy frames may require nails or screws, while lightweight frames can be hanged using adhesive hooks or picture wire. Ensure that the hardware is compatible with your wall surface to prevent any damage.
- Plan the Picture Arrangement: Take some time to plan the arrangement and layout of your pictures on the wall. Consider factors such as the size and shape of the frames, the overall composition you want to achieve, and the available wall space. You can create a mock layout on the floor or use masking tape to mark the positions on the wall.
- Measure and Mark: Use a tape measure to determine the desired height and spacing for your pictures. Mark the precise spots on the wall where the hooks or nails will be placed. This will serve as a guide when using the laser level.
By preparing adequately before using the laser level, you will streamline the picture-hanging process and minimize the likelihood of mistakes or readjustments. With a clean wall, the right tools, appropriate hanging hardware, a planned picture arrangement, and accurate measurements, you are now ready to start using your laser level to hang pictures.
Choosing the Right Laser Level
Selecting the right laser level is crucial to ensure accurate and efficient picture hanging. With a wide range of options available in the market, here are some factors to consider when choosing the right laser level:
- Type of Laser Level: There are two main types of laser levels – manual and self-leveling. Manual laser levels require manual adjustments to achieve a level line, while self-leveling laser levels automatically level themselves once placed on a surface. Self-leveling laser levels are recommended for picture hanging as they provide greater accuracy and ease of use.
- Projection Type: Consider the projection type you need for your project. The most common laser level projections for picture hanging are horizontal and vertical lines. However, if you plan on hanging pictures at specific angles or creating complex arrangements, a laser level that projects angles or various line patterns may be more suitable.
- Visibility: Opt for a laser level that offers high visibility, especially if you are working in bright or well-lit areas. Look for models with a bright laser beam or those that have additional visibility enhancement features, such as pulse mode or laser enhancement glasses.
- Range and Accuracy: Consider the range and accuracy of the laser level. Depending on the size of your project, ensure that the laser level can cover the distance required. Look for models with a range that meets your needs and a high level of accuracy, ideally within ±1/8 inch per 30 feet.
- Durability and Quality: Invest in a high-quality laser level that is durable and built to last. Look for models with sturdy construction, water and dust resistance, and a reliable locking mechanism to secure the leveling line in place during the picture hanging process.
- Budget: Determine your budget range and choose a laser level that offers the features you need within that budget. While it’s important to consider cost, remember that a high-quality laser level will provide better accuracy and longevity, making it a worthwhile investment.
By considering these factors, you can select the right laser level that suits your specific picture hanging needs. Remember, investing in a quality laser level will enhance your accuracy and efficiency, resulting in beautifully aligned and evenly spaced picture displays.
Read more: How To Use A Laser Level To Hang Doors
Selecting the Appropriate Location
Choosing the right location for hanging pictures is essential to create a visually pleasing display. Here are some key considerations when selecting the appropriate location:
- Wall Type: Consider the type of wall you are working with. Different wall surfaces, such as drywall, plaster, or brick, may require different hardware and installation methods. Ensure that the chosen location can support the weight of the pictures and that the chosen hardware is suitable for the wall surface.
- Room and Wall Layout: Take the overall layout of the room into consideration. Decide whether you want to create a focal point by hanging pictures on a prominent wall or distribute them evenly throughout the space. Consider the height and available wall space to ensure that the pictures are easily visible and proportionate to the room’s dimensions.
- Lighting: Pay attention to the lighting in the chosen location. Hanging pictures in areas that receive natural light or have nearby light fixtures can enhance the visibility and impact of the artwork. Avoid areas with excessive glare or direct sunlight, as it can affect the color and longevity of the pictures.
- Eye-Level Placement: Aim to hang pictures at eye level for optimal viewing. This generally means positioning the center of the artwork at around 57-60 inches from the floor. Adjust this height if you have specific preferences or if the pictures will be viewed primarily while seated or standing.
- Consider the Room’s Purpose: Think about the purpose and function of the room where the pictures will be hung. For example, in a living room, you may want to hang pictures above a couch or fireplace to create a focal point. In a hallway, you can create a gallery wall that adds visual interest and reflects your personal style.
- Balance and Symmetry: Strive for balance and symmetry, especially when hanging multiple pictures. Ensure that there is equal spacing between each frame and that they are aligned properly. Take into account the size and shape of the pictures to create a visually pleasing composition.
By carefully selecting the appropriate location, you can enhance the overall aesthetics of your pictures and ensure that they complement the existing decor and layout of the room. A well-chosen location will allow your pictures to shine and become captivating focal points in your space.
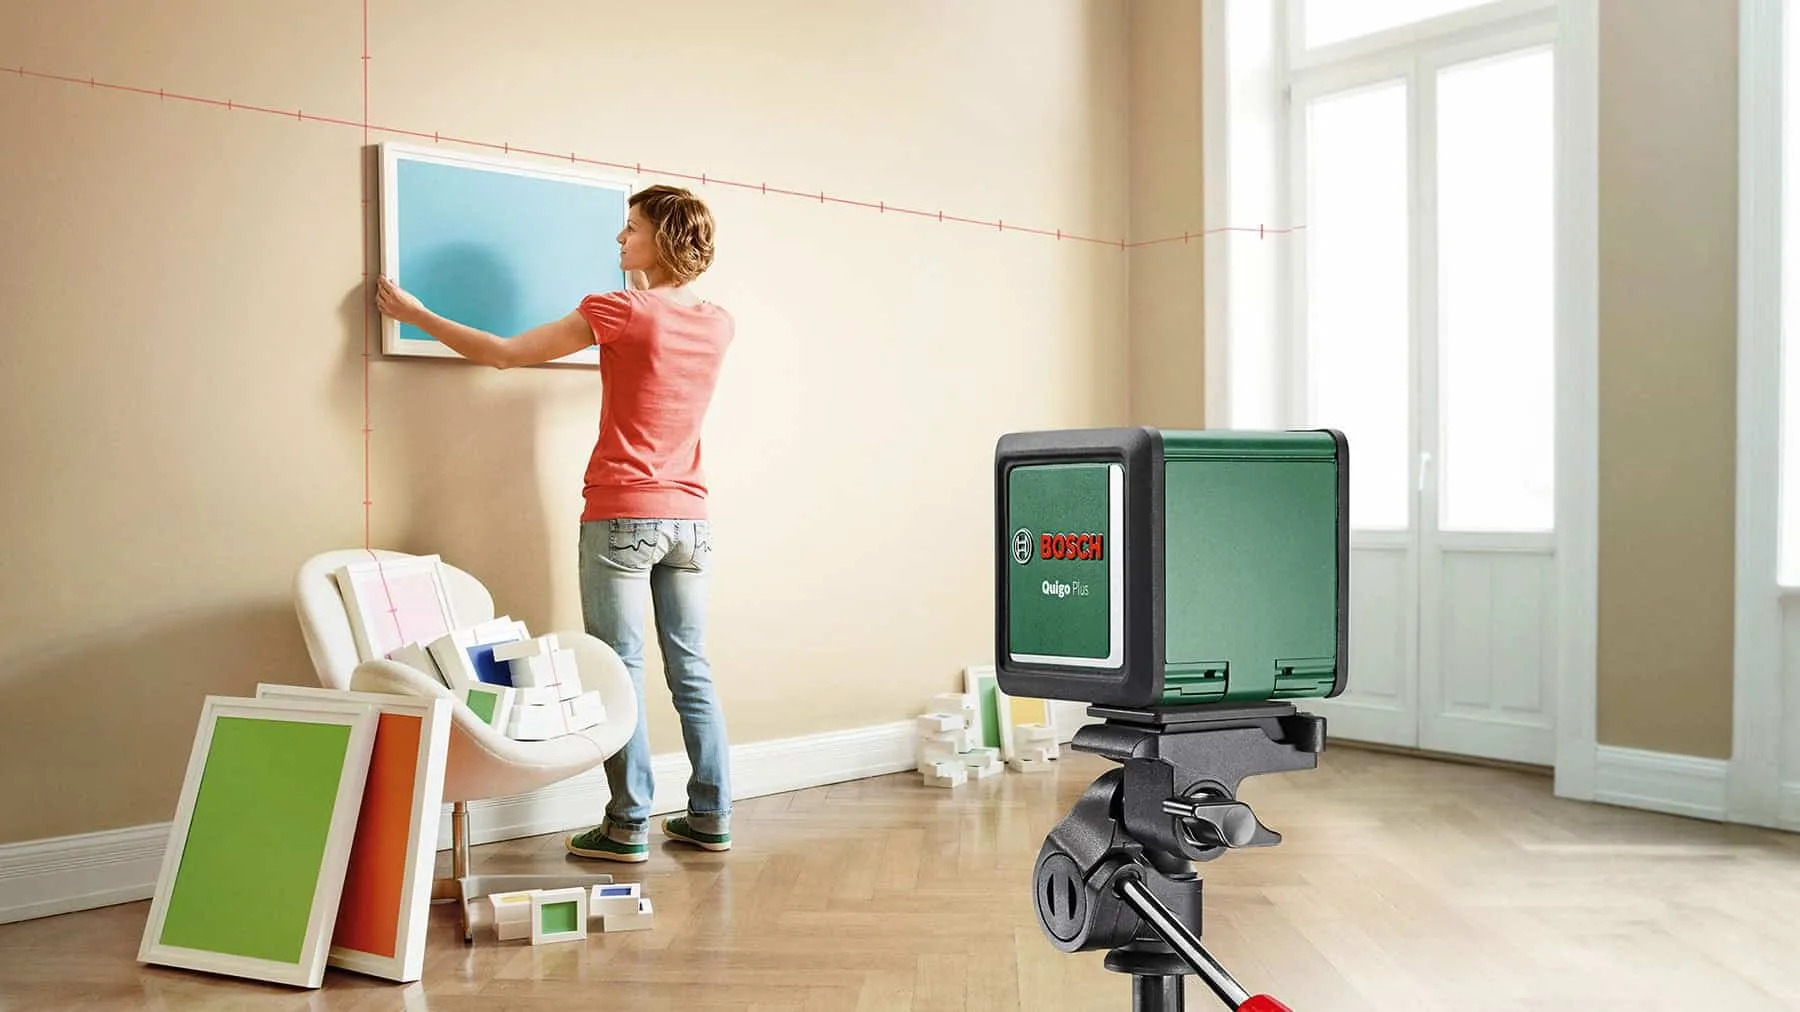
When using a laser level to hang pictures, make sure to mark the exact spot where the nail or hook should go by aligning the laser with the top of the frame. This will ensure that your pictures are perfectly straight and level.
Setting up the Laser Level
Once you have chosen the appropriate location for hanging your pictures, it’s time to set up the laser level. Here’s a step-by-step guide on how to do it:
- Read the User Manual: Familiarize yourself with the specific instructions and features of your laser level by reading the user manual. This will ensure that you understand how to set up and operate the laser level effectively.
- Ensure Stability: Place the laser level on a stable surface, such as a table or tripod, ensuring that it is secure and won’t move during operation. Some laser levels come with a built-in tripod mount, while others may require an additional tripod attachment.
- Power On the Laser Level: Power on the laser level according to the manufacturer’s instructions. This may involve pressing a button or switches to activate the laser beam projection.
- Adjust the Level: If you are using a manual laser level, adjust the bubble vials to ensure that the level is completely horizontal. This step is not required for self-leveling laser levels, as they automatically level themselves once activated.
- Position the Laser Level: Position the laser level near the area where you will be hanging the pictures. Make sure it is aligned with the marked spots on the wall. If you have a self-leveling laser level, it will automatically adjust to level itself. Otherwise, manually adjust the laser level to ensure that the leveling line aligns with the desired height and spacing for the pictures.
- Secure the Laser Level: Once the laser level is properly positioned, secure it in place to prevent any movement during the picture hanging process. Ensure that it remains stable and the laser beam is clearly visible on the wall.
By following these steps, you can properly set up your laser level, ensuring that it is stable, aligned, and ready for accurate picture hanging. Taking the time to set up the laser level correctly will result in precise and professional-looking displays.
Adjusting the Leveling Line
Once the laser level is set up and positioned, it’s time to adjust the leveling line for precise picture hanging. Here’s how to do it:
- Activate the Leveling Line: Activate the leveling line feature on your laser level. This will project a visible horizontal or vertical line on the wall, which will serve as a reference for aligning your pictures.
- Align the Line: Use the leveling controls on your laser level to align the projected line with the marked spots on the wall. Adjust the laser level up, down, left, or right until the leveling line is perfectly aligned with your desired height and spacing for the pictures.
- Double-Check the Alignment: Take a step back and visually double-check the alignment of the leveling line. Ensure that it appears straight and level to the naked eye. If necessary, make small adjustments using the leveling controls until you are satisfied with the alignment.
- Confirm Stability: Make sure that the laser level remains stable and stationary during the adjustment process. Any movement or shifting of the laser level can result in an inaccurate leveling line, leading to misaligned pictures.
- Use Additional Measuring Tools (Optional): If you prefer to double-check the alignment, you can use a traditional level or a measuring tape to confirm that the leveling line is indeed straight and level. This step is optional but can provide additional reassurance.
Throughout the process of adjusting the leveling line, it’s important to maintain patience and attention to detail. Taking the time to accurately align the leveling line will ensure that your pictures are hung straight, level, and visually pleasing.
Once you are satisfied with the positioning and alignment of the leveling line, you are ready to move on to the next step – hanging your pictures with precision.
Hanging Pictures with Accuracy
Now that the laser level’s leveling line is properly aligned, it’s time to hang your pictures with accuracy. Follow these steps to ensure precise and level placement:
- Measure and Mark: Using a tape measure and pencil, measure the distance between the hanging hardware on the back of the picture frame. Transfer these measurements to the wall, marking the exact spots where the nails or hooks will be placed.
- Hanging Hardware: Install the appropriate hanging hardware on the marked spots. This can include nails, screws, picture hooks, or adhesive hooks, depending on the weight and type of picture frame. Ensure that the hardware is securely attached to the wall.
- Hang the First Picture: Place the first picture on the wall, aligning it with the marked spots and the leveling line projected by the laser level. Carefully hang the picture on the selected hanging hardware, ensuring that it is level and straight.
- Check Alignment: Step back and visually check the alignment of the first picture. Use the laser level or a traditional level to confirm that it is hanging straight and level. Make any necessary adjustments to ensure accuracy.
- Hang the Remaining Pictures: Repeat the same process for the remaining pictures, using the leveling line and the first picture as a guide for proper alignment. Measure, mark, mount the hanging hardware, and hang each picture, making sure they are level and evenly spaced.
- Step Back and Assess: Once all the pictures are hung, step back and assess the overall display. Check for consistency in spacing and alignment. Make any final adjustments if needed.
By following these steps, you can hang your pictures with accuracy and precision. The laser level’s leveling line serves as a valuable reference point, ensuring that your pictures are straight, level, and aesthetically pleasing.
Remember, take your time during the picture hanging process to ensure the best results. It’s worth the effort to achieve a beautifully aligned and balanced display.
Additional Tips and Tricks
Here are some additional tips and tricks to enhance your picture hanging process using a laser level:
- Use Painter’s Tape: Consider using painter’s tape to temporarily affix the pictures to the wall. This allows you to step back and assess the arrangement before committing to permanent hanging.
- Consider Artwork Size and Weight: Take into account the size and weight of your pictures when selecting the appropriate hanging hardware. Heavy frames may require sturdier hooks or screws, while lighter frames can be hung on adhesive hooks or wire.
- Create a Gallery Wall Template: If you’re planning a gallery wall with multiple pictures, create a paper template by tracing each frame’s outline on craft paper. Arrange and tape the templates on the wall to experiment with different layouts before drilling any holes.
- Use a Laser Detector: In situations with limited visibility or longer distances, consider using a laser detector. This device can help you locate and follow the laser beam when it’s not clearly visible to the naked eye.
- Take Lighting Conditions Into Account: Be aware of the lighting conditions in the room where the pictures will be hung. Adjust the brightness or intensity of the laser level’s beam as needed to ensure optimum visibility and accuracy.
- Consider Eye-Level Viewing: Keep in mind the average eye level height (around 57-60 inches) when hanging pictures in living areas or hallways. For spaces primarily used while seated, adjust the height accordingly for optimal viewing.
- Experiment with Arrangements: Have fun experimenting with different picture arrangements before committing to the final configuration. Use the laser level’s leveling line as a guide to maintain alignment and balance within the arrangement.
- Make Small Adjustments: Use the leveling controls on your laser level to fine-tune the leveling line as needed. Even small adjustments can make a significant impact on the overall alignment of your pictures.
Following these tips and tricks will help you make the most of your laser level and ensure a smooth and successful picture hanging experience. Remember to take your time, be patient, and enjoy the process of creating a beautifully displayed and perfectly aligned gallery of pictures.
Conclusion
Using a laser level to hang pictures is a game-changer when it comes to achieving precise and professional-looking displays. With its ability to project straight and level lines, a laser level ensures that your pictures are hung with accuracy, alignment, and aesthetic appeal.
Throughout this article, we’ve covered various aspects of using a laser level for picture hanging. From understanding what a laser level is to selecting the appropriate model, preparing the space, and adjusting the leveling line, each step is crucial to achieve the desired results.
By taking the time to properly set up the laser level and align the leveling line, you can confidently hang your pictures, knowing that they will be straight, level, and evenly spaced. With the added tips and tricks, you can further enhance your picture hanging experience and create stunning displays.
Remember, picture hanging is not just about functionality but is also an opportunity to showcase your personal style and creativity. Experiment with different arrangements, consider lighting conditions, and take into account the room’s overall layout to create a visually pleasing and harmonious display of artwork or photographs.
So go ahead, grab your laser level, gather your tools, and embark on the journey of transforming your walls into a captivating gallery. With patience, attention to detail, and the help of a laser level, you can achieve picture-perfect results that will be the envy of your friends and family.
Happy picture hanging!
Frequently Asked Questions about How To Use Laser Level To Hang Pictures
Was this page helpful?
At Storables.com, we guarantee accurate and reliable information. Our content, validated by Expert Board Contributors, is crafted following stringent Editorial Policies. We're committed to providing you with well-researched, expert-backed insights for all your informational needs.


0 thoughts on “How To Use Laser Level To Hang Pictures”