Articles
How To Use Starrett Miter Protractor
Modified: August 17, 2024
Learn how to effectively use the Starrett Miter Protractor with these informative articles. Master the art of precise measurements and enhance your woodworking skills.
(Many of the links in this article redirect to a specific reviewed product. Your purchase of these products through affiliate links helps to generate commission for Storables.com, at no extra cost. Learn more)
Introduction
Welcome to this comprehensive guide on how to use the Starrett Miter Protractor. Whether you’re a seasoned professional or a DIY enthusiast, the Starrett Miter Protractor is an invaluable tool for achieving precision and accuracy in your woodworking projects. This innovative device allows you to measure and set the angles on your miter saw with ease, ensuring that your cuts are perfect every time.
Known for its quality and accuracy, the Starrett Miter Protractor is a favorite among craftsmen and carpenters worldwide. With its compact design and user-friendly features, it simplifies the process of making miter cuts and eliminates guesswork, saving you time and reducing the risk of errors.
In this guide, we will walk you through the steps of using the Starrett Miter Protractor, from setting up your miter saw to making precise angle measurements and adjusting the saw accordingly. We will also provide you with some helpful tips for maximizing the effectiveness of this tool.
Whether you’re working on intricate moldings, picture frames, or other woodworking projects, the Starrett Miter Protractor will be your go-to tool for achieving professional results. So, let’s dive in and discover how to make the most of this remarkable device.
Key Takeaways:
- Achieve precision and professionalism in woodworking projects with the Starrett Miter Protractor, simplifying accurate miter cuts and enhancing woodworking skills.
- Prioritize safety, double-check measurements, and incorporate tips for optimal usage to elevate woodworking experience and achieve exceptional results with the Starrett Miter Protractor.
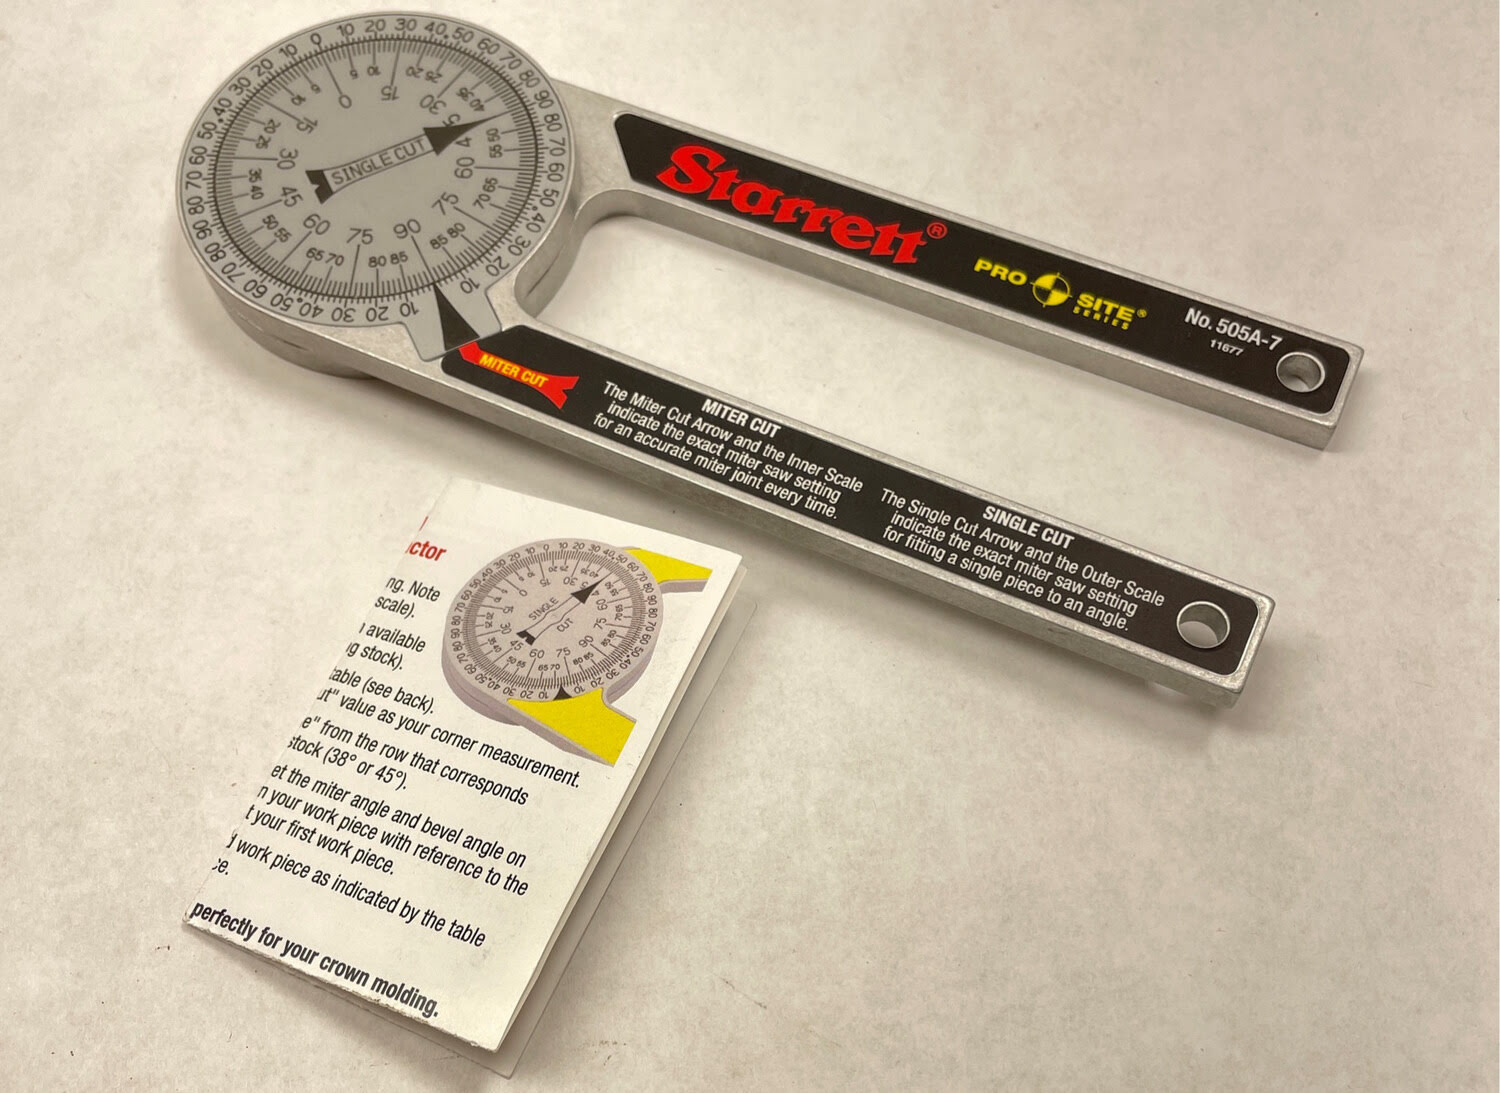
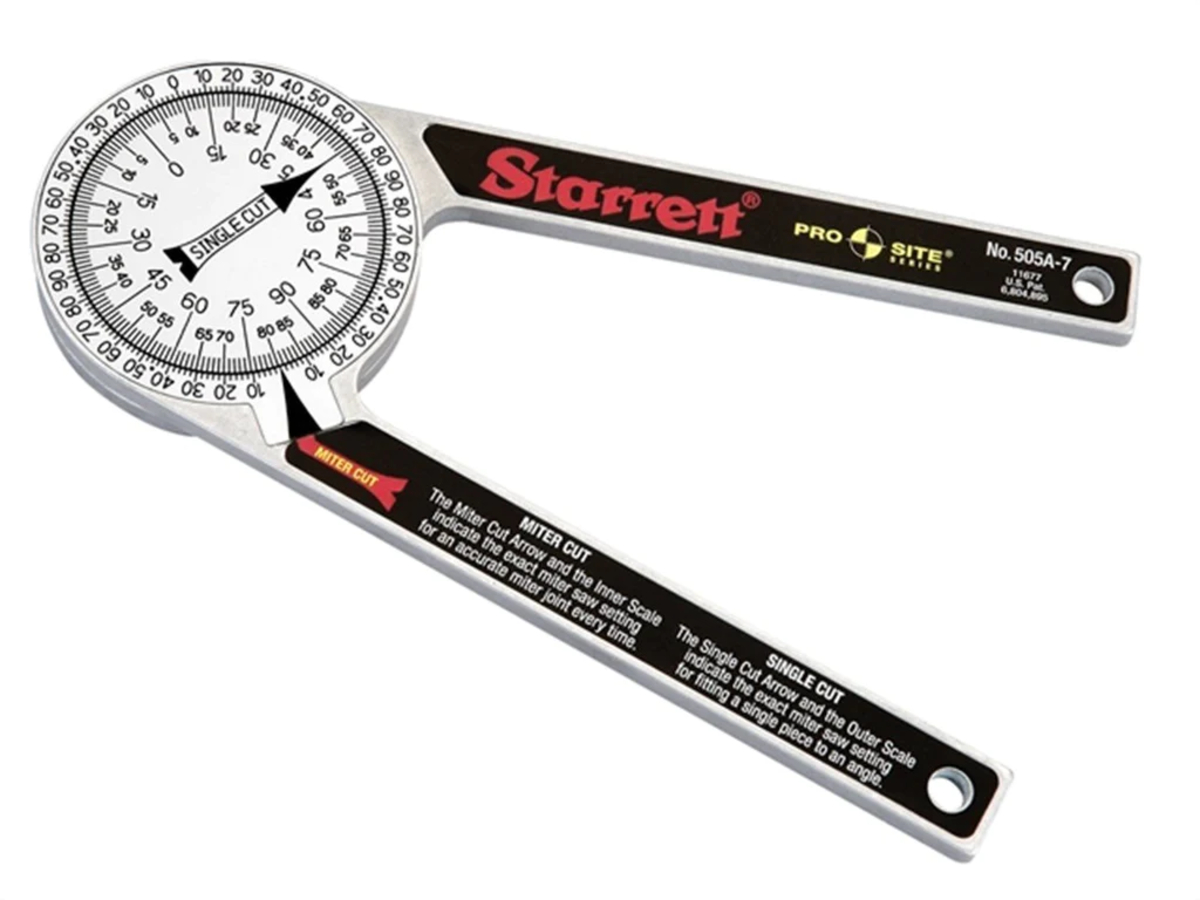
Getting to Know the Starrett Miter Protractor
Before we delve into the steps of using the Starrett Miter Protractor, let’s familiarize ourselves with this tool’s features and components.
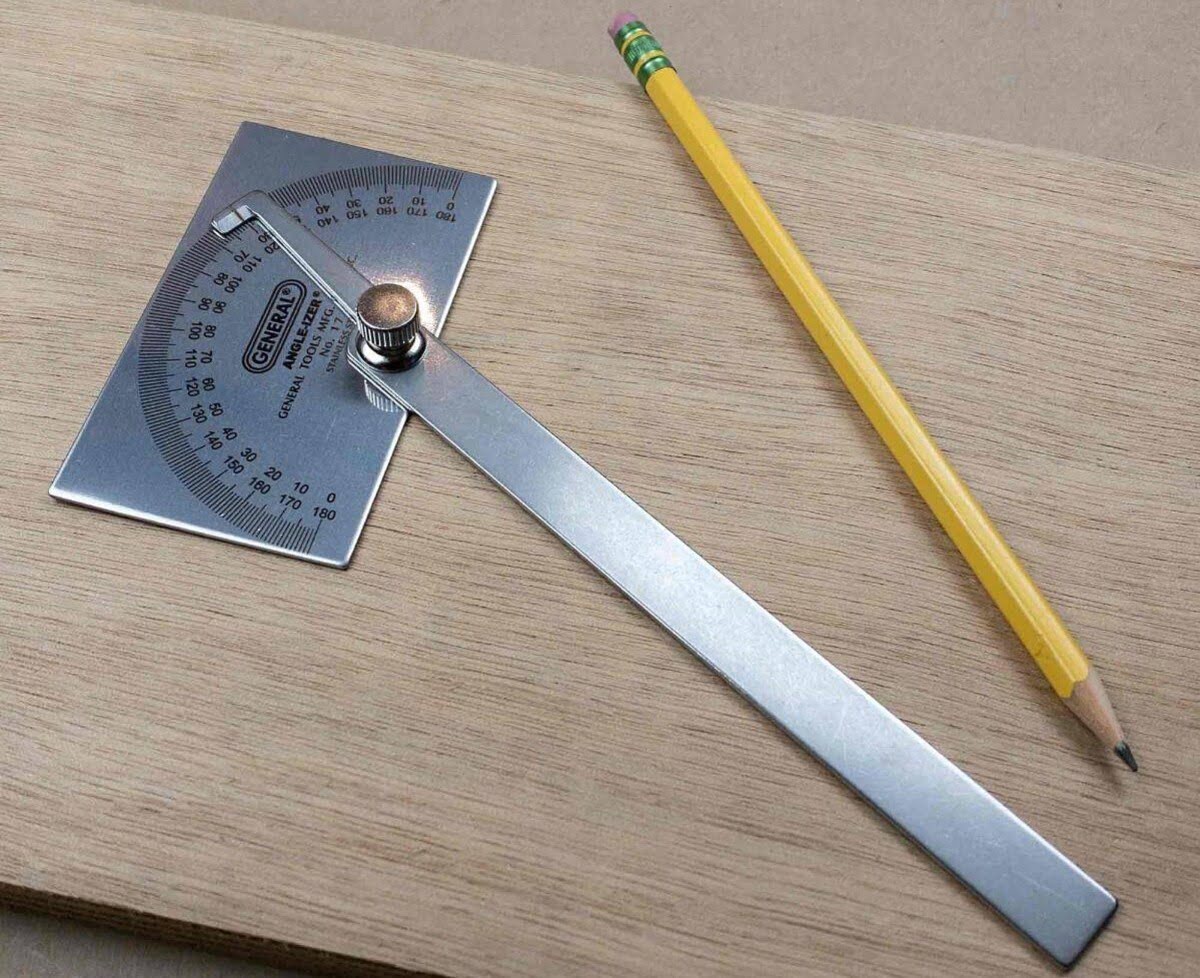
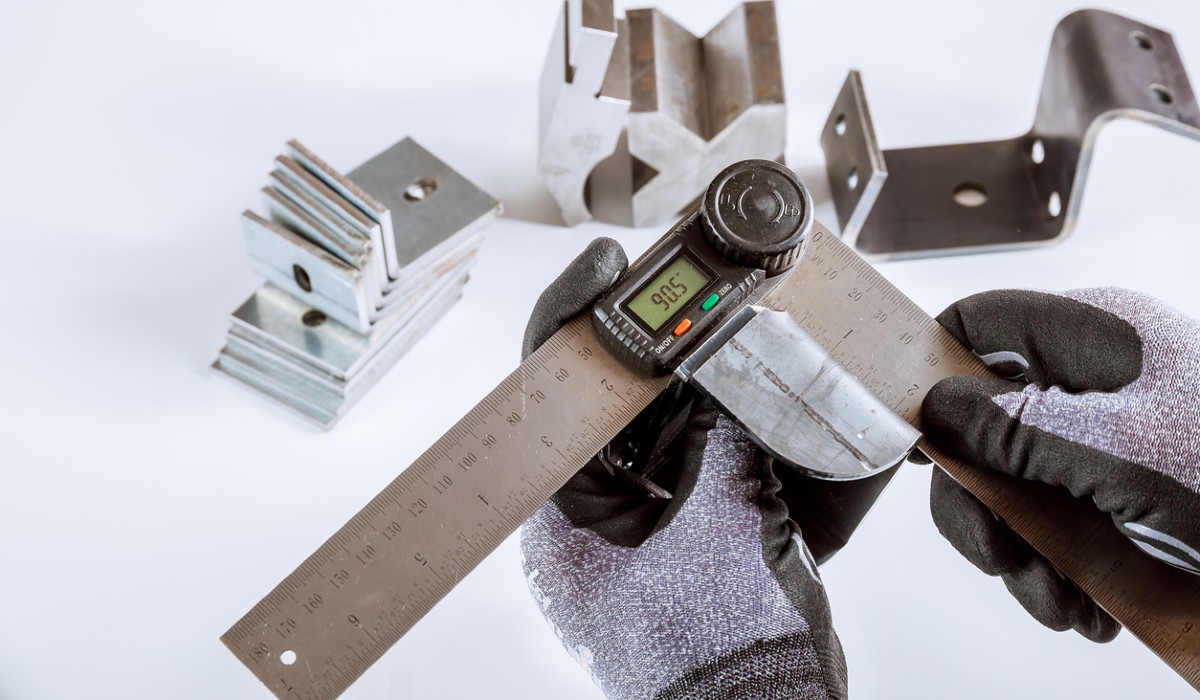
The Starrett Miter Protractor is a compact and lightweight tool that combines the functionality of a protractor and a miter gauge. It is specifically designed for use with miter saws and allows you to measure and set precise angles for your cuts.
The protractor features two main parts: the base and the arm. The base is a flat and rectangular piece that rests against the surface of the miter saw’s table. It has a scale that indicates the angle measurements in degrees, ranging from 0 to 180 degrees.
The arm, which is connected to the base, is the adjustable part of the protractor. It can be rotated to measure and set the desired angle. The arm has a locking mechanism that securely holds the angle in place once it has been set.
One of the standout features of the Starrett Miter Protractor is its precision. It is constructed with high-quality materials and calibrated to provide accurate measurements. The clear and easy-to-read markings on the scale make it effortless to identify the exact angle you are working with.
In addition to its functionality, the Starrett Miter Protractor is also designed with user convenience in mind. Its compact size allows for easy storage and portability, making it a versatile tool for both workshop and on-site projects.
Now that we have a good understanding of the Starrett Miter Protractor and its key features, let’s move on to the next section, where we will learn how to set up your miter saw in preparation for using this tool.
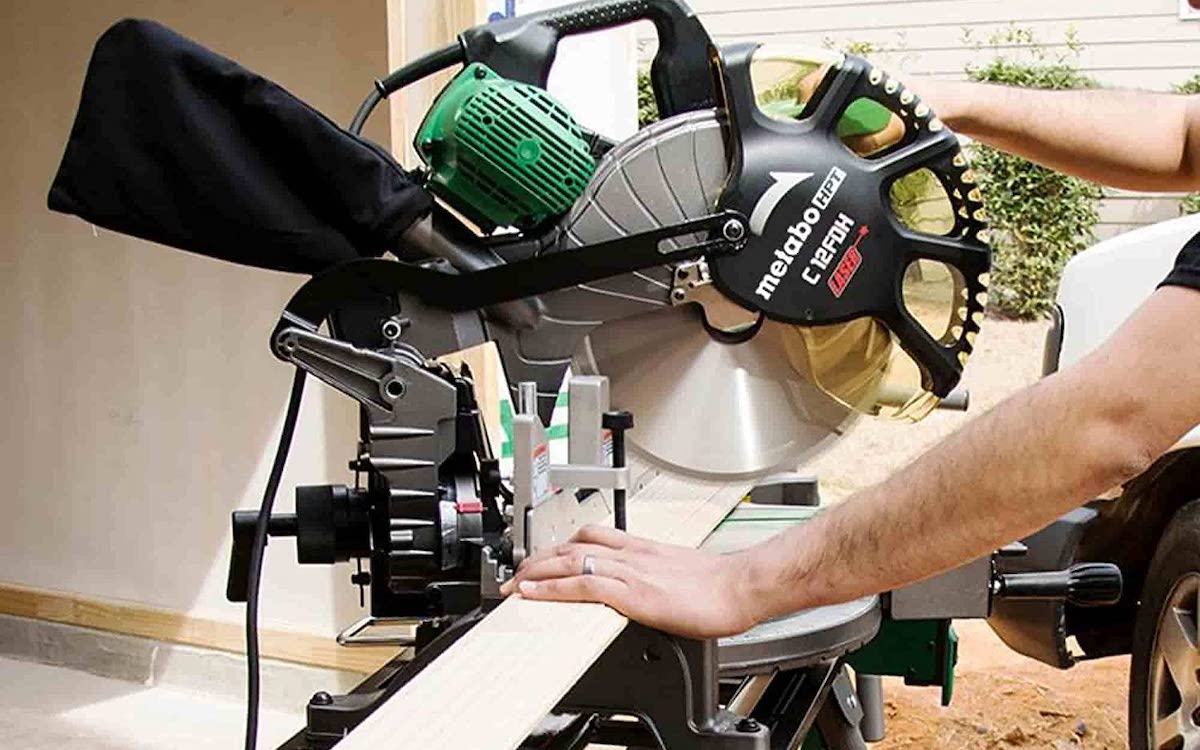
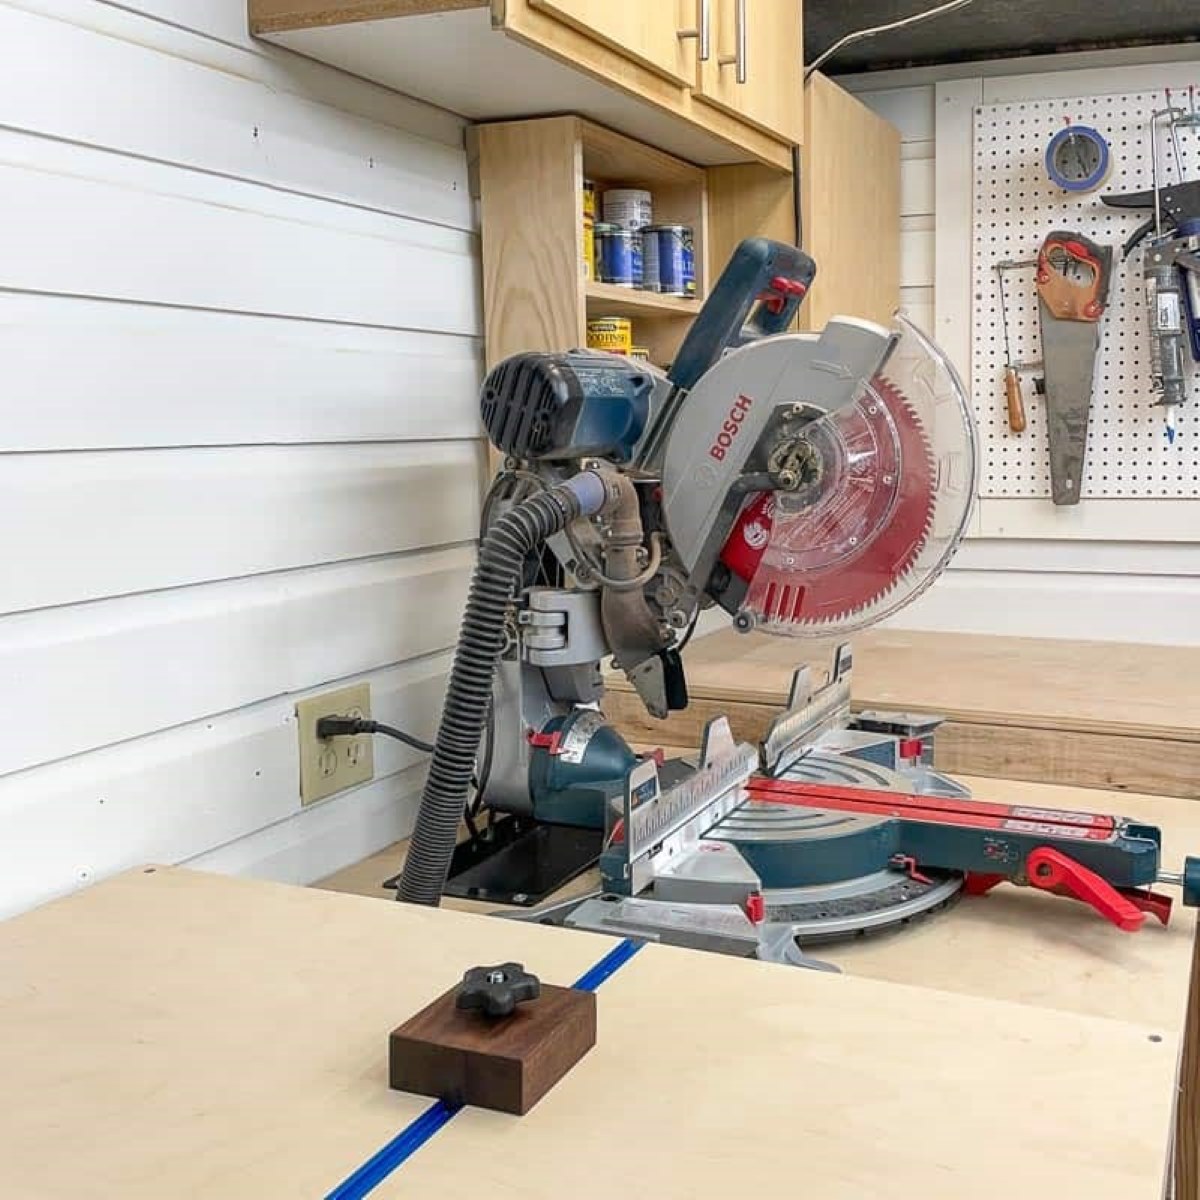
Step 1: Setting Up the Miter Saw
Before you can start using the Starrett Miter Protractor, it’s essential to properly set up your miter saw. Follow the steps below to ensure your saw is ready for accurate and precise cuts:
- Begin by preparing your work area. Make sure you have ample space to maneuver the boards or workpieces you will be cutting.
- Next, check that your miter saw is securely mounted or placed on a stable work surface. This will prevent any unwanted movement or vibrations during the cutting process.
- Adjust the miter saw’s fence or hold-down clamps to secure the material you will be cutting. This will help maintain stability and prevent any potential accidents.
- Check the alignment of the miter saw blade. Ensure that the blade is straight and perpendicular to the miter saw’s table. Use an appropriate tool, such as a combination square or an angle gauge, to ensure accuracy.
- Verify that the blade is sharp and in good condition. A dull or damaged blade will not give you clean and precise cuts. Replace the blade if necessary.
By properly setting up your miter saw, you lay the foundation for accurate and high-quality cuts. With the saw in optimal condition, you can now proceed to align the Starrett Miter Protractor for precise angle measurements.
True
Step 2: Aligning the Miter Protractor with the Miter Saw Blade
Once your miter saw is properly set up, it’s time to align the Starrett Miter Protractor with the miter saw blade. This step is crucial for accurate angle measurements. Follow these simple instructions:
- Start by ensuring that the miter saw’s blade is at a 90-degree angle (perpendicular) to the table. This will be the reference point for aligning the protractor.
- Place the base of the Starrett Miter Protractor flat against the miter saw’s table, ensuring that it is flush and parallel to the edge of the table.
- Adjust the arm of the protractor so that it is pointing towards the miter saw blade without touching it. Make sure the arm is straight and not at an angle.
- Rotate the arm of the protractor until it aligns with the blade’s cutting edge. Take care to align the protractor’s edge parallel to the blade’s edge.
- Double-check that the protractor is aligned accurately by visually inspecting the alignment from different angles. The protractor’s arm should perfectly align with the saw blade.
Once you have aligned the Starrett Miter Protractor with the miter saw blade, you can proceed to the next step of reading the angle measurement on the protractor.
It is important to note that the alignment process may vary slightly depending on the specific miter saw model and the design of the protractor. Always consult the user manual or specific instructions provided with your miter saw and protractor for any model-specific guidelines.
Now that you have successfully aligned the protractor, let’s move on to the next step: reading the angle measurement on the Starrett Miter Protractor.
True
Step 3: Reading the Angle Measurement on the Miter Protractor
Once you’ve aligned the Starrett Miter Protractor with the miter saw blade, it’s time to read the angle measurement on the protractor. The protractor’s scale is marked with degrees, allowing you to accurately determine the angle you’re working with.
- Start by locating the zero-degree mark on the scale of the Starrett Miter Protractor. This is usually indicated by a prominent line or a labeled zero.
- Next, look for the line or mark that aligns with the protractor arm. This mark will indicate the angle measurement.
- Read the angle measurement by identifying the number or degree marking that aligns with the protractor arm. Take note of the whole number and any decimal places if present.
For example, if the protractor arm aligns with the line labeled 45 degrees, then the angle measurement would be 45 degrees. If the arm aligns between two marks, you can estimate the angle measurement based on the nearest whole number or decimal place.
Keep in mind that different miter saw models may have varying increments on their protractors, such as 1-degree or 5-degree increments. Always take note of the specific increment on the protractor and adjust your angle measurement accordingly.
Now that you know how to read the angle measurement on the Starrett Miter Protractor, you can proceed to the next step of adjusting the miter saw to match the desired angle.
Remember, accuracy is key when using the miter protractor. Take your time to ensure the alignment and reading of the angle measurement are precise. This will help you achieve precise and professional cuts with your miter saw.
True
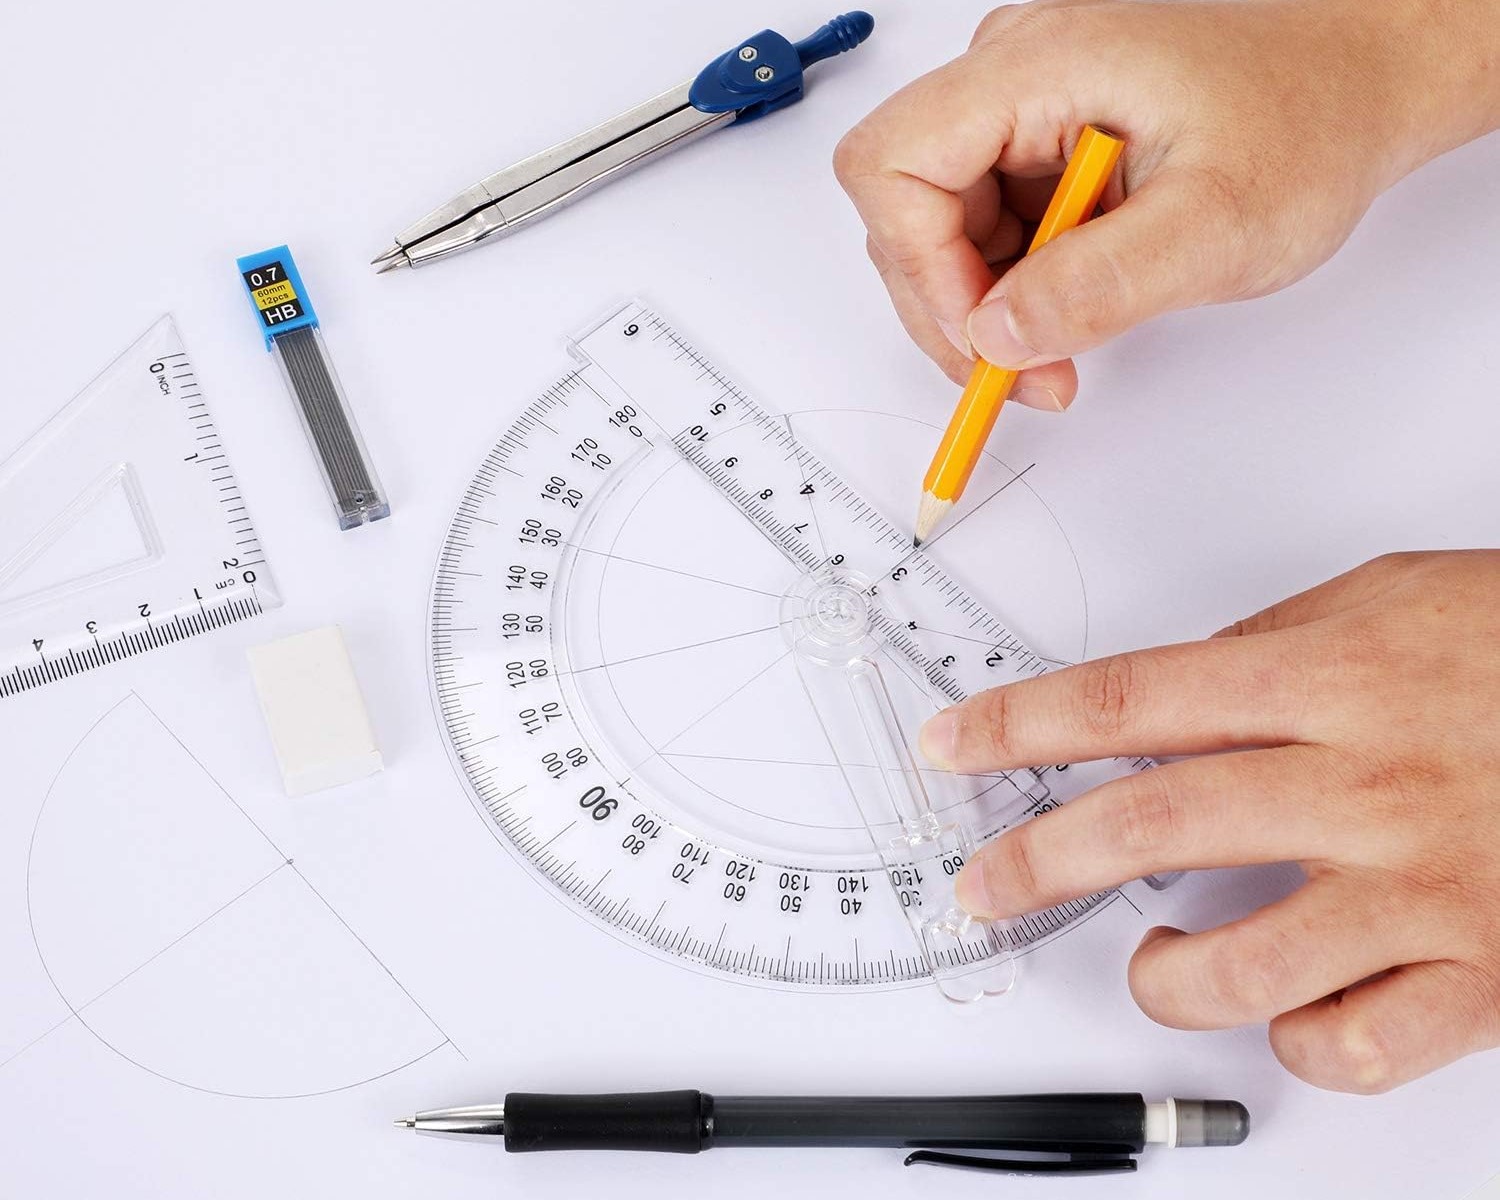
When using the Starrett Miter Protractor, ensure that the base of the tool is flat against the workpiece and the blade is aligned with the angle to accurately measure and mark miter cuts.
Read more: How To Use A Miter Saw Protractor
Step 4: Adjusting the Miter Saw to Match the Desired Angle
Now that you have determined the angle measurement using the Starrett Miter Protractor, it’s time to adjust the miter saw to match the desired angle. This step allows you to set the miter saw at the precise angle required for your project.
- Start by loosening the miter saw’s angle adjustment mechanism. This will vary depending on the model of your miter saw, but it usually involves releasing a locking lever or knob.
- Using the angle scale or gauge provided on your miter saw, set the blade at the desired angle indicated by the Starrett Miter Protractor. Pay close attention to the increment markings on the miter saw’s scale to ensure accurate adjustment.
- Once you have set the desired angle, secure the miter saw in place by tightening the angle adjustment mechanism. Ensure that the blade is securely locked at the chosen angle.
It’s important to note that some miter saws have detents or preset stops for common angles, such as 45 degrees or 90 degrees. If your desired angle corresponds to one of these presets, you can simply set the miter saw at the respective detent or preset stop.
After adjusting the miter saw to match the desired angle, double-check the alignment by visually inspecting the protractor arm and the blade. Ensure that they are parallel and properly aligned.
Now that you have adjusted the miter saw to match the desired angle, you are ready to move on to the next step of making accurate miter cuts with the Starrett Miter Protractor.
Remember to take your time during this step to ensure precision and accuracy. Properly adjusting the miter saw guarantees that your cuts will be at the correct angle, resulting in a professional and polished finished product.
True
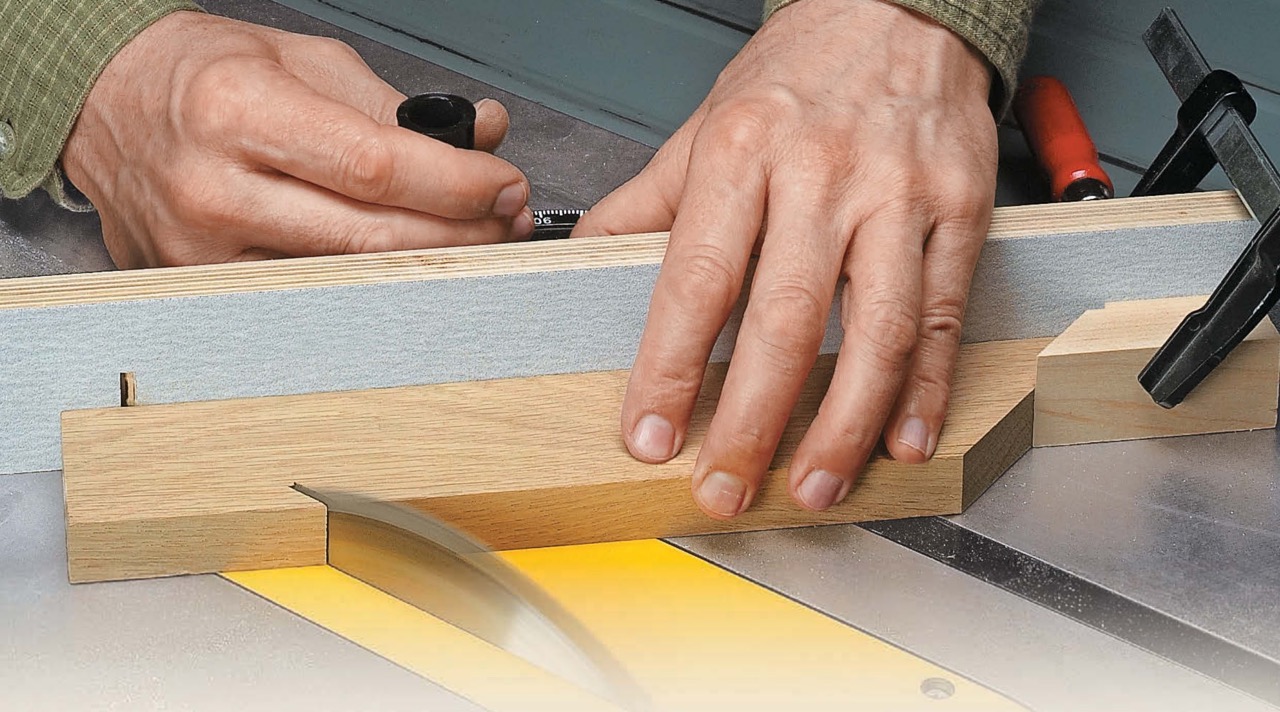
Step 5: Making Accurate Miter Cuts with the Starrett Miter Protractor
Now that your miter saw is adjusted to the desired angle, it’s time to put the Starrett Miter Protractor to work and make accurate miter cuts. Follow these steps to ensure precise and clean cuts:
- Prepare the material you will be cutting by measuring and marking the desired length.
- Position the material against the miter saw’s fence, ensuring it is securely held in place.
- Align the marked cutting line with the blade by carefully positioning the material on the saw’s table.
- Lower the blade and make sure it is clear of any obstructions, ensuring a smooth and uninterrupted cutting motion.
- Turn on the miter saw and slowly push the material through the blade, maintaining a steady and controlled motion.
As you guide the material through the blade, keep an eye on the Starrett Miter Protractor to ensure that the angle remains consistent throughout the cut. This will help you achieve accurate and clean miter cuts.
It’s important to note that proper safety precautions should be followed when operating a miter saw, including wearing safety glasses, using push sticks or push blocks if necessary, and keeping your hands clear of the blade at all times.
Once the cut is complete, turn off the miter saw and carefully remove the cut material from the table. Inspect the cut for accuracy and make any necessary adjustments for future cuts if needed.
By following these steps and utilizing the Starrett Miter Protractor, you can make precise and professional miter cuts for a variety of woodworking projects.
Now that you have successfully made accurate miter cuts using the Starrett Miter Protractor, let’s move on to some helpful tips for using this tool effectively.
True
Tips for Using the Starrett Miter Protractor Effectively
While the Starrett Miter Protractor is designed to simplify the process of making precise miter cuts, there are a few tips and tricks you can employ to enhance your experience and achieve even better results:
- Double-check your measurements: Before making any cuts, it’s important to double-check your angle measurements with the protractor. Small errors in measurement can lead to significant discrepancies in the final cuts.
- Make test cuts: If you are working on a project that requires precise angles, consider making test cuts on scrap material to ensure the accuracy of your setup. This will allow you to make any necessary adjustments before working on your actual project materials.
- Use a stop block: To ensure consistent and repeatable cuts, consider using a stop block. This can be a clamp or a piece of wood that acts as a guide, allowing you to position your material in the same spot for each cut.
- Maintain a clean workspace: Sawdust and debris can interfere with the accuracy of your measurements. Regularly clean your miter saw’s table and the Starrett Miter Protractor to ensure proper alignment and precision.
- Practice proper safety measures: Always prioritize safety when using a miter saw and the Starrett Miter Protractor. Read and follow the safety guidelines provided by the manufacturer, wear appropriate safety gear, and work in a well-ventilated area.
- Invest in a quality miter saw blade: The quality of your miter cuts depends not only on the accuracy of the angles but also on the sharpness and quality of the blade. Invest in a high-quality blade to achieve clean and precise cuts.
- Regularly calibrate your miter saw: Over time, miter saws may become slightly misaligned, affecting the accuracy of your angle measurements. Regularly calibrate and perform maintenance on your miter saw to ensure optimal performance.
By incorporating these tips into your woodworking routine, you can use the Starrett Miter Protractor more effectively and achieve outstanding results in your projects.
Now that you have a solid understanding of how to use the Starrett Miter Protractor and some valuable tips for optimal usage, you are ready to take your woodworking skills to the next level.
True
Conclusion
The Starrett Miter Protractor is a versatile tool that simplifies the process of making accurate miter cuts on a miter saw. By following the steps outlined in this guide, you can effectively use this tool to achieve precision and professionalism in your woodworking projects.
From setting up your miter saw to aligning the protractor and adjusting the saw to the desired angle, each step plays a crucial role in ensuring accurate and clean cuts. The Starrett Miter Protractor’s user-friendly design and precise measurements make it a valuable asset in any woodworking workshop or job site.
Remember to take your time, double-check your measurements, and prioritize safety when working with a miter saw and the Starrett Miter Protractor. Practice using the protractor on scrap materials before tackling your actual project to enhance your accuracy and build confidence in your skills.
By incorporating the tips provided in this guide, such as double-checking measurements, using stop blocks, and maintaining a clean workspace, you can further optimize your use of the Starrett Miter Protractor, ultimately improving the quality and precision of your miter cuts.
So, whether you’re a professional woodworker or a passionate DIY enthusiast, the Starrett Miter Protractor is a tool that will elevate your woodworking experience and help you achieve exceptional results. Explore its capabilities, unleash your creativity, and enjoy the satisfaction of creating beautiful and precise miter cuts in your woodworking projects.
Frequently Asked Questions about How To Use Starrett Miter Protractor
Was this page helpful?
At Storables.com, we guarantee accurate and reliable information. Our content, validated by Expert Board Contributors, is crafted following stringent Editorial Policies. We're committed to providing you with well-researched, expert-backed insights for all your informational needs.

0 thoughts on “How To Use Starrett Miter Protractor”