
Articles
What Is A Rip Cut In Woodworking
Modified: January 6, 2024
Learn all about rip cuts in woodworking with our informative articles. Find tips, techniques, and step-by-step guides to help you master this essential woodworking skill.
(Many of the links in this article redirect to a specific reviewed product. Your purchase of these products through affiliate links helps to generate commission for Storables.com, at no extra cost. Learn more)
Introduction
Woodworking is a versatile and rewarding craft that allows you to create beautiful and functional pieces from raw wood. Whether you are a beginner or an experienced woodworker, it is important to understand the various techniques and processes involved in working with wood. One such technique that is commonly used in woodworking is called a rip cut.
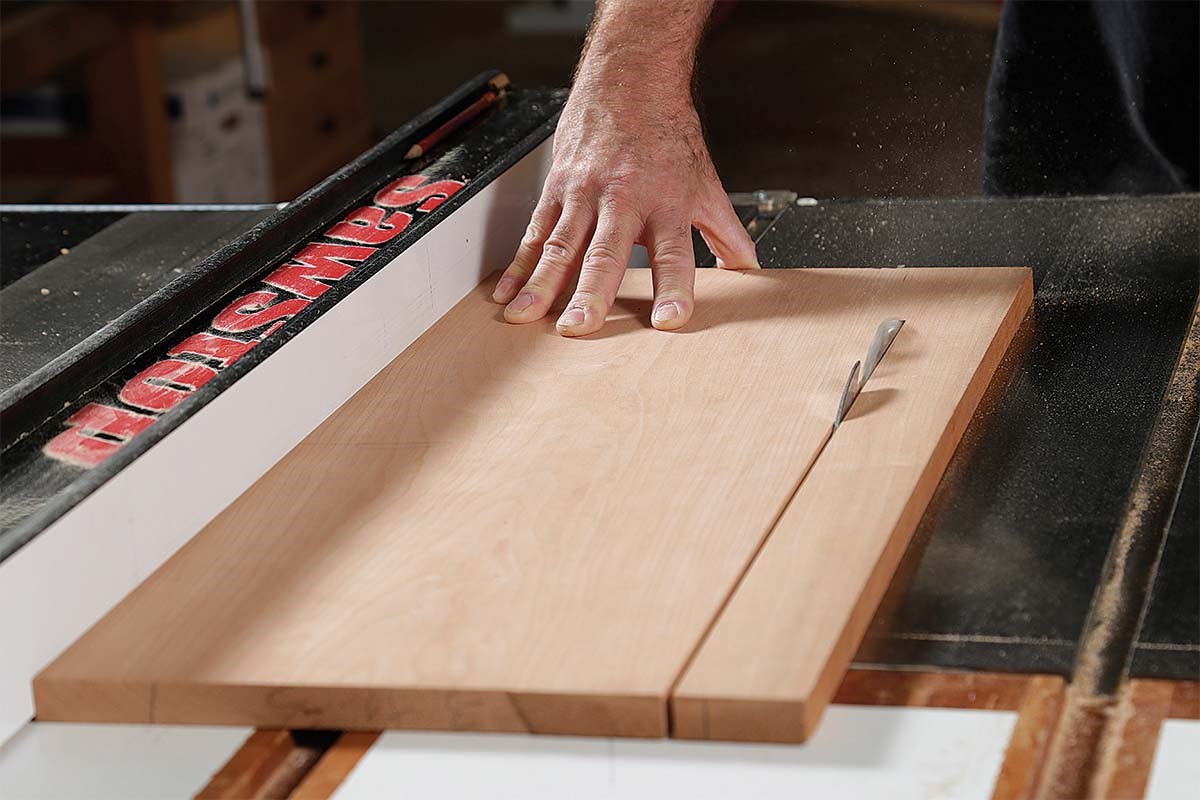
A rip cut is a fundamental woodworking technique that involves cutting a piece of wood lengthwise, parallel to the grain. Unlike a crosscut, which involves cutting across the grain, a rip cut follows the natural pattern of the wood fibres, resulting in a long, narrow strip of wood.
The purpose of a rip cut is to create boards of different widths, remove excess material, or reshape the wood to fit a specific design or project. It is a versatile technique that can be used in a wide range of applications, from building furniture and cabinets to creating decorative trim pieces or even constructing wooden toys.
To perform a rip cut, you will need a few basic tools and equipment, including a table saw or a circular saw with a rip fence attachment, a push stick or push block, and a measuring tape or ruler to ensure accurate cuts. Safety precautions should always be followed when performing rip cuts, as they involve working with sharp tools and powerful machinery.
In this article, we will delve into the details of rip cuts in woodworking, exploring the tools and equipment required, the step-by-step process to perform a rip cut, as well as safety precautions to keep in mind. We will also discuss common issues that may arise during rip cuts and provide tips and tricks for successful outcomes.
So, if you are ready to expand your woodworking skills and unlock the potential of rip cuts, let’s dive in and explore this essential technique in more detail.
Key Takeaways:
- Rip cuts are a versatile woodworking technique used to create boards of varying widths, remove excess material, and shape wood to fit specific design requirements, making them essential for a wide range of woodworking applications.
- Prioritizing safety, using high-quality blades, and maintaining a clean working environment are crucial for achieving accurate and successful rip cuts, allowing woodworkers to unlock endless possibilities in their woodworking projects.
Read more: How To Cut Hardwood With Hand Tools
Definition of Rip Cut
A rip cut is a woodworking technique that involves cutting a piece of wood lengthwise, parallel to the grain. It derives its name from the action of “ripping” or splitting the wood along its length. Unlike a crosscut, which cuts across the grain, a rip cut follows the natural pattern of the wood fibers.
When performing a rip cut, the woodworker aims to produce a long, narrow strip of wood that can be used for various applications. This technique is commonly used to create boards of different widths, remove excess material, or shape the wood to fit specific design requirements.
It is important to note that rip cuts require careful precision and attention to detail. Since they involve cutting with the grain, there is a higher risk of the wood splitting or tearing if not performed correctly. Therefore, using the right tools, adopting the proper cutting techniques, and ensuring safety measures are crucial for achieving clean and accurate rip cuts.
Rip cuts can be executed using various tools, including table saws, circular saws, band saws, or even hand saws. The choice of tool depends on the size and thickness of the wood being cut, as well as the desired outcome.
Overall, a rip cut is a fundamental woodworking technique that allows woodworkers to shape and modify wood to their specifications. By understanding the principles and techniques involved in rip cuts, woodworkers can expand their range of abilities and create unique pieces with precision and skill.
Purpose of Rip Cuts in Woodworking
Rip cuts serve several important purposes in woodworking, making them a valuable technique for woodworkers of all skill levels. Understanding the purpose of rip cuts can help you utilize this technique effectively and achieve desired results in your woodworking projects.
1. Creating Boards of Different Widths: One of the primary purposes of rip cuts is to create boards of varying widths. This is particularly useful when constructing furniture or cabinetry, where different components require different widths of wood. By performing rip cuts, you can efficiently transform a wide piece of lumber into narrower boards of the desired size.
2. Removing Excess Material: Rip cuts are also used to remove excess material from a piece of wood. This is often necessary when working with rough-sawn lumber or salvaged wood that needs to be trimmed down to the desired dimensions. By making precise rip cuts, you can remove unwanted sections and create a clean and refined piece of wood.
3. Shaping Wood to Fit Design Requirements: In woodworking, it is common to encounter situations where the wood needs to be shaped to fit specific design requirements. This could involve tapering the edges of a tabletop, creating a beveled edge for a decorative trim piece, or cutting a curve along the length of a wooden board. Rip cuts allow woodworkers to reshape the wood and achieve the desired design elements.
4. Material Conservation: Rip cuts are an effective way to optimize material usage and reduce waste. By carefully planning and executing rip cuts, woodworkers can derive maximum yield from a piece of lumber. This is especially important when working with expensive or unique wood species, as it allows you to make the most of your resources and minimize material waste.
5. Joinery and Woodworking Techniques: Rip cuts play a vital role in various joinery techniques, such as making tongue-and-groove joints, rabbets, or dado cuts. These joints are commonly used in furniture-making, cabinetry, and other woodworking projects to join pieces of wood securely and create sturdy structures. By mastering the art of rip cuts, you can enhance your joinery skills and create strong and visually appealing woodwork.
Overall, rip cuts are a crucial technique in woodworking that allows woodworkers to transform raw wood into functional and beautiful pieces. Whether you are shaping wood, creating boards, or optimizing material usage, rip cuts provide a versatile and effective means of achieving your woodworking goals.
Tools and Equipment Required for Rip Cuts
Performing rip cuts in woodworking requires having the right tools and equipment. Having the proper tools not only ensures accurate and clean cuts but also plays a crucial role in ensuring your safety. Here are the essential tools and equipment you will need for rip cuts:
1. Table Saw: A table saw is a powerful tool that is commonly used for performing rip cuts. It consists of a circular blade mounted on an arbor, which is powered by an electric motor. Table saws offer precise control and stability, making them ideal for cutting large pieces of wood lengthwise. They often come with a rip fence, which acts as a guide to maintain a straight and consistent cut.
2. Circular Saw: If you don’t have access to a table saw, a circular saw can also be used for rip cuts. When using a circular saw, it is essential to attach a rip fence to ensure straight and accurate cuts. You can purchase a rip fence attachment or make one using a straight piece of wood or a metal straight edge.
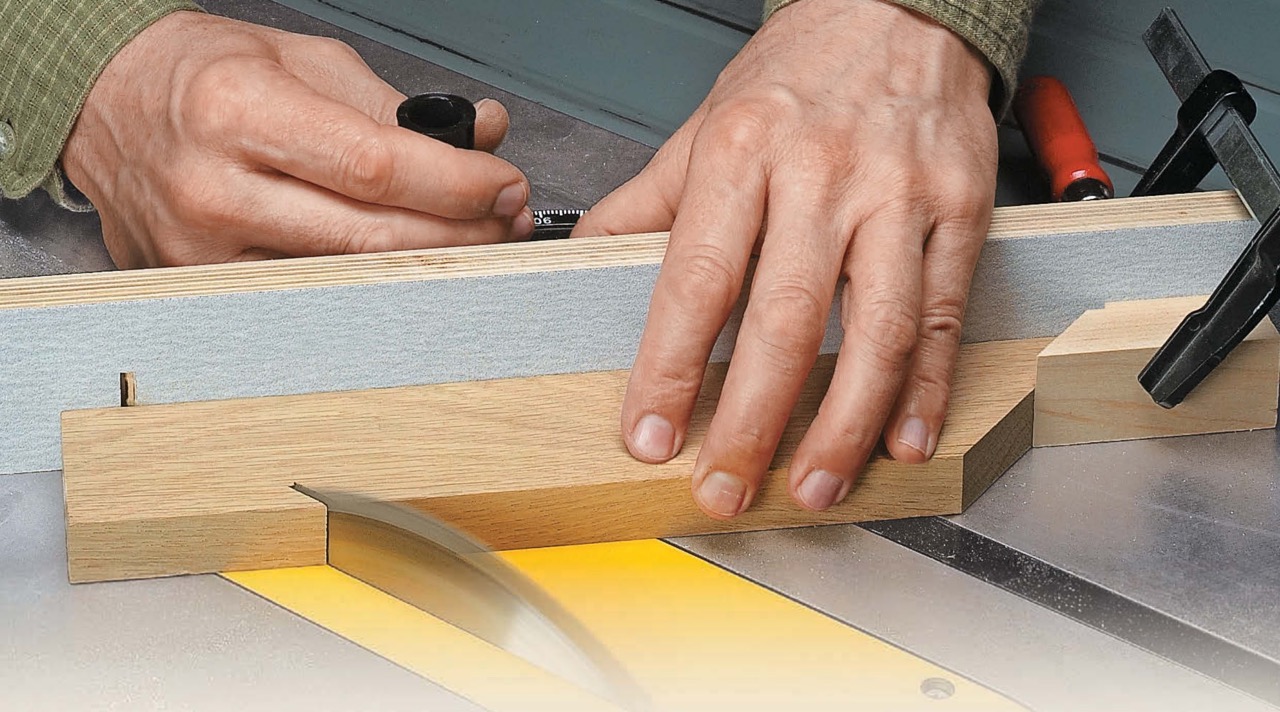
3. Push Stick or Push Block: When performing rip cuts, it is crucial to keep your hands a safe distance from the blade. A push stick or push block is used to push the wood through the saw while maintaining a safe grip and preventing your hands from getting too close to the blade. These tools provide control and help reduce the risk of accidents when feeding the wood into the saw.
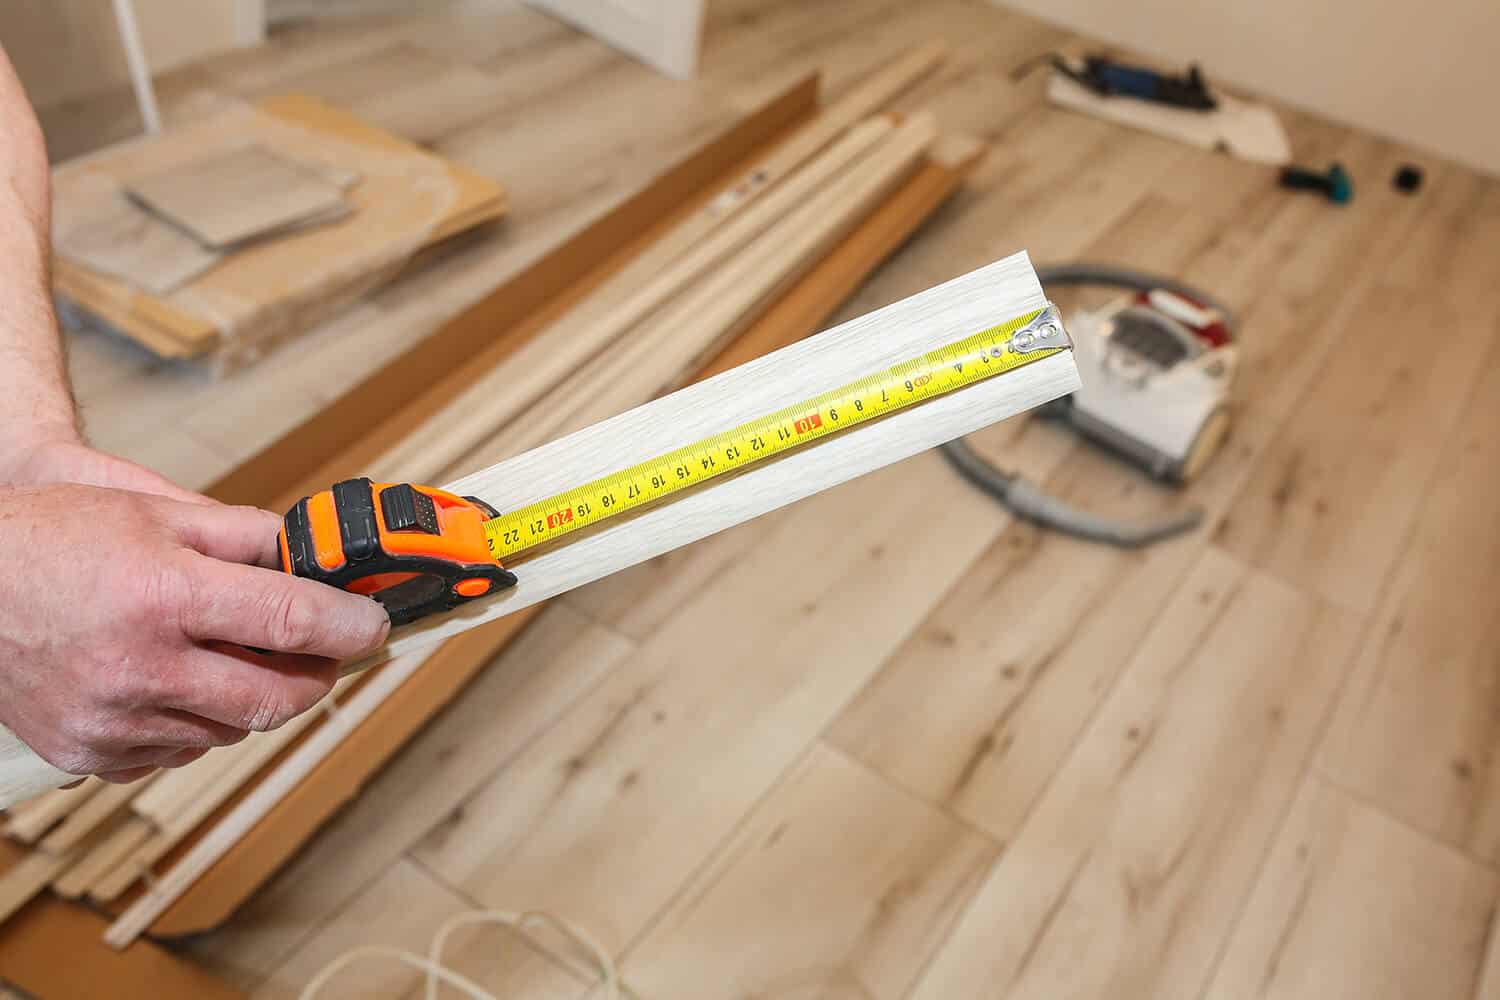
4. Measuring Tape or Ruler: Accurate measurements are essential for rip cuts to ensure the wood is cut to the desired width. A measuring tape or ruler is used to measure and mark the dimensions on the wood before cutting. Make sure to use a reliable and accurate measuring tool to achieve precise results.
5. Safety Equipment: Safety should always be a priority when working with power tools. Wear eye protection, such as safety glasses or goggles, to shield your eyes from flying debris. Additionally, wearing ear protection, such as earplugs or earmuffs, can help reduce noise-induced hearing damage. It is also advisable to wear a dust mask to avoid inhaling wood particles and dust generated during the cutting process.
6. Clamps: Clamps are useful for securing the wood in place while performing rip cuts. They help prevent the wood from shifting or moving during the cutting process, ensuring accurate and consistent cuts. Use different types of clamps, such as bar clamps or quick-release clamps, depending on the size and shape of the wood you are working with.
7. Workbench or Sawhorses: Having a stable and level work surface is important when performing rip cuts. A sturdy workbench or a set of sawhorses provides a secure platform to support the wood during cutting. This helps maintain control and stability, ensuring accurate and safe cuts.
Having these essential tools and equipment for rip cuts will enable you to perform this technique effectively and with confidence. Remember to follow the manufacturer’s guidelines and practice proper safety measures to ensure a successful and accident-free woodworking experience.
Steps to Perform a Rip Cut
Performing a rip cut requires careful planning and proper execution to ensure clean and accurate results. Here are the general steps to follow when performing a rip cut in woodworking:
1. Measure and Mark: Start by measuring the desired width of the board you want to create. Use a measuring tape or ruler to mark the measurement on the edge of the wood. Ensure the mark is clear and precise, as it will serve as a guide during the cutting process.
2. Set Up the Fence: If you are using a table saw, position the rip fence parallel to the blade at the desired distance. The rip fence acts as a guide to ensure a straight and consistent cut. Adjust the fence by loosening the lock mechanism, sliding it into position, and tightening the lock to secure it in place.
3. Safety Precautions: Before starting the cut, ensure you are wearing the appropriate safety equipment. Put on safety glasses or goggles to protect your eyes from flying debris, and consider wearing ear protection to reduce noise levels. It is also advisable to use a dust mask to prevent inhalation of wood particles and dust.
4. Position the Wood: Place the wood on the table saw or work surface, aligning it with the rip fence. Ensure that the marked measurement aligns with the blade and the fence. Make sure the wood is securely supported on the table or workbench to avoid any movement or instability during the cut.
5. Start the Cut: Turn on the table saw, grip the push stick or push block firmly, and position it against the wood. Apply gentle pressure as you feed the wood into the blade. Maintain a steady pace and avoid forcing the wood through the cut, as it can cause kickback or lead to an uneven cut.
6. Follow Through: Continue pushing the wood through the blade, keeping it against the rip fence. Use the push stick or push block to maintain control and steady pressure. Pay attention to the sound of the blade and the feel of the wood cutting to ensure a smooth and clean cut.
7. Complete the Cut: Once the wood has passed through the blade, keep applying gentle pressure until the entire length of the cut is complete. Allow the blade to come to a complete stop before removing the cut piece or adjusting the rip fence.
8. Verify and Adjust: Check the resulting cut piece to ensure it matches the desired width and is free from any defects or irregularities. If adjustments are needed, pause and readjust the rip fence before performing additional rip cuts.
By following these steps, you can perform accurate and clean rip cuts in your woodworking projects. Remember to always prioritize safety, use the appropriate tools and equipment, and practice proper technique to achieve the best results.
When making a rip cut in woodworking, always use a rip fence to guide the wood through the saw blade. This will help ensure a straight and accurate cut.
Read more: How To Cut Rabbet With Hand Tools
Safety Precautions for Rip Cuts
Performing rip cuts in woodworking requires working with sharp tools and powerful machinery. It is essential to prioritize safety and follow proper precautions to minimize the risk of accidents or injuries. Here are some important safety precautions to keep in mind when performing rip cuts:
1. Wear Personal Protective Equipment (PPE): Always wear the appropriate personal protective equipment, such as safety glasses or goggles, to protect your eyes from flying debris. Additionally, consider wearing ear protection, such as earplugs or earmuffs, to reduce the risk of noise-induced hearing damage. A dust mask is also recommended to prevent inhalation of wood particles and dust generated during the cutting process.
2. Familiarize Yourself with the Tools: Ensure that you are familiar with the specific tools you are using, such as table saws or circular saws. Read and understand the manufacturer’s instructions and safety guidelines for each tool before operating it. Different tools may have specific safety features or operating procedures that you need to be aware of.
3. Keep a Clear Workspace: Maintain a clean and organized work area around the cutting area. Remove any unnecessary objects or obstacles that could interfere with the operation or cause tripping hazards. Ensure there is ample space for the wood to move freely through the cut without obstruction.
4. Use a Rip Fence or Guide: When using a table saw or circular saw, always use a rip fence or guide to keep the wood aligned and straight during the cut. This helps maintain control and accuracy while reducing the risk of kickback or binding. Ensure that the fence is properly set and securely locked in place.
5. Use Push Sticks or Push Blocks: To keep your hands a safe distance from the blade, always use push sticks or push blocks when feeding the wood through the saw. These tools provide better control, allowing you to maintain a safe grip on the wood while keeping your hands away from the blade. Use them consistently throughout the entire cut.
6. Maintain Proper Blade Height: Set the blade height to the appropriate position, leaving just enough clearance for the wood to pass through without causing excessive friction or binding. Proper blade height helps ensure a smoother and safer cutting process. Consult the tool’s manual for guidance on adjusting the blade height.
7. Avoid Overloading the Blade: Do not force the wood through the cut. Instead, apply steady and consistent pressure as you feed the wood into the blade. Forcing the wood can lead to kickback or result in an uneven cut. Allow the blade to do the work and let it cut at its own pace.
8. Stay Focused and Alert: When performing rip cuts, maintain focus and give your full attention to the task at hand. Avoid distractions and do not rush the process. Take regular breaks if needed to prevent fatigue, as tiredness can increase the risk of accidents.
9. Unplug Power Tools when Not in Use: When you are finished using a power tool, make sure to unplug it from the power source. This helps prevent accidental starting and reduces the risk of injury when handling or adjusting the tool.
10. Seek Training and Guidance: If you are new to woodworking or using power tools, it is advisable to seek proper training or guidance from experienced woodworkers or professionals. They can teach you the correct techniques, safety protocols, and best practices to ensure safe and successful rip cuts.
By following these safety precautions, you can minimize the risk of accidents and injuries when performing rip cuts in woodworking. Always prioritize safety, be aware of your surroundings, and use the appropriate tools and equipment for the task at hand.
Common Issues and Troubleshooting
While performing rip cuts in woodworking, you may encounter common issues that can affect the quality and accuracy of your cuts. Understanding these issues and knowing how to troubleshoot them can help you overcome challenges and achieve better results. Here are some common issues and their potential solutions:
1. Tearout or Splintering: Tearout or splintering can occur when the wood fibers become damaged or torn during the cut, resulting in an uneven and rough edge. To minimize tearout, try the following solutions:
- Use a sharp, high-quality blade that is appropriate for the type of wood you are cutting.
- Apply masking tape or painter’s tape along the cutline to help reduce tearout.
- Make sure the blade height is properly set to just clear the thickness of the wood.
- Cut with a slower feed rate to reduce the strain on the wood fibers.
2. Binding or Kickback: Binding occurs when the wood becomes caught between the blade and the fence, causing the wood to stall or kickback forcefully. This can be dangerous and potentially cause injury. To avoid binding and kickback, consider these precautions:
- Use a push stick or push block to maintain control and keep your hands a safe distance from the blade.
- Ensure the rip fence is properly aligned with the blade and securely locked in place.
- Do not force the wood through the cut, but instead allow the blade to cut at its own pace.
- Inspect the wood for any irregularities, knots, or moisture content that may contribute to binding.
3. Inaccurate Cuts or Variations in Width: Inaccurate cuts or variations in width can be frustrating, especially when working on projects that require precise measurements. Here are some tips to troubleshoot this issue:
- Check that the rip fence is parallel to the blade and properly aligned throughout the entire cut.
- Inspect the blade for signs of dullness or damage. Replace the blade if necessary.
- Ensure your measurement and marking are accurate before making the cut.
- Consider using a featherboard to help guide and secure the wood against the rip fence, allowing for consistent and accurate cuts.
4. Burning or Scorch Marks: Burning or scorch marks on the wood can occur when the blade heats up due to friction, causing discoloration or charring. To prevent burning or scorch marks:
- Ensure the blade is sharp and clean, as a dull or dirty blade can generate excessive heat.
- Monitor the feed rate and avoid feeding the wood too slowly, which can cause excessive heat buildup.
- Consider using a blade with a higher tooth count, which can help dissipate heat more effectively.
Remember that practice and experimentation play a significant role in troubleshooting and improving the quality of your rip cuts. As you gain more experience, you will become more adept at identifying and resolving issues that may arise during the cutting process. Don’t be discouraged by setbacks – instead, approach them as learning opportunities and keep refining your technique.
Tips and Tricks for Successful Rip Cuts
To achieve clean, accurate, and successful rip cuts in woodworking, consider the following tips and tricks that can enhance your technique:
1. Use High-Quality Blades: Invest in high-quality blades that are appropriate for the type of wood you are cutting. Sharp blades with the correct tooth design and an appropriate number of teeth per inch (TPI) will yield cleaner cuts and reduce tearout.
2. Take Your Time: Rushing through the cutting process can lead to mistakes and compromised results. Take your time and maintain a steady and controlled pace when feeding the wood through the saw. This helps to ensure accuracy and reduce the risk of accidents.
3. Check for Moisture Content: Wood with high moisture content can be more prone to warping or binding during rip cuts. Check the moisture content of the wood using a moisture meter before cutting. Aim for wood with a moisture content appropriate for your region and the specific woodworking project.
4. Optimize Material Preparation: Properly preparing your wood material before making rip cuts can greatly improve the quality of your cuts. This involves jointing and planing the wood to ensure flat and straight edges, which will result in more precise and consistent cuts.
5. Use Featherboards: Featherboards are an invaluable tool for maintaining consistent pressure against the rip fence, ensuring that your wood remains flat and straight during the cut. They help prevent binding, minimize tearout, and improve the overall quality of the cut.
6. Test Cuts and Adjustments: Before making final cuts on your workpiece, conduct test cuts on scrap wood of similar thickness and species. This allows you to fine-tune the rip fence and blade settings, ensuring accurate measurements and reducing the risk of errors on your actual project.
7. Consider Blade Angle: Depending on the desired outcome and wood species, experimenting with the blade angle during the rip cut can yield different results. Sometimes, a slight tilt of the blade can help reduce tearout or create a smoother edge; however, this technique requires practice and caution to avoid accidents.
8. Maintain a Clean Working Environment: Dust and debris buildup can affect the quality of your cuts by obstructing the blade or causing overheating. Regularly clean your work area, including the table saw, to minimize dust and debris accumulation. This promotes better visibility and reduces the risk of burning or scorching the wood.
9. Secure the Wood Properly: Ensure that the wood is securely held against the rip fence and the work surface. Use clamps or other appropriate methods to prevent movement or shifting during the cut. This ensures consistent and accurate cuts while maintaining your safety.
10. Practice Proper Blade Maintenance: Regularly clean and maintain your blades to keep them in optimal condition. Clean resin and pitch buildup from the blade, and sharpen or replace the blade when necessary. A well-maintained blade will perform better and provide cleaner cuts.
11. Safety First: Always prioritize safety and never compromise on safety measures. Familiarize yourself with the user manual of your tools, wear appropriate safety equipment, and follow safety guidelines and procedures. Remember, a safe woodworking environment leads to successful and enjoyable rip cuts.
By incorporating these tips and tricks into your woodworking practice, you can enhance the precision, quality, and overall success of your rip cuts. Remember to be patient, practice, and continuously refine your technique to achieve the best results in your woodworking projects.
Conclusion
Rip cuts are a fundamental woodworking technique that allows woodworkers to shape, size, and transform wood to their desired specifications. By understanding the definition, purpose, and steps involved in rip cuts, woodworkers can unlock a world of possibilities in their woodworking projects.
Throughout this article, we have explored the definition of rip cuts, which involve cutting wood lengthwise, parallel to the grain. We have discussed the importance of rip cuts in creating boards of different widths, removing excess material, and shaping wood to fit specific design requirements. Rip cuts are versatile and essential for various woodworking applications.
Furthermore, we have delved into the tools and equipment required for rip cuts, emphasizing the importance of safety and the necessary measures to protect oneself during woodworking activities. We have also provided step-by-step instructions on how to perform rip cuts effectively and accurately.
Additionally, we addressed common issues and troubleshooting tips to help woodworkers overcome challenges that may arise during rip cuts. By understanding these issues and knowing how to address them, woodworkers can achieve cleaner and more precise cuts in their projects.
Finally, we shared valuable tips and tricks to enhance the success of rip cuts, emphasizing the use of high-quality blades, taking your time, ensuring proper material preparation, and maintaining a clean working environment. By implementing these tips, woodworkers can optimize their results and improve their overall woodworking experience.
In conclusion, rip cuts are a fundamental technique that every woodworker should master. With practice, attention to detail, and a commitment to safety, woodworkers can achieve accurate, clean, and successful rip cuts, unlocking endless possibilities in their woodworking projects.
So, if you’re ready to elevate your woodworking skills and create remarkable pieces, embrace the art of rip cuts and enjoy the journey of turning ordinary pieces of wood into extraordinary works of art.
Frequently Asked Questions about What Is A Rip Cut In Woodworking
Was this page helpful?
At Storables.com, we guarantee accurate and reliable information. Our content, validated by Expert Board Contributors, is crafted following stringent Editorial Policies. We're committed to providing you with well-researched, expert-backed insights for all your informational needs.


0 thoughts on “What Is A Rip Cut In Woodworking”