
Articles
How To Build Woodworking Bench
Modified: December 7, 2023
Discover expert tips and step-by-step guides on building the perfect woodworking bench with our collection of informative articles. Enhance your woodworking skills today!
(Many of the links in this article redirect to a specific reviewed product. Your purchase of these products through affiliate links helps to generate commission for Storables.com, at no extra cost. Learn more)
Introduction
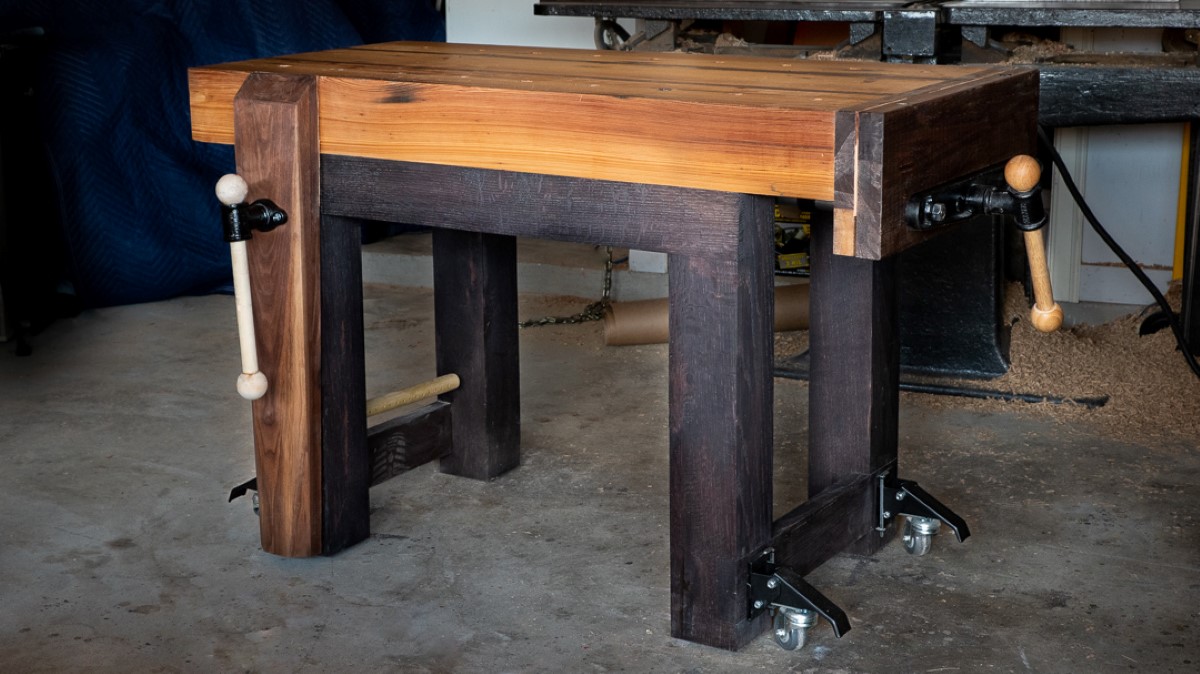
When it comes to woodworking, having a sturdy and reliable workbench is essential. A woodworking bench provides a solid foundation for you to work on, making your projects easier and more efficient. While there are many pre-made workbenches available in the market, building your own woodworking bench can be a rewarding and cost-effective option.
In this article, we will guide you through the process of building your own woodworking bench. We will cover everything from the tools and materials needed to planning the design and assembling the bench. Whether you are a beginner or an experienced woodworker, this guide will help you create a bench that suits your needs and enhances your woodworking experience.
Before we get started, it’s important to remember that building a woodworking bench requires some basic woodworking skills and tools. If you’re new to woodworking, don’t be intimidated! This project can be a great way to improve your skills and learn new techniques.
So, grab your tools and let’s get started on building your very own woodworking bench!
Key Takeaways:
- Building your own woodworking bench allows you to create a customized, sturdy, and functional work surface that enhances your woodworking experience while reflecting your craftsmanship and style.
- By carefully planning, selecting the right materials, and following precise cutting and assembly steps, you can build a woodworking bench that not only meets your specific needs but also provides a sense of accomplishment and satisfaction in your woodworking journey.
Read more: How To Build Patio Benches
Tools and Materials Needed
Before you begin building your woodworking bench, it’s important to gather all the necessary tools and materials. Here is a list of the essential items you will need:
Tools:
- Measuring tape
- Miter saw or circular saw
- Chisel set
- Drill with assorted drill bits
- Screwdriver set
- Clamps
- Woodworking vice
- Sanding block or electric sander
- Router (optional)
- Paintbrushes or foam brushes
Materials:
- 2×4 lumber for the base and legs
- ¾” plywood for the top
- Wood screws
- Wood glue
- Wood stain or paint
- Protective finish (polyurethane or lacquer)
It’s important to select high-quality materials for your woodworking bench. The 2×4 lumber should be straight and free from knots or defects. Plywood should be smooth and free from warping. When it comes to screws, choose ones specifically designed for woodworking projects.
Additionally, make sure to have a well-ventilated workspace and proper safety equipment, such as safety glasses, ear protection, and a dust mask.
Once you have gathered all the necessary tools and materials, you are ready to move on to the next step: planning the design of your woodworking bench.
Planning the Design
Before you start cutting and assembling the wood, it’s important to plan the design of your woodworking bench. Consider the following factors:
Read more: How To Build Bench Seat With Storage
Size and Dimensions:
Determine the size and dimensions of your bench based on the space available in your workshop or garage. It should be wide and long enough to accommodate your projects comfortably. Consider the height as well to ensure a comfortable working position.
Work Surface:
Decide whether you want a solid wood top or a plywood top. A solid wood top offers durability and stability, while a plywood top is more cost-effective and easier to replace if damaged. You may also want to consider adding a router insert or a vice to enhance the functionality of your work surface.
Storage and Accessories:
Think about any storage needs you may have. You can include shelves, drawers, or pegboards to store your tools and accessories. Consider adding bench dogs or other clamping mechanisms to hold your projects securely in place.
Style and Aesthetics:
Consider the overall style and aesthetic appeal you want for your woodworking bench. You can choose to stain or paint the wood to match your workshop or personal preference. Remember that the bench will be a focal point in your workspace, so choose a design that reflects your style and taste.
Sketch out your design on paper or use design software to visualize it. Take measurements and make adjustments as necessary to ensure an accurate and functional design.
Once you have finalized the design, you are ready to move on to the next step: choosing the right wood for your woodworking bench.
Read more: How To Build A Coat Rack Bench
Choosing the Right Wood
Choosing the right wood for your woodworking bench is crucial to ensure its durability and strength. Here are some factors to consider when selecting the wood:
Hardwood vs. Softwood:
Decide whether you want to use hardwood or softwood for your bench. Hardwoods, such as oak, maple, or birch, are known for their strength and durability. Softwoods, such as pine or fir, are more affordable and easier to work with. The choice depends on your budget, the intended use of the bench, and personal preference.
Moisture Content:
Make sure the wood you choose has an appropriate moisture content. Too much moisture can lead to warping and other issues. Look for kiln-dried or air-dried wood with a moisture content of around 6-8% for indoor use.
Quality and Grading:
Inspect the wood for quality and grading. Look for straight boards without knots, cracks, or other defects. Choose boards with a smooth surface and tight grain for better stability and appearance.
Read more: How To Build A Dining Table Bench
Budget:
Consider your budget when selecting wood for your bench. Hardwoods tend to be more expensive than softwoods, so choose accordingly. Keep in mind that investing in higher-quality wood can ensure the longevity of your bench.
Sustainability:
If sustainability is important to you, consider using reclaimed or salvaged wood for your bench. This not only helps reduce waste but also adds character and uniqueness to your project.
Once you have chosen the right wood for your woodworking bench, it’s time to move on to the next step: cutting the wood to the desired dimensions.
Cutting the Wood
Now that you have chosen the right wood for your woodworking bench, it’s time to start cutting the wood to the desired dimensions. Here’s a step-by-step guide to help you through the process:
Measure and Mark:
Begin by measuring and marking the wood according to your design and desired dimensions. Use a measuring tape and a pencil to make accurate marks. Double-check your measurements to ensure precision.
Read more: How To Build A Picnic Table Bench
Cutting the Base and Legs:
Start by cutting the 2×4 lumber for the base and legs of your woodworking bench. Use a miter saw or a circular saw to make straight cuts. Ensure that all the pieces are cut to the same length for a level and stable base.
Cutting Other Components:
Depending on your design, you may need to cut additional components such as shelves, drawers, or supports. Use the same cutting tools and techniques to cut these pieces to the desired dimensions.
Smooth the Edges:
After cutting the wood, you may notice rough or uneven edges. Use a sanding block or an electric sander to smooth out the edges and create a more finished look. Be cautious and wear protective gear while sanding.
Label and Organize:
As you cut the wood, label each piece to avoid confusion during assembly. This step will make the assembly process much smoother and more organized. Keep the pieces organized and within easy reach to prevent any mix-ups.
By following these steps, you will have the necessary wood pieces for your woodworking bench. The next step is to assemble the base of the bench.
Assembling the Base
With the wood pieces cut to the desired dimensions, it’s time to start assembling the base of your woodworking bench. Follow these steps for a sturdy and stable base:
1. Lay Out the Pieces:
Start by laying out the base pieces according to your design. This will give you a visual reference and make the assembly process easier.
2. Attach the Legs:
Position the legs at the corners of the base and use clamps to hold them in place. Pre-drill holes through the legs and into the base pieces to prevent splitting. Secure each leg with wood screws or dowels for added strength.
3. Install the Supports:
If your design includes horizontal supports between the legs, position them at the desired height and secure them in place. Again, pre-drill holes and use screws or dowels to ensure a strong connection.
Read more: How To Build An Outdoor Storage Bench
4. Add Additional Components:
If you have included shelves or drawers in your design, attach them to the base using appropriate fasteners. Make sure they are level and securely attached for stability.
5. Check for Stability:
Once the base is assembled, check for stability by gently rocking the bench. If there is any wobbling, identify the source of the issue and make necessary adjustments. Ensure that all joints are secure and the base is level.
When assembling the base, it’s helpful to have an extra pair of hands to hold pieces in place while you secure them. Take your time and double-check your work to ensure a solid and stable base for your woodworking bench.
Now that the base is assembled, it’s time to move on to the next step: adding the top to your woodworking bench.
Adding the Top
With the base of your woodworking bench securely assembled, it’s time to add the top. Follow these steps to ensure a smooth and functional work surface:
1. Measure and Cut the Plywood:
Measure the dimensions of the base to determine the size of the plywood top. Use a miter saw or a circular saw to cut the plywood to the desired dimensions. Ensure that the edges are clean and straight for a precise fit.
Read more: How To Build A Workbench With Hand Tools
2. Position the Plywood:
Place the plywood on top of the base, aligning it with the edges. Ensure that it is centered and evenly overhangs on all sides. Use clamps to hold it securely in place.
3. Attach the Plywood:
Pre-drill holes through the plywood and into the base, spacing the holes evenly along the edges. This will prevent splitting and ensure a secure attachment. Secure the plywood to the base using wood screws or other appropriate fasteners.
4. Reinforce the Corners:
To provide additional stability, consider reinforcing the corners of the plywood top. This can be done by attaching corner brackets or adding wooden blocks underneath the corners. This will prevent any potential sagging or warping over time.
5. Sand and Finish:
After securely attaching the plywood to the base, sand the top surface to ensure a smooth finish. You can use a sanding block or an electric sander for this task. Remove any rough spots or splinters for a comfortable working surface.
Once the top is attached and finished, your woodworking bench is taking shape! The final step is to add some finishing touches to enhance the appearance and protect the wood.
Read more: How To Build A Desk With Hand Tools
Finishing Touches
Now that your woodworking bench is nearly complete, it’s time to add some finishing touches to enhance its appearance and protect the wood. Follow these steps to give your bench a polished and professional look:
1. Sanding:
Go over the entire bench with a fine-grit sandpaper to remove any rough edges or imperfections. Sand in the direction of the wood grain for a smooth finish. Take your time and ensure that the surface is even and ready for staining or painting.
2. Staining or Painting:
If you prefer the natural beauty of the wood, you can choose to stain it to enhance its color and grain. Apply the stain evenly with a brush or foam brush, following the manufacturer’s instructions, and wipe off any excess. Allow the stain to dry completely before moving on to the next step.
If painting is your preference, apply a coat or two of paint in your desired color. Make sure to use paint suitable for wood surfaces and apply it evenly with a brush or foam brush. Allow each coat to dry before applying the next.
3. Protective Finish:
To protect the wood and give your bench a lasting finish, apply a protective coat such as polyurethane or lacquer. This will seal the wood, making it more resistant to scratches, stains, and moisture. Apply the protective finish according to the manufacturer’s instructions and allow it to dry completely.
Read more: How To Build A Guitar With Hand Tools
4. Optional Features:
Consider adding some optional features to your bench to enhance its functionality. This could include installing a woodworking vice, adding storage compartments or shelves, or attaching a router insert. These optional features can greatly increase the versatility of your bench and make your woodworking projects even easier.
5. Final Inspection:
Once the finish has dried, inspect the bench for any areas that may need touch-ups or adjustments. Check that all screws and fasteners are secure, ensuring the overall stability of your bench.
With these finishing touches, your woodworking bench is ready to be put to use in your workshop. Enjoy the satisfaction of working on a bench that you crafted yourself!
Conclusion
Congratulations on building your very own woodworking bench! By following the steps outlined in this article, you have created a sturdy and functional work surface that will serve you well in your woodworking projects.
Through careful planning, selecting the right materials, and precise cutting and assembly, you have built a bench that meets your specific needs and fits seamlessly into your workshop or garage.
Remember, your woodworking bench is not just a tool; it’s a reflection of your craftsmanship. Take pride in the work you’ve put into building it and enjoy the benefits it brings to your woodworking endeavors.
With each project you undertake on your new bench, you will develop your skills and continue to hone your craft. Remember to always prioritize safety and wear appropriate protective gear while working on your projects.
As you gain experience and knowledge in woodworking, you may find yourself wanting to make modifications or improvements to your bench. Feel free to adapt and customize your bench according to your evolving needs and preferences.
Building your own woodworking bench is not only a practical choice, but it also provides a sense of accomplishment and satisfaction. Your bench will become an integral part of your woodworking journey, supporting you as you bring your creative ideas to life.
So, go ahead and unleash your creativity on your new woodworking bench. Let it be your reliable companion as you embark on countless woodworking projects and continue to refine your skills as a woodworker!
Frequently Asked Questions about How To Build Woodworking Bench
Was this page helpful?
At Storables.com, we guarantee accurate and reliable information. Our content, validated by Expert Board Contributors, is crafted following stringent Editorial Policies. We're committed to providing you with well-researched, expert-backed insights for all your informational needs.


0 thoughts on “How To Build Woodworking Bench”