Home>Articles>Why Does My Showerhead Leak While Shower Is On

Articles
Why Does My Showerhead Leak While Shower Is On
Modified: August 28, 2024
Discover why your showerhead leaks while the shower is on and learn how to fix it with our informative articles.
(Many of the links in this article redirect to a specific reviewed product. Your purchase of these products through affiliate links helps to generate commission for Storables.com, at no extra cost. Learn more)
Introduction
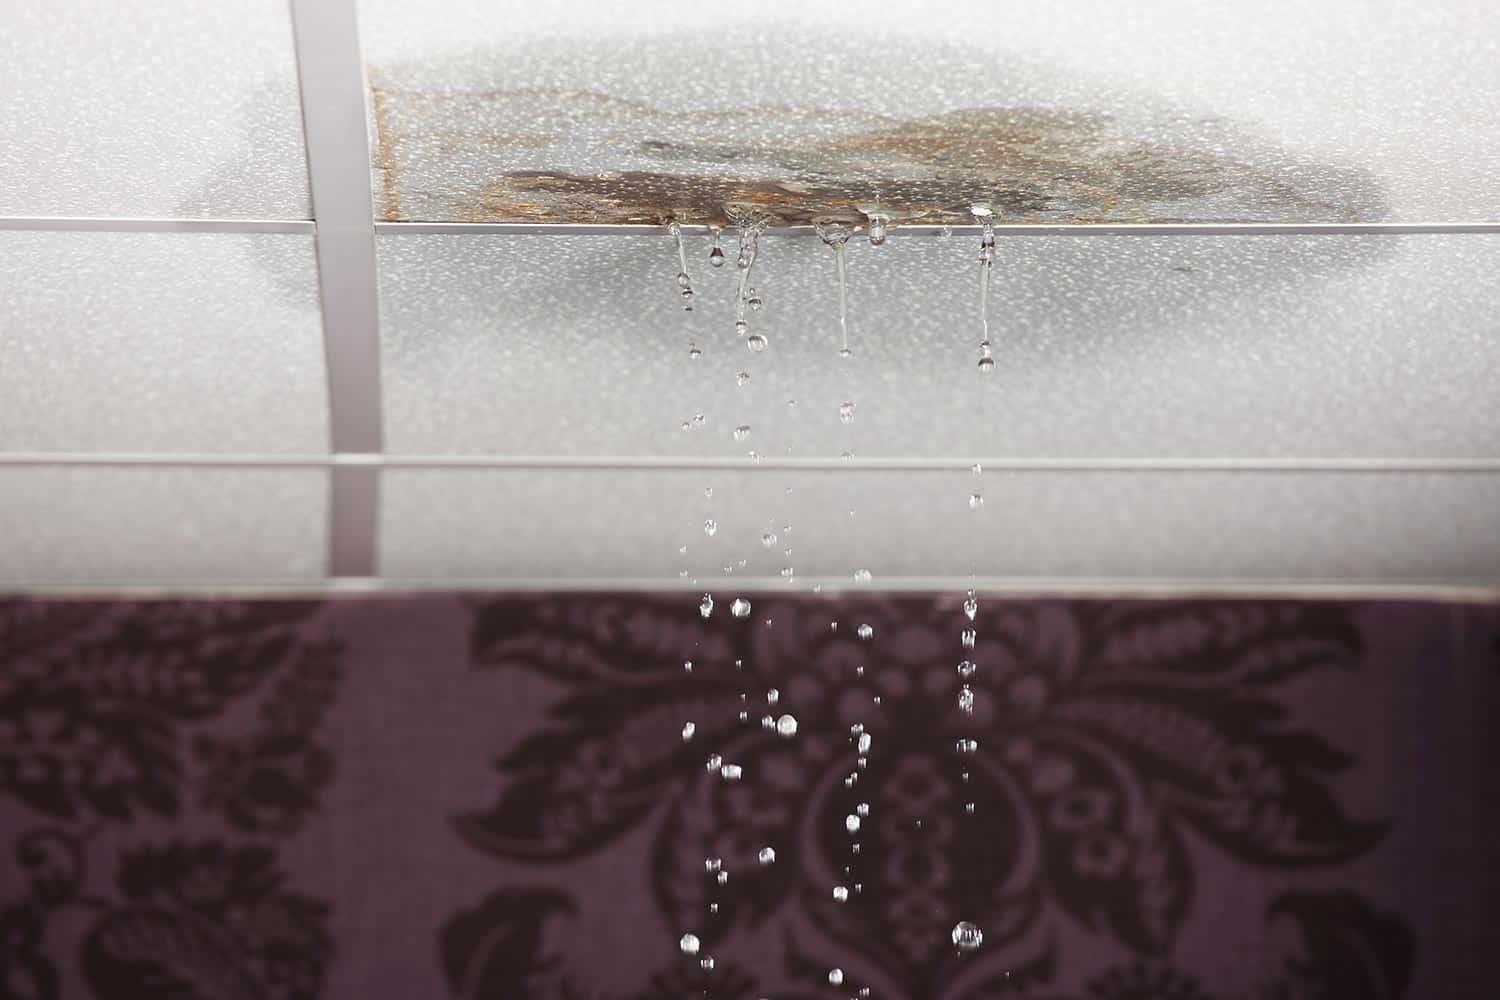
A leaking showerhead can be a frustrating problem to deal with. Not only can it lead to a waste of water, but it can also result in a less enjoyable showering experience. If you’ve ever wondered why your showerhead leaks while the shower is on, you’re not alone. This article will explore some of the common causes of showerhead leaks and provide practical solutions to fix them.
Showerhead leaks are typically caused by factors such as loose connections, clogged showerheads, high water pressure, or worn-out components. It’s essential to identify the underlying cause before attempting to troubleshoot and resolve the leakage issue. By understanding the root cause, you can apply the appropriate fix and prevent future leaks.
In the following sections, we will delve into each of these common causes and provide step-by-step instructions on how to address them effectively. Whether you are a DIY enthusiast or someone looking to save money on plumbing repairs, this article aims to equip you with the necessary knowledge and skills to tackle showerhead leakage.
Key Takeaways:
- Don’t let a leaking showerhead dampen your day. Tighten connections, clean clogs, regulate water pressure, or replace the showerhead for a refreshing, leak-free shower experience.
- Save water, enhance your shower, and prevent leaks by addressing loose connections, clogs, high water pressure, and worn-out showerheads. Enjoy a rejuvenated showering experience with these practical solutions.
Read more: Why Does My Rain Showerhead Drip
Common Causes of Showerhead Leaks
A leaking showerhead can have several underlying causes. Understanding these causes can help you identify and resolve the issue efficiently. Here are some of the most common reasons why your showerhead may be leaking:
- Loose connection or damaged seal: Over time, the connection between the showerhead and the shower arm can become loose or the seal may get damaged. This can lead to water leakage around the base of the showerhead.
- Clogged showerhead: Mineral deposits and sediment can accumulate in the small holes of the showerhead, causing blockage and disrupting the water flow. This can result in water leakage or uneven water spray.
- High water pressure: Excessively high water pressure can put strain on the showerhead and its components, causing leaks. If your showerhead is constantly leaking, even when the shower is turned off, it could be a sign of high water pressure.
- Worn-out showerhead: Over time, the internal parts of the showerhead, such as the washers and O-rings, can deteriorate and cause leaks. The constant exposure to water and the buildup of mineral deposits can accelerate the wear and tear of these components.
Identifying the specific cause of your showerhead leak is crucial for effective troubleshooting. Once you have determined the underlying issue, you can implement the appropriate fix to resolve the leakage problem.
In the next section, we will explore step-by-step instructions on how to fix a leaking showerhead, based on the different causes mentioned above.
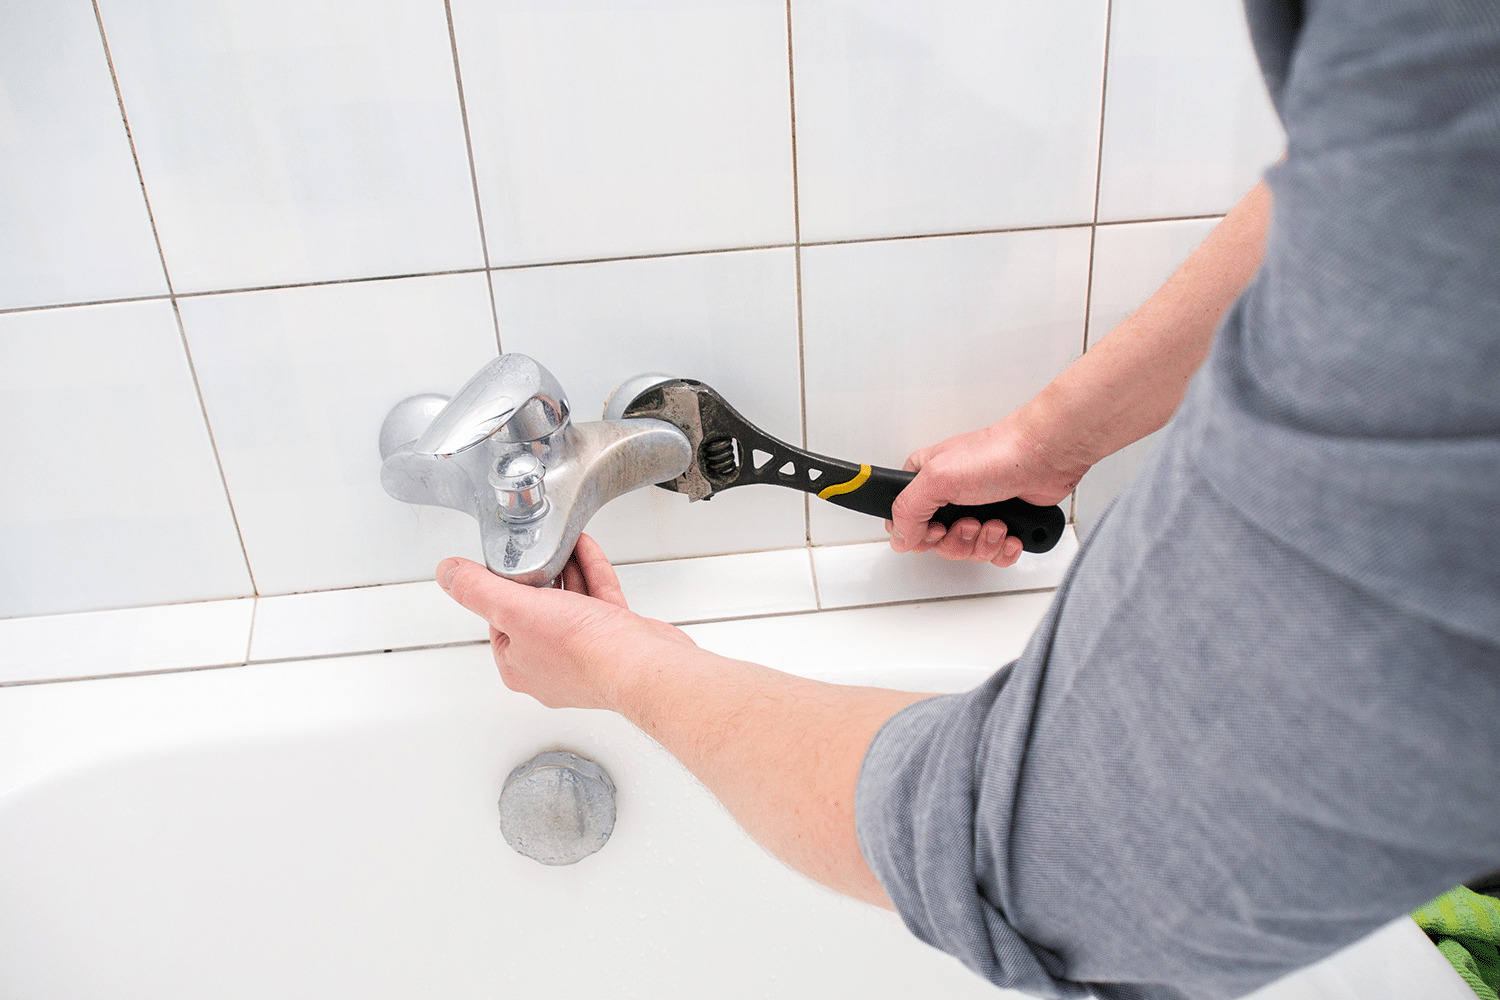
Loose Connection or Damaged Seal
A common cause of a leaking showerhead is a loose connection or a damaged seal between the showerhead and the shower arm. Over time, the constant use, movement, and exposure to water can loosen the connection or cause the seal to deteriorate. This can result in water leakage around the base of the showerhead.
To fix a leak caused by a loose connection or damaged seal, follow these steps:
- Turn off the water supply to the shower.
- Using an adjustable wrench or pliers, gently but firmly tighten the connection between the showerhead and the shower arm.
- If tightening the connection doesn’t resolve the leak, check the seal. Inspect the rubber or silicone gasket between the showerhead and the shower arm for any signs of damage or wear.
- If the seal is damaged, remove it and replace it with a new one. Rubber or silicone gaskets are readily available at hardware stores and are relatively inexpensive.
- Carefully apply plumber’s tape to the threads of the shower arm to create a watertight seal. This will help prevent future leaks.
- Reattach the showerhead to the shower arm, making sure it is securely tightened.
Once you have completed these steps, turn the water supply back on and check for any water leakage. If the leak persists, it may be necessary to inspect other potential causes, such as a clogged showerhead or high water pressure.
Remember to exercise caution when tightening connections and avoid overtightening, as this can damage the showerhead or the shower arm. If you are unsure about any step of the process or if the leakage continues despite your efforts, it is recommended to consult a professional plumber for assistance.
Now that we have addressed the issue of loose connections and damaged seals, let’s move on to the next common cause of showerhead leaks: a clogged showerhead.
Clogged Showerhead
A clogged showerhead is another common cause of leaks. Over time, mineral deposits, sediment, and debris can accumulate in the small openings and nozzles of the showerhead, obstructing the water flow. This can result in water leakage or uneven water spray.
To address a clogged showerhead and resolve the leakage issue, follow these steps:
- Remove the showerhead from the shower arm. You can typically do this by unscrewing it counterclockwise.
- Inspect the showerhead for any visible signs of mineral deposits or debris. If you notice significant buildup, it is a clear indication of a clog.
- Fill a bowl or basin with a solution of equal parts white vinegar and water. Submerge the showerhead in the solution, ensuring that the clogged openings are completely covered.
- Let the showerhead soak in the vinegar solution for at least 30 minutes. This will help dissolve the mineral deposits and debris.
- After soaking, use a small brush, such as an old toothbrush, to gently scrub the showerhead, paying particular attention to the clogged openings. This will help dislodge any remaining buildup.
- Rinse the showerhead thoroughly with clean water to remove any vinegar residue or loosened debris.
- Inspect the showerhead openings again to ensure they are clear and free from clogs.
- Apply plumber’s tape to the threads of the shower arm to create a tight seal. This will help prevent any future leaks.
- Reattach the cleaned showerhead to the shower arm, tightening it securely but not excessively.
Once you have completed these steps, turn the water supply back on and test the showerhead for any signs of leakage. The thorough cleaning should have resolved the clog and eliminated the leakage caused by the blockage.
If the showerhead continues to leak or if the water flow is still compromised, there may be an underlying issue that requires further investigation. It may be necessary to consult a professional plumber for assistance.
With the clogged showerhead addressed, let’s move on to the next potential cause of leakage: high water pressure.
High Water Pressure
High water pressure is a common culprit behind showerhead leaks. When the water pressure in your plumbing system is too high, it can put excessive strain on the showerhead and its components, causing leaks to occur. If you notice that your showerhead is constantly leaking, even when the shower is turned off, it could be a sign of high water pressure.
To address the issue of high water pressure and prevent showerhead leaks, follow these steps:
- Begin by measuring the water pressure in your plumbing system using a water pressure gauge. This device can be purchased at a hardware store and is typically easy to use.
- Check the recommended water pressure range for your home. Generally, the ideal water pressure should be between 40 to 60 psi (pounds per square inch). If the water pressure exceeds this range, it may be necessary to install a pressure regulator.
- Locate the main water supply valve for your home, which is typically located near the water meter or where the main water line enters the house.
- Turn off the main water supply to your home.
- If you already have a pressure regulator installed, check if it is adjustable. If it is, use a flat-head screwdriver to adjust it to the desired pressure range.
- If you don’t have a pressure regulator or if your existing regulator is not adjustable, consider installing a new pressure regulator. This can be done by a professional plumber or as a DIY project if you have the necessary skills.
- Once the pressure regulator is installed or adjusted, turn the main water supply back on and test the water pressure using the gauge again. Make sure the pressure is within the recommended range.
- Check the showerhead for any signs of leakage. With the proper water pressure, the likelihood of leaks should be significantly reduced.
By installing or adjusting a pressure regulator, you can regulate and maintain the water pressure in your plumbing system, preventing excessive pressure that could lead to showerhead leaks. If you are unsure about installing a pressure regulator or if the leaks persist despite your efforts, it is advisable to seek the assistance of a professional plumber.
Now that we have discussed the issue of high water pressure, let’s explore the possibility of a worn-out showerhead as the cause of the leakage.
Read more: Why Is My HVAC Leaking
Worn-out Showerhead
A worn-out showerhead is another common cause of leaks. Over time, the internal components of the showerhead, such as the washers and O-rings, can deteriorate and result in leaks. Constant exposure to water and the buildup of mineral deposits can accelerate the wear and tear of these components, leading to leakage.
If you suspect that a worn-out showerhead is causing the leaks, follow these steps to resolve the issue:
- Turn off the water supply to the shower.
- Remove the showerhead from the shower arm by unscrewing it counterclockwise.
- Inspect the internal components of the showerhead for any signs of wear or damage, such as cracked washers or deteriorated O-rings.
- If you notice any damaged components, carefully remove them and replace them with new ones. These replacement parts can typically be found at hardware stores or plumbing supply stores.
- While you have the showerhead disassembled, take the opportunity to clean any mineral deposits or debris that may have accumulated. Soak the components in a vinegar and water solution or use a mild descaling solution to remove any buildup.
- Rinse the components thoroughly with clean water to ensure they are free from any residue or loosened debris.
- Apply plumber’s tape to the threads of the shower arm to create a tight seal.
- Reattach the cleaned and repaired showerhead to the shower arm, ensuring it is securely tightened.
Once you have completed these steps, turn the water supply back on and check for any signs of leakage. The replacement of worn-out components and the cleaning of mineral deposits should have resolved the issues causing the leaks.
If the showerhead continues to leak or the water flow is still compromised, it may be necessary to consider replacing the entire showerhead. Sometimes, excessive wear and damage may be present within the internal structure of the showerhead, making it difficult to effectively repair the leaks.
When replacing the showerhead, consider selecting a high-quality, durable option that is resistant to mineral buildup and designed to provide a reliable, leak-free experience.
With the issue of a worn-out showerhead addressed, it’s time to learn about the practical solutions to fix a leaking showerhead, including tightening connections or replacing seals, cleaning the showerhead, installing a pressure regulator, or replacing the showerhead altogether.
How to Fix a Leaking Showerhead
If you’re dealing with a leaking showerhead, there are several practical solutions you can try to resolve the issue. The specific fix will depend on the underlying cause of the leak. Here are some steps you can take to fix a leaking showerhead:
Tightening Connections or Replacing Seals
If the leak is caused by a loose connection or a damaged seal, you can attempt to tighten the connections and replace the seals. Follow these steps:
1. Turn off the water supply to the shower.
2. Using an adjustable wrench or pliers, gently but firmly tighten the connection between the showerhead and the shower arm.
3. If tightening the connection doesn’t stop the leak, inspect the rubber or silicone gasket between the showerhead and the shower arm for any signs of damage or wear.
4. If the seal is damaged, remove it and replace it with a new one. You can find replacement gaskets at hardware stores.
5. Apply plumber’s tape to the threads of the shower arm to create a tight seal.
6. Reattach the showerhead to the shower arm, making sure it is securely tightened.
7. Turn on the water supply to check for any remaining leaks.
Cleaning the Showerhead
If the leak is due to a clogged showerhead, cleaning the showerhead can often resolve the issue. Follow these steps:
1. Remove the showerhead from the shower arm by unscrewing it counterclockwise.
2. Inspect the showerhead for any visible mineral deposits or debris.
3. Fill a bowl or basin with equal parts white vinegar and water.
4. Submerge the showerhead in the vinegar solution, ensuring that the clogged openings are fully covered.
5. Let the showerhead soak in the solution for at least 30 minutes to dissolve the mineral deposits.
6. After soaking, use a small brush, such as an old toothbrush, to gently scrub the showerhead and dislodge any remaining buildup.
7. Rinse the showerhead thoroughly with clean water to remove any vinegar residue or loosened debris.
8. Reattach the cleaned showerhead to the shower arm, ensuring it is securely tightened.
9. Turn on the water supply to check for any remaining leaks.
Read more: Why Is My Humidifier Leaking
Installing a Pressure Regulator
If the leak is caused by high water pressure, installing a pressure regulator can help regulate the water flow and prevent leaks. Follow these steps:
1. Measure the water pressure in your plumbing system using a water pressure gauge.
2. Check the recommended water pressure range for your home. Typically, it should be between 40 to 60 psi (pounds per square inch).
3. Locate the main water supply valve for your home.
4. Turn off the main water supply.
5. If you already have a pressure regulator, check if it is adjustable. If so, use a flat-head screwdriver to adjust it to the desired pressure range.
6. If you don’t have a pressure regulator or if your existing one is not adjustable, consider installing a new pressure regulator. This can be done by a professional plumber or as a DIY project.
7. Once the pressure regulator is installed or adjusted, turn the main water supply back on and check for any remaining leaks.
Replacing the Showerhead
If all else fails, or if the showerhead is old and worn out, replacing it may be the best solution. Choose a high-quality showerhead that suits your preferences and follow the manufacturer’s instructions for installation.
Remember to test the showerhead for any remaining leaks after implementing any of these fixes. If the issue persists or if you are unsure about any step of the process, it is recommended to consult a professional plumber for further assistance.
By taking the appropriate steps to fix a leaking showerhead, you can enjoy a more pleasant and leak-free showering experience.
Tightening Connections or Replacing Seals
A common cause of a leaking showerhead is a loose connection or a damaged seal between the showerhead and the shower arm. Over time, the constant use, movement, and exposure to water can loosen the connection or cause the seal to deteriorate. This can result in water leakage around the base of the showerhead.
To fix a leak caused by a loose connection or damaged seal, follow these steps:
- Turn off the water supply to the shower.
- Using an adjustable wrench or pliers, gently but firmly tighten the connection between the showerhead and the shower arm.
- If tightening the connection doesn’t resolve the leak, check the seal. Inspect the rubber or silicone gasket between the showerhead and the shower arm for any signs of damage or wear.
- If the seal is damaged, remove it and replace it with a new one. Rubber or silicone gaskets are readily available at hardware stores and are relatively inexpensive.
- Carefully apply plumber’s tape to the threads of the shower arm to create a watertight seal. This will help prevent future leaks.
- Reattach the showerhead to the shower arm, making sure it is securely tightened.
Once you have completed these steps, turn the water supply back on and check for any water leakage. If the leak persists, it may be necessary to inspect other potential causes, such as a clogged showerhead or high water pressure.
Remember to exercise caution when tightening connections and avoid overtightening, as this can damage the showerhead or the shower arm. If you are unsure about any step of the process or if the leakage continues despite your efforts, it is recommended to consult a professional plumber for assistance.
Now that we have addressed the issue of loose connections and damaged seals, let’s move on to the next common cause of showerhead leaks: a clogged showerhead.
Check for mineral deposits or a worn-out rubber washer in the showerhead. Clean or replace these parts to fix the leak.
Cleaning the Showerhead
A clogged showerhead is another common cause of leaks. Mineral deposits, sediment, and debris can accumulate in the small openings and nozzles of the showerhead over time, obstructing the water flow. This can result in water leakage or uneven water spray. To address a clogged showerhead and resolve the leakage issue, follow these steps:
- Remove the showerhead from the shower arm. You can typically do this by unscrewing it counterclockwise.
- Inspect the showerhead for any visible signs of mineral deposits or debris. If you notice significant buildup, it is a clear indication of a clog.
- Fill a bowl or basin with a solution of equal parts white vinegar and water. Submerge the showerhead in the solution, ensuring that the clogged openings are completely covered.
- Let the showerhead soak in the vinegar solution for at least 30 minutes. This will help dissolve the mineral deposits and debris.
- After soaking, use a small brush, such as an old toothbrush, to gently scrub the showerhead, focusing on the clogged openings. This will help dislodge any remaining buildup.
- Rinse the showerhead thoroughly with clean water to remove any vinegar residue or loosened debris.
- Inspect the showerhead openings again to ensure they are clear and free from clogs.
- Apply a thin layer of plumber’s tape to the threads of the shower arm to create a tight seal when reattaching the showerhead.
- Reattach the cleaned showerhead to the shower arm, making sure it is securely tightened.
Once you have completed these steps, turn the water supply back on and test the showerhead for any remaining leaks. The thorough cleaning should have resolved the clog and eliminated the leakage caused by the blockage.
If the showerhead continues to leak or if the water flow is still compromised, there may be an underlying issue that requires further investigation. It may be necessary to consult a professional plumber for assistance.
With the clogged showerhead addressed, let’s move on to the next potential cause of leakage: high water pressure.
Read more: Why Does My Window AC Leak Water
Installing a Pressure Regulator
If you are dealing with a leaking showerhead caused by high water pressure, installing a pressure regulator can help regulate and control the water flow, preventing leaks and reducing the strain on your plumbing system. Here are the steps to install a pressure regulator:
- Measure the water pressure in your plumbing system using a water pressure gauge. You can purchase one at a local hardware store.
- Check the recommended water pressure range for your home. Typically, it should be between 40 to 60 psi (pounds per square inch).
- Locate the main water supply valve for your home. It is usually near the water meter or where the main water line enters the house.
- Turn off the main water supply.
- If you already have a pressure regulator installed, check if it is adjustable. If it is, use a flat-head screwdriver to adjust it to the desired pressure range.
- If you don’t have a pressure regulator or if your existing one is not adjustable, consider installing a new pressure regulator. You can purchase a pressure regulator from a hardware store or consult a professional plumber for assistance.
- Ensure that the water flows in the correct direction through the pressure regulator. Most pressure regulators have an arrow indicating the proper flow direction.
- Follow the manufacturer’s instructions to install the pressure regulator in line with the main water supply. This may involve cutting and soldering pipes or using compression fittings, depending on the type of regulator.
- Once the pressure regulator is installed, turn the main water supply back on.
- Measure the water pressure again using a water pressure gauge to ensure that it is within the recommended range.
By installing a pressure regulator, you can ensure that the water pressure in your plumbing system is regulated and maintained at the appropriate level. This helps prevent excessive pressure that can lead to leaks in showerheads and other fixtures.
If you are unsure about installing a pressure regulator or if the leaks persist despite your efforts, it is advisable to seek the assistance of a professional plumber.
With the installation of a pressure regulator, you have taken a significant step in resolving the issue of high water pressure and preventing leaks in your showerhead. Let’s move on to the final potential solution: replacing the showerhead.
Replacing the Showerhead
If you’ve tried tightening connections, replacing seals, cleaning the showerhead, and installing a pressure regulator without success, or if your showerhead is old and worn-out, it may be time to consider replacing it. Replacing the showerhead can often solve persistent leaks and improve your showering experience. Follow these steps to replace the showerhead:
- Turn off the water supply to the shower.
- Using an adjustable wrench or pliers, carefully unscrew the existing showerhead from the shower arm. Turn it counterclockwise until it comes off.
- Clean the threads of the shower arm using a cloth to remove any debris or residue.
- Choose a new showerhead that meets your preferences and requirements. Look for a high-quality, durable showerhead that is designed to provide a reliable, leak-free experience.
- Apply a thin layer of plumber’s tape to the threads of the shower arm to create a watertight seal.
- Attach the new showerhead to the shower arm, turning it clockwise until it is securely tightened. Use an adjustable wrench or pliers if necessary, but be careful not to overtighten and damage the showerhead or the shower arm.
- Turn on the water supply and test the new showerhead for any leaks. Adjust the water flow and spray pattern as desired.
If you are unsure about replacing the showerhead or if you encounter any difficulties during the process, it is recommended to consult a professional plumber for assistance. They can ensure that the replacement is done correctly and help you choose the right showerhead for your needs.
By replacing the showerhead, you can enjoy a fresh, leak-free showering experience. Make sure to maintain and clean the new showerhead regularly to prevent clogs and extend its lifespan.
Now that you are equipped with the knowledge of how to fix a leaking showerhead through tightening connections or replacing seals, cleaning the showerhead, installing a pressure regulator, or replacing the showerhead, you can confidently address any leak issues and enjoy a rejuvenated showering experience.
Conclusion
A leaking showerhead can be a frustrating issue to deal with, but with the right knowledge and steps, you can effectively address the problem and enjoy a leak-free showering experience. By understanding the common causes of showerhead leaks and implementing the appropriate solutions, you can regain control over your bathroom fixtures.
Throughout this article, we have explored four common causes of showerhead leaks: loose connections or damaged seals, clogged showerheads, high water pressure, and worn-out showerheads. To fix these issues, we have discussed various troubleshooting techniques, including tightening connections or replacing seals, cleaning the showerhead, installing a pressure regulator, and replacing the showerhead altogether.
Remember, when tightening connections or replacing seals, it is important to exercise caution and avoid overtightening, as it may damage the showerhead or shower arm. Cleaning the showerhead regularly prevents mineral buildup and keeps the water flowing smoothly. Installing a pressure regulator is essential to regulate water pressure and prevent unnecessary strain on the plumbing system. If all else fails, replacing the showerhead can provide a fresh start and eliminate persistent leaks.
If you encounter any difficulties during the troubleshooting process or if the leaks persist despite your efforts, it is advisable to seek the assistance of a professional plumber. They can provide expert advice and help resolve the issue more efficiently.
By addressing and resolving the causes of showerhead leaks, you not only save water and prevent unnecessary water waste, but you also enhance your showering experience. A leak-free showerhead ensures consistent water flow, improved water pressure, and a more enjoyable showering environment.
Remember to regularly inspect and maintain your showerhead to prevent future leaks. Clean the showerhead, check for any signs of wear and tear, and monitor water pressure to ensure its optimal performance.
With the knowledge and steps discussed in this article, you are now equipped to tackle the issue of a leaking showerhead effectively. Apply the appropriate fix based on the underlying cause and enjoy a rejuvenated showering experience that is free from leaks and interruptions.
Frequently Asked Questions about Why Does My Showerhead Leak While Shower Is On
Was this page helpful?
At Storables.com, we guarantee accurate and reliable information. Our content, validated by Expert Board Contributors, is crafted following stringent Editorial Policies. We're committed to providing you with well-researched, expert-backed insights for all your informational needs.

0 thoughts on “Why Does My Showerhead Leak While Shower Is On”