Home>Construction & Tools>Building Materials>How To Demolish A Brick Fireplace

Building Materials
How To Demolish A Brick Fireplace
Modified: October 22, 2024
Learn how to safely demolish a brick fireplace using the right building materials and techniques. Get step-by-step guidance and tips for a successful demolition.
(Many of the links in this article redirect to a specific reviewed product. Your purchase of these products through affiliate links helps to generate commission for Storables.com, at no extra cost. Learn more)
Introduction
Demolishing a brick fireplace can be a daunting task, but with the right tools, knowledge, and preparation, it can be a manageable and rewarding project. Whether you're looking to update the look of your living space or need to remove a damaged or outdated fireplace, this guide will walk you through the step-by-step process of safely and effectively demolishing a brick fireplace.
Before diving into the demolition process, it's essential to gather the necessary tools and equipment, prepare the work area, and understand the potential challenges that may arise during the project. By following the outlined steps and taking the time to approach each phase with care and attention to detail, you can successfully dismantle the fireplace while minimizing risks and ensuring a smooth progression.
In the following sections, we'll delve into the specific steps required to demolish a brick fireplace, from removing the mantel and surround to clearing out debris and properly disposing of materials. By the end of this guide, you'll have the knowledge and confidence to tackle this project and transform your space according to your vision. Let's embark on this journey to revitalize your living area by deconstructing the old and making way for the new.
Key Takeaways:
- Safety First!
Gathering the right tools, preparing the work area, and wearing protective gear are crucial for safely demolishing a brick fireplace. Approach each step with care and attention to detail. - Clean and Green
After demolition, clear out debris, dispose of materials responsibly, and restore the area. Embrace sustainable practices and celebrate the accomplishment of transforming your living space.
Read more: How To Stain A Brick Fireplace
Step 1: Gather the Necessary Tools and Equipment
Before initiating the demolition process, it’s crucial to assemble the essential tools and equipment to ensure a safe and efficient workflow. Here’s a comprehensive list of items you’ll need:
- Safety Gear: Prioritize safety by wearing protective gear, including goggles, gloves, a dust mask, and sturdy work boots.
- Demolition Tools: Equip yourself with a sledgehammer, pry bar, chisel, and a heavy-duty hammer to effectively dismantle the brick structure.
- Power Tools: Depending on the scale of the project, consider using a reciprocating saw or angle grinder with a masonry-cutting blade to expedite the demolition process.
- Container for Debris: Prepare a sturdy container, such as a wheelbarrow or large bins, to collect and transport the demolished materials.
- Protective Coverings: Safeguard the surrounding area with drop cloths or plastic sheeting to minimize dust and debris from spreading.
- Utility Knife and Plastic Bags: Use these items for careful removal and disposal of any insulation or other materials hidden within the fireplace structure.
- Flashlight: Ensure proper visibility in confined spaces by having a reliable flashlight or headlamp on hand.
- Fire Extinguisher: As a precautionary measure, keep a fire extinguisher nearby to address any unexpected sparks or small fires during the demolition process.
By gathering these tools and equipment, you’ll be well-prepared to tackle the demolition of the brick fireplace with confidence and efficiency. Additionally, it’s advisable to familiarize yourself with the proper usage and safety guidelines for each tool to mitigate potential risks and ensure a smooth progression of the project.
Step 2: Prepare the Work Area
Preparing the work area is a critical initial step in the demolition process, as it sets the stage for a safe and organized workspace. Here’s a detailed guide on how to effectively prepare the area for dismantling the brick fireplace:
- Clear the Surrounding Space: Remove any furniture, decorations, or flammable materials from the vicinity of the fireplace to create ample working room and minimize the risk of damage or obstruction.
- Protective Coverings: Safeguard the flooring and nearby surfaces by laying down heavy-duty drop cloths or plastic sheeting to prevent scratches, stains, and debris accumulation.
- Ventilation: Ensure proper ventilation by opening windows and using fans to facilitate air circulation and minimize the accumulation of dust and fumes during the demolition process.
- Isolate Utilities: If the fireplace is connected to gas lines, ensure that the gas supply is turned off and seek professional assistance to disconnect and cap the gas line safely.
- Electrical Precautions: If the fireplace has electrical components, such as a fan or lighting, turn off the power supply to the area and consider removing the electrical components as per safety guidelines.
- Secure Surrounding Structures: Inspect the adjacent walls, flooring, and ceiling for any vulnerabilities or structural weaknesses that may be impacted by the demolition process. Take necessary precautions to reinforce or protect these areas as needed.
- Establish a Debris Removal Plan: Set up a designated area for debris disposal, ensuring that the chosen location can accommodate the volume of materials and is easily accessible for loading and transportation.
By meticulously preparing the work area, you’ll create a safe, organized, and efficient environment for the demolition process. Taking the time to address these preparatory steps will contribute to a smoother workflow and minimize potential hazards or disruptions as you proceed with the project.
Step 3: Remove the Mantel and Surround
Removing the mantel and surround is a significant phase in the demolition of a brick fireplace, requiring careful attention to detail and precision to avoid damage to surrounding structures. Here’s a comprehensive guide on how to effectively execute this step:
- Assess the Attachment: Inspect the mantel and surround to identify the method of attachment. Depending on the installation, it may be secured with screws, adhesive, or brackets.
- Disconnect Utilities: If the mantel or surround incorporates electrical components, such as lighting or heating elements, ensure that the power supply is turned off and safely disconnect any wiring.
- Protective Measures: Place protective coverings over the flooring and adjacent surfaces to prevent scratches or damage during the removal process.
- Support and Dismantle: Enlist assistance to support the mantel and carefully detach it from the wall. Use a pry bar and hammer to gently loosen and remove the surround, taking care to avoid undue force that could cause splintering or breakage.
- Inspect for Hidden Fasteners: Thoroughly examine the area for concealed fasteners or anchors that may be securing the mantel or surround. Use a flashlight and inspect from various angles to ensure all attachment points are identified.
- Label and Store Components: If the mantel and surround are intended for reuse or repurposing, label and store the components carefully to prevent damage and facilitate future installation.
By methodically following these steps, you can safely and effectively remove the mantel and surround, laying the groundwork for the subsequent phases of the fireplace demolition. Taking the time to approach this phase with care and precision will contribute to a successful and seamless progression of the project.
Before starting to demolish a brick fireplace, make sure to turn off the gas and electricity supply to the area. It’s also important to wear protective gear such as gloves, goggles, and a mask to prevent injury and exposure to dust and debris.
Step 4: Dismantle the Brick Facade
The process of dismantling the brick facade of a fireplace requires a methodical approach and the right tools to ensure a safe and efficient demolition. Here’s a detailed guide on how to effectively execute this crucial step:
- Assess the Structural Integrity: Before initiating the demolition, carefully inspect the brick facade for any signs of structural instability or damage that may pose risks during the dismantling process.
- Protective Gear: Prioritize safety by wearing protective gear, including goggles, gloves, and a dust mask, to shield yourself from debris and dust generated during the demolition.
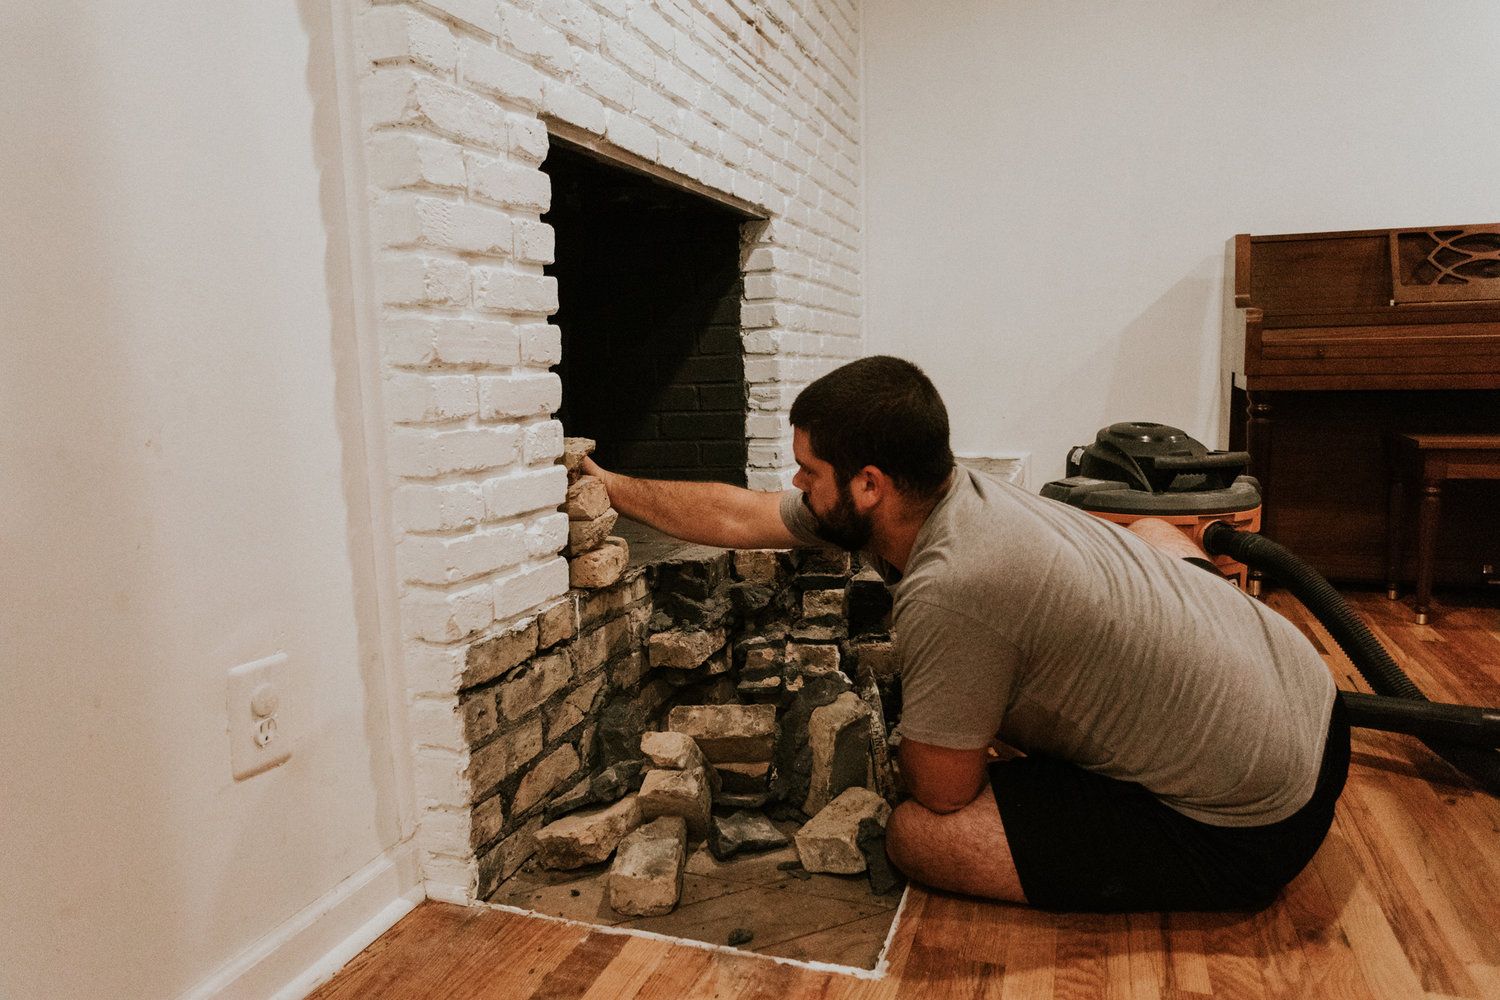
- Strategic Demolition: Begin the demolition process by using a sledgehammer to carefully strike the bricks, starting from the top and working your way down. Exercise caution to avoid dislodging large sections of bricks at once, which could pose safety hazards.
- Use of Pry Bar and Chisel: As you progress, utilize a pry bar and chisel to carefully dislodge individual bricks and address any mortar that may be stubbornly adhered to the surrounding structure.
- Safe Disposal of Debris: As bricks and debris accumulate, carefully remove and dispose of them in a designated area, ensuring that the disposal process adheres to local regulations and safety guidelines.
- Inspect for Hidden Elements: Thoroughly examine the interior of the facade for hidden elements, such as insulation or wiring, and take necessary precautions to remove or address these components safely.
- Reinforce Surrounding Structures: As the facade is dismantled, be mindful of the surrounding structures and take measures to reinforce or support any areas that may be impacted by the removal of the brick facade.
By approaching the dismantling of the brick facade with meticulous attention to safety and precision, you can effectively progress through this phase of the fireplace demolition, paving the way for the subsequent steps in the project.
Read more: How To Stucco A Brick Fireplace
Step 5: Clear Out the Debris
Once the brick facade and surrounding elements have been successfully dismantled, the next crucial step in the fireplace demolition process is clearing out the accumulated debris and preparing the area for the final phases of the project. Here’s a comprehensive guide on how to effectively execute this pivotal step:
- Debris Removal: Begin by carefully collecting and removing the dislodged bricks, mortar, and any residual debris from the demolition site. Utilize a sturdy container, such as a wheelbarrow or large bins, to facilitate the removal process.
- Clean the Work Area: Thoroughly sweep and clean the area to eliminate dust, small particles, and any remaining debris. Consider using a shop vacuum to ensure a meticulous cleanup of the space.
- Inspect for Residual Materials: Conduct a detailed inspection of the area to identify any hidden or residual materials, such as nails, screws, or small fragments of brick and mortar. Carefully remove these items to ensure a clean and hazard-free work environment.
- Addressing Dust and Residue: Use damp cloths or a gentle cleaning solution to wipe down surfaces and address any residual dust or residue that may have settled on nearby structures or furnishings.
- Dispose of Debris: Adhere to local regulations and guidelines for the proper disposal of the collected debris. If applicable, separate materials for recycling and ensure that any hazardous components are handled and disposed of in accordance with environmental standards.
- Restore Ventilation and Accessibility: Reopen windows, remove protective coverings, and restore the area to its functional state, ensuring that ventilation is optimized and the space is accessible for the subsequent phases of the project.
By diligently clearing out the debris and restoring the work area to a clean and organized state, you’ll set the stage for the final phases of the fireplace demolition, ensuring a safe and efficient progression toward the project’s completion.
Step 6: Clean Up and Dispose of Materials
As the fireplace demolition project nears completion, the final step involves thorough cleanup and the responsible disposal of materials generated during the dismantling process. This phase is essential for leaving the work area in a pristine condition and ensuring that materials are managed in an eco-friendly and compliant manner. Here’s a detailed guide on how to effectively execute this crucial step:
- Final Inspection: Conduct a comprehensive inspection of the work area to ensure that all debris, tools, and equipment have been properly removed, and the space is free of hazards or obstructions.
- Clean Surfaces and Surroundings: Utilize appropriate cleaning solutions and tools to thoroughly clean the surrounding surfaces, including walls, flooring, and any adjacent structures that may have been impacted during the demolition process.
- Dispose of Hazardous Materials: If the fireplace contained any hazardous materials, such as asbestos insulation or lead-based paint, ensure that these materials are handled and disposed of in compliance with environmental regulations and safety protocols.
- Recycle and Reuse: Separate salvageable materials, such as bricks and metal components, for recycling or potential reuse in future projects. This sustainable approach minimizes waste and contributes to environmental conservation.
- Waste Disposal: Arrange for the proper disposal of non-recyclable debris and materials, adhering to local waste management guidelines and utilizing designated disposal facilities to responsibly manage the discarded items.
- Restore the Area: Return the work area to its pre-demolition state, ensuring that any protective coverings, temporary supports, or safety barriers are removed, and the space is restored to its original functionality.
- Document and Reflect: Take the opportunity to document the project’s completion, capturing before-and-after photographs and reflecting on the accomplishment of successfully demolishing the fireplace while maintaining a commitment to safety and environmental responsibility.
By conscientiously executing the cleanup and disposal of materials, you’ll conclude the fireplace demolition project with a sense of achievement, leaving behind a clean and rejuvenated space while upholding sustainable practices and regulatory compliance.
Conclusion
Embarking on the journey to demolish a brick fireplace is a significant undertaking that requires careful planning, the right tools, and a methodical approach. By following the step-by-step guide outlined in this comprehensive resource, you’ve gained valuable insights into the process of safely and effectively deconstructing a fireplace, paving the way for a transformation of your living space.
Throughout the demolition process, you’ve learned the importance of gathering the necessary tools and equipment, preparing the work area, and approaching each phase with attention to detail and safety. From the initial removal of the mantel and surround to the meticulous dismantling of the brick facade, you’ve navigated each step with confidence and precision, ensuring a smooth progression of the project.
As you cleared out the debris and responsibly disposed of materials, you demonstrated a commitment to environmental stewardship and the safe management of waste generated during the demolition. By embracing sustainable practices and adhering to regulatory guidelines, you’ve contributed to the preservation of our natural surroundings while revitalizing your living space.
As you conclude the fireplace demolition project, take pride in the accomplishment of transforming your environment and creating a clean, open canvas for future endeavors. Whether you’re pursuing a modernized aesthetic, addressing structural concerns, or simply seeking a fresh start, the successful completion of this project marks a significant milestone in your home improvement journey.
Remember to document your achievements, capturing the before-and-after moments as a testament to your dedication and expertise in tackling this endeavor. As you reflect on the process, celebrate the newfound potential that your revitalized space holds and the opportunities it presents for future projects and creative expression.
With the knowledge and experience gained from this endeavor, you’re well-equipped to take on future home improvement projects and continue shaping your living space according to your vision. Whether it’s a renovation, a redesign, or a complete transformation, the skills and insights acquired through the fireplace demolition process will serve as valuable assets in your ongoing pursuit of creating a space that truly reflects your style and aspirations.
Congratulations on successfully demolishing a brick fireplace and embracing the potential for new beginnings and fresh possibilities within your home.
Frequently Asked Questions about How To Demolish A Brick Fireplace
Was this page helpful?
At Storables.com, we guarantee accurate and reliable information. Our content, validated by Expert Board Contributors, is crafted following stringent Editorial Policies. We're committed to providing you with well-researched, expert-backed insights for all your informational needs.











0 thoughts on “How To Demolish A Brick Fireplace”