Home>Construction & Tools>Building Materials>How To Install Stacked Stone Veneer
Building Materials
How To Install Stacked Stone Veneer
Modified: August 17, 2024
Learn how to install stacked stone veneer as a building material with our step-by-step guide. Enhance your space with this versatile and durable option. Discover the process now!
(Many of the links in this article redirect to a specific reviewed product. Your purchase of these products through affiliate links helps to generate commission for Storables.com, at no extra cost. Learn more)
Introduction
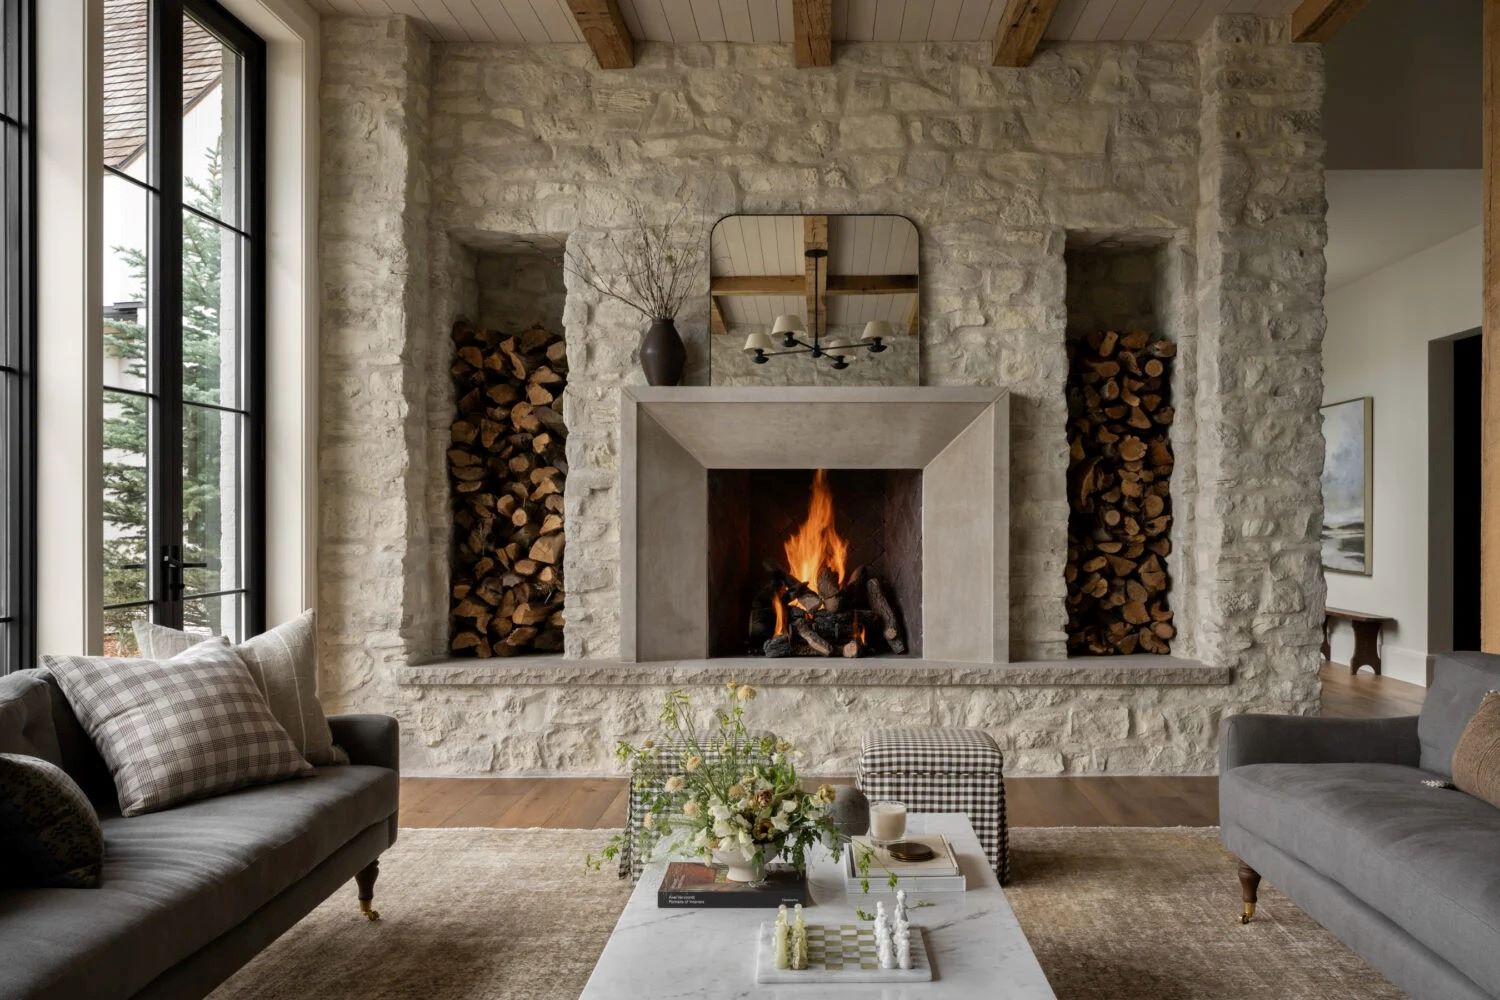
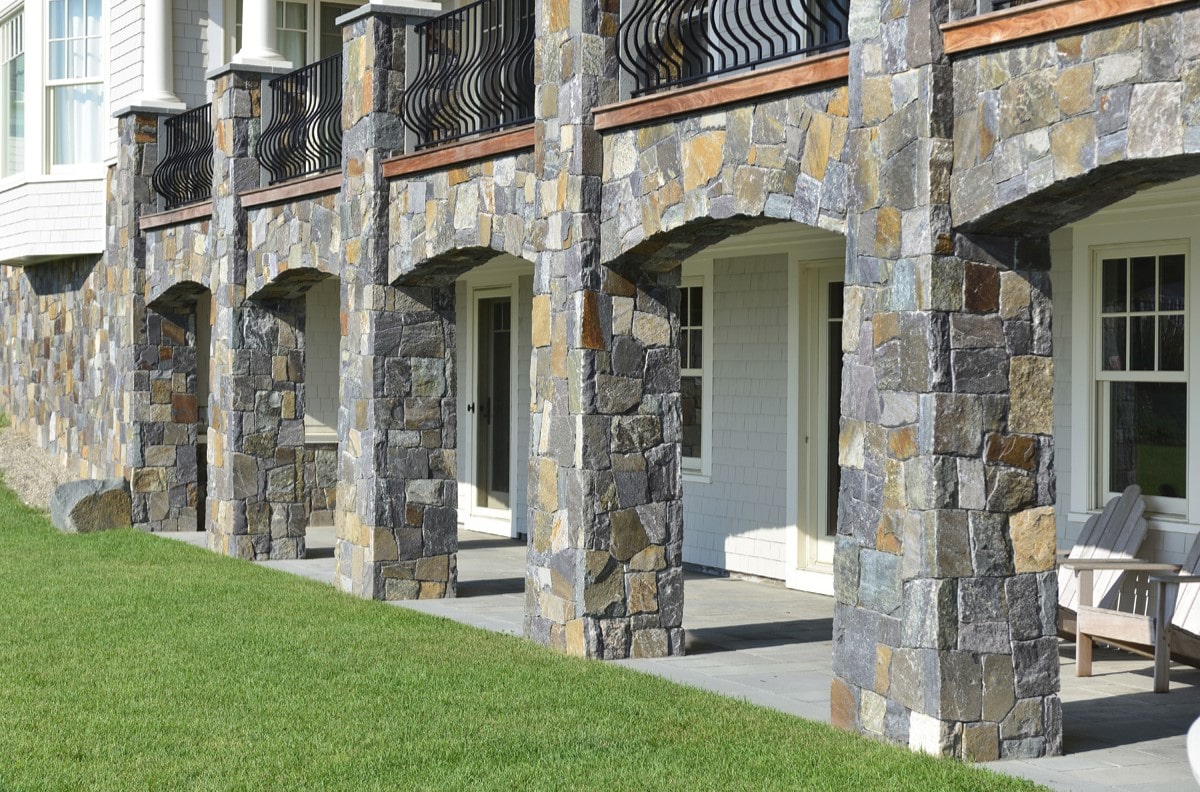
Adding stacked stone veneer to your home can significantly enhance its aesthetic appeal. Whether you're looking to spruce up your interior walls or add a touch of elegance to your exterior, stacked stone veneer provides a timeless and sophisticated look that can transform any space. This versatile building material is not only visually stunning but also durable, making it a popular choice among homeowners and designers alike.
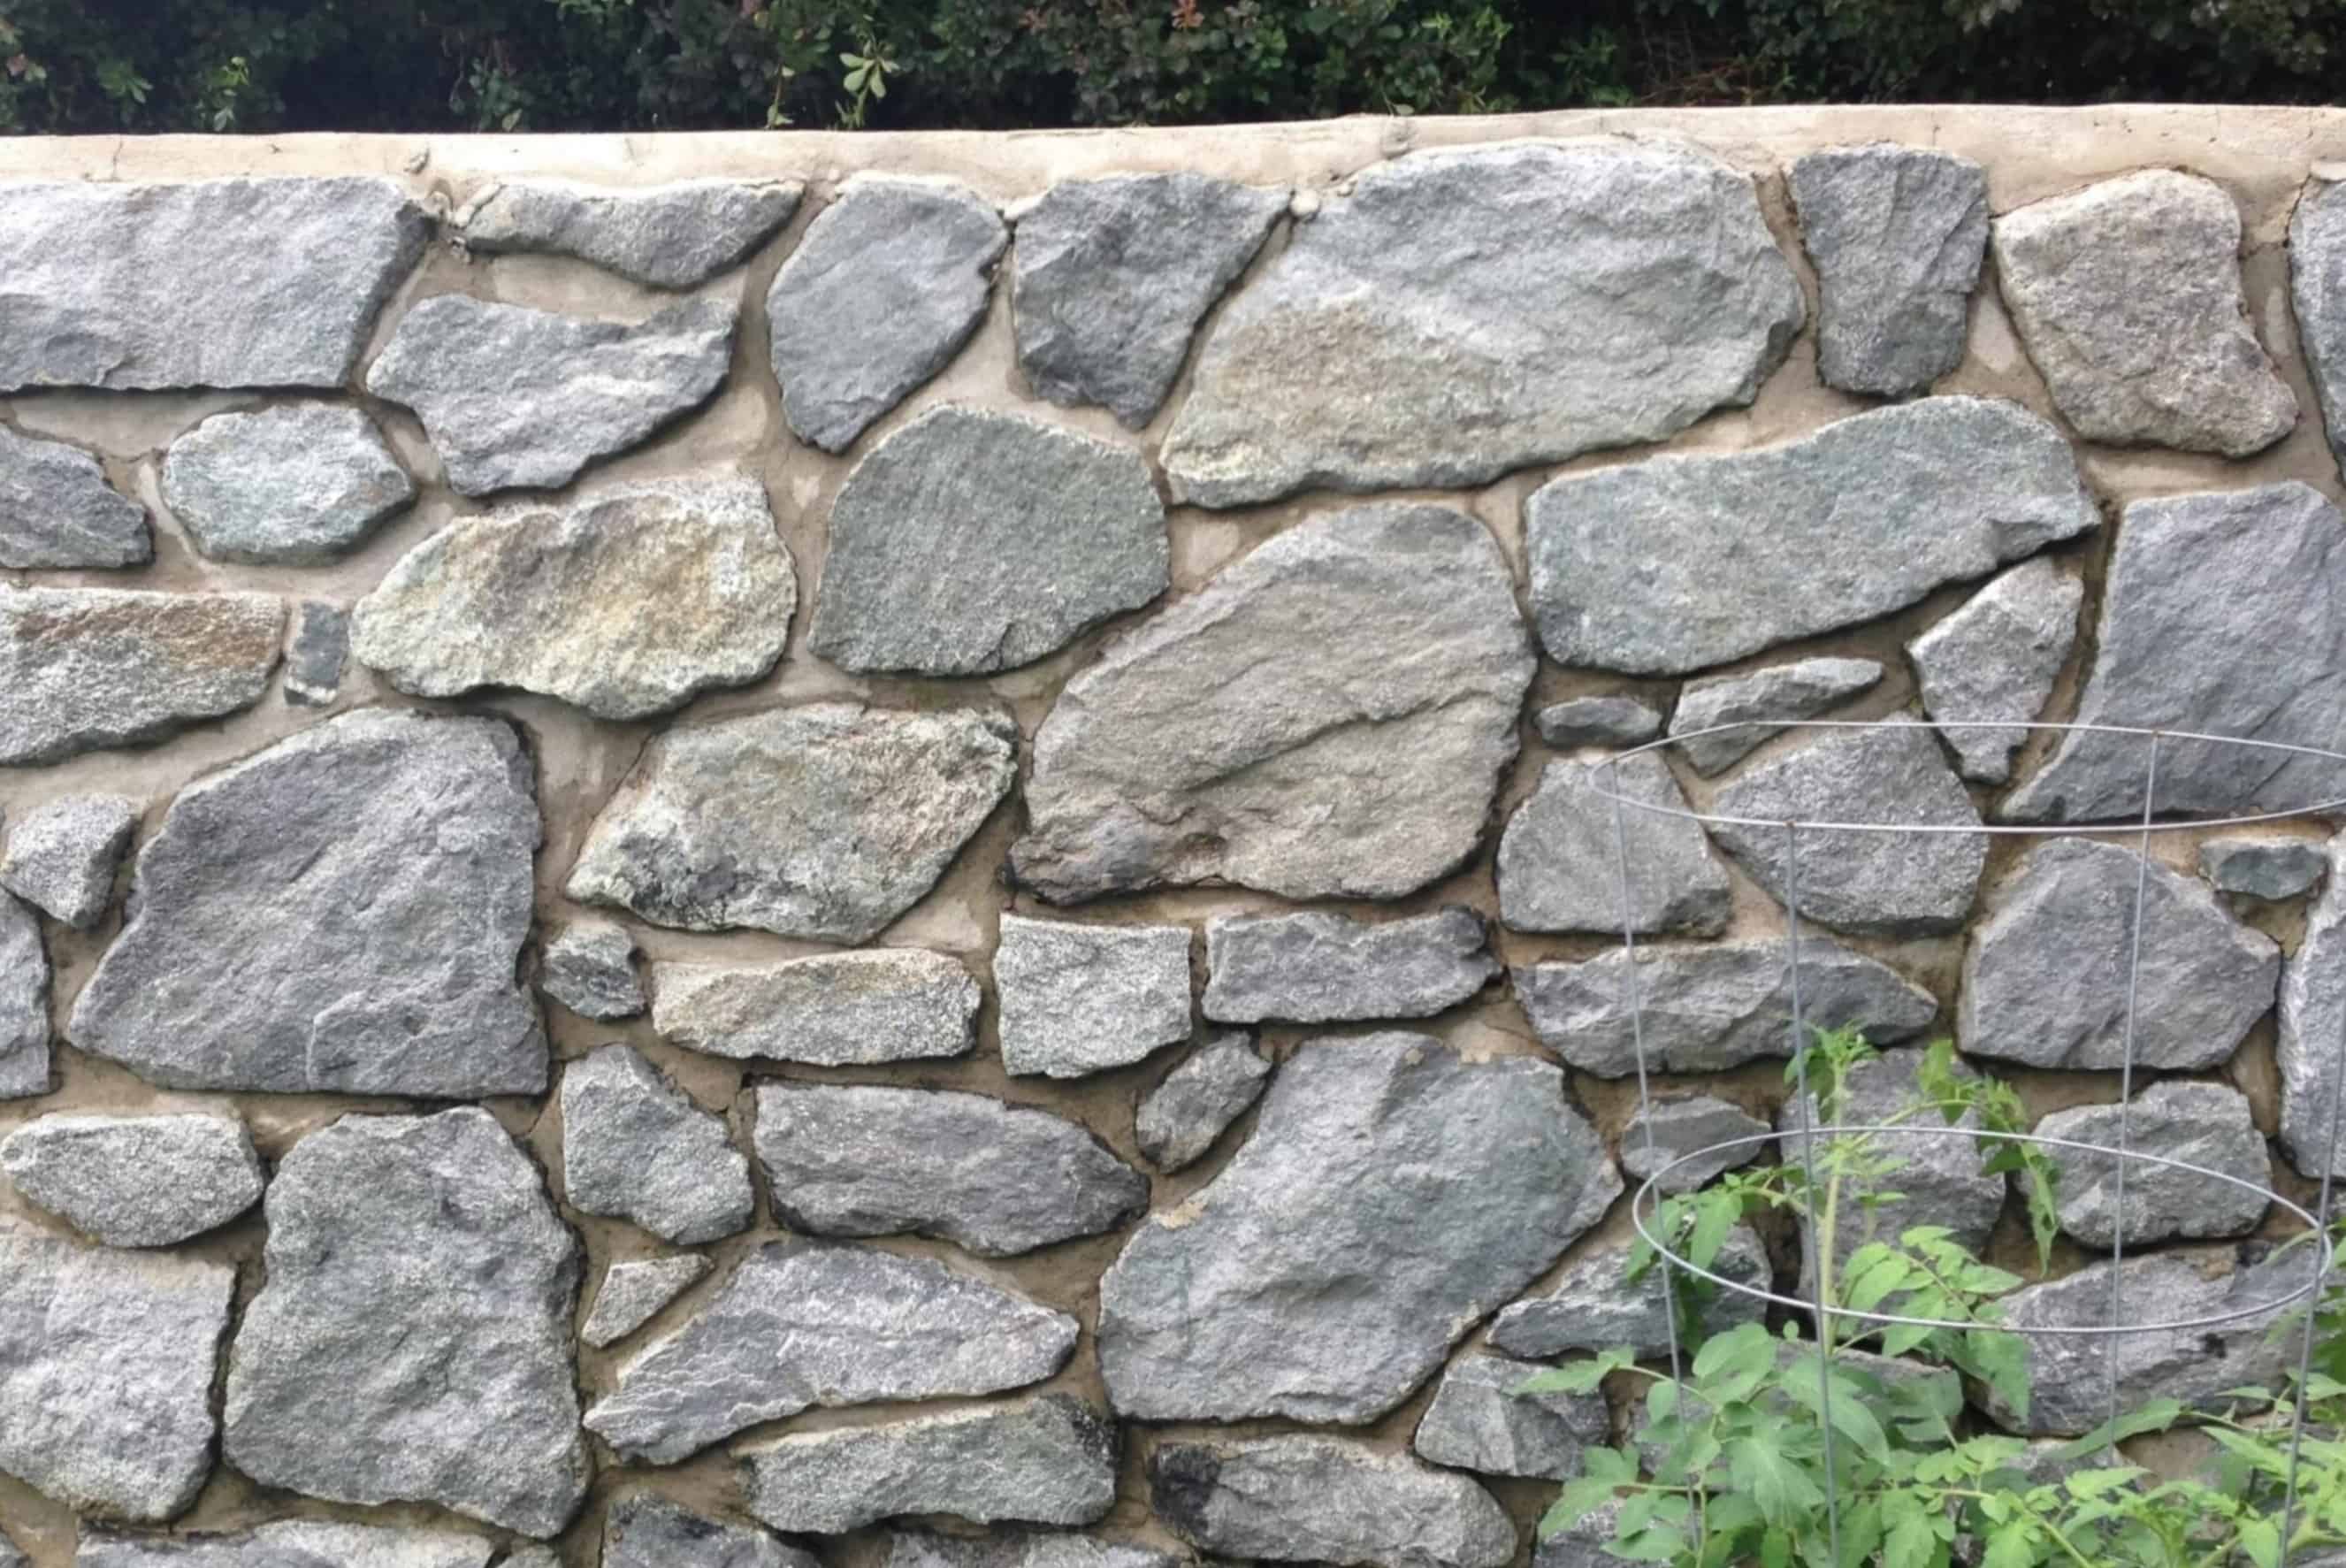
Stacked stone veneer, also known as stacked stone tiles or stacked stone panels, replicates the appearance of natural stone while offering easier installation and a more budget-friendly option. The process of installing stacked stone veneer may seem daunting at first, but with the right materials, tools, and a step-by-step guide, you can achieve professional-looking results without the need for extensive masonry skills.
In this comprehensive guide, we will walk you through the process of installing stacked stone veneer, from preparing the surface to grouting the joints and sealing the finished product. By following these steps, you can elevate the look of your home and create a captivating focal point that exudes sophistication and charm. Let's dive into the materials and tools you'll need to get started.
Key Takeaways:
- Elevate your home’s aesthetic with stacked stone veneer, a durable and visually stunning building material that adds timeless elegance to any space. Follow the step-by-step guide for professional-looking results.
- From surface preparation to grouting and sealing, installing stacked stone veneer is a rewarding project that infuses your home with enduring beauty and charm. Embrace the creative possibilities and enjoy the transformative impact.
Read more: How To Install Stone Veneer Fireplace
Materials Needed
Before embarking on the installation of stacked stone veneer, it’s essential to gather all the necessary materials to ensure a smooth and efficient process. Here’s a list of the materials you’ll need:
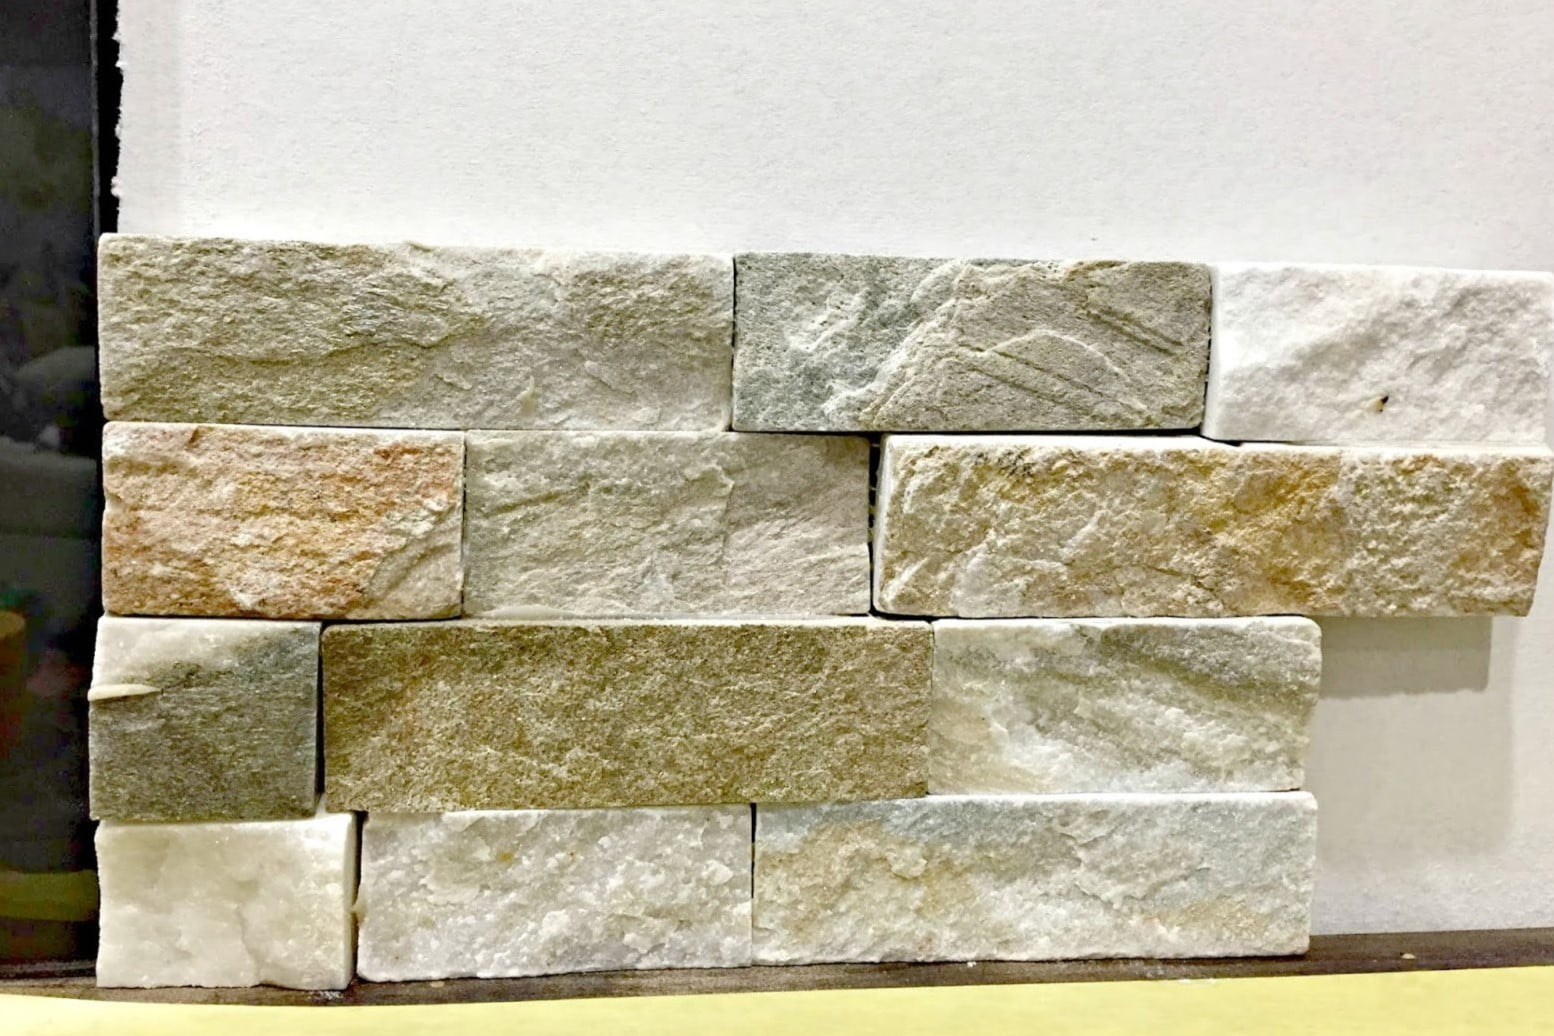
- Stacked Stone Veneer: Select high-quality stacked stone veneer that complements the style of your home. Ensure that you purchase an adequate amount to cover the intended area, accounting for any cuts or waste.
- Waterproofing Membrane: A waterproofing membrane is crucial for protecting the underlying structure from moisture and ensuring the longevity of the stone veneer installation.
- Latex-Modified Mortar: This type of mortar is designed to adhere well to both the stone veneer and the substrate, providing a strong bond and reliable support.
- Grout: Choose a grout color that complements the stacked stone veneer. Sanded grout is typically recommended for its durability and ability to fill wider joints.
- Sealer: Opt for a high-quality stone sealer to protect the veneer from stains and moisture, preserving its natural beauty over time.
- Backer Board: Depending on the surface where the veneer will be installed, such as drywall or wood, you may need to use a backer board to provide a suitable base for the stone veneer.
- Primer: If you’re working on an interior wall, a primer designed for masonry surfaces can help ensure proper adhesion and a professional finish.
- Shims: These small, tapered wedges can be used to maintain consistent spacing between the stone veneer pieces during installation.
- Stone Veneer Cleaner: Having a cleaner specifically formulated for stone veneer can aid in the maintenance and upkeep of the finished installation.
By gathering these essential materials, you’ll be well-prepared to proceed with the installation of stacked stone veneer. In addition to these materials, having the right tools on hand is equally important. Let’s explore the tools needed for this project.
Tools Needed
Equipping yourself with the right tools is crucial for a successful stacked stone veneer installation. Here’s a list of the essential tools you’ll need to complete the project:
- Notched Trowel: A notched trowel is used to apply the mortar to the substrate and create an even, textured surface for the stone veneer to adhere to.
- Grout Float: This tool is essential for pressing grout into the joints between the stone veneer pieces, ensuring a solid and uniform finish.
- Diamond Blade Wet Saw: A wet saw with a diamond blade is ideal for cutting the stacked stone veneer to the desired size and shape, allowing for precise and clean cuts.
- Level: A level is necessary to ensure that the stone veneer is installed straight and plumb, maintaining a professional and visually appealing result.
- Bucket and Mixing Drill: These are essential for preparing the mortar according to the manufacturer’s instructions, ensuring a consistent and workable mixture.
- Paintbrushes: Utilize paintbrushes for applying the waterproofing membrane and sealer, ensuring thorough coverage and protection.
- Protective Gear: Safety glasses, work gloves, and a dust mask are essential for protecting yourself during the cutting and installation processes.
- Measuring Tape: Accurate measurements are crucial for planning the layout and ensuring a precise fit of the stone veneer pieces.
- Utility Knife: A sharp utility knife can be used for trimming the waterproofing membrane and backer board to fit the installation area.
- Sponge and Bucket of Water: These are handy for cleaning excess mortar and grout from the surface of the stone veneer during installation.
By having these tools readily available, you’ll be well-equipped to tackle the installation of stacked stone veneer with confidence. With the materials and tools in place, the next steps involve preparing the surface for the veneer installation.
Preparing the Surface
Proper surface preparation is essential for ensuring the successful installation of stacked stone veneer. Whether you’re working on an interior wall, an exterior facade, or a fireplace surround, the surface must be clean, structurally sound, and capable of supporting the weight of the veneer. Here’s a step-by-step guide to preparing the surface:
- Clean the Surface: Remove any dirt, dust, or debris from the installation area. If the surface is painted or sealed, consider using a mild detergent and water to ensure a clean and residue-free base.
- Inspect for Structural Integrity: Examine the surface for any signs of damage, such as cracks or deterioration. Repair any structural issues before proceeding with the installation to ensure a stable and secure foundation for the stone veneer.
- Apply Waterproofing Membrane: If you’re installing the veneer on an exterior surface or in areas prone to moisture exposure, apply a waterproofing membrane according to the manufacturer’s instructions. This crucial step helps protect the underlying structure from water damage and ensures the longevity of the installation.
- Install Backer Board (If Necessary): In some cases, such as when working on drywall or wood surfaces, installing a backer board may be necessary to provide a suitable base for the stone veneer. Follow the manufacturer’s guidelines for securing the backer board to the surface.
- Prime the Surface (For Interior Installations): If you’re working on an interior wall, applying a primer designed for masonry surfaces can promote adhesion and create an optimal surface for the mortar and veneer.
- Plan the Layout: Consider the layout and arrangement of the stone veneer pieces, ensuring a visually appealing and balanced design. Take measurements and plan the placement of the veneer before applying the mortar.
By thoroughly preparing the surface according to these guidelines, you’ll establish a solid foundation for the stacked stone veneer installation. The next step involves applying the mortar to secure the veneer in place.
Applying the Mortar
Applying the mortar is a critical step in the installation of stacked stone veneer, as it serves as the adhesive that secures the veneer to the prepared surface. Proper application of the mortar is essential for achieving a strong and durable bond. Here’s a detailed guide on how to apply the mortar for your veneer installation:
- Mix the Mortar: Follow the manufacturer’s instructions to prepare the latex-modified mortar. Use a bucket and mixing drill to achieve a smooth and workable consistency.
- Apply the Mortar to the Surface: Use a notched trowel to spread the mortar onto the prepared surface, creating a consistent layer of adhesive. Ensure that the mortar is applied evenly and covers the entire area where the stone veneer will be installed.
- Create Texture in the Mortar: After applying the mortar, use the notched edge of the trowel to create grooves or ridges in the mortar. This texturing helps enhance the bond between the mortar and the veneer.
- Work in Small Sections: To prevent the mortar from drying out before the veneer is installed, work in manageable sections. Avoid applying mortar to a larger area than you can cover with the stone veneer within a reasonable timeframe.
- Check for Adequate Coverage: As you apply the mortar, periodically check for consistent coverage and thickness. The mortar should be sufficiently thick to support the veneer while allowing for adjustment and leveling during installation.
- Be Mindful of Joints: Pay attention to the spacing and alignment of the mortar joints, as they will influence the overall appearance of the finished installation. Maintain consistent joint widths and ensure that the mortar is level and plumb.
By following these steps and techniques for applying the mortar, you’ll establish a solid foundation for installing the stacked stone veneer. With the mortar in place, the next phase involves the actual installation of the stone veneer, where precision and attention to detail are paramount.
Before installing stacked stone veneer, make sure to properly prepare the surface by cleaning and applying a moisture barrier. This will ensure a strong and long-lasting bond for the veneer.
Read more: How To Install Stone Veneer Over Stucco
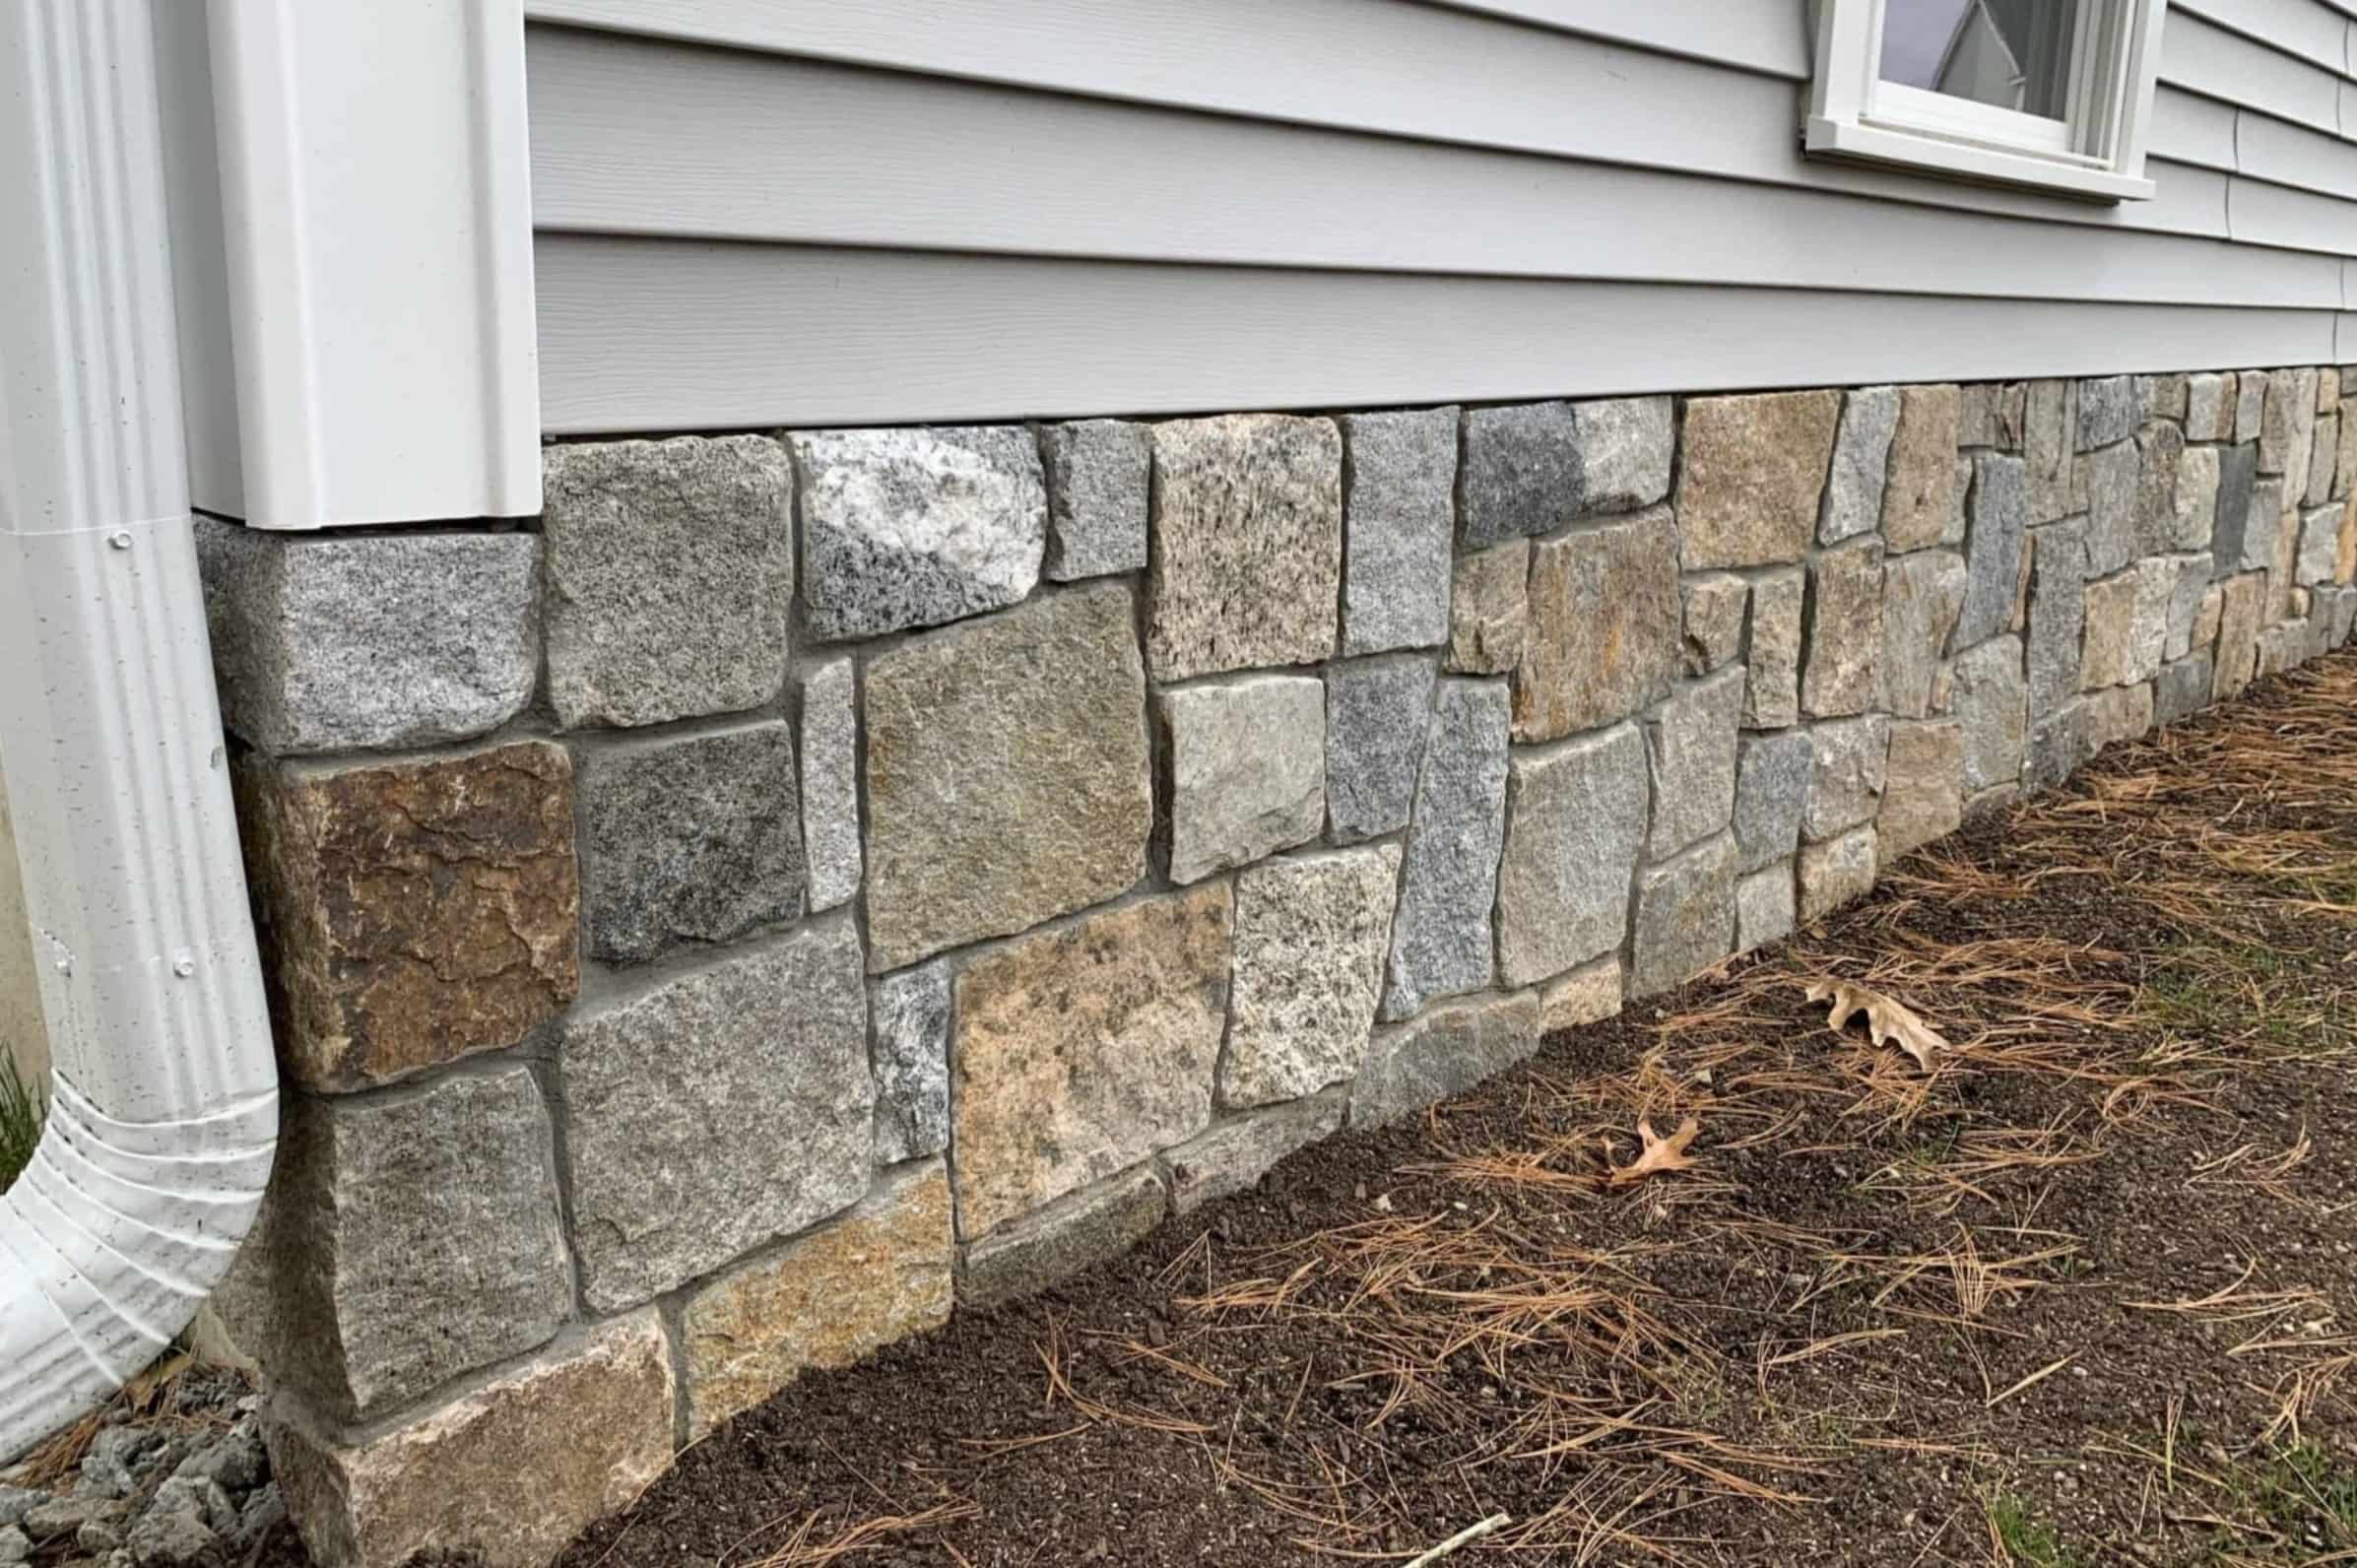
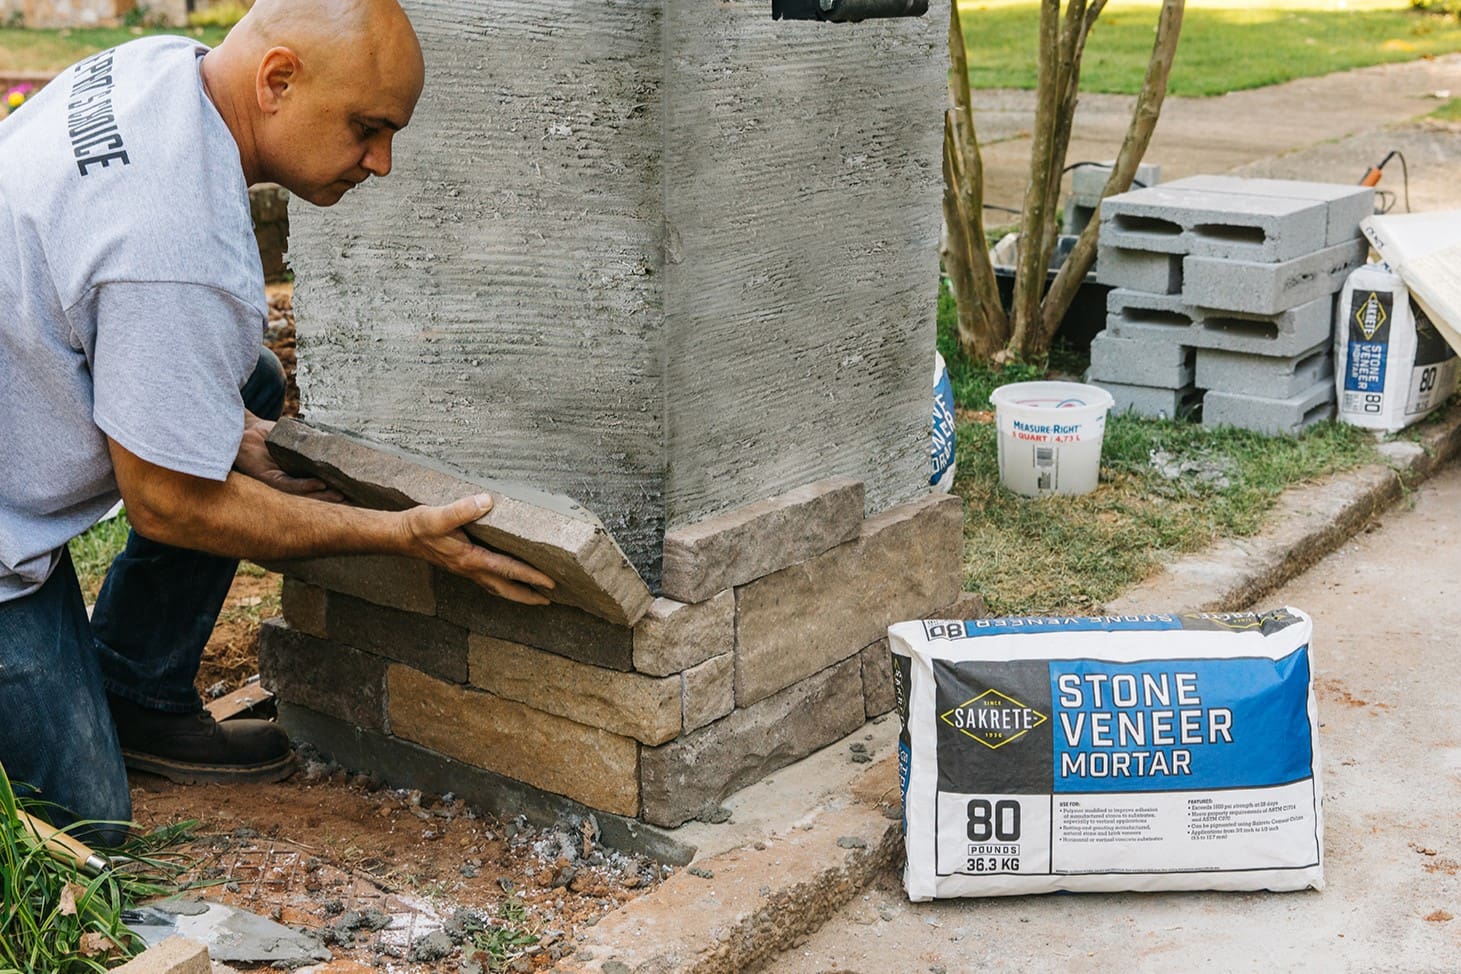
Installing the Stone Veneer
With the surface prepared and the mortar applied, the next phase of the installation process involves placing and securing the stacked stone veneer. This step requires precision, attention to detail, and a methodical approach to achieve a professional and visually appealing result. Here’s a comprehensive guide to installing the stone veneer:
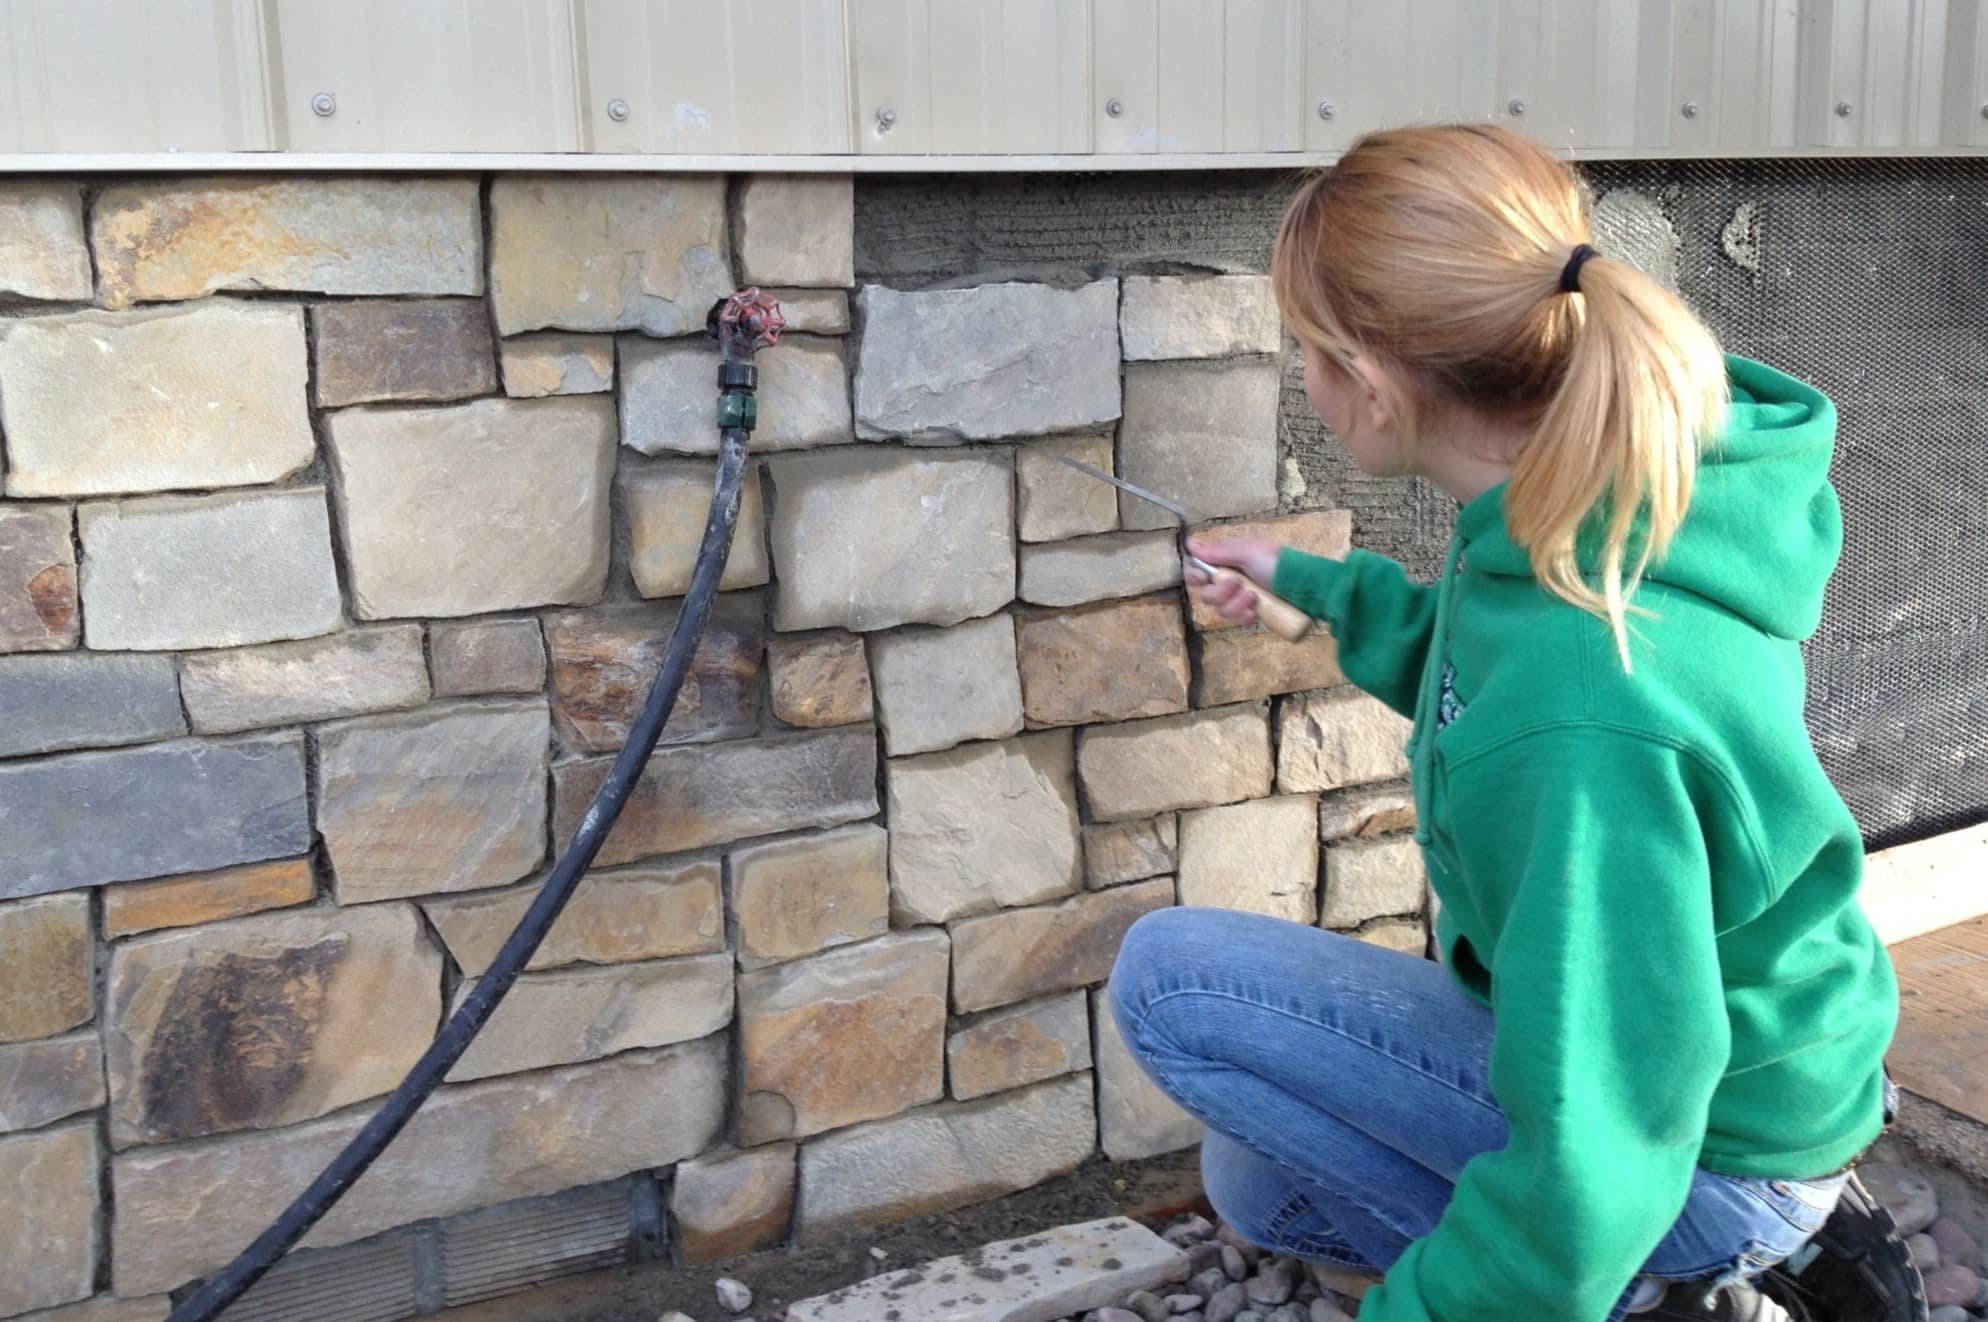
- Begin at the Bottom: Start at the bottom of the installation area and work your way upward. Apply the stone veneer pieces one at a time, ensuring a secure and level placement.
- Press and Hold: Press each stone veneer piece firmly into the mortar, holding it in place for a few seconds to ensure proper adhesion. This step is crucial for establishing a strong bond between the veneer and the surface.
- Maintain Consistent Joints: As you install each piece of veneer, pay attention to the spacing and alignment of the joints. Use shims to maintain consistent joint widths and ensure a uniform appearance.
- Adjust for Variation: Stacked stone veneer pieces may vary in thickness and shape. As you install the veneer, be prepared to adjust the mortar bed and make minor modifications to individual pieces to achieve a seamless and natural look.
- Check for Level and Plumb: Use a level to ensure that the stone veneer is installed straight and plumb. Making adjustments as needed during the installation process will help maintain a professional and visually appealing result.
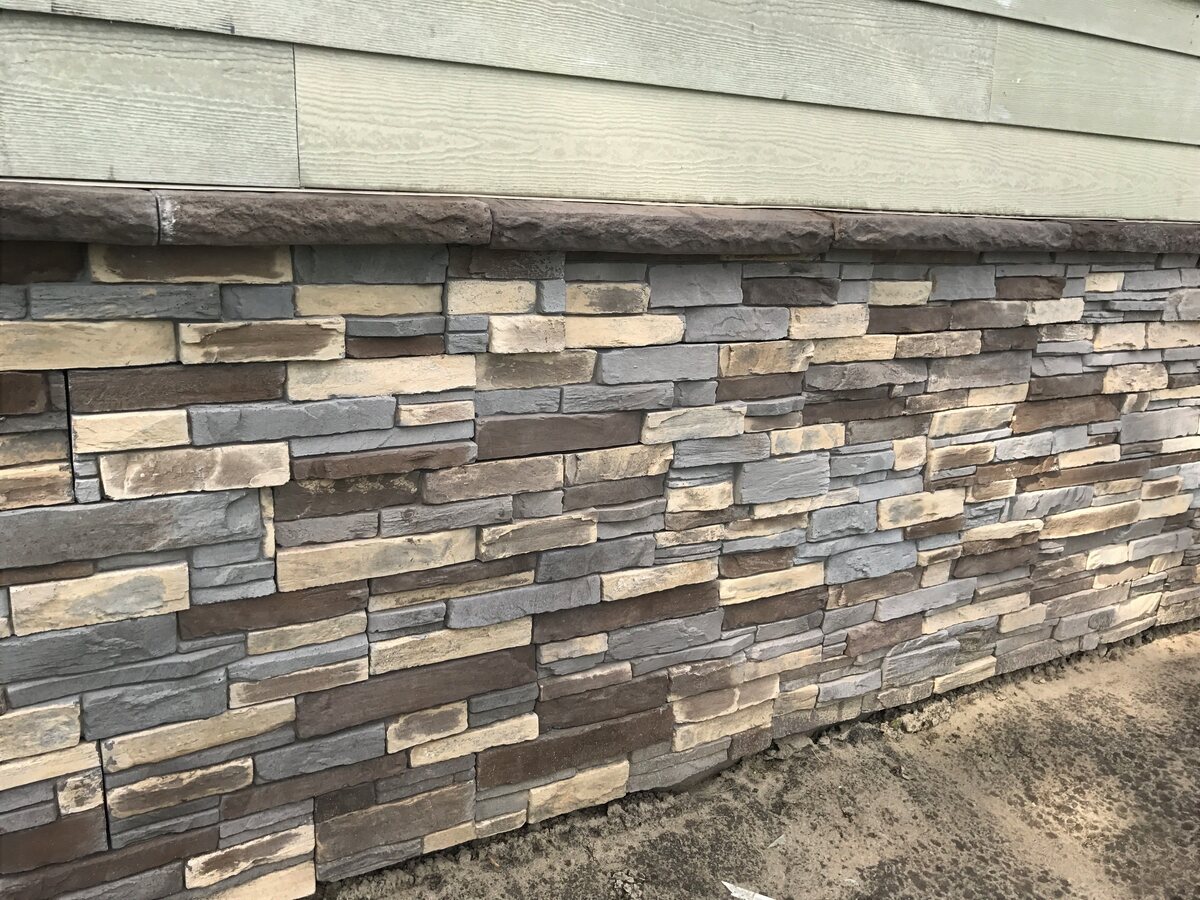
- Overlap Joints: When installing subsequent rows of veneer, stagger the joints to create a natural and visually appealing pattern. Overlapping the joints helps enhance the structural integrity and aesthetic appeal of the installation.
- Trimming and Cutting: Use a diamond blade wet saw to make precise cuts and trim the stone veneer pieces as needed to fit the installation area. Take care to achieve clean and accurate cuts for a seamless finish.
By following these guidelines and techniques for installing the stone veneer, you’ll be well on your way to creating a captivating and enduring feature in your home. Once the veneer is in place, the next step involves grouting the joints to complete the installation.
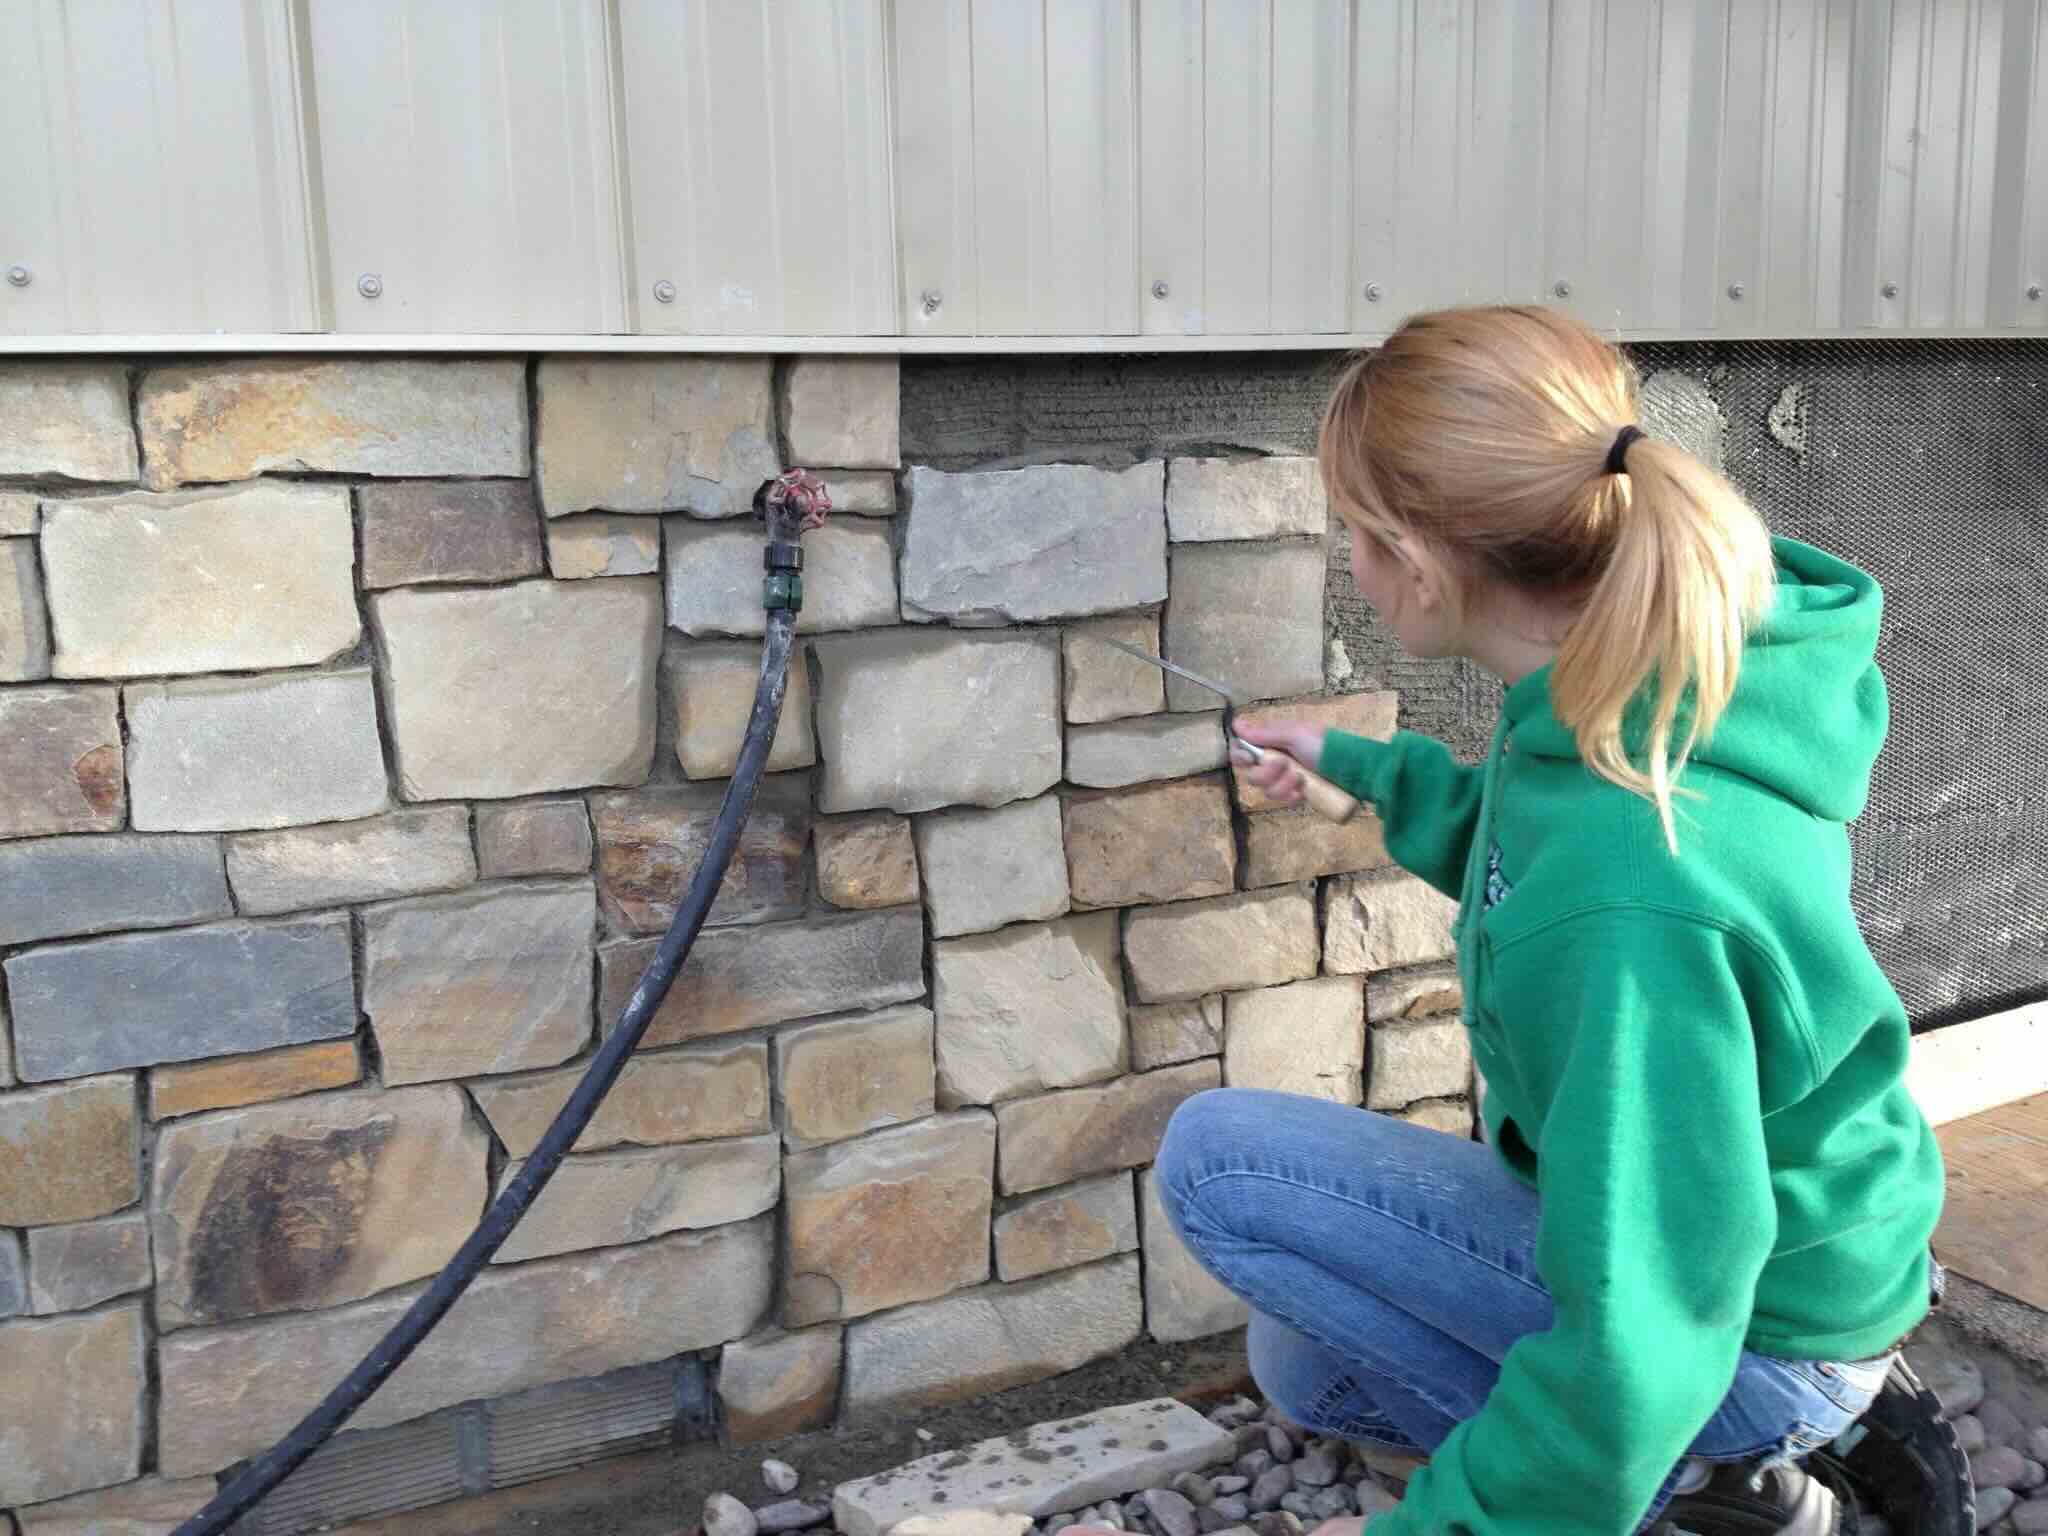
Grouting the Joints
Grouting the joints is a crucial step in the installation of stacked stone veneer, as it not only enhances the visual appeal of the finished installation but also contributes to the structural integrity of the veneer. Proper grouting ensures that the individual stone pieces are securely bonded and creates a cohesive, polished look. Here’s a detailed guide on how to grout the joints for your stone veneer installation:
- Choose the Right Grout: Select a sanded grout that complements the color and style of the stacked stone veneer. Sanded grout is recommended for its durability and ability to fill wider joints effectively.
- Mix the Grout: Follow the manufacturer’s instructions to prepare the grout mixture to the desired consistency. Use a bucket and mixing drill to achieve a smooth and lump-free blend.
- Apply the Grout: Use a grout float to press the grout into the joints between the stone veneer pieces. Work in small sections, ensuring that the grout fills the joints completely and evenly.
- Remove Excess Grout: After applying the grout, use a damp sponge to remove excess grout from the surface of the stone veneer. Rinse the sponge frequently and gently clean the veneer to reveal the desired grout lines.
- Shape and Finish the Joints: Once the grout has set for a short period, use a striking tool or a rounded stick to shape and smooth the grout lines. This step helps achieve a uniform and professional finish.
- Check for Uniformity: As you grout the joints, ensure that the color and texture of the grout are consistent throughout the installation. Pay attention to detail to achieve a visually appealing and cohesive result.
- Allow the Grout to Cure: Follow the manufacturer’s guidelines for the curing time of the grout. Allow the grout to set and cure thoroughly before proceeding to the final step of sealing the stone veneer.
By following these steps and techniques for grouting the joints, you’ll enhance the overall appearance and stability of the stacked stone veneer installation. With the grouting complete, the final phase involves sealing the stone veneer to protect and preserve its natural beauty.
Sealing the Stone Veneer
Sealing the stone veneer is a crucial final step in the installation process, as it helps protect the surface from stains, moisture, and other environmental factors while enhancing its natural beauty. Properly sealing the veneer ensures its longevity and facilitates easier maintenance. Here’s a comprehensive guide on how to seal the stone veneer:
- Choose the Right Sealer: Select a high-quality stone sealer that is suitable for the type of stacked stone veneer you’ve installed. Consider factors such as the finish you want to achieve and the level of protection required.
- Prepare the Veneer Surface: Ensure that the stone veneer surface is clean and free of any grout residue or debris. If necessary, use a stone veneer cleaner to remove any remaining traces of grout or dirt.
- Apply the Sealer: Using a paintbrush or roller, apply the stone sealer evenly across the entire surface of the veneer. Ensure thorough coverage while avoiding excess pooling or drips.
- Allow for Absorption: Depending on the type of sealer used, allow the veneer to absorb the initial application of the sealer. This may involve applying multiple coats, as recommended by the manufacturer, to achieve the desired level of protection and enhancement.
- Wipe Off Excess Sealer: After the sealer has been allowed to absorb, use a clean cloth to gently wipe off any excess sealer from the surface of the stone veneer. This step helps achieve a uniform finish and prevents any residual sealer from drying and forming a film.
- Allow the Sealer to Cure: Follow the manufacturer’s guidelines for the curing time of the sealer. Allow the sealed stone veneer to cure thoroughly before subjecting it to moisture or heavy use.
- Maintain Regular Maintenance: Once the stone veneer is sealed, follow the recommended maintenance practices to preserve its appearance and protection. This may include periodic resealing and routine cleaning to keep the veneer looking its best.
By following these steps and techniques for sealing the stone veneer, you’ll ensure that the installation remains beautiful and protected for years to come. With the completion of the sealing process, your stacked stone veneer installation is ready to be enjoyed and admired for its enduring beauty and charm.
Conclusion
Installing stacked stone veneer is a rewarding and transformative project that can elevate the visual appeal of your home while adding a touch of timeless elegance. By following the step-by-step guide outlined in this comprehensive overview, you can achieve professional-looking results and create a captivating focal point that exudes sophistication and charm.
From preparing the surface and applying the mortar to installing the stone veneer, grouting the joints, and sealing the finished product, each phase of the installation process requires attention to detail, precision, and a methodical approach. By carefully selecting high-quality materials, using the right tools, and following best practices for each step, you can ensure a successful and enduring installation.
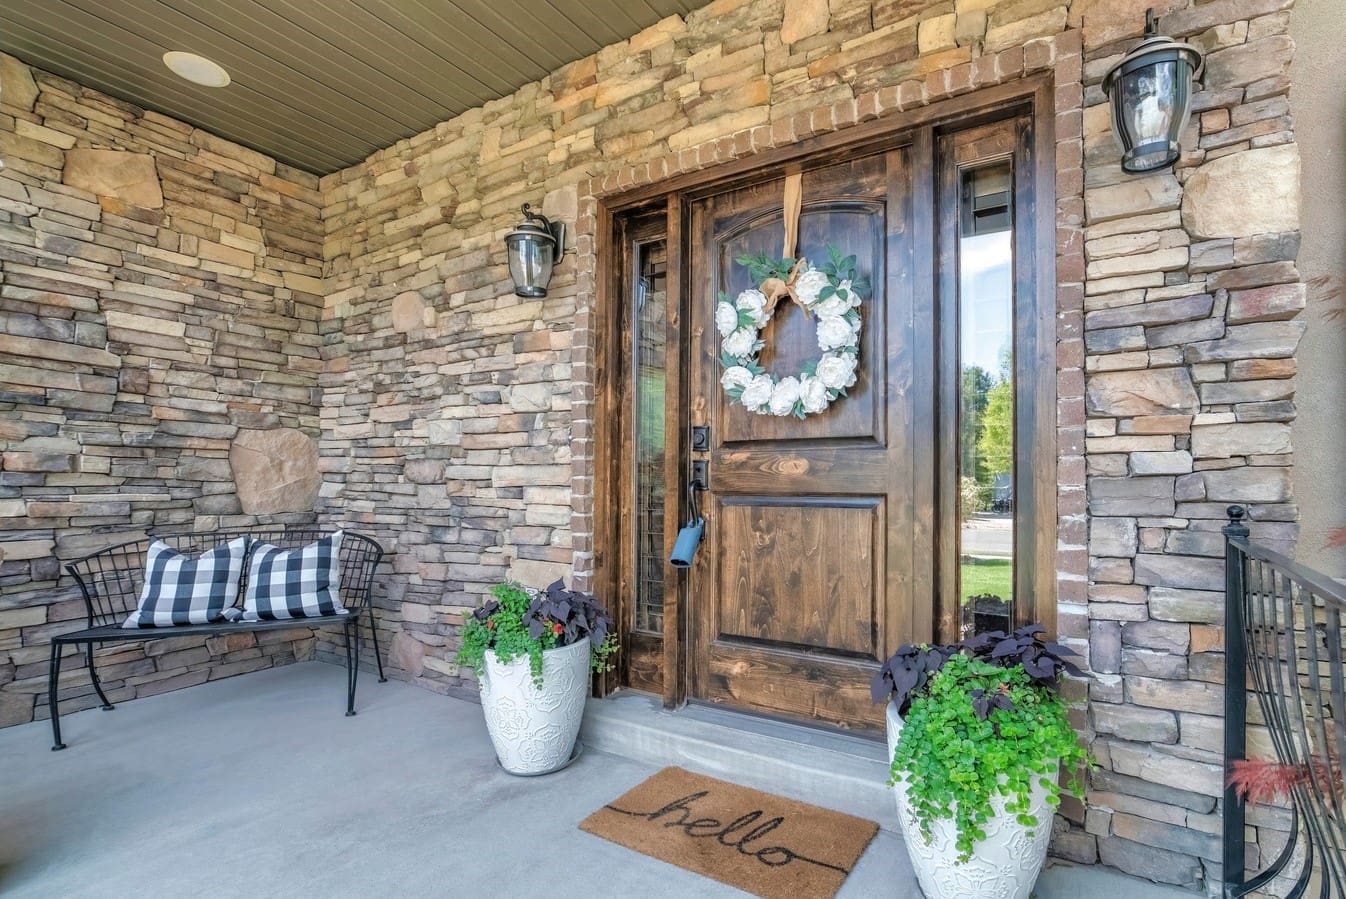
As you embark on your stacked stone veneer project, consider the unique character and style it can bring to your home. Whether used to enhance interior walls, create stunning exterior facades, or add a touch of luxury to fireplace surrounds, stacked stone veneer offers a versatile and visually striking solution for homeowners and designers alike.
Ultimately, the installation of stacked stone veneer is an opportunity to infuse your living spaces with the timeless beauty of natural stone, creating a lasting impression and a welcoming atmosphere. With proper installation and maintenance, your stacked stone veneer installation will stand as a testament to craftsmanship and enduring elegance for years to come.
Embrace the creative possibilities and transformative impact of stacked stone veneer, and enjoy the lasting beauty and charm it brings to your home.
Frequently Asked Questions about How To Install Stacked Stone Veneer
Was this page helpful?
At Storables.com, we guarantee accurate and reliable information. Our content, validated by Expert Board Contributors, is crafted following stringent Editorial Policies. We're committed to providing you with well-researched, expert-backed insights for all your informational needs.


0 thoughts on “How To Install Stacked Stone Veneer”