Home>Articles>How To Cover A Brick Fireplace With Stone Veneer
Articles
How To Cover A Brick Fireplace With Stone Veneer
Modified: October 20, 2024
Learn how to transform your brick fireplace into a stunning focal point with stone veneer installation. Our articles provide step-by-step guides and expert tips on covering a brick fireplace with stone veneer.
(Many of the links in this article redirect to a specific reviewed product. Your purchase of these products through affiliate links helps to generate commission for Storables.com, at no extra cost. Learn more)
Introduction
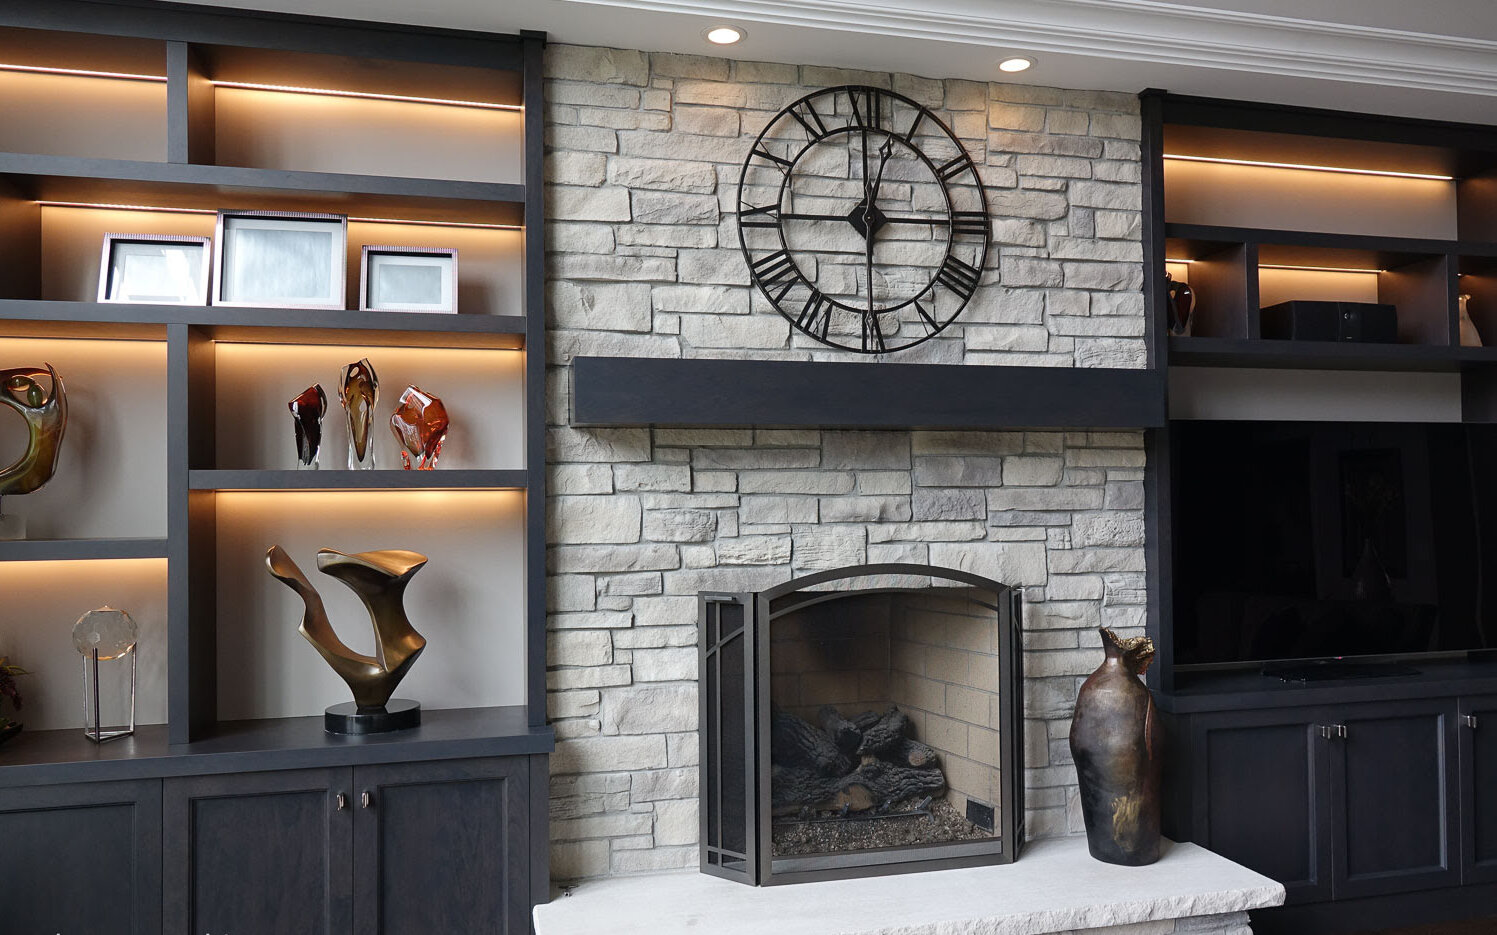
Brick fireplaces can add a certain charm and character to a home, but sometimes they can feel outdated or not quite in line with your desired aesthetic. If you’re looking to give your brick fireplace a fresh new look, one popular option is to cover it with stone veneer. Stone veneer provides a natural and rustic appearance, transforming your fireplace into a stunning focal point that adds style and value to your home.
In this article, we will guide you through the process of covering a brick fireplace with stone veneer. We will provide step-by-step instructions, along with helpful tips and recommendations, to ensure a successful and professional-looking outcome.
Before we get started, it’s important to note that covering a brick fireplace with stone veneer requires careful planning, attention to detail, and appropriate tools. It’s a project that can be accomplished by DIY enthusiasts, but if you’re unsure about your abilities, it’s always a good idea to consult with a professional.
Now, let’s take a look at the materials and tools you will need for this project.
Key Takeaways:
- Transform your outdated brick fireplace into a stunning focal point by covering it with stone veneer. Follow the step-by-step instructions and tips provided to achieve a professional-looking and visually appealing result.
- Ensure the longevity and beauty of your stone veneer fireplace by properly sealing, maintaining, and caring for it. Regular cleaning, avoiding harsh chemicals, and periodic reapplication of sealer will keep your fireplace looking stunning for years to come.
Materials and Tools Needed
Before you begin covering your brick fireplace with stone veneer, it’s important to gather all the necessary materials and tools. Here’s a list of what you’ll need:
Materials:
- Stone veneer: Choose a type and color of stone veneer that complements your home’s style. Measure the square footage of your fireplace to determine how much stone veneer you’ll need.
- Adhesive: Look for a high-quality adhesive specifically designed for stone veneer installation. Make sure it’s suitable for both indoor and outdoor use.
- Grout: Select a grout color that complements your stone veneer. The grout will fill in the gaps between the stones for a finished appearance.
- Waterproofing sealer: This will help protect the stone veneer from stains and moisture damage. Choose a sealer that is suitable for use on natural stone.
- Backer board: Install backer board over the brick surface to create a smooth and stable base for the stone veneer.
- Lath wire: Attach lath wire to the backer board to add extra support and ensure a strong bond between the adhesive and stone veneer.
- Screws and anchors: These will be used to secure the backer board to the brick surface.
- Painter’s tape: Use painter’s tape to protect surrounding surfaces, such as walls and flooring, from adhesive and grout.
- Drop cloths: Cover the floor and furniture near the fireplace to catch any debris or spills during the installation process.
- Trowel: A trowel is essential for applying the adhesive and grout evenly.
- Tile spacers: These small plastic pieces will help ensure consistent spacing between the stones for a professional finish.
- Angle grinder: You’ll need an angle grinder with a diamond blade to cut and trim the stone veneer to fit your fireplace dimensions.
- Safety gear: Don’t forget to protect yourself with safety goggles, gloves, and a dust mask when working with stone veneer and power tools.
Tools:
- Hammer
- Drill
- Screwdriver
- Level
- Measuring tape
- Pencil
- Bucket and sponge
- Caulk gun
Ensure you have all the necessary materials and tools before starting the project. This will help make the installation process smooth and efficient.
Preparation
Before you begin the process of covering your brick fireplace with stone veneer, there are a few important preparatory steps that you need to take. Preparation is crucial to ensure the success and longevity of your project. Here’s what you need to do:
1. Plan and Design:
Take the time to carefully plan and design how you want your stone veneer fireplace to look. Consider the style and color of stone veneer that will best complement your home’s aesthetic. You can create a drawing or use design software to visualize the final result. This will help you determine the amount of stone veneer you need and guide you during the installation process.
2. Obtain Necessary Permits:
Depending on your location, you may need to obtain permits or adhere to specific building codes when covering your fireplace with stone veneer. Check with your local building department to ensure that you’re in compliance with any regulations.
3. Gather Materials and Tools:
Refer to the list of materials and tools needed for the project and gather everything before you start. Having all the necessary items on hand will make the installation process smoother and more efficient.
4. Protect the Surrounding Area:
Use painter’s tape to cover any adjacent walls, flooring, or furniture that could potentially be damaged by adhesive or grout. Lay down drop cloths to catch debris and spills. This will help protect your home and make the cleanup easier.
Read more: How To Install Stone Veneer Fireplace
5. Safety Precautions:
Ensure you have the necessary safety gear, such as goggles, gloves, and a dust mask. Stone veneer installation involves working with adhesive, grout, and power tools, so it’s important to protect yourself from potential hazards.
6. Read Manufacturer’s Instructions:
Be sure to thoroughly read and understand the manufacturer’s instructions for the stone veneer, adhesive, and grout that you’re using. Following these instructions will ensure proper installation and maximize the durability of your finished fireplace.
Once you have completed these preparatory steps, you’re ready to move on to the next stage, which involves cleaning and prepping the brick fireplace.
Cleaning and Prepping the Brick Fireplace
Before you can start applying the stone veneer, it’s crucial to clean and prepare the brick fireplace surface. This will ensure proper adhesion and a smooth installation. Follow these steps to clean and prep your brick fireplace:
1. Remove Obstacles:
Clear the area around the fireplace of any obstacles, such as furniture, decorations, or accessories. This will give you plenty of space to work and prevent anything from getting in the way during the installation process.
Read more: How To Cover A Brick Fireplace
2. Protect Flooring and Surrounding Area:
Use drop cloths or plastic sheets to protect the flooring and surrounding area from debris and cleaning solutions. Cover any nearby furniture or valuable items as well.
3. Remove Dust and Debris:
Begin by brushing the brick surface with a stiff brush to remove any loose dust and debris. Pay attention to the mortar joints, as those areas can accumulate a significant amount of dirt.
4. Clean with Detergent Solution:
Mix a solution of warm water and mild detergent and apply it to the brick surface using a brush or sponge. Scrub gently to remove any dirt, soot, or stains on the brick. Rinse thoroughly with clean water to remove any residue from the cleaning solution.
5. Remove Efflorescence:
If you notice any white, powdery deposits on the surface of the brick, it may be efflorescence. Efflorescence is caused by water leaching minerals from the bricks and then evaporating, leaving behind a powdery residue. Scrub the affected areas with a stiff brush and water to remove the efflorescence.
Read more: How To Refinish A Brick Fireplace With Stone
6. Allow to Dry:
Give the cleaned brick surface enough time to dry completely before proceeding. This is an essential step, as the adhesive used for the stone veneer requires a dry surface to bond properly.
7. Inspect the Brick Surface:
After the brick fireplace has dried, inspect the surface for any cracks, loose mortar, or damage. Repair any necessary areas before moving on. Use a suitable masonry repair product or consult a professional if needed.
Once the brick fireplace is cleaned and prepped, you’re ready to move on to the exciting part of applying the stone veneer. Follow along as we guide you through each step of the process in the next section.
Applying the Stone Veneer
Now that you’ve cleaned and prepped your brick fireplace, it’s time to start applying the stone veneer. Follow these step-by-step instructions to achieve a professional-looking installation:
1. Prepare the Adhesive:
Follow the manufacturer’s instructions to prepare the adhesive. Mix it in a clean bucket according to the recommended ratio. Be sure to use the appropriate trowel or spreader to achieve the desired thickness of adhesive.
2. Apply the Adhesive:
Starting from the bottom of the fireplace, apply a layer of adhesive to the backer board using the trowel or spreader. Create an even and consistent coverage, making sure to cover the entire area where the stone veneer will be placed.
3. Place the Stone Veneer:
Press the stone veneer gently but firmly onto the adhesive, starting from the bottom and working your way up. Slide the stone veneer slightly to ensure proper adhesion. Use tile spacers to maintain consistent spacing between the stones.
4. Check for Level and Alignment:
Use a level to check the stones for both horizontal and vertical alignment. Make adjustments as needed to ensure a level and visually pleasing installation. Be mindful of the pattern and layout of the stones to create a cohesive look.
5. Repeat the Process:
Continue applying adhesive and placing the stone veneer in sections until you’ve covered the entire brick fireplace. Take breaks if needed to allow the adhesive to cure as recommended by the manufacturer.
Read more: How Thick Is Stone Veneer
6. Trim Excess Adhesive:
As you work, periodically check and remove any excess adhesive that oozes out between the stones. Use a damp sponge or cloth to clean the stones and remove any adhesive residue while it is still wet.
7. Allow the Adhesive to Cure:
After all the stone veneer is applied, allow the adhesive to cure according to the manufacturer’s instructions. This typically takes around 24 to 48 hours, but it’s important to follow the specific recommendations for the adhesive you’re using.
Once the adhesive has fully cured, you can move on to the next step of cutting and trimming the stone veneer to fit your fireplace dimensions. We’ll cover that process in the following section.
Cutting and Trimming the Stone Veneer
When covering a brick fireplace with stone veneer, you may encounter areas where the stone needs to be cut or trimmed to fit properly. Cutting and trimming the stone veneer can be a bit challenging, but with the right tools and techniques, you can achieve precise and clean cuts. Follow these steps to cut and trim the stone veneer:
1. Measure and Mark:
Using a measuring tape, measure the area where the stone veneer needs to be cut or trimmed. Mark the measurements on the stone veneer with a pencil or masking tape.
Read more: How To Cover Brick Fireplace With Concrete
2. Choose the Right Tool:
For thinner stone veneers, a wet saw with a diamond blade is typically the most effective tool for cutting. If you’re working with thicker stones, an angle grinder with a diamond blade or a masonry chisel may be more suitable.
3. Wet the Stone:
If you’re using a wet saw, wet the stone veneer with water before cutting. This helps to keep the diamond blade cool and lubricated, resulting in smoother cuts. If you’re using an angle grinder or chisel, keep a spray bottle of water nearby to wet the stone as you work.
4. Cut or Trim the Stone:
Carefully follow the marked lines and use the appropriate tool to cut or trim the stone veneer. Take your time and make slow, steady movements to ensure accuracy. If using a wet saw, allow the blade to do the work and avoid applying excessive pressure.
5. Test the Fit:
After cutting or trimming the stone veneer, test the fit by placing it in position on the fireplace. Make any necessary adjustments until the stone fits snugly without gaps or overlaps.
Read more: How To Attach Stone Veneer
6. Smooth the Edges:
Use a diamond file or sandpaper to smooth the edges of the cut stone veneer. This will ensure a seamless and professional finish.
7. Clean the Stone:
Once you’re satisfied with the fit and finish of the cut stone veneer, clean it with a damp cloth or sponge to remove any dust or debris.
Repeat these steps as needed to cut and trim all the necessary pieces of stone veneer for your fireplace. With careful precision and attention to detail, your newly cut and trimmed stones will seamlessly blend with the rest of the installation, creating a cohesive and visually appealing result.
Next, we’ll explore the process of filling in the gaps and grouting to complete the transformation of your brick fireplace with stone veneer.
Filling in the Gaps and Grouting
After applying the stone veneer and ensuring a proper fit, the next step in covering your brick fireplace is to fill in the gaps between the stones and grout the surface. This process gives the installation a finished and cohesive appearance. Follow these steps to fill in the gaps and grout your stone veneer fireplace:
1. Choose the Right Grout:
Select a grout color that complements the color and style of your stone veneer. Consider whether you want a grout color that matches the stones closely or one that provides a contrasting effect. Purchase a grout that is suitable for use with stone veneer.
Read more: What Is Stone Veneer Siding
2. Prepare the Grout:
Follow the manufacturer’s instructions to prepare the grout mixture. Make sure it has the right consistency – not too dry or too watery. Mix it in small batches to ensure it remains workable throughout the process.
3. Fill in the Gaps:
Using a grout float or a small putty knife, scoop a generous amount of grout onto the tool. Press the grout into the gaps between the stones, making sure to fill them completely. Hold the tool at a 45-degree angle and work the grout into the gaps using a diagonal motion.
4. Remove Excess Grout:
After filling the gaps, use the grout float or putty knife to remove excess grout from the surface of the stones. Hold the tool at a 90-degree angle and scrape it across the stones diagonally, removing the excess grout. Take care not to remove too much grout from the gaps.
5. Clean the Surface:
Once you’ve removed the excess grout, use a damp sponge or cloth to clean the surface of the stones. Gently wipe away any grout residue and smooth the grout lines. Rinse and wring out the sponge frequently to keep it clean and effective.
Read more: How To Clean Exterior Stone Veneer
6. Allow to Cure:
Allow the grout to cure as recommended by the manufacturer. This typically takes about 24 to 48 hours. During this time, avoid touching or disturbing the grout to ensure a strong and durable finish.
7. Seal the Grout:
After the grout has cured, apply a grout sealer to protect it from stains and moisture. Follow the manufacturer’s instructions for the specific sealer you’re using. Apply the sealer evenly to the grout lines, using a brush or roller. Let it dry completely before using your fireplace.
With the gaps filled and the grout finished, your stone veneer fireplace is now complete. It’s time to move on to the final step – sealing and protecting the stone veneer – to ensure its long-lasting beauty and durability.
Sealing and Protecting the Stone Veneer
Once you’ve filled in the gaps and grouted your stone veneer fireplace, the final step is to seal and protect the stone veneer. Sealing the stone helps enhance its appearance, prevents staining, and extends its lifespan. Follow these steps to seal and protect your stone veneer:
1. Choose a Suitable Sealer:
Look for a high-quality sealer that is specifically designed for use on natural stone. Consider whether you want a sealer with a matte or glossy finish. Read the product labels and choose a sealer that is recommended for the type of stone veneer you have installed.
Read more: How To Build A Stone Veneer Column
2. Prepare the Surface:
Ensure that the stone veneer surface is clean and free from any residual grout or debris. If necessary, use a damp cloth or sponge to gently wipe away any remaining grout or dust. Allow the surface to dry completely before applying the sealer.
3. Apply the Sealer:
Using a brush or roller, apply the sealer evenly over the entire surface of the stone veneer. Be sure to follow the manufacturer’s instructions for the recommended application method and coverage. Apply multiple coats if necessary, allowing each coat to dry before applying the next.
4. Pay Attention to Joints and Crevices:
Ensure that the sealer penetrates into the joints and crevices between the stones. Use a small brush or sponge to carefully apply the sealer to these areas. This will help protect and strengthen the bond between the stones.
5. Allow the Sealer to Dry and Cure:
Let the sealer dry according to the manufacturer’s instructions. This typically takes a few hours or overnight. Keep the area well-ventilated during the drying process. Avoid touching or disturbing the sealed surface until it has fully cured.
Read more: How To Repair Cracked Stone Veneer
6. Test the Sealer:
Once the sealer has dried, perform a small test by splashing water onto the sealed surface. If the water beads up and does not absorb into the stone, the sealer is working effectively. If the water starts to absorb, apply an additional coat of sealer to those areas.
7. Maintain the Sealed Surface:
Regularly clean the sealed stone veneer using a mild, pH-neutral cleaner and a soft brush or sponge. Avoid using abrasive cleaners or harsh chemicals as they can damage the sealer. Follow the manufacturer’s instructions for ongoing maintenance and reapplication of the sealer.
By sealing and protecting your stone veneer fireplace, you’ll ensure its longevity, beauty, and resistance to stains and moisture. This final step completes the transformation and allows you to enjoy your stunning fireplace for years to come.
Now that your stone veneer fireplace is sealed and protected, let’s wrap up with some final tips and recommendations to help you maintain and care for your new feature.
Final Tips and Recommendations
Now that you’ve successfully covered your brick fireplace with stone veneer, here are some final tips and recommendations to help you maintain and care for your new feature:
1. Regular Cleaning:
Keep the stone veneer clean by regularly dusting and wiping it with a soft cloth or brush. Avoid using abrasive cleaners or rough materials that could scratch the surface.
Read more: How To Cut Stone Veneer Panels
2. Avoid Harsh Chemicals:
When cleaning the stone veneer, use mild, pH-neutral cleaners specifically formulated for natural stone. Harsh chemicals can potentially damage the stone or strip away the protective sealer.
3. Protect from Direct Heat:
Avoid placing objects directly on the stone veneer or exposing it to intense heat sources. This can cause discoloration or damage to the surface. Use protective pads or trivets under hot objects.
4. Regularly Inspect for Damage:
Periodically inspect the stone veneer for any signs of damage, such as cracks or loose stones. If you notice any issues, address them promptly to prevent further damage and ensure the longevity of your fireplace.
5. Maintain the Grout:
Regularly inspect the grout lines and repair any cracks or deterioration. Keeping the grout in good condition will help maintain the structural integrity of the installation and prevent moisture penetration.
Read more: How To Install Stacked Stone Veneer
6. Avoid Sharp Impacts:
Avoid hitting or striking the stone veneer with sharp or heavy objects, as this can cause chips or cracks. Take care when moving furniture or other items near the fireplace to prevent accidental damage.
7. Reapply Sealer Periodically:
Over time, the protective sealer on the stone veneer can wear off. It’s recommended to reapply the sealer periodically, as specified by the manufacturer or as needed, to maintain its protective qualities.
8. Seek Professional Help if Needed:
If you encounter any major issues or feel unsure about maintaining or repairing your stone veneer fireplace, don’t hesitate to consult a professional. They can provide expert advice and assistance to ensure the longevity and appearance of your fireplace.
Remember to enjoy your beautiful new stone veneer fireplace and the cozy ambiance it brings to your home. By following these tips and recommendations, you’ll keep it looking stunning for years to come!
Now that you have a comprehensive understanding of covering a brick fireplace with stone veneer, you can confidently embark on this rewarding project. Best of luck, and may your stone veneer fireplace become the centerpiece of your home!
For any further guidance or assistance, feel free to consult an expert or refer to specific product instructions.
Conclusion
Covering a brick fireplace with stone veneer is a transformative and rewarding project that can breathe new life into your home’s interior. By following the step-by-step instructions and taking into account the tips and recommendations provided in this article, you can achieve a professional-looking and visually stunning result.
The process of covering a brick fireplace with stone veneer involves thorough preparation, precise installation, and proper maintenance. From cleaning and prepping the brick surface to applying the stone veneer, cutting and trimming, filling gaps, grouting, and sealing, each step is crucial to creating a durable and attractive finished product.
Remember to exercise caution throughout the project, use appropriate safety gear, and consult professionals when needed. It’s important to take the time to plan and design your stone veneer fireplace, gather the necessary materials and tools, and protect the surrounding area from any potential damage.
Once your stone veneer fireplace is complete, it’s important to maintain and care for it properly. Regular cleaning, avoiding harsh chemicals, protecting from direct heat, and inspecting for damage are all essential practices to prolong the life and beauty of your stone veneer fireplace.
In conclusion, covering a brick fireplace with stone veneer is a fantastic way to update the look of your home and create a stunning focal point. It adds both value and aesthetic appeal, transforming your fireplace into a captivating feature that enhances the overall ambiance of your living space.
We hope that this comprehensive guide has provided you with the knowledge and confidence to tackle this project. Remember to enjoy the process and take pride in your accomplishments. Embrace the beauty and warmth that your newly covered stone veneer fireplace brings to your home.
Should you have any further questions or need additional guidance, don’t hesitate to consult professionals in the field or refer to specific product instructions. Best of luck, and may your stone veneer fireplace become a cherished centerpiece for years to come!
Frequently Asked Questions about How To Cover A Brick Fireplace With Stone Veneer
Was this page helpful?
At Storables.com, we guarantee accurate and reliable information. Our content, validated by Expert Board Contributors, is crafted following stringent Editorial Policies. We're committed to providing you with well-researched, expert-backed insights for all your informational needs.

0 thoughts on “How To Cover A Brick Fireplace With Stone Veneer”