Home>Construction & Tools>Building Materials>How To Install Stone Veneer Over Exterior Brick
Building Materials
How To Install Stone Veneer Over Exterior Brick
Modified: August 17, 2024
Learn how to use building materials to install stone veneer over exterior brick with our step-by-step guide. Upgrade your home's exterior with this DIY project!
(Many of the links in this article redirect to a specific reviewed product. Your purchase of these products through affiliate links helps to generate commission for Storables.com, at no extra cost. Learn more)
Introduction
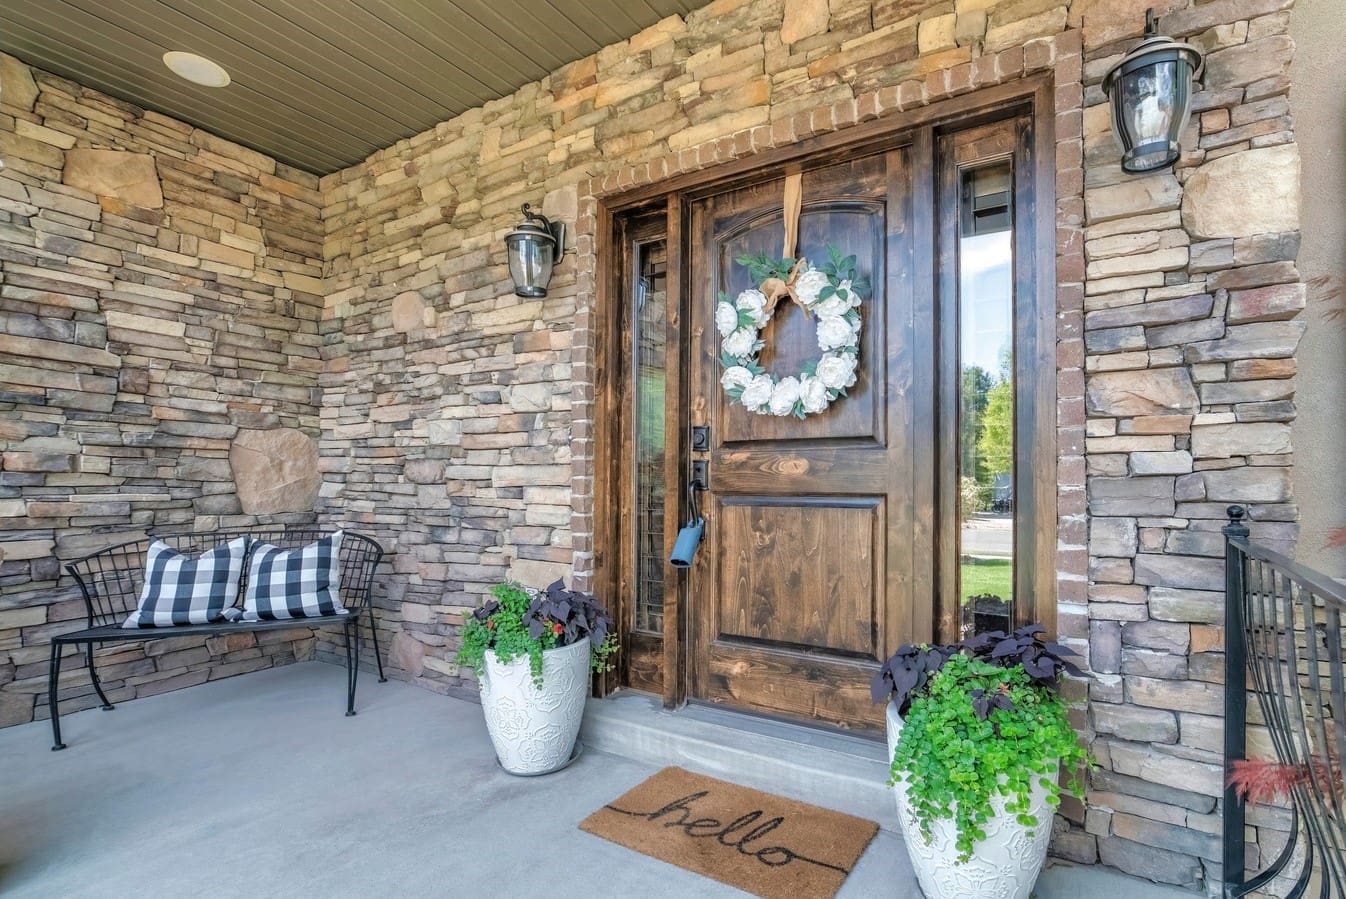
Transforming the exterior of your home with the timeless elegance of stone veneer is an exciting project that can enhance curb appeal and increase property value. Whether you seek to revitalize the appearance of your brick exterior or simply desire a fresh new look, installing stone veneer over exterior brick can achieve stunning results. This comprehensive guide will walk you through the step-by-step process of transforming your brick surface into a captivating stone-clad masterpiece.
From preparing the brick surface to meticulously placing the stone veneer and grouting the joints, each stage requires careful attention to detail and the right materials. By following these instructions, you can achieve a professional-quality finish that will leave your home exuding charm and character.
Before embarking on this project, it’s essential to gather the necessary tools, materials, and knowledge to ensure a successful outcome. With proper preparation and a willingness to embrace the artistry of stone veneer installation, you can embark on this journey with confidence and enthusiasm.
Key Takeaways:
- Transform your home’s exterior with stone veneer over brick for a timeless, elegant look that boosts curb appeal and property value. Follow the step-by-step guide for a professional-quality finish.
- Embrace the artistry of stone veneer installation to elevate your home’s charm and character. Meticulously prepare the brick surface, apply the scratch coat, install metal lath, mix and apply mortar, place the stone veneer, and grout the joints for a visually stunning transformation.
Read more: How To Install Exterior Brick Veneer
Step 1: Prepare the Brick Surface
Before applying stone veneer to the exterior brick, it’s crucial to prepare the surface to ensure proper adhesion and a flawless finish. Start by thoroughly cleaning the brick with a wire brush and mild detergent to remove any dirt, debris, or loose mortar. Pay close attention to areas with efflorescence, a white powdery residue that can hinder adhesion. Use a solution of water and muriatic acid to remove efflorescence, followed by rinsing the surface with clean water and allowing it to dry completely.
Inspect the brick for any cracks, chips, or protruding mortar, as these imperfections can affect the installation of the stone veneer. Repair any damaged areas with mortar repair caulk and allow it to cure according to the manufacturer’s instructions. Additionally, consider applying a bonding agent to the clean, dry brick surface to promote adhesion between the existing brick and the stone veneer.
Once the surface is clean, dry, and free of imperfections, it’s important to assess its flatness. Use a straight edge or level to identify any uneven areas that may require adjustments. If the brick surface is uneven, consider applying a scratch coat of mortar to create a level substrate for the stone veneer installation. This initial step sets the stage for a successful and durable application of stone veneer over the exterior brick.
Step 2: Apply a Scratch Coat
Applying a scratch coat is a crucial preparatory step that creates a textured surface for the stone veneer to grip onto, ensuring a strong bond and a professional finish. To begin, mix a batch of mortar to the consistency of peanut butter, using a 5-gallon bucket and a drill with a mixing paddle attachment for efficiency. It’s important to follow the manufacturer’s guidelines for the proper water-to-mortar ratio to achieve the desired consistency.
Before applying the scratch coat, dampen the prepared brick surface with water using a spray bottle or garden sprayer. This helps prevent the brick from absorbing moisture from the mortar too quickly, which can compromise the bond. Once the brick surface is damp but not saturated, use a trowel to apply the mortar evenly across the entire area, creating a layer with a thickness of approximately 3/8 inch.
After the scratch coat is applied, use a scratcher or a metal rake to create horizontal grooves in the mortar. This texturing process provides a roughened surface that promotes adhesion and allows the subsequent layers to key into the scratch coat. The grooves also enhance the mechanical bond between the scratch coat and the stone veneer, ensuring a secure attachment that withstands the test of time.
Allow the scratch coat to cure for the time recommended by the mortar manufacturer, typically 24 to 48 hours, before proceeding with the next steps of the stone veneer installation. This critical waiting period allows the mortar to achieve the necessary strength and stability for supporting the weight of the stone veneer. By meticulously applying and texturing the scratch coat, you establish a solid foundation for the subsequent stages of the installation, setting the stage for a visually stunning transformation of your exterior brick surface.
Step 3: Install Metal Lath
Installing metal lath is an essential step in preparing the brick surface for the application of stone veneer. The metal lath serves as a reinforcement layer that enhances the structural integrity of the scratch coat and provides a secure anchoring system for the stone veneer. Before starting this process, ensure that the scratch coat has fully cured according to the manufacturer’s recommendations.
Begin by measuring and cutting the metal lath to fit the dimensions of the prepared brick surface, using tin snips or metal cutting shears to achieve precise cuts. It’s important to overlap the edges of the metal lath by at least 2 inches to ensure a continuous and robust foundation for the stone veneer installation. Secure the metal lath to the scratch coat using galvanized nails or screws, ensuring that the lath is uniformly flat against the surface without any bulges or gaps.
When positioning the metal lath, pay close attention to corners, edges, and any protruding features such as windows or doors. Fold and overlap the metal lath around these areas to create a seamless transition and reinforce the entire surface. Additionally, consider installing casing beads or corner aids to provide clean, straight edges and corners for the stone veneer application.
As you install the metal lath, take care to avoid leaving any exposed sharp edges that could potentially damage the stone veneer during installation. Once the metal lath is securely in place, inspect the entire surface to ensure that it is uniformly covered and firmly attached to the scratch coat. This meticulous attention to detail during the installation of the metal lath sets the stage for a smooth and successful application of the stone veneer, ensuring a durable and visually appealing exterior transformation.
Before installing stone veneer over exterior brick, make sure the surface is clean and free of debris. Apply a layer of mortar and then press the stone veneer into place, making sure to stagger the joints for a natural look. Use a trowel to fill in any gaps with mortar.
Step 4: Mix and Apply Mortar
Preparing and applying mortar is a critical step in the process of installing stone veneer over exterior brick. The mortar serves as the bonding agent that secures the stone veneer to the prepared surface, creating a durable and visually striking exterior finish. Before mixing the mortar, ensure that the metal lath is securely installed and that the surface is clean and free of debris.
Start by selecting a high-quality mortar specifically designed for stone veneer installation, ensuring that it meets the necessary strength and bonding requirements. Follow the manufacturer’s instructions to mix the mortar to the appropriate consistency, typically resembling a thick, creamy peanut butter texture. Use a 5-gallon bucket and a drill with a mixing paddle attachment for efficient and thorough blending.
Once the mortar is mixed to the desired consistency, apply a generous layer to the prepared surface using a trowel, ensuring even coverage and a uniform thickness. The mortar should be applied with enough depth to accommodate the variations in the stone veneer and provide a solid base for adhesion. Work in small sections to prevent the mortar from drying out before the stone veneer is placed, maintaining a manageable and controlled application process.
As you apply the mortar, consider the placement and orientation of the stone veneer to ensure a visually appealing and cohesive arrangement. The mortar acts as a supportive bed for the stone veneer, allowing for adjustments and fine-tuning of the layout before the final placement. Additionally, use a notched trowel to create grooves in the mortar, enhancing the bond between the mortar and the stone veneer.
After applying the mortar, allow it to set for a brief period according to the manufacturer’s recommendations before proceeding with the placement of the stone veneer. This resting period allows the mortar to achieve the ideal tackiness for securely holding the stone veneer in place. By meticulously mixing and applying the mortar, you establish a solid foundation for the installation of the stone veneer, ensuring a visually stunning and enduring transformation of your exterior brick surface.
Read more: How To Install Stone Veneer Over Stucco
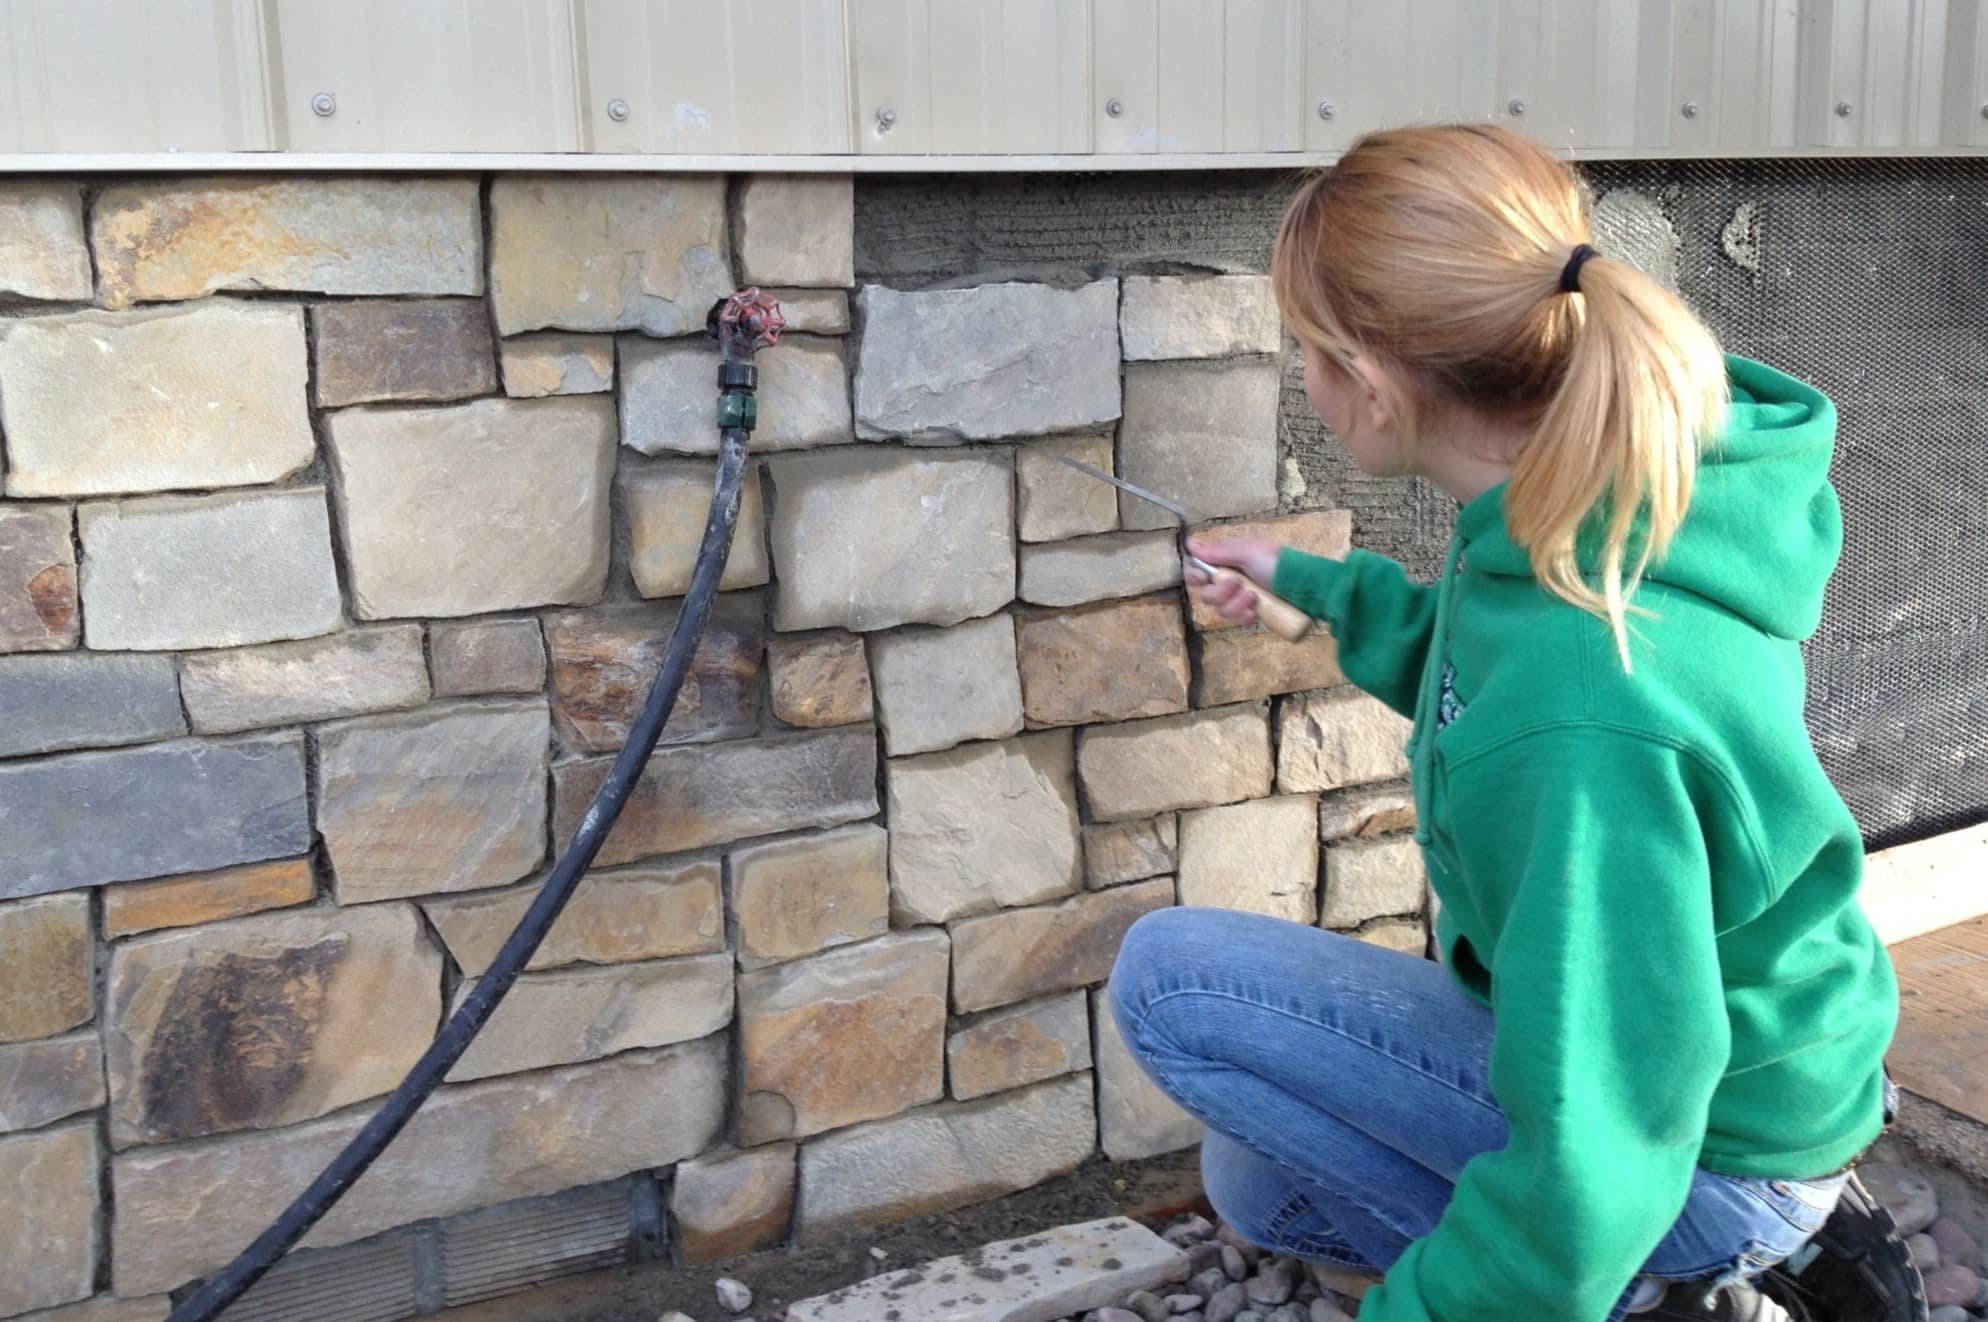
Step 5: Place the Stone Veneer
Placing the stone veneer onto the prepared surface is a transformative and visually rewarding stage of the installation process. This step requires careful attention to detail and a keen eye for achieving a balanced and harmonious arrangement of the stone pieces. Before beginning this phase, ensure that the mortar is adequately prepared and that the surface is ready to receive the stone veneer.
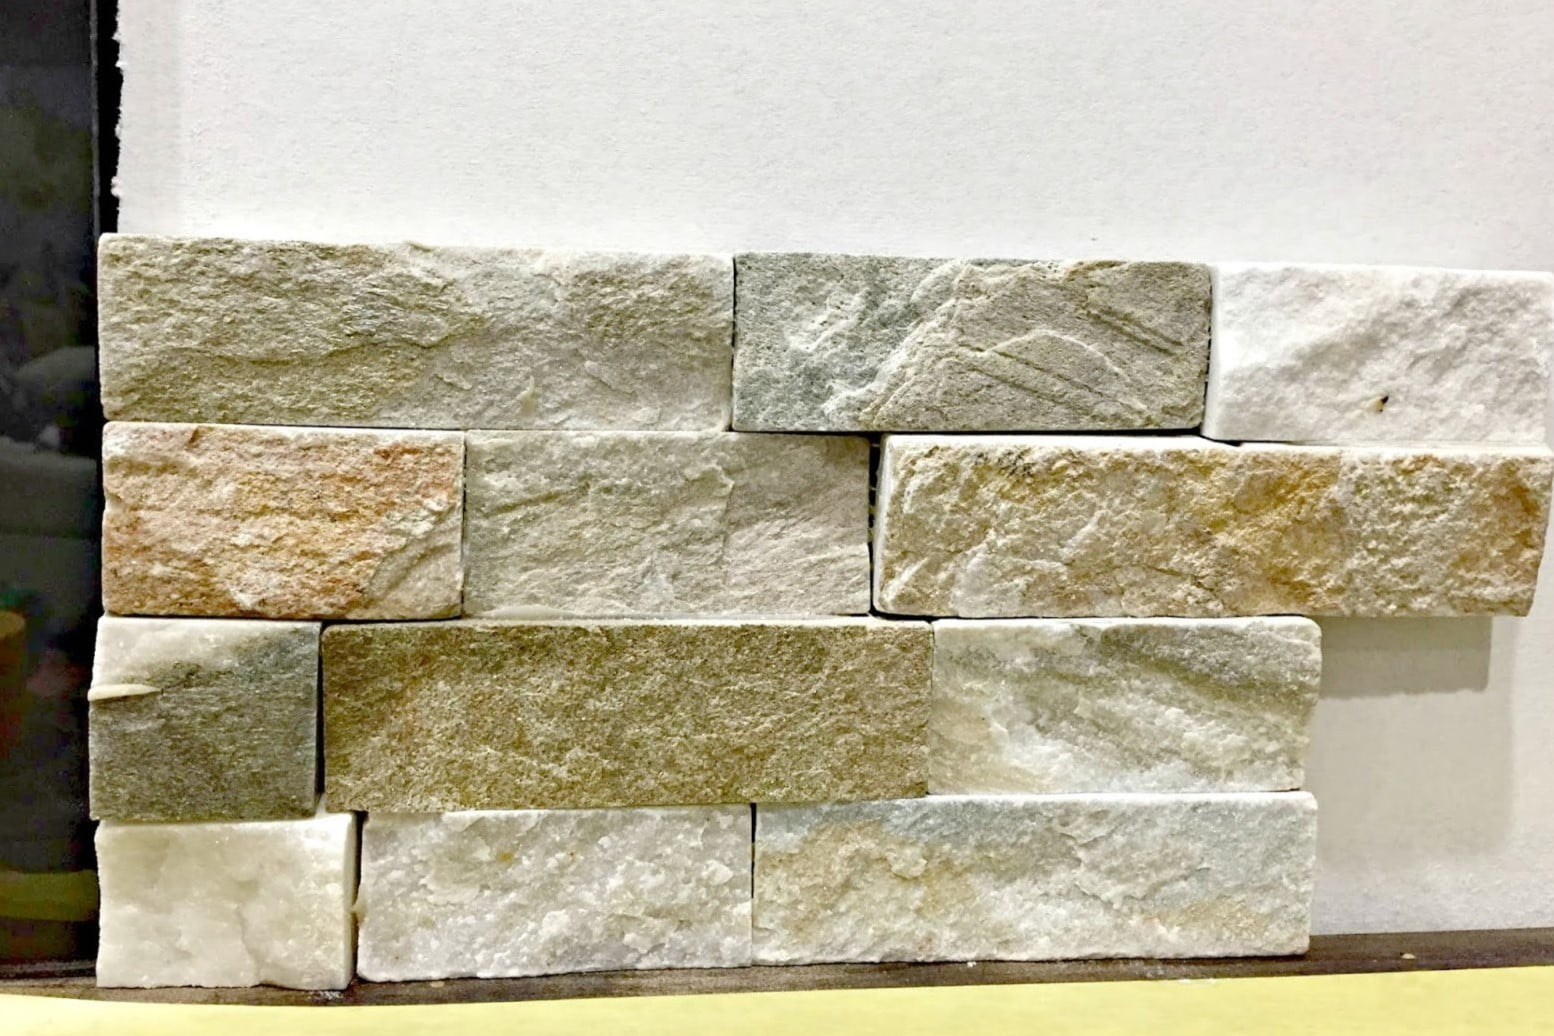
Start by selecting the stone veneer pieces, considering their shape, size, color variations, and texture to create an aesthetically pleasing composition. Lay out the stones in the desired pattern, making adjustments as needed to achieve a balanced distribution of colors and shapes. This pre-arrangement stage allows for a thoughtful and deliberate placement of the stone veneer, ensuring a visually appealing and cohesive result.
Once the layout is established, carefully lift each stone veneer piece and apply a generous amount of mortar to its back surface. Ensure that the mortar covers the entire back of the stone and extends to the edges, providing a secure bond with the prepared surface. Place the stone veneer onto the mortar-covered area, pressing and wiggling it slightly to ensure full contact and adhesion.
As you place each stone veneer piece, maintain consistent joint widths and a level surface, paying attention to the overall alignment and positioning. Use a level to verify that the stones are evenly placed and adjust them as necessary to achieve a uniform and visually pleasing result. Consider mixing different stone shapes and sizes to create an organic and natural appearance, incorporating variations to add depth and character to the overall design.
Throughout the placement process, take the time to step back and assess the evolving composition, making adjustments as needed to achieve a balanced and harmonious aesthetic. Consider the interplay of colors, textures, and shapes to create a visually captivating and cohesive exterior surface. By thoughtfully placing the stone veneer, you can achieve a stunning and enduring transformation of your exterior brick, infusing it with timeless elegance and charm.
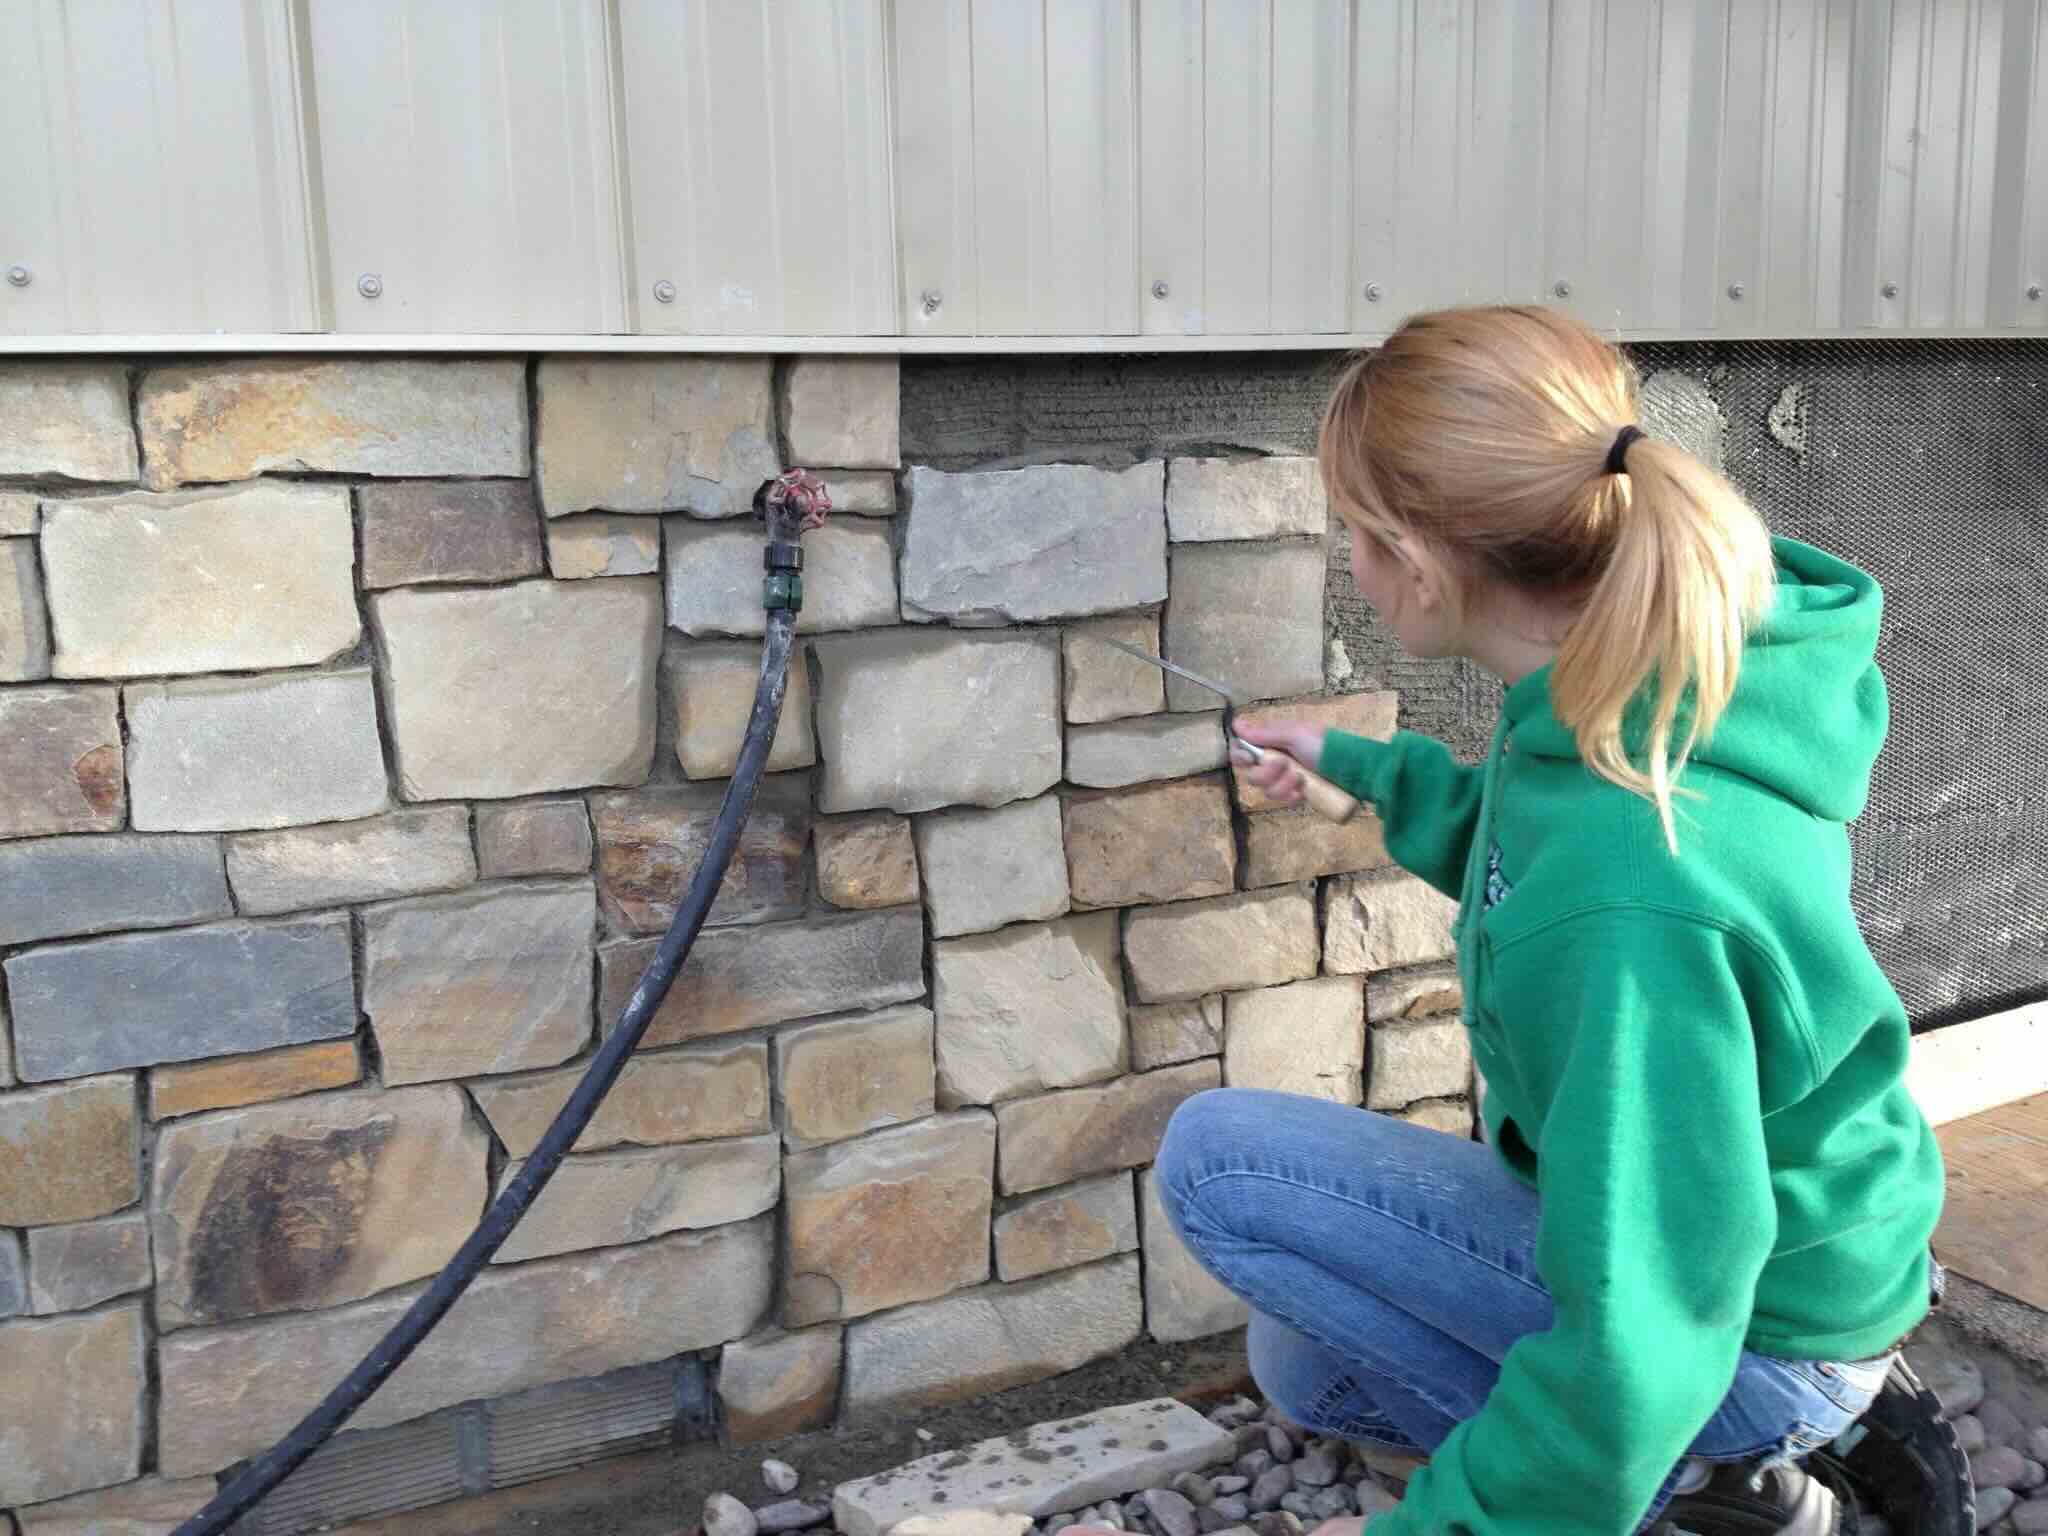
Step 6: Grout the Joints
Grouting the joints between the stone veneer pieces is a crucial step that enhances the structural integrity and visual appeal of the installation. The grout serves to fill the gaps between the stones, providing stability, weather resistance, and a finished look that unifies the overall appearance. Before grouting, ensure that the placed stone veneer pieces are securely adhered to the surface and that the mortar has set to the appropriate tackiness.
Start by selecting a high-quality grout that complements the color and texture of the stone veneer, ensuring a seamless and harmonious integration with the overall design. Mix the grout according to the manufacturer’s instructions, achieving a smooth and workable consistency that is suitable for filling the joints without excessive sagging or shrinkage.
Using a grout bag or a pointing trowel, carefully fill the joints between the stone veneer pieces with the prepared grout, ensuring complete coverage and a uniform appearance. Work methodically and deliberately to avoid air pockets and achieve a consistent level of grout throughout the entire surface. Pay close attention to the depth and smoothness of the grout lines, ensuring a professional and polished finish that complements the natural beauty of the stone veneer.
As you grout the joints, use a striking tool or a striking stick to compact the grout and create a smooth, level surface. This process helps to ensure that the grout is firmly packed and securely anchored within the joints, enhancing its durability and weather resistance. Additionally, use a stiff-bristled brush or a grout sponge to remove any excess grout from the stone surfaces, maintaining the integrity of the stone veneer and achieving a clean, refined appearance.
After completing the grouting process, allow the grout to set for the recommended time before applying any finishing touches or sealants. This critical waiting period allows the grout to achieve the necessary strength and stability, ensuring a lasting and visually appealing result. By meticulously grouting the joints, you enhance the overall quality and longevity of the stone veneer installation, creating a captivating and enduring exterior finish that elevates the beauty of your home.
Conclusion
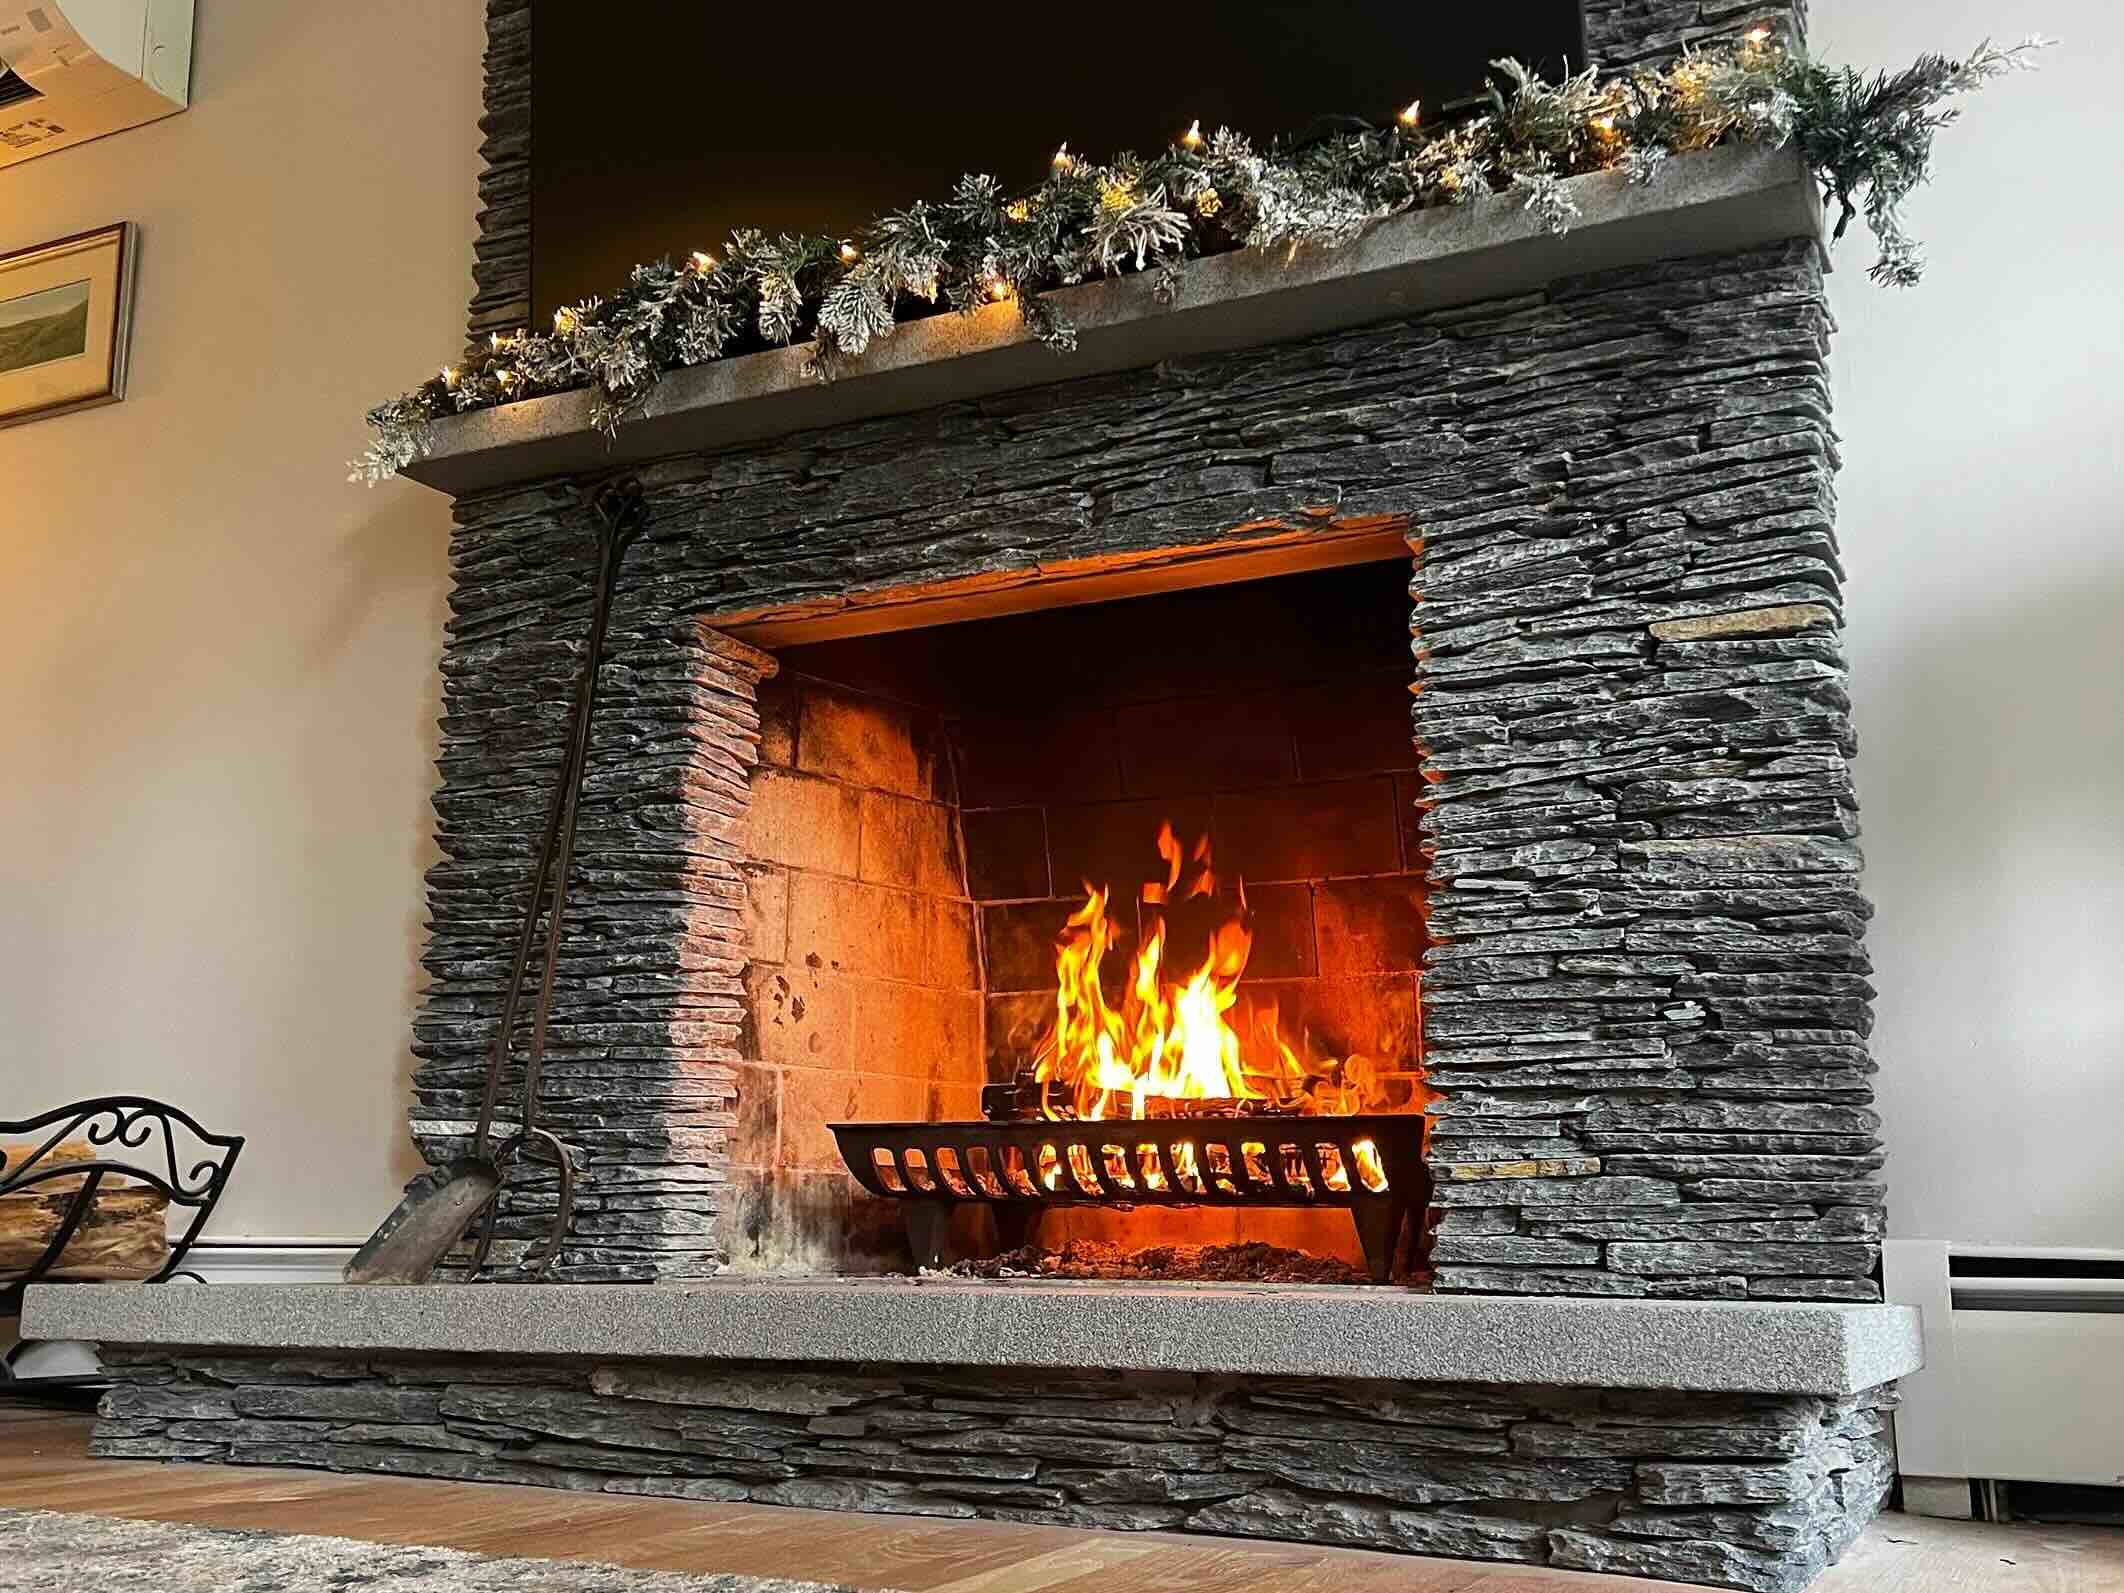
Embarking on the journey of installing stone veneer over exterior brick is a transformative endeavor that can breathe new life and timeless elegance into your home’s façade. Throughout the meticulous process of preparing the brick surface, applying the scratch coat, installing metal lath, mixing and applying mortar, placing the stone veneer, and grouting the joints, you have embarked on a journey of craftsmanship and artistry that culminates in a visually stunning and enduring transformation.
By meticulously following the step-by-step instructions and infusing each stage with care and attention to detail, you have created a durable and captivating exterior finish that exudes charm and character. The seamless integration of stone veneer over the existing brick surface not only enhances the aesthetic appeal of your home but also adds value and curb appeal that resonates for years to come.
As you stand back and admire the captivating interplay of colors, textures, and shapes that now grace your home’s exterior, take pride in the craftsmanship and dedication that have brought this vision to life. The enduring beauty of the stone veneer installation serves as a testament to your commitment to quality and artistry, leaving a lasting impression on all who behold your home.
Embrace the transformation that has taken place, knowing that the timeless elegance of stone veneer has elevated your home to new heights of beauty and sophistication. As the seasons unfold and the years pass, the enduring allure of the stone-clad exterior will continue to captivate and inspire, leaving an indelible mark on the landscape and the hearts of those who call your house a home.
May this journey of craftsmanship and creativity serve as a reminder of the transformative power of vision and dedication, shaping not only the physical spaces we inhabit but also the memories and experiences that define our lives.
Frequently Asked Questions about How To Install Stone Veneer Over Exterior Brick
Was this page helpful?
At Storables.com, we guarantee accurate and reliable information. Our content, validated by Expert Board Contributors, is crafted following stringent Editorial Policies. We're committed to providing you with well-researched, expert-backed insights for all your informational needs.


0 thoughts on “How To Install Stone Veneer Over Exterior Brick”