Home>Construction & Tools>Building Materials>How To Paint A Stucco Ceiling

Building Materials
How To Paint A Stucco Ceiling
Modified: August 20, 2024
Learn how to paint a stucco ceiling with our step-by-step guide. Find the best building materials and techniques for a flawless finish.
(Many of the links in this article redirect to a specific reviewed product. Your purchase of these products through affiliate links helps to generate commission for Storables.com, at no extra cost. Learn more)
Introduction
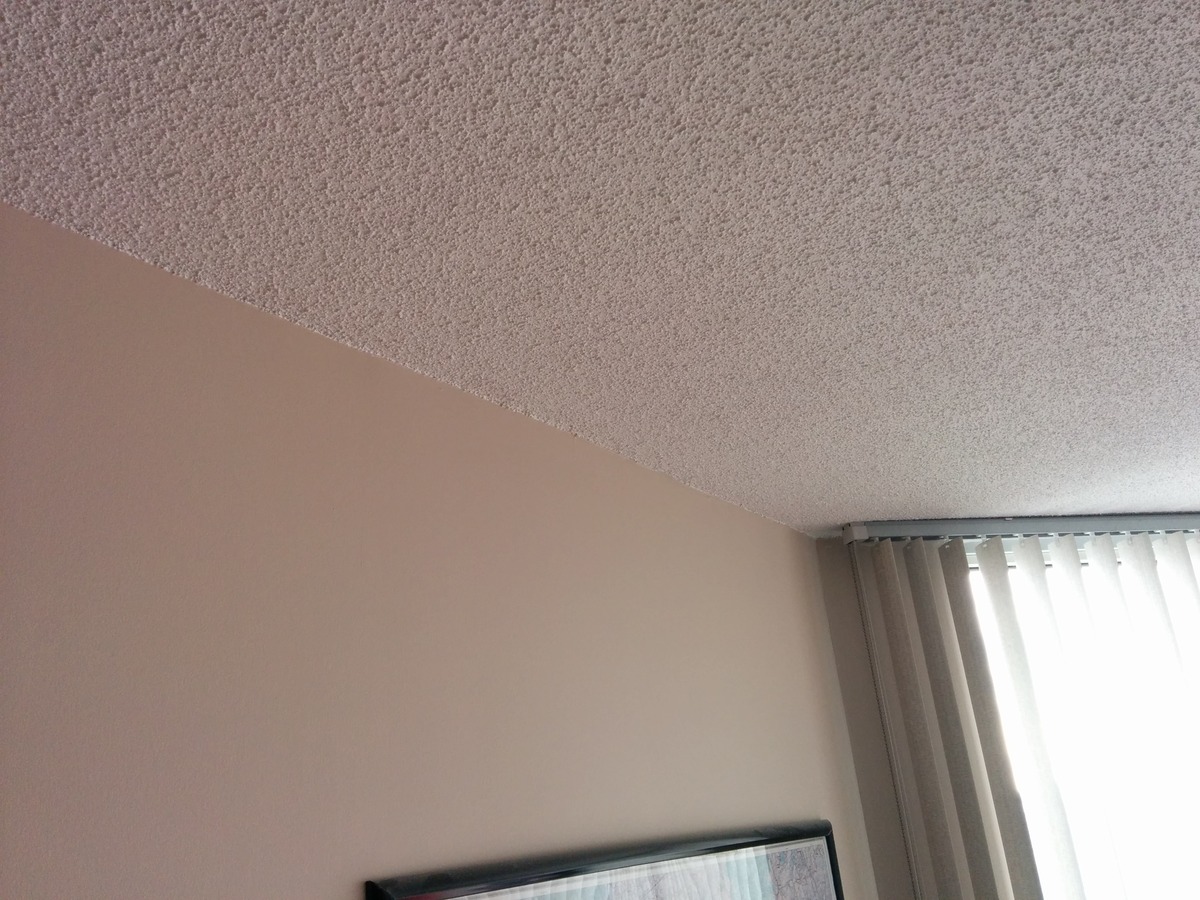
If you have a stucco ceiling, you know that it adds a unique and textured charm to your space. However, over time, it may start to look a bit tired and worn. A fresh coat of paint can do wonders to revitalize the appearance of your stucco ceiling, breathing new life into the room. Whether you're looking to brighten up a dull space or update the color to match your evolving décor, painting a stucco ceiling is a rewarding project that can make a significant impact.
In this comprehensive guide, we'll walk you through the step-by-step process of painting a stucco ceiling, from preparing the surface to choosing the right materials and achieving a professional finish. With the right techniques and a bit of patience, you can transform your stucco ceiling into a stunning focal point that enhances the overall aesthetic of your home.
So, roll up your sleeves, gather your materials, and let's dive into the art of painting a stucco ceiling. Whether you're a seasoned DIY enthusiast or a novice looking to take on a new challenge, this guide will equip you with the knowledge and confidence to tackle this project with finesse.
Key Takeaways:
- Transform your stucco ceiling with a fresh coat of paint to revitalize your space. Follow the step-by-step guide for a rewarding DIY project that enhances your home’s aesthetic appeal.
- Achieve a professional finish by meticulously preparing, priming, and painting your stucco ceiling. Embrace patience, attention to detail, and quality materials for stunning, long-lasting results.
Read more: How To Stucco A Ceiling
Materials Needed
Before embarking on the journey of painting your stucco ceiling, it’s essential to gather the necessary materials to ensure a smooth and successful process. Here’s a comprehensive list of items you’ll need:
- Paint: Choose a high-quality latex paint in the color of your choice. Opt for a flat or matte finish to complement the textured surface of the stucco.
- Primer: Invest in a good-quality primer suitable for stucco surfaces. Look for a product that offers excellent adhesion and stain-blocking properties.
- Paint Roller: Select a heavy-duty paint roller with a thick nap to effectively cover the textured surface of the stucco.
- Extension Pole: An extension pole for your paint roller will make it easier to reach high ceilings without the need for a ladder.
- Paint Tray and Liners: A sturdy paint tray and disposable liners will simplify the painting process and make cleanup a breeze.
- Painter’s Tape: Use painter’s tape to protect adjacent surfaces, such as walls and trim, from accidental paint splatter.
- Drapes or Plastic Sheeting: Cover the floor and furniture with drop cloths or plastic sheeting to prevent paint from dripping onto surfaces below.
- Paintbrushes: Keep a few high-quality paintbrushes on hand for cutting in along the edges and corners of the ceiling.
- Sandpaper: If the stucco surface is rough or has imperfections, have some fine-grit sandpaper available to smooth out any rough areas.
- Cleaner and TSP: Prepare the stucco surface by cleaning it thoroughly with a suitable cleaner or trisodium phosphate (TSP) to remove dirt, grease, and grime.
- Protective Gear: Don’t forget to wear protective gear, including goggles, a dust mask, and gloves, to safeguard yourself during the painting process.
By ensuring that you have all the necessary materials at your disposal, you’ll be well-prepared to tackle the task of painting your stucco ceiling with confidence and efficiency.
Preparing the Ceiling
Proper preparation is key to achieving a flawless finish when painting a stucco ceiling. Before you begin, it’s essential to thoroughly prepare the surface to ensure optimal paint adhesion and a professional outcome. Here’s a step-by-step guide to preparing the ceiling for painting:
- Clean the Surface: Start by cleaning the stucco surface to remove any dust, dirt, or grime that may have accumulated over time. Use a mild detergent or a solution of trisodium phosphate (TSP) and water to scrub the surface gently. Rinse with clean water and allow the ceiling to dry completely before proceeding.
- Repair Imperfections: Inspect the stucco for any cracks, holes, or areas of damage. Fill in any imperfections with a suitable patching compound, and smooth the surface with a putty knife. Allow the patched areas to dry thoroughly before sanding them lightly to create a seamless finish.
- Protect Surrounding Areas: Use painter’s tape to carefully mask off the edges where the ceiling meets the walls and any adjacent trim. Cover the floor and furniture with drop cloths or plastic sheeting to prevent accidental paint splatter.
- Prime the Surface: Applying a high-quality primer specifically designed for stucco surfaces is crucial to promote adhesion and create a uniform base for the paint. Use a paint roller to apply the primer evenly, working in manageable sections.
- Allow Sufficient Drying Time: Once the primer is applied, allow ample time for it to dry completely according to the manufacturer’s instructions. This will ensure that the surface is ready to receive the paint without any issues.
By meticulously preparing the stucco ceiling, you’ll lay the groundwork for a successful painting process and a stunning end result. Taking the time to clean, repair, and prime the surface will contribute to the longevity and visual appeal of the freshly painted ceiling.
Priming the Surface
Priming the stucco ceiling is a critical step that sets the stage for a smooth and durable paint application. The right primer not only enhances paint adhesion but also helps to seal the porous surface of the stucco, ensuring consistent color and sheen. Here’s a detailed look at the process of priming the stucco ceiling:
- Choose the Right Primer: Select a high-quality primer specifically formulated for stucco surfaces. Look for a product that offers excellent adhesion, stain-blocking properties, and the ability to create a uniform base for the paint.
- Prepare the Primer: Thoroughly stir the primer to ensure that the components are well mixed. If the primer is too thick, consider adding a small amount of water to achieve the desired consistency for smooth application.
- Apply the Primer: Using a heavy-duty paint roller with a thick nap, begin applying the primer to the stucco ceiling in manageable sections. Work in a methodical manner, ensuring even coverage and paying attention to any textured areas to fully coat the surface.
- Cut In Edges: Use a high-quality paintbrush to “cut in” around the edges and corners of the ceiling, ensuring that the primer reaches areas that may be challenging to cover with a roller alone.
- Allow Ample Drying Time: Once the primer is applied, allow it to dry thoroughly according to the manufacturer’s recommendations. This may involve waiting for several hours or overnight to ensure that the primer has fully cured before proceeding with the paint application.
- Inspect the Primed Surface: After the primer has dried, inspect the primed surface for any missed spots or uneven areas. Touch up any imperfections as needed to ensure that the entire ceiling is uniformly primed and ready for the next stage of painting.
By priming the stucco ceiling with care and attention to detail, you’ll create an optimal foundation for the paint, leading to a beautiful and long-lasting finish. The primer acts as a crucial intermediary layer that bridges the surface texture of the stucco with the paint, resulting in a professional-quality outcome.
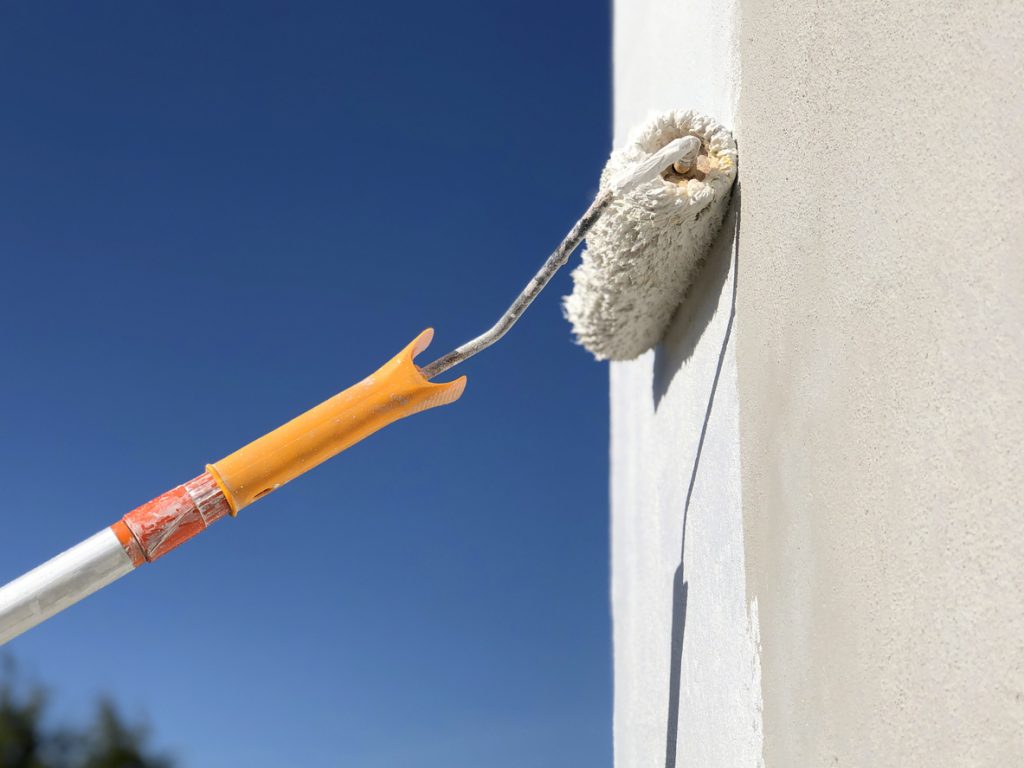
Use a roller with a thick nap to apply paint to a stucco ceiling. Work in small sections and use a brush to get into the crevices for even coverage.
Choosing the Right Paint
When it comes to painting a stucco ceiling, selecting the appropriate paint is a pivotal decision that significantly influences the final look and durability of the finish. The right paint not only complements the texture of the stucco but also withstands the test of time while enhancing the overall aesthetic of the space. Here’s a comprehensive guide to choosing the right paint for your stucco ceiling:
- Opt for Latex Paint: Latex or acrylic-based paints are ideal for stucco ceilings due to their durability, ease of application, and quick drying time. These water-based paints are also resistant to cracking and fading, making them well-suited for interior applications.
- Consider the Finish: For stucco ceilings, a flat or matte finish is recommended to complement the textured surface. These finishes help to conceal imperfections and minimize the appearance of glare, creating a soft and inviting ambiance in the room.
- Choose the Right Color: Select a color that harmonizes with the overall décor and lighting of the room. Lighter hues can make the space feel more expansive and airy, while darker shades add a sense of coziness and intimacy. Consider conducting a small test patch to assess how the color appears in the specific lighting conditions of the room.
- Look for Stain-Resistant Formulas: Given the nature of ceilings, it’s beneficial to choose a paint that offers stain-resistant properties. This feature helps the ceiling maintain its pristine appearance by repelling common household stains and minimizing the need for frequent cleaning.
- Check for Low VOC Formulations: Volatile organic compounds (VOCs) are chemicals that can off-gas from paint, potentially impacting indoor air quality. Opt for paints labeled as low-VOC or zero-VOC to minimize odors and promote a healthier indoor environment.
- Consult with Paint Specialists: If you’re uncertain about which paint would best suit your stucco ceiling, don’t hesitate to seek guidance from paint specialists at your local home improvement store. They can provide valuable insights and recommendations based on the specific characteristics of your ceiling and your desired outcome.
By thoughtfully considering these factors and selecting a high-quality paint that aligns with your preferences and the unique attributes of your stucco ceiling, you’ll be on the path to achieving a stunning and enduring finish that enhances the overall appeal of your living space.
Read more: How To Paint Exterior Stucco
Painting the Stucco Ceiling
Now that the surface is prepped and primed, it’s time to embark on the exciting phase of painting your stucco ceiling. This transformative process requires attention to detail and a methodical approach to ensure a flawless and professional result. Here’s a comprehensive guide to painting your stucco ceiling with finesse:
- Prepare the Paint: Thoroughly stir the paint to achieve a consistent color and texture. If necessary, pour the paint into a paint tray for easy access during the application process.
- Use the Right Tools: Equip yourself with a heavy-duty paint roller with a thick nap to effectively cover the textured surface of the stucco. Attach an extension pole to the roller to reach high areas without the need for a ladder.
- Apply the Paint: Starting from one corner of the ceiling, use the paint roller to apply an even coat of paint in a consistent pattern. Work in manageable sections, slightly overlapping each pass to ensure thorough coverage. Take care to distribute the paint evenly across the textured surface, allowing the roller to reach into the crevices of the stucco.
- Cut In Edges and Corners: Use a high-quality paintbrush to carefully cut in along the edges and corners of the ceiling, ensuring that the paint reaches areas that may be challenging to cover with a roller alone. This meticulous step creates a clean and polished finish.
- Work Methodically: Proceed methodically across the entire ceiling, maintaining a consistent rhythm and technique to ensure uniform coverage. Take periodic breaks to step back and assess the evenness of the paint application, making any necessary adjustments as you progress.
- Allow for Sufficient Drying Time: Once the first coat of paint is applied, allow it to dry completely according to the manufacturer’s instructions. Depending on the paint type and environmental conditions, this may take several hours. Assess the coverage and determine if a second coat is necessary to achieve the desired opacity and finish.
- Apply a Second Coat (If Needed): If the first coat does not provide the desired level of coverage or if the color appears uneven, consider applying a second coat of paint using the same method as the first. This additional layer can enhance the richness of the color and ensure a professional-quality result.
By following these steps and approaching the painting process with patience and precision, you’ll be able to transform your stucco ceiling into a visually striking feature that elevates the ambiance of your living space. The act of painting the stucco ceiling is a gratifying endeavor that yields tangible and impressive results.
Tips for a Professional Finish
While painting a stucco ceiling can be a rewarding DIY project, achieving a professional finish requires attention to detail and a strategic approach. By incorporating the following tips into your painting process, you can elevate the overall quality of the finish and ensure a visually stunning result:
- Lighting and Ventilation: Adequate lighting and ventilation are essential for a successful painting project. Ensure that the room is well-lit to accurately assess the paint application, and open windows or use fans to promote air circulation, aiding in the drying process.
- Consistent Technique: Maintain a consistent rolling and cutting-in technique throughout the painting process to achieve uniform coverage and a seamless finish. Avoid applying excessive pressure, which can result in uneven distribution of paint.
- Overlap and Blend: When using a roller, slightly overlap each pass to blend the paint and ensure comprehensive coverage. This technique helps to minimize visible seams and create a cohesive look across the entire ceiling.
- Inspect for Drips and Splatter: Periodically inspect the painted surface for any drips, splatter, or uneven areas. Quickly address these imperfections by lightly rolling over them or using a brush to blend and smooth out the paint.
- Work in Sections: Divide the ceiling into manageable sections and focus on one area at a time to maintain control and achieve consistent results. This approach prevents the paint from drying too quickly and allows for seamless blending between sections.
- Quality Over Quantity: Prioritize the use of high-quality paint and tools, as well as a thorough preparation process. Investing in premium materials and taking the time to prepare the surface will contribute to a professional-looking finish that stands the test of time.
- Patience with Drying Time: Allow each coat of paint to dry completely before assessing the need for additional coats or touch-ups. Rushing the drying process can compromise the finish and lead to visible imperfections.
- Final Inspection: Once the painting is complete, conduct a final inspection under various lighting conditions to identify any areas that may require touch-ups or refinement. Address these areas promptly to ensure a flawless end result.
By integrating these tips into your painting approach and maintaining a meticulous mindset, you can elevate the quality of your stucco ceiling’s finish, achieving a professional look that enhances the overall aesthetic of your living space. The combination of technique, patience, and attention to detail is key to attaining a stunning and enduring result.
Conclusion
Embarking on the journey of painting a stucco ceiling is a transformative endeavor that allows you to breathe new life into your living space while showcasing your creativity and attention to detail. By following the comprehensive steps outlined in this guide and incorporating the tips for a professional finish, you can confidently take on this project and achieve a stunning result that enhances the ambiance of your home.
From the meticulous preparation and priming of the surface to the selection of the right paint and the methodical application process, each step plays a crucial role in creating a flawless finish that highlights the unique texture of the stucco. Throughout the painting journey, remember to approach the task with patience, consistency, and a keen eye for detail, ensuring that every aspect of the process contributes to the overall quality of the outcome.
As you immerse yourself in the art of painting a stucco ceiling, embrace the gratifying nature of the project and the sense of accomplishment that comes with revitalizing a prominent feature of your home. Whether you’re aiming to refresh the existing color or embark on a bold new vision, the act of painting a stucco ceiling is an opportunity to infuse your living space with personality and style.
Upon completion, take a moment to admire the stunning transformation, basking in the beauty of your freshly painted stucco ceiling. The visual impact and enhanced allure of the space will serve as a testament to your dedication and craftsmanship, leaving a lasting impression on all who experience the revitalized ambiance of your home.
With the knowledge and insights gained from this guide, you’re well-equipped to embark on this creative endeavor and achieve a professional-quality finish that elevates the aesthetic appeal of your living environment. Embrace the art of painting a stucco ceiling, and revel in the remarkable impact it brings to your cherished space.
Frequently Asked Questions about How To Paint A Stucco Ceiling
Was this page helpful?
At Storables.com, we guarantee accurate and reliable information. Our content, validated by Expert Board Contributors, is crafted following stringent Editorial Policies. We're committed to providing you with well-researched, expert-backed insights for all your informational needs.










0 thoughts on “How To Paint A Stucco Ceiling”