Articles
How To Fix Cracked Ceiling Paint
Modified: October 19, 2024
Learn the best tips and tricks from our articles on how to fix cracked ceiling paint. Discover effective solutions to restore your ceiling's appearance.
(Many of the links in this article redirect to a specific reviewed product. Your purchase of these products through affiliate links helps to generate commission for Storables.com, at no extra cost. Learn more)
Introduction
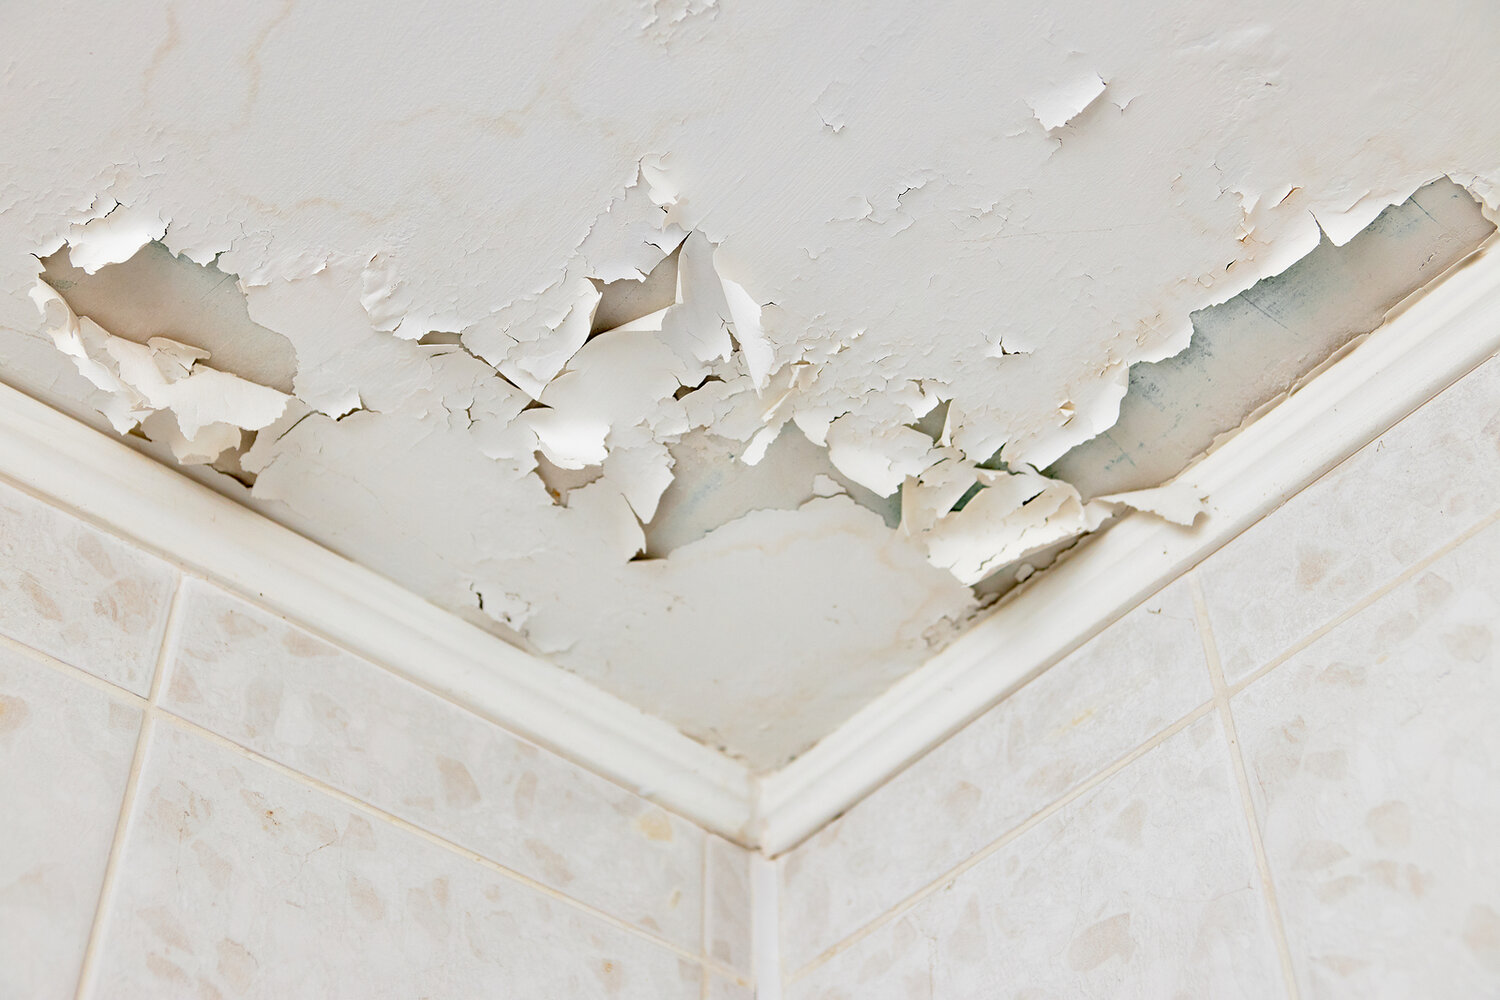
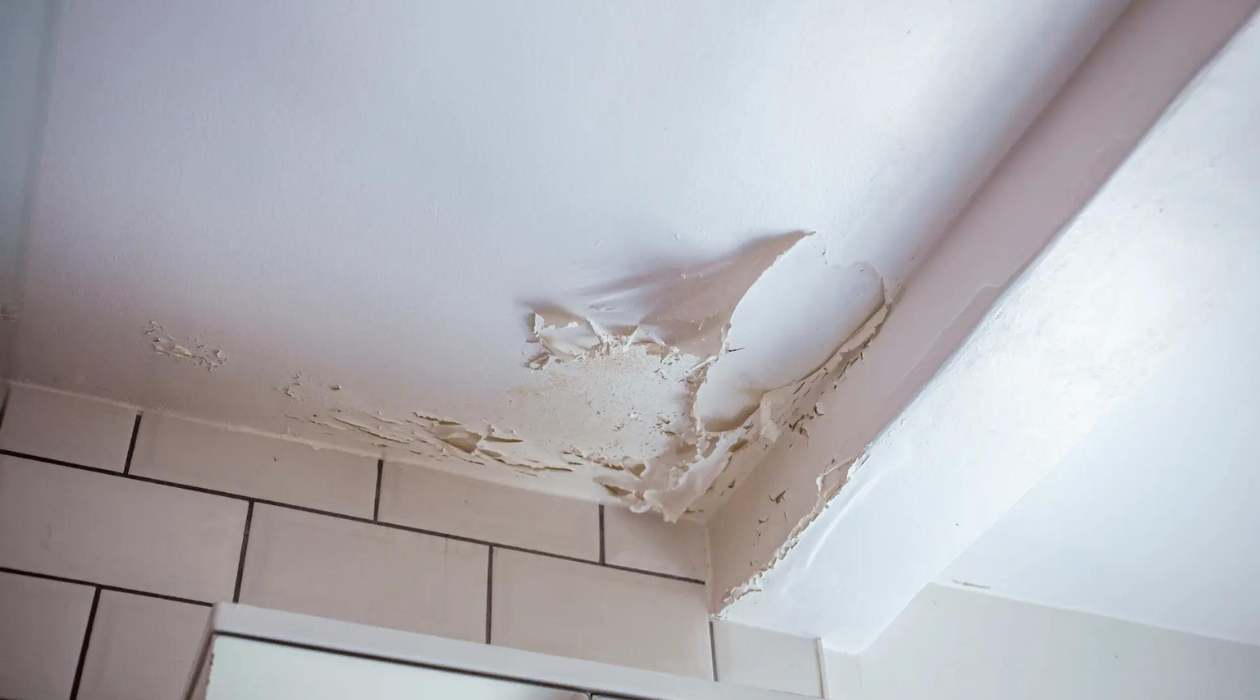
Cracked ceiling paint is a common issue that many homeowners face. It can be unsightly and detract from the overall appearance of a room. Whether the cracks are small and barely noticeable or large and prominent, it is essential to address the problem and fix the cracked paint to restore the ceiling’s beauty and integrity.
There are several factors that can contribute to cracked ceiling paint. Temperature fluctuations, moisture, improper surface preparation, or settling of the building can all cause the paint to crack over time. It is crucial to identify the underlying cause of the problem before attempting to fix it. This will ensure that the issue is fully resolved and prevent future cracking.
In this article, we will guide you through the process of fixing cracked ceiling paint step-by-step. We will cover the necessary tools and materials, as well as the specific techniques required to achieve a seamless and long-lasting repair. By following these steps, you can restore your ceiling to its original condition and enjoy a beautifully painted surface once again.
Key Takeaways:
- Properly assessing the cause of cracked ceiling paint and using high-quality materials and techniques for repair can restore the beauty and integrity of your ceiling, preventing future issues.
- By addressing the underlying causes, such as temperature fluctuations and moisture, and following a step-by-step repair process, you can achieve a seamless and professional-looking finish, enhancing the overall aesthetics of your space.
Common Causes of Cracked Ceiling Paint
Before diving into the process of fixing cracked ceiling paint, it is important to understand the common causes behind this issue. By identifying the root cause, you can take appropriate measures to not only fix the cracks but also prevent them from reoccurring in the future. Here are some of the common culprits:
- Temperature Fluctuations: Extreme temperature changes can cause the materials in your ceiling to expand and contract, leading to cracks in the paint. This is especially common in regions with intense seasonal variations.
- Moisture and Humidity: Excessive moisture and high humidity levels can weaken the adhesion between the paint and the ceiling surface. Over time, this can result in cracks as the paint starts to peel or separate from the ceiling.
- Poor Surface Preparation: Insufficient surface preparation before painting can lead to adhesion issues, causing the paint to crack or bubble. Failing to clean the ceiling surface properly or not applying a suitable primer can compromise the paint’s integrity.
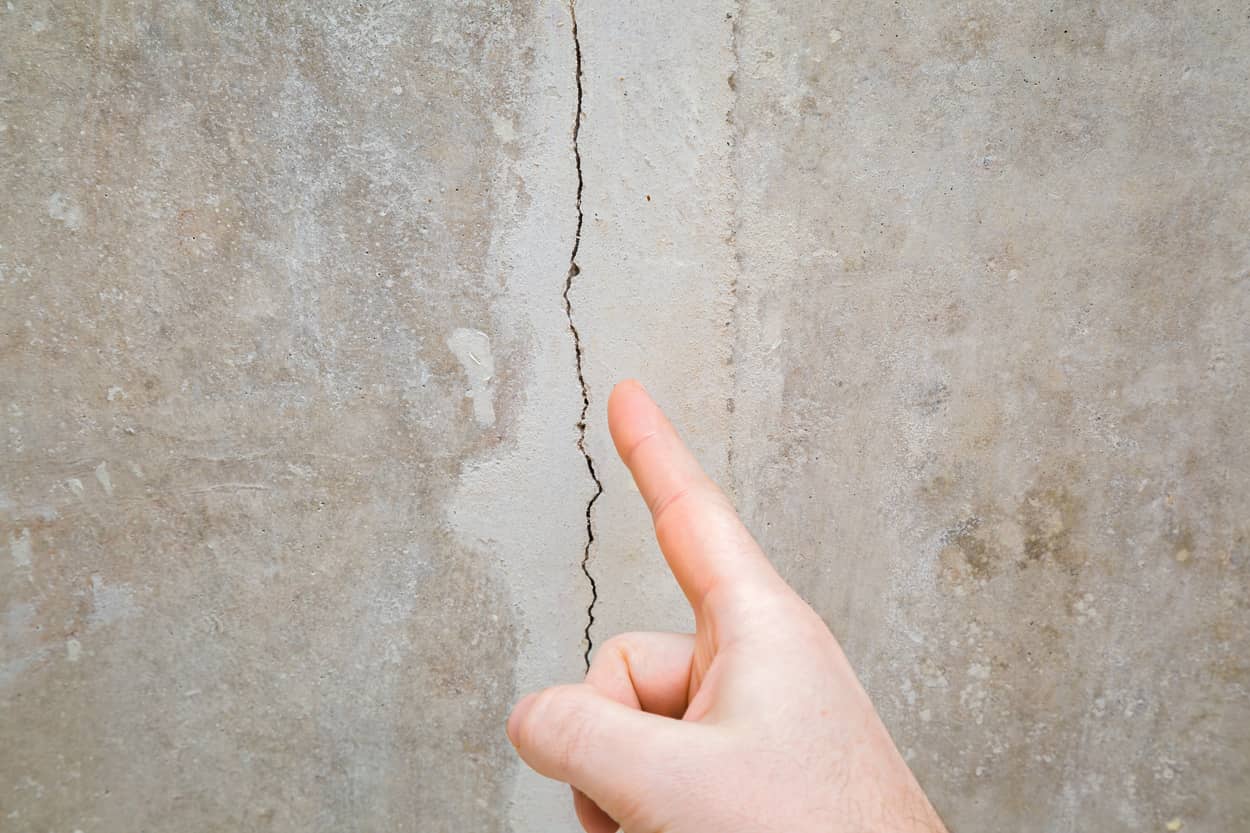
- Settling of the Building: As buildings age, they can settle or shift slightly over time. This movement can put strain on the ceiling surface, causing the paint to crack and develop hairline fractures.
- Inadequate Paint Quality: Using low-quality or incompatible paint products can also contribute to cracked ceiling paint. It is essential to use high-quality paint specifically designed for ceilings to ensure durability and flexibility.
Identifying the specific cause of the cracked ceiling paint in your home will help you determine the best approach to fixing the issue. Once you have identified the cause, you can proceed with the necessary steps and techniques to repair and restore your ceiling’s paint.
Tools and Materials Needed
Before you can begin fixing the cracked ceiling paint, you will need to gather the necessary tools and materials. Having the right supplies on hand will ensure a smooth and efficient repair process. Here’s a list of what you will need:
Tools:
- Putty knife
- Sanding block or sandpaper
- Drop cloth or plastic sheeting
- Clean cloth or sponge
- Paintbrushes
- Paint roller and tray
- Step ladder or scaffolding (if needed)
- Dust mask and eye protection
Materials:
- Joint compound or spackling paste
- Primer
- Ceiling paint
- Painter’s tape
- Paint tray liners
- Plastic wrap or plastic bags (for storing wet brushes or rollers)
- Ceiling repair tape or mesh (if necessary)
Ensure that you have all the tools and materials mentioned above before you start the repair process. This will save you time and effort, allowing for a seamless repair experience.
Read more: How To Cover Cracks In Ceiling
Steps to Fix Cracked Ceiling Paint
Now that you have gathered the necessary tools and materials, it’s time to start fixing the cracked ceiling paint. Follow these step-by-step instructions to achieve a successful repair:
- Step 1: Assess the Damage
- Step 2: Prepare the Surface
- Step 3: Apply Joint Compound
- Step 4: Sand the Surface
- Step 5: Prime the Ceiling
- Step 6: Paint the Ceiling
Begin by examining the cracks in the ceiling paint. Determine the size and severity of the cracks. If the cracks are small and fine, you may only need to repair the surface. However, if the cracks are larger and more pronounced, you may need to use ceiling repair tape or mesh.
Protect the surrounding area by laying down a drop cloth or plastic sheeting. Clean the cracked area using a damp cloth or sponge to remove any dirt, dust, or loose particles. Allow the surface to dry completely before proceeding.
Using a putty knife, apply a thin layer of joint compound or spackling paste over the cracks. Smooth it out evenly, feathering the edges to blend with the surrounding surface. For larger cracks, apply the compound over the ceiling repair tape or mesh, following the manufacturer’s instructions.
Once the joint compound has dried completely, use a sanding block or sandpaper to gently smooth the patched area. Sand in a circular motion until it feels flush with the surrounding ceiling. Be careful not to oversand and damage the surrounding paint.
Apply a coat of primer to the patched area and let it dry according to the manufacturer’s instructions. This will ensure proper adhesion and help the paint blend seamlessly with the rest of the ceiling.
Using a paint roller or brush, apply ceiling paint to the patched area. Start at the edges and work your way toward the center, blending the new paint with the surrounding surface. Apply additional coats if necessary, allowing each coat to dry completely before the next.
Remember to follow the manufacturer’s instructions for drying times and recommended number of coats. Once the paint has fully dried, inspect the repaired area to ensure a smooth and flawless finish.
By following these steps, you can effectively fix the cracked ceiling paint and restore the beauty of your ceiling. Regular maintenance and keeping the underlying causes in check can help prevent future cracking and ensure a long-lasting repair.
Assess the Damage
The first step in fixing cracked ceiling paint is to assess the extent of the damage. By carefully examining the cracks, you can determine the appropriate course of action for repair. Here’s how to assess the damage:
1. Start by identifying the size and location of the cracks. Are they small hairline cracks or larger, more prominent cracks? Take note of their length and width, as well as any patterns or clustering.
2. Inspect the surrounding area for any signs of moisture or water damage. This could indicate an underlying issue that needs to be addressed before repairing the paint.
3. Gently press on the cracked areas to see if there is any movement or give. If the surface feels loose or unstable, it may require additional reinforcement or a different repair method.
4. Take note of any discoloration or peeling paint around the cracks. This could indicate poor adhesion or previous attempts at repair that may need to be addressed.
By thoroughly assessing the damage, you can determine the best approach to fix the cracked ceiling paint. Small hairline cracks may only require surface repairs, while larger cracks may need additional reinforcement or the use of ceiling repair tape or mesh.
Addressing the underlying cause of the cracks, such as temperature fluctuations or moisture issues, is also crucial to prevent the paint from cracking again in the future. Once you have assessed the damage, you can proceed with the appropriate repair method and restore your ceiling to its original condition.
Prepare the Surface
After assessing the damage to the cracked ceiling paint, the next step is to prepare the surface for repair. Proper surface preparation is essential for ensuring a successful and long-lasting fix. Here’s how to prepare the surface:
1. Begin by protecting the surrounding area. Lay down a drop cloth or plastic sheeting to catch any debris or paint that may fall during the repair process. This will make cleanup easier and protect your furniture and flooring.
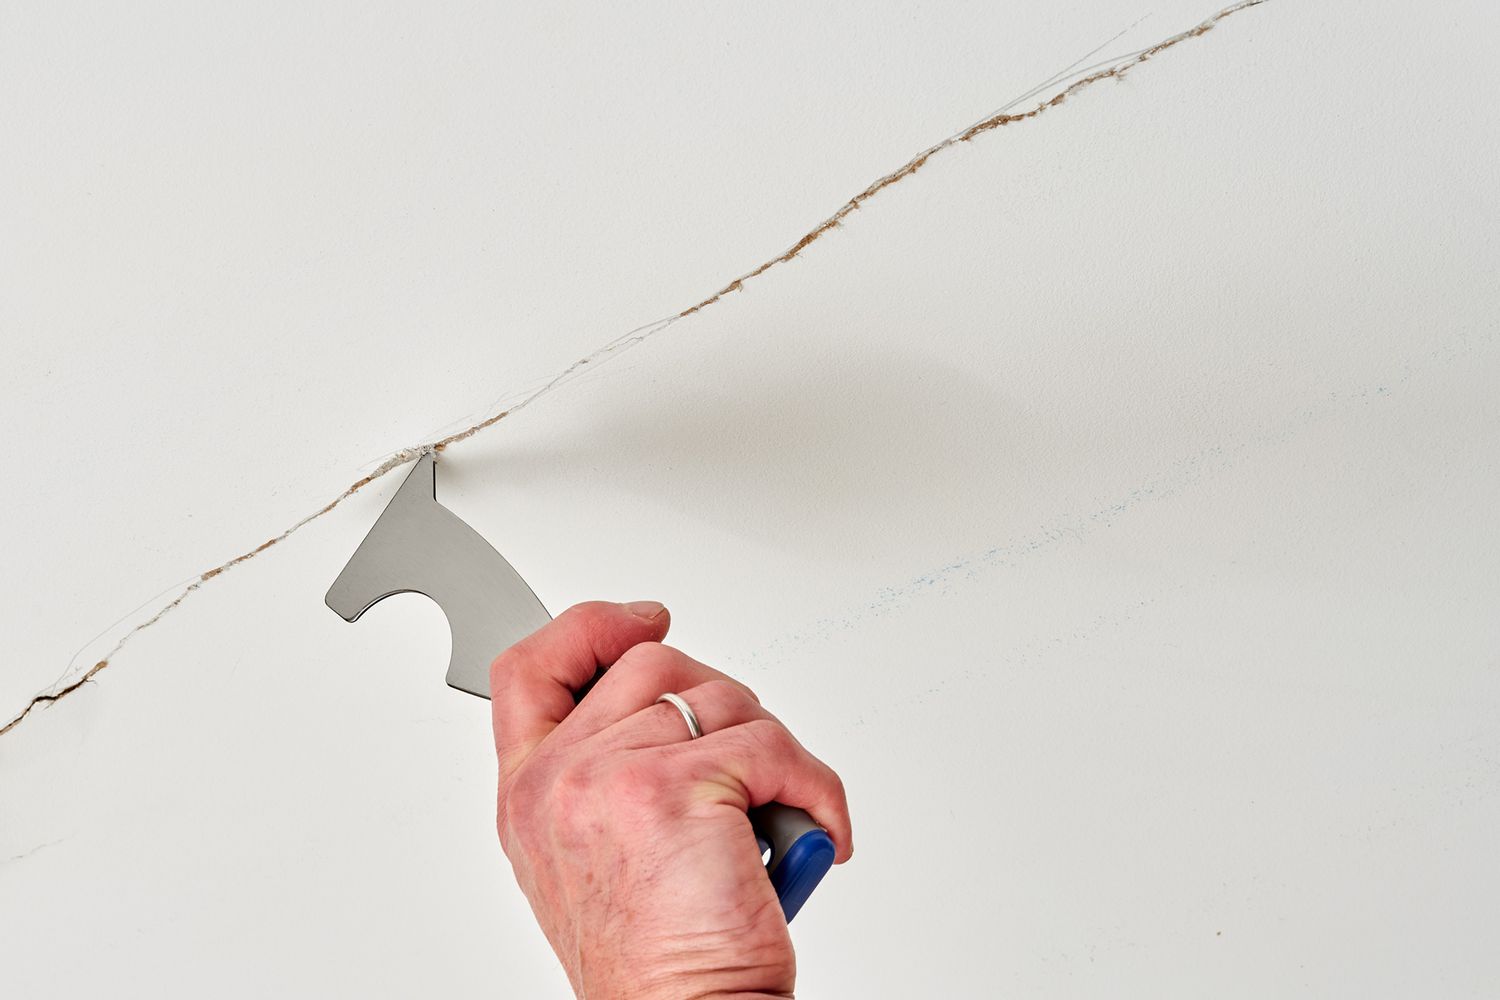
2. Remove any loose or flaking paint around the cracked areas. Use a putty knife or scraper to gently scrape away any loose or peeling paint. Be careful not to damage the underlying surface or create larger cracks.
3. Clean the cracked area thoroughly. Use a damp cloth or sponge to remove any dust, dirt, or grease from the surface. Cleaning the area ensures better adhesion and a smoother repair.
4. Allow the surface to dry completely before proceeding. Moisture can interfere with the repair materials and compromise their effectiveness. If necessary, use a fan or open windows to help speed up the drying process.
Preparing the surface properly is essential for achieving a seamless and durable repair. By removing loose paint and cleaning the area, you create a smooth and stable surface for the next steps of the repair process. Taking the time to prepare the surface will greatly improve the results of your cracked ceiling paint fix.
Apply Joint Compound
After preparing the surface, the next step in fixing cracked ceiling paint is to apply joint compound or spackling paste to fill in the cracks and create a smooth surface. Here’s how to apply joint compound:
1. Start by gathering your joint compound and a putty knife. Choose a putty knife that is slightly wider than the cracks to ensure full coverage.
2. Take a small amount of joint compound onto the putty knife. Spread it over the crack in a thin layer, pushing the compound into the crack and making sure it fills the entire space. Apply the compound in a smooth, even motion.
3. Feather the edges of the joint compound by pressing the putty knife gently against the surface and dragging it along the edges of the crack. This will help blend the compound into the surrounding area, creating a seamless repair.
4. Continue applying joint compound to all the cracks, working in sections if necessary. Be sure to smooth out the compound as much as possible to achieve a level surface.
5. For larger cracks, you may need to apply ceiling repair tape or mesh before applying the joint compound. Place the tape or mesh over the crack, ensuring it covers the entire length. Then, apply the joint compound over the tape or mesh, using the same feathering technique to blend it with the surrounding area.
6. Allow the joint compound to dry according to the manufacturer’s instructions. This usually takes a few hours or overnight, depending on the humidity and temperature of the room.
Applying joint compound is an important step in fixing cracked ceiling paint as it fills in the cracks and creates a smooth and level surface. Take your time to ensure that the joint compound is applied evenly and feathered at the edges for a seamless repair.
Use a putty knife to scrape off any loose or flaking paint. Then, apply a coat of primer to the cracked area before repainting the ceiling. This will help the new paint adhere better and prevent future cracking.
Read more: How To Repair Plaster Ceiling Cracks
Sand the Surface
After the joint compound has fully dried, it’s time to sand the surface to create a smooth and even finish. Sanding helps to blend the repaired area with the surrounding ceiling and prepares it for priming and painting. Follow these steps to sand the surface:
1. Start by equipping yourself with a sanding block or sandpaper. Choose a fine-grit sandpaper, such as 120 or 150 grit, for a smoother finish.
2. Gently sand the repaired area in a circular motion. Use light pressure and be careful not to oversand, as it may damage the surrounding paint or create unevenness. The goal is to gradually smooth the surface while ensuring it remains flush with the rest of the ceiling.
3. Periodically wipe away the dust with a clean cloth or brush to keep the work area clean and maintain visibility of the sanded surface.
4. Continue sanding until the repaired area feels smooth and blends seamlessly with the surrounding ceiling. Run your hand over the surface to check for any remaining rough spots or inconsistencies.
5. Once you are satisfied with the smoothness of the repaired area, wipe away any remaining dust with a damp cloth or sponge. Make sure the surface is clean and dry before proceeding to the next step.
Sanding the surface is an important step in achieving a professional-looking repair. It helps to create a smooth and even surface, ensuring that the patched area will blend seamlessly with the surrounding painted ceiling. Take your time and be thorough in your sanding to achieve the best results.
Prime the Ceiling
Once you have sanded the repaired area and ensured a smooth surface, the next step in fixing cracked ceiling paint is to prime the ceiling. Priming is crucial as it helps to promote better adhesion of the paint and creates a uniform surface for a flawless finish. Here’s how to prime the ceiling:
1. Before beginning, make sure the repaired area is clean and free from any dust or debris. If needed, use a damp cloth or sponge to gently wipe away any remaining particles.
2. Cover the surrounding surfaces, such as walls and fixtures, with painter’s tape or plastic sheeting to protect them from primer overspray.
3. Open the can of primer and stir it well to ensure it is properly mixed. If necessary, pour a small amount into a separate paint tray for easier application.
4. Using a paintbrush, cut in along the edges of the repaired area to create a smooth transition between the primer and the existing paint on the ceiling. Be careful to maintain straight and even lines.
5. Once you have cut in, use a paint roller to apply primer to the rest of the ceiling, working in small sections. Start from one end and work your way across, making sure to overlap each section slightly to avoid visible lines or streaks.
6. Apply the primer in thin and even coats, allowing each coat to dry completely before applying the next one. Follow the manufacturer’s instructions regarding drying times.
7. After the final coat of primer has fully dried, inspect the surface for any imperfections or unevenness. If necessary, lightly sand any rough spots and touch up with a small amount of primer.
Priming the ceiling is an essential step in the process of fixing cracked paint. It prepares the surface for the final coat of paint, ensuring better adhesion and a uniform finish. Taking the time to prime properly will result in a more professional and long-lasting repair.
Paint the Ceiling
After priming the ceiling, it’s time to paint the repaired area to achieve a seamless and cohesive finish. Follow these steps to paint the ceiling:
1. Select a high-quality ceiling paint that matches the existing color of your ceiling. Ensure that the paint is specifically formulated for ceilings to achieve the best results.
2. Stir the paint thoroughly to ensure it is well-mixed and free from any settled pigments. Pour a sufficient amount of paint into a clean paint tray.
3. Cut in along the edges of the repaired area with a paintbrush. Use smooth and even strokes to create a crisp line between the paint and the surrounding ceiling.
4. Once you have cut in, use a paint roller to apply the paint to the rest of the ceiling. Start at one end and work your way across, using light and even pressure. Be sure to overlap each stroke slightly to ensure a uniform paint finish.
5. Apply the paint in thin and even coats, allowing each coat to dry completely before applying the next. This will help achieve full coverage and a consistent color.
6. If necessary, apply a second or third coat of paint to ensure a smooth and even finish. Be sure to follow the drying times specified by the paint manufacturer between each coat.
7. Once you have finished painting the repaired area, step back and inspect the ceiling for any missed spots or uneven coverage. Touch up any areas as needed, using a small brush or roller. Allow the paint to dry fully.
Painting the ceiling is the final step in the process of fixing cracked paint. Make sure to follow the manufacturer’s instructions regarding drying times between coats and for the final drying time before moving any furniture or removing protective coverings.
By carefully painting the repaired area, you can achieve a seamless and well-blended finish, restoring the beauty of your ceiling.
Conclusion
Fixing cracked ceiling paint is a task that can be accomplished with the right tools, materials, and techniques. By following the step-by-step process outlined in this article, you can restore the beauty and integrity of your ceiling.
Assessing the damage, preparing the surface, applying joint compound, sanding the surface, priming, and finally painting the ceiling are all crucial steps in the repair process. Each step is important for achieving a seamless and long-lasting result.
It’s essential to identify the underlying cause of the cracked paint and address it to prevent future issues. Factors such as temperature fluctuations, moisture, poor surface preparation, settling of the building, and inadequate paint quality can all contribute to cracked ceiling paint.
By taking the time to properly prepare the surface, apply joint compound, sand the area, and prime before painting, you can ensure a smooth and professional-looking finish. Additionally, using high-quality materials and following the manufacturer’s instructions will lead to a more durable repair.
Regular maintenance and keeping an eye out for signs of cracking or damage can help you address issues before they become more severe. Taking a proactive approach can save you time and money in the long run.
Remember, fixing cracked ceiling paint requires patience, attention to detail, and the willingness to put in the necessary effort. With the right approach and a little bit of time, you can achieve a beautifully repaired and painted ceiling that enhances the overall aesthetics of your space.
So, roll up your sleeves, gather your tools, and embark on the journey to fix your cracked ceiling paint. Enjoy the satisfaction of restoring your ceiling to its former glory and enjoy the fresh and immaculate look of a beautifully painted space.
Now that you've tackled ceiling paint cracks, why stop there? Dive into our comprehensive guide on home repair to handle more fix-ups around your space. Ready for a hands-on challenge? Our DIY home improvement tips will set you up for success, helping you transform your home with your own two hands. Fascinated by bigger transformations? Learn all about house renovation and see how deep changes can breathe new life into any dwelling. Keep your living space in top shape and boost its charm with every project you undertake.
Frequently Asked Questions about How To Fix Cracked Ceiling Paint
Was this page helpful?
At Storables.com, we guarantee accurate and reliable information. Our content, validated by Expert Board Contributors, is crafted following stringent Editorial Policies. We're committed to providing you with well-researched, expert-backed insights for all your informational needs.


0 thoughts on “How To Fix Cracked Ceiling Paint”