Home>Construction & Tools>Building Materials>How To Stucco A Brick Wall

Building Materials
How To Stucco A Brick Wall
Modified: February 18, 2024
Learn how to stucco a brick wall with the right building materials and techniques. Transform your exterior with our step-by-step guide. Discover the best practices for a flawless finish.
(Many of the links in this article redirect to a specific reviewed product. Your purchase of these products through affiliate links helps to generate commission for Storables.com, at no extra cost. Learn more)
Introduction
So, you've got a brick wall that needs a fresh new look, and you're considering stucco as the solution. Stucco is a versatile and durable material that can revitalize the appearance of your brick wall while providing added protection against the elements. Whether you're aiming for a rustic, Old-World charm or a sleek, modern finish, stucco can be customized to suit your aesthetic preferences.
In this comprehensive guide, we'll walk you through the process of stuccoing a brick wall, from the essential materials and tools needed to the step-by-step application process. By the end of this article, you'll have the knowledge and confidence to tackle this rewarding home improvement project.
Stuccoing a brick wall is a gratifying endeavor that allows you to unleash your creativity while enhancing the structural integrity of your property. With the right guidance and a can-do attitude, you'll soon be on your way to transforming your brick wall into a stunning focal point that exudes timeless appeal. Let's dive in and explore the art of stuccoing a brick wall!
Key Takeaways:
- Transform your brick wall with stucco for a durable, customizable, and visually appealing finish. Follow the step-by-step guide for a rewarding home improvement project.
- Prepare, mix, apply, and finish stucco with precision and creativity to achieve a stunning, long-lasting transformation of your brick wall.
Read more: How To Stucco A Brick Wall
Materials and Tools Needed
Before embarking on your stuccoing journey, it's crucial to gather the necessary materials and tools to ensure a smooth and efficient process. Here's a comprehensive list of what you'll need:
Materials:
- Portland cement
- Builders' sand
- Acrylic admixture (for enhanced durability)
- Water
- Wire mesh or metal lath
- Bonding agent
- Stucco colorant (optional)
Tools:
- Masonry trowels (both pointing and finishing)
- Hawk (a tool for holding the stucco mix)
- Stiff-bristled brush
- Wheelbarrow or mixing tub
- Bucket or hose for water
- Staple gun and galvanized staples
- Protective gear (gloves, safety goggles, dust mask)
Having these materials and tools at your disposal will streamline the stucco application process and contribute to the overall quality of the finished product. Additionally, ensuring that you have the appropriate safety gear will help safeguard your well-being throughout the project.
Preparing the Brick Wall
Properly preparing the brick wall is a critical initial step that sets the foundation for a successful stucco application. Here are the key preparatory measures to take:
Read more: How To Stucco A Brick Fireplace
1. Clean the Surface:
Begin by thoroughly cleaning the brick wall to remove any dirt, debris, and loose mortar. A pressure washer can be highly effective in this regard, ensuring that the surface is free from any contaminants that could compromise the stucco adhesion.
2. Repair Any Damage:
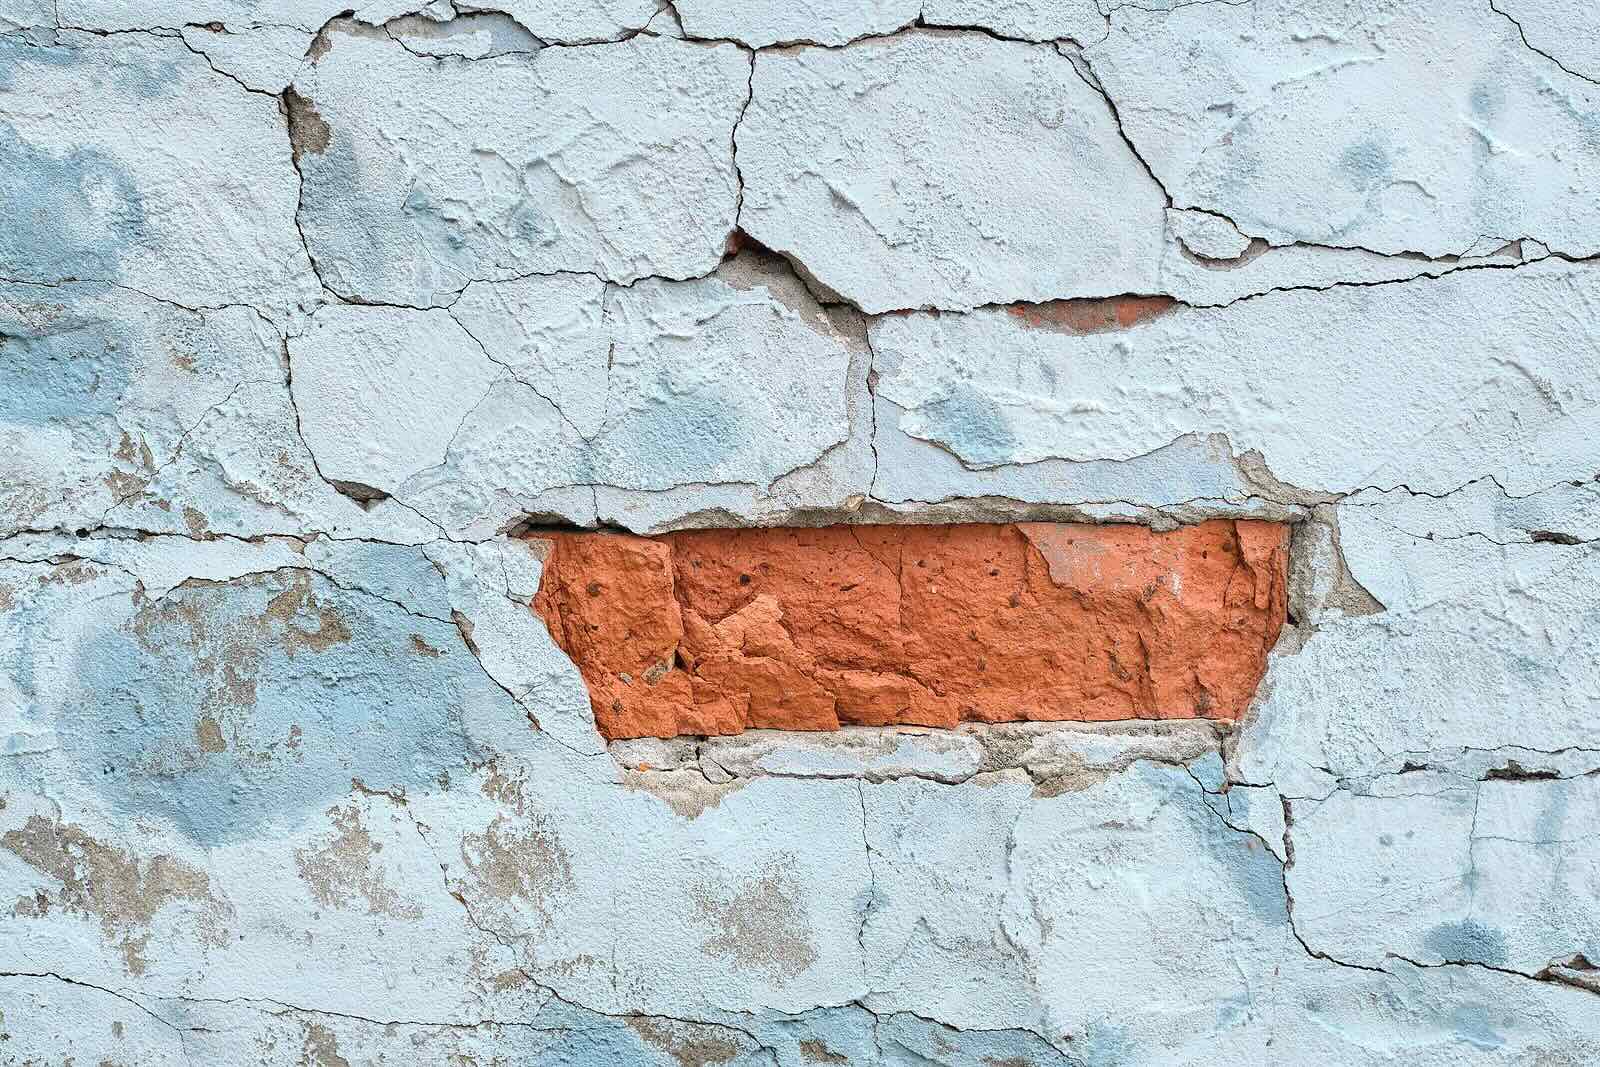
Inspect the brick wall for any cracks, holes, or other forms of damage. Use a suitable masonry repair compound to fill in these imperfections and allow ample time for the repairs to cure before proceeding.
3. Apply Bonding Agent:
To promote strong adhesion between the brick surface and the stucco, apply a bonding agent following the manufacturer’s instructions. This step is crucial for ensuring that the stucco adheres securely to the brick, preventing future delamination.
4. Install Lath or Mesh:
Depending on the condition of the brick wall, you may need to install a metal lath or wire mesh to provide a mechanical key for the stucco. This step is particularly important for ensuring a strong and lasting bond.
By meticulously preparing the brick wall, you create an optimal canvas for the application of stucco, setting the stage for a visually appealing and long-lasting finish. Taking the time to execute these preparatory tasks with precision will contribute to the overall success of your stucco project.
Read more: How To Stucco A Brick Fireplace
Mixing the Stucco
Now that the brick wall is primed and ready, it’s time to prepare the stucco mixture. Achieving the right consistency and composition is crucial for ensuring a smooth application and a durable finish. Here’s a step-by-step guide to mixing stucco:
1. Gather Your Materials:
Assemble the necessary materials for the stucco mix, including Portland cement, builders’ sand, acrylic admixture (for added durability), and water. The proper ratio of these components is essential for creating a high-quality stucco mix.
2. Measure the Ingredients:
Accurately measure the Portland cement and builders’ sand according to the desired mix ratio. A common ratio is 1 part cement to 3 parts sand, but this can vary based on the specific project requirements and the type of finish desired.
3. Add Acrylic Admixture:
If enhanced durability and flexibility are desired, incorporate the acrylic admixture into the mix according to the manufacturer’s recommendations. This additive can significantly improve the stucco’s resistance to cracking and weathering.
Read more: What Is A Stucco Wall
4. Mix Thoroughly:
In a wheelbarrow or mixing tub, combine the measured cement, sand, and acrylic admixture. Gradually add water while continuously mixing the ingredients to achieve a uniform and workable consistency. Be mindful not to overwater the mix, as this can compromise its strength and adhesion.
5. Test the Consistency:
The stucco mix should have a pliable, workable texture that holds its shape without being overly stiff or runny. Aim for a consistency that allows for easy application and shaping on the wall surface.
6. Let the Mix Rest:
After achieving the desired consistency, allow the stucco mix to rest for a few minutes before use. This resting period allows the ingredients to fully combine and ensures a more homogenous mixture.
By following these steps and paying close attention to the mixing process, you’ll be equipped with a well-prepared stucco mix that is primed for seamless application onto the prepared brick wall. The quality of the stucco mix directly influences the final result, making this stage a crucial aspect of the stuccoing process.
Applying the Stucco
With the stucco mix prepared and the brick wall primed, it’s time to embark on the application process. Applying stucco requires a methodical approach and attention to detail to achieve a professional-grade finish. Here’s a comprehensive guide to applying stucco to a brick wall:
Read more: How To Stucco Concrete Walls
1. Load the Hawk:
Begin by loading the prepared stucco mix onto a hawk, a tool specifically designed for holding and transporting the stucco. This portable platform allows for easy access to the stucco during the application process.
2. Start at the Bottom:
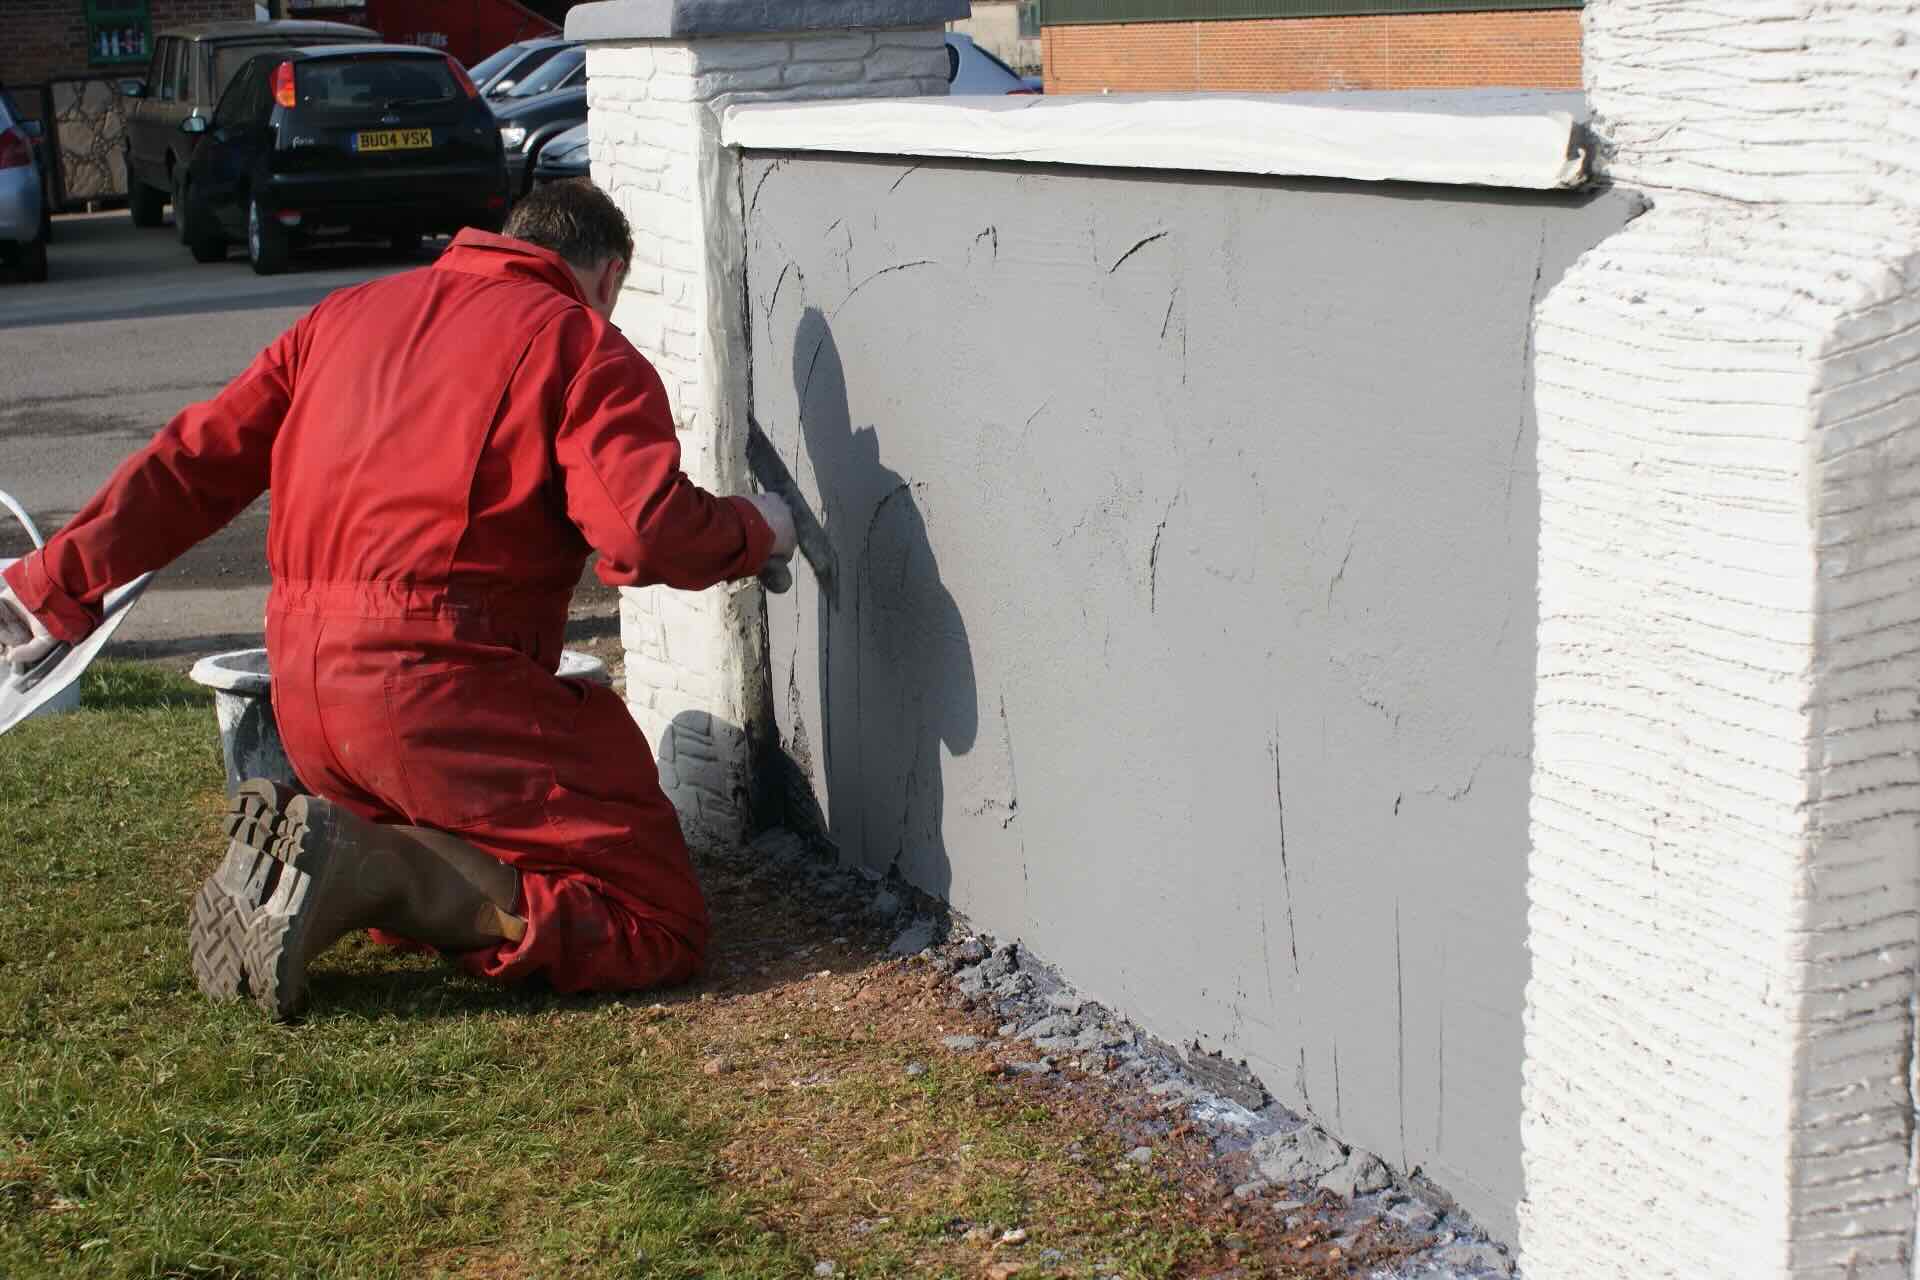
Working from the bottom of the wall upwards, scoop a suitable amount of stucco onto the masonry trowel. Use the pointing trowel to apply the stucco onto the wall surface in an even layer, starting with a small section at a time.
3. Spread and Even Out:
Use the finishing trowel to spread and even out the stucco, ensuring a consistent thickness across the applied area. Smooth, sweeping motions help distribute the stucco evenly and create a uniform surface texture.
4. Apply Multiple Coats:
Depending on the desired stucco thickness, multiple coats may be necessary. Allow each coat to partially set before applying the next, and use a scratch coat followed by a brown coat for standard stucco applications.
Read more: How To Do A Stucco Wall
5. Incorporate Texture (Optional):
If a textured finish is desired, various tools and techniques can be employed to create distinctive patterns or textures in the stucco surface. These can range from swirls and stippling to more intricate designs, adding visual interest to the wall.
6. Maintain Consistent Thickness:
Throughout the application process, strive to maintain a consistent thickness of the stucco layer, paying attention to any variations and adjusting as needed to achieve a uniform finish.
By following these steps and exercising precision during the application, you’ll be well on your way to transforming the brick wall with a beautifully applied layer of stucco. Attention to detail and a methodical approach are key to achieving a professional-quality stucco finish.
Finishing Touches
As the stucco application nears completion, attention to detail during the finishing touches is crucial for achieving a polished and refined outcome. These final steps add finesse to the stucco surface and contribute to its overall visual appeal and longevity. Here’s a guide to the essential finishing touches:
1. Curing and Damp Curing:
After the stucco has been applied, it’s important to facilitate proper curing to ensure optimal strength and durability. Keep the stucco damp by misting it with water several times a day for the initial curing period. This process helps prevent rapid drying and promotes a robust bond.
Read more: How To Remove Stucco Walls
2. Addressing Imperfections:
Inspect the stucco surface for any imperfections, such as air bubbles, uneven areas, or protruding aggregate. Use a stiff-bristled brush to address these issues, gently smoothing out the surface and refining its texture as needed.
3. Sealing and Waterproofing (Optional):
Depending on the specific requirements of the project, consider applying a suitable sealer or waterproofing agent to the cured stucco. This additional layer of protection can enhance the stucco’s resistance to moisture and prolong its lifespan.
4. Adding Color (Optional):
If a colored stucco finish is desired, this is the stage to incorporate the chosen stucco colorant into the mix. Thoroughly blend the colorant with a portion of the stucco mix and apply it as the final coat, ensuring even coverage for a vibrant and uniform finish.
5. Final Inspection:
Conduct a comprehensive visual inspection of the stucco surface, checking for uniformity, texture consistency, and any remaining blemishes. Address any final touch-ups or adjustments to achieve a flawless stucco finish.
Read more: How To Spray Stucco Exterior Walls
6. Celebrate Your Achievement:
Once the finishing touches are complete and the stucco has fully cured, take a moment to admire your handiwork. The transformation of the brick wall through the meticulous application of stucco is a testament to your dedication and craftsmanship.
By meticulously tending to these finishing touches, you’ll elevate the stuccoed brick wall to a level of refinement and durability that will endure for years to come. These final steps are integral to the overall success of the stucco application process, culminating in a visually stunning and resilient surface.
Tips and Considerations
Embarking on a stuccoing project involves careful planning and execution to ensure a satisfying and enduring outcome. Here are valuable tips and considerations to enhance your stuccoing experience:
1. Weather Awareness:
Schedule your stucco project during moderate weather conditions, avoiding extreme heat, freezing temperatures, or high humidity. Ideally, aim for mild, overcast days to facilitate optimal stucco curing without rapid evaporation or excessive moisture.
2. Work in Sections:
When applying stucco, work in manageable sections to maintain a consistent workflow and ensure uniformity in the finish. This approach also allows for better control over the application and minimizes the risk of the stucco drying too quickly.
Read more: How To Cover Stucco Interior Walls
3. Protect Adjacent Surfaces:
Prior to stucco application, take measures to protect adjacent surfaces, such as windows, doors, and landscaping, from inadvertent contact with the stucco mix. Covering these areas with plastic sheeting or masking tape can prevent accidental damage.
4. Consider Texture and Color:
If you desire a textured or colored stucco finish, explore various techniques and color options to achieve the aesthetic effect you envision. Experimenting with different textures and colors can add character and visual interest to the stuccoed surface.
5. Seek Professional Guidance:
If you’re new to stucco application or have complex project requirements, consider consulting with a professional contractor or stucco specialist. Their expertise and insights can provide invaluable guidance and ensure a successful outcome.
6. Prioritize Safety:
Throughout the stuccoing process, prioritize safety by wearing appropriate protective gear, including gloves, safety goggles, and a dust mask. Additionally, exercise caution when working at elevated heights or using power tools.
Read more: How To Hang TV On Stucco Wall
7. Regular Maintenance:
Once the stucco has been applied, maintain its integrity by periodically inspecting for any signs of damage or wear. Promptly address any issues that arise to preserve the stucco’s condition and prolong its lifespan.
8. Embrace Creativity:
Stuccoing presents an opportunity to express your creativity and personalize the appearance of your property. Embrace this creative freedom by exploring different stucco textures, colors, and finishes to achieve a look that resonates with your vision.
By heeding these tips and considerations, you’ll navigate the stuccoing process with confidence and foresight, ultimately yielding a stuccoed brick wall that exudes durability, charm, and individuality. Embracing best practices and thoughtful considerations enhances the overall experience and results in a stucco finish that stands the test of time.
Conclusion
Stuccoing a brick wall is a transformative endeavor that blends practicality with artistic expression, resulting in a visually striking and enduring enhancement to your property. Through meticulous preparation, precise application, and thoughtful finishing touches, you have the power to breathe new life into your brick wall, infusing it with character and resilience.
As you embark on this stuccoing journey, remember that attention to detail and a methodical approach are paramount. By gathering the essential materials and tools, preparing the brick wall with care, and mastering the art of stucco application, you are poised to achieve a remarkable outcome that reflects your dedication and craftsmanship.
Furthermore, the tips and considerations shared in this guide serve as valuable companions, offering insights to enrich your stuccoing experience and ensure a successful result. Embracing creativity, prioritizing safety, and seeking professional guidance when needed are all integral aspects of the stuccoing process that contribute to a rewarding and fulfilling project.
Upon completion, take pride in the enduring beauty and protection that stucco brings to your brick wall. Whether you opt for a textured, rustic finish or a sleek, modern appearance, the versatility of stucco allows you to tailor the aesthetic to your preferences, creating a timeless and captivating exterior feature.
Ultimately, the art of stuccoing a brick wall is a testament to your vision and dedication to enhancing your living space. The enduring allure and durability of the stucco finish stand as a testament to your commitment to quality and craftsmanship. As you admire the newly stuccoed brick wall, may it serve as a reminder of the transformative power of creativity and the enduring value of meticulous attention to detail.
So, embrace the journey, savor the process, and revel in the remarkable transformation that stuccoing imparts to your brick wall. Your dedication and artistry have left an indelible mark, shaping an architectural feature that exudes timeless elegance and enduring strength.
Frequently Asked Questions about How To Stucco A Brick Wall
Was this page helpful?
At Storables.com, we guarantee accurate and reliable information. Our content, validated by Expert Board Contributors, is crafted following stringent Editorial Policies. We're committed to providing you with well-researched, expert-backed insights for all your informational needs.






0 thoughts on “How To Stucco A Brick Wall”