Home>Dining>Tableware>How To Apply Whitewash Finish To A Dining Table
Tableware
How To Apply Whitewash Finish To A Dining Table
Modified: May 6, 2024
Learn how to achieve a stunning whitewash finish on your dining table with our step-by-step guide. Transform your tableware with this easy DIY technique.
(Many of the links in this article redirect to a specific reviewed product. Your purchase of these products through affiliate links helps to generate commission for Storables.com, at no extra cost. Learn more)
Introduction
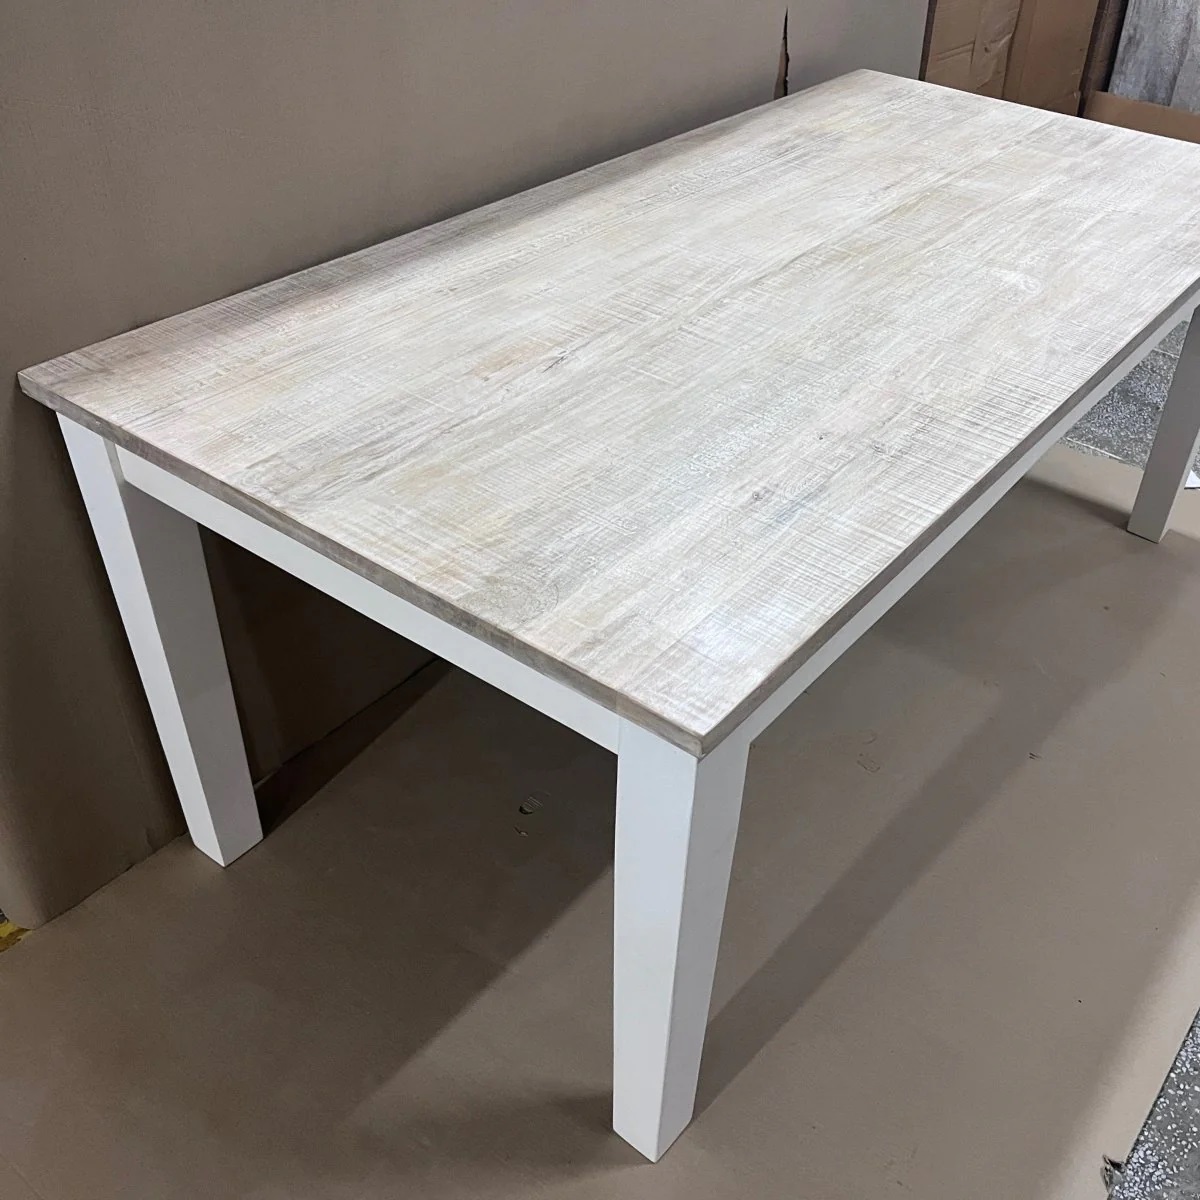
Welcome to this comprehensive guide on how to apply a whitewash finish to a dining table. If you’re looking to give your table a rustic and weathered appearance, whitewashing is a fantastic option to consider. This technique involves applying a semi-transparent white stain to the surface of the wood, allowing the natural grain to show through whilst still adding a light and airy feel to the overall look.
Whitewashing has been a popular method of adding character and charm to furniture for centuries. Traditionally, it was used to brighten up dark and dreary spaces, making them appear more inviting. Today, it continues to be a favorite choice for homeowners who want to achieve a shabby chic or coastal-inspired aesthetic in their homes.
In this guide, we will take you through each step of the process, from preparing the dining table to applying the whitewash finish and sealing it to protect it for years to come. So, whether you’re a seasoned DIY enthusiast or a first-time furniture refinisher, you’ll find all the information you need right here.
Before we delve into the practical steps, let’s learn more about what exactly a whitewash finish is and why it’s worth considering for your dining table.
Key Takeaways:
- Whitewash finish adds elegance, warmth, and coastal charm to dining tables, concealing imperfections and transforming dark, formal furniture into bright, relaxed focal points with a rustic, weathered appearance.
- By following simple steps to prepare, apply, and seal the whitewash finish, DIY enthusiasts can achieve a flawless, shabby chic look that complements various design styles, bringing new life to their dining tables and creating an inviting atmosphere in their homes.
Read more: How To Whitewash A Dining Table
What is Whitewash Finish?
Whitewash finish is a technique that involves applying a thin, translucent layer of white stain or paint to the surface of wood. Unlike traditional paint, which covers the natural grain of the wood, whitewash allows the grain to show through, giving the furniture a rustic, weathered appearance.
The term “whitewash” dates back to the 16th century and was initially used for coating buildings to protect the wood from the elements. Over time, it became a popular technique for furniture as well, particularly in coastal and farmhouse-style interiors.
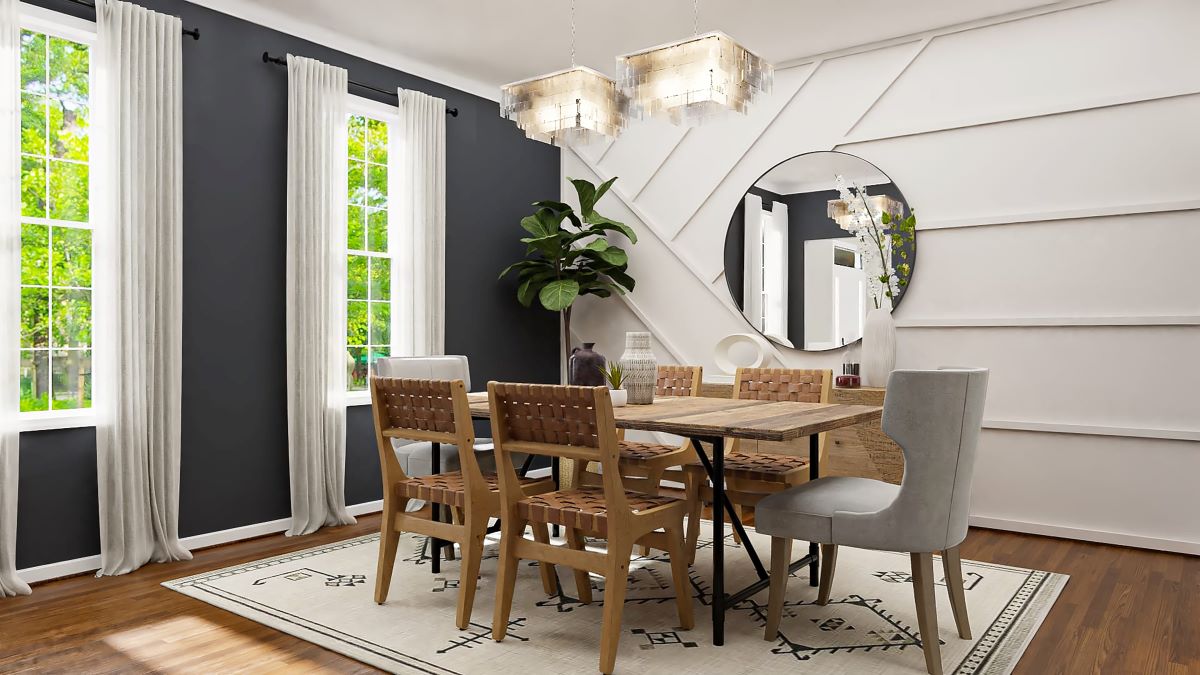
Whitewash finish offers several benefits that make it a great option for dining tables. Firstly, it adds a touch of elegance and warmth to the space without overpowering the existing decor. The subtle white hue blends seamlessly with various design styles, from traditional to contemporary.
Another advantage of whitewash finish is that it can help to lighten up dark or heavy-looking furniture. If you have a dining table that feels a bit too dark or formal for your taste, applying a whitewash finish can transform it into a focal point that adds brightness and a relaxed atmosphere to your dining area.
Furthermore, whitewash finish is an excellent solution for hiding imperfections and scratches on your dining table’s surface. The semi-transparent nature of the finish allows it to partially conceal small blemishes while still showcasing the natural beauty of the wood grain.
Lastly, whitewashing is a relatively easy and affordable technique to achieve. It doesn’t require many specialized tools or materials, making it accessible to DIY enthusiasts of all levels. With just a bit of time and effort, you can completely transform the look of your dining table and give it a fresh, coastal-inspired makeover.
Now that you have a better understanding of what a whitewash finish is and its advantages, let’s move on to the tools and materials you’ll need to get started.
Tools and Materials Needed
Before you begin the whitewashing process, it’s important to gather all the necessary tools and materials. Here’s a list of what you’ll need:
Tools:
- Paintbrush or foam brush: Choose a brush with bristles or foam appropriate for the size of your dining table.
- Sandpaper: Use a medium grit sandpaper (around 120-150) to prepare the surface of the table.
- Clean cloth: This will be used to wipe down the table during the preparation stage.
- Drop cloth or plastic sheet: Protect your work area from any spills or drips.
- Stirring stick or paint mixer: This will be used to mix the whitewash solution.
- Container for mixing: Use a clean bucket or paint tray to mix the whitewash solution.
Materials:
- Whitewash stain or paint: Choose a high-quality whitewash stain or paint specifically formulated for wood surfaces.
- Water: You’ll need water to dilute the whitewash stain and create the desired consistency.
- Wood conditioner (optional): If your dining table has a particularly porous surface, a wood conditioner can be used to help achieve an even application of the whitewash finish.
- Sealer: To protect the whitewash finish and ensure its longevity, you’ll need a clear sealer such as polyurethane or wax.
It’s important to note that the tools and materials required may vary depending on the specific product and instructions you’re using. Always refer to the manufacturer’s guidelines and adjust accordingly.
Now that you have all the necessary tools and materials gathered, it’s time to move on to the first step: preparing the dining table for the whitewash finish.
Read more: How To Whitewash A Coffee Table
Step 1: Preparing the Dining Table
Before applying the whitewash finish, it’s crucial to properly prepare the surface of the dining table. This step ensures that the whitewash will adhere well and results in a smooth and even finish. Follow these steps to prepare your dining table:
1. Clean the table:
Start by removing any dust, dirt, or debris from the surface of the table. Use a clean cloth or a soft-bristle brush to gently wipe or brush away any particles. This will create a clean canvas for the whitewash finish.
2. Sand the table:
Next, lightly sand the surface of the table using medium-grit sandpaper (around 120-150 grit). Sanding helps to smooth out any rough spots, imperfections, or previous finishes on the wood. Sand in the direction of the wood grain to avoid scratching or damaging the surface.
3. Wipe down the table:
After sanding, use a clean cloth to wipe down the table. This step removes any sanding dust and ensures a clean surface for the whitewash finish. Make sure the table is completely free of dust particles before proceeding.
4. Apply a wood conditioner (optional):
If your dining table has a porous surface, such as pine or oak, it may benefit from the application of a wood conditioner. This step is optional but can help achieve a more even absorption of the whitewash finish. Follow the instructions on the wood conditioner product and allow it to fully dry before moving on to the next step.
By properly preparing your dining table, you create the ideal foundation for a successful whitewash finish. Once the surface is clean, smooth, and ready for the next step, you can move on to mixing the whitewash solution in preparation for application.
Step 2: Mixing the Whitewash Solution
Now that your dining table is prepared, it’s time to mix the whitewash solution. This solution will be applied to the wood surface to create the desired whitewash effect. Follow these steps to mix the whitewash solution:
1. Choose the right whitewash product:
Depending on your preference and the look you want to achieve, you can choose between a premixed whitewash stain or a DIY solution using white paint and water. Both options can yield great results, so choose the one that suits your needs.
2. Read the instructions:
Whether you’re using a premixed stain or creating your own whitewash solution, carefully read the manufacturer’s instructions. Different products may have specific mixing ratios or additional steps to follow, so it’s essential to follow the guidelines provided to ensure the best results.
Read more: How To Finish Napkin Edges
3. Dilute the whitewash:
If you’re using a concentrated whitewash stain, you’ll need to dilute it with water to create the desired consistency. Begin by adding a small amount of water to the stain, then stir thoroughly. Gradually add more water as needed until you achieve a semi-transparent, milky consistency that allows the wood grain to show through.
4. Test the solution:
Before applying the whitewash solution to the entire table, it’s a good idea to test it on a small, inconspicuous area. Apply a small amount of the mixture to a hidden part of the table or a scrap piece of wood to ensure you’re satisfied with the color and effect.
5. Stir periodically:
If you’re working with a large quantity of whitewash solution, it’s important to stir it periodically during the application process. This helps to keep the mixture well-blended and ensures consistent results across the entire surface of the dining table.
Once the whitewash solution is mixed and ready, it’s time to move on to the exciting part of the process: applying the whitewash finish to the dining table.
Step 3: Applying the Whitewash Finish
With the whitewash solution mixed and prepared, it’s time to apply the whitewash finish to your dining table. This step creates the beautiful, weathered effect that the whitewash technique is known for. Follow these steps for a successful application:
1. Start with a small section:
Begin by applying the whitewash finish to a small section of the table surface. This will allow you to gauge the desired color and effect before moving on to larger areas. Use a paintbrush or foam brush to apply an even layer of the whitewash solution, working in the direction of the wood grain.
2. Work in manageable sections:
To ensure even coverage and prevent the whitewash solution from drying too quickly, work in manageable sections. Apply the whitewash to one area at a time, making sure to blend the edges to avoid noticeable lines or marks.
3. Follow the wood grain:
Always apply the whitewash finish in the direction of the wood grain. This technique helps to accentuate the natural texture and beauty of the wood, creating a more authentic and pleasing result.
4. Use varying pressure:
Slightly vary the pressure while applying the whitewash to create depth and dimension. Lightly press on the brush for lighter coverage, and apply slightly more pressure for a denser effect in certain areas. This technique adds visual interest and enhances the overall look of the whitewash finish.
Read more: How To Whitewash A Stone Fireplace
5. Work quickly and efficiently:
Once you begin applying the whitewash finish, work quickly and efficiently to maintain a consistent appearance. Avoid stopping or taking breaks in the middle of applying the whitewash to ensure a seamless and uniform finish.
6. Check for drips and excess:
Periodically check for drips or excess whitewash on the table surface as you work. If any drips occur, use a clean cloth or brush to lightly dab and remove them. It’s important to correct any mistakes or excess whitewash while it’s still wet.
7. Allow the whitewash to dry:
After applying the whitewash finish to the entire dining table, allow it to dry completely according to the manufacturer’s instructions. Ensure proper ventilation in the room to aid in the drying process.
With the whitewash finish applied and dried, it’s time to move on to the next step: removing excess whitewash to achieve the desired look.
Step 4: Removing Excess Whitewash
Once the whitewash finish has dried, you may notice some areas where the color appears too intense or uneven. In this step, we’ll focus on removing excess whitewash to achieve the desired look and ensure a more balanced finish. Follow these steps to remove excess whitewash:
Read more: How To Place Silverware When Finished
1. Assess the table:
Take a step back and carefully examine the table surface. Look for any areas where the whitewash appears too thick or where you’d like to create a lighter effect. These are the areas where you’ll focus your attention.
2. Sand the surface:
Using a fine-grit sandpaper (around 220-240 grit), gently sand the areas where you want to remove or lighten the whitewash. Lightly sanding the surface will help to feather out and blend the whitewash, creating a more consistent appearance.
3. Wipe down the table:
After sanding, use a clean cloth to wipe away any sanding residue. This will ensure that the surface is clean and ready for the next steps.
4. Apply more whitewash (optional):
If after sanding, you find that the removed whitewash is still too prominent or uneven, you may choose to apply more whitewash to the affected areas. Apply a thin layer of the whitewash solution and blend it with surrounding areas for a more seamless look.
Read more: How To Seal A Dining Table
5. Repeat as necessary:
Continue assessing, sanding, and removing excess whitewash as needed until you achieve the desired level of color and overall appearance. Take your time and work methodically to ensure a balanced and natural-looking finish.
6. Clean the table surface:
Once you’re satisfied with the removal of excess whitewash, use a clean cloth to gently wipe down the entire table surface. This will remove any leftover dust or residue from the sanding process.
With the excess whitewash removed, your dining table should now have a more even and refined appearance. The final step in the whitewashing process involves sealing the finish to protect it and ensure its long-lasting beauty.
Step 5: Sealing the Whitewash Finish
After applying the whitewash finish and removing any excess, it’s important to seal the surface to protect the whitewash and enhance its durability. Sealing the finish will also help to prevent stains and damage caused by daily use. Follow these steps to seal the whitewash finish:
1. Choose the right sealer:
There are various options for sealing the whitewash finish, such as polyurethane, wax, or varnish. Consider factors like the level of protection desired, the sheen you prefer, and the maintenance required when selecting a sealer. Read the manufacturer’s instructions for the specific product you choose.
Read more: How To Paint A Dining Table
2. Prepare the sealer:
Follow the instructions provided by the sealer manufacturer to prepare the product for application. This may involve stirring the sealer well or diluting it with a specific solvent.
3. Apply the sealer:
Using a clean brush or foam brush, apply an even coat of the sealer to the entire surface of the dining table. Work in the direction of the wood grain and pay extra attention to the areas with the whitewash finish. Be careful to avoid overloading the brush to prevent drips or pooling of the sealer.
4. Allow the sealer to dry:
Follow the recommended drying time indicated by the sealer manufacturer. Ensure proper ventilation in the room to aid in the drying process. Avoid touching or placing objects on the table during this time to prevent any marks or damage.
5. Lightly sand (optional):
If desired, you can lightly sand the surface with fine-grit sandpaper (around 220-240 grit) after the sealer has dried. This step helps to create a smooth and satin-like finish. Be sure to wipe away any sanding residue with a clean cloth afterwards.
Read more: How To Resurface A Dining Table
6. Apply additional coats (optional):
Depending on the level of protection and the desired appearance, you may choose to apply additional coats of sealer. Follow the manufacturer’s instructions for the recommended number of coats and drying times in between.
7. Allow the sealer to cure:
After the final coat of sealer has been applied, it’s important to allow it to cure fully. This process can take anywhere from a few days to a few weeks, depending on the specific product used. Avoid placing heavy objects on the table or exposing it to moisture during this curing period.
By sealing the whitewash finish, you’re ensuring its longevity and protecting it from wear and tear. Once the sealer has fully cured, your dining table is ready to be enjoyed for years to come.
Conclusion
Congratulations! You have successfully learned how to apply a beautiful whitewash finish to your dining table. By following the steps outlined in this guide, you’ve transformed your table into a stunning piece of furniture with a rustic, weathered appearance.
Whitewashing is not only a great way to add character and charm to your dining space, but it is also an affordable and relatively easy technique that can be done by DIY enthusiasts of all skill levels. With just a few tools and materials, you can achieve a shabby chic or coastal-inspired look that complements your existing decor.
Remember to thoroughly prepare the table surface by cleaning and sanding it before applying the whitewash. Mixing the whitewash solution and applying it in manageable sections, following the wood grain, and removing excess whitewash as needed are crucial steps to achieve a flawless finish.
Sealing the whitewash finish is the final step to protect and maintain its beauty for years to come. Choose the right sealer for your desired level of protection and sheen, and apply it according to the manufacturer’s instructions. Allow the sealer to dry and cure fully before using the table.
Now that you’ve acquired the skills to apply a whitewash finish, you can bring new life to other pieces of furniture or explore different techniques and variations. The possibilities are endless!
Thank you for joining us on this comprehensive guide. We hope you enjoy your beautifully whitewashed dining table and the inviting atmosphere it brings to your home.
Excited to bring that fresh, rustic charm into your living space? After mastering the art of applying a whitewash finish, why not continue transforming your home with some unique decorative pieces? Dive into our latest guide on rustic home decor, offering clever ideas to infuse that cozy, vintage vibe throughout your dwelling. From wooden accents to handcrafted artifacts, find all you need to create an inviting atmosphere that's both timeless and stylish.
Frequently Asked Questions about How To Apply Whitewash Finish To A Dining Table
Was this page helpful?
At Storables.com, we guarantee accurate and reliable information. Our content, validated by Expert Board Contributors, is crafted following stringent Editorial Policies. We're committed to providing you with well-researched, expert-backed insights for all your informational needs.


0 thoughts on “How To Apply Whitewash Finish To A Dining Table”